Custom SharePoint Solutions with HTML and JavaScript: For SharePoint 2013 and SharePoint Online (2015)
3. Content Editor and Script Editor Web Parts
Brandon Atkinson1
(1)
VA, US
At this point, you should have all the tools that you need installed and a SharePoint environment to develop in. You’ve also been exposed to the differences between server-side development and front-end development. We’ve looked at some of the parts and pieces that make up front-end development as well. Now it’s time to actually start using some of what we’ve learned and build some stuff!
In this chapter, we’ll look at using the Content Editor and Script Editor Web Parts. If you’ve been around SharePoint for a while, then you already know about the Content Editor Web Part, and you know how it allows you to add HTML easily to any page. The latest version of SharePoint brought with it the Script Editor Web Part, which allows you to easily add JavaScript to any page. We’ll look at how these web parts work and interact with each other. By the end of this chapter, you’ll understand the pros and cons of using these web parts and you will have built some custom solutions using HTML and JavaScript.
Content Editor Web Part
The Content Editor Web Part (CEWP) is a workhorse in the SharePoint landscape; it’s been around a long time and most users are familiar with it. The CEWP, true to its name, is used to place content on a page in SharePoint. You can easily place HTML on a page using this web part to post content to users, a list of links, and much, much more.
Using the CEWP, you can add rich content from the Ribbon using predefined styles and editing tools similar to Microsoft Word. You can write HTML directly into an editor or point it at an HTML file that holds your markup. You can find the CEWP under the Media and Content category when inserting a web part via the Ribbon, as shown in Figure 3-1.
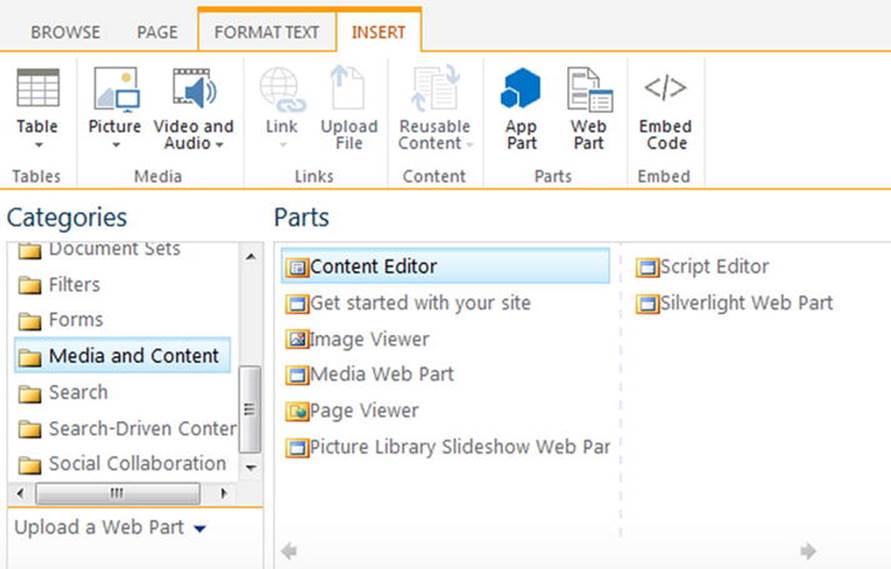
Figure 3-1.
The Media and Content category where you can find the Content Editor Web Part
Insert a CEWP into your page and place it in edit mode. You will see that there are three ways that you can add and edit content, described as follows and as shown in Figure 3-2.
· Rich content - When you first add a CEWP to a page, there is obviously no content there. In this case, you will see a link titled “Click here to add new content”. Clicking this link will place a cursor directly into the web part, and you can use the Ribbon to add rich content—just as you would in Microsoft Word. This is an easy and convenient way to add content to a page, but it is not a good way to build custom solutions that uses SharePoint data.
· HTML markup - Another way to insert content is by clicking the “Click here to add new content” link, and then clicking the Edit Source button in the Ribbon. This will open a dialog where you can directly type in HTML content into the CEWP. This is a great option for quick HTML inserts or testing your HTML markup. This is a better option for building custom solutions, but not quite the best.
· Link to an HTML file - You can also link directly to an HTML file to display content in the web part. In the CEWP tool pane, the first property is titled Content Link. In this textbox, simply add the URL to an HTML file, and its contents will be displayed when the web part is rendered. This is the preferred usage when building custom solutions, which we’ll look at in the next chapter.
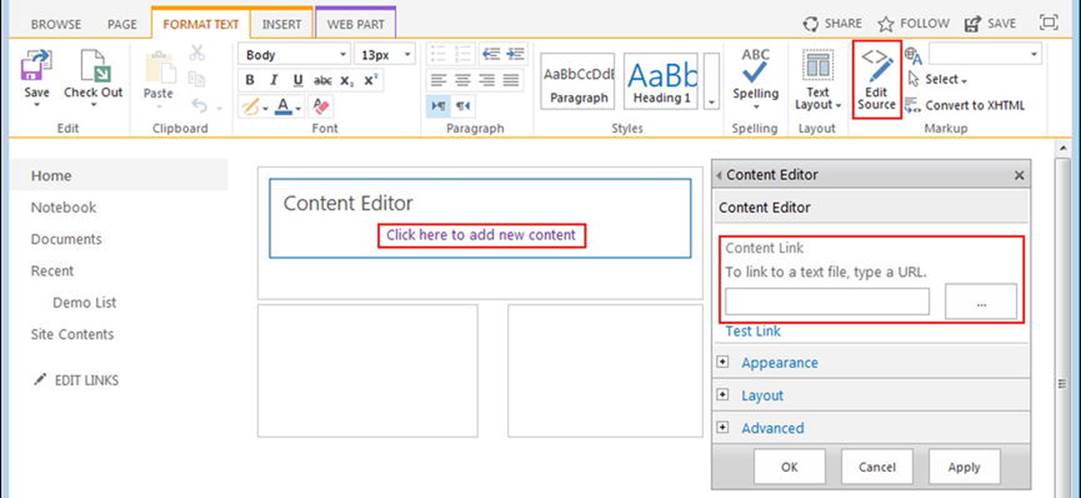
Figure 3-2.
The various ways you can add content in a Content Editor Web Part
For now, let’s place some HTML in using the Edit Source button from the Ribbon. Place the CEWP into edit mode, click the “Click here to add new content” link, and then click the Edit Source button in the Ribbon. Figure 3-3 shows the dialog that is displayed after clicking this button.
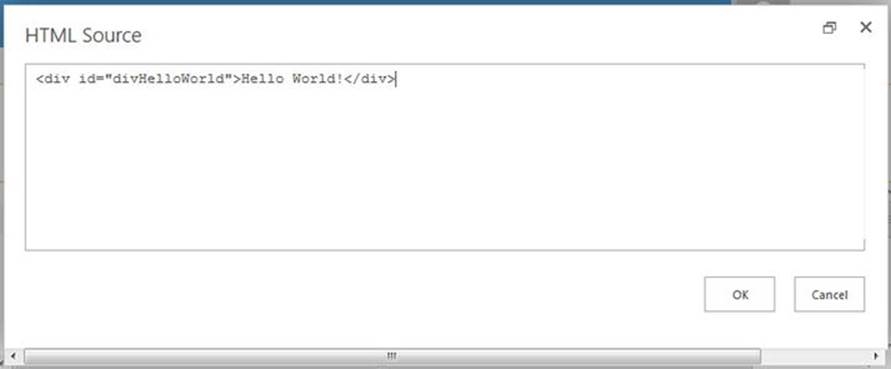
Figure 3-3.
Dialog that is presented after clicking the Edit Source button in the Ribbon
In this dialog, we can simply type our HTML content. In this example, all we’ll add is a DIV element that has an ID and some text inside it. The following HTML is all that is needed:
<div id="divHelloWorld">Hello World!</div>
Adding this content and saving the page will result in a nice “Hello World!” message displayed on the page, as shown in Figure 3-4.

Figure 3-4.
HTML content displayed in the Content Editor Web Part
This is a very simple and not very exciting example of adding HTML content to a page. However, if you’re new to adding in custom HTML, this is a great starting point for what is to come later in this chapter and in further chapters. Now that we have some HTML on the page, let’s take a look at the Script Editor Web Part and learn how we can inject custom JavaScript into the page along with our HTML.
Script Editor Web Part
The Script Editor Web Part (SEWP) is new to SharePoint 2013; it was designed just for what its name implies—adding scripts to a page in SharePoint. Prior to this web part being on the scene, if you wanted to inject a script on the page, you would use the CEWP instead. This worked great if you linked to a file that contained the script, but if you wanted to edit the source and place the script in manually, you often encountered issues. At times, scripts would not run, or would throw errors, or worse, the CEWP would actually change the code you entered. It was not a pleasant experience.
With the SEWP these are no longer issues that you need to worry about. You can now easily place JavaScript on a page using the SEWP, because it was built for this purpose. You can also place other items with this web part, including OBJECT tags, HTML, and more. You can find the SEWP under the Media and Content category when inserting a web part via the Ribbon, as shown in Figure 3-5.

Figure 3-5.
The Media and Content category where you can find the Script Editor Web Part
Insert a SEWP into your page and place it into edit mode. You will see that there is one way that you can add and edit scripts—by clicking the Edit Snippet link, as shown in Figure 3-6.
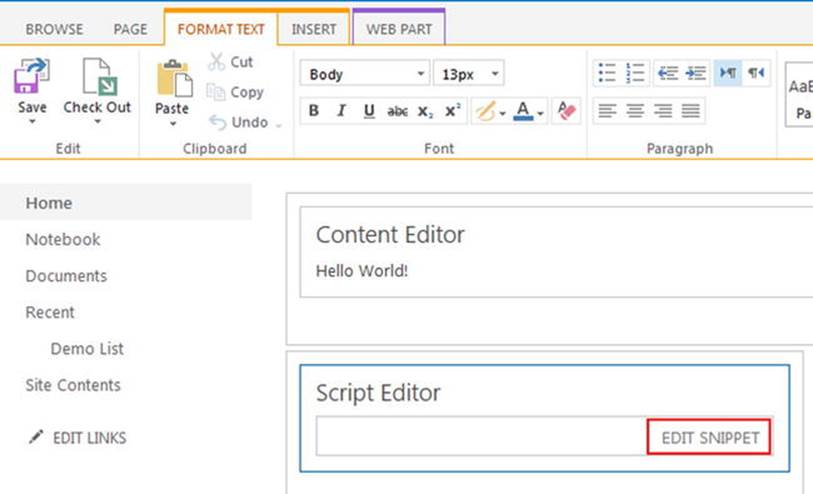
Figure 3-6.
Click Edit Snippet to add or edit your JavaScript
Clicking the Edit Snippet link will open a dialog titled Embed, where you can write your JavaScript, as shown in Figure 3-7. JavaScript placed into this web part must be valid and include the <script></script> tags in order to function properly. The SEWP can even be used to place HTML on the page as well. If you are placing HTML, the dialog will show you a preview of the content below the textbox that you are working in. If you are writing JavaScript, no preview will be shown because that code is typically not visible in the page.
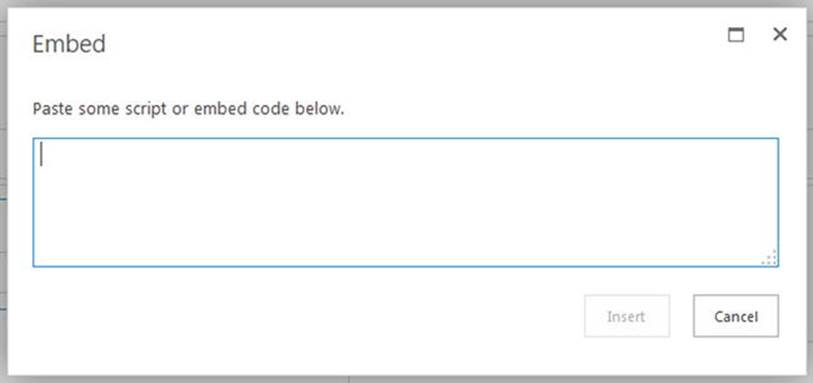
Figure 3-7.
Embed dialog for writing scripts inside the Script Editor Web Part
Note
Even though the Script Editor Web Part can be used to inject HTML, you should think of this web part as for scripts only. It’s a much better practice to separate your HTML and scripts into separate web parts. That being said, it can be very useful if you just need to perform a quick test of a script.
In this example, we’ll add some JavaScript using jQuery that will display an alert when the page is loaded:
<script type="text/javascript">
$(function() {
alert("Hello World!");
});
</script>
As you can see, this code includes an opening and closing <script> tag with a jQuery document.ready function inside. All that this script is doing is firing an alert with the text “Hello World!” inside it when jQuery detects the page has been loaded. Place this code in the dialog and click Insert. Save the page. When the page is refreshed, you will see that the alert fires, as shown in Figure 3-8.
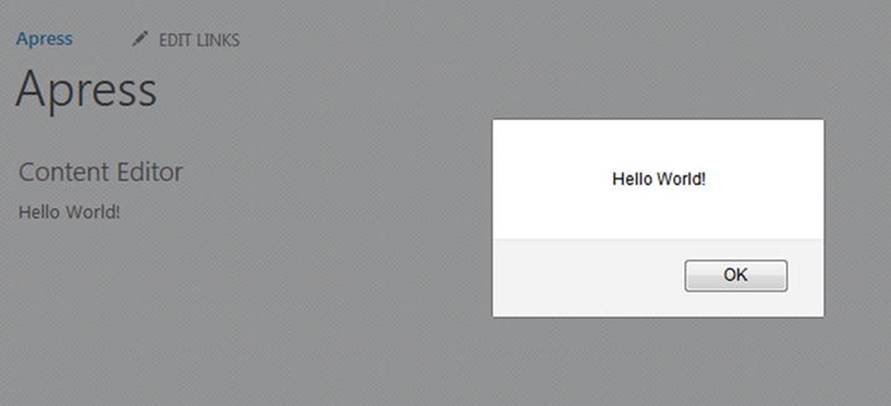
Figure 3-8.
JavaScript alert being shown via the Script Editor Web Part
Much like the example using the Content Editor Web Part, this is quite simple and not exciting. However, at this point you should now have a CEWP and a SEWP on your page. Next, let’s look at how we can wire them together for a complete solution.
Putting Them Together with the REST API
Now that we’ve placed a CEWP and a SEWP on our page, we can wire them up to work together. In this example, we’ll use the REST API to pull some data from a list in our site. We’ll use jQuery to make an AJAX call via the SEWP, and then update the CEWP after the call has been made. We’ll look at how you can use these two web parts together on a page, as well as how to make an AJAX call with jQuery. First, we’ll need a list to call to get data from.
Demo List
Throughout this book we’ll be using JSOM and the REST API to query data from SharePoint. To help facilitate this, we’ll create a new custom list that we can use in our efforts. We’ll keep it fairly simple: just create a new custom list and add an additional column to it. No frills here. To start, just add a custom list using the Add an App functionality and then name this new list Demo List.
Note
This section assumes that you know how to create a new list in SharePoint and how to create a new column. If you need assistance with creating a new column, please visit the following URL: http://office.microsoft.com/en-us/sharepoint-server-help/create-change-or-delete-a-column-in-a-list-or-library-HA102771913.aspx .
Once the list has been added, it will have a single column in the default view, which is Title. This is good, but let’s add one more—just so that we have some extra data to work with. Go to List Settings and add a new column using the “Create column” link on that page. Choose a type of Multiple Lines of Text and title this column Description. In my list, I made this a Plain Text column just to keep it simple. Figure 3-9 shows the Demo List after some data has been added to it.
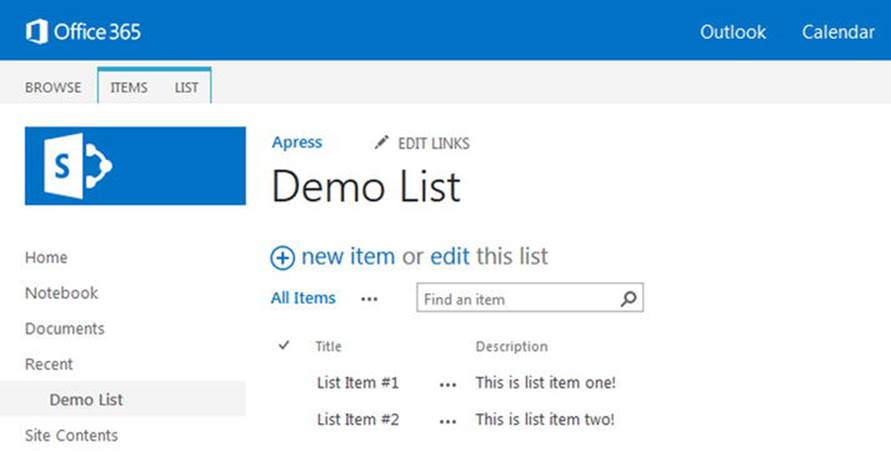
Figure 3-9.
Demo List ready to be queried for data
Just insert a couple of rows of data for now. The actual data in the list is not important for now; it’s really just there to ensure that we can query it and retrieve list items. Now that we have a list, let’s look at the code needed to query it via the REST API.
jQuery, AJAX, and REST API
Querying the list will be done by making an AJAX call to the REST API using jQuery. In the previous chapter, we took a quick look at the structure of the REST API URL. A typical URL structure to query a list looks like this:
http://DOMAIN/SITE/_api/web/lists/GetByTitle('List Name')/items
All REST API URLs start with _api after the site where the data resides, or immediately following the domain name if querying the root site collection of SharePoint. The _api is an indicator to SharePoint that you are requesting data via REST. The data can be requested in either XML or JSON format, but for most JavaScript calls, it will be JSON. A nice benefit of using the REST API is that you can craft your URLs in any browser and test them out before using them in your code!
Note
In my environment, I have created a subsite under the main site collection titled Apress. This site is the area where I’m writing and running all the code in this book. As a result of that, you will see URL structures that look like the following: /apress/. If you are working at the root site in your site collection, then your URL references would begin with / only. Take note of your URL and ensure that your references are correct! Later, we’ll write some code that does all this for you, but for this section it’s important to have the correct URL structure.
To make the call via the browser, we’ll use the standard jQuery AJAX call. The following code demonstrates this call:
<script type="text/javascript">
$(function() {
$.ajax({
url: "/apress/_api/web/lists/GetByTitle('Demo List')",
type: "GET",
headers: {
"accept": "application/json;odata=verbose"
},
}).success(function(data) {
alert(data.d.Title + " : " + data.d.Created);
});
});
</script>
In this example, we wrap the call in the now familiar document.ready function. The AJAX call is made using the $.ajax() function. It’s very straightforward and only includes a few properties:
· url - This is REST API URL that has been crafted to request whatever specific data you need. In this example, all we are requesting are the list properties.
· type - The type represents the standard HTTP methods, IE: GET, POST, PUT, and DELETE. For this example, we are simply requesting data, so we use a GET.
· headers - As mentioned earlier, the REST API can return XML or JSON. If you do not specify which format you want, it will return the default, which is XML. By specifying a header of "accept": "application/json;odata=verbose", we tell the REST API that we would like JSON back.
At the end of the $.ajax call, we attach a success function which processes the “data” that is returned from the REST API. jQuery makes it very easy to handle AJAX calls and perform various functions based on what happens with that call. For instance, you can attach other functions, like a failure and a finally. We’ll look at these in more detail later on.
In our success function, we pass in the data object that is returned from the REST API. All we’re going to do right now is pop up an alert with the list title and the data it was created. We do this with the following lines of code:
· data.d.Title
· data.d.Created
The data object is all the data that is returned from the query. There is a lot in this object that we won’t use. The d property holds all the list properties that we are looking for. It may look strange, but this is how you will access all the data returned via the REST API. For instance, if you request list items in a query, you would access data.d.results. Placing this code into the SEWP and saving the page will result in the alert shown in Figure 3-10.
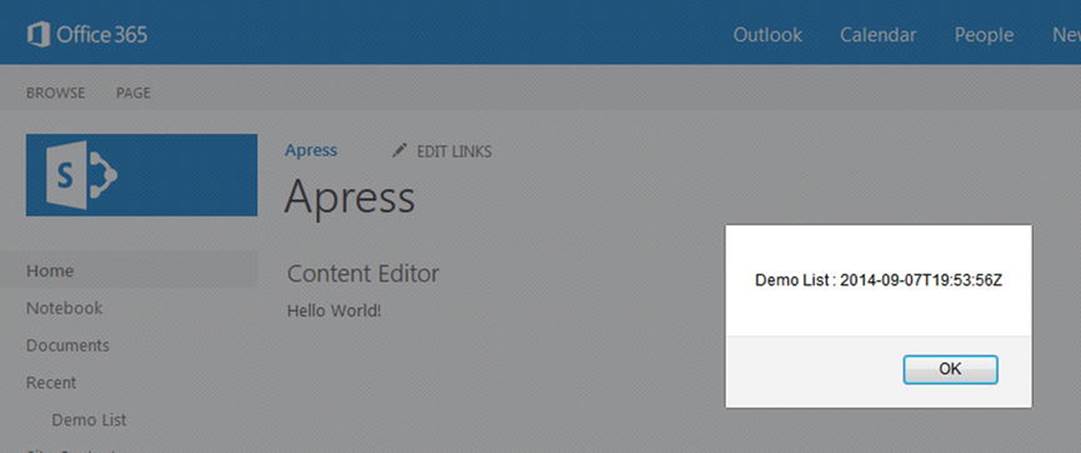
Figure 3-10.
JavaScript alert showing the Demo List title and date created
Now that we have the AJAX call wired up, and data is being returned, you should see the annoying alert pop-up. This is great, as it lets us know that everything is working correctly. However, in real life you probably won’t be making REST calls just to pop up alerts. Let’s get this data into the CEWP with a little more jQuery magic.
Wiring It All Up
At this point, you should have a CEWP and a SEWP on your page. The CEWP is showing some basic HTML, and the SEWP is making a REST API call and popping up an alert. Now it’s time to make them work together by having the SEWP make the call to get the list data, and then update the HTML in the CEWP with the results. After this example, you should see how easy it is to have these two web parts work together to create solutions.
Luckily, we do not need to make any changes to the CEWP! If you used the HTML from this section of this chapter, you are all set. If not, it should look like this:
<div id="divHelloWorld">Hello World!</div>
The key to this line of code and making the web parts work together is the ID attribute in the DIV tag: "divHelloWorld". By giving the DIV an ID, we can very easily use jQuery to find the element in the HTML and update its content. There are other ways to do this as well; for instance, we could have place a CSS class on the DIV and searched that way. Either way, as long as we can easily find the element, we can easily update it!
Now let’s make an update to the SEWP script to update the CEWP. The change is quite small, but should make a big impact. Update your script with the following code; the only change is in the success function, wherethe alert is replaced with some new jQuery code:
<script type="text/javascript">
$(function() {
$.ajax({
url: "/apress/_api/web/lists/GetByTitle('Demo List')",
type: "GET",
headers: {
"accept": "application/json;odata=verbose"
},
}).success(function(data) {
$("#divHelloWorld").html(data.d.Title + " : " + data.d.Created);
});
});
</script>
This new line simply searches for an HTML element with the ID "divHelloWorld". The # symbol is used to instruct jQuery that we are looking for an ID, rather than some other attribute. Updating the SEWP with these changes and clicking Save on the page will result in the CEWP’s HTML being updated, as shown in Figure 3-11. We show the date created in the results; your date will be different from what is shown in the example.
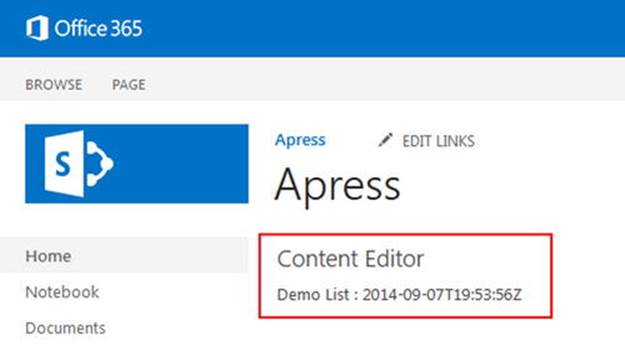
Figure 3-11.
Content Editor Web Part has been updated via the Script Editor Web Part
If you keep your eyes on the CEWP, you can see the “Hello World” message on the screen before it is updated to the list information. This is because we are using the jQuery document.ready function, which will not fire until the page (document) is loaded. If you didn’t catch it the first time, simply hit refresh in the browser to see it again. In a real-world scenario, your HTML may simply be empty to avoid this type of visible change.
Not a One-Size-Fits-All Solution
The CEWP and SEWP are quick and easy ways to inject custom HTML and scripts into your page. At this point, you may think: What else do I need? I can start building custom solutions right now! Certainly these two web parts give you a great opportunity to build solutions for your users, they are easy to use, and they work great together. However, this solution is not necessarily a great option for more complex custom development.
As you progress through your development efforts, not only in this book but in your own efforts, you may find that the solution needs become larger and more complex. You may find that you need multiple JavaScript files, custom style sheets, or maybe even multiple HTML files. Such situations would make using the CEWP and SEWP quite unruly and very difficult to manage. In addition, you may find that you need to have the same functionality used across multiple pages. Having to place multiple web parts on multiple pages and wiring them up can pose a challenge. It also opens the door for other users to modify your HTML and JavaScript. Remember, anyone who has the permission level to edit web parts can edit this code, which could be a very bad thing.
This solution can be quite effective, but it should be used sparingly. It’s a great solution for simple one-off scripts that perform little work, or simple HTML to display limited amounts of data. Since it’s a fast solution, it’s perfect for testing some HTML and scripts to ensure that they work correctly. No matter your decision to use this method, take a moment to think about whether it’s the best choice for your needs and your users.
Summary
In this chapter, we explored the Content Editor Web Part and its new counterpart, the Script Editor Web Part. We looked at how you can place custom HTML and JavaScript on your pages using these web parts, and how easy it is to do so. You learned how to wire up an AJAX call via jQuery to the REST API and retrieve data about a list. Finally, we looked at how to marry the two web parts into a single solution.
In the next chapter, we’ll continue down the path of building custom solutions using what we’ve learned so far. We’ll take a look at how to move this development into a more maintainable structure and get our hands on some more advanced scripts. We’ll also expand on the REST API calls, as well as JavaScript Object Model calls.
© Brandon Atkinson 2015
Brandon AtkinsonCustom SharePoint Solutions with HTML and JavaScript10.1007/978-1-4842-0544-0_4