Adobe Creative Cloud Design Tools All-in-One For Dummies (2013)
Book I
Getting Started with Adobe Creative Cloud
Chapter 2: Using Common Menus and Commands
In This Chapter
![]() Discovering common menus and dialog boxes
Discovering common menus and dialog boxes
![]() Addressing Creative Cloud alerts
Addressing Creative Cloud alerts
![]() Working with common menu options
Working with common menu options
![]() Understanding contextual menus
Understanding contextual menus
![]() Speeding up your workflow with shortcuts
Speeding up your workflow with shortcuts
![]() Changing preferences
Changing preferences
When you work with Adobe Creative Cloud, you’ll notice that many menus, commands, and options are similar across all applications. Discovering how to use these standard menus and dialog boxes is essential to using the applications in the Creative Cloud.
Throughout this book you will notice that specific keyboard shortcuts are the same across applications. This consistency makes finding out how to use the features and options easy. This chapter provides an overview of some of the common menus, dialog boxes, options, commands, and preferences that exist in most or all of the applications in Adobe Creative Cloud.
Discovering Common Menus
When you work with applications in Adobe Creative Cloud, you’ll notice that many of the menus on the main menu bar are the same. Similar functionality makes finding important features easy, even when you’re completely new to the software.
Menu items contain features that control much of the functionality in each application. A menu item may also contain features that are related to a particular task. For example, you might save from the File menu, or change your text in the Type menu. Some of the menu items that commonly appear in the Creative Cloud applications include the following:
![]() File: Contains many features that control the overall document, such as creating, opening, saving, printing, and setting general properties for the document. The File menu may also include options for importing or exporting data into or from the current document.
File: Contains many features that control the overall document, such as creating, opening, saving, printing, and setting general properties for the document. The File menu may also include options for importing or exporting data into or from the current document.
![]() Edit: Contains options and commands for editing the current document. Commands include copying, pasting, and selecting as well as options for opening preferences and setting dialog boxes that are used to control parts of the document. Commands for spell-checking and transforming objects are also common parts of the Edit menu.
Edit: Contains options and commands for editing the current document. Commands include copying, pasting, and selecting as well as options for opening preferences and setting dialog boxes that are used to control parts of the document. Commands for spell-checking and transforming objects are also common parts of the Edit menu.
![]() Type: Contains options related to type and typesetting, such as font selection, size, leading, and more.
Type: Contains options related to type and typesetting, such as font selection, size, leading, and more.
![]() View: Contains options for changing the level of magnification of the document. The View menu also sometimes includes options for viewing the workspace in different ways; showing rules, grids, or guides; and turning alignment snapping on and off. Snapping helps with precise placement of selection edges, cropping marquees, slices, shapes, and paths.
View: Contains options for changing the level of magnification of the document. The View menu also sometimes includes options for viewing the workspace in different ways; showing rules, grids, or guides; and turning alignment snapping on and off. Snapping helps with precise placement of selection edges, cropping marquees, slices, shapes, and paths.
![]() Window: Contains options primarily used to open or close whatever panels are available in the application. You can also choose how to view the workspace and save a favorite arrangement of the workspace.
Window: Contains options primarily used to open or close whatever panels are available in the application. You can also choose how to view the workspace and save a favorite arrangement of the workspace.
![]() Help: Contains the option to open the Help documentation that’s included with the application. This menu may also include information about updating the software, registration, and tutorials.
Help: Contains the option to open the Help documentation that’s included with the application. This menu may also include information about updating the software, registration, and tutorials.
Figure 2-1 shows a list of items that appear under the File menu in Photoshop.
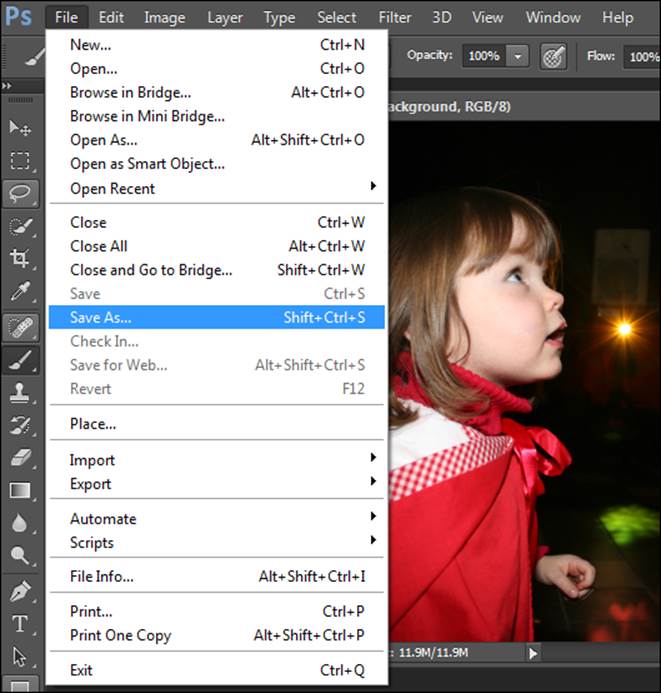
Figure 2-1: Menus in Photoshop let you choose and control different options.
Each application has additional application-specific menus determined by the needs of the software. For example, you can use the Photoshop Image menu to resize the image or document, rotate the canvas, and duplicate the image, among other functions. InDesign has a Layout menu you can use to navigate the document, edit page numbering, and access controls for creating and editing the document’s table of contents; we discuss these menus where appropriate throughout this book.
Using Dialog Boxes
A dialog box is a window that appears when certain menu items are selected. It offers additional options in the form of drop-down lists, panes, text fields, option buttons, check boxes, and buttons that enable you to change settings and enter information or data as necessary. You use dialog boxes to control the software or your document in various ways. For example, when you open a new file, you typically use the Open dialog box to select a file to open. When you save a file, you use the Save As dialog box to select a location for saving the file, to name the file, and to execute the Save command.
Some dialog boxes also include tabs. These dialog boxes may need to contain many settings of different types that are organized into several sections by using tabs. A dialog box typically has a button that executes the particular command and one that cancels and closes the dialog box without doing anything. Figure 2-2 shows a common dialog box.
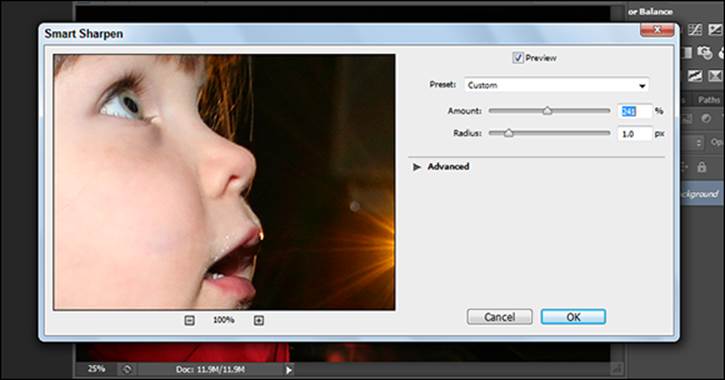
Figure 2-2: Using a dialog box to change filter settings.
A dialog box in Windows offers the same functionality as a dialog box on the Mac. Dialog boxes perform similar tasks and include the same elements to enter or select information. For example, here are some tasks you perform by using dialog boxes:
![]() Save a new version of a file.
Save a new version of a file.
![]() Specify printing or page-setup options.
Specify printing or page-setup options.
![]() Set up preferences for the software you’re using.
Set up preferences for the software you’re using.
![]() Check the spelling of text in a document.
Check the spelling of text in a document.
![]() Open a new document.
Open a new document.
 You can’t use the application you’re working with until the dialog box is closed. When you have a dialog box open in the application you’re using, the window pops up on the screen. Before you can begin working with the application again, you have to close the dialog box. You can close it by making your choices and clicking a button (such as Save or OK) when you’re finished or by clicking the Cancel button to close it without making any changes.
Encountering Alerts
Alerts, which are common on any operating system and in most applications, are similar to dialog boxes in that they’re small windows that contain information. However, alerts are different from dialog boxes because you can’t edit the information in them. Alerts are designed simply to tell you something and give you one or more options that you select by clicking a button. For example, an alert may indicate that you can’t select a particular option. Usually you see an OK button to click to acknowledge and close the alert. You may see other buttons on the alert, such as a button to cancel what you were doing or one that opens a dialog box. Figure 2-3 shows a typical alert.
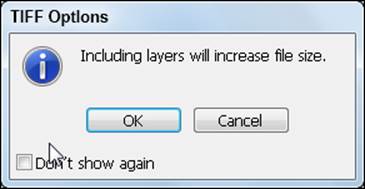
Figure 2-3: A simple choice: OK or cancel.
 You can sometimes use an alert to confirm an action before executing it. Sometimes an alert window also offers the option (typically in the form of a check box) of not showing the alert or warning again. You may want to select this option if you repeatedly perform an action that shows the warning and you don’t need to see the warning every time.
Getting to Know Common Menu Options
Various menu options are typically available in each of the Creative Cloud applications. However, within each of these menus, several other options are available. Some of them open dialog boxes — this type of option is typically indicated by an ellipsis that follows the menu option, as shown in Figure 2-4.
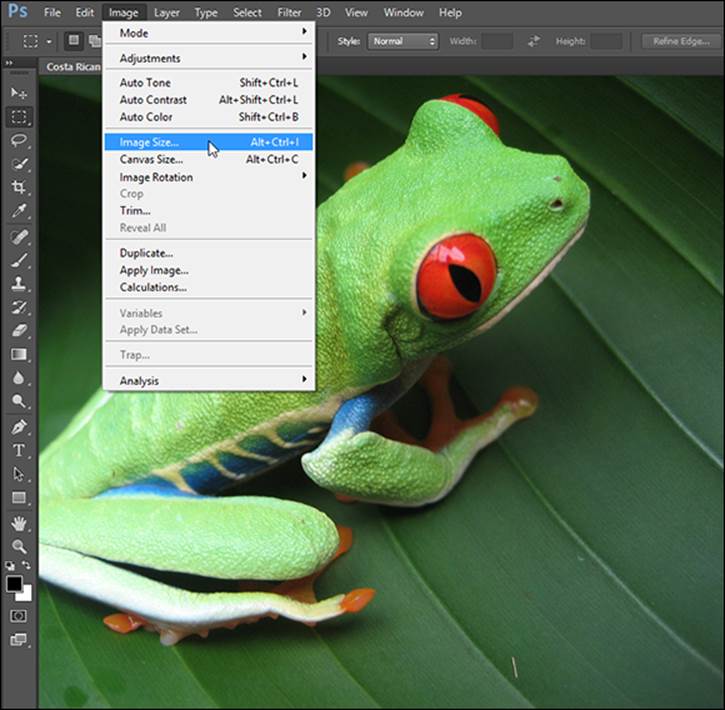
Figure 2-4: Choosing a menu option with an ellipsis opens a submenu.
The following menu options are found in several Creative Cloud applications, and these commands either perform similar (or the same) functions or they open similar dialog boxes:
![]() New: Creates a brand-new document in the native file format. For example, in InDesign, a new INDD (the extension for InDesign documents) file is created by choosing File⇒New⇒Document. You can sometimes choose the type of new file you want to create.
New: Creates a brand-new document in the native file format. For example, in InDesign, a new INDD (the extension for InDesign documents) file is created by choosing File⇒New⇒Document. You can sometimes choose the type of new file you want to create.
![]() Open: Opens a dialog box where you can choose a (supported) file to open on your hard drive or a disc.
Open: Opens a dialog box where you can choose a (supported) file to open on your hard drive or a disc.
![]() Close: Closes the current document. If it has unsaved changes, you’re prompted to save those changes first.
Close: Closes the current document. If it has unsaved changes, you’re prompted to save those changes first.
![]() Save: Saves the changes you’ve made to the current document.
Save: Saves the changes you’ve made to the current document.
![]() Save As: Saves a new copy of the current document using a different name.
Save As: Saves a new copy of the current document using a different name.
![]() Import: Imports a file, such as an image or sound file, into the current document.
Import: Imports a file, such as an image or sound file, into the current document.
![]() Export: Exports the current data to a specified file format. You can sometimes select several kinds of file formats to save the current data in.
Export: Exports the current data to a specified file format. You can sometimes select several kinds of file formats to save the current data in.
![]() Copy: Copies the selected data to the computer’s Clipboard.
Copy: Copies the selected data to the computer’s Clipboard.
![]() Paste: Pastes the data from the Clipboard into the current document.
Paste: Pastes the data from the Clipboard into the current document.
![]() Undo: Undoes the most recent task you performed in the application. For example, if you just created a rectangle, the rectangle is removed from the document.
Undo: Undoes the most recent task you performed in the application. For example, if you just created a rectangle, the rectangle is removed from the document.
![]() Redo: Repeats the steps you applied the Undo command to. For example, if you removed that rectangle you created, the Redo command adds it back to the document.
Redo: Repeats the steps you applied the Undo command to. For example, if you removed that rectangle you created, the Redo command adds it back to the document.
![]() Zoom In: Magnifies the document so that you can view and edit its contents closely.
Zoom In: Magnifies the document so that you can view and edit its contents closely.
![]() Zoom Out: Scales the view smaller so that you can see more of the document at a time.
Zoom Out: Scales the view smaller so that you can see more of the document at a time.
![]() Help: Opens the Help documentation for the current application.
Help: Opens the Help documentation for the current application.
About Contextual Menus
The contextual menu is an incredibly useful, quick way to make selections or issue commands, and it’s available in all kinds of applications. Contextual menus include some of the most useful commands you may find yourself choosing repeatedly.
A contextual menu is similar to the menu types we describe in the previous sections; however, it’s context-sensitive and opens when you right-click (Windows) or Control-click (Mac) something in the application. Contextual means that which options appear on the menu depend on which object or item you right-click (Windows) or Control-click (Mac).
For example, if you open a contextual menu when the cursor is over an image, commands involving the image are listed on the menu. However, if you right-click (Windows) or Control-click (Mac) the document’s background, you typically see options that affect the entire document instead of just a particular element within it. You can therefore select common commands specifically for the item you’ve selected. Figure 2-5 shows a contextual menu that appears when you right-click (Windows) or Control-click (Mac) an object in Photoshop.
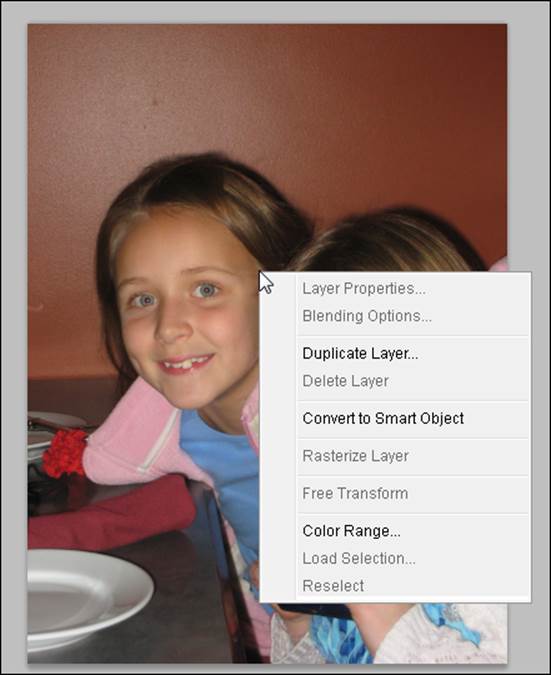
Figure 2-5: Open a contextual menu in Windows by right-clicking an image or object.
The tool you select in the Tools panel may affect which contextual menus you can access in a document. You may have to select the Selection tool first to access certain menus. If you want to open a contextual menu for a particular item in the document, make sure that the object is selected before you right-click (Windows) or Control-click (Mac).
If you’re using a Mac, you can right-click to open a contextual menu if you have a two-button mouse hooked up to your Mac. Otherwise, you press Control-click to open a contextual menu.
Using Common Keyboard Shortcuts
Shortcuts are key combinations that enable you to quickly and efficiently execute commands, such as save or open files or copy and paste objects. Many of these shortcuts are listed on the menus discussed in previous sections. If the menu option has a key combination listed next to it, you can press that combination to access the command rather than use the menu to select it. Figure 2-6 shows shortcuts associated with a menu item.
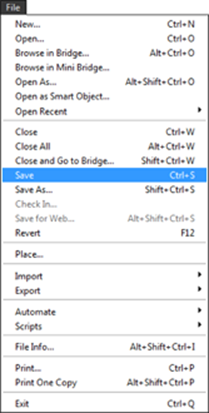
Figure 2-6: Shortcuts are shown next to their associated commands.
For example, if you open the File menu, next to the Save option is Ctrl+S (Windows) or ![]() +S (Mac). Rather than choose File⇒Save, you can press the shortcut keys to save your file. It’s a quick way to execute a particular command.
+S (Mac). Rather than choose File⇒Save, you can press the shortcut keys to save your file. It’s a quick way to execute a particular command.
Some commonly used shortcuts in the Adobe Creative Cloud applications are listed in Table 2-1.
Table 2-1 Common Keyboard Shortcuts
|
Command |
Windows Shortcut |
Mac Shortcut |
|
New |
Ctrl+N |
|
|
Open |
Ctrl+O |
|
|
Save |
Ctrl+S |
|
|
Undo |
Ctrl+Z |
|
|
Redo |
Shift+Ctrl+Z |
Shift+ |
|
Copy |
Ctrl+C |
|
|
Paste |
Ctrl+V |
|
|
|
Ctrl+P |
|
|
Preferences (General) |
Ctrl+K |
|
|
Help |
F1 or sometimes Ctrl+? |
F1 or sometimes |
Many additional shortcuts are available in each application in the Creative Cloud applications, and not all are listed on menus. You can find these shortcuts throughout the documentation provided with each application. Memorizing the shortcuts can take some time, but the time you save in the long run is worth it.
Changing Your Preferences
Setting your preferences is important when you’re working with new software. Understanding what your preferences can do for you gives you a good idea about what the software does. All applications in the Creative Cloud have different preferences; however, the way the Preferences dialog box works in each application is the same.
You can open the Preferences dialog box in each application by choosing Edit⇒Preferences (Windows) or Application Name⇒Preferences⇒General (Mac). The Preferences dialog box opens, as shown in Figure 2-7. Click an item in the list on the left side of the dialog box to navigate from one topic to the next.
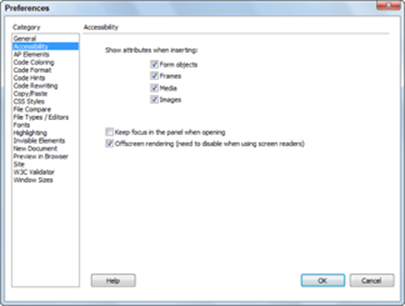
Figure 2-7: Click an item on the left to navigate among topics.
The Preferences dialog box contains a great number of settings you can control by entering values into text fields using drop-down lists, buttons, check boxes, sliders, and other, similar controls. Preferences can be quite detailed. However, you don’t have to know what each preference does or even change any of them: Most dialog boxes containing preferences are quite detailed in outlining which features the preferences control and are therefore intuitive to use. Adobe also sometimes includes a Description area near the bottom of the dialog box. When you hover the mouse over a particular control, a description of that control appears in the Description area.
In some Preferences dialog boxes, a list box on the left side of the dialog box contains the categories of preferences you can change. When you finish changing the settings in that topic, select a new topic from the list and change the settings for another topic.
In some applications, not all settings you can modify are in the Preferences dialog box. For example, in Illustrator, you can change the color settings by choosing Edit⇒Color Settings to open the Color Settings dialog box. When you hover the mouse pointer over a particular drop-down list or button, a description of that control appears at the bottom of this extremely useful dialog box.
By launching Adobe Bridge (described in Chapter 5 of this minibook) and choosing Edit⇒Color Settings, you can change your color preferences across all Creative Cloud applications at one time, as shown in Figure 2-8.
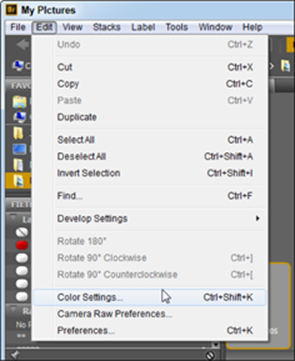
Figure 2-8: Change all color settings at one time using Adobe Bridge.
In many Creative Cloud applications, you have the option to specify your main preferences for the overall document, such as setting up page dimensions, number of pages in the document, or page orientation (landscape or portrait). You can access these kinds of options by choosing the following command in each application:
![]() File⇒New: Dreamweaver
File⇒New: Dreamweaver
![]() File⇒Document Setup: Illustrator and InDesign
File⇒Document Setup: Illustrator and InDesign
![]() Image⇒Image Size: Photoshop
Image⇒Image Size: Photoshop
Figure 2-9 shows the Image Size dialog box.
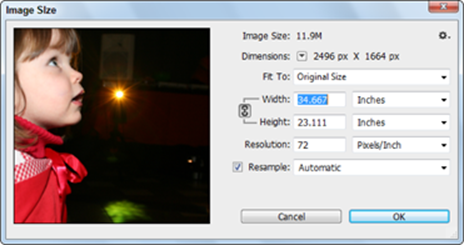
Figure 2-9: The Image Size dialog box.
All materials on the site are licensed Creative Commons Attribution-Sharealike 3.0 Unported CC BY-SA 3.0 & GNU Free Documentation License (GFDL)
If you are the copyright holder of any material contained on our site and intend to remove it, please contact our site administrator for approval.
© 2016-2026 All site design rights belong to S.Y.A.