Adobe Creative Cloud Design Tools All-in-One For Dummies (2013)
Book VI
Dreamweaver CC
Chapter 2: Understanding the Dreamweaver Workspace
In This Chapter
![]() Familiarizing yourself with the workspace
Familiarizing yourself with the workspace
![]() Finding out about panels
Finding out about panels
![]() Creating a new website
Creating a new website
![]() Discovering the Property inspector
Discovering the Property inspector
![]() Previewing your page
Previewing your page
![]() Understanding Dreamweaver preferences
Understanding Dreamweaver preferences
Dreamweaver CC lets you create and manage web pages and complete websites for desktop, mobile, and tablet devices. In this chapter, you find out how to start a website and build pages within it. A website is simply a group of linked pages that contain text and images and can also contain media, such as video, audio, Flash movies, transitions, and animations.
Getting to Know the Workspace
Dreamweaver comes with a number of workspaces, which are arrangements of different panels and toolbars. A workspace consists of panels, toolbars, and inspectors and puts most all the tools you need within close reach. The Designer workspace is what you see by default. (See Figure 2-1.) The Dreamweaver workspace is slightly different from ones you may see in other Adobe applications, but their premise is the same: You can open panels, panel groups, toolbars, and dialog boxes to do the work you need. Whichever document you’re editing appears in the Document window, which occupies most of the workspace — with top and bottom toolbars and lots of options to choose from. You can customize your workspace with only the panels, toolbars, and arrangement of windows you need, or choose from a number of additional workspace presets included with Dreamweaver.
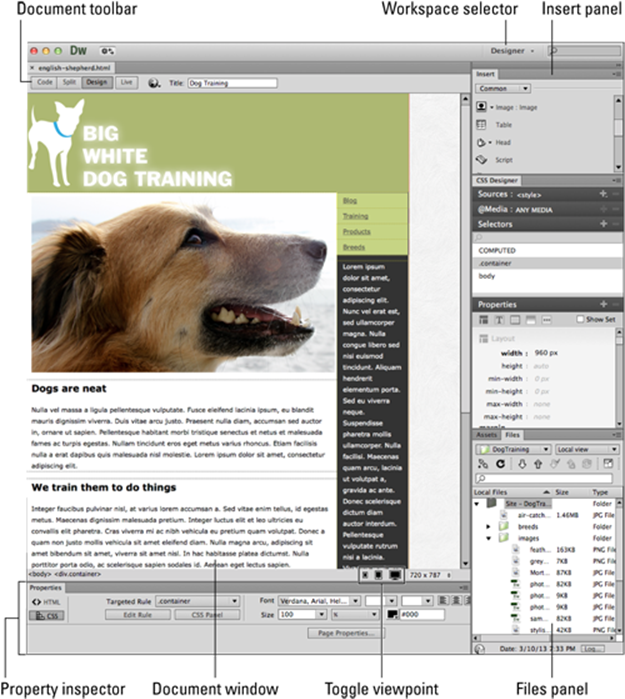
Figure 2-1: The Dream-weaver workspace.
When Dreamweaver is first launched, you see a Welcome screen. This screen provides the option to open any recent items (if you’ve created pages already) or to create new HTML, CSS, XML, sites, and many other types of files.
The Insert panel
The Dreamweaver CC Insert panel provides you with tools to insert common web page elements such as hyperlinks, e-mail links, tables, and images as well as additional text formatting options and widgets that enhance your page. Choose Window⇒Insert to reveal the panel in the upper-right corner of your workspace.
The Insert panel is divided into eight categories that provide you with different elements to add to your page. You can switch between these categories by using the drop-down list at the top of the panel:
![]() Common: Contains the most commonly used objects, such as images and tables.
Common: Contains the most commonly used objects, such as images and tables.
![]() Structure: Contains layout elements — such as tables and CSS elements like the DIV tag — that help you create a web page layout.
Structure: Contains layout elements — such as tables and CSS elements like the DIV tag — that help you create a web page layout.
![]() Media: Contains media elements that help you add animation and audio made with HTML5, Flash, or Edge.
Media: Contains media elements that help you add animation and audio made with HTML5, Flash, or Edge.
![]() Form: Contains the elements necessary to create a form in your Dreamweaver page.
Form: Contains the elements necessary to create a form in your Dreamweaver page.
![]() jQuery Mobile: Contains jQuery Mobile-specific objects (such as form and layout elements) for use with jQuery Mobile pages and projects.
jQuery Mobile: Contains jQuery Mobile-specific objects (such as form and layout elements) for use with jQuery Mobile pages and projects.
![]() jQuery UI: Contains jQuery UI components such as Accordion, Progressbar, and various buttons.
jQuery UI: Contains jQuery UI components such as Accordion, Progressbar, and various buttons.
![]() Templates: Provides you with text-formatting tags.
Templates: Provides you with text-formatting tags.
![]() Favorites: Allows you to group and organize the Insert panel buttons you use the most within one common location.
Favorites: Allows you to group and organize the Insert panel buttons you use the most within one common location.
 To bring up the Customize Favorite Objects dialog box, simply right-click (Windows) or Control-click (Mac) within the Insert panel and choose Customize Favorites from the contextual menu. The Customize Favorite Objects dialog box, shown in Figure 2-2, appears. Click an object in the Available Objects list and then click the double arrow to add the object to your Favorites category.
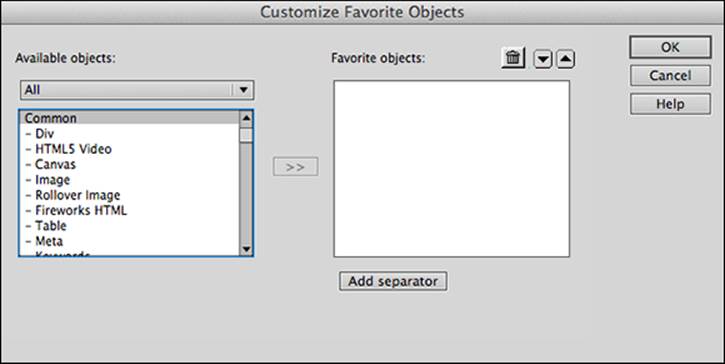
Figure 2-2: Customize the Insert panel’s Favorites category by adding frequently used objects from other categories.
The Document toolbar
The Document toolbar, shown in Figure 2-3, contains tools to help you view your document in different modes, such as Code and Design, as well as address such items as the document title and CSS styles. In addition, you can preview your page in Live view to see how it may appear in an actual web browser.
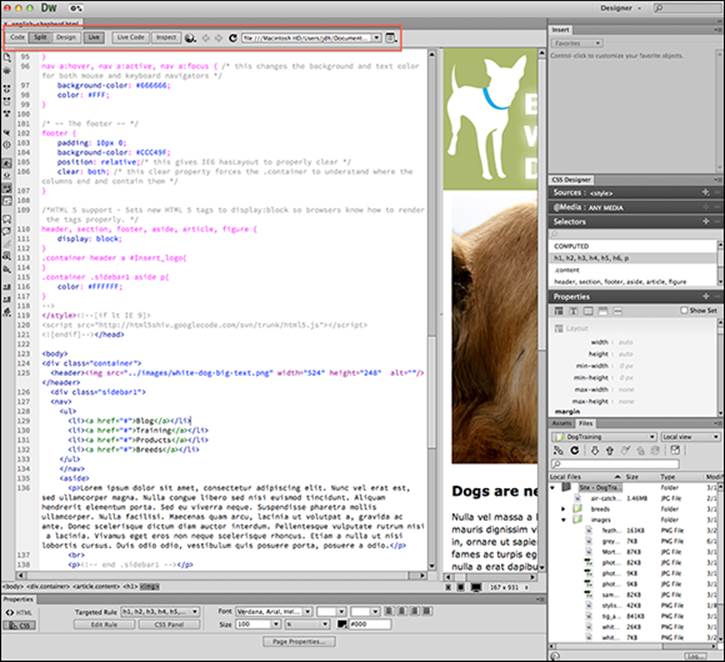
Figure 2-3: Control your view of the page from the Document toolbar.
The tools here include the following:
![]() Code view: Show the code and only the code using this view. Dreamweaver helps you to decipher code by color-coding tags, attributes, CSS, and other elements.
Code view: Show the code and only the code using this view. Dreamweaver helps you to decipher code by color-coding tags, attributes, CSS, and other elements.
![]() Split view: Selecting this option splits the Document window between Code and Design views. If you understand a little about code, this view can be extremely helpful because you see both the design and the code simultaneously.
Split view: Selecting this option splits the Document window between Code and Design views. If you understand a little about code, this view can be extremely helpful because you see both the design and the code simultaneously.
![]() Design view: This option displays your page in Design view in the Document window.
Design view: This option displays your page in Design view in the Document window.
![]() Live view: Live view renders your page as though it’s in a browser — free of borders, guides, and other visual aids. In Live view, you can’t edit the previewed content, but you can still jump to Code, Split, or Design view and modify your page content.
Live view: Live view renders your page as though it’s in a browser — free of borders, guides, and other visual aids. In Live view, you can’t edit the previewed content, but you can still jump to Code, Split, or Design view and modify your page content.
![]() Live Code (Live view only): When Live view is enabled, you can view and inspect the source code of your document as a user would see it in a browser (via the View Source or Page Source menu options in most browsers). You can’t edit page code in this view.
Live Code (Live view only): When Live view is enabled, you can view and inspect the source code of your document as a user would see it in a browser (via the View Source or Page Source menu options in most browsers). You can’t edit page code in this view.
![]() Inspect (Live view only): The Inspect button works with Live view to reveal the CSS rules that format elements on your page. When you select an element on the page with Inspect enabled, the CSS Designer panel reveals the properties that format that element, and allows you to disable or modify specific properties and see the results in real time.
Inspect (Live view only): The Inspect button works with Live view to reveal the CSS rules that format elements on your page. When you select an element on the page with Inspect enabled, the CSS Designer panel reveals the properties that format that element, and allows you to disable or modify specific properties and see the results in real time.
![]() Previous Page, Next Page, Refresh, Address (Live view only): These controls work very much like they do on a standard web browser, allowing you to navigate your page history while in Live view, refresh the current page, type in a new address, or return to the home (index) page of your site. The buttons that you see will depend on which view you are in.
Previous Page, Next Page, Refresh, Address (Live view only): These controls work very much like they do on a standard web browser, allowing you to navigate your page history while in Live view, refresh the current page, type in a new address, or return to the home (index) page of your site. The buttons that you see will depend on which view you are in.
![]() Live View Options: Click and select options from this menu to control how your document appears and works when Live view is enabled.
Live View Options: Click and select options from this menu to control how your document appears and works when Live view is enabled.
A very cool but underestimated feature is the capability to type any website address in the Live view browser. You can type in the URL of a website that you’d like to browse, and then you can use the Related Documents toolbar to inspect the files (such as CSS and JavaScript) that comprise it and see how it’s built.
![]() Preview/Debug in Browser: Click this button to preview or debug your document in one of your installed web browsers, Adobe’s BrowserLab, or Device Central.
Preview/Debug in Browser: Click this button to preview or debug your document in one of your installed web browsers, Adobe’s BrowserLab, or Device Central.
![]() Document Title: Enter the name of your document in this field.
Document Title: Enter the name of your document in this field.
![]() Related Documents: Documents used by and attached to your page, such as external CSS and JavaScript files, are listed above the view selection (Code/Split/Design) buttons. You can click any listed document to edit the attached file in Split view without having to switch documents.
Related Documents: Documents used by and attached to your page, such as external CSS and JavaScript files, are listed above the view selection (Code/Split/Design) buttons. You can click any listed document to edit the attached file in Split view without having to switch documents.
Note: XML, JavaScript, CSS, and other code-based file types can be viewed and edited only in Code view; the Design and Split buttons appear dimmed out.
Note: Refreshing also updates code features that are Document Object Model (DOM) dependent, such as the capability to select a code block’s opening or closing tags.
Using the panel groups
Dreamweaver provides you with a panel docking area off to the right of the workspace. The panels in Dreamweaver appear grouped and tabbed, and you can easily access the appropriate panel for the job by either clicking the tab of the panel to bring it forward or by selecting the named panel from the Window menu.
Close a panel by either selecting the name of the panel from the Window menu or by tearing the panel out of the group and clicking the Close icon.
Saving your workspace
Just as with the other Creative Cloud applications, you can organize your workspace by turning on the visibility of the panels and toolbars that you use regularly and closing the others. You can also save your workspace so that you can recall it at any time:
1. Choose Window⇒Workspace Layout⇒New Workspace.
The New Workspace Layout dialog box appears.
2. Type an appropriate name in the Name text box.
3. Click OK to create the new workspace.
To recall a workspace you’ve previously saved, you can use one of the following methods:
![]() Select the workspace from the Workspace menu near the top of the screen (in the Application bar above the panel group), as shown in Figure 2-4.
Select the workspace from the Workspace menu near the top of the screen (in the Application bar above the panel group), as shown in Figure 2-4.
![]() Open the workspace by choosing Window⇒Workspace Layout⇒[your workspace name].
Open the workspace by choosing Window⇒Workspace Layout⇒[your workspace name].
Dreamweaver CC features several workspaces geared toward different types of users as well as different tasks. You can recall any of these workspaces by using either of the ways described in the preceding list.
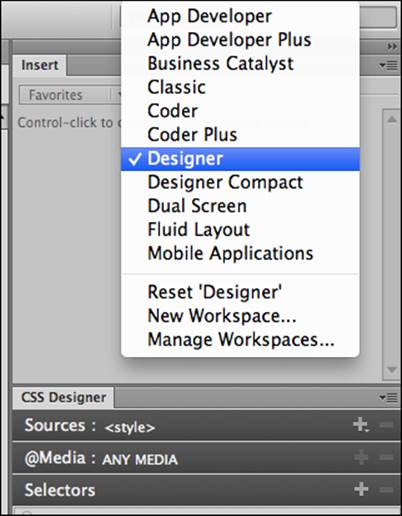
Figure 2-4: The Workspace menu on the Application bar allows you easy access to your saved workspaces.
Creating a Site
Sites are quite important to maintain the links and consistency and the general organization of your web pages. (See Chapter 3 of this minibook for more on creating sites.) Some good news is that the process of creating a new site is easy to accomplish in Dreamweaver CC.
To create a site, follow these steps:
1. Choose Site⇒New Site.
The Site Setup dialog box appears.
This dialog box walks you through the steps to create a new site. In this chapter, you breeze through the steps, but you can find more details about them in Chapter 3 of this minibook.
2. In the Site Name box, type a name for your new site.
For example, enter chapter2.
3. The Local Site Folder field shows you where the new site folder will be created. If you want to change it, you can click the Folder icon to select an existing folder. For now, leave the default folder path and click Save.
The site now appears in the Files panel in the lower-right corner of your workspace.
Checking Out the Property Inspector
After you’ve created a site, you can begin to add new pages as well as assets, such as images, to that site. The Property inspector becomes one of your most useful panels because it provides you with information about any element you’ve selected in the Document window. This contextual panel, shown in Figure 2-5, displays text attributes when text is selected or image attributes when images are selected, and so on.

Figure 2-5: The Property inspector as it will appear with text selected (top) and an image selected (bottom).
To see this panel in action, you need to create a new page with some elements on it. You may not have any of your own pages yet, so you can use one of the CSS Starter pages that loaded with your Dreamweaver CC installation, and follow these steps:
1. Choose File⇒New to create a new page in Dreamweaver.
The New Document dialog box appears.
2. Choose Blank Page⇒HTML⇒2 Column Fixed, right sidebar, header and footer and then click Create.
3. Choose File⇒Save As.
The Save As dialog box appears.
4. Type a name in the Save As text box.
The location is routed automatically to the site folder you created. See the earlier section Creating a Site to see how to create a site.
5. With your new page open in the Document window, click to select various elements, such as text, a table, or a hyperlink (linked text).
With each selection, the Property inspector changes to provide you with specific information about that element. (Refer to Figure 2-5.)
For more information on the Property inspector, see Chapter 4, “Working with Images,” in this minibook.
The Property inspector is analogous to the Option bar, which appears at the top of the Illustrator, InDesign, and Photoshop workspaces and the Property inspector in Flash. If you’re a former GoLive user, the concept of using the Property inspector is also quite familiar to you because this same feature existed in that application as well.
Previewing Your Page in a Browser or with Live View
Perhaps you’ve completed your page and you want to investigate how it looks in a browser. You can quickly preview your file by simply clicking the Preview/Debug in Browser button on the Document toolbar and selecting a browser to preview your page or access the Browser List set in Dreamweaver’s preferences, as shown in Figure 2-6.
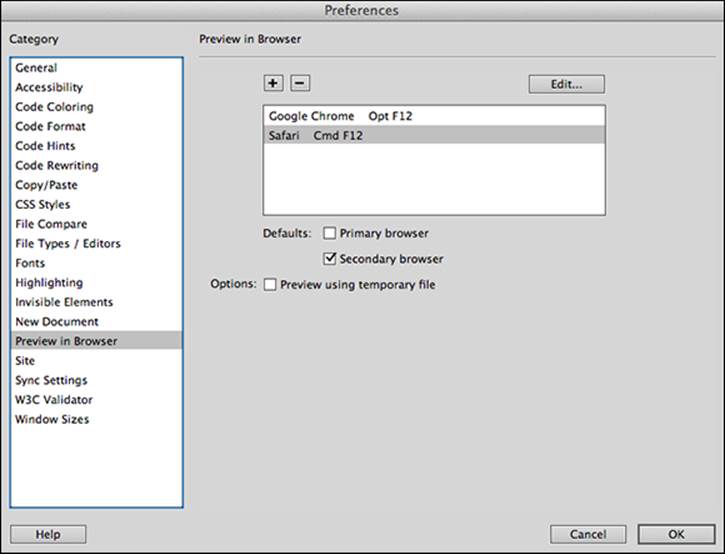
Figure 2-6: The Preview/Debug in Browser button lets you select from your installed browsers, which you can add in Dream-weaver Preferences as shown here.
You can always add browsers from the Preferences panel by choosing Edit⇒Preferences⇒Preview in Browser (Windows) or Dreamweaver⇒Preferences⇒Preview in Browser (Mac).
The Dreamweaver CC Live view displays your page as you would see it in a browser. This feature is a nice alternative to the Preview in Browser command because you don’t ever need to exit Dreamweaver.
To view your page in Live view, follow these steps:
1. With a page open in the Document window, click the Live View button on the Document toolbar.
2. To see the resulting source code of your page, click the Live Code button that appears next to the Live View button.
This step is equivalent to using the View Page Source or View Source options available in most every browser. In this mode, you can only view code, not edit it.
3. To edit your page code, switch to Split view or Code view on the Document toolbar.
Understanding Dreamweaver Preferences
You can change many preferences in Dreamweaver CC for Windows or Mac OS X.
To access general preferences, choose Edit⇒Preferences (Windows) or Dreamweaver⇒Preferences (Mac). You see categories, such as Accessibility, Code Coloring, and General, in the panel on the left, along with subcategories that appear in the panel to the right. The general rule for changing preferences is that if you don’t know what it means, don’t touch it. But if you want to tweak certain things, this is the place to go.
Preferences are especially helpful to people who hand-code and want to enter their own code hints and highlight colors, or who want to change the font that appears in Code view.
All materials on the site are licensed Creative Commons Attribution-Sharealike 3.0 Unported CC BY-SA 3.0 & GNU Free Documentation License (GFDL)
If you are the copyright holder of any material contained on our site and intend to remove it, please contact our site administrator for approval.
© 2016-2026 All site design rights belong to S.Y.A.