Adobe Creative Cloud Design Tools All-in-One For Dummies (2013)
Book VII
Flash Professional CC
Chapter 7: Controlling Your Movie with ActionScript
In This Chapter
![]() Discovering ActionScript
Discovering ActionScript
![]() Adding actions to the Timeline
Adding actions to the Timeline
![]() Creating button symbols
Creating button symbols
![]() Applying code snippets
Applying code snippets
![]() Enabling buttons with ActionScript
Enabling buttons with ActionScript
Whether you’re creating a website, mobile application, or game, you can’t create a truly interactive experience without giving your users total control of the action. If you want to take your movies to the next level, then, ActionScript can help. This powerful, built-in scripting language can help you do everything from controlling basic movie playback to creating complex games and even loading dynamic content and data.
This chapter introduces you to ActionScript and shows you how to use it to create interactive elements, such as clickable buttons, in your movies.
Getting to Know ActionScript
ActionScript is a powerful scripting language that you can use to control playback, navigation, and imported media, such as images, video, and audio. The ActionScript language comprises a vast series of commands that are placed on the Timeline, within movie clips, or in external files using the Actions panel and the Code Snippets panel. Think of ActionScript as a set of instructions you can give your movie to tell it how to behave and add capabilities.
In its most basic form, ActionScript is used for Timeline control so that you can tell animations when and where to stop, loop, play, or jump to other points along a timeline. You can also make highly interactive movies by adding controls to your movie, allowing users to drive the action.
The Code Snippets panel
A great tool for designers and code newbies is the Code Snippets panel, shown in Figure 7-1. If you’ve never written ActionScript, the learning curve can be a bit daunting, and sometimes you just need to get the job done. The Code Snippets panel contains dozens of useful pieces of code that you can easily apply in a single click. Whether you want to navigate the Timeline, play sounds, or control video in your movie, a code snippet can help.
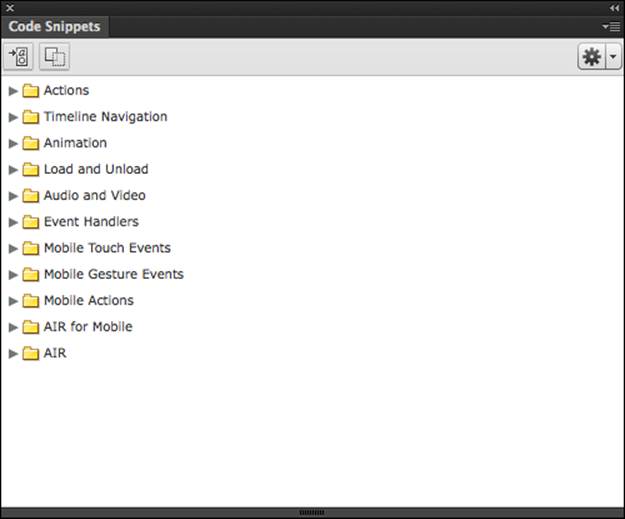
Figure 7-1: The Code Snippets panel contains dozens of useful pieces of ActionScript you can use in your movies.
The Actions panel
If you are comfortable writing code by hand or have experience with other scripting languages (such as JavaScript), you can use the Actions panel to write your own code throughout your movie. The Actions panel has familiar functionality to many script editors, and contains a handy list to show you where code is located within your document.
To launch the Actions panel, choose Window⇒Actions or use the F9 (Windows) or Option+F9 (Mac) shortcut key combination.
To place an action on a frame, select the frame on the Timeline and launch the Actions panel. (See Figure 7-2.)
Previewing ActionScript
If you press the Enter or Return key to watch a movie clip play on the stage, you’ll probably be a little disappointed. Don’t worry: To see ActionScript in, well . . . action, you just need to preview the movie in Flash Player.
ActionScript is understood and processed within Flash Player, so most scripted movies need to be tested by choosing Control⇒Test Movie.
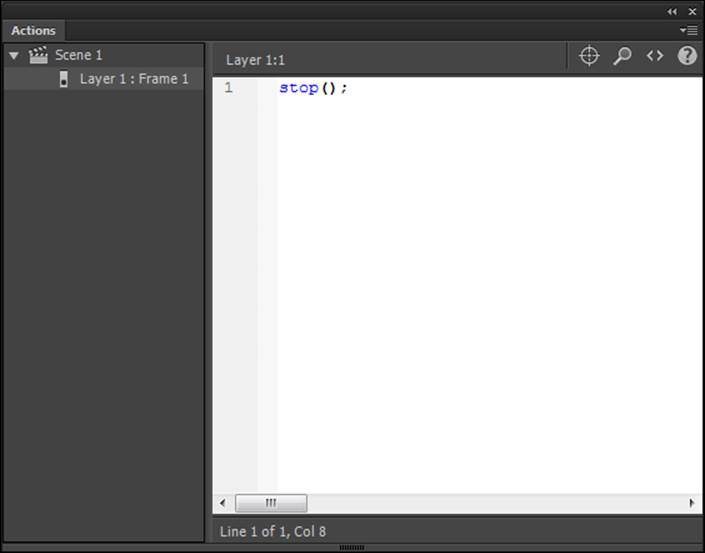
Figure 7-2: The Actions panel.
ActionScript 3.0 versus ActionScript 2.0
Since its introduction in Flash Player 9, ActionScript version 3.0 has brought many major changes and improvements to the way ActionScript performs and to the way it’s created within movies.
Previous versions of ActionScript (1.0+, 2.0) are still in use among some Flash projects, but beginning in Flash CS7 you will need to write your code using ActionScript 3.0.
If you’ve worked with older versions of ActionScript, you should be aware of some key differences:
![]() ActionScript 3.0 can only be placed on keyframes in the Timeline or external (.as) files. You can't place ActionScript 3 statements directly on symbol instances.
ActionScript 3.0 can only be placed on keyframes in the Timeline or external (.as) files. You can't place ActionScript 3 statements directly on symbol instances.
![]() ActionScript 3.0 is stricter about a number of coding practices. Practices that Flash would normally let slide in ActionScript 2.0 may cause errors in ActionScript 3.0.
ActionScript 3.0 is stricter about a number of coding practices. Practices that Flash would normally let slide in ActionScript 2.0 may cause errors in ActionScript 3.0.
![]() ActionScript 3.0 projects can be published only to Flash Player 9 or later. This consideration is important if the requirements of your project limit the use of Flash Player to version 8 or earlier.
ActionScript 3.0 projects can be published only to Flash Player 9 or later. This consideration is important if the requirements of your project limit the use of Flash Player to version 8 or earlier.
 If you’re a first-time coder or have never worked with scripting or programming languages, some concepts in ActionScript 3.0 may present a significant learning curve.
Creating ActionScript with the Actions Panel
All ActionScript code is added to keyframes on the Timeline, and here you’ll add some common ActionScript statements within the Code Editor (see Figure 7-3) directly, or by selecting actions in the Code Snippets panel to add them to the Code Editor. In the following exercises, you add code to your document using both methods.
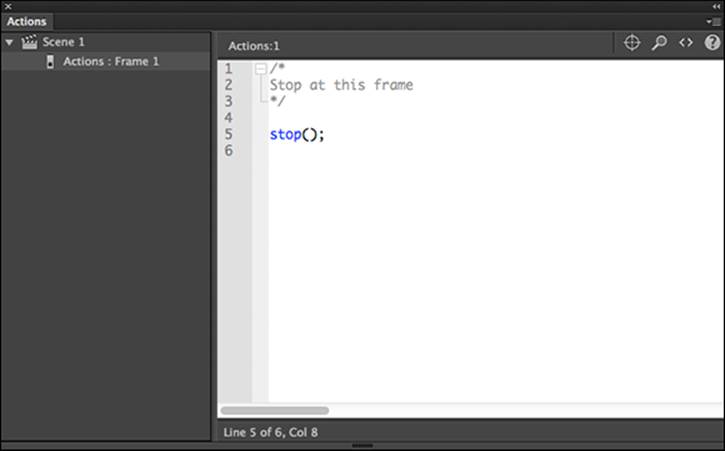
Figure 7-3: Create code by typing in the Code Editor window.
Adding a stop()
The stop() statement does exactly what it sounds like: It stops the timeline at whatever frames you place it on. (See Figure 7-4.) A common use of stop() is to keep a movie from looping, which is the default behavior for Flash Player.
Follow these steps to create a stop action in your movie:
1. On a new layer, create a motion or shape tween from Frames 1 through 24 and press Enter or Return to play back and preview the animation.
For more information on creating tweens, see Chapter 3 of this minibook.
2. Click the New Layer button below the timeline to create a new layer and name it Actions. If necessary, drag the layer upward so that it’s the topmost layer in the stack.
This dedicated layer is where you add ActionScript to control your new motion tween. It is common to name the layer Actions and keep it at the top of the Timeline — a good habit to develop, especially if you expect to share your document with others.
3. Add a keyframe on Frame 24 of the new Actions layer with the F6 shortcut key.
4. Select the keyframe and choose Window⇒Actions to launch the Actions panel.
5. In the Actions panel, locate the Code Snippets button and click it.
The Code Snippets panel opens.
 You can add ActionScript to keyframes with existing content, but it’s always a good practice to separate scripts from visual elements on the stage by creating a dedicated layer for your ActionScript.
6. Locate and open the Timeline Navigation folder, and double-click Stop at This Frame.
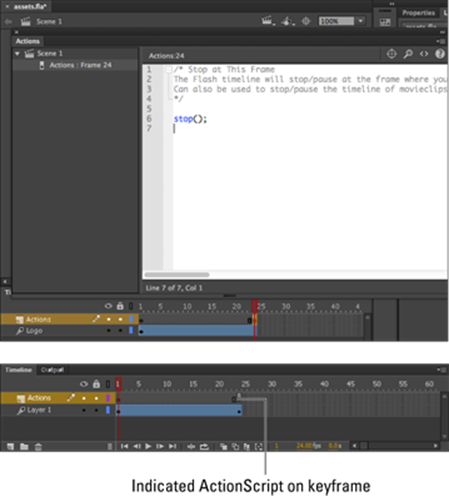
Figure 7-4: The Actions panel view, showing a stop() action (top). A lowercase a indicates that Action-Script was added to Frame 24 of the Actions layer (bottom).
The actions panel reads
/* Stop at This Frame
The Flash timeline will stop/pause at the frame where you insert this code.
Can also be used to stop/pause the timeline of movieclips.
*/
stop();
 The first part of this snippet includes a comment. This is not code that executes any commands in your movie; it is simply instructions on how to make the code work, or statements about what it does, or anything else you want to add. The next part of the snippet is the ActionScript code required to stop the timeline: stop(). Take a look at your Timeline (refer to the bottom of Figure 7-4), and you'll notice that a lowercase a now appears inside the keyframe, which indicates that there is ActionScript on the keyframe. These scripts run when the playhead passes that keyframe.
In order to view all of the ActionScript code within the script pane, choose View⇒Word Wrap. Turning on Word Wrap does not affect the functionality of your code, but will enable you to see it without scrolling horizontally in or resizing the panel.
7. Choose Control⇒Test Movie to preview your movie.
The animation plays until Frame 24 and then stops.
Using goto: gotoAndPlay() and gotoAndStop()
To loop a movie or to send the playhead to a different point on the Timeline, you can tell your movie to jump forward or backward to a specific frame with one of two variations of the goto statement: gotoAndPlay() and gotoAndStop().
Each of these two statements requires a frame name or number so that Flash Player knows where to send the playhead. When placed on a frame, these actions send the playhead forward or backward to the specified frame and stop, or they resume playback from that point.
To use gotoAndStop, follow these steps:
1. Create a new document with different graphics on keyframes at Frames 1, 5, and 9 on Layer 1. Create a new layer and name it Actions. On the Actions layer, select and create a new keyframe at Frame 10 by pressing F6.
2. Choose Window⇒Actions to open the Actions panel.
3. With Frame 10 of the Actions layer selected, type the following code into the Code Editor.
The statements should read
this.gotoAndStop(5);
4. Choose Control⇒Test Movie to preview your movie.
The playhead moves between Frames 1 and 10, and jumps to frame 5, where it stops. It does not progress to the final graphic on Frame 9 again, or loop the movie.
Follow these steps to use gotoAndPlay():
1. Insert a new keyframe (press F6) on Frame 6 on the Actions layer.
2. Delete the ActionScript code on Frame 10 of the Actions layer (what you added in the preceding exercise).
3. With Frame 6 of the Actions layer selected, enter the following ActionScript code into the Code Editor. (See Figure 7-5.)
The actions should read
this.gotoAndPlay(1);
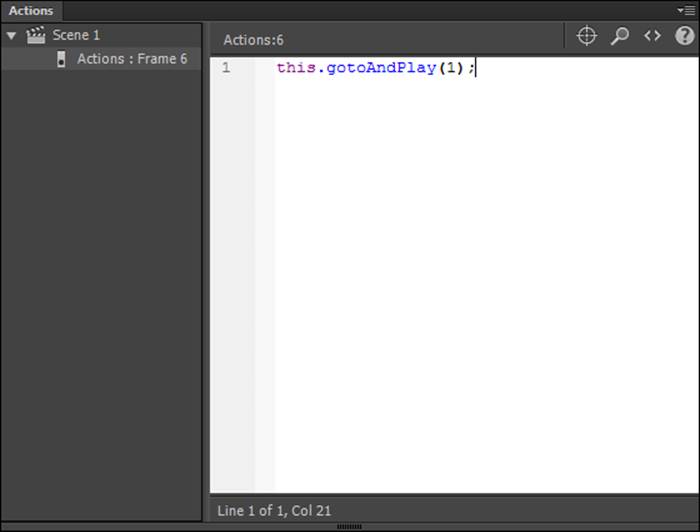
Figure 7-5: The goto-AndPlay() action in the Code Editor, located at Frame 6.
4. Choose Control⇒Test Movie to preview your movie.
The animation plays until Frame 6, and then continuously loops between Frames 1 and 6. Leave the document open for the next exercise.
Using frame labels
Many statements (like the goto statements described in the preceding section) reference exact frame numbers to navigate the Timeline. If you happen to change the placement of something on your Timeline (such as the start or end of an animation), frame numbers may become inaccurate. For cases like these, you can assign names directly to keyframes on the Timeline that you can call directly from ActionScript.
Frame labels are familiar names you can assign to any keyframe (such as start, end, or big_finale). You can then tell ActionScript to jump to these frames by name as an alternative to using a frame number. If the location of the named frame changes, scripts still function as long as the label name is the same. When you move a keyframe, the label you assign to it moves with it.
Here’s how to modify a button to use a frame label instead of a frame number:
1. With the file you created in the previous section, create a new layer on the Timeline and assign it the name Labels.
This name is arbitrary, but it’s always a good idea to name layers as intuitively as possible.
2. Select Frame 10 of your new layer.
3. Enter image3 in the text box shown in the Label area of the Property inspector. (See Figure 7-6.)
For example, we assigned this keyframe the label name image3.
Your label names can also be arbitrary; however, it is good practice to use intuitive names and avoid using special characters, spaces, words used by ActionScript code, or beginning the label with numbers (such as 5dogs).
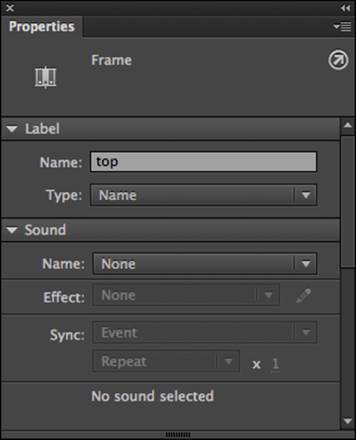
Figure 7-6: Assign any keyframe a label name with the Property inspector.
4. Select Frame 6 of your Actions layer and choose Window⇒Actions to open the Actions panel (if it’s not already open).
If you haven't already, follow the steps in the preceding section, Using goto: gotoAndPlay() and gotoAndStop(), to add a gotoAndPlay() statement.
5. Locate and delete the line that reads gotoAndPlay(1). Select frame 1 of the Actions layer, and add the following code, as shown in Figure 7-7.
The code should read
gotoAndStop ("image3");
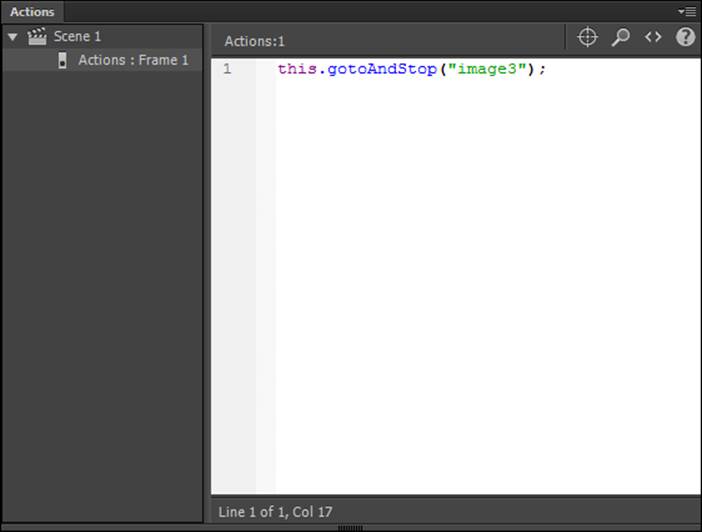
Figure 7-7: Use a frame label you assigned to move the playhead to a specified frame.
6. Choose Control⇒Test Movie to preview your changes.
See the timeline jump directly to Frame 10 and stop without displaying the first or second images. This time, however, the code uses a frame label instead of an absolute frame number to move the playhead.
Now, no matter where you move the keyframe with your label, the script follows automatically as long as the frame label remains the same.
Creating Button Symbols
In everyday life, buttons give you control over your world, whether it’s switching on a light or your TV at home or navigating web pages and e-mail messages online. To make your movies better, you can use buttons to give users control over the action with timeline control and navigation.
In Flash, buttons are special symbol types built to respond to mouse or keyboard interaction such as clicks, rollovers, and specific key presses. When paired with ActionScript, buttons can be used for just about any navigation or control task. Buttons are created in the same way as other symbol types, and you can easily drag instances to the stage from your library to create more buttons.
Buttons truly come to life after ActionScript is added, but you must understand how to create proper buttons before wiring them up.
Creating a new button
As with graphical symbols, you can create buttons from existing content on the stage or as new empty symbols to which you can add content later.
Follow these steps to create a new button symbol from existing content:
1. On a new layer in a new document, create a new, solid shape on the stage that you want to use as a button and select the shape with the Selection tool.
2. Choose Modify⇒Convert to Symbol.
The Convert to Symbol dialog box appears.
3. Enter a name for your new button in the Name text box and select Button from the Type drop-down list.
4. Click OK to create the button.
Choose Window⇒Library to launch the Library panel, and you see the new symbol with the special button icon next to it.
Understanding button states
Take a look inside your button by double-clicking it on the stage or in the Library panel; its unique timeline contains four specially marked frames: Up, Over, Down, and Hit. Each frame represents a button state, or the appearance of a button, as it interacts with a mouse in different ways.
Each frame, or state, can contain unique artwork so that your button can change appearance as it’s clicked, pressed, or released. You can even add layers inside your button to stack artwork for more creative flexibility. This list describes the states and what they represent:
![]() Up: The appearance of your button when it’s not pressed or rolled over. This state is the one you see most of the time as the button sits on the stage.
Up: The appearance of your button when it’s not pressed or rolled over. This state is the one you see most of the time as the button sits on the stage.
![]() Over: The appearance of the button when the mouse pointer rolls over it. Adding unique content to this frame creates the rollover effect that many people know and love from using web buttons.
Over: The appearance of the button when the mouse pointer rolls over it. Adding unique content to this frame creates the rollover effect that many people know and love from using web buttons.
![]() Down: The appearance of the button when it’s clicked and the mouse button is held down.
Down: The appearance of the button when it’s clicked and the mouse button is held down.
![]() Hit: Contents aren’t visible, but this state sets the hot spot, or clickable area, of your button. If the Hit frame is empty, it uses the shape on the last available state by default. You can create a more specific clickable area if you want to give users more or less area to work with or you want to simplify usability for odd-shaped buttons.
Hit: Contents aren’t visible, but this state sets the hot spot, or clickable area, of your button. If the Hit frame is empty, it uses the shape on the last available state by default. You can create a more specific clickable area if you want to give users more or less area to work with or you want to simplify usability for odd-shaped buttons.
Use a filled shape in the Hit frame so that the user has no problem interacting with your button.
Adding content to button states
You can add content to each frame of your button to make it complete. Follow these steps:
1. If it’s not already open, edit your new button by double-clicking it on the stage or in the Library panel.
You should have some content on the Up state from when you created the button. Now you can define content for remaining states as well.
2. Select the Over frame on the button’s timeline and add a new keyframe with the F6 shortcut key.
3. Use the Selection tool or Property inspector or another drawing tool to modify the artwork on the Over frame. (See Figure 7-8.)
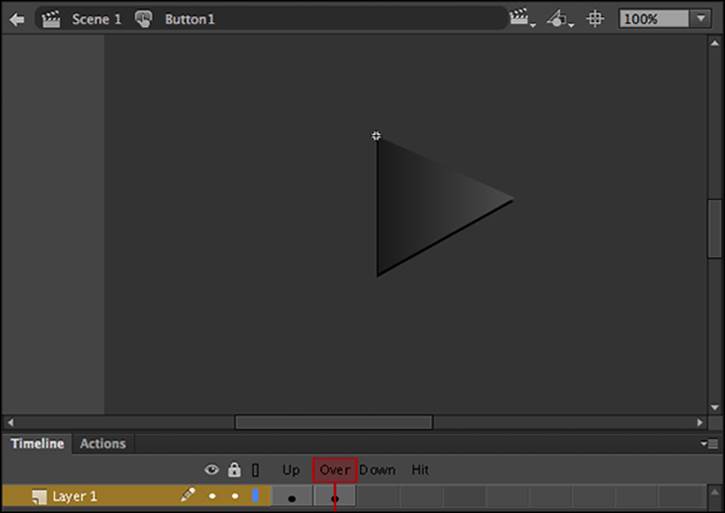
Figure 7-8: Modified content for the Over frame appears when the user rolls the mouse over the button.
4. Select the Down frame and insert a new keyframe by using the F6 shortcut key.
5. Modify or add content to the Down frame.
This step determines how the button appears when the user clicks and holds down the mouse button.
6. Select the Hit frame and create a new keyframe by pressing the F6 shortcut key.
7. Use existing artwork that’s copied to this keyframe or one of the shape tools to fill this frame with a large, filled Hit area.
8. Exit the button by clicking Scene 1 above the stage.
9. Choose Control⇒Test Movie to preview your movie.
Rollover and click your new button to see the different states in action.
Enabling simple buttons
Although choosing Control⇒Test Movie to preview your work is the best way to preview buttons, you may want to see how certain elements of your movie behave in real time on the stage. To see buttons in action on the stage as you build your movie, you can choose Control⇒Enable Simple Buttons. You then see buttons as they would appear and respond to a user in Flash Player.
 Buttons can’t be selected or modified on the stage with Enable Simple Buttons mode active; you must disable Enable Simple Buttons to apply actions or transformations or to edit the button in place.
Modifying button instances
Individual button instances can have unique transformations and color effects applied, just like graphic symbol instances. In addition, each button can have a unique ActionScript applied to it, so you can use several instances of a single button symbol to create an entire menu or control bar.
Here’s how to add and modify additional instances of your button on the stage:
1. Choose Window⇒Library to make sure that the Library panel is visible.
2. Drag two more instances of your button symbol to the same layer as your existing button instance.
If necessary, position the buttons so that they’re spread apart from each other.
3. Select one of the button instances and choose Window⇒Properties.
The Property inspector opens.
4. Choose Tint from the Style drop-down list in the Color Effect section.
5. Select a color and set the tint percentage to 100 percent.
The button becomes tinted with the chosen color.
6. Select a different button instance, choose the Transform tool from the Tools panel, and use the Transform tool to resize or rotate the selected button.
Preview buttons by choosing Control⇒Test Movie or Control⇒Enable Simple Buttons.
Putting It All Together: Creating a Simple Photo Viewer
After you’ve created buttons and gotten a taste of adding ActionScript to the timeline, you put it all together by “wiring up” a photo viewer on the main Timeline with ActionScript. The Code Snippets panel does most of the heavy lifting here, but your understanding of the Actions panel and modifying statements will prove quite handy.
For this photo viewer example, create a new Flash file and follow these steps:
1. Import five unique photos or graphics to your library.
For more information on importing images, refer to Chapter 5 of this minibook.
2. Create a button symbol that can represent both Forward and Backward buttons.
For instance, create a right-pointing arrow that can be flipped over.
3. On the main Timeline, create a new layer called Images and add four keyframes back to back (totaling five); on each of those keyframes, place a unique image or graphic from your library so that you have five images on consecutive keyframes.
4. Create a new layer and add two button instances to it.
One button should represent a Previous button on the left side of the stage; the other one, a Next button on the right side of the stage.
5. Create a new layer and use the Text tool to create a piece of type that reads Made with Adobe Flash on the stage. Place it in the lower-right corner of the stage.
For more information on creating text on the stage, refer to Chapter 2 of this minibook.
Your photo viewer should look similar to the one in Figure 7-9.
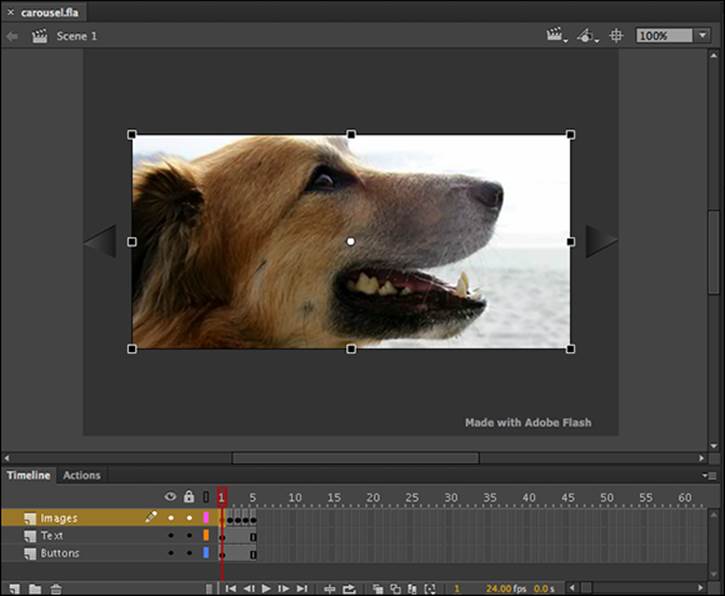
Figure 7-9: Set up your photo viewer movie as shown here: one layer for the five photos and images, one for buttons, and one for text.
Applying Code Snippets
The Code Snippets panel brings ActionScript within reach for many more Flash users, and it provides ready-to-use code fragments for most every common need.
For designers and developers who are experienced in writing their own ActionScript code, the Code Snippets panel can be a valuable tool for creating and managing your own, custom fragments of code that are applied in one click to save typing time.
In the following section, you explore how to use the Code Snippets panel to carry out common scripting tasks and bring your photo viewer movie to life.
Stopping the main Timeline
If you follow the photo viewer example in the earlier section, Putting It All Together: Creating a Simple Photo Viewer, and then attempt to preview that movie, the Timeline runs on its own, causing it to rapidly flip through the images you’ve placed on the main Timeline (five of them, if you’re following along from the preceding section).
Because the idea was to create a photo viewer, users should be able to determine when the next photo is viewed, so you need to stop the Timeline at each photo to give them a chance to view it.
To stop the Timeline at specific points, follow these steps:
1. Preview your movie by choosing Control⇒Test Movie (Windows) or Command⇒Test Movie (Mac).
Notice that the Timeline plays through continuously. The stop actions you add soon will fix this problem.
2. Close Flash Player and return to your Flash document.
3. In the Timeline panel, drag the playhead to the beginning of the Timeline (Frame 1).
4. Choose Window⇒Code Snippets to open the Code Snippets panel, or expand it from its icon view in the panel group on the right.
5. Locate and expand the Timeline Navigation folder in the Code Snippets panel.
6. Double-click the snippet labeled Stop at This Frame.
A new layer (named Actions) is added to the Timeline, and a stop action is added at Frame 1.
![]() Every time a code snippet is added, the Actions panel opens to show you the code that was created. A quick and easy way to return to the Code Snippets panel is to use the Code Snippets button at the top of the Actions panel.
Every time a code snippet is added, the Actions panel opens to show you the code that was created. A quick and easy way to return to the Code Snippets panel is to use the Code Snippets button at the top of the Actions panel.
7. Repeat Step 6 for Frames 2, 3, 4, and 5, respectively, so that you have a stop on each of the five frames.
When you complete this step, your movie should resemble Figure 7-10.
8. Preview your movie by choosing Control⇒Test Movie (PC) or Command⇒Test Movie (Mac).
This time, you remain stopped at Frame 1.
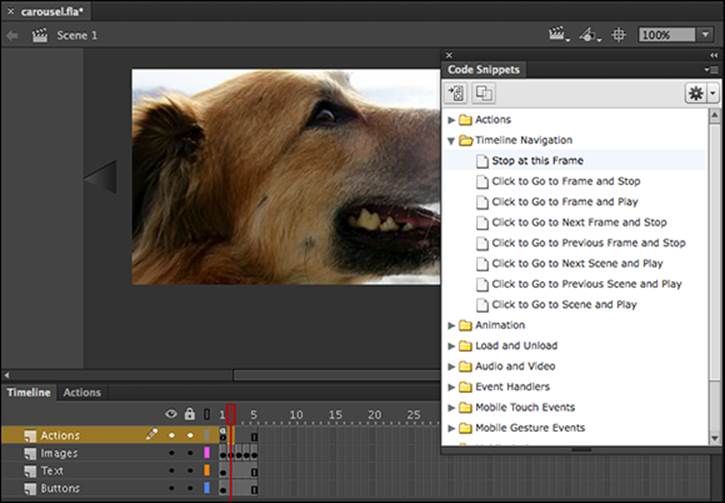
Figure 7-10: Use the Code Snippets panel to stop the Timeline at each of the five frames of your movie.
Creating the Previous and Next buttons
After your Timeline is under control, you need to give users the capability to move back and forth between the images you’ve placed across the Timeline.
As suggested by the movie setup described earlier in the Putting It All Together: Creating a Simple Photo Viewer section, you should have a layer on the main Timeline with two button instances — one that represents the Previous button and another that represents the Next button.
You can use two instances of the same button symbol or instances of two unique symbols in the library. Follow these steps to create the buttons:
1. Drag the playhead to Frame 1.
The code you add for your buttons must be added at the beginning of the movie.
2. Click and select a button to use for the Previous button on the stage.
3. If the Code Snippets panel isn’t already visible, choose Window⇒Code Snippets to open it, or expand it from its icon view in the panel group on the right.
4. In the Code Snippets panel, click to expand the Timeline Navigation category.
5. Locate and double-click the Click to Go to Previous Frame and Stop code snippet.
This step adds some new ActionScript to the existing Actions layer, which is tied to your selected button.
6. A prompt lets you know that Flash will create an instance name for the new button automatically; click OK.
7. Click to select the button you’ll use for the Next button on the stage.
8. Within the Code Snippets panel, you should already have expanded the Timeline Navigation category. Locate and double-click the Click to Go to Next Frame and Stop code snippet. Click OK in the Set Instance Name that appears.
This step adds code to the Actions layer, as shown in Figure 7-11.
9. Save your movie by choosing File⇒Save.
Next, you test it to see your new code in action.
10. Choose Control⇒Test Movie.
When your movie launches in Flash Player, click the Next button a couple of times to advance through your images. Click the Previous button to navigate backward.
About instance names
Every time you need to add ActionScript to control a button (or a movie clip), you first need to create an instance name for the button. An instance name is a unique ID that tells ActionScript which object on the stage to control or work with. The Code Snippets panel automatically assigns an instance name to a selected button or movie clip when you apply a snippet. You can also add your own instance name by selecting the symbol instance and entering an instance name in the Property inspector.
Instance names can be assigned to buttons, movie clips, and certain text fields. Each instance name needs to be unique, even across several instances of the same symbol, and should not contain spaces or special characters, or share the same name as anything in the ActionScript language.
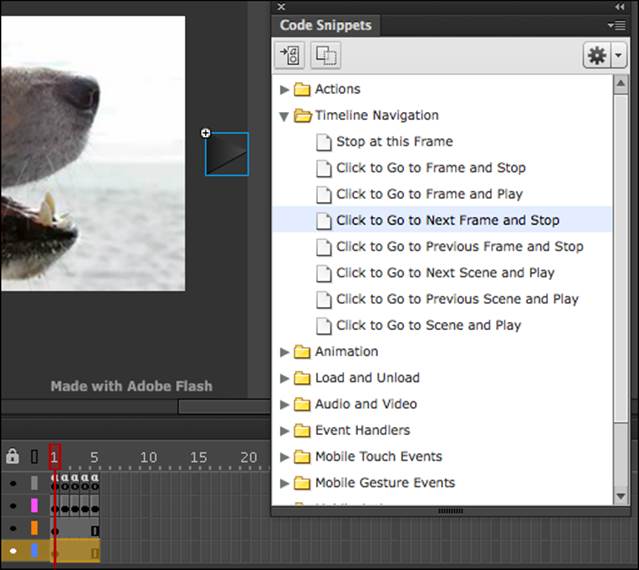
Figure 7-11: On Frame 1 of the Timeline, use the Code Snippets panel to add the code that makes your button advance the slide show.
Linking to a website or web page
Users move around the web by using buttons or hyperlinks to navigate to web pages within a site or to other websites.
You can easily link to a website or web page within Flash movies by using a button or piece of text and a bit of code help from the Code Snippets panel. For your photo viewer, you link the text you placed on the stage to the Adobe website to let visitors know just how cool Flash is!
To create a clickable link to a website or web page, follow these steps:
1. Drag the playhead to Frame 1 on the Timeline.
As with buttons, you add code for a text box at the beginning of the Timeline.
2. Use the Selection tool to click and select the text box you created on the stage when you set up your movie.
3. If the Code Snippets panel isn’t already visible, choose Window⇒Code Snippets to open it, or expand it from its icon view in the panel group on the right.
4. In the Code Snippets panel, click to expand the Actions category.
5. Locate and double-click the Click to Go to Web Page code snippet, shown in Figure 7-12.
This step adds some new ActionScript to the existing Actions layer, which is tied to your selected button.
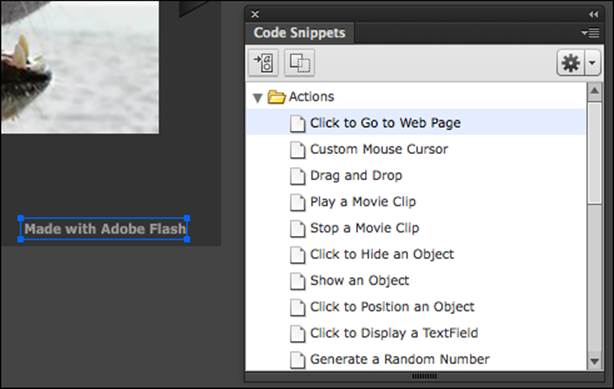
Figure 7-12: Use the Code Snippets panel to open a browser and go to a web page when clicked.
You see a prompt that lets you know Flash will create an instance name for your text field automatically.
6. Click OK. When the Actions panel opens to show you the new code that has been created, as shown in Figure 7-13, take a moment to review it.
Notice that the Adobe website (www.adobe.com) has automatically been inserted as the default. Keep in mind, however, that you can edit this web address to make your text link to any site you want.
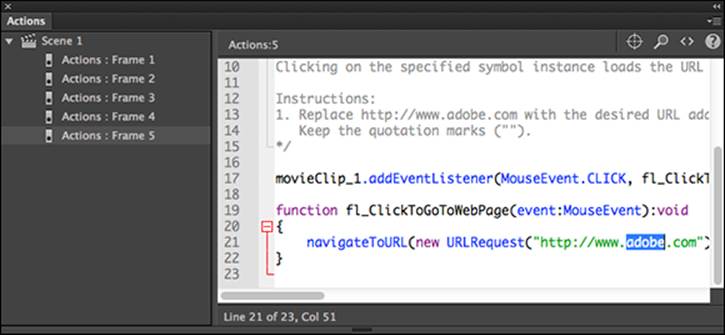
Figure 7-13: You can modify the web address placed by the Code Snippets panel in the Actions panel.
7. Save your movie and choose Control⇒Test Movie to preview it.
8. Click the text field.
Your default system browser opens to the Adobe website.
All materials on the site are licensed Creative Commons Attribution-Sharealike 3.0 Unported CC BY-SA 3.0 & GNU Free Documentation License (GFDL)
If you are the copyright holder of any material contained on our site and intend to remove it, please contact our site administrator for approval.
© 2016-2026 All site design rights belong to S.Y.A.