Adobe Creative Cloud Design Tools All-in-One For Dummies (2013)
Book VIII
Fireworks CC
Chapter 7: Using Buttons and Symbols
In This Chapter
![]() Understanding states
Understanding states
![]() Creating rollover buttons
Creating rollover buttons
![]() Converting graphics to symbols
Converting graphics to symbols
Before you jump in to creating buttons and animations, you need to understand states and how they work in Fireworks. States (a change in visibility) allow you to organize layers in such a way that you can create several versions of your artwork; these states can be used for rollovers or animations.
Using States in Fireworks
You may want to use states for two reasons:
![]() Animation: You can build and edit animated GIFs with states like the one you see in Figure 7-1. One step of the animation goes into each frame. The states (sometimes referred to as frames) are played one after another to create the appearance of motion — an effect a little like a flip book you may have found in a box of caramel corn. By using layers, you can specify which items are animated and which items remain static.
Animation: You can build and edit animated GIFs with states like the one you see in Figure 7-1. One step of the animation goes into each frame. The states (sometimes referred to as frames) are played one after another to create the appearance of motion — an effect a little like a flip book you may have found in a box of caramel corn. By using layers, you can specify which items are animated and which items remain static.
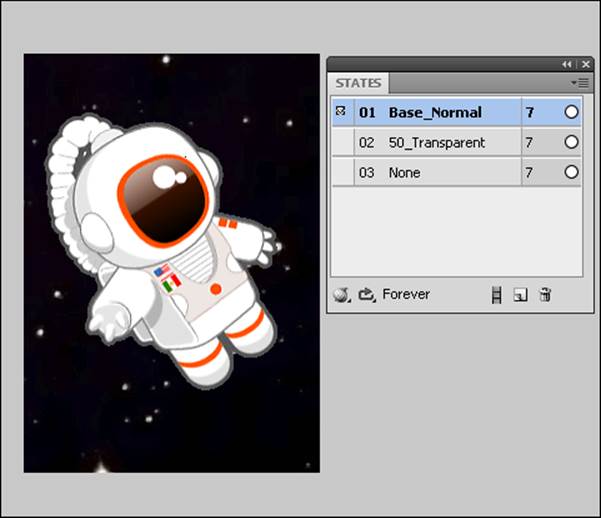
Figure 7-1: In this example, the astronaut fades to 0 percent opacity over three states.
![]() Rollovers: You can also use states to produce rollovers. By slicing an image (discussed in Chapter 6 of this minibook), you can trigger the different versions (or states) that appear when the user’s mouse pointer crosses over the artwork.
Rollovers: You can also use states to produce rollovers. By slicing an image (discussed in Chapter 6 of this minibook), you can trigger the different versions (or states) that appear when the user’s mouse pointer crosses over the artwork.
Making a Rollover Button
You can create interactive buttons in Fireworks to make rollovers, swap images, and react to other interactions with viewers. For all these effects, use the States panel.
In this section, you find out how to use states to create a rollover button — a button that changes when a mouse pointer passes over it.
Creating the basic art
First, you need to create the basic art for the button. (For this example, the button is a rounded rectangle, but you can substitute another shape.) Follow these steps:
1. Click and hold the Rectangle tool in the Vector section of the Tools panel and then select Rounded Rectangle from the list of hidden tools.
2. Click and drag in the workspace to create a shape.
Any size is fine for this example.
3. Choose Window⇒Styles to open the Styles panel.
4. Select a style from the drop-down list.
In Figure 7-2, Plastic Styles is selected.
This basic button is what the viewer initially sees on your web page.
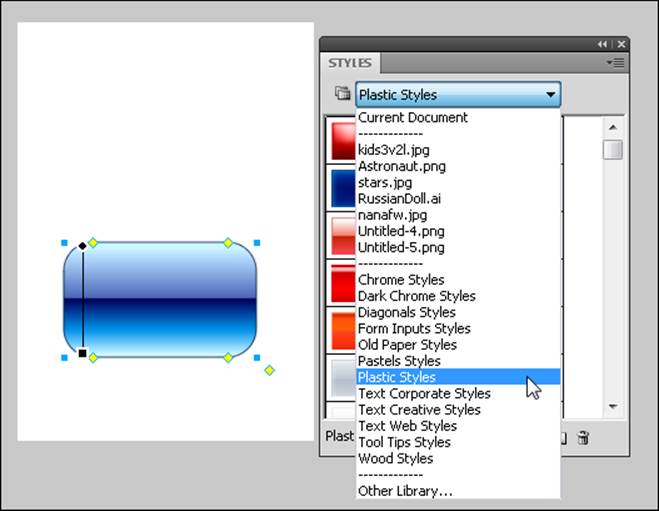
Figure 7-2: Using the Styles panel, apply any style to the shape.
Adding rollover behavior
In this section, you add rollover behavior to the button and create the version of the button artwork that viewers will see when their mouse pointer passes over it. Follow these steps:
1. Select the rounded rectangle shape you created in the preceding section and then right-click to select Insert Rectangular Slice.
The shape is highlighted, as shown in Figure 7-3, indicating that a hotspot has been created.
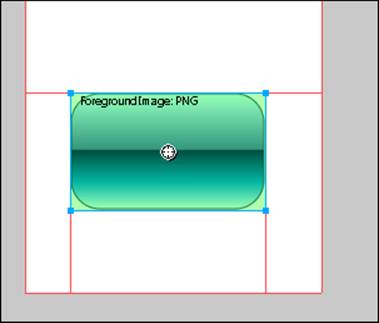
Figure 7-3: Right-click to add a rectangular slice to a selected object.
2. Right-click (Windows) or Control-click (Mac) the center of the slice and choose Add Simple Rollover Behavior from the contextual menu, as shown in Figure 7-4.
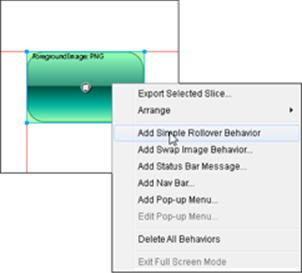
Figure 7-4: Choose Add Simple Rollover Behavior to make your button a rollover.
3. Choose Window⇒States to open the States panel.
4. From the States panel menu, choose Duplicate State, as shown in Figure 7-5.
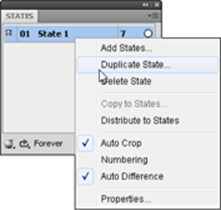
Figure 7-5: Choose to duplicate a state.
The Duplicate State dialog box appears. Keep the settings at the default of State 1 being inserted after the current state, as shown on the left in Figure 7-6.
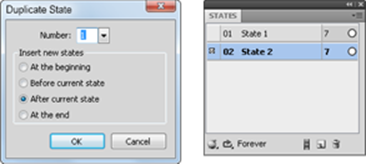
Figure 7-6: Duplicate your original state before making changes that will occur on rollover.
5. Click OK.
A State 2 row appears in the States panel, as shown on the right in Figure 7-6.
6. Click the Hide Slices and Hotspots tool in the Web section of the Tools panel, or turn off the visibility of the Web layer by clicking the Visibility icon to the left of it in the Layers panel, as shown in Figure 7-7.
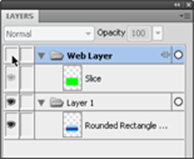
Figure 7-7: Hide slices so that you can see your image.
7. With the Pointer tool, select the original shape you created.
8. Choose Window⇒Styles to open the Styles panel.
9. Select a new style from the drop-down list.
This step creates the version of the button that appears when a viewer passes the mouse pointer over the button.
10. Save the file.
Testing and exporting the button
The rollover you created won't work with the image file alone; unlike a .jpg, .gif, or .png file, the rollover needs supporting HTML and JavaScript code in order to make it work. To collect all the parts to make your rollover work, you need to export the rollover out of Fireworks. Follow these steps:
1. If the eye icon is turned off on the left side of the Web Layer in the Layers panel, turn it on now.
Your slices and hotspots are now visible.
2. Choose File⇒Preview in Browser to test your button.
3. If you’re happy with the effect and want to use the button on a web page, choose File⇒Export to open the Export dialog box.
4. Name the file.
Remember that you need to follow standard web-based naming conventions.
5. Select HTML and Images from the Export drop-down list.
6. Make sure that Export HTML File is selected in the HTML drop-down list and that Export Slices is selected in the Slices drop-down list. Then click Save.
Discovering Fireworks Symbols
When you make web graphics, you may discover that you repeatedly create the same button or the same background image. To stay consistent and save lots of time, you can turn artwork into a symbol or use some of the precreated symbols in the Common Library panel.
Symbols are simply elements you can store in the Common Library or Document Library panel. Use the Common Library to store symbols that you can access across Fireworks; the Document Library is for symbols to be accessed only within the associated document.
Fireworks has three types of symbols: graphic, animation, and button. In this section, you find out how to use and modify symbols.
Symbol instances refer to the placement of the symbols on the artboard. Symbol instances are dynamically linked back to the original symbol used to create them.
 If you convert artwork to a symbol, the new symbol object is linked dynamically to all instances of that symbol on the artboard. If you change the symbol object, all instances are updated automatically.
Working with a precreated symbol
To use a precreated symbol in Fireworks, follow these steps:
1. Choose Window⇒Common Library to open the Common Library panel.
The precreated symbols in this library are organized in categories, such as Animations, Buttons, and Flex Components.
2. Double-click the category you want to use.
3. Select a symbol to see a preview in the preview pane at the top of the Common Library panel.
4. When you find a symbol you want to use, drag it out to the artboard.
The symbol instance is placed on the artboard. (See Figure 7-8.)
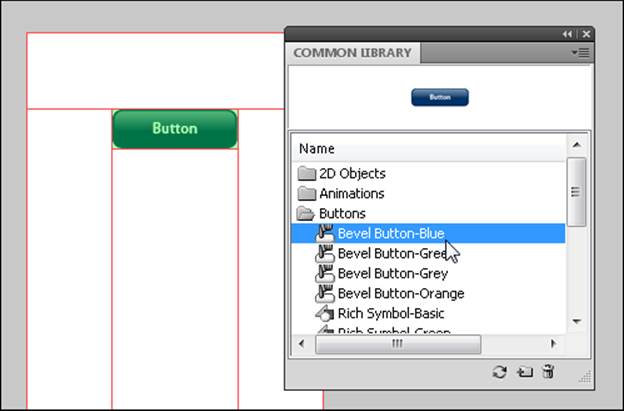
Figure 7-8: Creating a symbol instance.
If you’re creating a navigation bar with four buttons, for example, repeat Step 4 three times.
Converting artwork to a symbol
If you find yourself in the position of repeatedly creating the same button, animation, or graphic, follow these steps to convert that artwork to a symbol:
1. With the Pointer tool, select the artwork you want to convert.
2. Choose Modify⇒Symbol⇒Convert to Symbol.
The Convert to Symbol dialog box opens.
3. Type a name for the symbol in the Name text box.
4. Select the symbol type: Graphic, Animation, or Button.
5. To scale the symbol without distorting it, select the Enable 9-Slice Scaling Guides check box. (See Figure 7-9.)
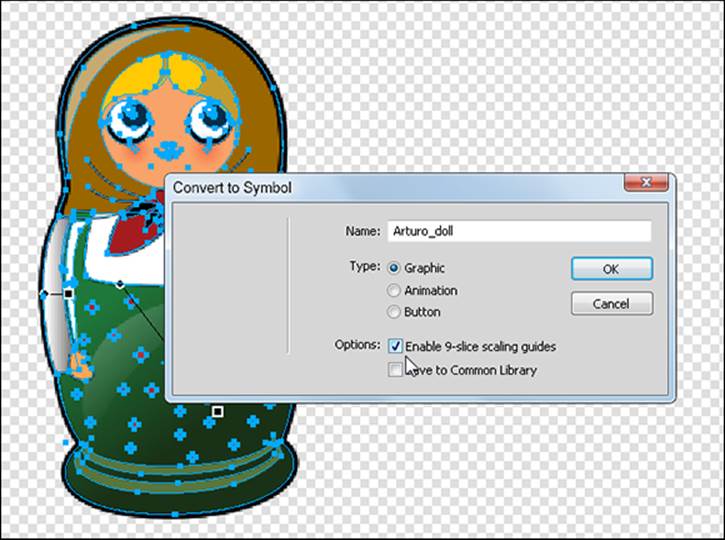
Figure 7-9: Setting symbol options.
6. To store the symbol so that it can be used in multiple documents, select the Save to Common Library check box.
7. Click OK to close the Convert to Symbol dialog box. Then click Save to save the symbol in the Custom Symbols folder.
You can now find the saved symbol by choosing Window⇒Common Library. Double-click the Custom Symbols folder to locate any symbols created and saved to the Common Library.
Scaling with 9-slice
A helpful feature of Fireworks is 9-slice scaling, which lets you determine what part of a symbol will be scaled. This feature can be extremely helpful when you’re working with buttons that have rounded corners or other elements you don’t want to scale. To use this feature, simply select the Enable 9-Slice Scaling Guides check box in the Convert to Symbol dialog box.
 Adobe Illustrator has many symbols you can borrow from its symbol libraries. Simply drag a symbol from the Illustrator Symbols panel onto the artboard and then copy and paste the symbol into Fireworks. All components, such as vector shapes, are maintained. Find out more about Illustrator symbols in Book III, Chapter 11.
Editing a symbol
You can edit a symbol object or just one instance of it. You may want to edit the symbol object if you decide to change the color of all your buttons to orange at the same time, but you have to edit each symbol instance individually if you want each button to have a different word on it.
To edit a symbol object or instance, right-click on it and choose Symbol⇒Edit Symbol, or choose Modify⇒Symbol⇒Edit Symbol. You are then entered into the Symbol editing mode. Here you can use your tools to reposition, recolor, retype, or make any other modifications that you’d make to any other graphic in Fireworks.
Exit the editing mode by clicking the arrow in the breadcrumbs bar in the upper-left portion of the workspace, as shown in Figure 7-10.
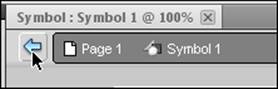
Figure 7-10: Exit the Symbol editing mode by clicking the arrow.
If you no longer want an object to be a symbol, choose Modify⇒Symbol⇒Break Apart.
Editing a symbol without breaking the link
At times, you may want to change an instance but maintain its link to the symbol object. Perhaps you’re creating a cool graphic effect of butterflies and want to change one butterfly’s position and opacity, as shown in Figure 7-11.

Figure 7-11: Edit properties of symbol instances without breaking the link to the original symbol.
You can use the Properties panel to modify the following instance properties without affecting the symbol object or other symbol instances:
![]() Blending mode
Blending mode
![]() Opacity
Opacity
![]() Filters
Filters
![]() Width and height
Width and height
![]() X and Y coordinates
X and Y coordinates
Editing a symbol component
At times, you need to break apart a symbol so that you can edit its components, perhaps to change their colors. To edit individual components of a symbol, follow these steps:
1. Select the symbol instance you want to modify.
2. Choose Modify⇒Symbol⇒Break Apart.
The symbol instance is no longer linked to the symbol object.
3. With the Subselection tool, select the components of the artwork that you want to edit.
They’re now ready for you to make any changes that you would make to regular (nonsymbol) objects on the artboard.
When you modify the original symbol object, this instance is no longer affected.
All materials on the site are licensed Creative Commons Attribution-Sharealike 3.0 Unported CC BY-SA 3.0 & GNU Free Documentation License (GFDL)
If you are the copyright holder of any material contained on our site and intend to remove it, please contact our site administrator for approval.
© 2016-2026 All site design rights belong to S.Y.A.