Adobe Edge Animate CC For Dummies (2013)
Part III
Formatting and Animating
Chapter 10
Animating and Formatting Text Boxes
In This Chapter
![]() Addressing text formatting properties
Addressing text formatting properties
![]() Assigning HTML tags to text
Assigning HTML tags to text
![]() Animating cool text effects
Animating cool text effects
In this Chapter, I discuss all of the different attributes and properties for using text boxes in your animation. Sometimes you may want to use text to convey a message. In Edge Animate, you can format and animate text so that it flows within your composition.
Although limited in capacity, the text box editor in Edge Animate is still rather feature-rich. While you can format each text box to show text with properties such as italics and bold, you can’t make only some of the words appear italic and bold. It’s an all-or-nothing proposition on that front. You can, however, tweak your animation in various ways to look the way you want. Here are some typical examples:
![]() By placing some text boxes creatively, you can arrange elements on the Stage so it appears that one word in a paragraph is italic while other words are not.
By placing some text boxes creatively, you can arrange elements on the Stage so it appears that one word in a paragraph is italic while other words are not.
![]() While working in the text box editor, you can press Enter to start a new line of text. You can even format paragraphs to have an indent.
While working in the text box editor, you can press Enter to start a new line of text. You can even format paragraphs to have an indent.
![]() You can change the look of your text by applying additional formatting properties such as alignment, paragraph spacing, vertical alignment, word spacing, and text shadows — and animate all these properties.
You can change the look of your text by applying additional formatting properties such as alignment, paragraph spacing, vertical alignment, word spacing, and text shadows — and animate all these properties.
 Although text shadows don’t appear in Internet Explorer 9, they work fine in Chrome, Firefox, Safari, and other modern browsers.
Applying Text Properties
When you create a text box, the Properties panel expands to include Text tools (as shown in Figure 10-1). Then you can tweak the text as described in this section, using basic or advanced formatting, HTML tags, and animation of some attributes.
You can nest a text box within another element that isn’t a text box (such as a rectangle). Note, however, that you can’t nest one text element inside another.
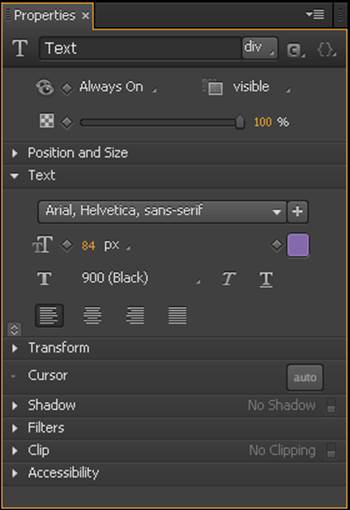
Figure 10-1: Use the Text properties to format text.
Basic text formatting
The basic formatting attributes for text are shown in Figure 10-1. You can format text the following ways:
![]() Choose a font: Choose any font from the drop-down list or add a new font. For more information about adding and selecting fonts, see Chapter 12.
Choose a font: Choose any font from the drop-down list or add a new font. For more information about adding and selecting fonts, see Chapter 12.
See Figure 2-7 for a list of default fonts available from the Properties panel.
![]() Set font size: You can format the text to any px, percent, or em size that you want (Figure 10-2):
Set font size: You can format the text to any px, percent, or em size that you want (Figure 10-2):
• Percentage units represent percentages of the parent element’s font size. For Edge Animate, use % in relative terms. For example, if you set one text block at 100% and another text block at 50%, then the latter font appears half as big as the former. For fonts, the parent element is the Stage itself.
• Px is the abbreviation for pixel units. Pixels are fixed units. One pixel is equal to one dot on the computer screen (the smallest division of your screen’s resolution).
The px unit is a fixed unit, generally used when you want to print.
• Ems are scalable units used in websites and can adopt to screen resolutions. An em is equal to the current font-size, for instance, if the font-size of the document is 12pt, 1em is equal to 12pt. Ems are scalable in nature, so 2em would equal 24pt, .5em equals 6pt, and so on.
If you want maximum scalability, you may want to use ems in your Adobe Edge Animate CC compositions.
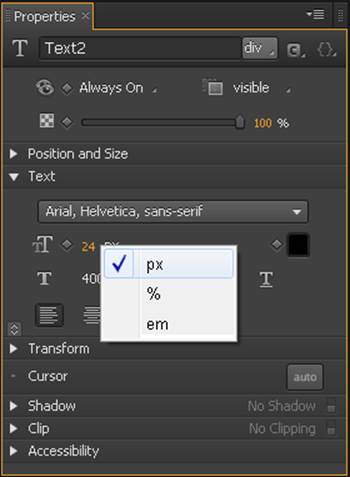
Figure 10-2: Use px, %, or em to Format Text Size.
![]() Adding font weight: You may have noticed Edge Animate doesn’t have any icons to trigger bold formatting. Instead, Edge Animate uses font weight, which you can find directly beneath the font size. Use font weight to format your text with thin, light, normal, medium, or bold settings (as shown in Figure 10-3).
Adding font weight: You may have noticed Edge Animate doesn’t have any icons to trigger bold formatting. Instead, Edge Animate uses font weight, which you can find directly beneath the font size. Use font weight to format your text with thin, light, normal, medium, or bold settings (as shown in Figure 10-3).
To see the differences in the settings, first use 100 (Thin) and then use 900 (Black), you should see a dramatic change in style.
![]() Adding color to the text: You can format the color of your text just as you would the background color of an element (as shown in Figure 10-4). For more information on using the color graph, see Chapter 9.
Adding color to the text: You can format the color of your text just as you would the background color of an element (as shown in Figure 10-4). For more information on using the color graph, see Chapter 9.
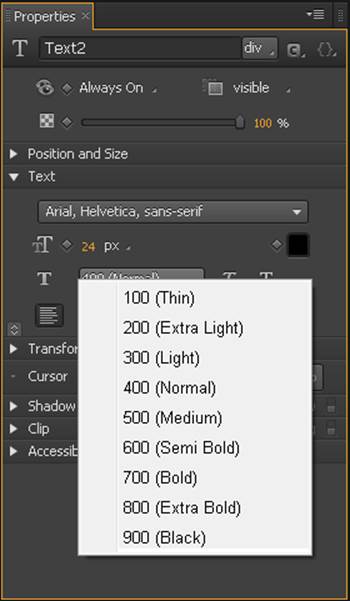
Figure 10-3: Use Font Weight for bold text.
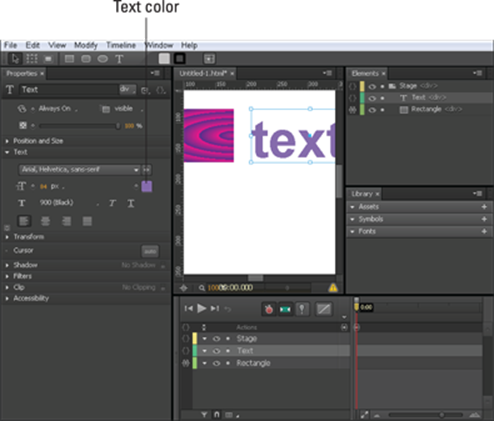
Figure 10-4: Format Text Color using the color graph.
![]() Underlining and italicizing text: You can underline and italicize text, but it’s an all-or-nothing deal. You can underline and/or italicize all text in a box or none. The procedure looks like this:
Underlining and italicizing text: You can underline and italicize text, but it’s an all-or-nothing deal. You can underline and/or italicize all text in a box or none. The procedure looks like this:
1. From the Stage, single-click the Text Box element.
Don’t double-click. Doing so opens the editor box, which you don’t need just now.
2. Choose italic, or underline, or both (as indicated in Figure 10-5).
Any text in the text box now shows your chosen formatting.
![]() Aligning text: You can align text to the left margin, to the center, to the right margin, or justified (as shown in Figure 10-6).
Aligning text: You can align text to the left margin, to the center, to the right margin, or justified (as shown in Figure 10-6).
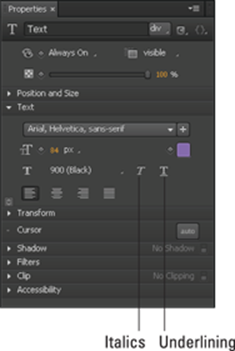
Figure 10-5: Applying italics and/or underlining to text.
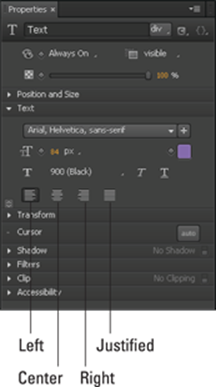
Figure 10-6: Left, center, right, or justified text.
![]() Adding shadows: You can apply Shadow properties to your text for additional visual effect.
Adding shadows: You can apply Shadow properties to your text for additional visual effect.
 Shadows on text don’t appear in Internet Explorer 9.
For more information on using Shadow properties, see Chapter 9.
 One thing that you cannot format from the Properties panel is bullet points. However, if you need to use bullets in your text, you can add them from one of the .js files. The JavaScript file you need to open is untitled.js, where untitled is the name of your project. Don't confuse this file with the _edgeAction.js or the _edgePreload.js files. With the correct .js file open, search for your text. Then edit the text as shown here:
{
id:'Text_1',
display:'none',
type:'text',
rect:['13px','64px','99.7%','50.2%','auto','auto'],
text:"Introduction to bullet list:<ul><li>First bullet text</li><li>Second bullet text</li><li>Last bullet text</li></ul>",
align:"left",
font:['Verdana, Geneva, sans-serif',[112.5,"%"],"rgba(0,0,0,1.00)","normal","none","normal"]
},
You can add in HTML-style tags within the JavaScript, using <ul> to start the bullet list, and <li> for each item in the list. Don't forget to close each item with </li> and end the list with </ul>.
Using HTML tags
Using HTML tags for your text can help with search engine optimization (SEO) and browser parsing so people can find your animation online more easily.
In practice, assigning HTML tags to your font barely affects your animation's standing (beyond a slight improvement) in search engine results. Even so, it's good practice to use the correct HTML tag for certain types of text, as outlined in the following definitions. For the most part, assigning a tag to your text doesn't visibly change anything; except if you use 'address' (which makes your font italic). It's considered a best practice to use the HTML tags to adhere to coding standards — and it also helps with accessibility, as when someone uses a screen reader.
You can find the HTML tags up near the top of the Properties panel when you have a text box selected. Simply click the drop-down arrow near div to open the menu as shown in Figure 10-7.
Directly to the right of the HTML tags menu, you can find Class and Actions icons. (For more information about these properties, see Chapter 6.)
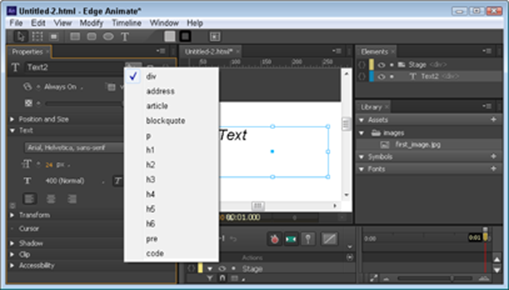
Figure 10-7: Assigning HTML tags to text.
You can assign the following HTML tags to text blocks:
![]() div: This is the default setting for text boxes. In CSS3, it defines a section in a document.
div: This is the default setting for text boxes. In CSS3, it defines a section in a document.
![]() address: Address text is usually depicted with italics, which Edge Animate does format for you. Use this tag to define contact information.
address: Address text is usually depicted with italics, which Edge Animate does format for you. Use this tag to define contact information.
![]() article: Use the article tag to define content that can stand alone and that you can distribute apart from the rest of your content.
article: Use the article tag to define content that can stand alone and that you can distribute apart from the rest of your content.
![]() blockquote: Use this section to define a section of text that you quoted from elsewhere.
blockquote: Use this section to define a section of text that you quoted from elsewhere.
![]() p: This is the standard tag used to format paragraphs.
p: This is the standard tag used to format paragraphs.
![]() h1 through h6: These are standard header tags. Use h1 for the topmost header and then h2 for second-level headings and so on.
h1 through h6: These are standard header tags. Use h1 for the topmost header and then h2 for second-level headings and so on.
![]() pre: Text appears in a fixed-width font (usually Courier), and it preserves both spaces and line breaks.
pre: Text appears in a fixed-width font (usually Courier), and it preserves both spaces and line breaks.
![]() code: Use this tag when you want to display computer code.
code: Use this tag when you want to display computer code.
You can assign one HTML tag to each text block. Therefore, you may want to use one text block for your headers (h1) and another text block for your paragraphs (p). Using HTML tags for text is considered a good practice for web development because
![]() It helps with screen readers, which the visually impaired use to “read” a screen. The screen reader uses text-to-speech software to express content audibly.
It helps with screen readers, which the visually impaired use to “read” a screen. The screen reader uses text-to-speech software to express content audibly.
![]() Using HTML tags is considered good general coding practice.
Using HTML tags is considered good general coding practice.
![]() HTML does help, even if minimally, with SEO.
HTML does help, even if minimally, with SEO.
Advanced Text Formatting
Adobe Edge Animate CC offers Advanced Text Formatting properties that you can use to fine-tune the presentation of your text. Just click the icon indicated in Figure 10-8 to reveal them in the Properties panel.
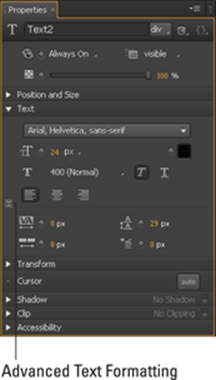
Figure 10-8: Using the Advanced Text Formatting options for spacing.
The Advanced Text Formatting options include
![]() Letter spacing: Defines how far apart the letters are, and how far each one is from the others. You’d be surprised how much onscreen space you can save by a judicious use of this option.
Letter spacing: Defines how far apart the letters are, and how far each one is from the others. You’d be surprised how much onscreen space you can save by a judicious use of this option.
![]() Word spacing: Defines how much space appears between words.
Word spacing: Defines how much space appears between words.
![]() Line height: Defines how much space appears between lines of text. You can use this option to provide just enough space (neither too cramped nor or too spaced out).
Line height: Defines how much space appears between lines of text. You can use this option to provide just enough space (neither too cramped nor or too spaced out).
![]() Text indent: Using this option, you can indent the first line of a text block to make it look more like a paragraph in a book.
Text indent: Using this option, you can indent the first line of a text block to make it look more like a paragraph in a book.
You can create animations that use all of the Advanced Text Formatting options to achieve a more professional, polished look.
Animating Text
Now, before you get carried away with the idea of animating your text, keep in mind that you can animate some text properties but not others. To give you a sense of which is which, this section lists the attributes you can animate — and those you can’t.
The animation sequences you create can use any property that has a keyframe diamond next to it. If you don’t see the diamond, then you can’t create a keyframe with that property.
Built-in animation properties
Text properties that you can animate include
![]() Size
Size
![]() Color
Color
![]() All the spacing (Advanced Text Formatting) properties, including
All the spacing (Advanced Text Formatting) properties, including
• Letter spacing
• Word spacing
• Line height
• Text indent
The following procedure provides an example of animating text so that it changes size, color, and spacing:
1. Use the Text tool to draw a text box on the Stage and type in some text.
Note that if you press Enter, you start a new line. To close the text box editor, click the X or click the Stage.
2. Format the text by changing the color, size, and letter spacing as shown in Figure 10-9. Simply select the text box, and leave the text box editor closed, to format the text.
You have to double-click the text box to open the editor, so use only a single click to select the text box.
3. Toggle the Pin and move the Playhead down the Timeline away from the Pin.
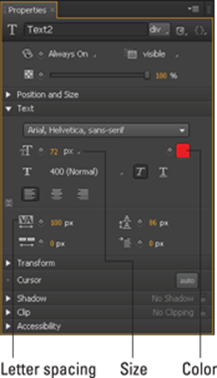
Figure 10-9: Editing the text properties.
4. Reset the properties that you changed in Step 2 back to their defaults.
As you change each setting, the properties appear in the Timeline (as shown in Figure 10-10).
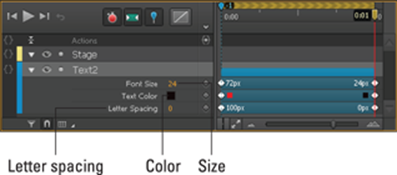
Figure 10-10: Properties appearing in the Timeline.
You can preview the animation on the Stage or in the browser.
The keyboard shortcut for previewing in the browser is Ctrl+Enter.
Other animation effects
Text properties that don’t show a keyframe diamond (and so can’t be directly animated) include
![]() Weight
Weight
![]() Italics and underlining
Italics and underlining
![]() Alignment
Alignment
Even though Edge Animate doesn’t have keyframes for these properties, you can still create animation sequences that mimic that behavior.
In the following steps, I show how to create a workaround for animating properties that don’t have keyframes assigned to them — in this case, animating a change in the weight of text:
1. Create a text box on the Stage and type in some text. Then close the text box editor.
2. Set the font weight to 100 (Thin). (See Figure 10-3.)
3. Toggle the Pin and slide the Playhead down the Timeline away from the Pin.
4. Change the opacity from 100% to 0%. (Refer to Figure 8-13.)
You just created an animated sequence in which your text disappears.
5. Copy and paste the text element.
By doing so, you’re placing an identical text box on top of the existing text box.
6. For the new text box, set the Opacity to 0% and the font weight to 900 (Black).
7. Slide both the Pin and the Playhead together (place the cursor over the orange bar with chevrons, then click and drag) down the Timeline so that the Pin is at the end of the first animation sequence and the Playhead is farther down the Timeline.
8. Adjust the Opacity back to 100% to create an animation sequence in which the bold text gradually appears.
You can view this animation from the Stage or preview in a browser. You should see the thin-weighted font fade out and then see the text fade back in with a heavier weight.
If you want more of an abrupt change from Thin to Bold, here’s how to do that:
1. Create a text box, type in some text, and then close the text editor.
2. From the Properties panel, change the Visibility from Always On to On.
3. Change the font weight to Thin.
4. Copy and paste the text box.
5. In the Elements panel (top-right of the interface), rename the first text box to Thin and the second text box to Bold so you can remember which is which.
6. Select the Bold text box and set the Visibility to Off.
7. Drag the Playhead and the Pin (don’t toggle the Pin) together down the Timeline to the point at which you want the font weight to change.
8. From the Elements panel, choose the Thin text box and set the Visibility to Off.
9. From the Elements panel, select the Bold text box, set Visibility to On, and set the weight to 900 (Black).
Because you never toggled the Pin, you didn’t create any keyframe animation sequences. However, you did create keyframe diamonds in the Timeline (as shown in Figure 10-11).
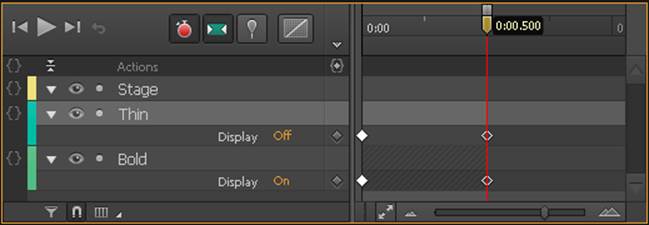
Figure 10-11: Keyframe animations without an animation sequence.
When you preview this animation, you should see the thin text appear and then abruptly change to bold.
You can use these same two procedures to mimic animations for italics, underlining, and alignment. The accompanying sidebar describes an experiment of mine.
Mimicking the Star Wars Text Crawl
I was going through the Adobe Edge Animate CC Facebook page (this was in mid-April 2013) and I saw a post about someone creating an animation that looked just like the text crawl you see at the beginning of Star Wars movies. I attempted to re-create this effect, using just Edge Animate.
The only thing I couldn't truly replicate was using a 3D transform tool to make the text appear as if it were lying back on a flat surface and moving away from the viewer. Instead, I shrank the text gradually as it entered from the bottom of the screen, slowly scrolled up, and then exited the top of the screen. You can see the final result here:http://goo.gl/znZ8N
All materials on the site are licensed Creative Commons Attribution-Sharealike 3.0 Unported CC BY-SA 3.0 & GNU Free Documentation License (GFDL)
If you are the copyright holder of any material contained on our site and intend to remove it, please contact our site administrator for approval.
© 2016-2026 All site design rights belong to S.Y.A.