Swift Development with Cocoa (2015)
Chapter 7. SpriteKit
The SpriteKit framework was first introduced in iOS 7 and OS X 10.9, and because it is designed purposely for creating games, it is heavily optimized for rendering and animating 2D graphics.
At its core, SpriteKit is a simple, object-oriented toolkit for drawing sprites (i.e., images and text) that provides you with significantly more flexibility and performance than using UIKit for the same purposes, while at the same time not forcing you to go down to the level of writing OpenGL code.
In addition to its graphical features, SpriteKit also comes with a built-in 2D physics engine, which handles collision detection, collision resolution, and rigid-body simulation.
In this chapter, you’ll learn how to create SpriteKit scenes, how to work with sprites and shape nodes, as well as how to take advantage of new features added in iOS 8.
SpriteKit’s Architecture
At the high level, SpriteKit is all about nodes. There are three things to know about nodes:
§ Nodes are contained within a SpriteKit view.
§ Nodes can have other nodes as their children.
§ Nodes render graphics into the view (depending on their type).
SpriteKit nodes are all instances of SKNode, or one of its subclasses. There are a lot of different subclasses: at its base, the empty SKNode class represents an empty, invisible node, while SKSpriteNode represents an image or colored rectangle, SKShapeNode draws a Bézier path,SKEffectNode applies image effects like blurs or tints on its children, and more.
When you want to make a game that uses SpriteKit, you assemble a scene full of these nodes, and add them to a scene. Scenes can be thought of as different screens in your game—you might have a main menu scene, a settings scene, and a scene for each of your game’s different levels. Scenes are represented by the SKScene class.
Each scene is presented in a SpriteKit view. This view, which is an instance of SKView, is the context in which all of your game’s graphics are presented. The SpriteKit view is a subclass of UIView, and is mananged in a view controller much like any other view in an app.
Making an App That Uses SpriteKit
Xcode comes with a template for SpriteKit games, but the framework is seriously simple to add. Additionally, it’s easier to pick up the technology when you build it from scratch; with that in mind, we’ll build a simple little app that uses SpriteKit. Once you’ve built it, you can use it as a playground for testing out different techniques and features in SpriteKit:
1. Create a new, single view application and name it SpriteKit.
2. Add the SpriteKit framework. Select the project at the top of the project navigator, and then scroll down in the main editor until you find the Linked Frameworks and Libraries section. Click the + button, and select “SpriteKit.framework” from the list that appears.
Once you’ve added the SpriteKit framework, you get access to all of its classes. One of those is the SKView class, which we need to make the app’s main view controller use.
3. To make the main view controller use a SpriteKit view, open the main storyboard and go to the single view controller that comes as part of the template.
Select the view by clicking on it, and go to the Identity inspector.
Change the view’s class from UIView to SKView.
We’ll now add code that presents an empty SpriteKit scene in the view. To prove that what we’re adding is actually new, custom content, we’ll make the empty scene use a bright green background. (This means that if you’re not seeing a bright green screen when you’re done with this part of the exercise, something’s gone wrong!)
4. At this point, open the ViewController.swift file and add the following code to the viewDidLoad method:
5. let scene = SKScene(size: self.view.bounds.size)
6.
7. scene.backgroundColor = UIColor.greenColor()
8.
9. let skView = self.view as SKView
10.
skView.presentScene(scene)
11.Run the application. When it loads, you should see a green screen (Figure 7-1).

Figure 7-1. The empty scene
Working with SpriteKit Scenes
A SpriteKit game is composed of scenes. Each scene contains all of the graphical elements that make up a part of your game. For example, you could have a scene that contains your main menu, a scene that shows the high scores, and a scene for each of your game’s levels.
NOTE
Depending on the type of your game, you could also have a single scene for all levels, and customize that based on the specifics of each level. Puzzle games tend to do this, as they have a number of common elements in each level (like the score display, a back button, etc.), and only change the contents of the puzzle itself.
In SpriteKit, you can think of scenes as being similar to view controllers in a regular application. Both scenes and view controllers are responsible for the visible parts of the app, and handle the behavior of these elements on the screen—a view controller is in charge of providing data to views and responding to user actions, and a scene is in charge of creating the appropriate sprites and responding to user input.
To make a SpriteKit scene, you create a subclass of the SKScene class, and then make your game’s SKView present it. Presenting a scene can be done directly, or with a transition.
When you present a scene directly, the scene immediately appears in the view. Presenting a scene directly is done using the presentScene method:
skView.presentScene(scene)
NOTE
You generally present the first scene of your game directly, without using a transition.
You can also present a screen using a transition, which is an animation that the SpriteKit view uses to indicate that the game is moving to a new scene. These include things like fading from one to the other, fading down to black and then back up to the new scene, or sliding the old scene off-screen and the new one on.
NOTE
There’s a wide variety of different transitions available. For the full list, check out the documentation for the SKTransition class in the Xcode documentation.
To present a transition, you create an instance of the SKTransition class. The specific animation that the transition uses depends on the method you use to create the transition, as well as the parameters you provide to that method. For example, to create a transition that slides the new scene in from the right over half a second, you call the moveInWithDirection(_, duration:) method, which returns your SKTransition object.
Once you’ve created the transition, you then give it to the SKView along with the new scene, like so:
let transition = SKTransition.moveInWithDirection(
SKTransitionDirection.Right, duration: 0.5)
self.view?.presentScene(game, transition: transition)
Once a scene is presented, or begins appearing through a transition, it receives the didMoveToView message. This is the scene’s opportunity to prepare its content so that it’s ready for the user to see it. This is your chance to add sprites, set the scene’s background, and do other necessary setup tasks.
To demonstrate this, we’re going to extend the SpriteKit example to use our own custom subclass of SKScene:
1. First, create the new SKScene subclass. Go to the File menu, and choose New → New File.
Create a new Cocoa Touch class called GameScene. Make it a subclass of SKScene.
2. Add the didMoveToView method. Open GameScene.swift, and add the following method to the class:
3. override func didMoveToView(view: SKView!) {
4. self.scaleMode = .AspectFill
5.
6. let label = SKLabelNode(text: "Hello")
7. label.position = CGPoint(x: size.width / 2.0, y: size.height / 2.0)
8.
9. self.addChild(label)
10.
}
11.Make the view controller present the new scene on startup. Open ViewController.swift, and replace the code for viewDidLoad with the following:
12. let scene = GameScene(size: self.view.bounds.size)
13.
14. let skView = self.view as SKView
15.
16. scene.scaleMode = .AspectFill
17. scene.backgroundColor = UIColor.blackColor()
18.
skView.presentScene(scene)
SpriteKit Nodes
SpriteKit scenes contain nodes. Nodes, on their own, don’t do anything at all except exist; however, the base SKNode class has a number of important subclasses, each of which does something specific to the scene.
All nodes have the concept of parenting. When a node is in a scene, it’s a child of another node. That other node may itself be a child of another, and so on, right up to the SKScene.
To add a node as a child of another node, you use the addChild method:
self.addChild(label)
A node can only have a single parent, though it can have any number of children. If you want to move a node from one parent to another (also known as re-parenting), you use the removeFromParent method on the node:
label.removeFromParent()
WARNING
If you try to add one node to another node, and the first node already has a parent, you’ll throw an exception. Always call removeFromParent before moving a node from one parent to another.
It’s OK for a node to have no parent. It just won’t be visible to the user unless it’s attached to a node in the scene.
Different nodes do different things. For example:
§ SKSpriteNode shows an image, or a colored rectangle. It’s the most common type of node.
§ SKLabelNode shows text.
§ SKShapeNode renders any UIBezierPath, such as rounded rectangles, circles, or any other kind of shape.
§ SKEffectNode applies image effects, such as blurs or color shifts, to all of its child nodes.
§ Empty SKNode objects, even though they don’t actually display anything in the scene, are useful for grouping multiple nodes together.
Putting Sprites in Scenes
The SKSpriteNode class is the main workhorse of SpriteKit. Given that pretty much every game will be displaying graphics of some kind, even if it’s just a button labeled “win the game,”[3] you need a way to put those graphics into the game.
Sprite nodes are designed for just this purpose, and are very simple to use. All you need is an image to show; once you’ve added that to your project, you create an SKSpriteNode instance that uses it.
NOTE
In this section, the name of the image that we’re using will be called BlockSquareBlue, but you can use any image you want. The BlockSquareBlue image, along with some other images, are contained in the source code that accompanies this book.
Here are the steps you’ll need to take:
1. First, add the image. To begin working with images, simply drag and drop the image into the project navigator. Xcode will ask you if you want to copy the image in; you generally want to do this.
2. Then create the sprite node and make it use the image. Open GameScene.swift, and add the following code to the didMoveToView method:
// Create the sprite
let spriteNode = SKSpriteNode(imageNamed: "BlockSquareBlue")
// Position the sprite right in the center of the scene
spriteNode.position = CGPoint(x: size.width / 2.0,
y: size.height / 2.0)
// Add the sprite
self.addChild(spriteNode)
Once you’re done, the sprite will be visible in the scene, as seen in Figure 7-2.
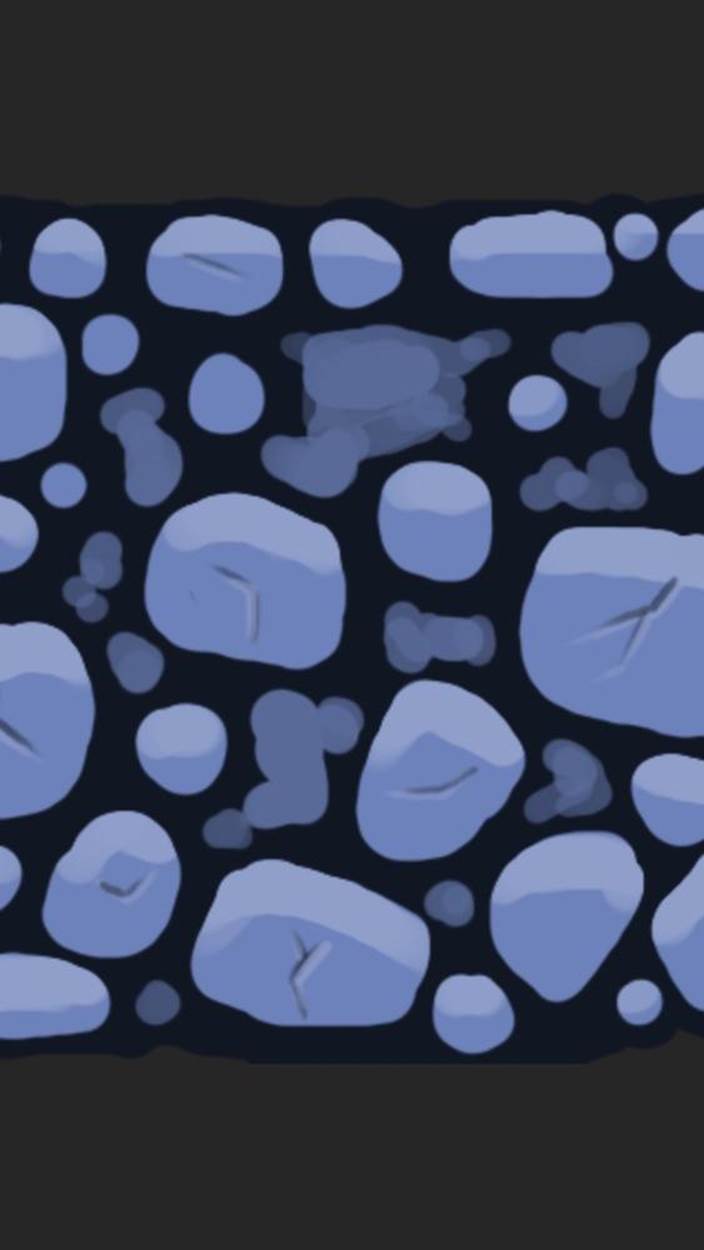
Figure 7-2. The sprite, added to the scene
Responding to Touches
Most games require input of some kind.[4] SpriteKit makes it very easy to add code that runs when something on the screen is touched.
Just like a UIView, SKNode objects can respond to touches. When this happens, they receive the touchesBegan(_, withEvent:) message, which indicates that a touch landed on the node.
Scenes are nodes, which means they also have the ability to detect when the user is touching them. Because scenes fill the entire screen, this means that a scene can detect a touch anywhere on the screen.
To demonstrate this, we’re going to add an additional scene to the game, which will show a main menu (really, some text); when it’s tapped, the game scene will appear:
1. First, create a new scene. Create a new SKScene subclass, and call it MenuScene.
2. Then add code that sets up the new scene. Add the didMoveToView method to the MenuScene class:
3. override func didMoveToView(view: SKView) {
4.
5. let label = SKLabelNode(text: "Welcome to My Awesome Game")
6. label.fontSize = 20
7.
8. label.position = CGPoint(x: self.size.width / 2.0,
9. y: self.size.height / 2.0)
10.
11. self.addChild(label)
12.
}
13.Next, add code that responds to the user touching the screen. Add the touchesBegan(_, withEvent:) method:
14. override func touchesBegan(touches: NSSet, withEvent event: UIEvent) {
15. let game = GameScene(size: self.size)
16.
17. let transition = SKTransition.moveInWithDirection(
18. SKTransitionDirection.Right, duration: 0.5)
19.
20. self.view?.presentScene(game, transition: transition)
}
21.Finally, make the app start with this scene. Open ViewController.swift, and change the code for the view controller so that it starts out with a MenuScene, like so:
22. let menuScene = MenuScene(size: self.view.bounds.size)
23.
24. let skView = self.view as SKView
25.
26. menuScene.scaleMode = .AspectFill
skView.presentScene(menuScene)
NOTE
A node won’t respond to touches unless its userInteractionEnabled property is set to true. Only SKScene objects have this turned on by default; everything else, you’ll need to manually enable.
Working with Textures
A texture is a chunk of image data that SpriteKit can use. If you’ve been following along with the examples in this chapter, you’ve already used textures: the SKSpriteNode automatically converts images into textures as part of setting up.
Textures are generally the biggest consumers of memory that any game has, and SpriteKit automatically takes steps to minimize the memory usage of the textures in your app. If you create two sprite notes that use the same image, SpriteKit will notice this and make them share the same image.
Most textures are loaded from images, with a few being generated at runtime by code. You can either do this automatically, such as when a sprite node is created, or you can directly create an SKTexture object to store and manage the texture memory.
You can also create subtextures—textures that use a subsection of another texture’s image. This is useful for creating sprites in a game that need to be divided into smaller sections. For example:
let texture = SKTexture(imageNamed: "BlockSquareRed")
let rect = CGRect(x: 0.25, y: 0.25, width: 0.5, height: 0.5)
let subTexture = SKTexture(rect: rect, inTexture: texture)
Texture Atlases
Another way to save texture memory and improve performance is to bundle as many different pictures as possible into a single texture. This is more efficient for graphics cards, as each individual texture has its own overhead. It’s better to have a hundred small pictures packed into a single texture than it is to have a hundred small pictures stored in individual textures.
One way you could do this in your game could be to load an SKTexture, and then manually create subtextures. However, this is a very tedious process, and would require massive amounts of work if the layout of the texture ever changed.
Instead, Xcode provides built-in support for generating texture atlases. All you need to do is create a folder whose name ends in .atlas, and put the individual images into it; at compile time, Xcode packs all of the images into one or more larger images and writes out a file indicating where each individual image can be found in the larger atlas image.
(((“SKTextureAtlas objectusing the SKTextureAtlas object. You create an SKTextureAtlas by providing the name of the folder you added to your project. Once you have a texture atlas, you can ask it to provide you with specific named textures:
let atlas = SKTextureAtlas(named: "Sprites")
let textureInAtlas = atlas.textureNamed("BlockSquareBlue")
You can also ask a texture atlas to provide an array of all the texture names that it contains:
let textureNames = atlas.textureNames as [String]
NOTE
If you have an image stored in a texture atlas, you don’t need to use the SKTextureAtlas class to access it. The SKTexture(imageNamed:) method actually searches all texture atlases to find the image you specify. The SKTextureAtlas class is designed to make it easier to group different textures together.
Working with Text
Sprites aren’t the only things that the player wants to see. Sometimes, you’ve just got to show them text.
The SKLabelNode class is designed to show text to the user. SKLabelNode works just like SKSpriteNode, only it uses text that you specify in conjunction with a font that you provide to render an image that contains the text that you want (Figure 7-3).
The fonts available to display your text in vary between versions of iOS. Certain fonts are only available in certain versions of iOS; to our knowledge, fonts have never been removed from iOS, only added, but it pays to check to see if the font you want to use is available.
To that end, a great resource for checking this is the website http://iosfonts.com, which lists all fonts currently available in iOS, along with when they were added.
If you’d prefer to go straight to the source to find out which fonts you can use, you can ask iOS directly, using the UIFont class. Fonts are grouped into family names (e.g., the Helvetica font family contains Helvetica Bold Oblique, Helvetica Light, etc.). Each of these individual fonts have their own name, which you use when preparing an SKLabelNode.
To find out which fonts are available to use, you can use the UIFont class’s familyNames method, like so:
for familyName in UIFont.familyNames() as [String] {
for fontName in UIFont.fontNamesForFamilyName(familyName)
as [String] {
println(fontName)
}
}
Once you have a font you want to use, you simply create the SKLabelNode instance with the text you want to use:
let textLabel = SKLabelNode(text: "This is some text")
Once you’ve created it, prepare it with the font, size, and color you want to use:
textLabel.fontName = "Zapfino"
textLabel.fontSize = 30
textLabel.fontColor = UIColor.blueColor()
Label nodes can be aligned in different ways. By default, the center point of the label (i.e., the node’s position in the scene) is equal to the baseline and the horizontal center of the text. However, you can change this by changing the node’s verticalAlignmentMode andhorizontalAlignmentMode properties:
textLabel.verticalAlignmentMode = .Top
textLabel.horizontalAlignmentMode = .Left
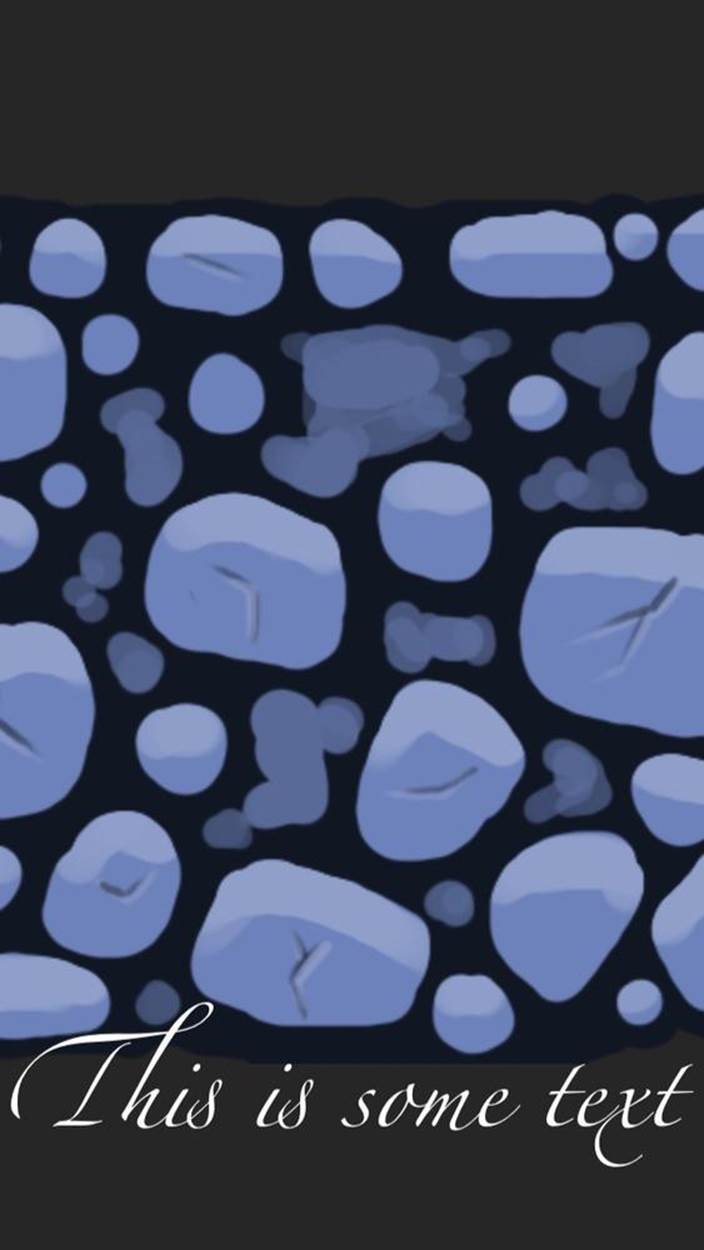
Figure 7-3. Text in the scene
Animating Content with Actions
The content of your game’s scene is likely to need some animation. Animations in SpriteKit are done using the SKAction class, which represent changes in a node’s state.
An SKAction represents a movement, rotation, change in color, or just about any other change that a node can have applied to it. Importantly, actions take place over time, and can be arranged into sequences and groups.
To use an SKAction, you first create one.
NOTE
There’s a huge number of possible actions that you can use. For full details, see the class reference for SKAction in the Xcode documentation.
For example, to create an action that moves a node upwards by 50 pixels, you do this:
// Move upwards by 50 pixels
let moveAction = SKAction.moveBy(CGVector(dx: 0, dy:50), duration: 1.0)
Most actions can be reversed (i.e., they can be asked to generate an action that performs the opposite of what they do). Not all actions can be reversed, but all actions that have an obvious way of reversing themselves can. For example, to make an action that moves a node down by 50 pixels, you could simply reverse the action that was just demonstrated:
// Move down by 50 pixels
let moveBackAction = moveAction.reversedAction()
You can use actions to rotate a node, by creating a rotation action and giving it an angle. Note that this is measured in radians—while there are 360 degrees in a circle, there are 2π radians in a circle:
// Rotate by half a circle (π radians) over 1 second
let rotateAction = SKAction.rotateByAngle(CGFloat(M_PI), duration: 1.0)
You can also scale a node using actions:
// Scale to double normal size over half a second
let scaleAction = SKAction.scaleTo(2.0, duration: 0.5)
Actions can be grouped together, using the group method. This method takes an array of actions, and returns a single action; when this action is run, all of the actions in the array are started at the same time:
// Grouping actions means the actions run together
let rotateWhileScaling = SKAction.group([rotateAction, scaleAction])
If you want to run actions one after another, you use a sequence. These are created in a similar way to groups, in that you provide an array of actions; the resulting action, when started, kicks off each action one at a time, and waits for the current action to finish before starting the next:
// Sequences mean the actions run one after the other
let rotateThenScale = SKAction.sequence([rotateAction, scaleAction])
Finally, to actually run actions on a node, you use the node’s runAction method:
// Run an action on a node using runAction
textLabel.runAction(repeatingMoveAction)
Using Shape Nodes
While sprite nodes show pictures and label nodes show text, you often want to quickly show some kind of generic shape (e.g., a rectangle, a circle, a triangle, etc.). This is where shape nodes come in (Figure 7-4).
To create a shape node that draws a rectangle, you can use the ShapeNode(rectOfSize:) method, like so:
let shapeNode = SKShapeNode(rectOfSize: CGSize(width: 50.0, height: 50.0))
Shape nodes can also use a UIBezierPath to draw a shape. The advantages of Beziér paths include the fact that they can describe almost any shape you want, which means you can display them using a shape node. Bézier paths are discussed in detail in Creating Custom Paths:
// Can also provide a custom path
let path = UIBezierPath(ovalInRect: CGRect(x: 0,
y: 0,
width: 50,
height: 70))
let shapeNodeWithPath = SKShapeNode(path: path.CGPath,
centered: true)
Once you’ve created a shape node, you configure its various properties. These include the colors used to both fill the shape as well as to draw its outline, how thick the lines should be, and whether or not the shape should have a glow:
shapeNode.lineWidth = 4.0
shapeNode.lineCap = kCGLineCapRound
shapeNode.strokeColor = UIColor.whiteColor()
shapeNode.fillColor = UIColor.redColor()
shapeNode.glowWidth = 4.0
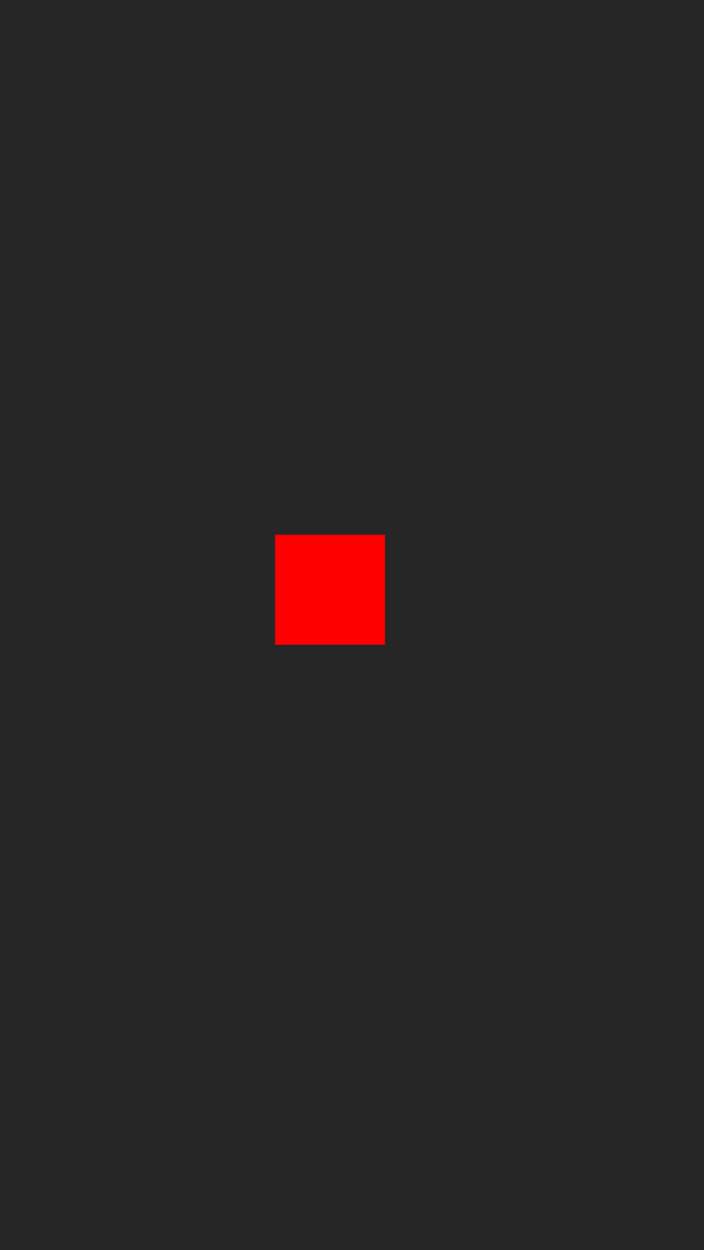
Figure 7-4. A shape node in the scene
Using Image Effect Nodes
Image effect nodes allow you to create sophisticated visual effects with SpriteKit—things like blurring, color shifting, and other nifty effects.
Image effect nodes, which are implemented using the SKEffectNode class, work in a different way to the other kinds of nodes previously discussed in this chapter. While the other nodes add something new to the scene, like images or text, image effect nodes instead change their children. This means that you could create, say, a blur effect, and then add nodes underneath it; all of its children would then be blurred (Figure 7-5).
Image effects get their power through the CIFilter API. CIFilter objects are Core Image filters, which have been a part of iOS and OS X for some time. They’re best known for their use in Instagram, where they provide the color shifting and tinting effects; now, thanks to SpriteKit, you can use them to modify your game in real time.
To create an image effect node, we’re going to use a Gaussian blur filter as an example. Before you can create an image effect node, you first have to create the image effect itself. In the case of a Gaussian blur, this means asking the CIFilter class to create a CIGaussianBlur filter, and then configuring that filter’s blurring radius:
let blurFilter = CIFilter(name: "CIGaussianBlur")
blurFilter.setDefaults()
blurFilter.setValue(5.0, forKey: "inputRadius")
Once you’ve created your image effect, you then create the image effect node, and provide it with your effect:
let blurEffectNode = SKEffectNode()
blurEffectNode.filter = blurFilter
blurEffectNode.shouldEnableEffects = true
self.addChild(blurEffectNode)
NOTE
By default, an image effect node will not apply its CIFilter unless you set shouldEnableEffects to true.
Once you’ve added the image effect node to the scene, you then add nodes underneath it. Those nodes will then have the CIFilter applied to them.
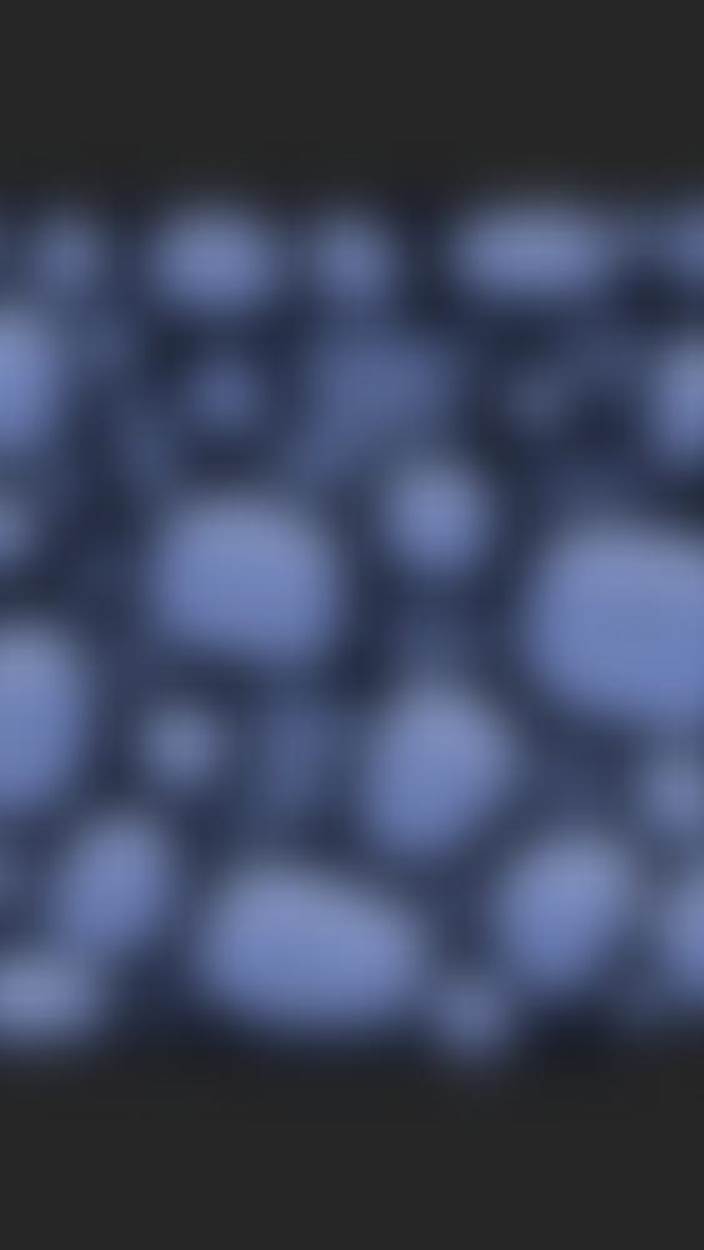
Figure 7-5. A blurred sprite, using an SKEffectNode
NOTE
It’s worth pointing out that SKScenes are image effect nodes. This means that you can just give the scene a CIFilter, and the whole scene will be affected by it:
self.filter = blurFilter
Note that image effects might impact the performance of your game.
Adding Physics to SpriteKit Objects
SpriteKit comes bundled with a built-in 2D physics engine. This means that your sprites get physical interactions for free—they get affected by gravity, collide with each other, and can be attached to each other. This gives you a lot of power for very little development effort.
To enable physics in your game, all you need to do is create a SKPhysicsBody object and attach it to each node that you want to have physical properties. Once attached to a node, it will start being affected by gravity, and collide with other objects that have their own bodies.
When you create a body, you also specify its collision shape. This can be different to the overall shape of the sprite—for example, you could have a basketball sprite with a rectangular physics body, which wouldn’t be able to roll:
let body = SKPhysicsBody(rectangleOfSize: shapeNode.frame.size)
shapeNode.physicsBody = body
Once you’ve got a physics body, you’ll likely want to configure its mass. In SpriteKit, mass is measured in kilograms. So, to set a body’s mass to 1 kilogram, you do this:
body.mass = 1.0
When working with physics in SpriteKit, it’s very useful to see the behind-the-scenes outlines of where your physics bodies are. This allows you to work out if you’ve got a problem with objects appearing to bounce off things that don’t appear to be there, and other annoying bugs. To enable physics debugging in SpriteKit, you simply turn on showsPhysics on your SKView:
self.view?.showsPhysics = true
Usually, physics bodies represent complete, enclosed shapes—rectangles, polygons, circles, and the like. However, you can also create physics bodies that are composed entirely of disconnected edges. These are useful for, among other things, creating boundary walls for your game.
To create a physics body that represents a connected loop of edges, you use the SKPhysicsBody(edgeLoopFromRect:) method. Bodies made up of edges are never affected by gravity:
let wallsBody = SKPhysicsBody(edgeLoopFromRect: self.frame)
Because the scene is a node, you can attach physics bodies to the scene itself. So, to attach this edge loop to the scene, you simply do this:
self.physicsBody = wallsBody
Adding Joints to SpriteKit Objects
When nodes have physics bodies, they can be attached to each other. This is accomplished using joints, which describe a relationship between two physics bodies.
Joints in SpriteKit are represented by subclasses of the SKPhysicsJoint class. There are several different kinds of joints built into SpriteKit. For example:
SKPhysicsJointFixed
The two bodies are fixed, and cannot move relative to each other. They’re still allowed to move around, but they’re tied together.
SKPhysicsJointSpring
The two bodies are allowed to move relative to each other, but if they get too far apart, a force will be applied to push them back together.
SKPhysicsJointSliding
The two bodies are allowed to move relative to each other, but only along a single axis.
SKPhysicsJointPin
One object is pinned to another—it can rotate, but can’t move.
To create a joint, you simply create an instance of the type of joint you want to create, and then add it to your scene’s physicsWorld. When you create a joint, you specify the two SKPhysicsBody objects that the joint should constrain:
let pinJoint = SKPhysicsJointPin.jointWithBodyA(hingeNode.physicsBody,
bodyB: shapeNode.physicsBody,
anchor: hingeNode.position)
self.physicsWorld.addJoint(pinJoint)
Lighting SpriteKit Scenes
Lighting a scene can bring a game to life. SpriteKit has built-in support for lights and shadowing, and you don’t have to do much work to get great results.
Lights in SpriteKit are represented by the SKLightNode class. This node is invisible on its own, but causes lighting effects to get applied to nearby sprite nodes.
NOTE
Lights are only applied to sprite nodes. They won’t apply to label nodes, for example.
To create a light node, you create it and configure it with a color:
let light = SKLightNode()
light.enabled = true
light.lightColor = UIColor.yellowColor()
The position of the light node determines where the light is shining from. Once you’ve got it set up, you simply add it to your scene.
Lighting a sprite is expensive, which means you need to specify what nodes should get lit up by your lights. This is done through bitmasks: if the result of a logical AND between the bitmask of a light and a sprite node results in a true value, the sprite is lit up.
This means that you need to specify both a category bitmask for the light, as well as a lighting bitmask for the node that you want to be lit:
// Light all nodes
light.categoryBitMask = 0xFFFFFFFF
// This node will be lit, because 0xFFFFFFFF AND 0x1 = true
spriteNode.lightingBitMask = 0x1
Constraints
Nodes can be constrained to each other: you can tell SpriteKit to ensure that one node is always at the same position as another, or that it should always be pointing at a node. Constraints are significantly cheaper than full-on physics, and are easier to set up. They’re also a lot less prone to annoying problems; however, they’re nowhere near as powerful.
To create a constraint, you create an instance of the SKConstraint class, and provide information on how the constraint should work. Once you have that, you apply it to the node that you want to constrain.
For example, to make one node point at another, you create an SKConstraint using the orientToNode(_, offset:) method:
let pointAtConstraint = SKConstraint.orientToNode(
shapeNode, offset: SKRange(constantValue: 0.0))
pointingNode.constraints = [pointAtConstraint]
Using Shaders in SpriteKit
A shader is a custom program that lets you completely customize how SpriteKit should draw a node’s contents. By default, SpriteKit handles everything in a fairly sane way: a texture is loaded and displayed, taking into account lighting where applicable.
However, custom shaders let you take things far beyond this. Using a custom shader, you have total control over the final color result of every pixel in a node. This means you can create refraction effects, reflection, generative textures, and more.
When you write shaders, you write a program in a language called GLSL, which is the OpenGL Shading Language. In addition to this written program, you provide data to it through special variables called uniforms.
To demonstrate this, we’ll create a custom shader that renders the contents of a sprite as red. We’ll then customize it to make chunks of the sprite transparent:
1. First, create the shader. Create a new empty file called CustomShader.fsh, and add it to your project.
2. Then add the shader code. Put the following code in the CustomShader.fsh file:
3. void main()
4. {
5. // Get the original color
6. vec4 color = SKDefaultShading();
7.
8. // Set the color to red
9. color = vec4(1.0, 0.0, 0.0, color.a);
10.
11. // Multiply this by alpha to preserve transparency
12. color.rgb *= color.a;
13.
14. // Return the finished color
15. gl_FragColor = color;
}
NOTE
.fsh stands for Fragment SHader. In computer graphics, a fragment is effectively another term for a pixel. The purpose of a fragment shader is to shade (i.e., determine the color of) each fragment that makes up the content of a sprite.
16.Next, create the SKShader object. Open GameScene.swift, and add the following code to the end of the didMoveToView method:
17. let shader = SKShader(fileNamed: "CustomShader")
spriteNode.shader = shader
When you run the application, the entire sprite will be bright red.
NOTE
The main() function of your shader needs to return a color that’s premultiplied against the alpha channel. This means that if you’re providing your own colors, you’ll need to multiply them against the alpha channel that SpriteKit’s already calculated.
This shader is very simple, and doesn’t do much—it’s hardcoded to use a red color. It would be significantly nicer if our code could configure the shader, so we’ll add support for this now.
You provide data to your shaders through uniforms, which are represented by instances of the SKUniform class. Uniforms can be textures, floats, or arrays of floats (also known as vectors).
To provide a texture to your shader, you first acquire a texture from somewhere, and then put that in an SKUniform. You then provide that SKUniform to the SKShader. Once you’ve done that, you can modify your shader code to make use of the new uniform:
1. First, add the uniforms. Add the following code to the end of the didMoveToView method:
2. let noiseTexture = SKTexture(noiseWithSmoothness: 0.5,
3. size: CGSize(width: 256, height: 256),
4. grayscale: true)
5. let textureUniform = SKUniform(name: "noiseTexture",
6. texture: noiseTexture)
7. let thresholdUniform = SKUniform(name: "threshold", float: 0.5);
8.
9. shader.addUniform(textureUniform)
shader.addUniform(thresholdUniform)
10.Then update the shader code. Replace the contents of CustomShader.fsh with the following code:
11.void main()
12.{
13. // Get the original color for this pixel
14. vec4 color = SKDefaultShading();
15.
16. // Get the corresponding point in the noise shader
17. vec4 noiseSample = texture2D(noiseTexture, v_tex_coord);
18.
19. // If the noise value is below the threshold,
20. // then set the alpha value to 0
21. if (noiseSample.a < threshold) {
22. color.a = 0.0;
23. }
24.
25. // Premultiply the color channels (red, green, and blue)
26. // with the alpha channel
27. color.rgb *= color.a;
28.
29. // Return the finished color
30. gl_FragColor = color;
}
When you run the application, the sprite will have holes in it (Figure 7-6). Try playing with the threshold uniform to vary the size of the holes.
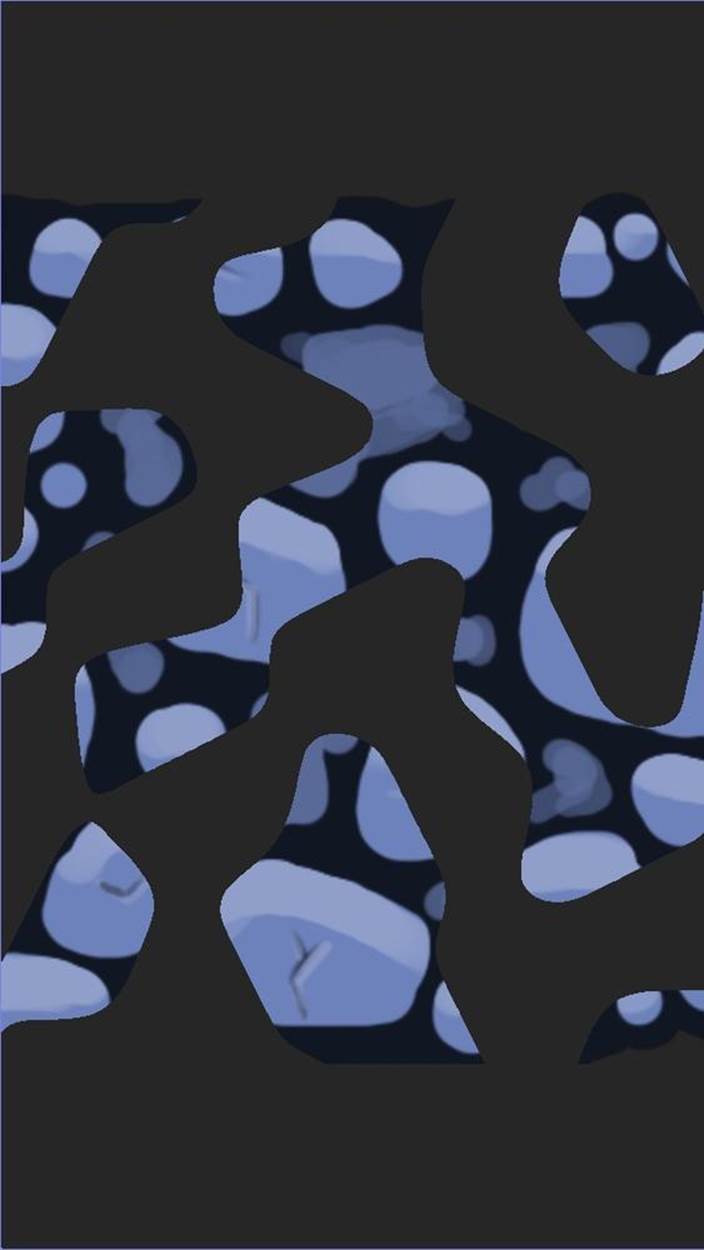
Figure 7-6. Using a custom shader
Using SpriteKit Editor
The SpriteKit editor is a feature built into Xcode that lets you visually compose a SpriteKit scene. This means that you don’t have to manually type in the position and image name of each of your sprites—all you have to do is drag and drop them into place, just like you do with the Interface Builder.
The files that the SpriteKit editor creates can be loaded using the SKScene class’s SKScene(fileName:) constructor. This loads the file, unpacks all of the nodes, and prepares the scene for launch. You still get to run your own setup code after this happens, using the didMoveToViewmethod. Here’s how it’s done:
1. First, create a new SpriteKit scene file. Go to the File menu, and choose New → New File. Select the Resource section, and create a new SpriteKit scene. Name it GameScene.
The file will be created, and when you select it in the project navigator, you’ll be treated to a delightfully boring and empty scene.
2. Then drag in a Color Sprite. Find the Color Sprite, and drag it into the scene. A red box will appear.
3. Finally, make the game load the scene from the file. Open ViewController.swift, and replace the viewDidLoad method with the following code:
4. let scene = GameScene(fileNamed: "GameScene")
5.
6. let skView = self.view as SKView
7.
skView.presentScene(scene)
Run the app again. It’ll look the same, but with the addition of the red box—this is because the scene first starts up with the red box, and then the code in didMoveToView sets the background color, and adds the label.
[3] Jon’s getting pretty close to finally beating this game.
[4] A notable exception is David O’Reilly’s Mountain, which is described by the author as a relax-em-up, in which the player is a mountain and therefore doesn’t need to do anything at all.