iOS Drawing: Practical UIKit Solutions (2014)
Chapter 1. Drawing Contexts
Drawing contexts are the virtual canvases you draw into from your applications. In this chapter, you review core technologies that underlie iOS drawing. You dive into contexts, discovering how to build and draw into them. You use contexts to create images, documents, and custom views, learning about basic drawing fundamentals in UIKit, Core Graphics, and Quartz.
Frameworks
iOS’s drawing routines are primarily sourced from the UIKit and QuartzCore frameworks. They consist of a mix of modern Objective-C interfaces (from UIKit) along with older C-based functions and Core Foundation-style objects (from QuartzCore). These items live side by side in your code. Here’s an example that shows a UIKit drawing operation followed by a Quartz one:
// Draw a rounded rectangle in UIKit
UIBezierPath *bezierPath =
[UIBezierPath bezierPathWithRoundedRect:inset cornerRadius:12];
[bezierPath stroke];
// Fill an ellipse in Quartz
CGContextFillEllipseInRect(context, rect);
The QuartzCore framework is commonly referred to as Quartz or Quartz 2D. The latter is Apple’s official name for its native 2D rendering and antialiasing API. It’s also the name used for the primary drawing reference in Apple’s developer library, the “Quartz 2D Programming Guide.”
The reach of this framework is wider than the Quartz 2D name might suggest. The QuartzCore framework implements compositing as well as rendering, along with many other graphics features. For example, the QuartzCore APIs include animation, tiling, and Core Image filtering (even though Core Image is properly its own framework).
To iOS developers, Quartz is often better known by its internal implementation name, Core Graphics. This book uses the terms Quartz and Core Graphics synonymously throughout. Most of the C-based APIs start with the two-letter CG prefix, derived from the Core Graphics name. From geometry (CGRect and CGPoint) to objects (CGColorRef, CGImageRef, and CGDataProviderRef), Quartz offers a vast, rich trove of drawing technology.
Quartz and its predecessors have been around for a long time. Contributing elements date back to the 1980s, when Display PostScript powered the graphics on the NeXTStep operating system. Quartz still uses an internal imaging model that’s very similar to modern PDF.
With each iOS release, updates continue to move the drawing APIs further toward Objective-C, simplifying, enhancing, and refining programmatic drawing. Core Graphics functions, however, continue to play an important role in day-to-day drawing development. Although newer routines replace many common tasks, they haven’t supplanted them all. Be prepared to work with both frameworks for the foreseeable future.
When to Draw
Although iOS drawing is a fairly common task for developers, the task itself is not very general. Most drawing is limited to certain specific arenas, namely four extremely common scenarios where it makes sense to work directly with graphics: creating custom views, building images, creating PDFs, and building with Core Graphics.
Creating Custom Views
Every UIKit view is, essentially, a blank canvas. You can fully customize a view by drawing whatever contents best express the view’s role in your application. You do this by drawing that content in a special method called drawRect:. This method enables you to customize a view’s look by calling UIKit and Quartz drawing routines.
Figure 1-1 shows a custom color control. It consists of a deck of swatch views, each of which is a UIView subclass that implements the drawRect: method. These views draw the border with its rounded edges, the informational text, and the splash of color to create a fully realized, yet fully custom, look.
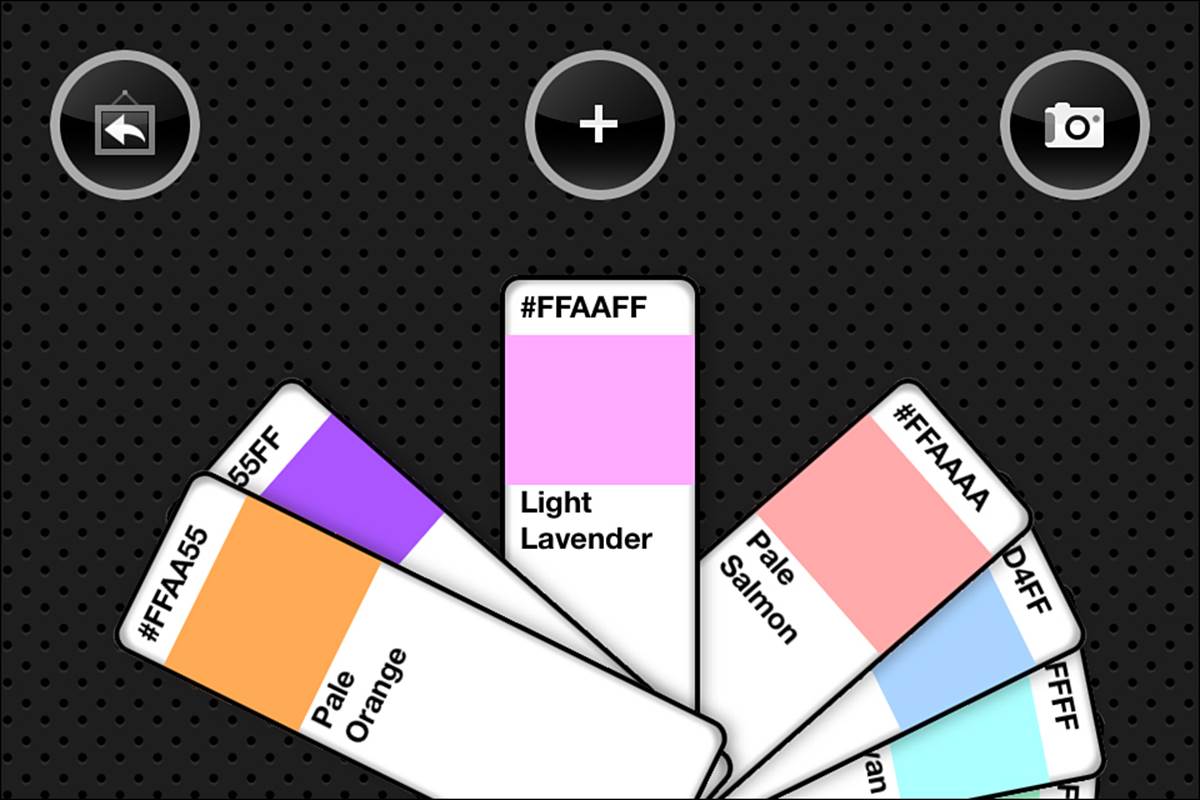
Figure 1-1 These swatches are drawn by custom drawRect: methods.
Unless you override it in a subclass, the default drawRect: method basically does nothing. Subclasses that create a presentation using UIKit and Core Graphics routines override this method. They add their drawing requests to their subclass implementation. Simple views that merely update a background color or that supply content in other ways apart from drawing should not override drawRect:. Similarly, OpenGL ES-powered views do not use this entry point for drawing.
The drawRect: method has a close cousin that is meant only for printing: drawRect:forViewPrintFormatter: allows you to customize content that should print differently than it displays.
Building Images
Not every image starts its life as a PNG or JPEG file. On iOS, you can draw into a UIKit image context and retrieve a UIImage instance. This enables you to create new images or modify existing images.
Figure 1-2 shows a programmatically constructed color wheel. This image was created via a series of colored Bezier path arcs drawn into a UIKit image context. The resulting image was then added to a standard image view. Drawing allows you to build custom images as you need them without having to rely on a preexisting library of image files.
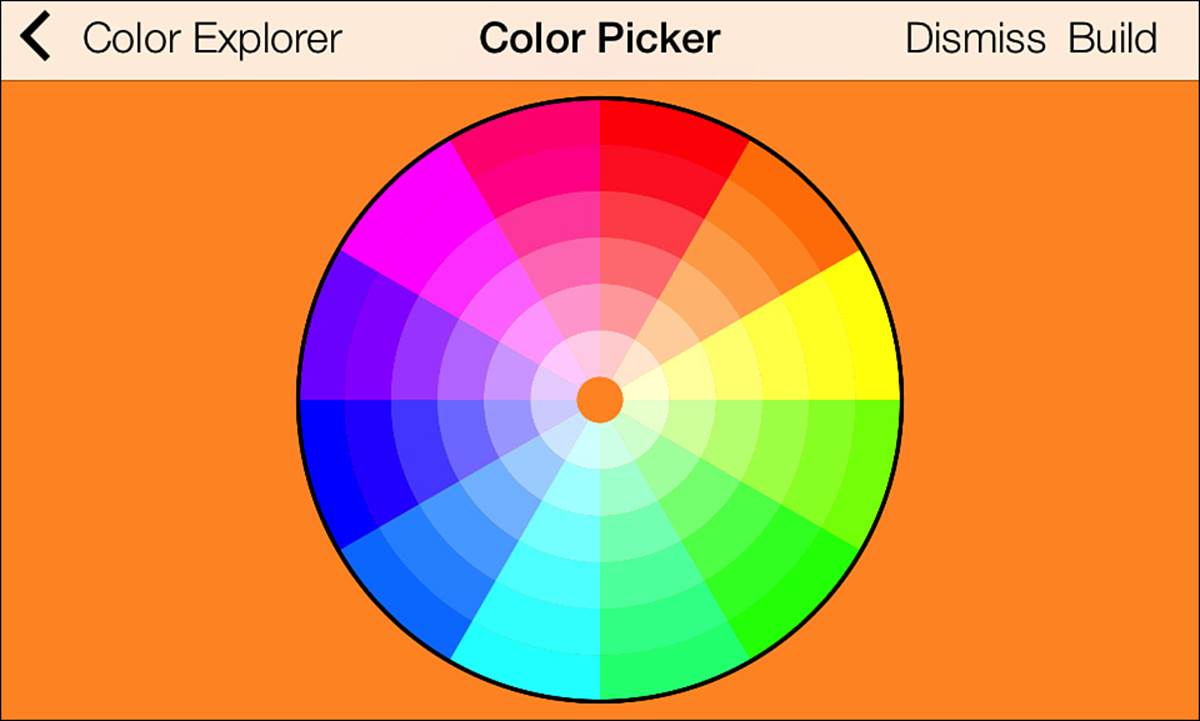
Figure 1-2 This color wheel was built from code into a custom UIImage.
Code-based drawing makes an important trade-off. Although you need greater processing time to create images (not a huge amount, but its measurable), you end up with a slimmer application bundle, with fewer required resources. Your images are far more flexible—limited only to the code you use to create them.
Creating PDFs
The same kinds of calls that help you build images also support PDF creation. You can draw into a UIKit PDF context, which is either sent directly to a file or saved to data. This enables you to build PDF content from your apps and then share them, store them, or display them, as in Figure 1-3.
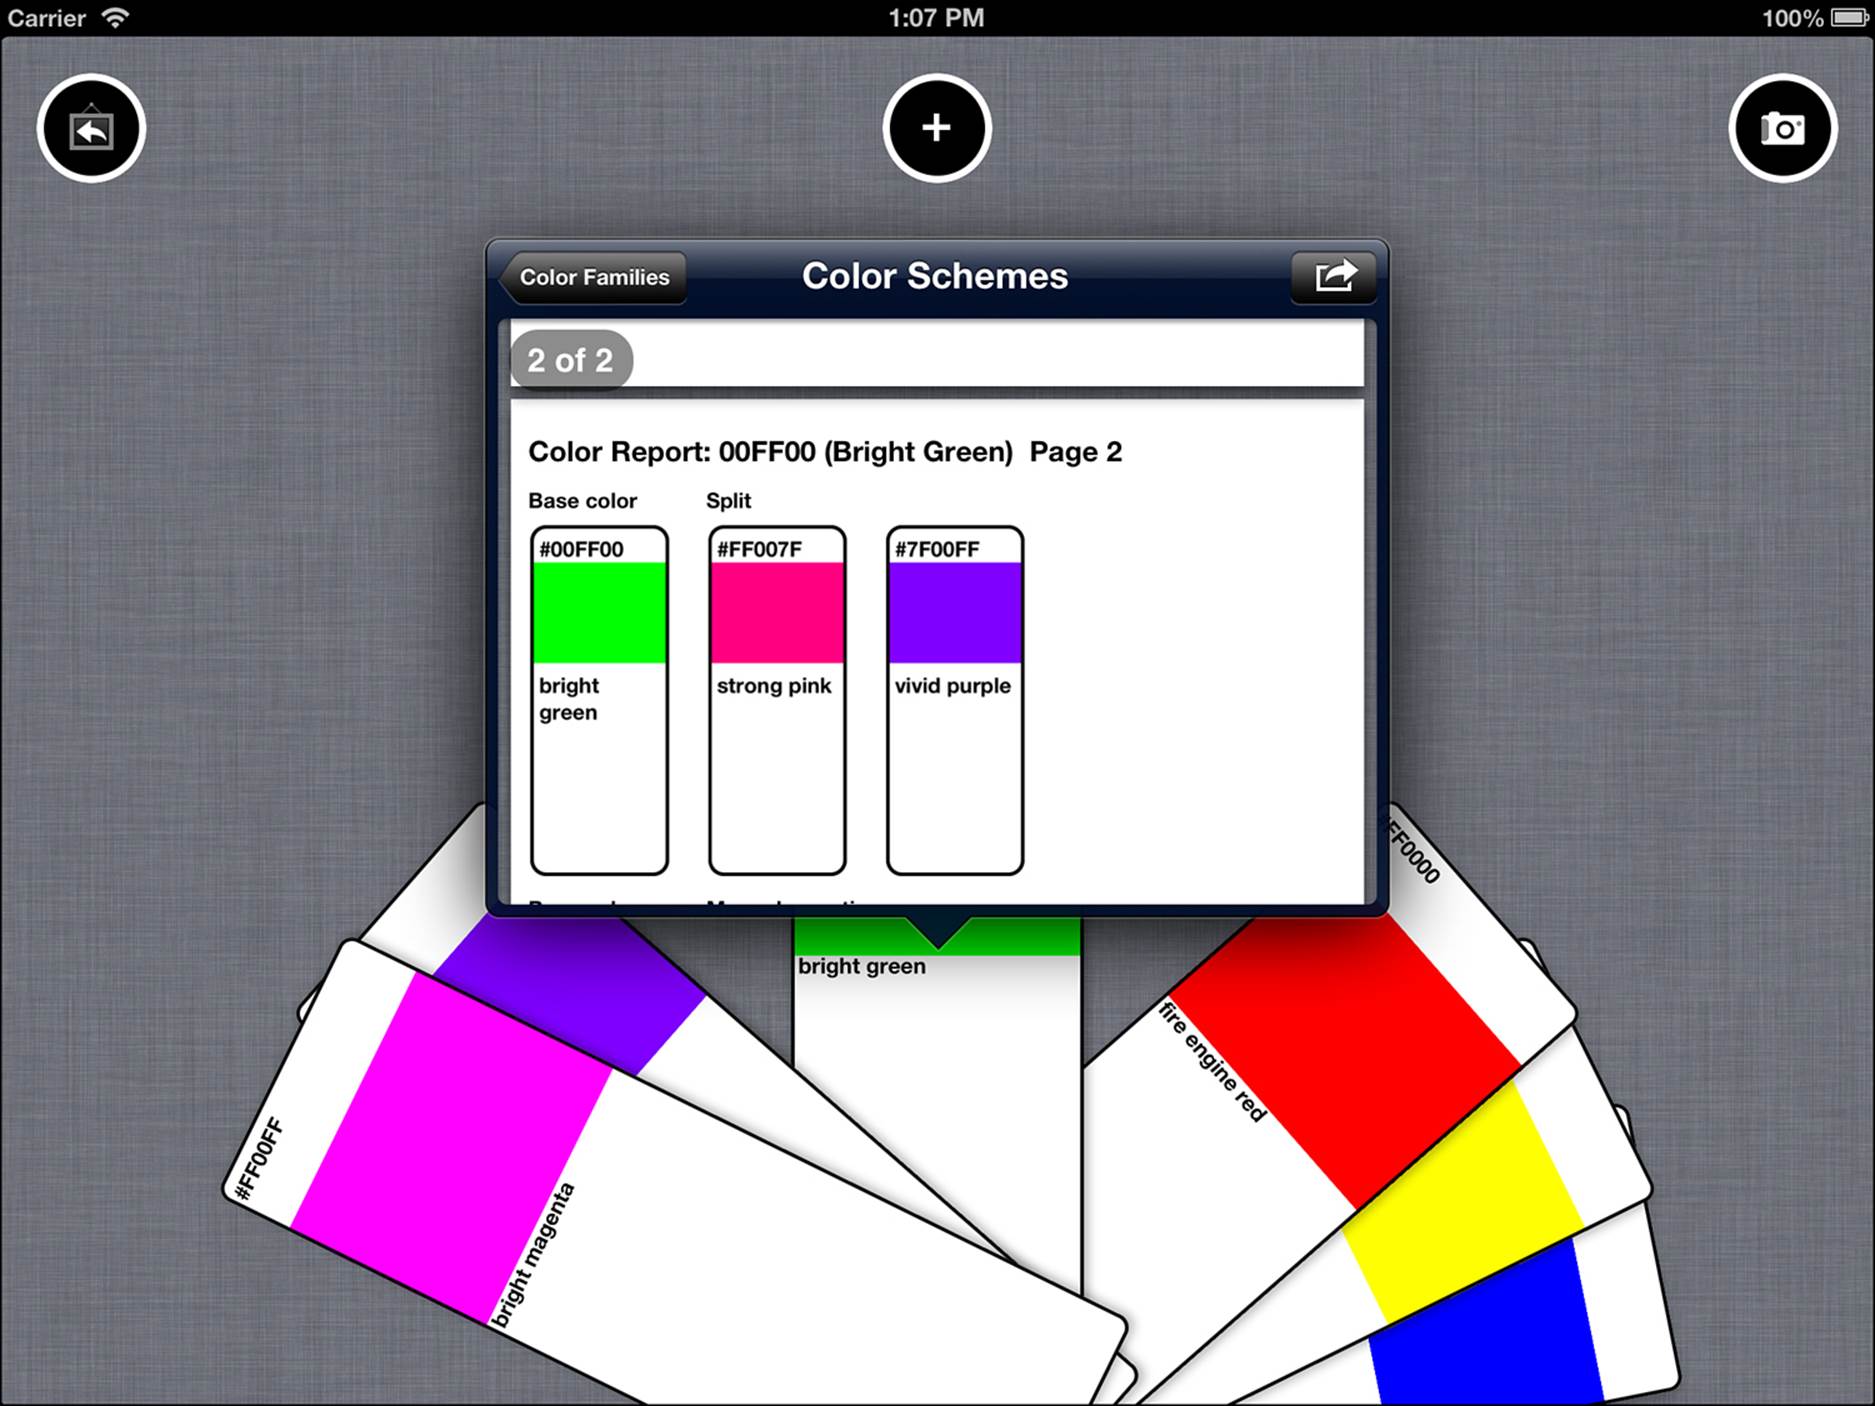
Figure 1-3 A multipage PDF is previewed in this iOS 6 popover.
PDFs provide a highly portable, system-independent standard that encapsulates a complete document description. The document you create on iOS looks the same, more or less, on any computer you use to view it. The operating system’s color management system may affect color presentation.
Building with Core Graphics
When you hit the edges of UIKit’s current capabilities, you can fall back to standard Quartz. Core Graphics has been around a long time, and its drawing features have powered OS X for a decade. Any feature that isn’t immediately tweakable in UIKit is almost always available through Quartz.
Drawing items into a Core Graphics context provides flexible and powerful drawing solutions—even if they’re not quite as simple as their UIKit siblings. Core Graphics uses Core Foundation-style C-based objects and requires manual retain and release development strategies.
For example, you might want to access image data on a byte-by-byte level. That’s a task that isn’t well handled by UIKit (yet!) but is perfect for Core Graphics’s bitmap contexts. Figure 1-4 shows an example of why you might turn to Quartz functions. In this example, the RGB image on the left is rendered into a grayscale color space using Core Graphics.
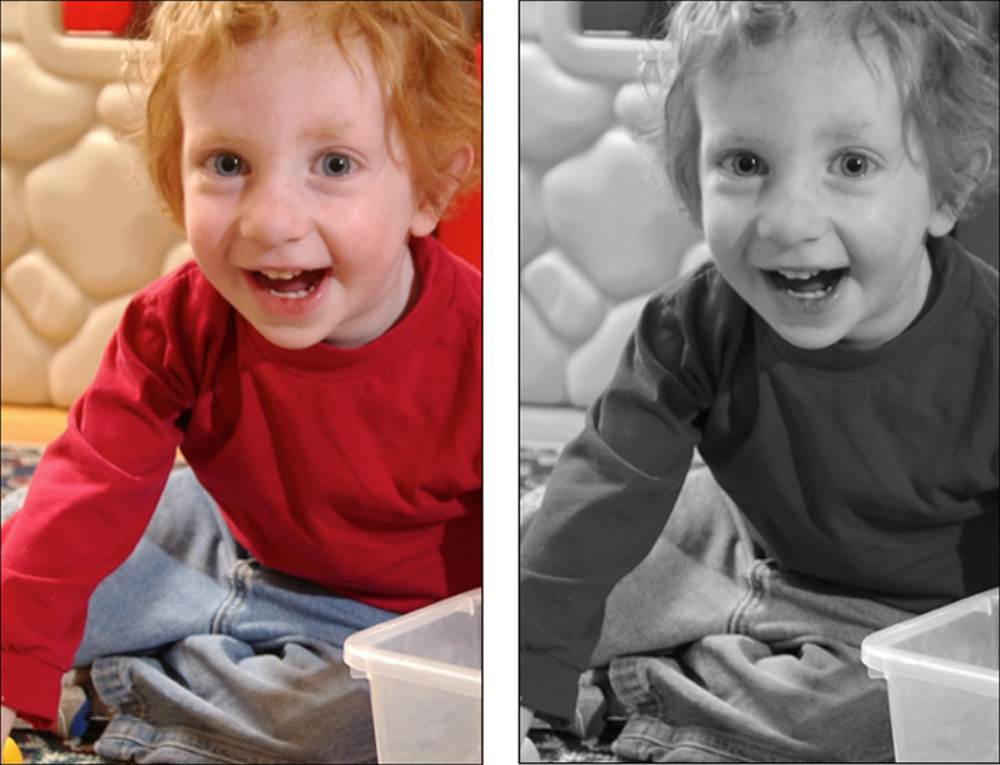
Figure 1-4 The routine that transformed this RGB image to a grayscale representation was written using Core Graphic primitives.
The resulting images must be transformed from Quartz CGImageRef (CG types that end with Ref are pointers to objects) into UIImage instances (imageWithCGImage:) and displayed in a standard image view.
Contexts
Every iOS drawing operation begins with a context. Conceptually, contexts are very similar to blank pages of paper or empty canvases. They represent an iOS destination for drawing. They contain all the information about the state of the drawing medium—for example, whether the canvas is rotated or transformed in some way, what kind of colors can be drawn onto the canvas, the degree of detail you can paint at any point, and so forth.
In iOS, you primarily work with two kinds of drawing contexts: bitmap contexts and PDF contexts. The Core Image framework offers a third context type, which is used for performing image processing tasks rather than drawing.
Bitmap Contexts
Bitmap contexts are essentially rectangular arrays of data. The size of that data depends on the kinds of color each picture element (or “pixel”) represents. Device RGB, as shown in the left image of Figure 1-4, uses three or four bytes per pixel, depending on whether the bitmap is opaque (3 bytes) or not (4 bytes).
An opaque bitmap ignores translucency values, optimizing storage. Translucent images use what’s called an alpha value. This value is stored in a separate byte from the actual color or luminance information. It refers to each pixel’s translucency. The color information for Device RGB is stored in 3 bytes, each corresponding to a single red, green, or blue level.
Device Gray images, as shown on the right in Figure 1-4, use 1 or 2 bytes per pixel. One luminance byte is stored for each pixel and, optionally, one transparency byte.
PDF Contexts
From a developer’s point of view, PDF contexts work in much the same way as bitmap contexts. You draw to them using identical commands and functions. You set colors and draw shapes and text just as if you were drawing in a view or to an image. There are, however, differences.
PDF contexts contain vector data in their “backing store,” describing the drawing in a resolution-independent manner. Bitmap contexts are rasterized. They use pixel arrays to store the data drawn into them.
PDF contexts also may contain more than one page. You establish a bounding rectangle that specifies the default size and location of each PDF page. An empty rectangle (CGRectZero) defaults to a standard A (letter) page. That is 8.5 by 11 inches, or 612 by 792 points. (Chapter 2 discusses the difference between points and pixels.)
PDF drawings are stored internally as vector-based command sequences. This provides an inherent resolution independence that you don’t see in bitmap drawings. Apple writes in its documentation, “PDF files are resolution independent by nature—the size at which they are drawn can be increased or decreased infinitely without sacrificing image detail. The user-perceived quality of a bitmap image is tied to the resolution at which the bitmap is intended to be viewed.”
You draw into these contexts just like you’d draw into bitmap contexts. The differences primarily lie in their destination (files and data representations) and when you start a new page.
In addition to bitmap and PDF contexts, you may also encounter Core Image contexts.
Core Image Contexts
The Core Image framework helps you process images extremely quickly. It supplies routines that apply digital image processing and computer vision to image sources. With it, you can apply filters, chain filters together, implement feature detection (to find faces and eyes), and analyze images to produce auto-adjustments.
Core Image contexts are image contexts specific to rendering Core Image objects to Quartz 2D and OpenGL. Accelerated by the onboard graphics processing unit (GPU), Core Image contexts integrate with Core Video pixel buffers. Core Image uses its own style of colors (CIColor) and images (CIImage), which have been optimized for Core Image’s fast filtering and image processing features.
Establishing Contexts in UIKit
UIKit provides friendly entry points for building contexts. The simplest image drawing pattern is shown in Listing 1-1. This involves nothing more than starting a new context (you specify the size of that context), drawing to it, retrieving a new image, and ending the context. This pattern produces images at a base 1:1 scale, where every drawing operation corresponds to exact pixels within the bitmap context.
Listing 1-1 Creating a Basic Bitmap Context in UIKit
UIGraphicsBeginImageContext(size);
// Perform drawing here
UIImage *image =
UIGraphicsGetImageFromCurrentImageContext();
UIGraphicsEndImageContext();
Device Scale
Listing 1-2 shows a more sophisticated (and recommended) entry point. It enables you to build images that respect device scale. The with-options variant used here to create the bitmap context specifies the scale for drawing the image. Scale refers to the relationship between logical space (measured in points) and physical displays (measured in pixels).
An image created with a scale of 2 produces Retina-ready graphics. The pixel extent doubles in each direction, producing an image that stores four times the data compared to an image drawn at the base scale of 1. The opacity parameter allows you to ignore the alpha channel to optimize bitmap storage. You need only 3 bytes per pixel versus 4 with alpha.
Listing 1-2 Context Options Enable Drawing at Device Scale
UIGraphicsBeginImageContextWithOptions(
targetSize, isOpaque, deviceScale);
// Perform drawing here
UIImage *image =
UIGraphicsGetImageFromCurrentImageContext();
UIGraphicsEndImageContext();
I strongly encourage you to use the approach shown in Listing 1-2 for images you use in your application. For example, when drawing an image for a UIImageView, always use the with-options approach.
You can supply a screen scale to the third parameter by querying the UIScreen class. For images drawn to the primary screen, use the mainScreen method, as in this example:
UIGraphicsBeginImageContextWithOptions(
targetSize, isOpaque, [UIScreen mainScreen].scale);
You may also pass 0.0 as the third parameter. This automatically determines the scaling, based on the device’s main screen.
When working with video out, where you have connected a monitor to an iOS device using a cable or when you’re using AirPlay to wirelessly present a second screen, use the scale of that particular destination. Query UIScreen for that information.
Creating PDF Contexts
With PDF context creation, you must draw either to a file path or to a mutable data object, which is supplied to a data consumer. Listing 1-3 shows an example of the former. You supply a bounds rectangle (pass CGRectZero for an A-sized page) and a dictionary where you specify metadata and security information for the new document. For example, you might specify the author, owner and user passwords, printing and copying permission, keywords, and so on.
As with the bitmap context, Core Graphics implementations (specifically, CGPDFContext) have been around a lot longer than their UIKit equivalents. If you want to dive into the C-based classes and functions, you’ll discover another take on PDF production.
Listing 1-3 Drawing an Image into a PDF File
UIGraphicsBeginPDFContextToFile(pathToFile, theBounds, documentInfo);
UIGraphicsBeginPDFPage();
// Perform drawing here
UIGraphicsEndPDFContext();
You begin each page of drawing by calling UIGraphicsBeginPDFPage(). This establishes a new page in the document for you to write to. You do not have to end each page explicitly, but you do have to end the PDF context, just as you end any other context, when you are done creating your output.
Building Contexts in Quartz
Core Graphics enables you to build bitmap contexts without using the UIKit entry points. This approach uses an older API set and is helpful when you need to access drawing data on a byte-by-byte basis. Chapter 3 uses Quartz-based contexts to power several of its image-processing examples.
Listing 1-4 showcases the calls involved. These highlight the greater complexity of using Quartz compared to UIKit. That’s because, among other things, Quartz uses the older-style Core Foundation system of objects, with their manual retain and release patterns.
Always run the Static Analyzer (Product > Analyze in Xcode) on Quartz code to check whether your references are properly released. It provides a source code analysis tool that discovers potential bugs in your iOS code for both UIKit methods and Quartz functions. Read more about the Clang analyzer on the LLVM website, at http://clang-analyzer.llvm.org.
In Listing 1-4, notice the iterative nature of the release patterns. If the context cannot be created, the color space must be freed. At each stage of Core Graphics drawing, you accumulate a trail of allocated objects, which you must properly manage before returning control from a method or function.
As a final point, note how this example uses kCGImageAlphaPremultipliedFirst. This specifies an ARGB byte order, using Quartz-friendly alpha premultiplication. For each pixel, the alpha value is stored in the first of 4 bytes and the blue value in the last. This arrangement is documented in the CGImageAlphaInfo definition in the CGImage.h header file.
Listing 1-4 Building an Image Using Core Graphics Calls
// Create a color space
CGColorSpaceRef colorSpace = CGColorSpaceCreateDeviceRGB();
if (colorSpace == NULL)
{
NSLog(@"Error allocating color space");
return nil;
}
// Create the bitmap context. (Note: in new versions of
// Xcode, you need to cast the alpha setting.)
CGContextRef context = CGBitmapContextCreate(
NULL, width, height,
BITS_PER_COMPONENT, // bits = 8 per component
width * ARGB_COUNT, // 4 bytes for ARGB
colorSpace,
(CGBitmapInfo) kCGImageAlphaPremultipliedFirst);
if (context == NULL)
{
NSLog(@"Error: Context not created!");
CGColorSpaceRelease(colorSpace );
return nil;
}
// Push the context.
// (This is optional. Read on for an explanation of this.)
// UIGraphicsPushContext(context);
// Perform drawing here
// Balance the context push if used.
// UIGraphicsPopContext();
// Convert to image
CGImageRef imageRef = CGBitmapContextCreateImage(context);
UIImage *image = [UIImage imageWithCGImage:imageRef];
// Clean up
CGColorSpaceRelease(colorSpace );
CGContextRelease(context);
CFRelease(imageRef);
Drawing into Contexts
Many Quartz functions depend on referencing a context that you can draw into. For example, consider the function calls in Listing 1-5. These set a 4-pixel-wide line width, set a gray color, and then stroke an ellipse within a rectangular container. Each function call requires a contextparameter, which must be a valid CGContextRef. You can build this context yourself (as in Listing 1-4) or retrieve one from UIKit, which is explored in the next section.
Listing 1-5 Drawing an Ellipse
// Set the line width
CGContextSetLineWidth(context, 4);
// Set the line color
CGContextSetStrokeColorWithColor(context,
[UIColor grayColor].CGColor);
// Draw an ellipse
CGContextStrokeEllipseInRect(context, rect);
The code in Listing 1-5 naturally lives where Listing 1-4 says, Perform drawing here. At this point in Listing 1-4, you have fully created a bitmap context reference, and you can use that reference with these drawing requests.
By the end of Listing 1-4, you’ve created an image and manually released the context. Figure 1-5 shows the output created by merging Listing 1-5 into Listing 1-4. The image you produce is a gray ellipse, stroked with a 4-pixel-wide line. Figure 1-5 shows that image displayed in aUIImageView instance.
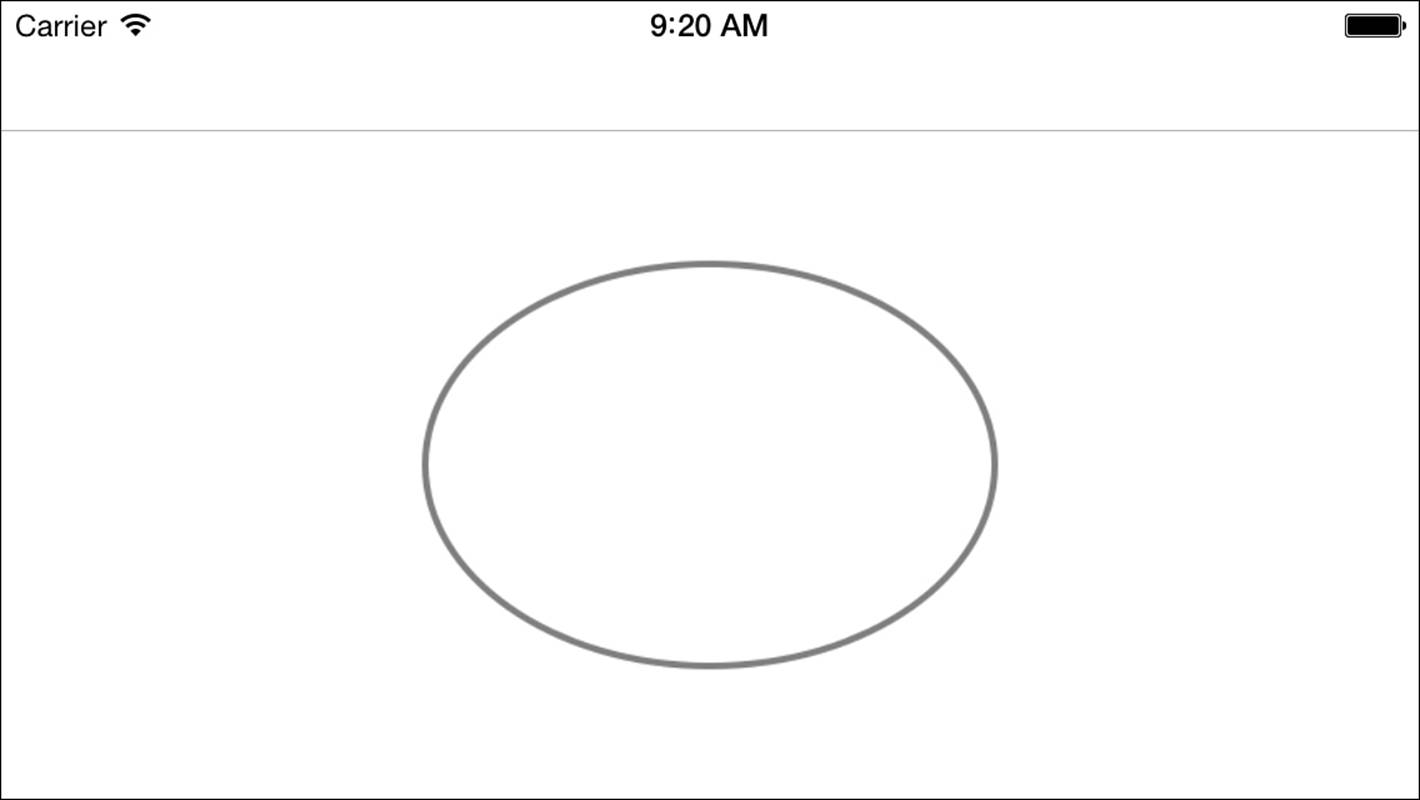
Figure 1-5 Core Graphics functions require a context to draw this ellipse.
This entire process is performed outside the auspices of UIKit. The only UIKit call is imageWithCGImage:, which converts the newly created CGImageRef to a UIImage instance.
Drawing Within a UIKit Context
UIKit simplifies the task of creating and managing contexts. It takes just one line to establish a new image or PDF context, and another to wrap things up. Between those lines, you are free to apply any drawing requests. These are applied to the current context.
Listing 1-6 applies the same drawing functions as in Listing 1-5, and it produces an identical image result. However, instead of drawing to a custom Quartz context, these updates are drawn to a newly established image context. In order to bridge between Quartz and UIKit, you callUIGraphicsGetCurrentContext(). This returns a CGContextRef, enabling you to use that value in your Core Graphics drawing calls.
Once again, when you compare the number of lines of code in Listing 1-6 with the combination of Listings 1-4 and 1-5, you see how much simpler UIKit drawing can be.
Listing 1-6 Drawing an Ellipse Within a UIKit Image Context
// Establish the image context
UIGraphicsBeginImageContextWithOptions(
targetSize, isOpaque, 0.0);
// Retrieve the current context
CGContextRef context = UIGraphicsGetCurrentContext();
// Perform the drawing
CGContextSetLineWidth(context, 4);
CGContextSetStrokeColorWithColor(context,
[UIColor grayColor].CGColor);
CGContextStrokeEllipseInRect(context, rect);
// Retrieve the drawn image
UIImage *image =
UIGraphicsGetImageFromCurrentImageContext();
// End the image context
UIGraphicsEndImageContext();
You can call UIGraphicsGetCurrentContext() after starting any image or PDF context. That context persists until you call UIGraphicsEndImageContext() or UIGraphicsEndPDFContext().
Similarly, you can establish a context outside these routines by calling UIGraphicsPushContext(context). Supply a manually built Quartz context like the one created in Listing 1-4. You end that context with UIGraphicsPopContext(). These calls establish the context you’re drawing to inside the UIKit context stack. Pushing and popping the stack enables you to temporarily switch between drawing destinations as needed.
Otherwise, outside an explicit context environment, the current context is nil—with one exception. Upon calling drawRect:, views push a context onto the UIKit graphics context stack. So if you are implementing the drawRect: method, you can assume that there’s always a valid context that you can retrieve:
- (void) drawRect: (CGRect) rect
{
// Perform drawing here
// If called, UIGraphicsGetCurrentContext()
// returns a valid context
}
UIKit Current Context
In Quartz, nearly every drawing function typically requires a context parameter. You pass it explicitly to each function. For example, you might set the stroke color to gray:
CGContextSetStrokeColorWithColor(context, [UIColor grayColor].CGColor);
In UIKit drawing, context is established from runtime conditions. Consider Listing 1-7. This code once again builds the same 4-pixel-wide ellipse shown in Figure 1-5. However, nowhere does this code explicitly reference a context.
This listing creates an elliptical path. It sets the line width to 4, establishes a gray color for stroking, and then strokes the path. In each step, the context is accessed on your behalf. As with Listing 1-6, the same gray color is applied to the current context, but that context is not specified. Listing 1-7 does this without mentioning the context.
Listing 1-7 Drawing an Ellipse Within a UIKit Image Context
// Stroke an ellipse using a Bezier path
UIBezierPath *path = [UIBezierPath bezierPathWithOvalInRect:rect];
path.lineWidth = 4;
[[UIColor grayColor] setStroke];
[path stroke];
What’s happening is that UIKit owns a stack of graphics contexts. It applies drawing operations to whatever context is at the top of that stack. The settings that update the context state to 4 for line width and gray for stroke color apply to that topmost context.
So how do you integrate Core Graphics contexts with UIKit? UIKit provides two key functions, which were briefly mentioned earlier in the chapter:
• You manually push a context by calling UIGraphicsPushContext(context). This function pushes the context onto the UIKit stack and sets the active context you’ll be drawing to.
• You balance this by calling UIGraphicsPopContext(). This pops the current context off the UIKit stack, resetting the active context either to the next item on the stack or to nil.
By surrounding Listing 1-7 with these calls, you can embed the Bezier path-based drawing code from Listing 1-7 into the Quartz-based context in Listing 1-3. This approach bridges UIKit drawing into Core Graphics context creation and management.
To summarize, the steps for mixing a Core Graphics context with UIKit drawing are as follows:
1. Create a Core Graphics context.
2. Push the context using UIGraphicsPushContext().
3. Use a combination of UIKit drawing calls that infer the current context and Quartz calls that use the context explicitly.
4. (Optionally retrieve the context contents as an image.)
5. Pop the context with UIGraphicsPopContext().
6. Release the context’s memory.
If you try to draw with UIKit with no active context, you’ll receive warnings that the context is invalid.
UIKit and Quartz Colors
Many Core Foundation classes have UIKit equivalents and vice versa. Often these are toll free bridged, which means the Core Foundation-style data types can be used interchangeably with UIKit version. You use ARC bridging calls (__bridge) to move between the Core Foundation-style version and the UIKit version. Toll-free bridging is notably absent from many Quartz/UIKit relationships, including colors.
Most drawing routines and classes in UIKit represent Objective-C wrappers around Quartz functions and Core Graphics objects. UIColor holds a CGColor inside it. UIBezierPath instances include CGPath internals. UIImage wraps CGImage or CIImage. These wrappers are not, however, equivalent objects. Although you can easily access the backing Quartz elements, they can’t be bridged.
In UIKit, the UIColor class represents color and opacity values. You create these by using a variety of entry points, but the most common approaches involve supplying either RGB values (colorWithRed:green:blue:alpha:) or HSV values (colorWithHue:saturation:brightness:alpha:) to the class.
When working with Core Graphics, you’ll find yourself moving back and forth between UIKit and Quartz. To assist with this, every UIColor offers a CGColor property. This property offers a Quartz CGColorRef corresponding to the instance’s color and alpha values.
You use this property to provide compliant parameters to Quartz. For example, consider the following line of code:
CGContextSetFillColorWithColor(context,
[UIColor greenColor].CGColor);
This function call consists of a Quartz routine that sets a context’s fill color. The second parameter starts with the standard green preset from UIColor. Its CGColor property provides a type that represents a Quartz 2D drawing color, which can safely be used with the Core Graphics function.
Take special care when separating or referencing a Quartz color from its UIKit wrapper. You may need to manually retain that color so its lifetime extends beyond the scope of its parent. Many devs have gotten caught by ARC’s memory management, encountering freed memory errors when passing a CGColorRef variable that no longer points to a valid instance. Mark Dalrymple of the Big Nerd Ranch discusses this issue in http://blog.bignerdranch.com/296-arc-gotcha-unexpectedly-short-lifetimes.
To move back to UIKit from Quartz, use the class constructor method. This builds a UIKit instance from the Core Graphics object reference:
UIColor *color = [UIColor colorWithCGColor:myCGColorRef];
Note
Take care when using the CGColor property of UIColor instances. ARC may assume you won’t use the UIKit color any further after you assign CGColor to a variable. This can raise an exception. Always retain and release Core Graphics properties you assign to variables, even if you extract them from UIKit objects.
The Painter’s Model
iOS uses a painter’s model to draw in contexts. Unless you specify otherwise, all new drawing is added on top of the existing drawing. This is similar to the way a painter physically applies pigments to a canvas. You modify a context by overlaying new drawing operations.
Listing 1-8 demonstrates this model. Its code builds two circular Bezier paths. It draws the left one in purple, then the right one in green. Figure 1-6 shows the result. The green circle overlaps and obscures part of the original purple drawing.
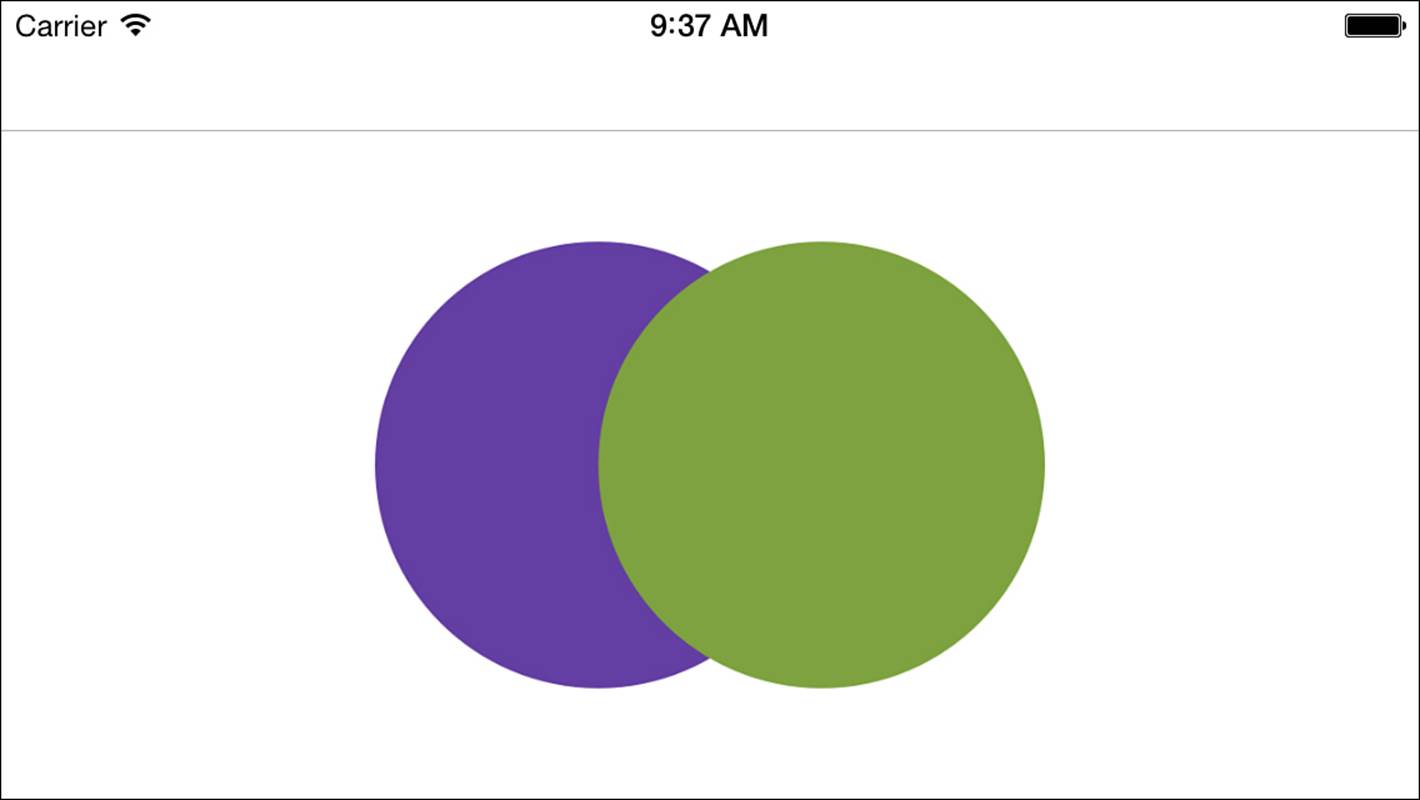
Figure 1-6 The green circle is drawn after the purple one, covering up part of that original drawing.
Note
The sample code in this chapter refers to two UIColor instance variables called greenColor and purpleColor. These are not the UIKit-supplied standard colors. They derive from the tentative cover art used during the writing of this book. The green color RGB values are (125, 162, 63). The purple color values are (99, 62, 162).
Interested in exploring iOS color further? Visit http://github.com/erica/uicolor-utilities.
Listing 1-8 Drawing Overlapping Circles
- (UIImage *) buildImage
{
// Create two circular shapes
CGRect rect = CGRectMake(0, 0, 200, 200);
UIBezierPath *shape1 = [UIBezierPath bezierPathWithOvalInRect:rect];
rect.origin.x += 100;
UIBezierPath *shape2 = [UIBezierPath bezierPathWithOvalInRect:rect];
UIGraphicsBeginImageContext(CGSizeMake(300, 200));
// First draw purple
[purpleColor set];
[shape1 fill];
// Then draw green
[greenColor set];
[shape2 fill];
UIImage *image = UIGraphicsGetImageFromCurrentImageContext();
UIGraphicsEndImageContext();
return image;
}
If you reverse this drawing order, drawing shape2 first and then shape1, you get the results shown in Figure 1-7. Although the positions and colors are identical to those in Figure 1-6, the purple shape is drawn second. It obscures part of the green circle. The most recently drawn pigments are added to the canvas on top of the existing content.
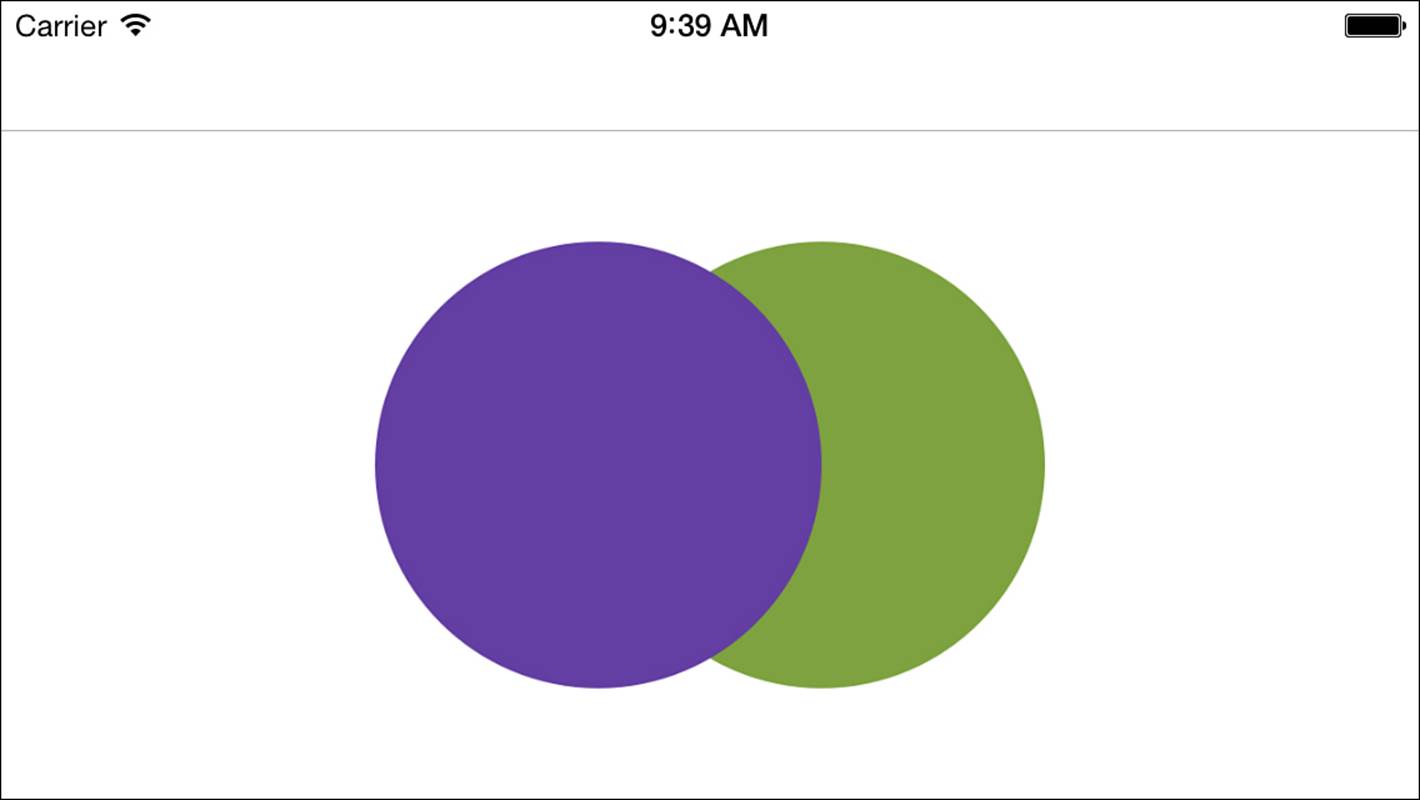
Figure 1-7 Reversing the drawing order causes the purple circle to obscure part of the green circle.
Translucency
When drawing, translucency plays an important role when painting. Adjusting the purple color’s alpha component changes the result of the drawing operation. Here, the color’s translucency is set to half its normal value:
purpleColor = [purpleColor colorWithAlphaComponent:0.5f];
Figure 1-8 shows the result of drawing the purple circle with the adjusted alpha level. Although the purple color still covers the green shape, its translucency allows you to see through it to the green color, which was laid down first.

Figure 1-8 Using a partially translucent purple color enables you to see the green shape “behind” the purple drawing.
Although, as you’re about to discover, the “rules” of drawing can change programmatically, one thing stays constant: The new source material you draw into a context always affects whatever context is already there, regardless of the mathematics applied. This applies even when using blend modes, such as “destination atop,” where the source material is only drawn into clear areas that are not already filled by context data.
The key lies in understanding that there’s a source that you’re adding, whether it’s a shape, a line, or an image, and a destination you’re drawing to, which is represented by the context. The additive nature of drawing routines enables you to lay down one drawing element at a time, to iteratively build up to the goal you’re working toward, just as a painter draws on a real-world canvas.
Context State
In Listing 1-8, the set method, when called on a color instance, specified the color of subsequent fill and stroke operations within the current context. In that listing, the purple color was set first, and then the green color. After each color was specified, it applied to all subsequent drawing operations.
Two related methods specify whether a color is used for just fill (setFill) or just stroke (setStroke) operations. A fill is used to completely color the interior of a shape. A stroke is used to outline that shape. In Figure 1-9, the fill color is green, and the stroke color is purple.
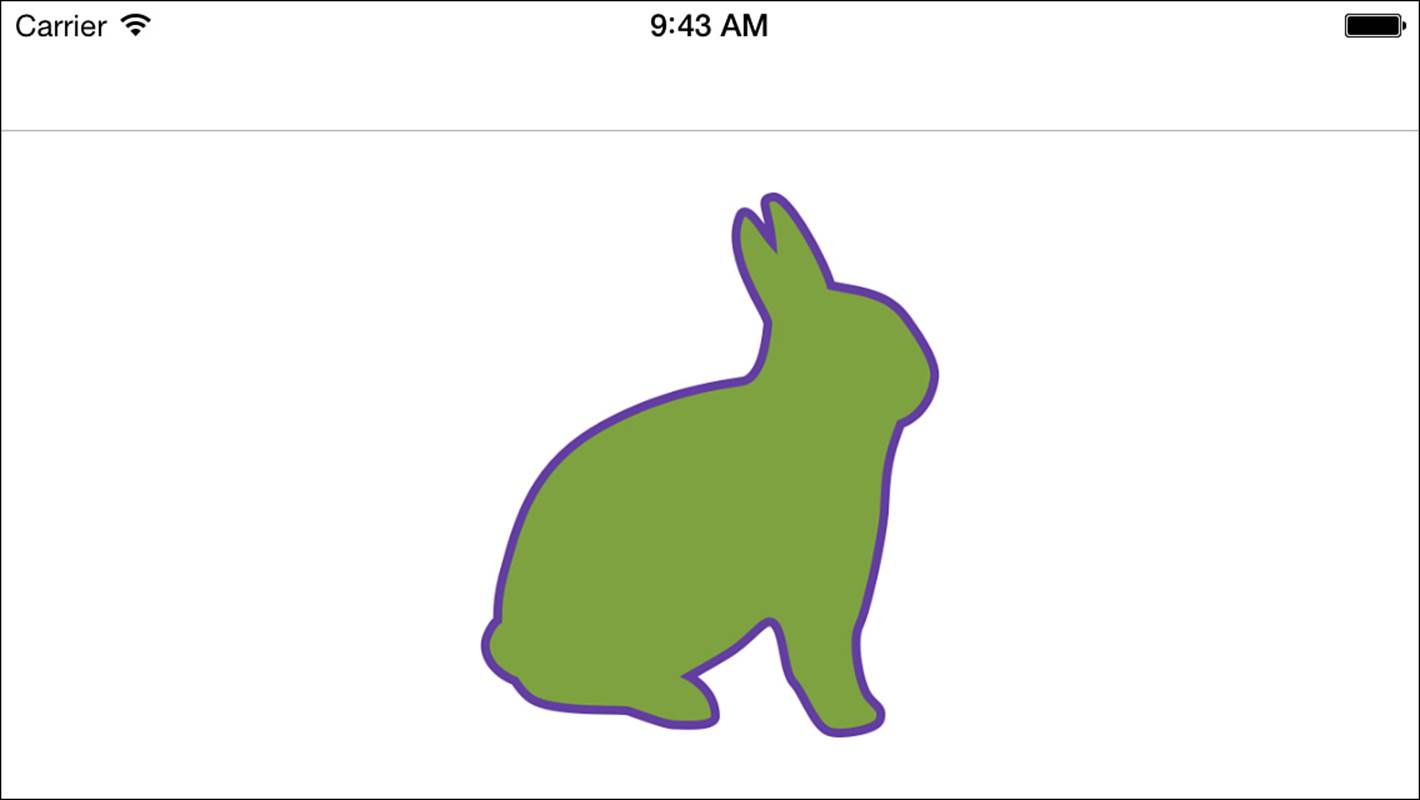
Figure 1-9 The context stroke and fill colors apply to all subsequent drawing operations.
All three of these methods (set, setFill, and setStroke) update a current drawing state, specifying the active fill and stroke colors.
Applying State
Consider the following lines of code, which were used to create the graphic shown in Figure 1-9:
[greenColor setFill];
[purpleColor setStroke];
[bunnyPath fill];
[bunnyPath stroke];
They set fill and stroke colors and then apply them to a Bezier path. The big question is this: Who is the target of these calls, storing the fill and stroke color states, allowing them to be applied by later operations?
The answer is the current context. The object returned by UIGraphicsGetCurrentContext() stores the fill and stroke colors. That context is inferred by each setting and drawing method.
All contexts store graphic state information, which acts as drawing operation parameters. Fill and stroke color are just two types of state saved to a context. As you’re about to discover, contexts can store quite a lot of information. The graphics state affects drawing operations by tweaking the ways each operation is realized.
Pushing and Popping Graphic State
Every context owns a stack of graphic state settings. Each time you create a new context, the stack starts with a fresh state. You can then modify that state and, if needed, push and pop copies of that state onto and off of a graphics state (GState) stack.
This stack is different from the context stack maintained by UIKit. That stack stores drawing destinations, letting you move between contexts by pushing and popping the stack. A drawing destination is like a canvas. When you change the context stack, you choose which canvas to draw to. The state stack is specific to each context. It holds sets of drawing preferences that apply to this context alone, changing how drawing operations apply to each “canvas.” Both approaches use stacks, but they affect different parts of the graphics system.
Each graphics state remembers any changes made to it. For example, if you push a new state onto the stack and adjust the default line width to 10, that context state persists until it’s popped off the stack. After that, the default line width returns to whatever value it was before that state was created.
Listing 1-9 demonstrates the process of managing the graphics state stack. It starts by setting the fill and stroke colors to the same green and purple you saw used in Figure 1-9. It draws a bunny and then “saves” the current state by calling CGContextSaveGState(). This pushes a copy of the state onto the context’s GState stack. Any changes to the context will now apply to that new copy of the graphics state.
If you kept drawing without making any changes to that state, you’d keep creating green bunnies with purple outlines. However, Listing 1-9 updates its colors before drawing. These new colors are orange and blue. And they override any previous color settings for the current state. When the second bunny is drawn, it displays in orange and blue.
Finally, the listing restores the previous graphics state by calling CGContextRestoreGState(). This pops the stack, discarding any changes made to the newer state copy. The final bunny therefore falls back to the original color states, namely purple and green. Figure 1-10 shows the result of the drawing operations detailed in Listing 1-9.
Listing 1-9 Managing State
UIGraphicsBeginImageContext(size);
CGContextRef context = UIGraphicsGetCurrentContext();
// Set initial stroke/fill colors
[greenColor setFill];
[purpleColor setStroke];
// Draw the bunny
[bunnyPath fill];
[bunnyPath stroke];
// Save the state
CGContextSaveGState(context);
// Change the fill/stroke colors
[[UIColor orangeColor] setFill];
[[UIColor blueColor] setStroke];
// Move then draw again
[bunnyPath applyTransform:
CGAffineTransformMakeTranslation(50, 0)];
[bunnyPath fill];
[bunnyPath stroke];
// Restore the previous state
CGContextRestoreGState(context);
// Move then draw again
[bunnyPath applyTransform:
CGAffineTransformMakeTranslation(50, 0)];
[bunnyPath fill];
[bunnyPath stroke];
UIImage *image = UIGraphicsGetImageFromCurrentImageContext();
UIGraphicsEndImageContext();
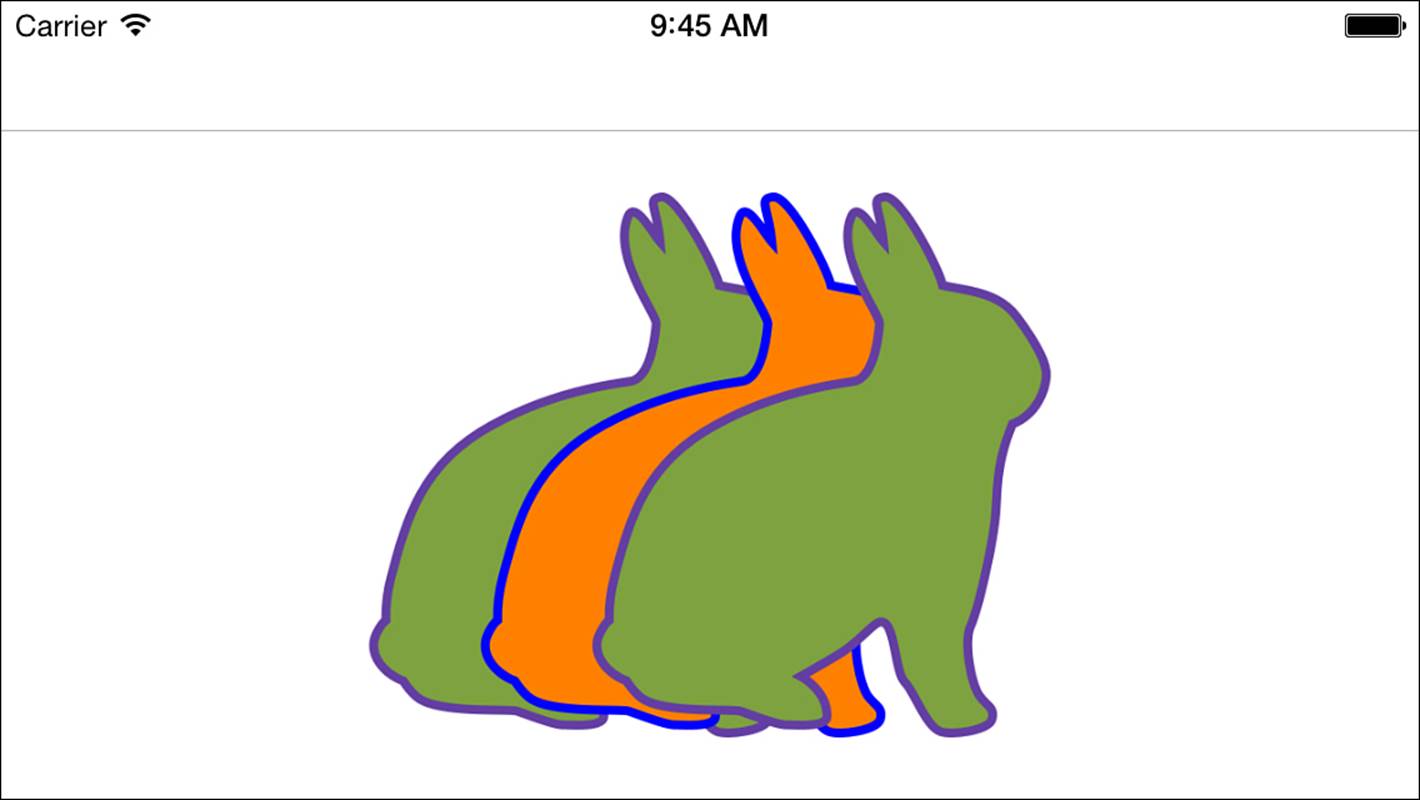
Figure 1-10 The color changes used to draw the second bunny are discarded upon restoring the graphic state to its previous settings.
State Types
A context saves many kinds of state, not just fill and stroke settings. Each of these states expresses a persistent aspect of the current context. Table 1-1 lists customizable state attributes that you can adjust using Core Graphics context calls and provides visual examples that roughly demonstrate the kinds of changes you can make to these settings.
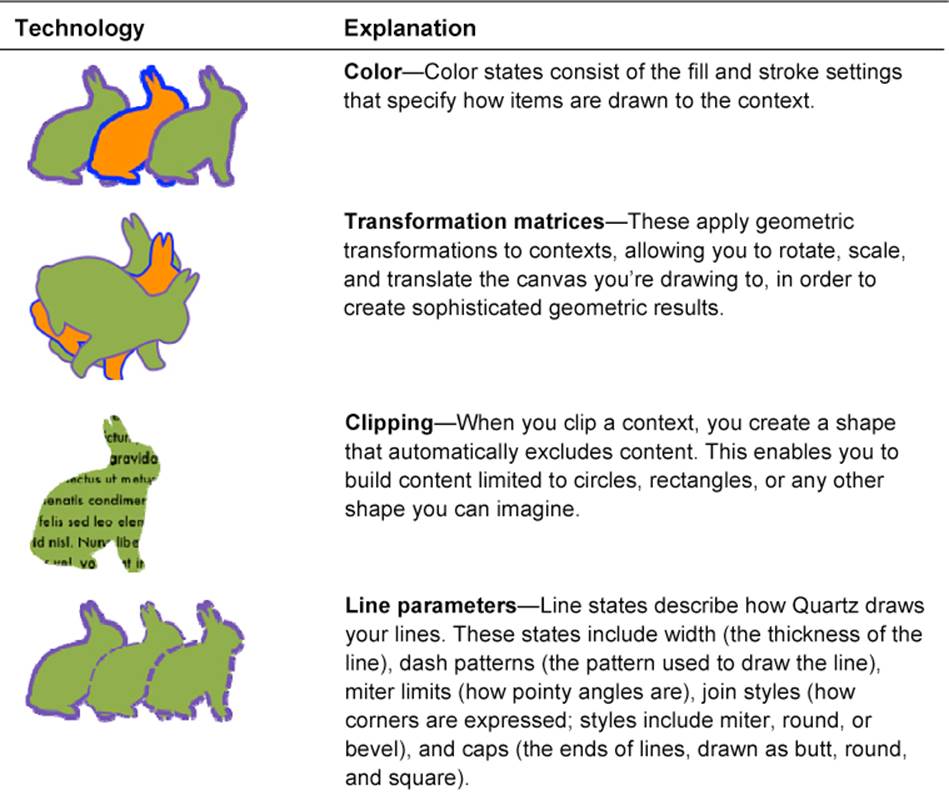
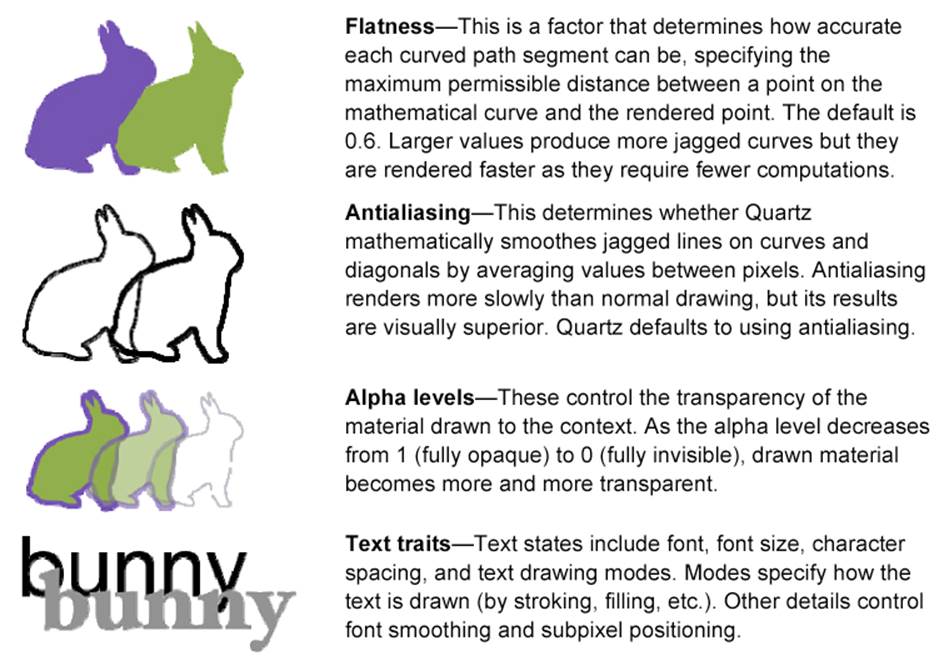

Table 1-1 Context States
Context Coordinate System
When you work primarily in UIKit, the coordinate system starts at the top-left corner of the screen (0, 0) and extends to the right and down. In Quartz, the coordinate system starts at the bottom left of the screen.
Look at Figure 1-11. It depicts a square {20, 20, 40, 40} drawn in UIKit (left) and Quartz (right). In each case, the object begins 20 points off the origin. However, as you can see, that origin differs in each circumstance.
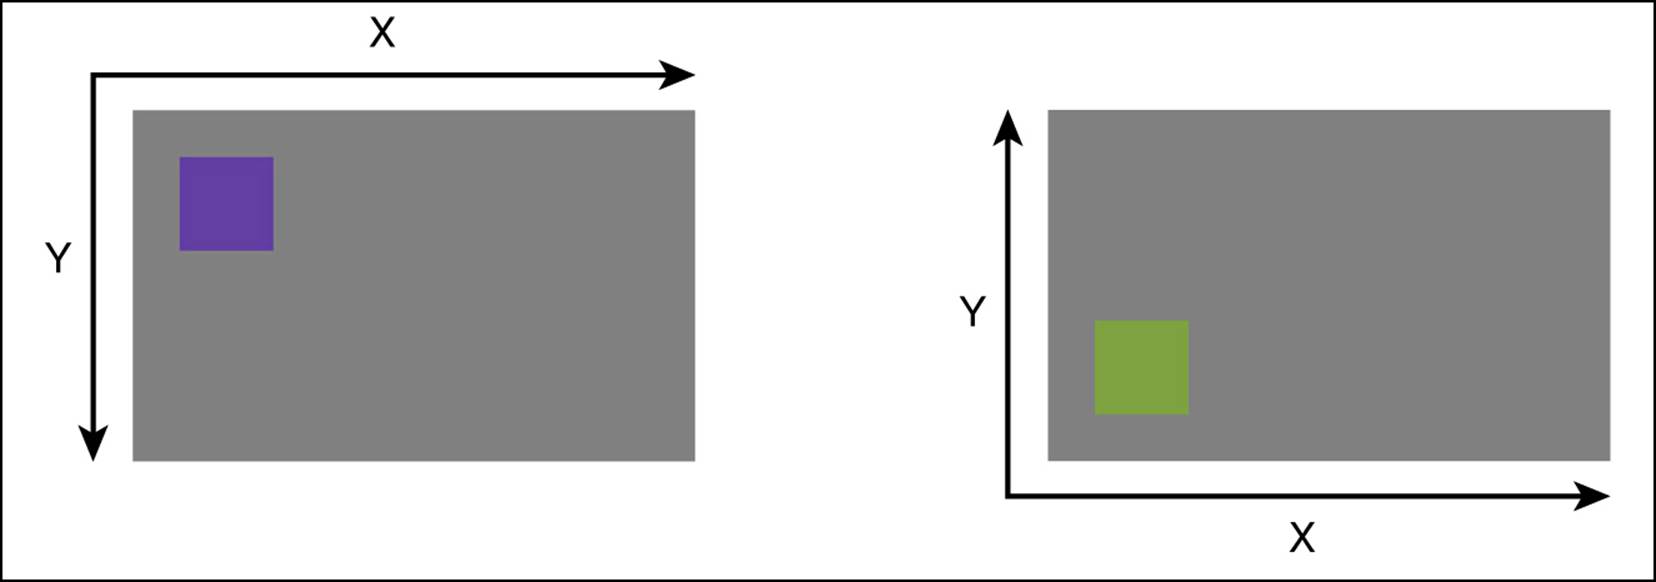
Figure 1-11 The UIKit origin (top left) is different from the Quartz origin (bottom left).
Which origin holds sway depends on how you created the context. If you built it using any of the UIKit functions, the origin is at the top left. If you used CGBitmapContextCreate(), the origin is at the bottom left.
Flipping Contexts
You can adjust Core Graphics contexts to use the UIKit origin. Listing 1-10 shows the code, which implements these steps:
1. Push the CGContextRef onto the UIKit graphics stack.
2. Flip the context vertically. You do this by building a transform that scales and translates the original context.
3. Concatenate that transform to the context’s current transformation matrix (CTM). This adjusts the context’s coordinate system to mimic UIKit, letting you draw starting from the top-left corner.
4. Perform any drawing operations using the new coordinate system.
5. Pop the graphics stack.
You can work directly in Quartz without applying this coordinate workaround. Most UIKit developers, however, appreciate the ability to use a single system that matches drawing to familiar view placement tasks. Some developers create dual macros, defined to the same flipping function. This enables them to visually match a QUARTZ_ON request to a QUARTZ_OFF one. The routine doesn’t change, but a developer gains a sense of the current state for code inspection.
Listing 1-10 contains a secondary flipping routine, one that does not require you to supply a context size in points. Quite honestly, it’s a bit of a hack, but it does work because the image it retrieves will use the same size and scale as the context.
You can also retrieve a context’s size by calling CGBitmapContextGetHeight() and CGBitmapContextGetWidth() and dividing the number of pixels these functions return by the screen scale. This assumes that you’re working with a bitmap context of some kind (like the one created by UIGraphicsBeginImageContextWithOptions()) and that you’re matching the screen’s scale in that context.
Listing 1-10 Adjusting Coordinate Origins
// Flip context by supplying the size
void FlipContextVertically(CGSize size)
{
CGContextRef context = UIGraphicsGetCurrentContext();
if (context == NULL)
{
NSLog(@"Error: No context to flip");
return;
}
CGAffineTransform transform = CGAffineTransformIdentity;
transform = CGAffineTransformScale(transform, 1.0f, -1.0f);
transform = CGAffineTransformTranslate(transform, 0.0f, -size.height);
CGContextConcatCTM(context, transform);
}
// Flip context by retrieving image
void FlipImageContextVertically()
{
CGContextRef context = UIGraphicsGetCurrentContext();
if (context == NULL)
{
NSLog(@"Error: No context to flip");
return;
}
UIImage *image =
UIGraphicsGetImageFromCurrentImageContext();
FlipContextVertically(image.size);
}
// Query context for size and use screen scale
// to map from Quartz pixels to UIKit points
CGSize GetUIKitContextSize()
{
CGContextRef context =
UIGraphicsGetCurrentContext();
if (context == NULL) return CGSizeZero;
CGSize size = CGSizeMake(
CGBitmapContextGetWidth(context),
CGBitmapContextGetHeight(context));
CGFloat scale = [UIScreen mainScreen].scale;
return CGSizeMake(
size.width / scale, size.height / scale);
}
// Initialize the UIKit context stack
UIGraphicsPushContext(context);
// Flip the context vertically
FlipContextVertically(size);
// Draw the test rectangle. It will now use the UIKit origin
// instead of the Quartz origin.
CGRect testRect = CGRectMake(20, 20, 40, 40);
UIBezierPath *path = [UIBezierPath bezierPathWithRect:testRect];
[greenColor set];
[path fill];
// Pop the context stack
UIGraphicsPopContext();
Clipping
Clipping enables you to exclude any painting operations that fall outside a path within your context. To clip, add a path to your context and then call the CGContextClip() clipping function. Figure 1-12 shows an example, where colored circles drawn to a context are clipped within the letters of the word Hello.
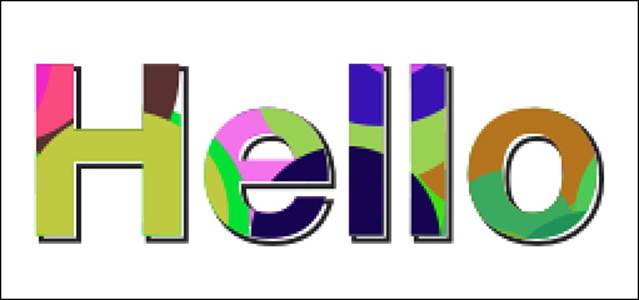
Figure 1-12 Randomly colored circles are clipped to the boundaries of the word Hello.
Listing 1-11 demonstrates the steps involved in clipping:
1. Save the graphic state. This enables you to restore the state to a preclipped version at a later time. If you won’t need to return to an unclipped state, skip this step.
2. Add a path to the context and clip to it using CGContextClip(). Adding a path temporarily stores it in the graphics context. When stored, you create a mask by clipping. This blocks out the parts of the context you don’t want to paint to. This example uses a UIBezierPathinstance, which is not compatible with the CGContextClip() function. Retrieve the CGPathRef from the Bezier path’s CGPath property and pass that instead.
3. When clipped, perform any standard drawing operations. Material drawn outside the bounds of the clipping path is automatically discarded on your behalf.
4. To finish, restore the graphic state. This allows you to resume normal drawing without any further clipping, returning the context to the state before you began clipped operations.
This process amounts to saving, clipping, drawing, and restoring. (Say it out loud.) Chapter 6 introduces ways to use Objective-C blocks to clip and draw within saved-and-restored graphics states rather than managing those states through explicit calls.
Listing 1-11 Drawing Using Clipping
// Save the state
CGContextSaveGState(context);
// Add the path and clip
CGContextAddPath(context, path.CGPath);
CGContextClip(context);
// Perform clipped drawing here
// Restore the state
CGContextRestoreGState(context);
// Drawing done here is not clipped
Transforms
The sequence of letters in Figure 1-13 is built by drawing each character at points around a circle. This figure takes advantage of one of UIKit’s terrific built-in features: NSString instances know how to draw themselves into contexts. You just tell a string to draw at a point or into a rectangle, as in this example:
[@"Hello" drawAtPoint:CGPointMake(100, 50)
withAttributes:@{NSFontAttributeName:font}]
The syntax for this call changed in iOS 7, deprecating earlier APIs. Prior to iOS 7, you’d say:
[@"Hello" drawAtPoint:CGPointMake(100, 50) withFont:font]
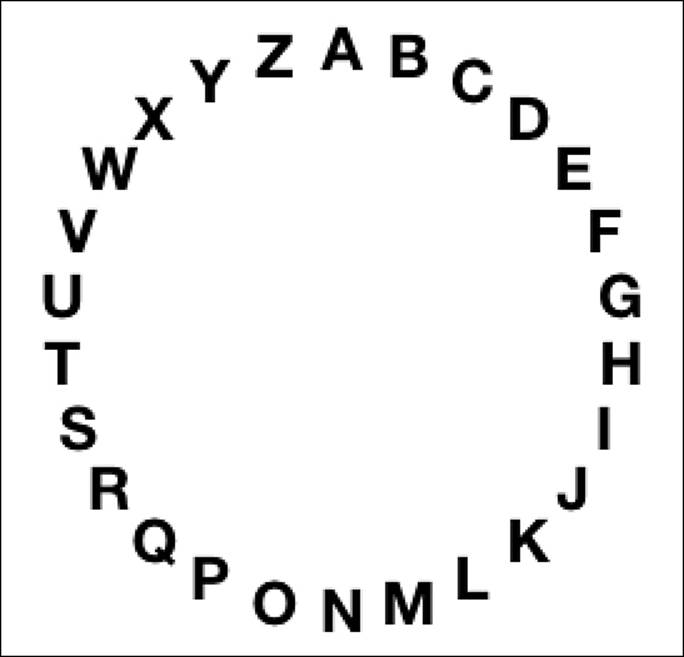
Figure 1-13 Drawing letters in a circle.
This circle progresses clockwise, with a letter deposited every (2 × Pi / 26) radians. Each x and y position was calculated as an offset from a common center. The following code iteratively calculates points around the circle using r × sin(theta) and r × cos(theta), using those points to place each letter:
NSString *alphabet = @"ABCDEFGHIJKLMNOPQRSTUVWXYZ";
for (int i = 0; i < 26; i++)
{
NSString *letter =
[alphabet substringWithRange:NSMakeRange(i, 1)];
CGSize letterSize =
[letter sizeWithAttributes:@{NSFontAttributeName:font}];
CGFloat theta = M_PI - i * (2 * M_PI / 26.0);
CGFloat x = center.x + r * sin(theta) - letterSize.width / 2.0;
CGFloat y = center.y + r * cos(theta) - letterSize.height / 2.0;
[letter drawAtPoint:CGPointMake(x, y)
withAttributes:@{NSFontAttributeName:font}];
}
This is an acceptable way to approach this challenge, but you could greatly improve it by leveraging context transforms.
Note
High school algebra can be essential for developers working with Core Graphics. Revisiting concepts like sine, cosine, tangents, and matrices can offer you exciting tools to work with. Rusty? Khan Academy (www.khanacademy.org) offers an indispensable resource for freshening your skills.
Transform State
Every context stores a 2D affine transform as part of its state. This transform is called the current transform matrix. It specifies how to rotate, translate, and scale the context while drawing. It provides a powerful and flexible way to create advanced drawing operations. Contrast the layout shown in Figure 1-14 with the one in Figure 1-13. This improvement is achieved through the magic of context transforms.
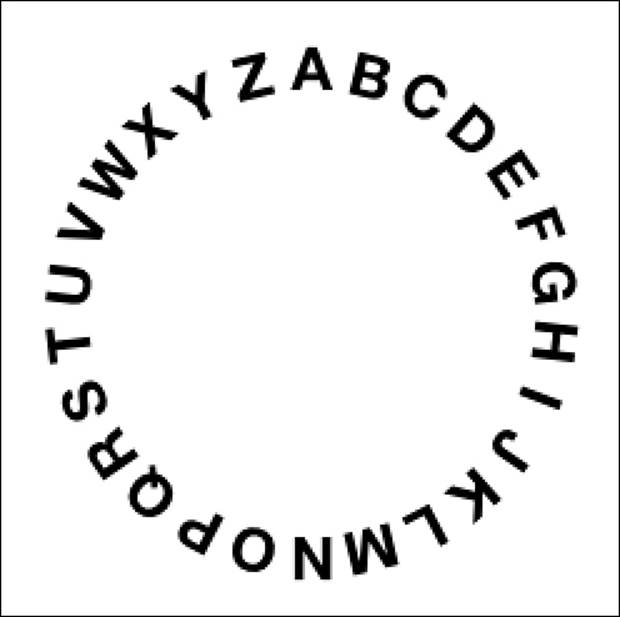
Figure 1-14 Drawing letters in a circle using transforms.
Listing 1-12 shows the steps that went into creating this. It consists of a series of transform operations that rotate the canvas and draw each letter. Context save and restore operations ensure that the only transform that persists from one drawing operation to the next is the one that appears in boldface in the listing. This translation sets the context’s origin to its center point.
This enables the context to freely rotate around that point, so each letter can be drawn at an exact radius. Moving to the left by half of each letter width ensures that every letter is drawn centered around the point at the end of that radius.
Listing 1-12 Transforming Contexts During Drawing
NSString *alphabet = @"ABCDEFGHIJKLMNOPQRSTUVWXYZ";
// Start drawing
UIGraphicsBeginImageContext(bounds.size);
CGContextRef context = UIGraphicsGetCurrentContext();
// Retrieve the center and set a radius
CGPoint center = RectGetCenter(bounds);
CGFloat r = center.x * 0.75f;
// Start by adjusting the context origin
// This affects all subsequent operations
CGContextTranslateCTM(context, center.x, center.y);
// Iterate through the alphabet
for (int i = 0; i < 26; i++)
{
// Retrieve the letter and measure its display size
NSString *letter =
[alphabet substringWithRange:NSMakeRange(i, 1)];
CGSize letterSize =
[letter sizeWithAttributes:@{NSFontAttributeName:font}];
// Calculate the current angular offset
CGFloat theta = i * (2 * M_PI / (float) 26);
// Encapsulate each stage of the drawing
CGContextSaveGState(context);
// Rotate the context
CGContextRotateCTM(context, theta);
// Translate up to the edge of the radius and move left by
// half the letter width. The height translation is negative
// as this drawing sequence uses the UIKit coordinate system.
// Transformations that move up go to lower y values.
CGContextTranslateCTM(context, -letterSize.width / 2, -r);
// Draw the letter and pop the transform state
[letter drawAtPoint:CGPointMake(0, 0)
withAttributes:@{NSFontAttributeName:font}];
CGContextRestoreGState(context);
}
// Retrieve and return the image
UIImage *image = UIGraphicsGetImageFromCurrentImageContext();
UIGraphicsEndImageContext();
return image;
Building a More Exacting Layout
A more pedantic solution to drawing the letters in a circle avoids the extra spacing around the I and the squeezing around the W. Listing 1-13 details the steps needed to create the more precise layout shown in Figure 1-15. This example demonstrates finer layout placement.
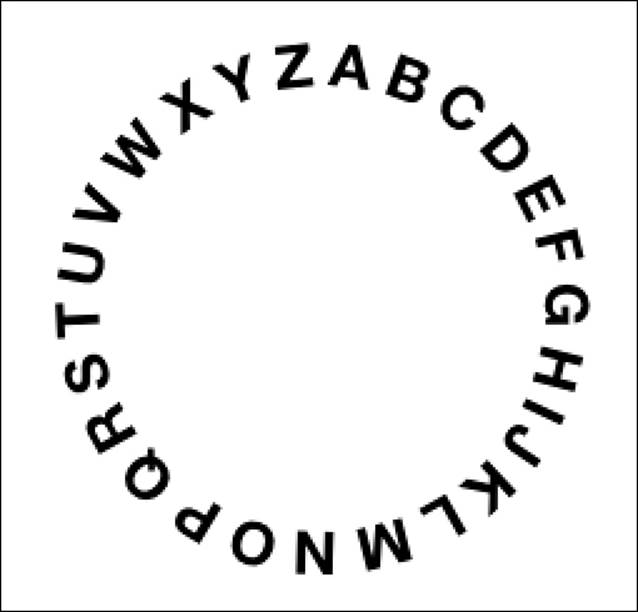
Figure 1-15 This version uses better spacing, based on the width of each letter.
Start by calculating the total width of the layout. Sum the width of each individual letter (as done here) or just measure the string as a whole. This enables you to mark your progress along the layout, producing a percentage of travel from beginning to end.
Next, adjust the placement for each letter based on the percentage consumed by each iteration. Use this percentage to calculate a rotation angle for laying down the letter.
Finish by drawing the letter just as you did in Listing 1-12. What you end up with is a layout that respects the width of each letter, moving forward proportionately according to the letter’s natural size.
Listing 1-13 Precise Text Placement Around a Circle
// Calculate the full extent
CGFloat fullSize = 0;
for (int i = 0; i < 26; i++)
{
NSString *letter =
[alphabet substringWithRange:NSMakeRange(i, 1)];
CGSize letterSize =
[letter sizeWithAttributes:@{NSFontAttributeName:font}];
fullSize += letterSize.width;
}
// Initialize the consumed space
CGFloat consumedSize = 0.0f;
// Iterate through each letter, consuming that width
for (int i = 0; i < 26; i++)
{
// Measure each letter
NSString *letter =
[alphabet substringWithRange:NSMakeRange(i, 1)];
CGSize letterSize =
[letter sizeWithAttributes:@{NSFontAttributeName:font}];
// Move the pointer forward, calculating the
// new percentage of travel along the path
consumedSize += letterSize.width / 2.0f;
CGFloat percent = consumedSize / fullSize;
CGFloat theta = percent * 2 * M_PI;
consumedSize += letterSize.width / 2.0f;
// Prepare to draw the letter by saving the state
CGContextSaveGState(context);
// Rotate the context by the calculated angle
CGContextRotateCTM(context, theta);
// Move to the letter position
CGContextTranslateCTM(context, -letterSize.width / 2, -r);
// Draw the letter
[letter drawAtPoint:CGPointMake(0, 0) withFont:font];
// Reset the context back to the way it was
CGContextRestoreGState(context);
}
Setting Line Parameters
Each context stores line width as part of its graphics state. You can adjust that line width by calling CGContextSetLineWidth() and passing the point size as its parameter. Subsequent drawing operations inherit the change in that state. That width does not, however, apply toUIBezierPath instances, the primary drawing tool for UIKit. Every UIKit path permits you to adjust its stroke width by setting its lineWidth parameter. Whatever value this is set to wins out over any context settings.
Take a look at Listing 1-14. It creates a path and sets its line width to 4. Then it instructs the context to use a 20-point-wide line. Figure 1-16 shows the result of these drawing requests. As the image demonstrates, drawing the path through Quartz honors that 20-point width. Drawing through UIKit overrides the context state with the path parameter.
Listing 1-14 Conflicting Line Widths
UIGraphicsBeginImageContext(bounds.size);
CGContextRef context = UIGraphicsGetCurrentContext();
// Build a Bezier path and set its width
UIBezierPath *path =
[UIBezierPath bezierPathWithRoundedRect:rect cornerRadius:32];
path.lineWidth = 4;
// Update the context state to use 20-point wide lines
CGContextSetLineWidth(context, 20);
// Draw this path using the context state
[purpleColor set];
CGContextAddPath(context, path.CGPath);
CGContextStrokePath(context);
// Draw the path directly through UIKit
[greenColor set];
[path stroke];
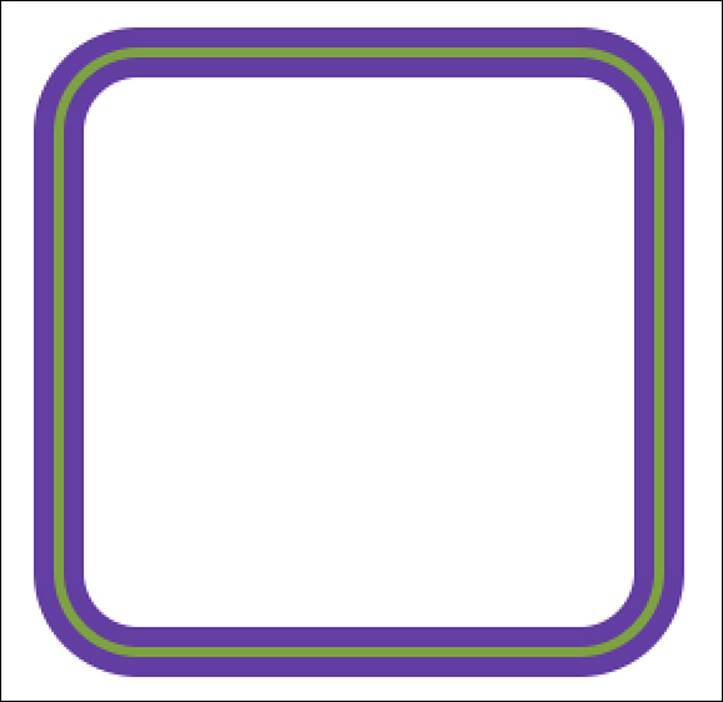
Figure 1-16 Some Quartz context semantics are implemented orthogonally to UIKit. The smaller interior stroke does not inherit the context’s default line width.
UIKit’s approach binds line width semantics to the UIBezierPath object and not to the context as a whole. That’s not a bad thing. Pushing a line width state in order to draw a shape makes less sense than associating that width with a particular object. It is not, however, a consistent thing. This approach is not universal—at least not yet. You can see this by trying out dashes.
Dashes
Dash patterns do not demonstrate the UIKit/Quartz dichotomy seen with line width. Changes made to the context state will affect UIKit paths, whether you use the UIKit or Quartz entry points. To set a path’s dash pattern in UIKit, use the setLineDash:count:phase: method.
This code snippet creates the output shown in Figure 1-17:
[greenColor set];
CGFloat dashes[] = {6, 2};
[path setLineDash:dashes count:2 phase:0];
[path stroke];
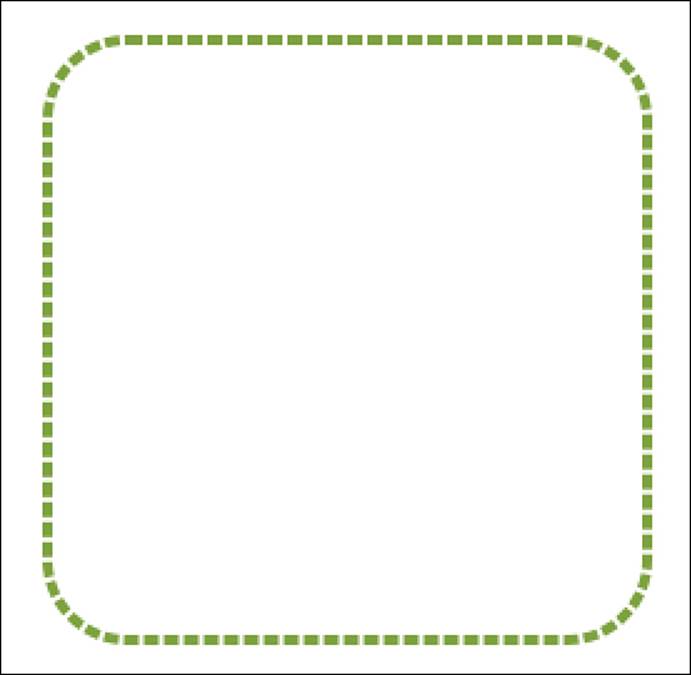
Figure 1-17 Dashes can be set in the context state or applied to a path instance.
This snippet uses three arguments. The first sets the dash pattern (6 points on, 2 points off), the second counts the first argument (2 items), and the third specifies a phase offset—that is, how far into the pattern to start. 0 means default to the normal layout pattern. You’ll read more about dashes in Chapter 4.
The same effect can be applied to the context as a whole by calling the equivalent Quartz function, CGContextSetLineDash(). This next code snippet also produces the output shown in Figure 1-17. It just gets there in a different way:
[greenColor set];
CGFloat dashes[] = {6, 2};
CGContextSetLineDash(context, 0, dashes, 2);
[path stroke];
Summary
This chapter introduces the basis of iOS drawing: the context. You saw how to create contexts, read about the different kinds of contexts available, and discovered how to retrieve content for use in images and PDF files. In iOS, contexts offer a wide array of nuanced state control. Before you leave this chapter, here are a few points to think about:
• For any drawing requirement, there are usually many solutions that get you to the same place. Your comfort in using Core Graphics functions versus UIKit classes may influence your choice of APIs, but there’s often no right answer in how you must or should draw. Do whatever works best for your development needs.
• UIKit classes continue evolving. With each generation of iOS, they provide more and more resources that enable you to skip direct Quartz. UIKit APIs offer the advantages of simplicity, parsimony, and ease of inspection. Most iOS developers will find that these advantages create a powerful case for primarily using UIKit.
Apple generally advises developers to work with the highest-level API possible. Use lower-level APIs when you need functionality that higher-level versions do not provide. There are numerous things you can do in the older-style APIs that you simply cannot do in UIKit, such as painting with calculated shadows or working with output color spaces.
• Being comfortable using Core Foundation-style C with manual memory management continues to be a rewarding skill. Knowing how the Ref style objects work and when and how to release remains relevant for the foreseeable future. Learn to use ARC-style bridging to transfer memory management to and from the Core Foundation system. You’ll be glad you invested the time because of the greater flexibility you gain.
Remember this rule of thumb: If a function’s name says Copy or Create, you have to release items. If it says Get, you don’t. And, wherever possible, always look for a release function with the same prefix as the Create function. For example, if you create a color space, useCGColorSpaceRelease() to balance that.
• Both Quartz and UIKit drawing are thread-safe. Apple Technical Q&A 1637 notes that beginning with iOS 4.0, “drawing to a graphics context in UIKit is thread-safe. This includes accessing and manipulating the current graphics stack, drawing images and strings, and usage of color and font objects from secondary threads.”
All materials on the site are licensed Creative Commons Attribution-Sharealike 3.0 Unported CC BY-SA 3.0 & GNU Free Documentation License (GFDL)
If you are the copyright holder of any material contained on our site and intend to remove it, please contact our site administrator for approval.
© 2016-2026 All site design rights belong to S.Y.A.