iOS Core Animation: Advanced Techniques (2014)
Part III. The Performance of a Lifetime
Chapter 15. Layer Performance
Doing more things faster is no substitute for doing the right things.
Stephen R. Covey
Chapter 14, “Image IO,” discussed how we can efficiently load and display images, with a view to avoiding performance glitches that might impact animation frame rate. In this final chapter, we study the performance of the layer tree itself and how to get the best out of it.
Inexplicit Drawing
The layer backing image can be drawn on-the-fly using Core Graphics, or set directly using the contents property by supplying an image loaded from a file, or drawn beforehand in an offscreen CGContext. In the previous two chapters, we talked about optimizing both of these scenarios. But in addition to explicitly creating a backing image, you can also create one implicitly through the use of certain layer properties, or by using particular view or layer subclasses.
It is important to understand exactly when and why this happens so that you can avoid accidentally introducing software drawing if it’s not needed.
Text
Both CATextLayer and UILabel draw their text directly into the backing image of the layer. These two classes actually use radically different approaches for rendering text: In iOS 6 and earlier, UILabel uses WebKit’s HTML rendering engine to draw its text, whereas CATextLayeruses Core Text. The latter is faster and should be used preferentially for any cases where you need to draw a lot of text, but they both require software drawing and are therefore inherently slow compared to hardware-accelerated compositing.
Wherever possible, try to avoid making changes to the frame of a view that contains text, because it will cause the text to be redrawn. For example, if you need to display a static block of text in the corner of a layer that frequently changes size, put the text in a sublayer instead.
Rasterization
We mentioned the shouldRasterize property of CALayer in Chapter 4, “Visual Effects,” as a way to solve blending glitches with overlapping translucent layers, and again in Chapter 12, “Tuning for Speed,” as a performance optimization technique when drawing complex layer subtrees.
Enabling the shouldRasterize property causes the layer to be drawn into an offscreen image. That image will then be cached and drawn in place of the actual layer’s contents and sublayers. If there are a lot of sublayers or they have complex effects applied, this is generally less expensive than redrawing everything every frame. But it takes time to generate that rasterized image initially, and it will consume additional memory.
Rasterizing can provide a big performance boost when used appropriately (as you saw in Chapter 12), but it’s very important to avoid rasterizing layers whose content changes every frame because it will negate any caching benefit, and actually make the performance worse.
To test whether you are using rasterization appropriately, use the Color Hits Green and Misses Red instrument to see if the rasterized image cache is being frequently flushed (which would indicate that the layer is either not a good candidate for rasterization, or that you are unwittingly making changes to it that are unnecessarily causing it to be redrawn).
Offscreen Rendering
Offscreen rendering is invoked whenever the combination of layer properties that have been specified mean that the layer cannot be drawn directly to the screen without pre-compositing. Offscreen rendering does not necessarily imply software drawing, but it means that the layer must first be rendered (either by the CPU or GPU) into an offscreen context before being displayed. The layer attributes that trigger offscreen rendering are as follows:
![]() Rounded corners (when combined with masksToBounds)
Rounded corners (when combined with masksToBounds)
![]() Layer masks
Layer masks
![]() Drop shadows
Drop shadows
Offscreen rendering is similar to what happens when we enable rasterization, except that the drawing is not normally as expensive as rasterizing a layer, the sublayers are not affected, and the result is not cached, so there is no long-term memory hit as a result. Too many layers being rendered offscreen will impact performance significantly, however.
It can sometimes be beneficial to enable rasterization as an optimization for layers that require offscreen rendering, but only if the layer/sublayers do not need to be redrawn frequently.
For layers that require offscreen rendering and need to animate (or which have animated sublayers), you may be able to use CAShapeLayer, contentsCenter, or shadowPath to achieve a similar appearance with less of a performance impact.
CAShapeLayer
Neither cornerRadius nor masksToBounds impose any significant overhead on their own, but when combined, they trigger offscreen rendering. You may sometimes find that you want to display rounded corners and clip sublayers to the layer bounds, but you don’t necessarily need to clip to the rounded corners, in which case you can avoid this overhead by using CAShapeLayer.
You can get the effect of rounded corners and still clip to the (rectangular) bounds of the layer without incurring a performance overhead by drawing the rounded rectangle using the handy +bezierPathWithRoundedRect:cornerRadius: constructor for UIBezierPath (seeListing 15.1). This is no faster than using cornerRadius in itself, but means that the masksToBounds property no longer incurs a performance penalty.
Listing 15.1 Drawing a Rounded Rectangle Using CAShapeLayer
#import "ViewController.h"
#import <QuartzCore/QuartzCore.h>
@interface ViewController ()
@property (nonatomic, weak) IBOutlet UIView *layerView;
@end
@implementation ViewController
- (void)viewDidLoad
{
[super viewDidLoad];
//create shape layer
CAShapeLayer *blueLayer = [CAShapeLayer layer];
blueLayer.frame = CGRectMake(50, 50, 100, 100);
blueLayer.fillColor = [UIColor blueColor].CGColor;
blueLayer.path = [UIBezierPath bezierPathWithRoundedRect:
CGRectMake(0, 0, 100, 100) cornerRadius:20].CGPath;
//add it to our view
[self.layerView.layer addSublayer:blueLayer];
}
@end
Stretchable Images
Another way to create a rounded rectangle is by using a circular contents image combined with the contentsCenter property mentioned in Chapter 2, “The Backing Image,” to create a stretchable image (see Listing 15.2). In theory, this should be slightly faster to render than using aCAShapeLayer because drawing a stretchable image only requires 18 triangles (a stretchable image is rendered using nine rectangles arranged in a 3x3 grid), whereas many more are needed to render a smooth curve. In practice, the difference is unlikely to be significant.
Listing 15.2 Drawing a Rounded Rectangle Using a Stretchable Image
@implementation ViewController
- (void)viewDidLoad
{
[super viewDidLoad];
//create layer
CALayer *blueLayer = [CALayer layer];
blueLayer.frame = CGRectMake(50, 50, 100, 100);
blueLayer.contentsCenter = CGRectMake(0.5, 0.5, 0.0, 0.0);
blueLayer.contentsScale = [UIScreen mainScreen].scale;
blueLayer.contents =
(__bridge id)[UIImage imageNamed:@"Circle.png"].CGImage;
//add it to our view
[self.layerView.layer addSublayer:blueLayer];
}
@end
The advantage of using stretchable images over the other techniques is that they can be used to draw an arbitrary border effect at no extra cost to performance. So, for example, a stretchable image could also be used to efficiently create a rectangular drop shadow effect.
shadowPath
We mentioned the shadowPath property in Chapter 2. If your layer is a simple geometric shape like a rectangle or rounded rectangle (which it will be if it doesn’t contain any transparent parts or sublayers), it is easy to create a shadow path that matches its shape and this will greatly simplify the calculations that Core Animation has to do to draw the shadow, avoiding the need to precompose the layer offscreen. This makes a huge difference to the performance.
If your layer has a more complex shape, it might be awkward to generate the correct shadow path, in which case you may want to consider pregenerating your shadow as a background image using a paint program.
Blending and Overdraw
As mentioned in Chapter 12, there is a limit to the number of pixels that the GPU can draw each frame (known as the fill rate), and while it can comfortably draw an entire screen full of pixels, it might begin to lag if it needs to keep repainting the same area multiple times due to overlapping layers (overdraw).
The GPU will discard pixels in layers that are fully obscured by another layer, but calculating whether a layer is obscured can be complicated and processor intensive. Merging together the colors from several overlapping translucent pixels (blending) is also expensive. You can help to speed up the process by ensuring that layers do not make use of transparency unless they need to. Whenever possible, you should do the following:
![]() Set the backgroundColor of your view to a fixed, opaque color.
Set the backgroundColor of your view to a fixed, opaque color.
![]() Set the opaque property of the view to YES.
Set the opaque property of the view to YES.
This reduces blending (because the compositor knows that nothing behind the layer will contribute to the eventual pixel color) and speeds up the calculations for avoiding overdraw because Core Animation can discard any completely obscured layers in their entirety instead of having to test each overlapping pixel individually.
If you are using images, try to avoid alpha transparency unless it is strictly needed. If the image will appear in front of a fixed background color, or a static background image that doesn’t need to move relative to the foreground, you can prefill the image background and avoid runtime blending.
If you are using text, a UILabel with a white background (or any other solid color) is more efficient to draw than one with a transparent background.
Finally, by judicious use of the shouldRasterize property, you can collapse a static layer hierarchy into a single image that doesn’t need to be recomposited each frame, avoiding any performance penalties due to blending and overdraw between the sublayers.
Reducing Layer Count
Due to the overhead of allocating layers, preprocessing them, packaging them up to be sent over IPC to the render server, and then converting them to OpenGL geometry, there is a practical upper limit on the number of layers you can display onscreen at once.
The exact limit will depend on the iOS device, the type of layer, and the layer contents and properties, but in general once the number of layers runs into the hundreds or thousands, you are going to start to see performance problems even if the layers themselves are not doing anything particularly expensive.
Clipping
Before doing any other kind of optimization to your layers, the first thing to check is that you are not creating and attaching layers to the window if they will not be visible. Layers might be invisible for a variety of reasons, such as the following:
![]() They lie outside of the bounds of the screen, or the bounds of their parent layer.
They lie outside of the bounds of the screen, or the bounds of their parent layer.
![]() They are completely obscured by another opaque layer.
They are completely obscured by another opaque layer.
![]() They are fully transparent.
They are fully transparent.
Core Animation does a fairly good job of culling layers that aren’t going to contribute to the visible scene, but your code can usually determine if a layer isn’t going to be needed earlier than Core Animation can. Ideally, you want to determine this before the layer object is ever created, to avoid the overhead of creating and configuring the layer unnecessarily.
Let’s try an example. Listing 15.3 shows the code for creating a simple scrolling 3D matrix of layers. This looks pretty cool, especially when it’s moving (see Figure 15.1), but it’s not particularly expensive to draw because each layer is just a simple colored rectangle.
Listing 15.3 Drawing a 3D Matrix of Layers
#import "ViewController.h"
#import <QuartzCore/QuartzCore.h>
#define WIDTH 10
#define HEIGHT 10
#define DEPTH 10
#define SIZE 100
#define SPACING 150
#define CAMERA_DISTANCE 500
@interface ViewController ()
@property (nonatomic, strong) IBOutlet UIScrollView *scrollView;
@end
@implementation ViewController
- (void)viewDidLoad
{
[super viewDidLoad];
//set content size
self.scrollView.contentSize = CGSizeMake((WIDTH - 1)*SPACING,
(HEIGHT - 1)*SPACING);
//set up perspective transform
CATransform3D transform = CATransform3DIdentity;
transform.m34 = -1.0 / CAMERA_DISTANCE;
self.scrollView.layer.sublayerTransform = transform;
//create layers
for (int z = DEPTH - 1; z >= 0; z--)
{
for (int y = 0; y < HEIGHT; y++)
{
for (int x = 0; x < WIDTH; x++)
{
//create layer
CALayer *layer = [CALayer layer];
layer.frame = CGRectMake(0, 0, SIZE, SIZE);
layer.position = CGPointMake(x*SPACING, y*SPACING);
layer.zPosition = -z*SPACING;
//set background color
layer.backgroundColor =
[UIColor colorWithWhite:1-z*(1.0/DEPTH) alpha:1].CGColor;
//attach to scroll view
[self.scrollView.layer addSublayer:layer];
}
}
}
//log
NSLog(@"displayed: %i", DEPTH*HEIGHT*WIDTH);
}
@end
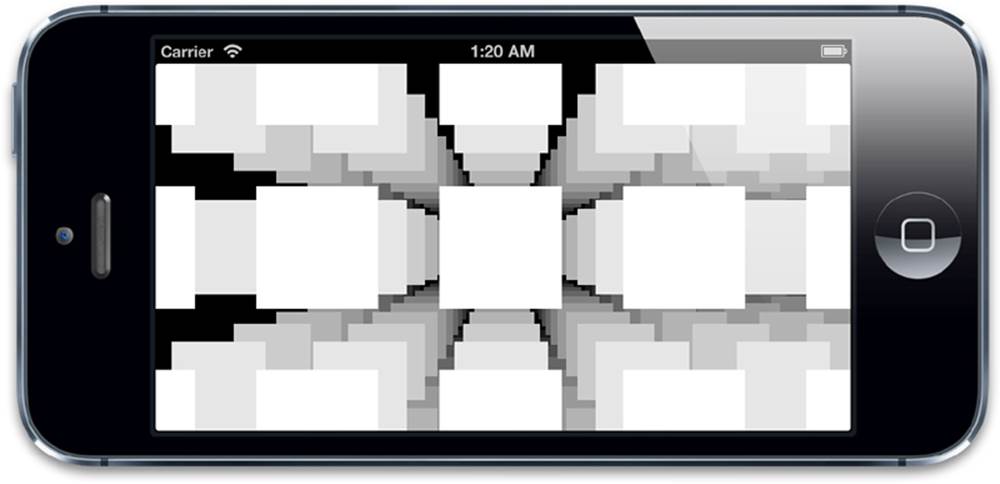
Figure 15.1 A scrolling 3D matrix of layers
The WIDTH, HEIGHT, and DEPTH constants control the number of layers being generated. In this case, we have 10×10×10 layers, so 1000 in total, of which only a few hundred will be visible onscreen at a time.
If we increase the WIDTH and HEIGHT constants to 100, our app slows down to a crawl. We now have 100,000 layers being created, so it’s not surprising that the performance has degraded.
But the number of layers that are actually visible onscreen has not increased at all, so nothing extra is being drawn. The reason the app is now slow is due to the sheer effort of managing all of those layers. Most of them don’t contribute to the rendering effort, but by forcing Core Animation to calculate the position of each of those layers before discarding them, we’ve killed our frame rate.
Because we know that our layers are arranged in a uniform grid, we can determine mathematically which ones will be visible onscreen without needing to actually create them or calculate their positions individually. The calculation is nontrivial because it has to take perspective into account. If we do that work upfront, however, it will save Core Animation from having to do something much more complex later on, and avoid us having to unnecessarily create and position layer objects that we don’t need.
Let’s refactor our app so that layers are instantiated dynamically as the view is scrolled instead of all being allocated in advance. That way, we can calculate whether they are needed before ever creating them. Next, we’ll add some code to calculate the visible area so that we can eliminate layers that are outside the field of view. Listing 15.4 shows the updated code.
Listing 15.4 Eliminating Layers Outside of the Screen Bounds
#import "ViewController.h"
#import <QuartzCore/QuartzCore.h>
#define WIDTH 100
#define HEIGHT 100
#define DEPTH 10
#define SIZE 100
#define SPACING 150
#define CAMERA_DISTANCE 500
#define PERSPECTIVE(z) (float)CAMERA_DISTANCE/(z + CAMERA_DISTANCE)
@interface ViewController () <UIScrollViewDelegate>
@property (nonatomic, weak) IBOutlet UIScrollView *scrollView;
@end
@implementation ViewController
- (void)viewDidLoad
{
[super viewDidLoad];
//set content size
self.scrollView.contentSize = CGSizeMake((WIDTH - 1)*SPACING,
(HEIGHT - 1)*SPACING);
//set up perspective transform
CATransform3D transform = CATransform3DIdentity;
transform.m34 = -1.0 / CAMERA_DISTANCE;
self.scrollView.layer.sublayerTransform = transform;
}
- (void)viewDidLayoutSubviews
{
[self updateLayers];
}
- (void)scrollViewDidScroll:(UIScrollView *)scrollView
{
[self updateLayers];
}
- (void)updateLayers
{
//calculate clipping bounds
CGRect bounds = self.scrollView.bounds;
bounds.origin = self.scrollView.contentOffset;
bounds = CGRectInset(bounds, -SIZE/2, -SIZE/2);
//create layers
NSMutableArray *visibleLayers = [NSMutableArray array];
for (int z = DEPTH - 1; z >= 0; z--)
{
//increase bounds size to compensate for perspective
CGRect adjusted = bounds;
adjusted.size.width /= PERSPECTIVE(z*SPACING);
adjusted.size.height /= PERSPECTIVE(z*SPACING);
adjusted.origin.x -= (adjusted.size.width - bounds.size.width) / 2;
adjusted.origin.y -= (adjusted.size.height - bounds.size.height) / 2;
for (int y = 0; y < HEIGHT; y++)
{
//check if vertically outside visible rect
if (y*SPACING < adjusted.origin.y ||
y*SPACING >= adjusted.origin.y + adjusted.size.height)
{
continue;
}
for (int x = 0; x < WIDTH; x++)
{
//check if horizontally outside visible rect
if (x*SPACING < adjusted.origin.x ||
x*SPACING >= adjusted.origin.x + adjusted.size.width)
{
continue;
}
//create layer
CALayer *layer = [CALayer layer];
layer.frame = CGRectMake(0, 0, SIZE, SIZE);
layer.position = CGPointMake(x*SPACING, y*SPACING);
layer.zPosition = -z*SPACING;
//set background color
layer.backgroundColor =
[UIColor colorWithWhite:1-z*(1.0/DEPTH) alpha:1].CGColor;
//attach to scroll view
[visibleLayers addObject:layer];
}
}
}
//update layers
self.scrollView.layer.sublayers = visibleLayers;
//log
NSLog(@"displayed: %i/%i", [visibleLayers count], DEPTH*HEIGHT*WIDTH);
}
@end
The mathematics of the calculation used here are very specific to this particular problem, but the principle is applicable to other situations, as well. (When you use a UITableView or UICollectionView, it does something similar behind the scenes to work out which of the cells need to be displayed.) The result is that our app can now handle hundreds of thousands of “virtual” layers without any performance problems because it doesn’t ever need to instantiate more than a few hundred of them at a time.
Object Recycling
Another trick that we can use when managing a large number of similar views or layers is to recycle them. Object recycling is quite a common pattern in iOS; it’s used for UITableView and UICollectionView cells, and for the annotation pins in MKMapView, along with many other examples.
The basic principle of object recycling is that you create a pool of identical objects. When you finish with a particular instance of an object (a layer in this case), you add it to the object pool. Each time you need an instance, you take one out of the pool. Only if the pool is empty do you create a new one.
The advantage of this is that you avoid the overhead of constantly creating and releasing objects (which is expensive because it requires the allocation/deallocation of memory) and you avoid having to re-apply properties that don’t vary between instances.
Let’s update our matrix example to use an object pool (see Listing 15.5).
Listing 15.5 Reducing Unnecessary Object Allocation by Recycling
@interface ViewController () <UIScrollViewDelegate>
@property (nonatomic, weak) IBOutlet UIScrollView *scrollView;
@property (nonatomic, strong) NSMutableSet *recyclePool;
@end
@implementation ViewController
- (void)viewDidLoad
{
[super viewDidLoad];
//create recycle pool
self.recyclePool = [NSMutableSet set];
//set content size
self.scrollView.contentSize = CGSizeMake((WIDTH - 1)*SPACING,
(HEIGHT - 1)*SPACING);
//set up perspective transform
CATransform3D transform = CATransform3DIdentity;
transform.m34 = -1.0 / CAMERA_DISTANCE;
self.scrollView.layer.sublayerTransform = transform;
}
- (void)viewDidLayoutSubviews
{
[self updateLayers];
}
- (void)scrollViewDidScroll:(UIScrollView *)scrollView
{
[self updateLayers];
}
- (void)updateLayers
{
//calculate clipping bounds
CGRect bounds = self.scrollView.bounds;
bounds.origin = self.scrollView.contentOffset;
bounds = CGRectInset(bounds, -SIZE/2, -SIZE/2);
//add existing layers to pool
[self.recyclePool addObjectsFromArray:self.scrollView.layer.sublayers];
//disable animation
[CATransaction begin];
[CATransaction setDisableActions:YES];
//create layers
NSInteger recycled = 0;
NSMutableArray *visibleLayers = [NSMutableArray array];
for (int z = DEPTH - 1; z >= 0; z--)
{
//increase bounds size to compensate for perspective
CGRect adjusted = bounds;
adjusted.size.width /= PERSPECTIVE(z*SPACING);
adjusted.size.height /= PERSPECTIVE(z*SPACING);
adjusted.origin.x -= (adjusted.size.width - bounds.size.width) / 2;
adjusted.origin.y -= (adjusted.size.height - bounds.size.height) / 2;
for (int y = 0; y < HEIGHT; y++)
{
//check if vertically outside visible rect
if (y*SPACING < adjusted.origin.y ||
y*SPACING >= adjusted.origin.y + adjusted.size.height)
{
continue;
}
for (int x = 0; x < WIDTH; x++)
{
//check if horizontally outside visible rect
if (x*SPACING < adjusted.origin.x ||
x*SPACING >= adjusted.origin.x + adjusted.size.width)
{
continue;
}
//recycle layer if available
CALayer *layer = [self.recyclePool anyObject];
if (layer)
{
recycled ++;
[self.recyclePool removeObject:layer];
}
else
{
//otherwise create a new one
layer = [CALayer layer];
layer.frame = CGRectMake(0, 0, SIZE, SIZE);
}
//set position
layer.position = CGPointMake(x*SPACING, y*SPACING);
layer.zPosition = -z*SPACING;
//set background color
layer.backgroundColor =
[UIColor colorWithWhite:1-z*(1.0/DEPTH) alpha:1].CGColor;
//attach to scroll view
[visibleLayers addObject:layer];
}
}
}
[CATransaction commit];
//update layers
self.scrollView.layer.sublayers = visibleLayers;
//log
NSLog(@"displayed: %i/%i recycled: %i",
[visibleLayers count], DEPTH*HEIGHT*WIDTH, recycled);
}
@end
In this case, we only have one type of layer object, but UIKit sometimes uses an identifier string to distinguish between multiple recyclable object types stored in separate pools.
You might have noticed that we’re now using a CATransaction to suppress animation when setting the layer properties. This wasn’t needed before because we were only ever setting properties on our layers once, prior to attaching them to the display. But now that the layers are being recycled, it has become necessary to disable the implicit animation that would normally occur when a visible layer’s properties are modified.
Core Graphics Drawing
After you have eliminated views or layers that are not contributing to the display onscreen, there might still be ways that you can reduce the layer count further. For example, if you are using multiple UILabel or UIImageView instances to display static content, you can potentially replace it all with a single view that uses -drawRect: to replicate the appearance of a complex view hierarchy.
It might seem counterintuitive to do this because we know that software drawing is slower than GPU compositing and requires additional memory, but in a situation where the performance is limited by the number of layers, software drawing may actually improve the performance by avoiding excessive layer allocation and manipulation.
Doing the drawing yourself in this case involves a similar performance tradeoff to rasterizing, but means that you can remove sublayers from the layer tree altogether (as opposed to just obscuring them, as you do when using shouldRasterize).
The -renderInContext: Method
Using Core Graphics to draw a static layout may sometimes be faster than using a hierarchy of UIView instances, but using UIView instances is both more concise and more flexible than writing the equivalent drawing code by hand, especially if you use Interface Builder to do the layout. It would be a shame to have to sacrifice those benefits for the sake of performance tuning.
Fortunately, you don’t have to. Having a large number of views or layers is only a problem if the layers are actually attached to the screen. Layers that are not connected to the layer tree don’t get sent to the render server and won’t impact performance (after they’ve been initially created and configured).
By using the CALayer -renderInContext: method, you can draw a snapshot of a layer and its sublayers into a Core Graphics context and capture the result as an image, which can then be displayed directly inside a UIImageView, or as the contents of another CALayer. Unlike using shouldRasterize—which still requires that the layers be attached to the layer tree—with this approach there is no ongoing performance cost.
Responsibility for refreshing this image when the layer content changes would be up to you (unlike using shouldRasterize, which handles caching and cache invalidation automatically), but once the image has initially been generated, you save significant per-frame performance overhead with this approach versus asking Core Animation to maintain a complex layer tree.
Summary
This chapter examined the common performance bottlenecks when using Core Animation layers and discussed how to avoid or mitigate them. You learned how to manage scenes containing thousands of virtual layers by only creating a few hundred real ones. You also learned some useful tricks for redistributing work between the CPU and GPU by selectively rasterizing or drawing layer contents when appropriate.
And that’s all there is to say about Core Animation (at least until Apple invents something new for us to play with).
All materials on the site are licensed Creative Commons Attribution-Sharealike 3.0 Unported CC BY-SA 3.0 & GNU Free Documentation License (GFDL)
If you are the copyright holder of any material contained on our site and intend to remove it, please contact our site administrator for approval.
© 2016-2026 All site design rights belong to S.Y.A.