iOS Core Animation: Advanced Techniques (2014)
Part II. Setting Things in Motion
Chapter 8. Explicit Animations
If you want something done right, do it yourself.
Charles-Guillaume Étienne
The previous chapter introduced the concept of implicit animations. Implicit animations are a straightforward way to create animated user interfaces on iOS, and they are the mechanism on which UIKit’s own animation methods are based, but they are not a completely general-purpose animation solution. In this chapter, we will look at explicit animations, which allow us to specify custom animations for particular properties or create nonlinear animations, such as a movement along an arbitrary curve.
Property Animations
The first type of explicit animation we will look at is the property animation. Property animations target a single property of a layer and specify a target value or range of values for that property to animate between. Property animations come in two flavors: basic and keyframe.
Basic Animations
An animation is a change that happens over time, and the simplest form of change is when one value changes to another, which is exactly what CABasicAnimation is designed to model.
CABasicAnimation is a concrete subclass of the abstract CAPropertyAnimation class, which in turn is a subclass of CAAnimation, the abstract base class for all animation types supported by Core Animation. As an abstract class, CAAnimation doesn’t actually do very much on its own. It provides a timing function (as explained in Chapter 10, “Easing”), a delegate (used to get feedback about the animation state), and a removedOnCompletion flag, used to indicate whether the animation should automatically be released after it has finished (this defaults to YES, which prevents your application’s memory footprint from spiraling out of control). CAAnimation also implements a number of protocols, including CAAction (allowing any CAAnimation subclass to be supplied as a layer action) and CAMediaTiming (which is explained in detail inChapter 9, “Layer Time”).
CAPropertyAnimation acts upon a single property, specified by the animation’s keyPath value. A CAAnimation is always applied to a specific CALayer, so the keyPath is relative to that layer. The fact that this is a key path (a sequence of dot-delimited keys that can point to an arbitrarily nested object within a hierarchy) rather than just a property name is interesting because it means that animations can be applied not only to properties of the layer itself, but to properties of its member objects, and even virtual properties (more on this later).
CABasicAnimation extends CAPropertyAnimation with three additional attributes:
id fromValue
id toValue
id byValue
These are fairly self-explanatory: fromValue represents the value of the property at the start of the animation; toValue represents its value at the end of the animation; byValue represents the relative amount by which the value changes during the animation.
By combining these three attributes, you can specify a value change in various different ways. The type is defined as id (as opposed to something more specific) because property animations can be used with a number of different property types, including numeric values, vectors, transform matrices, and even colors and images.
A property of type id can contain any NSObject derivative, but often you will want to animate property types that do not actually inherit from NSObject, which means that you will need to either wrap the value in an object (known as boxing) or cast it to an object (known as toll-free bridging), which is possible for certain Core Foundation types that behave like Objective-C classes, even though they aren’t. It’s not always obvious how to convert the expected data type to an id-compatible value, but the common cases are listed in Table 8.1.
Table 8.1 Boxing Primitive Values for Use in a CAPropertyAnimation
The fromValue, toValue, and byValue properties can be used in various combinations, but you should not specify all three at once because that could result in a contradiction. For example, if you were to specify a fromValue of 2, a toValue of 4, and a byValue of 3, Core Animation would not know whether the final value should be 4 (as specified by toValue) or 5 (fromValue + byValue). The exact rules around how these properties can be used are neatly documented in the CABasicAnimation header file, so we won’t repeat them here. In general, you will only need to specify either the toValue or byValue; the other values can be determined automatically from context.
Let’s try an example: We’ll modify our color fade animation from Chapter 7, “Implicit Animations,” to use an explicit CABasicAnimation instead of an implicit one. Listing 8.1 shows the code.
Listing 8.1 Setting the Layer Background Color with CABasicAnimation
@interface ViewController ()
@property (nonatomic, weak) IBOutlet UIView *layerView;
@property (nonatomic, strong) IBOutlet CALayer *colorLayer;
@end
@implementation ViewController
- (void)viewDidLoad
{
[super viewDidLoad];
//create sublayer
self.colorLayer = [CALayer layer];
self.colorLayer.frame = CGRectMake(50.0f, 50.0f, 100.0f, 100.0f);
self.colorLayer.backgroundColor = [UIColor blueColor].CGColor;
//add it to our view
[self.layerView.layer addSublayer:self.colorLayer];
}
- (IBAction)changeColor
{
//create a new random color
CGFloat red = arc4random() / (CGFloat)INT_MAX;
CGFloat green = arc4random() / (CGFloat)INT_MAX;
CGFloat blue = arc4random() / (CGFloat)INT_MAX;
UIColor *color = [UIColor colorWithRed:red
green:green
blue:blue
alpha:1.0];
//create a basic animation
CABasicAnimation *animation = [CABasicAnimation animation];
animation.keyPath = @"backgroundColor";
animation.toValue = (__bridge id)color.CGColor;
//apply animation to layer
[self.colorLayer addAnimation:animation forKey:nil];
}
@end
When we run the example, it doesn’t work as expected. Tapping the button causes the layer to animate to a new color, but it then immediately snaps back to its original value.
The reason for this is that animations do not modify the layer’s model, only its presentation (see Chapter 7). Once the animation finishes and is removed from the layer, the layer reverts back to the appearance defined by its model properties. We never changed the backgroundColorproperty, so the layer returns to its original color.
When we were using implicit animation before, the underlying action was implemented using a CABasicAnimation exactly like the one we have just used. (You might recall that in Chapter 7, we logged the result of the -actionForLayer:forKey: delegate method and saw that the action type was a CABasicAnimation.) However, in that case, we triggered the animation by setting the property. Now we are performing the same animation directly, but we aren’t setting the property any more (hence the snap-back problem).
Assigning our animation as a layer action (and then simply triggering the animation by changing the property value) is by far the easiest approach to keeping property values and animation states in sync, but assuming that we cannot do that for some reason (usually because the layer we need to animate is a UIView backing layer), we have two choices for when we can update the property value: immediately before the animation starts or immediately after it finishes.
Updating the property before the animation has started is the simpler of those options, but it means that we cannot take advantage of the implicit fromValue, so we will need to manually set the fromValue in our animation to match the current value in the layer.
Taking that into account, if we insert the following two lines between where we create our animation and where we add it to the layer, it should get rid of the snap-back:
animation.fromValue = (__bridge id)self.colorLayer.backgroundColor;
self.colorLayer.backgroundColor = color.CGColor;
That works, but is potentially unreliable. We should really derive the fromValue from the presentation layer (if it exists) rather than the model layer, in case there is already an animation in progress. Also, because the layer in this case is not a backing layer, we should disable implicit animations using a CATransaction before setting the property, or the default layer action may interfere with our explicit animation. (In practice, the explicit animation always seems to override the implicit one, but this behavior is not documented, so it’s better to be safe than sorry.)
If we make those changes, we end up with the following:
CALayer *layer = self.colorLayer.presentationLayer ?: self.colorLayer;
animation.fromValue = (__bridge id)layer.backgroundColor;
[CATransaction begin];
[CATransaction setDisableActions:YES];
self.colorLayer.backgroundColor = color.CGColor;
[CATransaction commit];
That’s quite a lot of code to have to add to each and every animation. Fortunately, we can derive this information automatically from the CABasicAnimation object itself, so we can create a reusable method. Listing 8.2 shows a modified version of our first example that includes a method for applying a CABasicAnimation without needing to repeat this boilerplate code each time.
Listing 8.2 A Reusable Method for Fixing Animation Snap-Back
- (void)applyBasicAnimation:(CABasicAnimation *)animation
toLayer:(CALayer *)layer
{
//set the from value (using presentation layer if available)
animation.fromValue = [layer.presentationLayer ?: layer
valueForKeyPath:animation.keyPath];
//update the property in advance
//note: this approach will only work if toValue != nil
[CATransaction begin];
[CATransaction setDisableActions:YES];
[layer setValue:animation.toValue forKeyPath:animation.keyPath];
[CATransaction commit];
//apply animation to layer
[layer addAnimation:animation forKey:nil];
}
- (IBAction)changeColor
{
//create a new random color
CGFloat red = arc4random() / (CGFloat)INT_MAX;
CGFloat green = arc4random() / (CGFloat)INT_MAX;
CGFloat blue = arc4random() / (CGFloat)INT_MAX;
UIColor *color = [UIColor colorWithRed:red
green:green
blue:blue
alpha:1.0];
//create a basic animation
CABasicAnimation *animation = [CABasicAnimation animation];
animation.keyPath = @"backgroundColor";
animation.toValue = (__bridge id)color.CGColor;
//apply animation without snap-back
[self applyBasicAnimation:animation toLayer:self.colorLayer];
}
This simple implementation only handles animations with a toValue, not a byValue, but it’s a good start toward a general solution. You could package it up as a category method on CALayer to make it more convenient and reusable.
This might all seem like a lot of trouble to solve such a seemingly simple problem, but the alternative is considerably more complex. If we don’t update the target property before we begin the animation, we cannot update it until after the animation has fully completed or we will cancel theCABasicAnimation in progress. That means we need to update the property at the exact point when the animation has finished, but before it gets removed from the layer and the property snaps back to its original value. How can we determine that point?
CAAnimationDelegate
When using implicit animations in Chapter 7, we were able to detect when an animation finished by using the CATransaction completion block. That approach isn’t available when using explicit animations, however, because the animation isn’t associated with a transaction.
To find out when an explicit animation has finished, we need to make use of the animation’s delegate property, which is an object conforming to the CAAnimationDelegate protocol.
CAAnimationDelegate is an ad hoc protocol, so you won’t find a CAAnimationDelegate @protocol defined in any header file, but you can find the supported methods in the CAAnimation header or in Apple’s developer documentation. In this case, we use the -animationDidStop:finished: method to update our layer’s backgroundColor immediately after the animation has finished.
We need to set up a new transaction and disable layer actions when we update the property; otherwise, the animation will occur twice—once due to our explicit CABasicAnimation, and then again afterward due to the implicit animation action for that property. See Listing 8.3 for the complete implementation.
Listing 8.3 Fixing the Background Color Value Once Animation Completes
@implementation ViewController
- (void)viewDidLoad
{
[super viewDidLoad];
//create sublayer
self.colorLayer = [CALayer layer];
self.colorLayer.frame = CGRectMake(50.0f, 50.0f, 100.0f, 100.0f);
self.colorLayer.backgroundColor = [UIColor blueColor].CGColor;
//add it to our view
[self.layerView.layer addSublayer:self.colorLayer];
}
- (IBAction)changeColor
{
//create a new random color
CGFloat red = arc4random() / (CGFloat)INT_MAX;
CGFloat green = arc4random() / (CGFloat)INT_MAX;
CGFloat blue = arc4random() / (CGFloat)INT_MAX;
UIColor *color = [UIColor colorWithRed:red
green:green
blue:blue
alpha:1.0];
//create a basic animation
CABasicAnimation *animation = [CABasicAnimation animation];
animation.keyPath = @"backgroundColor";
animation.toValue = (__bridge id)color.CGColor;
animation.delegate = self;
//apply animation to layer
[self.colorLayer addAnimation:animation forKey:nil];
}
- (void)animationDidStop:(CABasicAnimation *)anim finished:(BOOL)flag
{
//set the backgroundColor property to match animation toValue
[CATransaction begin];
[CATransaction setDisableActions:YES];
self.colorLayer.backgroundColor = (__bridge CGColorRef)anim.toValue;
[CATransaction commit];
}
@end
The problem with CAAnimation using a delegate pattern instead of a completion block is that it makes it quite awkward when you have multiple animations or animated layers to keep track of. When creating animations in a view controller, you would usually use the controller itself as the animation delegate (as we did in Listing 8.3), but since all the animations will be calling the same delegate method, you need some way to determine which completion call relates to which layer.
Consider the clock from Chapter 3, “Layer Geometry”; we originally implemented the clock without animation by simply updating the angle of the hands every second. It would look nicer if the hands animated to their new position realistically.
We can’t animate the hands using implicit animation because the hands are represented by UIView instances, and implicit animation is disabled for their backing layers. We could animate them easily using UIView animation methods, but there is a benefit to using an explicit property animation if we want more control over the animation timing (more on this in Chapter 10). Animating those hands using CABasicAnimation is potentially quite complex because we would need to detect which hand the animation relates to in the -animationDidStop:finished:method (so we can set its finishing position).
The animation itself is passed as a parameter to the delegate method. You might be thinking that you can store the animations as properties in the controller and compare them with the parameter in the delegate method, but this won’t work because the animation returned by the delegate is an immutable copy of the original, not the same object.
When we attached the animations to our layers using -addAnimation:forKey:, there was a key parameter that we’ve so far always set to nil. The key is an NSString that is used to uniquely identify the animation if you later want to retrieve it using the layer’s -animationForKey: method. The keys for all animations currently attached to a layer can be retrieved using the animationKeys property. If we were to use a unique key for each animation, we could loop through the animation keys for each animated layer and compare the result of calling -animationForKey: with the animation object passed to our delegate method. It’s not exactly an elegant solution, though.
Fortunately, there is an easier way. Like all NSObject subclasses, CAAnimation conforms to the KVC (Key-Value Coding) ad hoc protocol, which allows you to set and get properties by name using the -setValue:forKey: and -valueForKey: methods. But CAAnimation has an unusual feature: It acts like an NSDictionary, allowing you to set arbitrary key/value pairs even if they do not match up to any of the declared properties of the animation class that you are using.
This means that you can tag an animation with additional data for your own use. In this case, we will attach the clock hand UIView to the animation, so we can easily determine which view each animation relates to. We can then use this information in the delegate method to update the correct hand (see Listing 8.4).
Listing 8.4 Using KVC to Tag an Animation with Additional Data
@interface ViewController ()
@property (nonatomic, weak) IBOutlet UIImageView *hourHand;
@property (nonatomic, weak) IBOutlet UIImageView *minuteHand;
@property (nonatomic, weak) IBOutlet UIImageView *secondHand;
@property (nonatomic, weak) NSTimer *timer;
@end
@implementation ViewController
- (void)viewDidLoad
{
[super viewDidLoad];
//adjust anchor points
self.secondHand.layer.anchorPoint = CGPointMake(0.5f, 0.9f);
self.minuteHand.layer.anchorPoint = CGPointMake(0.5f, 0.9f);
self.hourHand.layer.anchorPoint = CGPointMake(0.5f, 0.9f);
//start timer
self.timer = [NSTimer scheduledTimerWithTimeInterval:1.0
target:self
selector:@selector(tick)
userInfo:nil
repeats:YES];
//set initial hand positions
[self updateHandsAnimated:NO];
}
- (void)tick
{
[self updateHandsAnimated:YES];
}
- (void)updateHandsAnimated:(BOOL)animated
{
//convert time to hours, minutes and seconds
NSCalendar *calendar =
[[NSCalendar alloc] initWithCalendarIdentifier:NSGregorianCalendar];
NSUInteger units = NSHourCalendarUnit |
NSMinuteCalendarUnit |
NSSecondCalendarUnit;
NSDateComponents *components = [calendar components:units
fromDate:[NSDate date]];
//calculate hour hand angle
CGFloat hourAngle = (components.hour / 12.0) * M_PI * 2.0;
//calculate minute hand angle
CGFloat minuteAngle = (components.minute / 60.0) * M_PI * 2.0;
//calculate second hand angle
CGFloat secondAngle = (components.second / 60.0) * M_PI * 2.0;
//rotate hands
[self setAngle:hourAngle forHand:self.hourHand animated:animated];
[self setAngle:minuteAngle forHand:self.minuteHand animated:animated];
[self setAngle:secondAngle forHand:self.secondHand animated:animated];
}
- (void)setAngle:(CGFloat)angle
forHand:(UIView *)handView
animated:(BOOL)animated
{
//generate transform
CATransform3D transform = CATransform3DMakeRotation(angle, 0, 0, 1);
if (animated)
{
//create transform animation
CABasicAnimation *animation = [CABasicAnimation animation];
animation.keyPath = @"transform";
animation.toValue = [NSValue valueWithCATransform3D:transform];
animation.duration = 0.5;
animation.delegate = self;
[animation setValue:handView forKey:@"handView"];
[handView.layer addAnimation:animation forKey:nil];
}
else
{
//set transform directly
handView.layer.transform = transform;
}
}
- (void)animationDidStop:(CABasicAnimation *)anim finished:(BOOL)flag
{
//set final position for hand view
UIView *handView = [anim valueForKey:@"handView"];
handView.layer.transform = [anim.toValue CATransform3DValue];
}
@end
We’ve successfully identified when each layer has finished animating and updated its transform to the correct value. So far, so good.
Unfortunately, even after taking those steps, we have another problem. Listing 8.4 works fine on the simulator, but if we run it on an iOS device, we can see our clock hand snap back to its original value briefly before our -animationDidStop:finished: delegate method is called. The same thing happens with the layer color in Listing 8.3.
The problem is that although the callback method is called after the animation has finished, there is no guarantee that it will be called before the property has been reset to its pre-animation state. This is a good example of why you should always test animation code on a device, not just on the simulator.
We can work around this by using a property called fillMode, which we explore in the next chapter, but the lesson here is that setting the animated property to its final value immediately before applying the animation is a much simpler approach than trying to update it after the animation has finished.
Keyframe Animations
CABasicAnimation is interesting in that it shows us the underlying mechanism behind most of the implicit animations on iOS, but adding a CABasicAnimation to a layer explicitly is a lot of work for little benefit when there are simpler ways to achieve the same effect (either using implicit animations for hosted layers, or UIView animation for views and backing layers).
CAKeyframeAnimation, however, is considerably more powerful and has no equivalent interface exposed in UIKit. CAKeyframeAnimation is, like CABasicAnimation, a subclass of CAPropertyAnimation. It still operates on a single property, but unlikeCABasicAnimation it is not limited to just a single start and end value, and instead can be given an arbitrary sequence of values to animate between.
The term keyframe originates from traditional animation, where a lead animator would draw only the frames where something significant happens (the key frames), and then the less highly skilled artists would draw the frames in between (which could be easily inferred from the keyframes). The same principle applies with CAKeyframeAnimation: You provide the significant frames, and Core Animation fills in the gaps using a process called interpolation.
We can demonstrate this using our colored layer from the earlier example. We’ll set up an array of colors and play them back with a single command using a keyframe animation (see Listing 8.5).
Listing 8.5 Applying a Sequence of Colors Using CAKeyframeAnimation
- (IBAction)changeColor
{
//create a keyframe animation
CAKeyframeAnimation *animation = [CAKeyframeAnimation animation];
animation.keyPath = @"backgroundColor";
animation.duration = 2.0;
animation.values = @[
(__bridge id)[UIColor blueColor].CGColor,
(__bridge id)[UIColor redColor].CGColor,
(__bridge id)[UIColor greenColor].CGColor,
(__bridge id)[UIColor blueColor].CGColor
];
//apply animation to layer
[self.colorLayer addAnimation:animation forKey:nil];
}
Note that we’ve specified blue as both the start and end color in the sequence. That is necessary because CAKeyframeAnimation does not have an option to automatically use the current value as the first frame (as we were doing with the CABasicAnimation by leaving fromValueas nil). The animation will immediately jump to the first keyframe value when it begins, and immediately revert to the original property value once it finishes, so for a smooth animation, we need both the start and end keyframes to match the current value of the property.
Of course, it’s possible to create animations that end on a different value than they begin. In that case, we would need to manually update the property value to match the last keyframe before we trigger the animation, just as we discussed earlier.
We’ve increased the duration of our animation from the default of 0.25 seconds to 2 seconds using the duration property so that the animation doesn’t take place too quickly to follow. If you run the animation, you’ll see that the layer cycles through the colors, but the effect seems a bit...strange. The reason for this is that the animation runs at a constant pace. It does not slow down as it transitions through each color, and this results in a slightly surreal effect. To make the animation appear more natural, we will need to adjust the easing, which will be explained in Chapter 10.
Supplying an array of values makes sense for animating something like a color change, but it’s not a very intuitive way to describe motion in general. CAKeyframeAnimation has an alternative way to specify an animation, by using a CGPath. The path property allows you to define a motion sequence in an intuitive way by using Core Graphics functions to draw your animation.
To demonstrate this, let’s animate a spaceship image moving along a simple curve. To create the path, we’ll use a cubic Bézier curve, which is a special type of curve that is defined using a start and end point with two additional control points to guide the shape. It’s possible to create such a path purely using C-based Core Graphics drawing commands, but it’s easier to do this using the high-level UIBezierPath class provided by UIKit.
Although it’s not actually necessary for the animation, we’re going to draw the curve onscreen using a CAShapeLayer. This makes it easier to visualize what our animation is going to do. After we’ve drawn the CGPath, we’ll use it to create a CAKeyframeAnimation, then apply it to our spaceship. Listing 8.6 shows the code, and Figure 8.1 shows the result.
Listing 8.6 Animating a Layer Along a Cubic Bézier Curve
@interface ViewController ()
@property (nonatomic, weak) IBOutlet UIView *containerView;
@end
@implementation ViewController
- (void)viewDidLoad
{
[super viewDidLoad];
//create a path
UIBezierPath *bezierPath = [[UIBezierPath alloc] init];
[bezierPath moveToPoint:CGPointMake(0, 150)];
[bezierPath addCurveToPoint:CGPointMake(300, 150)
controlPoint1:CGPointMake(75, 0)
controlPoint2:CGPointMake(225, 300)];
//draw the path using a CAShapeLayer
CAShapeLayer *pathLayer = [CAShapeLayer layer];
pathLayer.path = bezierPath.CGPath;
pathLayer.fillColor = [UIColor clearColor].CGColor;
pathLayer.strokeColor = [UIColor redColor].CGColor;
pathLayer.lineWidth = 3.0f;
[self.containerView.layer addSublayer:pathLayer];
//add the ship
CALayer *shipLayer = [CALayer layer];
shipLayer.frame = CGRectMake(0, 0, 64, 64);
shipLayer.position = CGPointMake(0, 150);
shipLayer.contents = (__bridge id)[UIImage imageNamed:
@"Ship.png"].CGImage;
[self.containerView.layer addSublayer:shipLayer];
//create the keyframe animation
CAKeyframeAnimation *animation = [CAKeyframeAnimation animation];
animation.keyPath = @"position";
animation.duration = 4.0;
animation.path = bezierPath.CGPath;
[shipLayer addAnimation:animation forKey:nil];
}
@end

Figure 8.1 The spaceship image layer moving along a Bézier curve
If you run the example, you may notice that the ship animation looks a bit unrealistic because it’s always pointing directly to the right as it moves rather than turning to match the tangent of the curve. You could animate the orientation of the ship as it moves by adjusting itsaffineTransform, but that would be tricky to synchronize with the other animation.
Fortunately, Apple anticipated this scenario, and added a property to CAKeyframeAnimation called rotationMode. Set rotationMode to the constant value kCAAnimationRotateAuto (see Listing 8.7), and the layer will automatically rotate to follow the tangent of the curve as it animates (see Figure 8.2).
Listing 8.7 Automatically Aligning Layer to Curve with rotationMode
- (void)viewDidLoad
{
[super viewDidLoad];
//create a path
...
//create the keyframe animation
CAKeyframeAnimation *animation = [CAKeyframeAnimation animation];
animation.keyPath = @"position";
animation.duration = 4.0;
animation.path = bezierPath.CGPath;
animation.rotationMode = kCAAnimationRotateAuto;
[shipLayer addAnimation:animation forKey:nil];
}
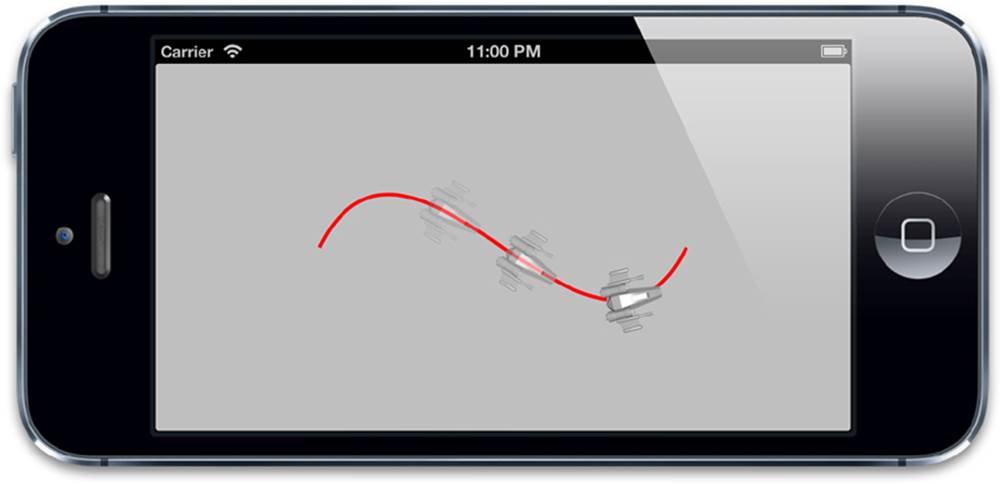
Figure 8.2 The spaceship layer rotating to match the tangent of the curve
Virtual Properties
We mentioned earlier that the fact that property animations work on key paths instead of keys means that we can animate subproperties and even virtual properties. But what is a virtual property?
Consider a rotation animation: If we wanted to animate a rotating object, we’d have to animate the transform because there is no explicit angle/orientation property on a CALayer. We might do that as shown in Listing 8.8.
Listing 8.8 Rotating a Layer by Animating the transform Property
@interface ViewController ()
@property (nonatomic, weak) IBOutlet UIView *containerView;
@end
@implementation ViewController
- (void)viewDidLoad
{
[super viewDidLoad];
//add the ship
CALayer *shipLayer = [CALayer layer];
shipLayer.frame = CGRectMake(0, 0, 128, 128);
shipLayer.position = CGPointMake(150, 150);
shipLayer.contents = (__bridge id)[UIImage imageNamed:
@"Ship.png"].CGImage;
[self.containerView.layer addSublayer:shipLayer];
//animate the ship rotation
CABasicAnimation *animation = [CABasicAnimation animation];
animation.keyPath = @"transform";
animation.duration = 2.0;
animation.toValue = [NSValue valueWithCATransform3D:
CATransform3DMakeRotation(M_PI, 0, 0, 1)];
[shipLayer addAnimation:animation forKey:nil];
}
@end
This works, but it turns out that this is more by luck than design. If we were to change the rotation value from M_PI (180 degrees) to 2 * M_PI (360 degrees) and run the animation, we’d find that the ship doesn’t move at all. That’s because the matrix representation for a rotation of 360 degrees is the same as for 0 degrees, so as far as the animation is concerned, the value hasn’t changed.
Now try using M_PI again, but set it as the byValue property instead of toValue, to indicate that the rotation should be relative to the current value. You might expect that to have the same effect as setting toValue, because 0 + 90 degrees == 90 degrees, but in fact the ship imageexpands instead of rotating because transform matrices cannot be added together like angular values can.
What if we want to animate the translation or scale of the ship independently of its angle? Because both of those require us to modify the transform property, we would need to recalculate the combined effect of each of those animations at each point in time and create a complex keyframe animation from the combined transform values, even though all we really want to do is animate a few conceptually discrete attributes of our layer independently.
Fortunately, there is a solution: To rotate the layer, we can apply our animation to the transform.rotation key path instead of animating the transform property itself (see Listing 8.9).
Listing 8.9 Animating the Virtual transform.rotation Property
@interface ViewController ()
@property (nonatomic, weak) IBOutlet UIView *containerView;
@end
@implementation ViewController
- (void)viewDidLoad
{
[super viewDidLoad];
//add the ship
CALayer *shipLayer = [CALayer layer];
shipLayer.frame = CGRectMake(0, 0, 128, 128);
shipLayer.position = CGPointMake(150, 150);
shipLayer.contents = (__bridge id)[UIImage imageNamed:
@"Ship.png"].CGImage;
[self.containerView.layer addSublayer:shipLayer];
//animate the ship rotation
CABasicAnimation *animation = [CABasicAnimation animation];
animation.keyPath = @"transform.rotation";
animation.duration = 2.0;
animation.byValue = @(M_PI * 2);
[shipLayer addAnimation:animation forKey:nil];
}
@end
This approach works great. The benefits of animating transform.rotation instead of the transform are as follows:
![]() It allows us to rotate more than 180 degrees in a single step, without using keyframes.
It allows us to rotate more than 180 degrees in a single step, without using keyframes.
![]() It allows us to perform a relative rather than absolute rotation (by setting the byValue instead of toValue).
It allows us to perform a relative rather than absolute rotation (by setting the byValue instead of toValue).
![]() It allows us to specify the angle as a simple numeric value instead of constructing a CATransform3D.
It allows us to specify the angle as a simple numeric value instead of constructing a CATransform3D.
![]() It won’t conflict with transform.position or transform.scale (which are also individually animatable using key paths).
It won’t conflict with transform.position or transform.scale (which are also individually animatable using key paths).
The odd thing about the transform.rotation property is that it doesn’t really exist. It can’t exist because CATransform3D isn’t an object; it’s a struct and so cannot have KVC (Key-Value Coding) compliant properties. transform.rotation is actually a virtual property thatCALayer provides to simplify the process of animating transforms.
You cannot set properties like transform.rotation or transform.scale directly; they can only be used for animation. When you animate these properties, Core Animation automatically updates the transform property with the actual value that your changes necessitate by using a class called CAValueFunction.
CAValueFunction is used to convert the simple floating-point value that we assign to the virtual transform.rotation property into the actual CATransform3D matrix value that is needed to position the layer. You can change the value function used by a givenCAPropertyAnimation by setting its valueFunction property. The function you specify will override the default.
CAValueFunction seems like it could be a useful mechanism for animating properties that cannot naturally be summed together or interpolated (such as transform matrices), but because the implementation details of CAValueFunction are private, it’s not currently possible to subclass it to create new value functions. You can only use the functions that Apple already make available as constants (which currently all relate to the transform matrix’s virtual properties and are therefore somewhat redundant since the default actions for those properties already use the appropriate value functions).
Animation Groups
Although CABasicAnimation and CAKeyframeAnimation only target individual properties, multiple such animations can be gathered together using a CAAnimationGroup. CAAnimationGroup is another concrete subclass of CAAnimation that adds an animations array property, to be used for grouping other animations. Let’s test this out by grouping the keyframe animation in Listing 8.6 together with another basic animation that adjusts the layer background color (see Listing 8.10). Figure 8.3 shows the result.
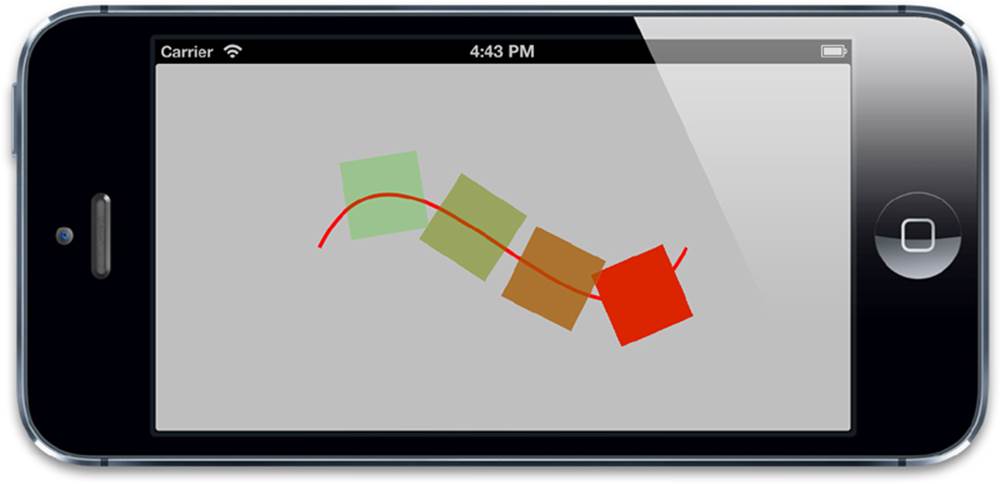
Figure 8.3 A grouped keyframe path and basic color property animation
Adding an animation group to a layer is not fundamentally different from adding the animations individually, so it’s not immediately clear when or why you would use this class. It provides some convenience in terms of being able to collectively set animation durations, or add and remove multiple animations from a layer with a single command, but it’s usefulness only really becomes apparent when it comes to hierarchical timing, which is explained in Chapter 9.
Listing 8.10 Grouping a Keyframe and Basic Animation Together
- (void)viewDidLoad
{
[super viewDidLoad];
//create a path
UIBezierPath *bezierPath = [[UIBezierPath alloc] init];
[bezierPath moveToPoint:CGPointMake(0, 150)];
[bezierPath addCurveToPoint:CGPointMake(300, 150)
controlPoint1:CGPointMake(75, 0)
controlPoint2:CGPointMake(225, 300)];
//draw the path using a CAShapeLayer
CAShapeLayer *pathLayer = [CAShapeLayer layer];
pathLayer.path = bezierPath.CGPath;
pathLayer.fillColor = [UIColor clearColor].CGColor;
pathLayer.strokeColor = [UIColor redColor].CGColor;
pathLayer.lineWidth = 3.0f;
[self.containerView.layer addSublayer:pathLayer];
//add a colored layer
CALayer *colorLayer = [CALayer layer];
colorLayer.frame = CGRectMake(0, 0, 64, 64);
colorLayer.position = CGPointMake(0, 150);
colorLayer.backgroundColor = [UIColor greenColor].CGColor;
[self.containerView.layer addSublayer:colorLayer];
//create the position animation
CAKeyframeAnimation *animation1 = [CAKeyframeAnimation animation];
animation1.keyPath = @"position";
animation1.path = bezierPath.CGPath;
animation1.rotationMode = kCAAnimationRotateAuto;
//create the color animation
CABasicAnimation *animation2 = [CABasicAnimation animation];
animation2.keyPath = @"backgroundColor";
animation2.toValue = (__bridge id)[UIColor redColor].CGColor;
//create group animation
CAAnimationGroup *groupAnimation = [CAAnimationGroup animation];
groupAnimation.animations = @[animation1, animation2];
groupAnimation.duration = 4.0;
//add the animation to the color layer
[colorLayer addAnimation:groupAnimation forKey:nil];
}
Transitions
Sometimes with iOS applications it is necessary to make layout changes that are very difficult to animate using property animations. You might need to swap some text or an image, for example, or replace a whole grid or table of views at once. Property animations only work on animatable properties of a layer, so if you need to change a nonanimatable property (such as an image) or actually add and remove layers from the hierarchy, property animations won’t work.
This is where transitions come in. A transition animation does not try to smoothly interpolate between two values like a property animation; instead it is designed as a sort of distraction tactic—to cover up content changes with an animation. Transitions affect an entire layer instead of just a specific property. The transition takes a snapshot of the old layer appearance and then animates in the new appearance in a single sweep.
To create a transition, we use CATransition, another subclass of CAAnimation. In addition to all the timing functions and so on that it inherits from CAAnimation, CATransition has a type and a subtype that are used to specify the transition effect. The type property is anNSString and can be set to one of the following constant values:
kCATransitionFade
kCATransitionMoveIn
kCATransitionPush
kCATransitionReveal
You are currently limited to these four basic CATransition types, but there are some ways that you can achieve additional transition effects, as covered later in the chapter.
The default transition type is kCATransitionFade, which creates a smooth crossfade between the previous layer appearance and the new appearance after you have modified its properties or contents.
We made use of the kCATransitionPush type in the custom action example in Chapter 7; this slides the new layer appearance in from the side, pushing the old one out of the opposite side.
kCATransitionMoveIn and kCATransitionReveal are similar to kCATransitionPush; they both implement a directional swipe animation, but with subtle differences; kCATransitionMoveIn moves the new layer appearance in over the top of the previous appearance, but doesn’t push it out to the side like the push transition, and kCATransitionReveal slides the old appearance out to reveal the new one instead of sliding the new one in.
The latter three standard transition types are inherently directional in nature. By default, they slide from the left, but you can control their direction using the subtype property, which accepts one of the following constants:
kCATransitionFromRight
kCATransitionFromLeft
kCATransitionFromTop
kCATransitionFromBottom
A simple example of using CATransition to animate a nonanimatable property is shown in Listing 8.11. Here we are changing the image property of a UIImage, which cannot normally be animated using either implicit animation or a CAPropertyAnimation because Core Animation doesn’t know how to interpolate between images. By using a crossfade transition applied to the layer, however, we make it possible to smoothly animate the change regardless of the content type (see Figure 8.4). Try changing the transition type constant to see the other possible effects.
Listing 8.11 Animating a UIImageView Using CATransition
@interface ViewController ()
@property (nonatomic, weak) IBOutlet UIImageView *imageView;
@property (nonatomic, copy) NSArray *images;
@end
@implementation ViewController
- (void)viewDidLoad
{
[super viewDidLoad];
//set up images
self.images = @[[UIImage imageNamed:@"Anchor.png"],
[UIImage imageNamed:@"Cone.png"],
[UIImage imageNamed:@"Igloo.png"],
[UIImage imageNamed:@"Spaceship.png"]];
}
- (IBAction)switchImage
{
//set up crossfade transition
CATransition *transition = [CATransition animation];
transition.type = kCATransitionFade;
//apply transition to imageview backing layer
[self.imageView.layer addAnimation:transition forKey:nil];
//cycle to next image
UIImage *currentImage = self.imageView.image;
NSUInteger index = [self.images indexOfObject:currentImage];
index = (index + 1) % [self.images count];
self.imageView.image = self.images[index];
}
@end
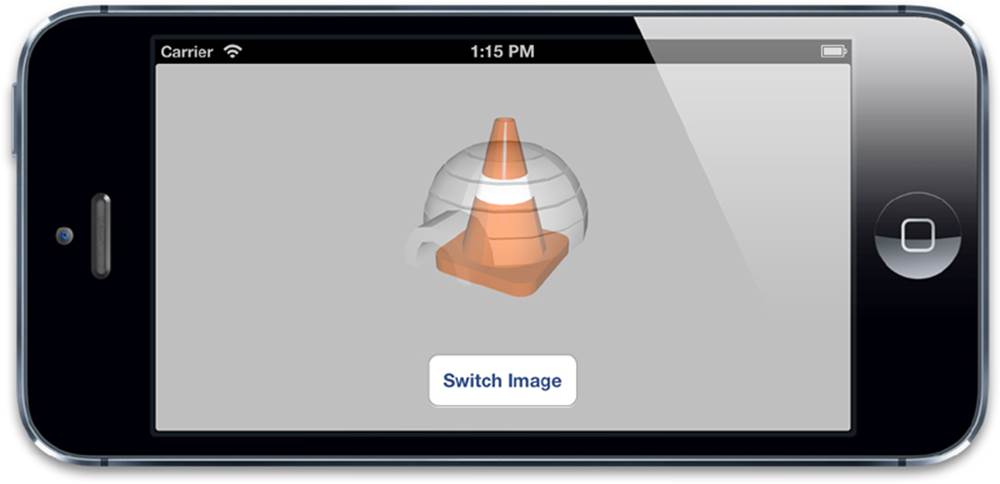
Figure 8.4 Smoothly crossfading between images using CATransition
As you can see from the code, transitions are added to a layer in the same way as property or group animations, using the -addAnimation:forKey: method. Unlike property animations, though, only one CATransition can operate on a given layer at a time. For this reason, regardless of what value you specify for the key, the transition will actually be attached with a key of "transition", which is represented by the constant kCATransition.
Implicit Transitions
The fact that CATransition can smoothly cover any changes made to a layer makes it an ideal candidate for use as a layer action for properties that are otherwise hard to animate. Apple realizes this, of course, and CATransition is used as the default action when setting the CALayer contents property. This is disabled for view backing layers along with all other implicit animation actions, but for layers that you create yourself, this means that changes to the layer contents image are automatically animated with a crossfade.
We used a CATransition as a layer action in Chapter 7 to animate changes to our layer’s background color. The backgroundColor property can be animated using a normal CAPropertyAnimation but that doesn’t mean you can’t use a CATransition instead.
Animating Layer Tree Changes
The fact that CATransition does not operate on specific layer properties means that you can use it to animate layer changes even when you do not know exactly what has changed. You can, for example, smoothly cover the reloading of a complex UITableView with a crossfade without needing to know which rows have been added and removed, or transition between two different UIViewController instances without needing to know anything about their internal view hierarchies.
Both of these cases are different from anything we’ve tried so far because they involve animating not only changes to a layer’s properties but actual layer tree changes—we need to physically add and remove layers from the hierarchy during the course of the animation.
The trick in this case is to ensure that the layer the CATransition is attached to will not itself be removed from the tree during the transition, because then the CATransition will be removed along with it. Generally, you just need to attach the transition to the superlayer of the layers that are affected.
In Listing 8.12, we show how you can implement a crossfade transition between tabs in a UITabBarController. Here we have simply taken the default Tabbed Application project template and used the -tabBarController:didSelectViewController: method of theUITabBarControllerDelegate to apply the transition animation. We’ve attached the transition to the UITabBarController view’s layer because that doesn’t get replaced when the tabs themselves are swapped.
Listing 8.12 Animating a UITabBarController
#import "AppDelegate.h"
#import "FirstViewController.h"
#import "SecondViewController.h"
#import <QuartzCore/QuartzCore.h>
@implementation AppDelegate
- (BOOL)application:(UIApplication *)application didFinishLaunchingWithOptions:(NSDictionary *)launchOptions
{
self.window = [[UIWindow alloc] initWithFrame:
[[UIScreen mainScreen] bounds]];
UIViewController *viewController1 = [[FirstViewController alloc] init];
UIViewController *viewController2 = [[SecondViewController alloc] init];
self.tabBarController = [[UITabBarController alloc] init];
self.tabBarController.viewControllers = @[viewController1,
viewController2];
self.tabBarController.delegate = self;
self.window.rootViewController = self.tabBarController;
[self.window makeKeyAndVisible];
return YES;
}
- (void)tabBarController:(UITabBarController *)tabBarController
didSelectViewController:(UIViewController *)viewController
{
//set up crossfade transition
CATransition *transition = [CATransition animation];
transition.type = kCATransitionFade;
//apply transition to tab bar controller's view
[self.tabBarController.view.layer addAnimation:transition forKey:nil];
}
@end
Custom Transitions
We’ve established that transitions are a powerful way to animate properties that would otherwise be difficult to change smoothly. But the list of animation types for CATransition seems a bit limited.
What’s even stranger is that Apple exposes Core Animation’s transition feature via the UIView +transitionFromView:toView:duration:options:completion: and +transitionWithView:duration:options:animations: methods, but the transition options available are completely different to the constants made available via the CATransition type property. The constants that can be specified for the UIView transition method options parameter are as follows:
UIViewAnimationOptionTransitionFlipFromLeft
UIViewAnimationOptionTransitionFlipFromRight
UIViewAnimationOptionTransitionCurlUp
UIViewAnimationOptionTransitionCurlDown
UIViewAnimationOptionTransitionCrossDissolve
UIViewAnimationOptionTransitionFlipFromTop
UIViewAnimationOptionTransitionFlipFromBottom
With the exception of UIViewAnimationOptionTransitionCrossDissolve, none of these transitions correspond to the CATransition types. You can test these alternative transitions by using a modified version of our earlier transition example (see Listing 8.13).
Listing 8.13 Alternative Transition Implementation Using UIKit Methods
@interface ViewController ()
@property (nonatomic, weak) IBOutlet UIImageView *imageView;
@property (nonatomic, copy) NSArray *images;
@end
@implementation ViewController
- (void)viewDidLoad
{
[super viewDidLoad];
//set up images
self.images = @[[UIImage imageNamed:@"Anchor.png"],
[UIImage imageNamed:@"Cone.png"],
[UIImage imageNamed:@"Igloo.png"],
[UIImage imageNamed:@"Spaceship.png"]];
}
- (IBAction)switchImage
{
[UIView transitionWithView:self.imageView
duration:1.0
options:UIViewAnimationOptionTransitionFlipFromLeft
animations:^{
//cycle to next image
UIImage *currentImage = self.imageView.image;
NSUInteger index = [self.images indexOfObject:currentImage];
index = (index + 1) % [self.images count];
self.imageView.image = self.images[index];
} completion:NULL];
}
@end
The documentation in some places seems to imply that since iOS 5 (which introduced the Core Image framework), it might be possible to use CIFilter in conjunction with the filter property of CATransition to create additional transition types. As of iOS 6, however, this still does not work. Attempting to use Core Image filters with CATransition has no effect. (This is supported on Mac OS, which probably accounts for the documentation discrepancies.)
For this reason, you are forced to choose between using a CATransition or the UIView transition method, depending on the effect you want. Hopefully, a future version of iOS will add support for Core Image transition filters and so make the full range of Core Image transition animations available via CATransition (and maybe even add the ability to create new ones).
That doesn’t mean that it’s impossible to achieve custom transition effects on iOS, though. It just means that you have to do a bit of extra work. As mentioned earlier, the basic principle of a transition animation is that you take a snapshot of the current state of the layer and then apply an animation to that snapshot while you change the layer behind the scenes. If we can figure out how to take a snapshot of our layer, we can perform the animation ourselves using ordinary property animations without using CATransition or UIKit’s transition methods at all.
As it turns out, taking a snapshot of a layer is relatively easy. CALayer has a -renderInContext: method that can be used to capture an image of its current contents by drawing it into a Core Graphics context, which can then be displayed in another view. If we place this snapshot view in front of the original, it will mask any changes we make to the real view’s contents, allowing us to re-create the effect of a simple transition.
Listing 8.14 demonstrates a basic implementation of this idea: We take a snapshot of the current view state and then spin and fade out the snapshot while we change the background color of the original view. Figure 8.5 shows our custom transition in progress.
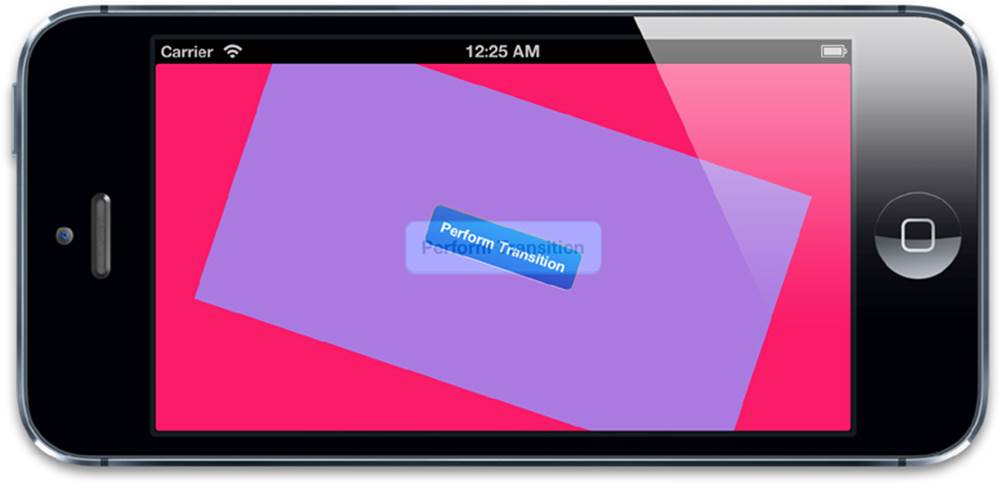
Figure 8.5 A custom transition implemented using renderInContext:
To keep things simple, we’ve performed the animation using the UIView -animateWithDuration:completion: method. Although it would be possible to perform the exact same effect using CABasicAnimation, we would have to set up separate animations for the layer transform and opacity properties and implement the CAAnimationDelegate to remove coverView from the screen once the animation has completed.
Listing 8.14 Creating a Custom Transition Using renderInContext:
@implementation ViewController
- (IBAction)performTransition
{
//preserve the current view snapshot
UIGraphicsBeginImageContextWithOptions(self.view.bounds.size, YES, 0.0);
[self.view.layer renderInContext:UIGraphicsGetCurrentContext()];
UIImage *coverImage = UIGraphicsGetImageFromCurrentImageContext();
//insert snapshot view in front of this one
UIView *coverView = [[UIImageView alloc] initWithImage:coverImage];
coverView.frame = self.view.bounds;
[self.view addSubview:coverView];
//update the view (we'll simply randomize the layer background color)
CGFloat red = arc4random() / (CGFloat)INT_MAX;
CGFloat green = arc4random() / (CGFloat)INT_MAX;
CGFloat blue = arc4random() / (CGFloat)INT_MAX;
self.view.backgroundColor = [UIColor colorWithRed:red
green:green
blue:blue
alpha:1.0];
//perform animation (anything you like)
[UIView animateWithDuration:1.0 animations:^{
//scale, rotate and fade the view
CGAffineTransform transform = CGAffineTransformMakeScale(0.01, 0.01);
transform = CGAffineTransformRotate(transform, M_PI_2);
coverView.transform = transform;
coverView.alpha = 0.0;
} completion:^(BOOL finished){
//remove the cover view now we're finished with it
[coverView removeFromSuperview];
}];
}
@end
There is a caveat to this approach: The -renderInContext: method captures the layer’s backing image and sublayers, but does not correctly handle transforms applied to those sublayers, and doesn’t work with video or OpenGL content. CATransition doesn’t seem to be affected by this limitation, so is presumably using a private method to capture the snapshot.
Canceling an Animation in Progress
As mentioned earlier in this chapter, you can use the key parameter of the -addAnimation:forKey: method to retrieve an animation after it has been added to a layer by using the following method:
- (CAAnimation *)animationForKey:(NSString *)key;
Modifying animations once they are in progress is not supported, so the primary uses of this are to check what the animation properties are or to detect whether a particular animation is attached to the layer.
To terminate a specific animation, you can remove it from the layer using the following method:
- (void)removeAnimationForKey:(NSString *)key;
Or you can just remove all animations using this method:
- (void)removeAllAnimations;
As soon as an animation is removed, the layer appearance updates to match its current model value. Animations are removed automatically when they finish unless you specify that they shouldn’t by setting the removedOnCompletion property of the animation to NO. If you set the animation to not be removed automatically, it is important to remove it yourself when it is no longer needed; otherwise, it will stay in memory until the layer itself is eventually destroyed.
Let’s extend our rotating ship example once again with buttons to stop and start the animation. This time, we provide a non-nil value for our animation key so that we can remove it later. The flag argument in the -animationDidStop:finished: method indicates whether the animation finished naturally or was interrupted, which we log in the console. If you terminate the animation using the stop button, it will log NO, but if you allow it to complete, it will log YES.
See Listing 8.15 for the updated example code. Figure 8.6 shows it in action.
Listing 8.15 Starting and Stopping an Animation
@interface ViewController ()
@property (nonatomic, weak) IBOutlet UIView *containerView;
@property (nonatomic, strong) CALayer *shipLayer;
@end
@implementation ViewController
- (void)viewDidLoad
{
[super viewDidLoad];
//add the ship
self.shipLayer = [CALayer layer];
self.shipLayer.frame = CGRectMake(0, 0, 128, 128);
self.shipLayer.position = CGPointMake(150, 150);
self.shipLayer.contents = (__bridge id)[UIImage imageNamed:
@"Ship.png"].CGImage;
[self.containerView.layer addSublayer:self.shipLayer];
}
- (IBAction)start
{
//animate the ship rotation
CABasicAnimation *animation = [CABasicAnimation animation];
animation.keyPath = @"transform.rotation";
animation.duration = 2.0;
animation.byValue = @(M_PI * 2);
animation.delegate = self;
[self.shipLayer addAnimation:animation forKey:@"rotateAnimation"];
}
- (IBAction)stop
{
[self.shipLayer removeAnimationForKey:@"rotateAnimation"];
}
- (void)animationDidStop:(CAAnimation *)anim finished:(BOOL)flag
{
//log that the animation stopped
NSLog(@"The animation stopped (finished: %@)", flag? @"YES": @"NO");
}
@end
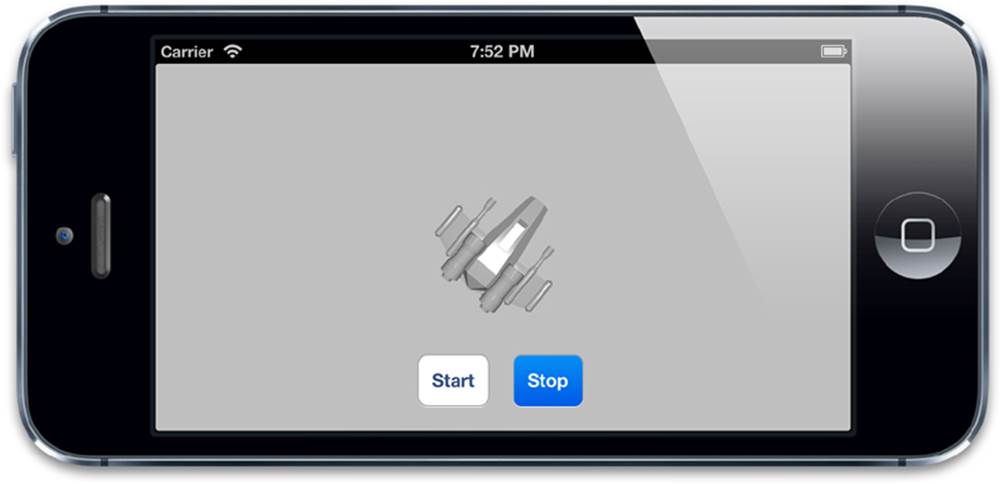
Figure 8.6 A rotation animation controlled by start and stop buttons
Summary
In this chapter, we covered property animations (which allow you to exert very specific control over the animation of individual layer properties), animation groups (which allow you to combine multiple property animations into a single unit), and transitions (which affect an entire layer and can be used to animate any sort of change to the layer’s contents, including the addition and removal of sublayers).
In Chapter 9, we study the CAMediaTiming protocol and discover how Core Animation deals with the passage of time.
All materials on the site are licensed Creative Commons Attribution-Sharealike 3.0 Unported CC BY-SA 3.0 & GNU Free Documentation License (GFDL)
If you are the copyright holder of any material contained on our site and intend to remove it, please contact our site administrator for approval.
© 2016-2025 All site design rights belong to S.Y.A.