iPad All-in-One For Dummies, 7th Edition (2015)
Book IV. Getting Productive with iWork
 Visit www.dummies.com/extras/ipadaio for great tips for using iWork apps to get things done.
In this book…
· Explore the iWork for iOS apps
· Share your work on iCloud
· Create documents with Pages
· Crunch numbers with Numbers
· Create power presentations with Keynote
Chapter 1. Introducing the iWork for iOS Apps for iPad
In This Chapter
![]() Getting familiar with the iWork for iOS apps
Getting familiar with the iWork for iOS apps
![]() Using an iWork app with iCloud
Using an iWork app with iCloud
![]() Discovering the basics of the iWork apps
Discovering the basics of the iWork apps
![]() Improving documents by adding photos and images
Improving documents by adding photos and images
![]() Managing your iWork documents
Managing your iWork documents
Word-processing and spreadsheet applications are among the most widely used software products; presentation software is not far behind, along with programs such as graphics and database editors. Having started from scratch on the hardware side and then the operating-system side, Apple employees started dreaming about what they could do if they were to start from scratch to write modern versions of word-processing, spreadsheet, and presentation programs. They knew they’d have to follow one of their advertising campaign themes: Think Different.
The result was the iWork suite of applications (a collection of applications that can work together) for the Mac — Keynote, Pages, and Numbers — that were developed one by one over a period of several years.
Today, iWork is a terrific suite of programs that have become a trio of dynamite apps for iPad and iPhone, and all the apps are now free when you buy a new iOS device.
In addition, Apple introduced iWork for iCloud in 2013, so you can work in very similar software interfaces online using your browser. All documents you create in these versions of iWork apps are stored both in iCloud and on your devices. (For more about iWork for iCloud, go towww.apple.com/iWork-for-iCloud).
 In this chapter, the focus is on the three iWork for iOS apps, including how to use their common interface elements. You also find a summary of differences between iWork for iPad and iWork for Mac in those cases where it matters.
Presenting the iWork for iOS Apps
iWork provides applications that are office oriented — so-called productivity applications. The iWork office suite includes three apps that are similar to Microsoft Office applications (but way cooler, I think):
· Pages: A word-processing and page-layout application (similar to Microsoft Word)
· Numbers: A spreadsheet application (similar to Microsoft Excel)
· Keynote: A presentation application (similar to Microsoft PowerPoint)
All three apps are optimized for those iPad models with a brilliant Retina display, plus they have some new templates that you can base your presentation on.
 Each program that you download from the App Store on a new iOS device is free. iCloud automatically migrates the apps and documents you create with these programs to any other Apple devices running iOS. (See Book I, Chapter 5, for more information.)
In the following sections, you take a quick look at these three iWork for iOS apps, all of which have been upgraded with the release of iOS 8.
Pages
For many people, word processing is the core of an office suite. In fact, many people don’t get beyond it. Pages for Mac adds a big desktop publishing plus to word processing in that it also allows you to create page layout documents. These have the type of structure that you see in newspapers and magazines — articles don’t just flow one after the other. Instead, an article on Page 1 may be continued on Page 4, and another article on the first page may be continued on Page 8. Also, objects such as photos can be anchored to associated text, or placed in specific positions on a page, and they don’t move as the text around them is added or deleted.
iWork provides you with a variety of sophisticated tools to create your Pages documents. These include advanced font handling, color, tables, and charts, as well as the ability to place QuickTime movies and hypertext links in your Pages documents. iWork applications also provide a variety of template options for your documents. Figure 1-1 shows some of the templates available with Pages for iOS.
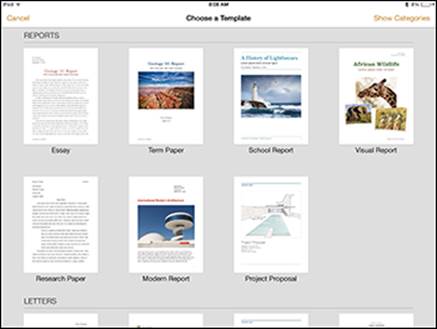
Figure 1-1: Choose a Pages template as a starting point.
For more on the Pages app, see Chapter 2 in this minibook.
Numbers
As with all spreadsheet programs, Numbers enables you to enter data in rows and columns. One of the most useful features of spreadsheets is that they perform calculations by means of formulas. For example, if you have a column listing your grocery expenditures by week, the addition of another grocery bill will cause the program to recalculate the column’s total. Spreadsheets are about data (usually numbers) and fast calculation updates, but they can also help you organize data such as address lists and even generate charts to show data trends.
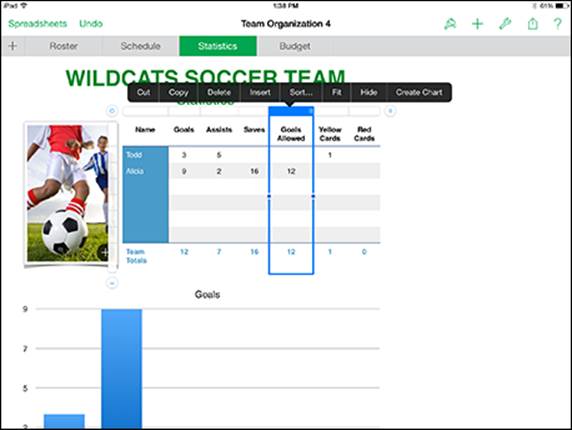
Spreadsheets can go beyond the common grid interface, and Numbers excels at this approach. Take a look at the Numbers document shown in Figure 1-2, which is based on the Travel Planner template.
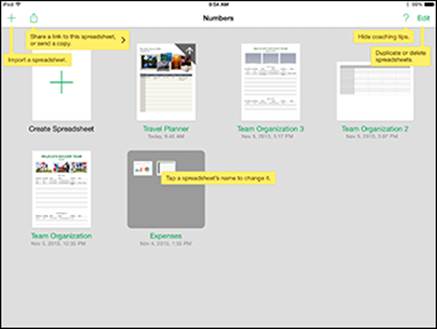
Figure 1-2: A highly visual Numbers spreadsheet.
A single document can have a number of sheets (like sheets in a Microsoft Excel workbook). On the iPad, sheets appear as tabs, as shown in Figure 1-2.
A Numbers sheet can contain a variety of objects such as tables and charts, but it can also contain other iWork objects, such as graphics, text boxes, movies, and audio. In Figure 1-2, the sheet is shown with a table and five pictures above it.
For more on the Numbers app, see Chapter 3 in this minibook.
Keynote
Call them lectures, classes, sermons, dog-and-pony shows, or sales pitches, but presentations are all much the same: Someone stands in front of a large or small group of people and explains, teaches, inspires, entertains, or persuades them. In some cases, a presentation can run on its own or be run by the viewer in person or online.
Today, a presentation often includes multimedia elements: slides of buildings in an architecture class; slides with music in a presentation about your community theater’s latest musical production; movies of good times on the beach in a talk about Uncle Charlie’s summer vacation.
Keynote was the original iWork application. Built by Apple engineers for Macworld and Worldwide Developers Conference keynote speeches delivered by Steve Jobs, Keynote has been refined over the years to become the powerful tool it is today. (See Figure 1-3.)
For more on the Keynote app, see Chapter 4 in this minibook.
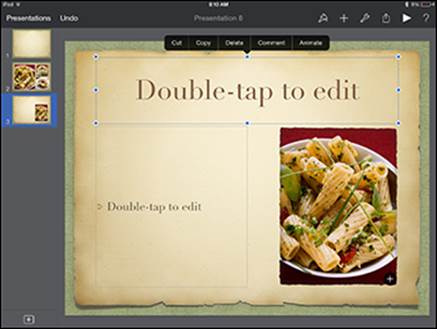
Figure 1-3: Editing a Keynote presentation.
Starting Out with an iWork App
The first time you run an iWork app, you’re greeted by a Welcome screen. The next time you open an app, you find yourself exactly where you were the last time you left it. Each iWork app has its own graphic. The first-time Welcome screen for Numbers is shown in Figure 1-4.
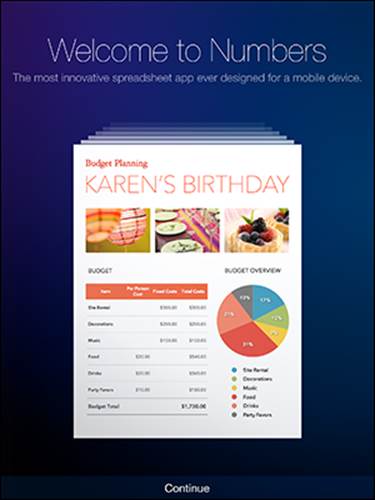
Figure 1-4: Numbers is launched for the first time on an iCloud-enabled iPad.
Tap Continue, and you’re taken to a screen showing Numbers templates with callouts to some of the tools available, as shown in Figure 1-5.
Getting Familiar with the iWork Interface
You’ll find that each of the iWork apps has a similar look and feel. One of the coolest advantages of iWork is that major features — not just small operations such as changing a font or selecting a color — are available using the same method in all its apps. You have only one set of features that you must understand when you’re using iWork, so I give you an overview of all that common functionality here to get you started.
The iWork apps (like all apps) are updated periodically. If an update is available, you see the App Store on your iPad Home screen with a number indicating that downloads are available. Updating your iWork apps when updates are available is generally a good idea so that their interfaces remain in sync.
Recent updates have included the addition of more 3D charts in Numbers, new animations and new transitions for Keynote, new templates, the ability to share view-only docs, and the ability to search for docs by name.
Creating a new document
You create a new document in the same way for each iWork app. Follow these steps:
1. Tap any of the iWork app icons to launch the application.
The Documents screen appears. This screen is titled Pages in the Pages app (see Figure 1-5), Spreadsheets in Numbers, and Presentations in Keynote.
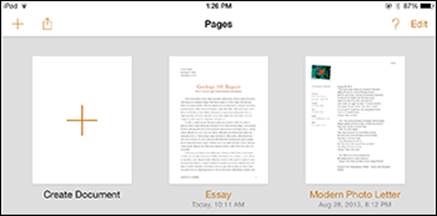
Figure 1-5: Create a new document from the Documents screen.
Note that when you first open an iWork app, you see a single document that contains basic information and instructions for that app. After that, when you create and save any documents, they will also display on the Documents screen.
If you see Documents on the button in the top-left corner while in Pages, you’re not on the Documents screen; you’re on the screen for working with an individual document, and tapping Documents (or Spreadsheets in Numbers or Presentations in Keynote) brings you back to the Documents screen.
2. Tap the plus sign (+) in the square titled Create Document at the top left of the Documents screen.
Templates are displayed in categories. The Basic template options (see Figure 1-6) will vary depending on which app you’re using. In Pages, for example, you can create a new Blank document, a Blank Landscape document, or a Note Taking document. You can also scroll down and tap another document template on which to base your new document, such as Modern Report or Project Proposal.
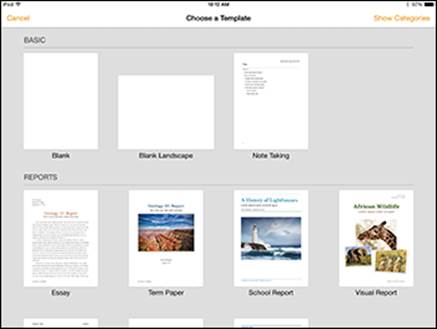
Figure 1-6: Select a template.
3. Tap the template you want to use as a starting point, or tap Blank (Pages and Numbers) or Black or White (Keynote) to start working with a completely clean document.
If you decide not to create a document right now, you can tap Cancel on the Templates screen and return to the Documents screen.
The templates are different for each of the iWork apps, so I discuss them in the appropriate chapters in this minibook.
Your new document opens on the screen.
Locating a document
Before long, you’ll have created several documents, and chances are good that you’ll want to go back and work on some of them, print them, or share them via iCloud, AirDrop, Mail, or Message. As with creating new documents, locating a document is done the same way in each of the iWork apps.
To locate a document, follow these steps:
1. Tap any of the iWork app icons to launch the application.
The Documents window appears. After you’ve created several documents, that screen looks like Figure 1-7.
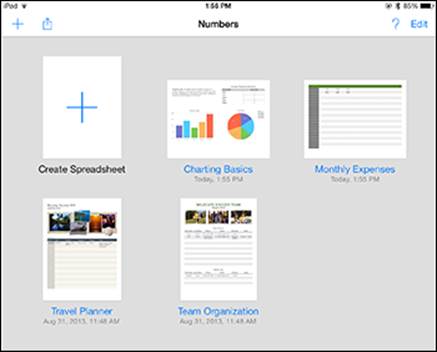
Figure 1-7: Gradually, your Documents window fills up.
2. View the documents and find the one you want to work with.
Below each document, you see its title and the date you last worked on it.
3. Tap the document you want to work with.
The document opens, and you can begin working in it.
Identifying other common iWork features
You’ve already seen the major iWork controls in Figures 4-2 and 4-3. In the following sections, you look at each one more closely.
Using popovers and dialogs
An important interface element in the Pages document shown in Figure 1-8 is the popover. Common to all iWork apps, the popover is essentially a menu. Like a menu, it goes away when you tap elsewhere. A dialog, on the other hand, offers settings and choices and you have to close it to get it off the screen.
This list describes three actions you can take with a popover:
· Recognize the purpose of the popover. Each popover includes an arrow that points to the object that opened it.
· Dismiss the popover. If you want to dismiss the popover (the equivalent of the Close or Cancel button on a dialog on your Mac or PC), tap anywhere outside the popover.
· Make a selection on the popover. When you tap a choice in a popover, it’s carried out and the popover closes automatically.
Working with the Documents toolbar
Also visible in Figure 1-7 and most other figures in this chapter is the toolbar, which runs along the top of the screen. On a Documents screen, the toolbar displays the name of the app in the center, the Help and Edit buttons at the right, and the plus sign (+) and Share buttons at the left.
Tap Edit, and your document icons start to jiggle — just as the icons do on the Home screen of your iPad. (And, just as on the Home screen, tap and hold a document icon and you enter Edit mode automatically.) While the icons are jiggling, you can drag one onto another to create a folder — just as on your iPad Home screen. Tap Done to stop all that jiggling and leave Edit mode.
Tap a folder to open it. The folder expands, as shown in Figure 1-8. From there, you can tap any document to open it.
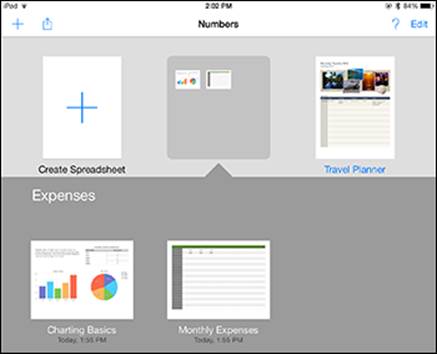
Figure 1-8: You can rename your folders at any time.
Press and hold the folder name, and the name field opens so that you can rename the folder. This press-and-hold method also works with individual document files so that you can rename them.
You can drag a document out of the folder and back to the Documents screen. When you remove the last document from a folder, the folder disappears.
When you’re finished organizing and renaming your folders and documents, tap Done.
If you choose an action such as copying a document, the iWork app automatically ends the jiggle-editing without your having to tap Done.
Working with a toolbar for a single document
When you’re working within a single document, you see a different toolbar, as you can see in Figure 1-9. (This is from Keynote.)
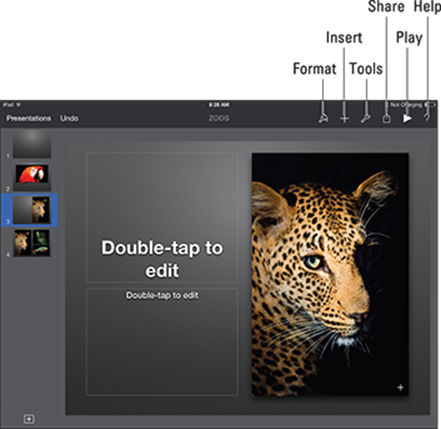
Figure 1-9: Work with a single document’s toolbar in Keynote.
On the far-left side of the toolbar, the Documents button (titled Presentations in Keynote and Spreadsheets in Numbers) lets you see all your documents in Documents view. Next to Documents is the Undo button. (It’s the same as the Edit⇒Undo command that you may have used in OS X for iWork and most other apps.) In the center of the window is the document’s name.
At the right of the iWork toolbar is a group of buttons:
· Format: Provides information and formatting choices about the current selection in the document. From here, you may choose a style, a list format, or a layout (alignment, columns, and line spacing) for a selected paragraph, or modify the style of an image. If nothing is selected, this button is dimmed.
· Insert: Lets you insert images from your photo albums on iPad. If you want to insert a photo into your iWork document, add it to your album by taking the photo or synchronizing it in iTunes. (I tell you more about this button in the next section.)
· Tools: The wrench-shaped button opens a popover containing tools that are based on the document as a whole rather than on the current selection within the document. Figure 1-10 shows the tools for a Pages document.
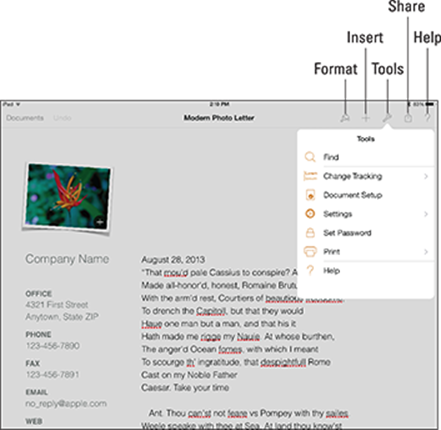
Figure 1-10: Tools for a Pages document.
· Share: Use this popover to share a link to the document via iCloud, to send a copy via Mail or Messages, or to open the document in another app (such as opening a PDF file in Adobe Reader).
· Play: In Keynote only, you tap this button to play the slideshow.
Some menus have disclosure triangles that let you drill down one more level. For example, Figure 1-11 shows the Printer Options menu. Print settings are described in Book V, Chapter 1.
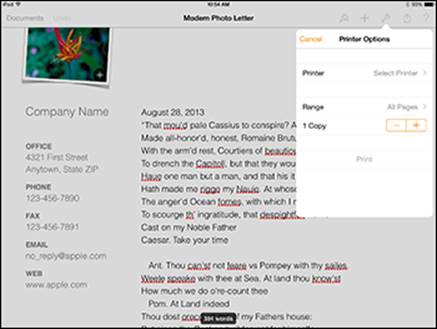
Figure 1-11: Settings for printing documents.
You can use the < button in the popover to return to the tools. The Settings submenu of the Tools menu is shown in Figure 1-12. Note that Word Count has been turned on, which causes the current word count to be displayed at the bottom of the document.
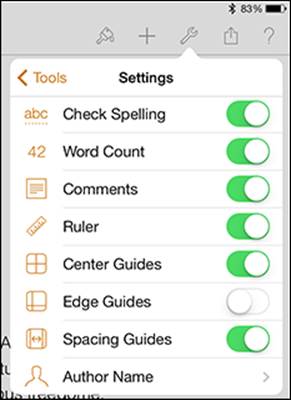
Figure 1-12: Adjusting settings.
The ruler that you may have noticed in Pages is used by its word-processing features. Similar tools at the top of the screen are used in Numbers and Keynote depending on what you’re trying to do. I discuss them in the relevant chapters in this minibook.
Working with Images
One important feature that distinguishes Apple software from many other products is how easily you can use graphics and video in the documents you create. It’s not unusual for you to see Pages templates with photo placeholders in them, and it certainly makes sense that Keynote templates often include photos. In today’s world, you expect images in word-processing documents and presentations. But spreadsheets? Take a look at the Numbers templates to see how the people at Apple are suggesting you rethink your understanding of spreadsheets.
Photos, images, and video can be added — easily and productively — to any iWork for iPad document. You have two ways to do this:
· From the Documents window, tap the Insert button (it looks like a plus sign).
· Select a template that includes a placeholder image.
Using a template with a placeholder image requires one more step than using the Insert button. Here’s how this process works:
1. Create a document based on a template.
Figure 1-13 shows the Harmony template in Keynote.
2. Tap the plus sign (+) in the bottom-left corner of the screen.
A pop-up displaying various types of slide styles appears.
3. Tap a slide style that contains an image.
In the lower-right corner of the image placeholder that appears is an Insert button. Tapping this button allows you to access a dialog from which you can insert another image to replace the placeholder image.
4. Tap the Insert button in the bottom-right corner of the placeholder figure to open a list of your photo albums, as shown in Figure 1-14.
You can browse photos on your iPad as well as albums you have created in iPhoto or other programs such as Photoshop Elements and synchronized to your iPad or from Photo Streams.
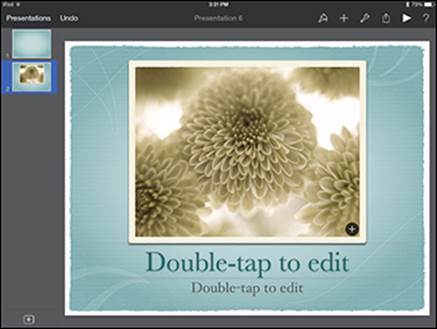
Figure 1-13: Create a document with placeholder images.
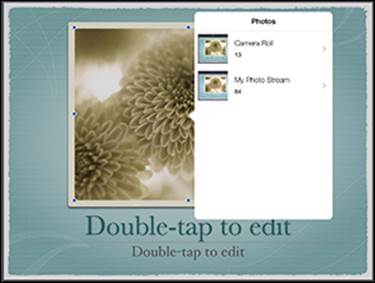
Figure 1-14: Choose a photo.
5. Tap to select the image you want to use instead of the placeholder.
6. Tap and drag the handles around the edges of the image in or out (see Figure 1-15) to adjust the size of the image.
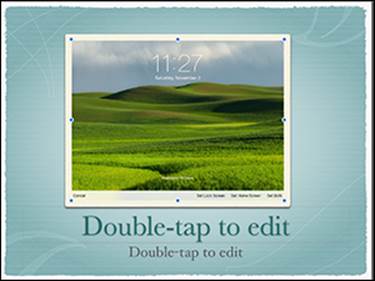
Figure 1-15: Tap an image to reveal resizing handles.
You start with the image the same size as the frame, but if you tap and drag handles in any direction, as you see in Figure 1-16, the image is shown dimly filling more and more of the entire screen. You can use these eight handles on the frame to change its size and shape. This is a hands-on way to handle tasks such as cropping images. Rest assured that the original image file is unchanged by these steps: You’re changing the image’s appearance only within the document.
You can drag the image around so that the part you want is inside the frame.
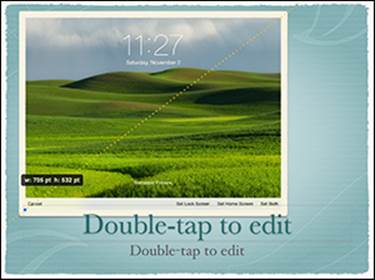
Figure 1-16: Adjust the size of an image
Managing Your iWork Documents
The data for your iWork documents is stored in files on your iPad, possibly on your Mac, and also sometimes on shared WebDAV (Web-based Distributed Authoring and Versioning, used for collaboration and managing of files on the web) servers and, as you will see, on iCloud, if you choose.
You can also take advantage of the fact that iWork documents can by synced across all your devices via iCloud.
Deep down inside the iPad operating system (iOS) are files and folders, but most of the time you manipulate them through apps. When it comes to apps, the files and folders are in a special area reserved only for that app (it’s called a sandbox).
 The storage areas for files on your iPad are kept separate for each app. If you install Pages and then remove it from your iPad, your Pages documents disappear along with the Pages app. Before uninstalling any app from your iPad, make certain that you have backed up any files you’ve created.
Sharing documents
You’ve copied a file from another place onto your iPad, and now it’s time to reverse the process. To share a file you’ve created in iWork on your iPad, follow these steps:
1. From the Documents window, open the document you want to share.
2. Tap the Share button.
As you see in Figure 1-17, the Share popover allows you to Share a Link via iCloud (which allows others to make changes to your document); Send a Copy via AirDrop, Messages, or Mail; or open the document in another format such as PDF and share it in that format.
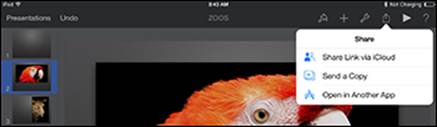
Figure 1-17: Share in a variety of ways.
Moving files with iTunes
You can move files to and from iTunes on your computer with a cable or with a Wi-Fi connection.
You can also use cloud storage programs such as Dropbox to manage files, which is sometimes simpler and avoids certain constraints imposed by Apple-centric iTunes.
Moving files to your computer from your iPad
Each iWork app has its own storage area for your files. You move files from your iPad to your computer using iTunes and these steps:
1. Connect your iPad to the computer where you want to move the files.
Your computer can be a Mac or PC. It must have iTunes installed. If iTunes isn’t installed, see Book I, Chapter 4, and then come back here.
You can also sync between your iPad and your computer using a Wi-Fi connection rather than a cable. On the iTunes Summary screen, select Sync with This iPad over Wi-Fi under Options. If you have that option turned off or do not want to use it, you can connect your iPad to your computer with a cable.
2. When iTunes launches, find your iPad in the Devices section of the Source List and select it by clicking once.
3. Select the Apps tab from the group of tabs running across the top of the pane, as shown in Figure 1-18.
If you’re running iTunes with the OS X Mavericks on a Mac, you won’t see an Info tab to the left of the Apps tab, but you will if you’re running Yosemite.
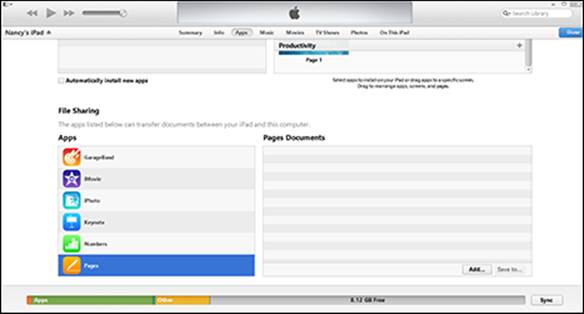
Figure 1-18: Connecting your iPad to iTunes on your Mac or PC.
4. Scroll down to the bottom of the pane and select the iWork app you’re interested in.
The documents on your iPad for that app are shown.
5. Select the document you want and click Save To.
6. Choose the folder and the name you want to use for the saved file.
The file is moved to your computer.
Moving files to your iPad from your computer
The process for moving files from your computer to your iPad is similar to the process described in the preceding section. To copy files from your computer to your iPad, follow these steps:
1. Connect your iPad to the computer from which the files are to be moved.
You can use a cable or a Wi-Fi connection if you have selected that option.
You can use a Mac or PC, but you must have installed iTunes on it.
2. Find your iPad under the Devices section of the Source List and click it.
3. Select the Apps tab from the group of tabs running across the top of the pane.
4. Scroll down to the bottom of the pane and select the iWork app you’re interested in.
The documents on your iPad for that app are listed.
5. Click Add in the lower-right portion of the window.
6. When prompted, select the file on your computer’s hard drive.
When you select a file, it moves to the list of files in iTunes and usually moves immediately to your iPad. If it doesn’t move immediately, click Sync.
In Step 5 in the preceding list, you can also simply drag the document icon from the Finder or Windows File Explorer window into the file list area.
All materials on the site are licensed Creative Commons Attribution-Sharealike 3.0 Unported CC BY-SA 3.0 & GNU Free Documentation License (GFDL)
If you are the copyright holder of any material contained on our site and intend to remove it, please contact our site administrator for approval.
© 2016-2025 All site design rights belong to S.Y.A.