iPad For Seniors For Dummies, 8th Edition (2016)
Part IV. Managing Your Life and Your iPad

 Visit www.dummies.com/extras/ipadforseniors for information about working with Siri commands.
Chapter 16. Keeping On Schedule with Calendar and Clock
Get ready to …
· View Your Calendar
· Add Calendar Events
· Add Events Using Siri
· Create Repeating Events
· Add Alerts
· Search Calendars
· Subscribe to and Share Calendars
· Create a Family Calendar
· Delete an Event
· Display Clock
· Add or Delete a Clock
· Set an Alarm
· Use Stopwatch and Timer
Whether you’re retired or still working, you have a busy life full of activities (even busier if you’re retired, for some unfathomable reason). You may need a way to keep on top of all those activities and appointments. The Calendar app on your iPad is a simple, elegant, electronic daybook that helps you do just that.
In addition to being able to enter events and view them by the day, week, month, or year, you can set up Calendar to send alerts to remind you of your obligations and search for events by keywords. You can even set up repeating events, such as weekly poker games, monthly get-togethers with the girls or guys, or weekly babysitting appointments with your grandchild. To help you coordinate calendars on multiple devices, you can also sync events with other calendar accounts or use iCloud to sync calendars between supported devices. And, by taking advantage of the Family Sharing feature, you can create a Family Calendar that everybody in your family can view and add events to.
Another preinstalled app that will help you stay on time is Clock. Though simple to use, Clock helps you view the time in multiple locations, set alarms, and use a timer.
In this chapter, you master the simple procedures for getting around your calendar, creating a family calendar, entering and editing events, setting up alerts, syncing, and searching. You also learn the simple ins and outs of using Clock.
View Your Calendar
1. Calendar offers several ways to view your schedule. Start by tapping the Calendar app icon on the Home screen to open it; if it’s your first time using Calendar you may be asked whether Calendar can use your Location (tap Allow or Don’t Allow). When you open Calendar, depending on what you last had open, you may see the day calendar or the weekly, monthly, or yearly calendar with today’s date highlighted. You might also see an open event.
2. If today’s calendar page isn’t already displayed, double-tap the Today button at the bottom of the screen. Tap the Search button and you see all saved appointments. The Today view with Search open, shown in Figure 16-1, displays your daily appointments with times listed on the left page and an hourly breakdown of the day on the right page. Tap an event on the list on the left to view more details.
3. Tap the Week button to view all events for the current week, as shown in Figure 16-2. In this view, appointments appear against the times listed along the left side of the screen.
4. Tap the Month button to get an overview of your busy month (see Figure 16-3). In this view, you see the name and timing of each event.
5. Tap the Year button to see all months in the year so you can quickly move to one, as shown in Figure 16-4.
6. In any calendar view, tap the Search button to see List view, which lists all your commitments in a drop-down list on the right side of the page, as shown in Figure 16-5.
7. To move from one month, or year to another, use your finger to scroll up or down the list and tap on an item.
8. To jump back to today, tap the Today button in the bottom-left corner of Calendar.
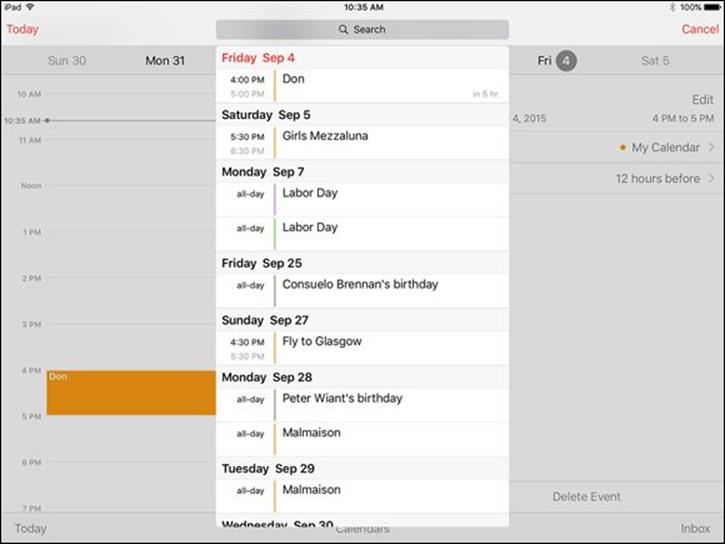
Figure 16-1
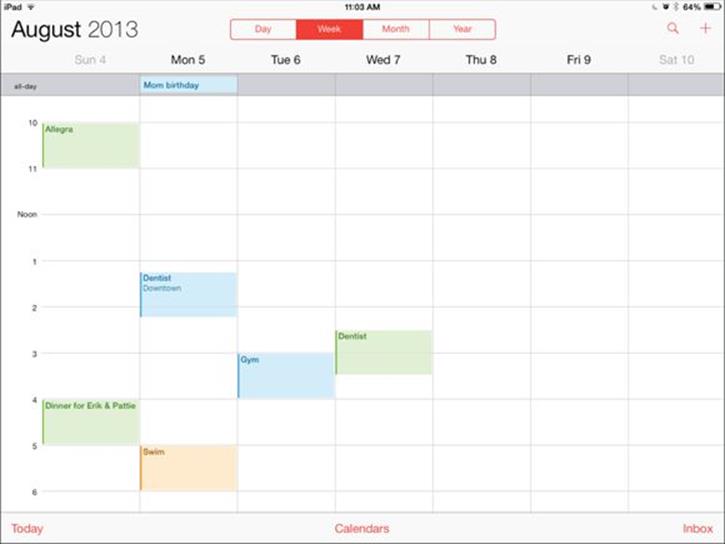
Figure 16-2
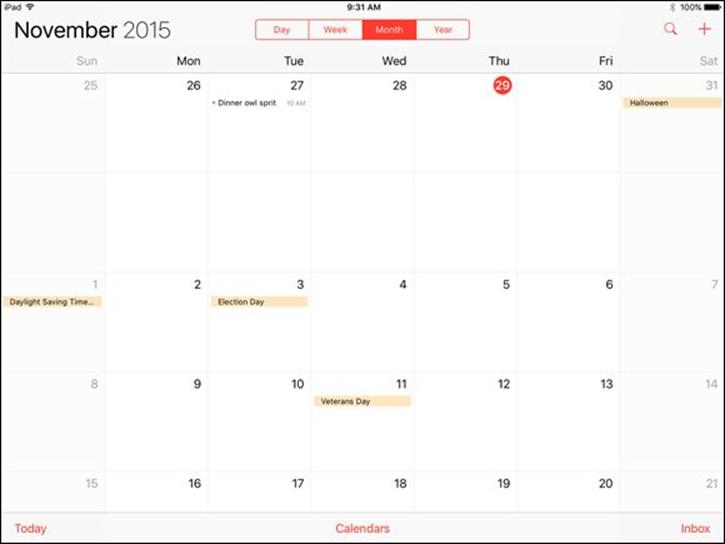
Figure 16-3
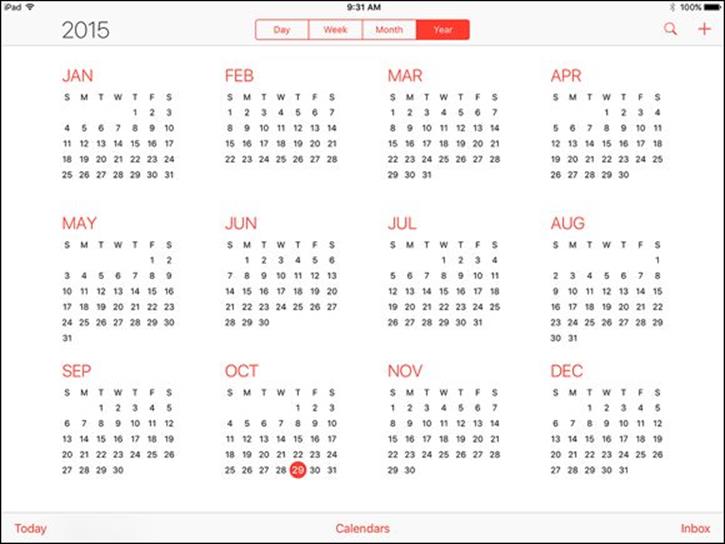
Figure 16-4
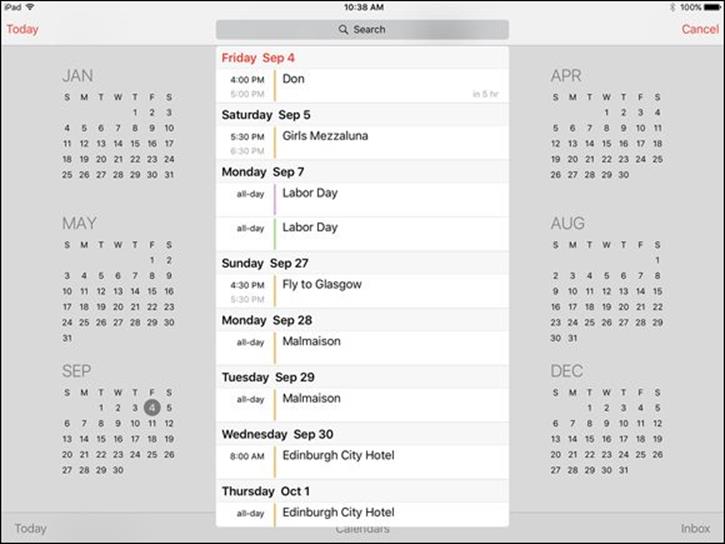
Figure 16-5
 Portrait and landscape orientation of your iPad with the Calendar app gives a slightly different look. Play around with turning your iPad in different directions to see which one you prefer to work in.
Note that you can use information within emails such as a flight number or phone number to add an event to Calendar. To turn on this feature, go to Settings ⇒ Mail, Contacts, Calendars and then turn on the Contacts Found in Mail and Events Found in Mail settings. To view any event that added an event to your calendar, tap Inbox; a list of events displays. Tap Done to return to the calendar.
Add Calendar Events
1. With any view displayed, tap the Add button to add an event. The New Event dialog, shown in Figure 16-6, appears.
2. Enter a title for the event and, if you want, a location.
3. Tap the All-day switch for an all-day event, or tap the Starts or Ends field. The tool for setting a date and time appears, as shown in Figure 16-7.
4. Place your fingertip on the date, hour, minute, or AM/PM column, and move your finger to scroll up or down.
5. If you want to add notes, use your finger to scroll down in the Add Event dialog and tap the Notes field. Type your note and then tap the Add button to save the event.
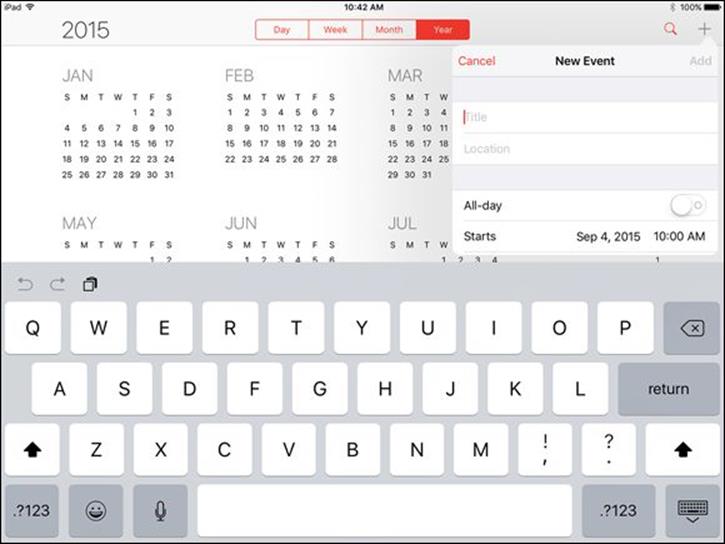
Figure 16-6

Figure 16-7
You can edit any event at any time simply by tapping it in any view of your calendar and then tapping Edit. The Edit dialog appears, offering the same settings as the New Event dialog (refer to Figure 16-6). Tap the Add button to save your changes or Cancel to return to your calendar without saving any changes.
Add Events Using Siri
1. Press and hold the Home button.
2. Say a command, such as “Create Meeting October 3rd at 2:30 p.m.”
3. When Siri asks you whether you’re ready to schedule the event, say “Yes.”
You can schedule an event with Siri in several ways because the feature is pretty flexible. You can say, “Create event,” and Siri asks you first for a date and then for a time. Or you can say, “I have a meeting with John on April 1st,” and Siri may respond by saying “I don’t find a meeting with John on April 1st; shall I create it?” You can say “Yes” to have Siri create it. Play around with this feature and Calendar; it’s a lot of fun!
Create Repeating Events
1. If you want an event to repeat, such as a weekly or monthly appointment, you can set a repeating event. With any view displayed, tap the Add button to add an event. The New Event dialog appears (refer to Figure 16-6).
2. Enter a title and location for the event, and set the start and end dates and times, as shown in the earlier task “Add Calendar Events.”
3. Scroll down the page, if necessary, and tap the Repeat field. The Repeat dialog, shown in Figure 16-8, is displayed.
4. Tap a preset time interval: Every Day, Week, 2 Weeks, Month, or Year. If you want, you can tap Custom and enter a Frequency and Day. For example, you could create an event to happen monthly, but only every three months or daily every three days.
5. Tap New Event to close the Repeat dialog, and then tap Add. You return to the calendar.
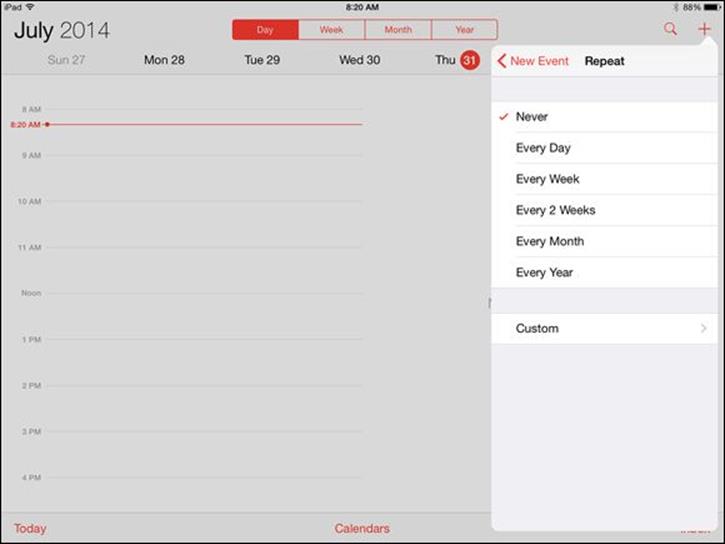
Figure 16-8
Add Alerts
1. If you want your iPad to alert you when an event is coming up, you can use the Alert feature. First, tap the Settings icon on the Home screen, and choose Sounds.
2. Scroll down and tap Calendar Alerts and then tap any Alert Tone, which causes the iPad to play the tone for you.
3. Press the Home button; tap Calendar; and create an event in your calendar or open an existing one for editing, as covered in earlier tasks in this chapter.
4. In the New Event dialog (refer to Figure 16-6) or the Edit dialog, tap the Alert field. The Event Alert dialog appears, as shown in Figure 16-9.
5. Tap any preset interval, from 5 Minutes to 2 Days Before or at the time of the event. Tap New Event or Edit Event to return to the New Event or Edit Event dialog.
6. Tap Add (for a new event) or Done (if you’re editing an existing event) to save the alert.
7. Tap the Day button to display Day view of the date of your event and then tap the event. The alert information is included in that view, as shown in Figure 16-10.
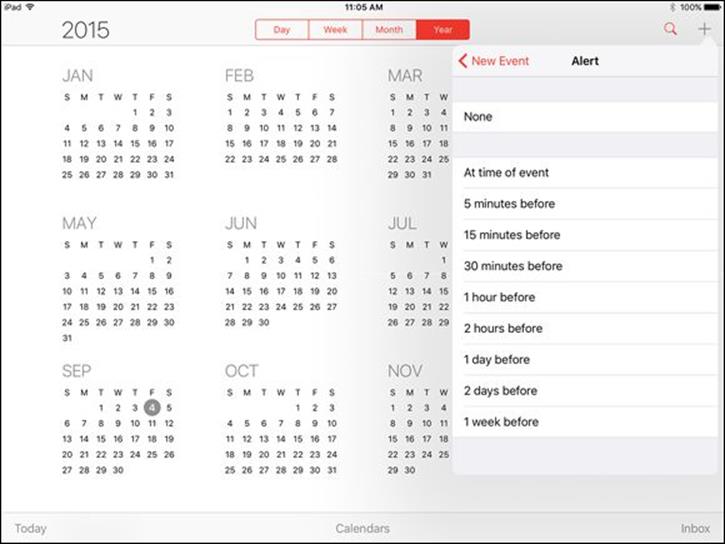
Figure 16-9
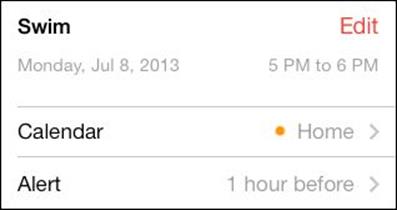
Figure 16-10
Search Calendars
1. With Calendar open in any view, tap the Search button in the top-right corner (refer to Figure 16-5).
2. Tap the Search field (the onscreen keyboard appears), type a word or words to search by, and then tap the Search key. While you type, the Results dialog appears, as shown in Figure 16-11.
3. Tap any result to display it in the view you were in when you started the search. The event details are displayed on the right.
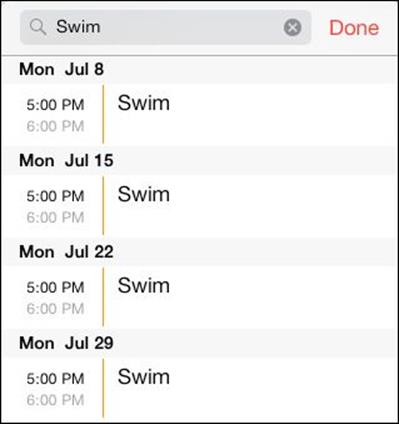
Figure 16-11
Subscribe to and Share Calendars
1. If you use a calendar from an online service such as Yahoo! or Google, you can subscribe to that calendar to read events saved there on your iPad. Note that you can only read, not edit, these events. Tap the Settings icon on the Home screen to get started.
2. Tap the Mail, Contacts, Calendars option on the left.
3. Tap Add Account. The Add Account options, shown in Figure 16-12, appear.
4. Tap an email choice, such as Outlook.com, Gmail, or Yahoo!.
5. In the settings that appear (see Figure 16-13), enter any requested information, such as name, email address, and email account password.
6. Tap Next or Sign In, depending on the type of account. The iPad verifies your address.
7. In the following settings, tap the On/Off switch for the Calendars field. Your iPad retrieves data from your calendar at the interval you’ve set to fetch data. To review these settings, tap the Back arrow in the top-left corner, and then tap the Fetch New Data option in the Mail, Contacts, Calendars pane.
8. In the Fetch New Data pane that appears (see Figure 16-14), be sure that the Push option’s On/Off switch is set to On and then choose the option you prefer for how frequently data is pushed to your iPad: every 15 or 30 minutes, hourly, or manually.
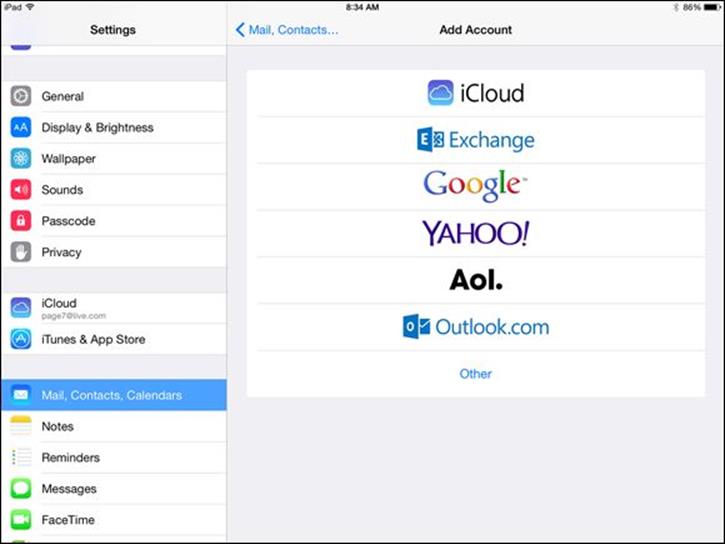
Figure 16-12
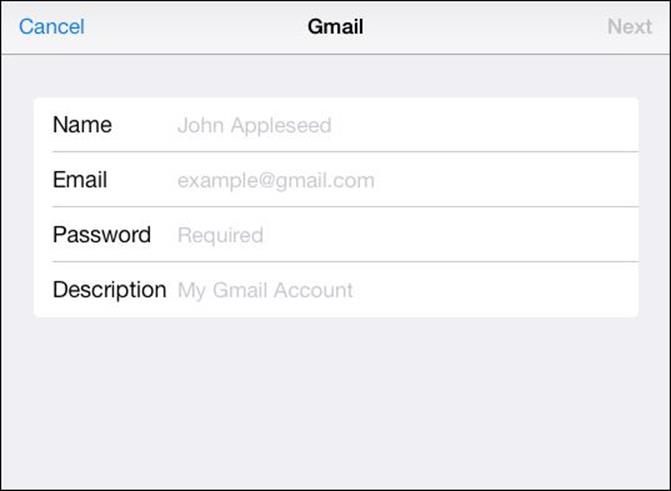
Figure 16-13

Figure 16-14
 If you store your contacts’ birthdays in the Contacts app, the Calendar app displays each one when the day comes around so that you won’t forget to pass on your congratulations … or condolences.
Create a Family Calendar
1. If you set up the Family Sharing feature (see Chapter 8 for how to do this), you create a group calendar that you can use to share family events with up to five other people. After you set up Family Sharing, you have to make sure the Calendar sharing feature is on. On the Home screen, tap Settings.
2. Tap iCloud and check that Family Sharing is set up on the second line (see Figure 16-15). (It will say Family rather than Set Up Family Sharing if it’s been set up.) If it’s not, go to Chapter 8 for step-by-step instructions for setting it up.
3. Tap the On/Off switch for Calendars to turn that choice on if it’s not already on.
4. Tap the Home button and then tap Calendar. Tap Calendars at the bottom of the screen. Scroll down and make sure Family is selected. Tap Done.
5. Now, when you create a new event in the New Event dialog, tap Calendar and choose Family or Show All Calendars. In the details of events is a notation that an event is from the Family calendar.
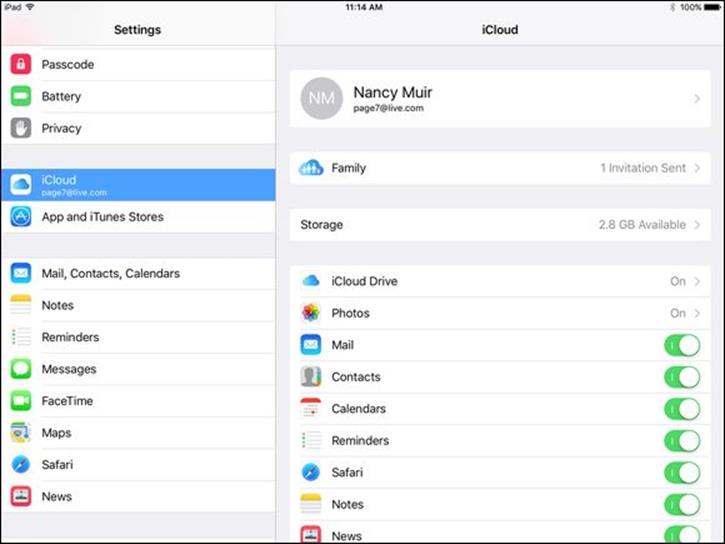
Figure 16-15
Delete an Event
1. When an upcoming luncheon or meeting is canceled, you may want to delete the appointment. With Calendar open, tap an event.
2. Tap Delete Event at the bottom of the screen (see Figure 16-16). Confirming options appear, including a Delete Event button.
3. If this event is a repeating event, you see two buttons that offer the option to delete this instance of the event or this instance and all future instances of the event (see Figure 16-17). Tap the button for the option you prefer. The event is deleted, and you return to Calendar view.
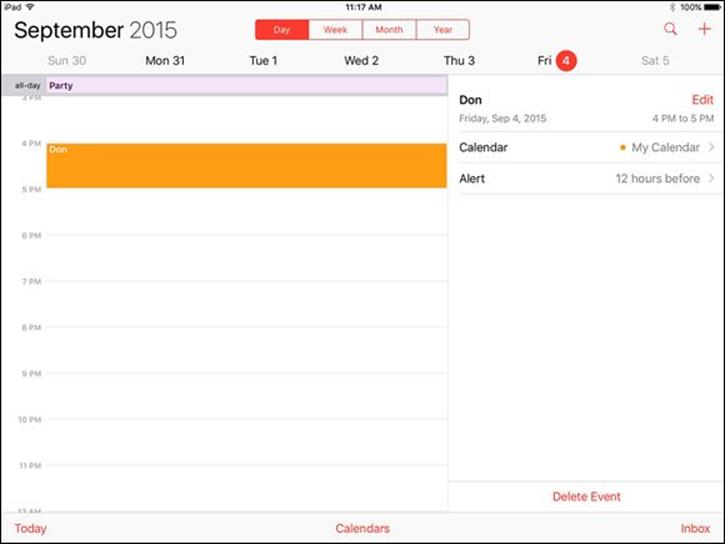
Figure 16-16
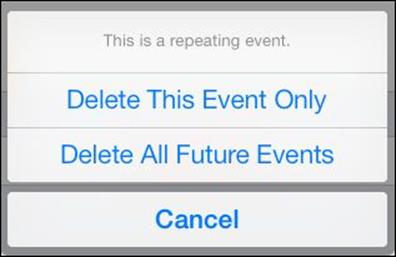
Figure 16-17
If an event is moved but not canceled, you don’t have to delete the old one and create a new one: Simply edit the existing event to change the day and time in the Edit dialog.
Display Clock
1. Clock is a preinstalled app. You can access it from the Home screen that contains all the other preinstalled apps, such as Notes and Camera. Tap the Clock app to open it. In World Clock view, preset location clocks are displayed along the top of the screen, and the locations of these clocks are displayed on a world map below them.
2. Tap a clock at the top of the screen to display it full-screen (see Figure 16-18).
3. Tap the World Clock button to return to the World Clock screen. (If the World Clock button isn’t visible, tap the screen to make it appear.)
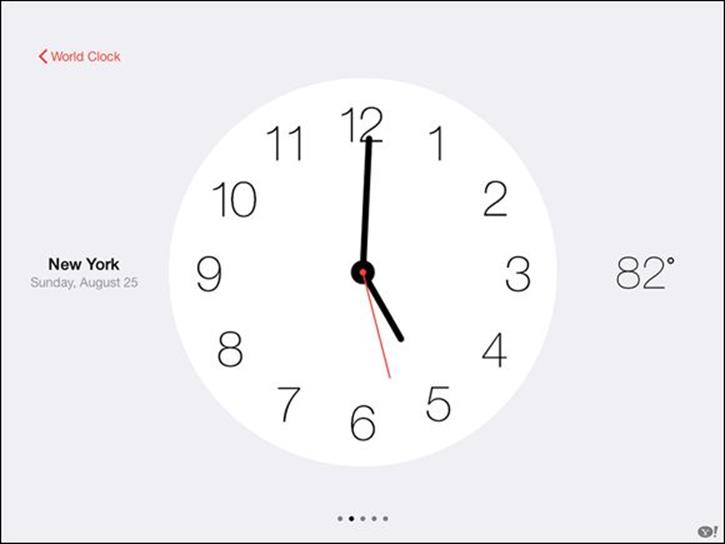
Figure 16-18
Clocks for cities that are currently in nighttime are displayed in black. Clocks for cities that are currently in daytime are displayed in white.
Add or Delete a Clock
1. You can add a clock for many (but not all) locations around the world. With Clock open, tap Add on the clock on the far-right side.
2. Tap a city in the resulting list, or tap a letter on the right side of the screen to display locations that begin with that letter. The clock appears in the last spot on the right side of the screen, and the location is displayed on the world map.
3. To remove a location’s clock, tap the Edit button in the top-left corner of the World Clock screen. Then tap the minus symbol next to a location and tap the Delete button (see Figure 16-19).
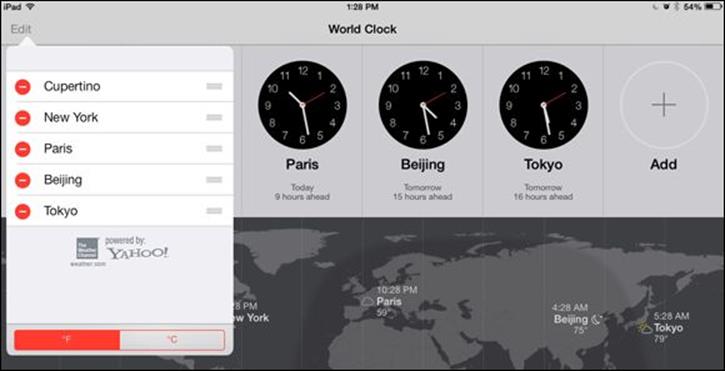
Figure 16-19
Set an Alarm
1. With the Clock app open, tap the Alarm tab at the bottom of the screen.
2. Tap the Add button (a button represented by a plus symbol in the top-right corner).
3. In the Add Alarm dialog, shown in Figure 16-20, take any of the following actions, tapping the Back button after you make each setting to return to the Add Alarm dialog:
· Tap Repeat if you want the alarm to repeat at a regular interval, such as every Monday or every Sunday.
· Tap Label if you want the alarm to have a name such as “Take Pill” or “Call Mom.”
· Tap Sound to choose the tone the alarm will play.
· Tap the On/Off switch for Snooze if you want to use the Snooze feature.
4. Place your finger on the three wheels at the top of the dialog, scroll to set the time when you want the alarm to occur, and tap Save. The alarm appears on the calendar’s Alarm tab.
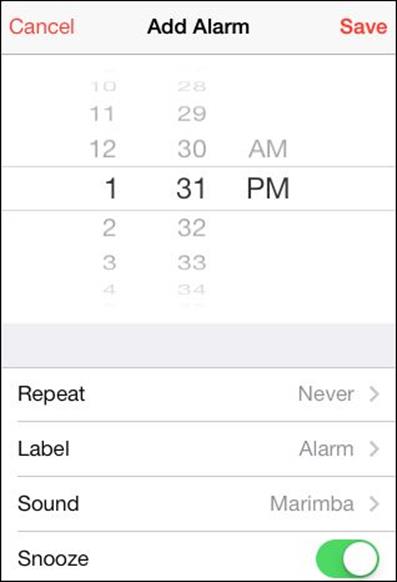
Figure 16-20
To delete an alarm, tap the Alarm tab and then tap Edit. All alarms appear. Tap the red circle with a minus in it next to the alarm and then tap the Delete button.
Use Stopwatch and Timer
Sometimes, life seems like a countdown or a ticking clock counting the minutes you’ve spent on a certain activity. You can use the Stopwatch and Timer tabs of the Clock app to count down to a specific time, such as the moment when your chocolate chip cookies are done, or to time a walk.
These two apps work very similarly. Tap the Stopwatch or Timer tab and tap the Start button (see Figure 16-21). When you set the Timer app, the iPad uses a sound to notify you when time’s up. When you start the Stopwatch app, you have to tap the Stop button when the activity is done.
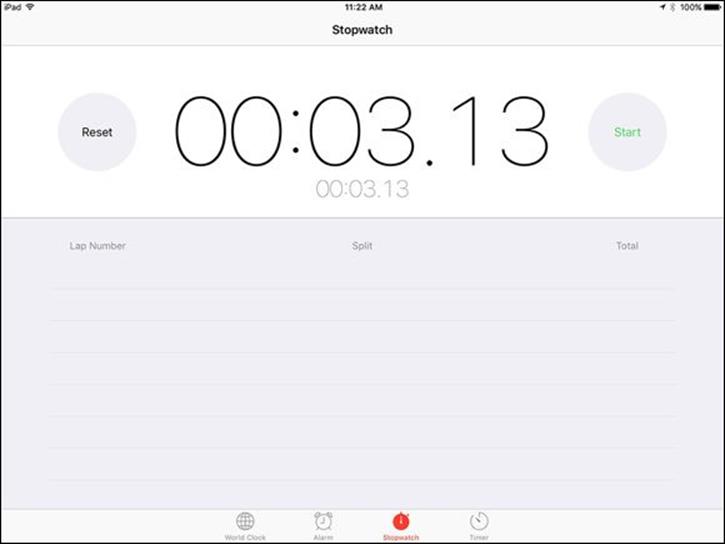
Figure 16-21
If you want to time incremental events, such as a series of laps you swim in a pool, with the Stopwatch running, tap the Lap button at the end of each segment and each segment is displayed in a list beneath the main timing field.
All materials on the site are licensed Creative Commons Attribution-Sharealike 3.0 Unported CC BY-SA 3.0 & GNU Free Documentation License (GFDL)
If you are the copyright holder of any material contained on our site and intend to remove it, please contact our site administrator for approval.
© 2016-2026 All site design rights belong to S.Y.A.