iPad For Seniors For Dummies, 8th Edition (2016)
Part I. Making the iPad Yours
Chapter 3. Getting Going
Get ready to …
· Charge the Battery
· Sign into an iTunes Account
· Sync Wirelessly
· Understand iCloud
· Turn on iCloud Backup
· Make iCloud Sync Settings
Your first step in getting to work with the iPad is making sure that its battery is charged. Next, if you want to find free or paid content for your iPad from Apple, from movies to music to e-books to audiobooks, you may want to open an iTunes account.
You can use the wireless sync feature to exchange content over a wireless network.
If you prefer, you can take advantage of the iCloud Library from Apple to store and share all kinds of content and data to all your Apple devices — wirelessly. Also, edits you make to documents in iCloud can be detected by iOS devices and Macs running OS X Yosemite or later whether or not they are compatible with the viewing app.
You can pick up where you left off reading, listening, or watching content from one device to another with a feature called Handoff.
Charge the Battery
1. My iPad showed up in the box almost fully charged, and let’s hope yours did, too. Because all batteries run down eventually, one of your first priorities is to know how to recharge your iPad battery. Go get your iPad and its Lightning-to-USB cable (iPad fourth generation and later, and iPad mini) and the Apple USB power adapter.
2. Gently plug the USB end of the Lightning-to-USB cable (or the Dock Connector-to-USB cable, for old models) into the USB power adapter.
3. Plug the other end of the cord (see Figure 3-1) into the Lightning Connector (or Dock Connector) slot on the iPad.
4. Unfold the two metal prongs on the power adapter (refer to Figure 3-1) so that they extend from it at a 90-degree angle; then plug the adapter into an electrical outlet.
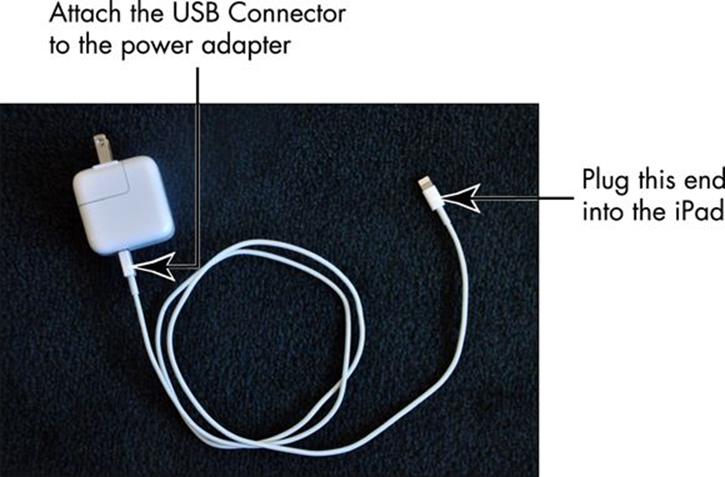
Figure 3-1
 Power adapters for early versions of the iPad or other Apple devices (such as the iPhone and iPod) don’t work with your fourth- generation or later iPad. Adapters are available from Apple and other companies, however.
Sign into an iTunes Account
1. To be able to buy or download free items from the iTunes Store or the App Store on your iPad, you must sign into an iTunes account. First, tap Settings on your iPad.
2. Click iTunes & App Store; assuming you’re not signed in with an Apple ID, the screen shown in Figure 3-2 appears.
3. Tap Sign In, enter your Apple ID and password, and then tap Sign In again (see Figure 3-3).
4. A screen appears asking for verification. Click OK. In the Account Settings screen that follows (see Figure 3-4), fill in any required information fields to verify your payment method and then click the Done button. A screen appears, confirming that your account information has been saved.
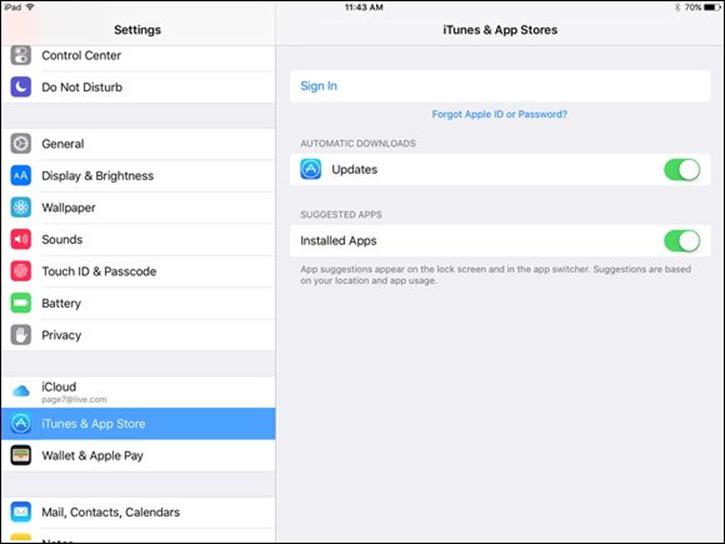
Figure 3-2
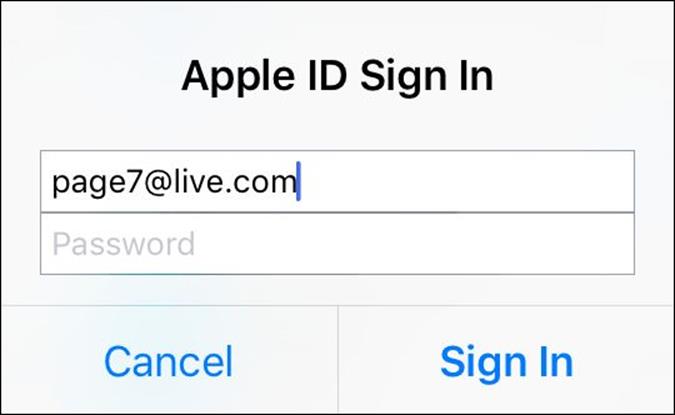
Figure 3-3
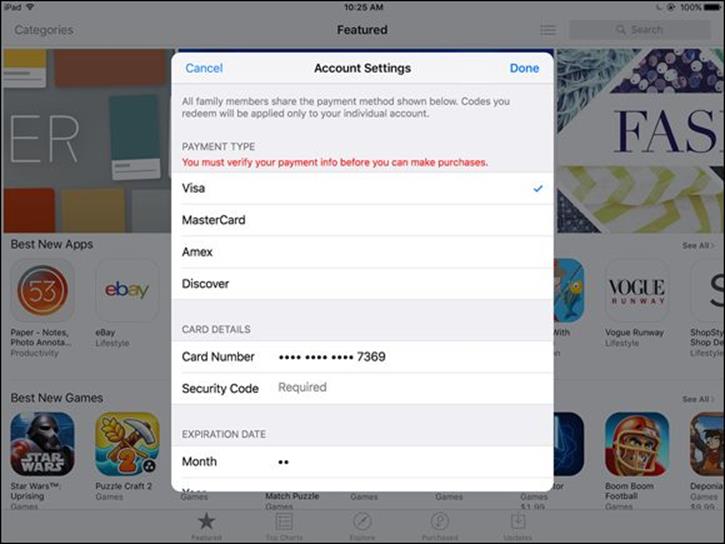
Figure 3-4
Though it should be quite safe, if you prefer not to leave your credit card info with Apple, one option is to buy an iTunes gift card and provide that as your payment information. You can replenish the card periodically through the Apple Store.
Sync Wirelessly
1. You can use the iTunes Wi-Fi Sync setting to allow cordless syncing if you’re within range of a Wi-Fi network that has a computer connected to it with iTunes installed (to install iTunes on your computer, go to www.apple.com/itunes/download). To use this setting you should have set up an Apple ID and chosen to sync with iTunes when you first set up your iPad. Then, with your iPad connected to your computer using the Lightening-to-USB Cable and iTunes open, on your computer, select your iPad in the Devices list. On the Summary tab of iTunes, click Sync with This iPad over Wi-Fi, and then click Apply. You only need to make this setting once. Disconnect your iPad from your computer.
2. Next, on your iPad tap Settings ⇒ General ⇒ iTunes Wi-Fi Sync.
3. In the pane shown in Figure 3-5, tap Sync Now to manually sync with a computer connected to the same Wi-Fi network.
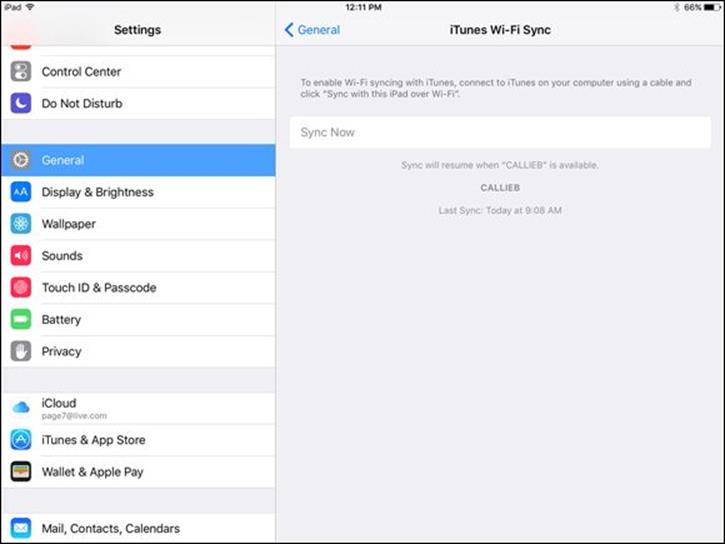
Figure 3-5
If you have your iPad set up to sync wirelessly to your Mac or PC, and both devices are within range of the same Wi-Fi network, the iPad appears in your iTunes Devices list. Selecting iPad on your Devices list allows you to sync and manage syncing from within iTunes.
You can click any item on the left side of the iTunes window to handle settings for syncing items such as movies, music, and apps. In the Apps category, you can also choose to remove certain apps from your Home screens. You can also tap the list of items On My Device on the left side to view and even play contents.
Understand iCloud
There’s an alternative to backing up content with iTunes. iCloud is a service that allows you to back up all your content and certain settings (such as bookmarks) to online storage. (However, note that some content, such as videos, isn’t backed up, so consider an occasional backup of content to your computer or an external storage device attached to your computer such as a USB stick, as well.) That content and those settings are pushed automatically to all your Apple devices through a wireless connection.
All you need to do is create an iCloud account (go to www.icloud.com and click Create Yours Now), which is free, and then make settings on your devices to specify which types of content you want pushed to each device. After you’ve done that, any content you create (except video) or purchase on one device — such as music, apps, books, and TV shows, as well as documents created in Apple’s iWork apps, photos, and so on — can be synced among your devices automatically.
When you get an iCloud account, you get 5GB of free storage. Content that you purchase through Apple (such as apps, books, music, and TV shows) won’t be counted against your storage. If you want additional storage, you can buy an upgrade from one of your devices. 50GB costs $0.99 cents per month, 200GB is $3.99 per month, 500GB is $9.99 a month, and one terabyte is $19.99 a month. Most people do just fine with the free 5GB of storage.
To upgrade your storage, tap Settings ⇒ iCloud ⇒ Storage ⇒ Manage Storage. In the pane that appears, tap Change Storage Plan. Tap the amount you need and then tap Buy. You can also choose Buy More Storage under Manage Storage if you are willing to pay more to get a greater storage amount.
If you change your mind, you can get in touch with Apple within 15 days to cancel your upgrade.
If you pay $24.99 a year for the iTunes Match service, you can sync almost any amount of music in your iTunes library to your devices, which may be a less expensive way to go than paying for added iCloud storage. Tap Match in iTunes or visit www.apple.com/itunes/itunes-match for more information.
Turn on iCloud Backup
Before you can use iCloud, you need an iCloud account, which is tied to the Apple ID you probably already have. You can turn on iCloud when you first set up your iPad, or you can use the Settings app on your iPad to sign up with your Apple ID and turn on the Backup feature.
1. When you first set up your iPad (except for an original iPad), in the sequence of screens that appears, tap Use iCloud.
2. In the next screen, tap Back Up to iCloud. In the next screen, shown in Figure 3-6, enter your Apple ID and password.
Your account is now set up based on the Apple ID you entered earlier in the setup sequence.
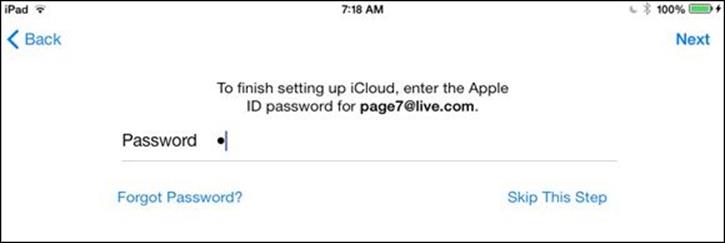
Figure 3-6
Here are the steps for setting up iCloud Backup on your iPad:
1. Tap Settings ⇒ iCloud ⇒ Backup (see Figure 3-7).
2. Tap the On/Off switch to turn on iCloud Backup.
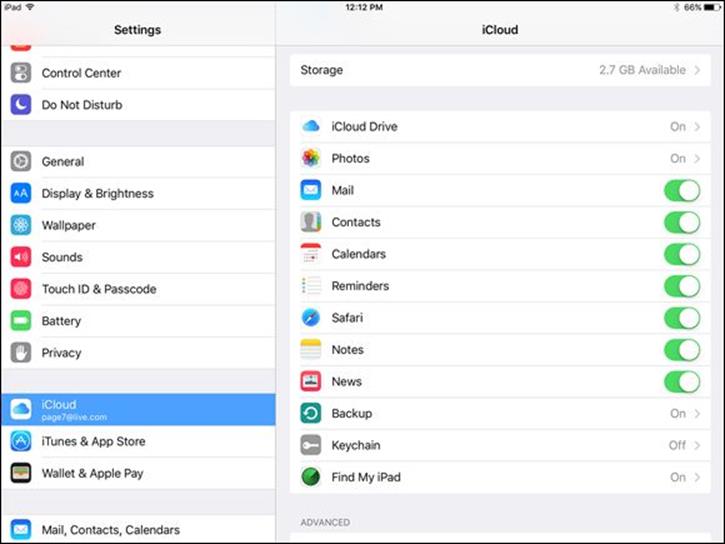
Figure 3-7
Make iCloud Sync Settings
When you have an iCloud account up and running (see the preceding task), you have to specify which types of content should be synced with your iPad via iCloud. Note that the content you purchase and download from the iTunes Store will be synced among your devices automatically via iCloud in a process Apple calls connectivity.
1. Tap Settings ⇒ iCloud.
2. In the iCloud Settings pane, shown in Figure 3-8, tap the On/Off switch for any item that’s turned off that you want to turn on (or vice versa). You can sync Photos, Mail, Contacts, Calendars, Reminders, Safari Bookmarks, Notes, News, Backup, Keychain (a service that syncs all your passwords in the Safari browser across all Macs, PCs, and Apple devices), and Find My iPad.
3. To enable automatic downloads of music, apps, and books, tap iTunes & App Store in Settings (see Figure 3-9).
4. Tap the On/Off switch for Music, Apps, Books, or Updates to set up automatic downloads of any of this content to your iPad via iCloud.
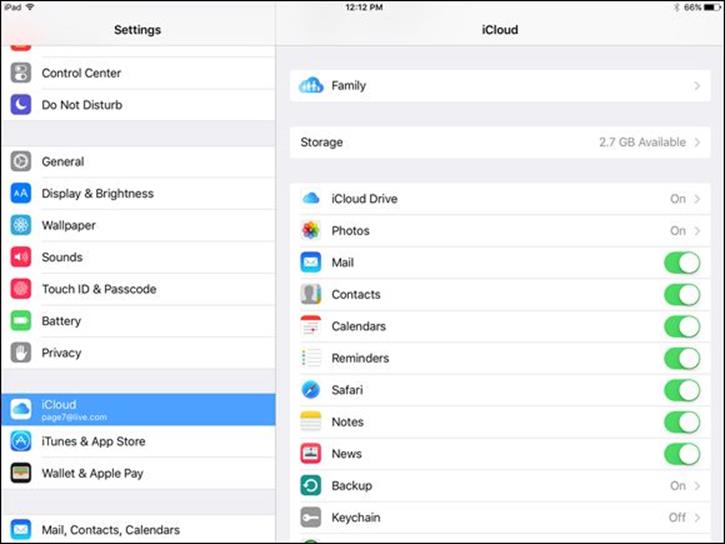
Figure 3-8
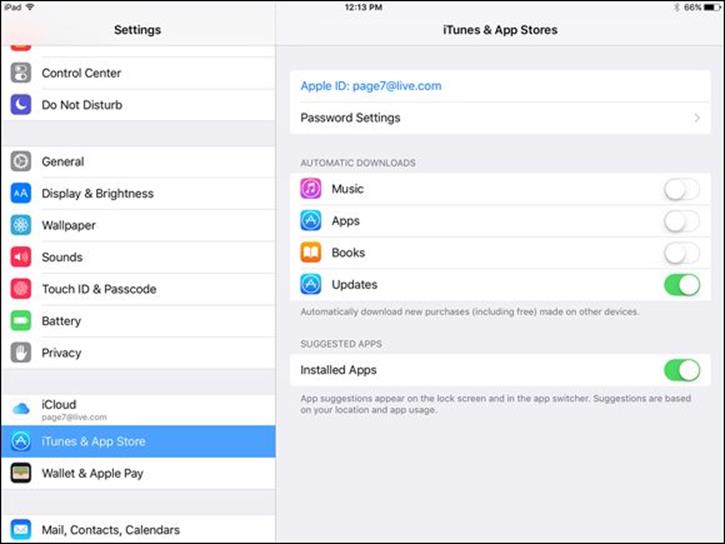
Figure 3-9
If you want to allow iCloud to provide a service for locating a lost or stolen iPad, tap the On/Off switch in the Find My iPad field to activate it. This service helps you locate, send a message to, or delete content from your iPad if it falls into other hands.
If you need help with any of these features, you can always find and download the Apple manual in the iBooks Store (it’s a free book).
All materials on the site are licensed Creative Commons Attribution-Sharealike 3.0 Unported CC BY-SA 3.0 & GNU Free Documentation License (GFDL)
If you are the copyright holder of any material contained on our site and intend to remove it, please contact our site administrator for approval.
© 2016-2026 All site design rights belong to S.Y.A.