Publishing Software on Mac (2015)
Chapter 5: Scripts, code, and automation
Detailed example of a Packages Project.
Now that we've explained the basics, let's look at a real project. This project installs add-ons to Microsoft Word 2011. These templates are composed of Microsoft Visual Basic Macro script. We've chosen to install some of them in a subfolder of the standard My Templates folder, and others in the Word startup folder, both folders created by the Office installation program. So we're installing files and subfolders in the current user folder, and files and subfolders in Applications. We also install files/subfolders in Application Support(Global) and Application Support (current user).
Another task is we need to validate the user's name, email, and registration code, and then get authorization from the web server that the sale is still valid(has not been refunded), and the number of install allocations hasn't been exceeded. When we receive that authorization, we need to install all the application files in the proper location. If the authorization is not received, we need to prevent access to the install files.
To do this, we will have two packages (distributions). There will be a basic package: the Install Package that contains the installable files to make our Word add-on work.
Once that package is built, it will become a component of the Validation Package. The Validation Package contains an application that verifies the name/email/registration code, captures the fingerprint information (using the shell script shown earlier), and sends the http request (get) with a query string containing all the aforementioned data. If the web server script authorizes the install, it will respond to the request with no errors. The application will write a dummy file that serves as a flag to show authorization, and then a shell script to open the Install Package with the Mac Installer app to execute the installation. The Install Package will check the dummy file exists before proceeding with the install.
Note: A post-installation script of the Install Package will delete the package (and the dummy file) after it has completed the install phase. This will slow down anyone trying to copy the Install package and reverse engineer it (unpack it) to get the contents.
Let's begin. I assume you've downloaded and installed the MacBookDemo package. In Finder, navigate to Users/JoeDeveloper/Development/Packages. Double-click on file: InstallPackage.pkgproj This will open the Install Package Project. Remember, this will eventually become a package included in the Validation Package. The Install Package runs after the Validation Package gets the authorization from the server. Click on Project on the left and then Settings.
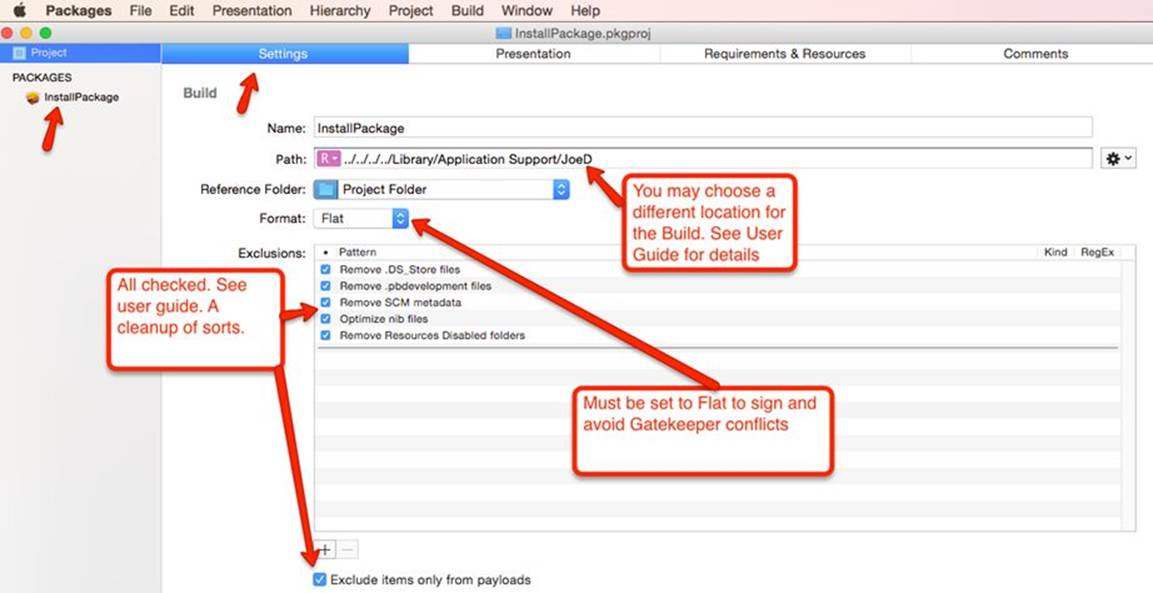
You'll see we've set InstallPackage in the Name and it should be under PACKAGES. We've set the Format to Flat. This is important so we can sign it to keep Gatekeeper happy. The exclusions should be the default.
Click on Presentation. In this area, you can select a text document (.txt, .rtf) to display in the chosen dialog. If you choose the top drop-down (that says "Introduction") to "Title", you can enter a title. The title chosen is "Install Package" for this project. If you set the top drop-down to "Introduction", double-click on "Welcome", and then Choose, you will see a Finder dialog that leads you to Welcome.rtf. This .rtf file will display during the Introduction phase of the install. There are other presentation phase documents possible, but we're not using them in this package.
Requirements.
When the authorization from the server is given, the validation app in our validation package (to be shown later)will write a file, Install.txt, to the hard drive.
We don't want to run this package and install the payload files unless the authorization is valid. So, we check for the presence of this file before proceeding with the install.
Click on Requirements & Resources. Note that we've limited the install to the Startup disk, as we need to link to Microsoft Office.
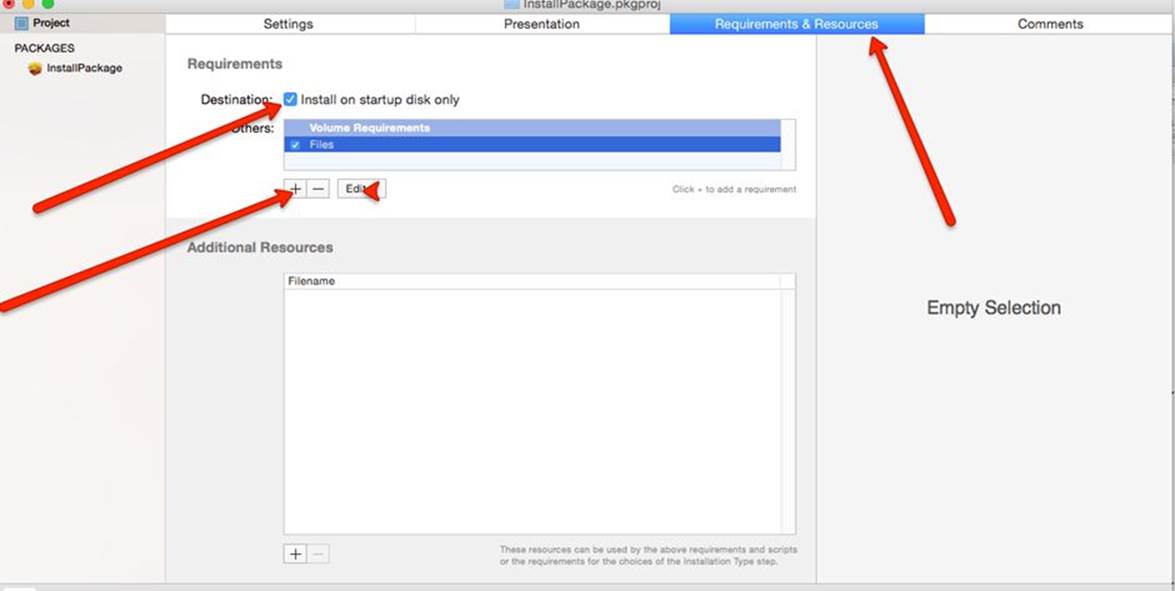
Click on Edit
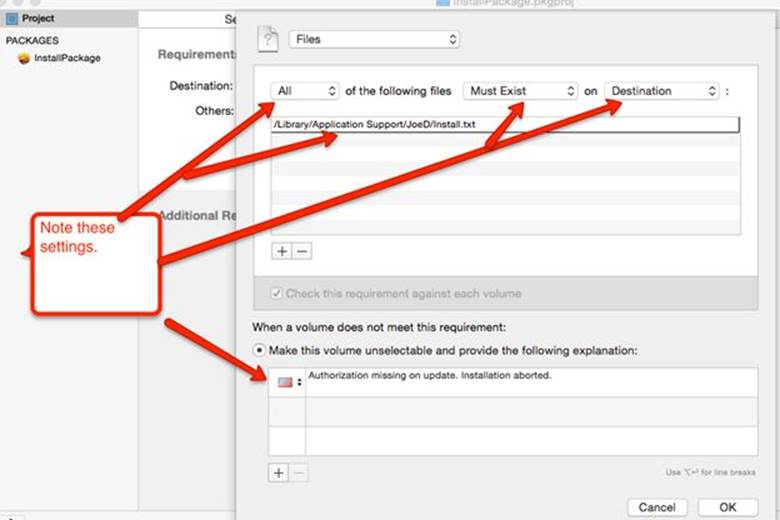
Note the top drop-down is set to Files. There are other potential requirements one could set. We chose that a file "Install.txt" must exist in the folder noted. If it doesn't exist, the authorization was not given by the validation.app, the "Install.txt" file not written, the installation will not proceed, and the error message will be given. If there were other requirements we could click on the + sign and enter them.
Now, we define the package. On the left click InstallPackage, then click Settings.
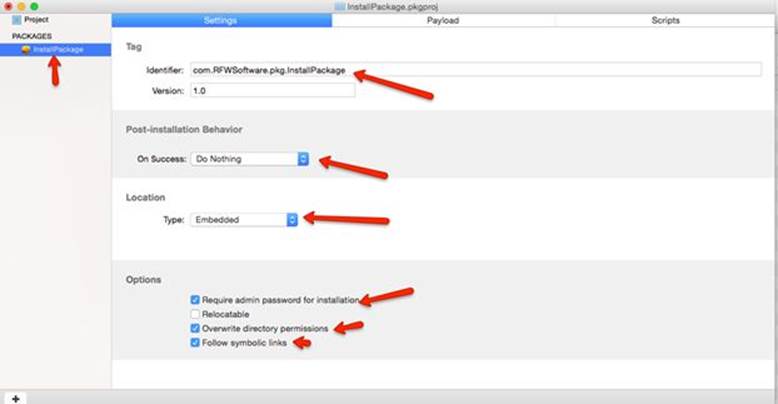
Note the various settings. We have chosen Follow symbolic links as we're going to use it to target the current user. We also want to require admin password, and to overwrite directory permissions.
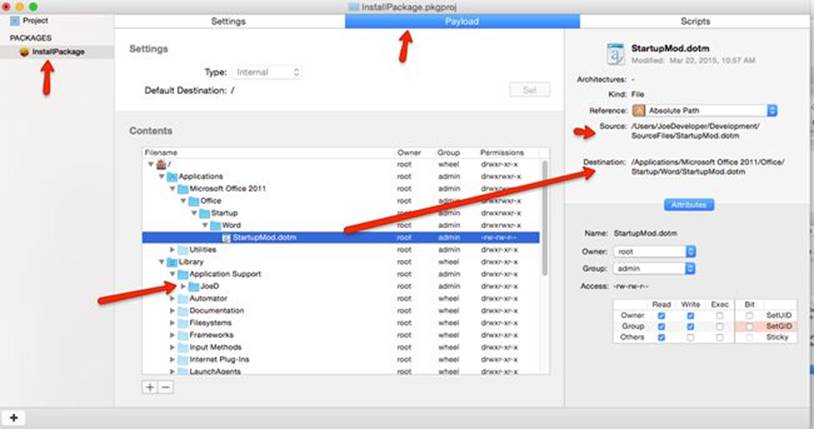
Now we will define our Payload files and folders. Click Payload. The first file we will add is StartupMod.dotm. This will load when Microsoft Word starts (once it's installed). We are assuming the target user has already installed Microsoft Office 2011. If so, in his Applications folder, he will have a "Microsoft Office 2011" folder with several subfolders. We wish to drill down to:
Microsoft Office 2011/Office/Startup/Word.
We must add these folders to our hierarchy by ctrl-clicking each folder, clicking "New Folder", and entering the folder name. Once done, we would ctrl-click the Word folder, click add files, and navigate to our source file, Startup.dotm. We ensure the permissions are correct. We added the folder "JoeD" to Application Support (Global)
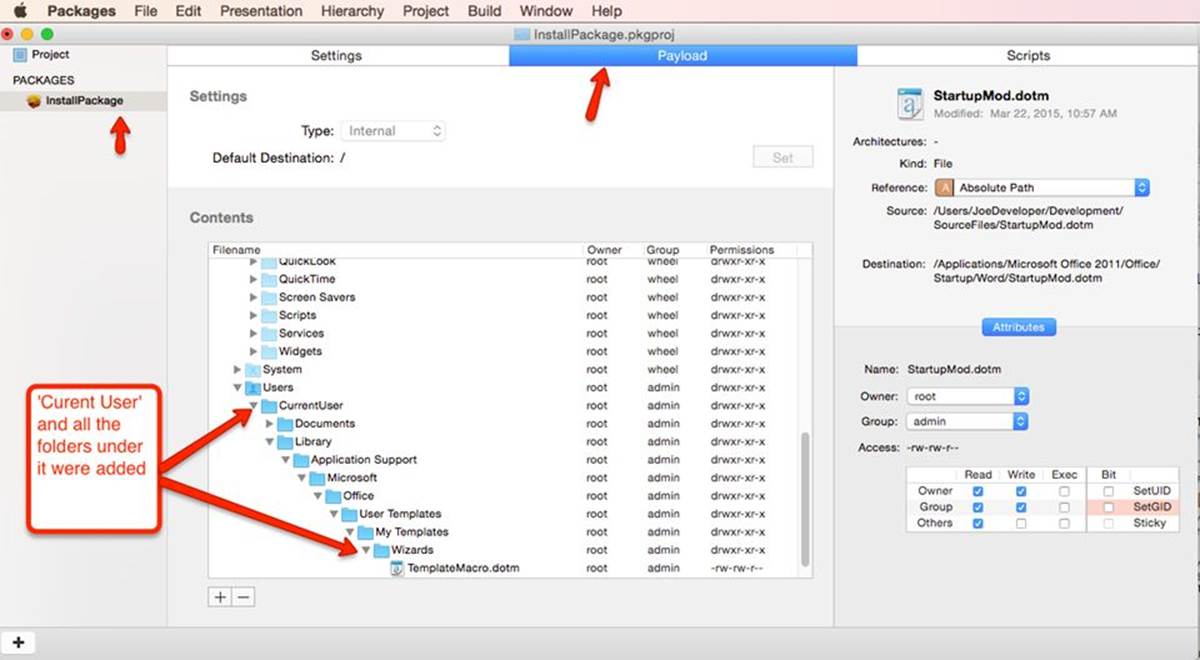
Now we need to add some files in subfolders of the target user folder. We go to the hierarchy, click on Users, we added a new folder called "CurrentUser" this folder will be symbolically linked to the Home folder of the target user by a shell script. Now we will drill down and add folders to the hierarchy: /CurrentUser/Library/Application Support/Microsoft/Office/User Templates/My Templates/Wizards.
The folders Library & Application Support will pre-exist in most Mac installations. The folders Microsoft through My Templates will pre-exist in a Mac with Microsoft Office 2011 installed. Wizards is a new folder. To this folder, we will add the file: "TemplateMacro.dotm" that we find in our SourceFiles folder.
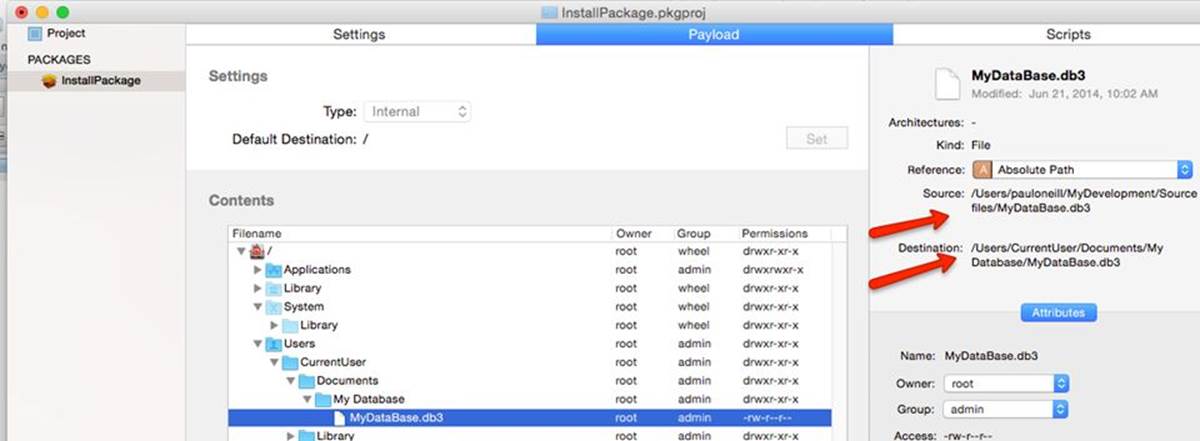
Also, under the target user's home folder should be a folder called Documents. We will add the Documents folder to our CurrentUser folder, and then add a "My Databases" folder. To that we'll add a file called "My Database.db3"
Now we've completed the Payload section of our InstallPackage. Optionally, we could add another folder under Application Support, JoeD, to store an initialization file that contained a product code (assuming we have more than one product).
So we now have shown how to configure the Payload section to install files in both the target user's home folder and elsewhere.
Now, we will add Scripts by clicking on Scripts near the top. The first pre-installation script we've given earlier:
The post-installation script will run after the install is complete:
#!/bin/bash
cd "/library/application support/JoeD"
#******remove install.txt to prevent InstallPackage from running standalone
rm install.txt
#******remove InstallPackage.pkg once installed
rm -rf InstallPackage.pkg
#********remove the symbolic link CurrentUser now we're done with it
rm /users/CurrentUser
exit 0
At this point we could build the InstallPackage
All materials on the site are licensed Creative Commons Attribution-Sharealike 3.0 Unported CC BY-SA 3.0 & GNU Free Documentation License (GFDL)
If you are the copyright holder of any material contained on our site and intend to remove it, please contact our site administrator for approval.
© 2016-2026 All site design rights belong to S.Y.A.