10 Lessons About C++(2015)
Chapter 1: Windows Programing
1.1 Getting Started: A simple window with event handling
The problem with teaching Windows programming -- especially to those wishing to become master programmers -- is that it is a vast subject, one that deserves a book or several books in its own right. In order to give an introduction I have been very selective, focusing on a few important basics with the intention that the reader can use these to build his or her own understanding.
The gist of Windows programming is this: the user initiates an event such as pressing a key or clicking a mouse, the Windows operating system recognizes and intercepts this event, preprocesses it, and dispatches it to the appropriate user program. When the user event is received by the program, it can decide on how it will act upon it, or otherwise leave it alone and let Windows handle it via its default processing.
There are a few things needed to get even the simplest of Windows applications up and running. Programmers who wish to create even a minimalist application will need to use the data types, classes, constants, functions and structures contained in the Microsoft Win32 base library. I have always preferred to try things out and learn about them in more depth later, so I will do the same here. Let's start with a bare bones Windows application with explanations to follow.
Every Windows program has an entry-point function that is named either WinMain or wWinMain:
int WINAPI wWinMain( HINSTANCE hInstance,
HINSTANCE hPrevInstance,
PWSTR pCmdLine,
int nCmdShow);
1. hInstance - a handle to a module the Windows operating system uses to identify the executable (.exe) when loaded into memory. This handle instance is required for certain Windows operations such as loading icons and bitmaps.
2. hPrevInstance - is relevant to 16-bit Windows applications but is no longer used. Now it is always set to zero.
3. pCmdLine - contains the command line arguments as a Unicode string.
4. nCmdShow - a flag indicating whether the main application window is to be minimized, maximized or displayed normally.
When creating a basic window programmatically the four minimum steps necessary are as follows:
1. Create the window class used to store information about things such as the type of Window being used, the Windows Procedure function used to control the window, icons, colours and other parameters. This is held in the WNDCLASSEX structure.
WNDCLASSEX windowClass;
windowClass.cbSize = sizeof( WNDCLASSEX );
windowClass.style = CS_HREDRAW | CS_VREDRAW;
windowClass.lpfnWndProc = WndProc;
windowClass.cbClsExtra = 0;
windowClass.cbWndExtra = 0;
windowClass.hInstance = hInstance;
windowClass.hIcon = LoadIcon( NULL, IDI_APPLICATION );
windowClass.hCursor = LoadCursor( NULL, IDC_ARROW );
windowClass.hbrBackground = (HBRUSH) GetStockObject( WHITE_BRUSH );
windowClass.lpszMenuName = NULL;
windowClass.lpszClassName = "MyClass";
windowClass.hIconSm = LoadIcon( NULL, IDI_WINLOGO );
2. Register the Windows class. Whenever a Windows program starts, it registers the windows class with the system, and gives the system a pointer to a callback function called the windows procedure. This windows procedure is called each time Windows wants to pass an event message back to the program. You need do this only once before using it as many times as necessary. The window attributes defined in step 1 can be changed at any time if desired.
Use RegisterClassEx to do the registering.
RegisterClassEx(&windowClass);
3. Create the window object using the CreateWindowEx function (See MSDN documentation for an explanation of CreateWindowEx and its parameters: https://msdn.microsoft.com/en-us/library/ms908193.aspx)
CreateWindowEx(
WS_EX_CLIENTEDGE,
g_szClassName,
"The title of my window",
WS_OVERLAPPEDWINDOW,
CW_USEDEFAULT,
CW_USEDEFAULT,
240,
120,
NULL,
NULL,
hInstance,
NULL);
See MSDN documentation for an explanation of CreateWindowEx and its parameters:
https://msdn.microsoft.com/en-us/library/ms908193.aspx
4. Enter the main message loop, which is where all event messages will get sent for processing. A bare minimum example is shown below:
LRESULT CALLBACK WndProc(HWND hwnd, UINT msg, WPARAM wParam, LPARAM lParam)
{
switch(msg)
{
case WM_CLOSE:
DestroyWindow(hwnd);
break;
case WM_DESTROY:
PostQuitMessage(0);
break;
default:
return DefWindowProc(hwnd, msg, wParam, lParam);
}
return 0;
}
A mouse click, for example, gets dispatched to the program that created the window over which the mouse was positioned and clicked. There are literally dozens of possible messages that will get handled by Windows - every time you resize, minimize, maximize, press a key, and so forth.
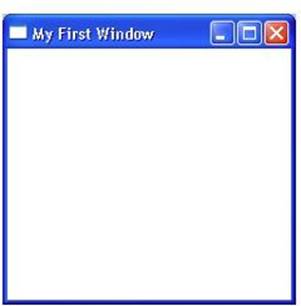
Then the program responsible for that window will get a chance to intercept and process the message for that event in whatever way the programmer chooses. This example shows you not only how to create a basic window programmatically, but also add the capability to respond to mouse event notifications. Hardly earth-shattering, but it does help you to get the hang of handling messages. When the program is first run we are presented with the simple window:
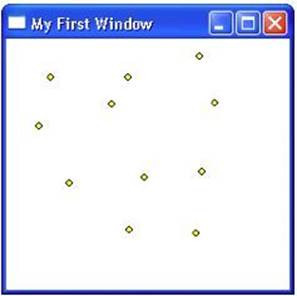
The current mouse cursor position is tracked every time it moves, so that when the left mouse button has been clicked, a yellow circle is painted at the location of the mouse click:
The full code listing is as follows:
#include <windows.h>
#include <set>
#define WIN32_LEAN_AND_MEAN
const unsigned radius = 3;
int xPos = 0;
int yPos = 0;
typedef std::pair<int, int> coordinate;
typedef std::set<coordinate>::const_iterator coord_iter;
// Step 4: Process any message sent to the Window
LRESULT CALLBACK WndProc(HWND hwnd,
UINT message,
WPARAM wParam,
LPARAM lParam)
{
PAINTSTRUCT paintStruct;
HDC hDC;
HBRUSH hOldBrush, hNewBrush;
static std::set<coordinate> coords;
switch( message )
{
case WM_CREATE:
return 0;
break;
case WM_CLOSE:
PostQuitMessage(0);
return 0;
break;
case WM_PAINT:
// Paint the set of circles
hDC = BeginPaint( hwnd, &paintStruct );
hNewBrush = CreateSolidBrush(RGB(255, 255, 0));
hOldBrush = (HBRUSH) SelectObject(hDC, hNewBrush);
for ( coord_iter it = coords.begin();
it != coords.end();
++it )
{
const int x = (*it).first;
const int y = (*it).second;
Ellipse( hDC, x - radius, y + radius, x + radius, y - radius );
}
SelectObject(hDC, hOldBrush);
DeleteObject(hNewBrush);
EndPaint(hwnd, &paintStruct);
return 0;
break;
case WM_MOUSEMOVE:
// Store the mouse cursor position at every movement
xPos = LOWORD(lParam);
yPos = HIWORD(lParam);
break;
case WM_LBUTTONDOWN:
// Store unique set of mouse coordinates and redraw
coords.insert( std::make_pair( xPos, yPos ) );
InvalidateRect(hwnd, NULL, TRUE);
break;
default:
break;
}
return DefWindowProc( hwnd, message, wParam, lParam );
}
int APIENTRY WinMain(HINSTANCE hInstance,
HINSTANCE hPrevInstance,
LPSTR lpCmdLine,
int nCmdShow)
{
WNDCLASSEX windowClass; // window class
HWND hwnd; // window handle
MSG msg; // message
// Step 1: Create the Windows class, exit if unsuccessful
windowClass.cbSize = sizeof( WNDCLASSEX );
windowClass.style = CS_HREDRAW | CS_VREDRAW;
windowClass.lpfnWndProc = WndProc;
windowClass.cbClsExtra = 0;
windowClass.cbWndExtra = 0;
windowClass.hInstance = hInstance;
windowClass.hIcon = LoadIcon( NULL, IDI_APPLICATION );
windowClass.hCursor = LoadCursor( NULL, IDC_ARROW );
windowClass.hbrBackground = (HBRUSH) GetStockObject( WHITE_BRUSH );
windowClass.lpszMenuName = NULL;
windowClass.lpszClassName = "MyClass";
windowClass.hIconSm = LoadIcon( NULL, IDI_WINLOGO );
// Step 2: Register the window, exit if unsuccessful
if ( !RegisterClassEx(&windowClass) ) return 0;
// Step 3: Create the window, exit if unsuccessful
if ( !CreateWindowEx(
NULL, // extended style
"MyClass", // class name
"My First Window", // app name
WS_OVERLAPPEDWINDOW | WS_VISIBLE | WS_SYSMENU, // window style
50, // x coordinate
50, // y coordinate
250, // width
250, // height
NULL, // handle to parent
NULL, // handle to menu
hInstance, // application instance
NULL ) ) return 0; // no extra parameter's
// Step 4: Enter the main message loop and event handling
while(GetMessage(&msg, NULL, 0, 0) > 0)
{
TranslateMessage(&msg);
DispatchMessage(&msg);
}
return msg.wParam;
}
1.2 Creating dialogs programmatically
Dialog boxes are Windows applications that can display messages and controls while allowing user interaction via events such as mouse clicks and key presses. Dialog boxes can be created as applications in their own right, or they can be used in addition to an existing application. A dialog box is created from a resource file, which is recognized as having the .rc extension. This file contains information about the dialog box and specifies parameters such as the dialog box size and location, its textual caption, and whether it contains controls like buttons, edit boxes, and so forth.
There are two main approaches to defining Microsoft Foundation Class (MFC) dialog boxes for User Interface-based applications. Either use the Resource Editor (a tool to define the dialog appearance and generate the code associated with the dialog) or create (and hence later modify) dialog boxes at run time by using using the Win32 API directly.
The Visual Studio Resource Editor can be used to position dialog components in conjunction with the Class Wizard to generate the corresponding C++ control code in separate .cpp and .h files. The Resource Editor is very convenient in that all dialog box layout information is stored in the resource (.rc) file, and all corresponding resource identifiers are stored in the resource.h file. To programmatically create a dialog box, use the DialogBox function. Its usage is:
INT_PTR DialogBox( HINSTANCE hInstance,
LPCTSTR lpTemplate,
HWND hWndParent,
DLGPROC lpDialogFunc );
The first argument hInstance is the handle to the application using the dialog box. The lpTemplate argument specifies the dialog box template. The hWndParent argument is a handle to the parent window that owns the dialog box. The lpDialogFunc argument is a pointer to the dialog box procedure, implying the need to define a callback procedure whose usage is:
INT_PTR CALLBACK DialogProc( HWND hwndDlg,
UINT uMsg,
WPARAM wParam,
LPARAM lParam );
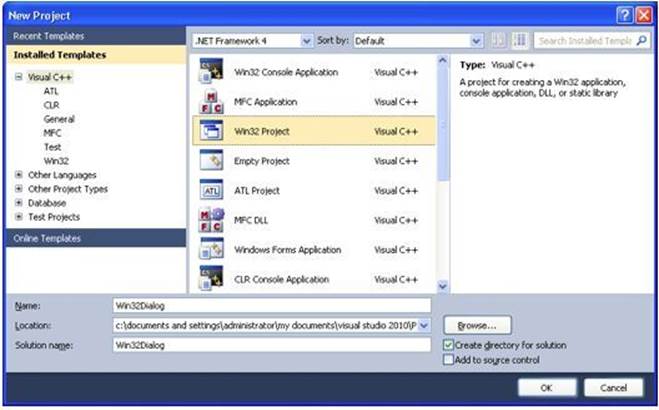
To do this in Visual Studio first create a new Win32 application. Specify the desired location of your project and enter the project name, say Win32Dialog, and then click OK:
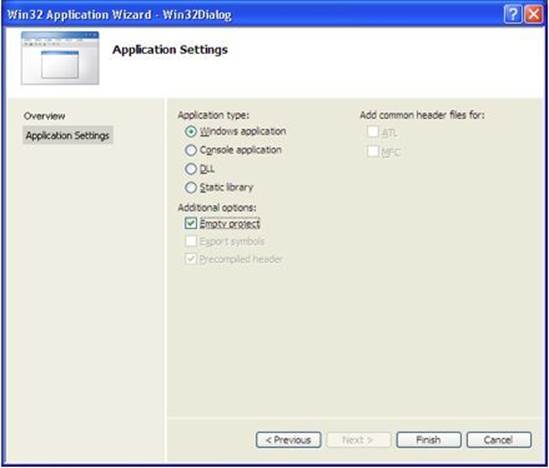
In the Application Wizard that appears make sure you create it as an Empty Project before clicking on Finish:
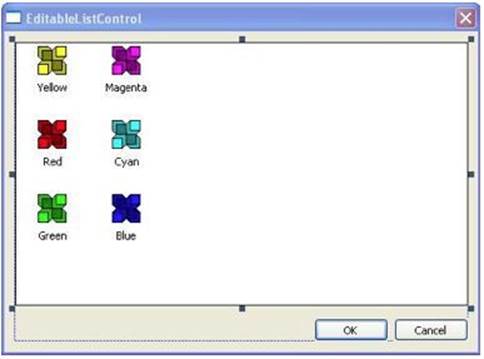
Now you need to actually create your dialog. Right-click the project folder that Visual Studio has created and select Add > Resource: Select Dialog and then select New:
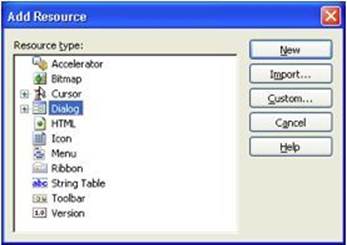
This will generate the resource header and rc file used to define the dialog. In the Resource Editor, right-click on the newly created dialog box and select Properties. The name of the ID defaults to IDD_DIALOG1. Change this name if you wish.
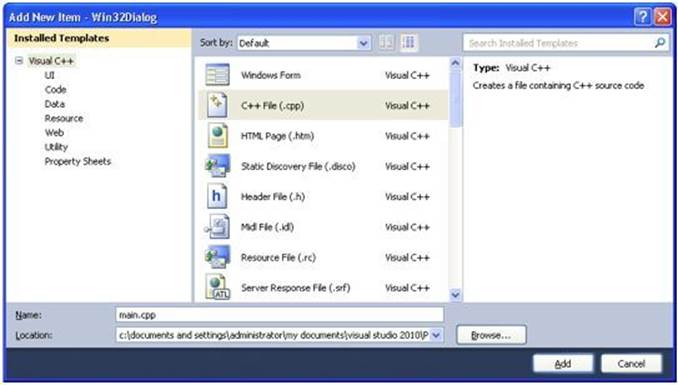
Then create the main source file by selecting Add > New Item. In the Name edit box type the name of the source file, such as main.cpp, and press Add:
In the main.cpp file, insert the following code:
#include <windows.h>
#include "resource.h"
HWND hWnd;
LRESULT CALLBACK DlgProc(HWND hWnd,
UINT Msg,
WPARAM wParam,
LPARAM lParam);
INT WINAPI WinMain( HINSTANCE hInstance,
HINSTANCE hPrevInstance,
LPSTR lpCmdLine,
int nCmdShow )
{
DialogBox( hInstance,
MAKEINTRESOURCE( IDD_DIALOG1 ),
hWnd,
reinterpret_cast<DLGPROC>( DlgProc ) );
return FALSE;
}
LRESULT CALLBACK DlgProc(HWND hWndDlg,
UINT Msg,
WPARAM wParam,
LPARAM lParam)
{
switch(Msg)
{
case WM_INITDIALOG:
return TRUE;
case WM_COMMAND:
switch(wParam)
{
case IDOK:
EndDialog(hWndDlg, 0);
return TRUE;
}
break;
}
return FALSE;
}
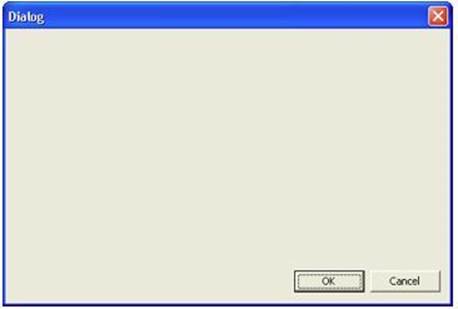
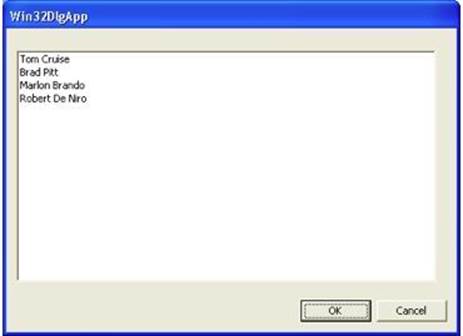
This will produce the following dialog when you run the application:
1.3 Creating Dialog Applications Using the MFC Application Wizard
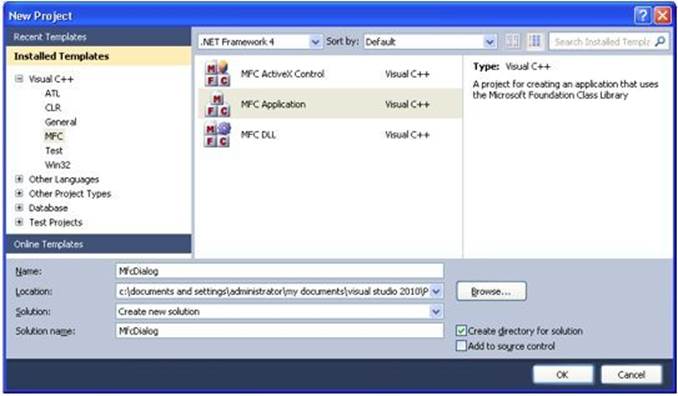
Alternatively you can create a Dialog application using the MFC Application Wizard in just a few steps. From the File menu select New > Project, and in the Installed Templates section of the New Project dialog select the MFC > MFC Application option. Give the project a name and select the location of the project folder, then click OK:
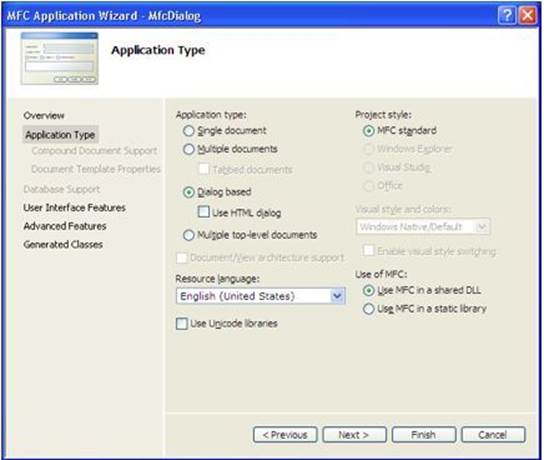
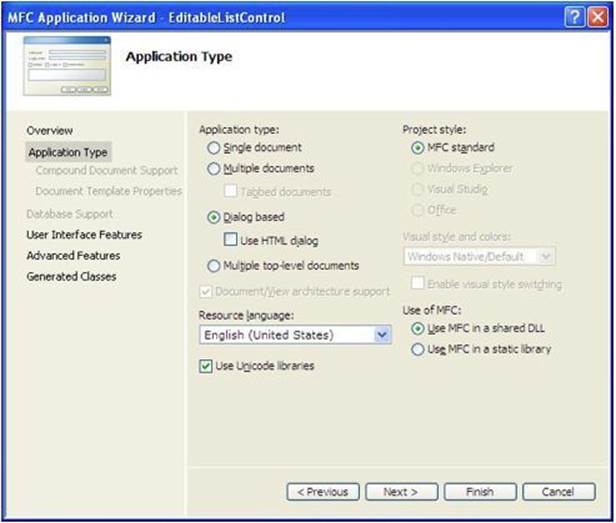
In the MFC Application Wizard that appears choose the Dialog option for the Application type and click Next:
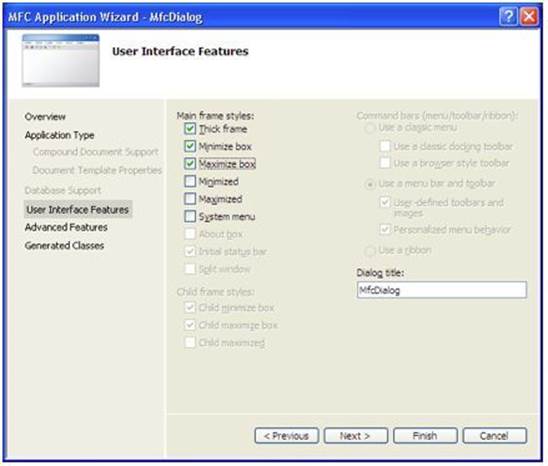
Select the particular Main Frame styles you prefer and click Next:
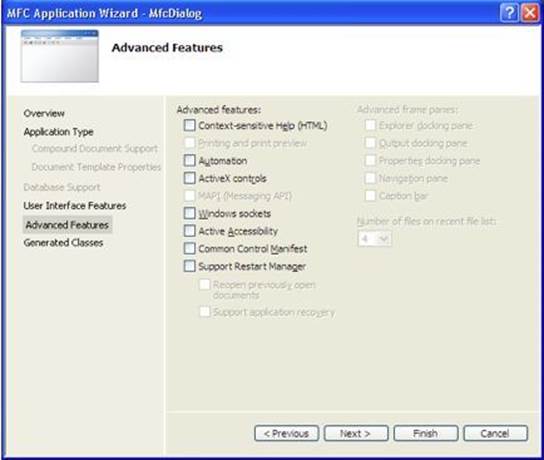
Finally for our minimalist application we will uncheck any remaining options before clicking on Finish:
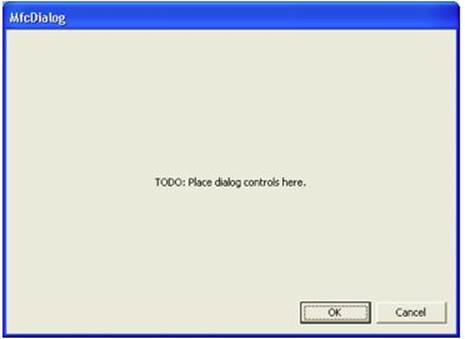
The Application Wizard will automatically generate the necessary resource files and the application whose user interface is a dialog box, the same as in the previous section:
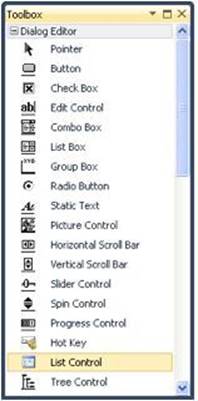
1.4 Adding Controls to Dialog Boxes: List Control
To add controls to your dialog, select the control you want from the Toolbox Window and drag it to the location on your dialog box. As an example, in the Dialog Application you created using the MFC Application Wizard, you want to select the List Control and drag this onto your Dialog:
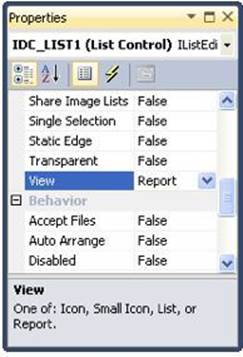
Right click on your List Control and select Properties. In the Appearance section set the View property to List. You can keep its ID property as IDC_LIST1:
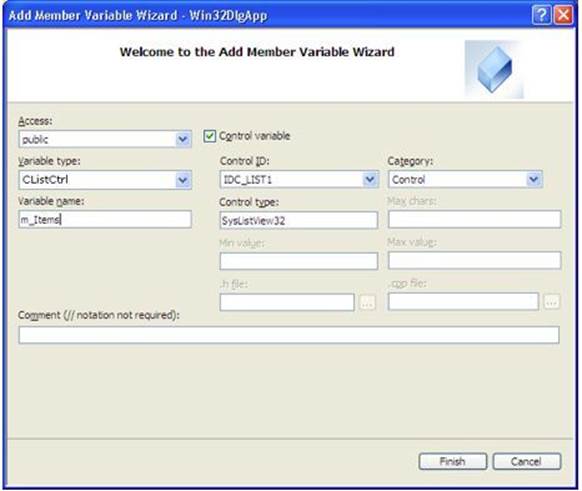
Right-click the list control and select Add Variable. Set the Variable Name to m_Items. Click Finish.
Now populate the list control with items using the CListCtrl::InsertItem method. Use it as follows:
int InsertItem(const LVITEM* pItem );
This method requires an LVITEM pointer as an argument. The LVITEM structure is defined as follows:
typedef struct _LVITEM
{
UINT mask;
int iItem;
int iSubItem;
UINT state;
UINT stateMask;
LPTSTR pszText;
int cchTextMax;
int iImage;
LPARAM lParam;
#if (_WIN32_IE >= 0x0300)
int iIndent;
#endif
} LVITEM, FAR *LPLVITEM;
The mask parameter specifies the types of values you want to set for the current item. iItem specifies the zero-based index of the item being changed. iSubItem is the index of the sub item for the current value. If the current item will be the leader, the iSubItem is stored in a 0-based array. If it is a sub item, then it is stored in a 1-based array. The pszText variable is the item string displayed, the length of which can be specified by assigning a value to cchTextMax.
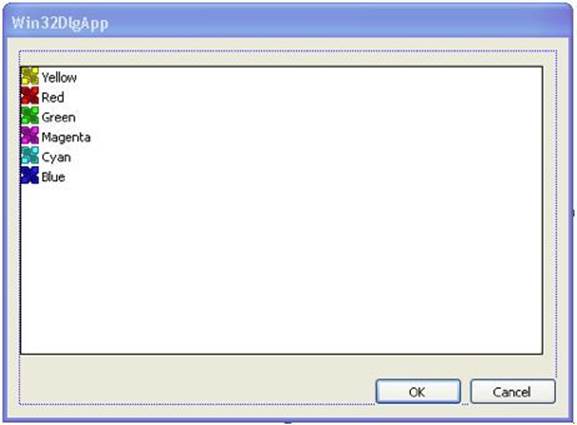
After initializing the LVITEM, it is passed to the InsertItem method to add it as a new list item. Here is an example that creates items and displays as a List view:
Creating Custom MFC Controls - an Editable List Control
Sometimes you may need more than than what the Microsoft Foundation Classes provide. The List Control, for example, is great for displaying lists of records in various modes. But what if you wish to make individual grid items in the list control editable, for example? The answer is to override the MFC class and provide custom methods to implement the behaviour you desire. This example describes the steps necessary to do just that.
Step 1: Create the MFC Project
Start by creating a dialog-based application in Visual Studio. Select File > New > Project > MFC Application. When the Application Wizard is launched, select Dialog based as the Application Type:
And then select Finish. In the Resources View, notice that a new dialog is created:
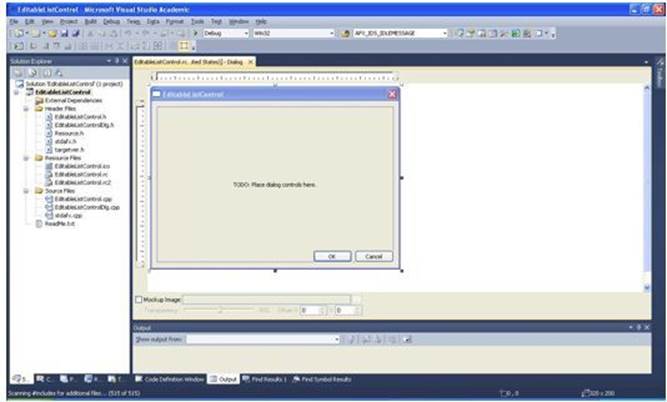
To get started, first delete the static control “TODO: Place dialog controls here” that gets created automatically. Then in the Toolbox, select the “List Control” and in the Resource View place this within your dialog area:
Right-click the List Control you just added and select Properties. In the Properties window, make sure the View section of Appearance is set to ‘Report’ style:

Step 2: Derive a class from CListCtrl
Create a new List Control class CEditableListCtrl, that publicly inherits from the standard CListCtrl. An efficient way to do this is to use the Class Wizard. Right click your project folder and select Class Wizard… Then press the Add Class button that appears in the MFC Class Wizard dialog:
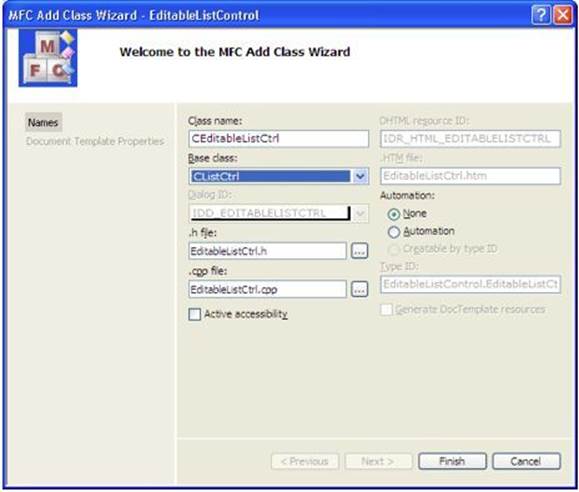
In our new derived CEditableListCtrl class, we need to define six new methods in order to make the List Control grid items editable:
class CEditableListCtrl : public CListCtrl
{
public:
int GetRowFromPoint( CPoint &point, int *col ) const;
CEdit* EditSubLabel( int nItem, int nCol );
void OnHScroll(UINT nSBCode, UINT nPos, CScrollBar* pScrollBar);
void OnVScroll(UINT nSBCode, UINT nPos, CScrollBar* pScrollBar);
void OnEndLabelEdit(NMHDR* pNMHDR, LRESULT* pResult);
void OnLButtonDown(UINT nFlags, CPoint point);
};
GetRowFromPoint - to determine the row and column number that the cursor falls on, if any:
int CEditableListCtrl::GetRowFromPoint( CPoint &point, int *col ) const
{
int column = 0;
int row = HitTest( point, NULL );
if( col ) *col = 0;
// Make sure that the ListView is in LVS_REPORT
if( ( GetWindowLong( m_hWnd, GWL_STYLE ) & LVS_TYPEMASK ) != LVS_REPORT )
{
return row;
}
// Get the top and bottom row visible
row = GetTopIndex();
int bottom = row + GetCountPerPage();
if( bottom > GetItemCount() )
{
bottom = GetItemCount();
}
// Get the number of columns
CHeaderCtrl* pHeader = (CHeaderCtrl*)GetDlgItem( 0 );
int nColumnCount = pHeader->GetItemCount();
// Loop through the visible rows
for( ; row <= bottom; row++ )
{
// Get bounding rectangle of item and check whether point falls in it.
CRect rect;
GetItemRect( row, &rect, LVIR_BOUNDS );
if( rect.PtInRect(point) )
{
// Find the column
for( column = 0; column < nColumnCount; column++ )
{
int colwidth = GetColumnWidth( column );
if(point.x >= rect.left && point.x <= (rect.left + colwidth ))
{
if( col ) *col = column;
return row;
}
rect.left += colwidth;
}
}
}
return -1;
}
EditSubLabel - is a method to edit the individual cells of the List Control. Taking the row and column integers as arguments, EditSubLabel creates and makes visible an edit control of the appropriate size and text justification. (This also requires another edit control class, CInPlaceEditwhich we derived from the standard CEdit class and is described in the next section.)
CEdit* CEditableListCtrl::EditSubLabel( int nItem, int nCol )
{
// The returned pointer should not be saved, make sure item visible
if( !EnsureVisible( nItem, TRUE ) ) return NULL;
// Make sure that column number is valid
CHeaderCtrl* pHeader = (CHeaderCtrl*)GetDlgItem(0);
int nColumnCount = pHeader->GetItemCount();
if( nCol >= nColumnCount || GetColumnWidth(nCol) < 5 ) return NULL;
// Get the column offset
int offset = 0;
for( int i = 0; i < nCol; i++ ) {
offset += GetColumnWidth( i );
}
CRect rect;
GetItemRect( nItem, &rect, LVIR_BOUNDS );
// Scroll horizontally if we need to expose the column
CRect rcClient;
GetClientRect( &rcClient );
if( offset + rect.left < 0 || offset + rect.left > rcClient.right )
{
CSize size;
size.cx = offset + rect.left;
size.cy = 0;
Scroll( size );
rect.left -= size.cx;
}
// Get Column alignment
LV_COLUMN lvcol;
lvcol.mask = LVCF_FMT;
GetColumn( nCol, &lvcol );
DWORD dwStyle ;
if( (lvcol.fmt&LVCFMT_JUSTIFYMASK) == LVCFMT_LEFT ) {
dwStyle = ES_LEFT;
}
else if( (lvcol.fmt&LVCFMT_JUSTIFYMASK) == LVCFMT_RIGHT ) {
dwStyle = ES_RIGHT;
}
else {
dwStyle = ES_CENTER;
}
rect.left += offset+4; ¬
rect.right = rect.left + GetColumnWidth( nCol ) - 3 ;
if( rect.right > rcClient.right) {
rect.right = rcClient.right;
}
dwStyle |= WS_BORDER | WS_CHILD | WS_VISIBLE | ES_AUTOHSCROLL;
CEdit *pEdit = new CInPlaceEdit(nItem, nCol, GetItemText( nItem, nCol ));
pEdit->Create( dwStyle, rect, this, IDC_LIST1 );
return pEdit;
}
Another essential modification is to add the means by which the user can initiate an edit of the selected List Control cell by modifying the OnLButtonDown method:
void CEditableListCtrl::OnLButtonDown(UINT nFlags, CPoint point)
{
int index;
CListCtrl::OnLButtonDown(nFlags, point);
ModifyStyle(0, LVS_EDITLABELS);
int colnum;
if( ( index = GetRowFromPoint( point, &colnum ) ) != -1 )
{
UINT flag = LVIS_FOCUSED;
if( (GetItemState( index, flag ) & flag) == flag )
{
// Add check for LVS_EDITLABELS
if( GetWindowLong(m_hWnd, GWL_STYLE) & LVS_EDITLABELS )
{
EditSubLabel( index, colnum );
}
}
else
{
SetItemState(
index,
LVIS_SELECTED | LVIS_FOCUSED,
LVIS_SELECTED | LVIS_FOCUSED);
}
}
}
Step 3: Derive a class from CEdit
We create a derived instance of the CEdit class to satisfy a number of requirements: it needs to send the LVN_ENDLABELEDIT message and self-destruct upon completion of editing; expand a little to accommodate the text; and also terminate upon pressing the Escape or Enter keys or when the edit control loses focus.
class CInPlaceEdit : public CEdit
{
public:
CInPlaceEdit(int iItem, int iSubItem, CString sInitText);
// ClassWizard generated virtual function overrides
//{{AFX_VIRTUAL(CInPlaceEdit)
public: virtual BOOL PreTranslateMessage(MSG* pMsg);
//}}AFX_VIRTUAL
public: virtual ~CInPlaceEdit();
// Generated message map functions
protected:
//{{AFX_MSG(CInPlaceEdit)
afx_msg void OnKillFocus(CWnd* pNewWnd);
afx_msg void OnNcDestroy();
afx_msg void OnChar(UINT nChar, UINT nRepCnt, UINT nFlags);
afx_msg int OnCreate(LPCREATESTRUCT lpCreateStruct);
//}}AFX_MSG
DECLARE_MESSAGE_MAP()
private:
int m_iItem;
int m_iSubItem;
CString m_sInitText;
BOOL m_bESC;
};
The derived CEdit control, CInPlaceEdit, is described as follows. The overridden PreTranslateMessage() determines whether certain key strokes make it to the edit control. OnKillFocus() sends the LVN_ENDLABELEDIT notification and destroys the edit control. The notification is sent to the parent of the list view control and not to the list view control itself. When sending the notification, the m_bESC member variable is used to determine whether to send a NULL string. OnNcDestroy() is the appropriate place to destroy the C++ object. The OnChar() function terminates editing if the Escape or the Enter key is pressed.
Otherwise for any other character, it lets the base class function take care of it before it tries to determine if the control needs to be resized. The function gets the extent of the new string and then compares it to the dimension of the edit control. If the string is too long to fit within the edit control, it resizes the edit control after checking if there is sufficient space for it to expand.
OnCreate() creates the edit control, initialising it with the proper values.
Full code listing of the CInPlaceEdit control:
CInPlaceEdit::CInPlaceEdit(int iItem, int iSubItem, CString sInitText):m_sInitText( sInitText )
{
m_iItem = iItem;
m_iSubItem = iSubItem;
m_bESC = FALSE;
}
CInPlaceEdit::~CInPlaceEdit(){}
BEGIN_MESSAGE_MAP(CInPlaceEdit, CEdit)
//{{AFX_MSG_MAP(CInPlaceEdit)
ON_WM_KILLFOCUS()
ON_WM_NCDESTROY()
ON_WM_CHAR()
ON_WM_CREATE()
//}}AFX_MSG_MAP
END_MESSAGE_MAP()
//CInPlaceEdit message handlers
// Translate window messages before they are dispatched to the TranslateMessage and DispatchMessage Windows functions.
BOOL CInPlaceEdit::PreTranslateMessage(MSG* pMsg)
{
if( pMsg->message == WM_KEYDOWN )
{
if(pMsg->wParam == VK_RETURN ||
pMsg->wParam == VK_DELETE ||
pMsg->wParam == VK_ESCAPE ||
GetKeyState( VK_CONTROL ) )
{
::TranslateMessage(pMsg);
::DispatchMessage(pMsg);
return TRUE;
// DO NOT process further
}
}
return CEdit::PreTranslateMessage(pMsg);
}
// Called immediately before losing the input focus
void CInPlaceEdit::OnKillFocus(CWnd* pNewWnd)
{
CEdit::OnKillFocus(pNewWnd);
CString str;
GetWindowText(str);
DestroyWindow();
}
// Called when nonclient area is being destroyed
void CInPlaceEdit::OnNcDestroy()
{
CEdit::OnNcDestroy();
delete this;
}
// Called for nonsystem character keystrokes
void CInPlaceEdit::OnChar(UINT nChar, UINT nRepCnt, UINT nFlags)
{
if( nChar == VK_ESCAPE || nChar == VK_RETURN)
{
if( nChar == VK_ESCAPE )
{
m_bESC = TRUE;
}
GetParent()->SetFocus();
return;
}
CEdit::OnChar(nChar, nRepCnt, nFlags);
// Resize edit control if needed
CString str;
GetWindowText( str );
CWindowDC dc(this);
CFont *pFont = GetParent()->GetFont();
CFont *pFontDC = dc.SelectObject( pFont );
CSize size = dc.GetTextExtent( str );
dc.SelectObject( pFontDC );
size.cx += 5;
// Get the client rectangle
CRect rect, parentrect;
GetClientRect( &rect );
GetParent()->GetClientRect( &parentrect );
// Transform rectangle to parent coordinates
ClientToScreen( &rect );
GetParent()->ScreenToClient( &rect );
// Check whether control needs resizing and if sufficient space to grow
if( size.cx > rect.Width() )
{
if( size.cx + rect.left < parentrect.right )
{
rect.right = rect.left + size.cx;
}
else
{
rect.right = parentrect.right;
}
MoveWindow( &rect );
}
// Construct list control item data
LV_DISPINFO dispinfo;
dispinfo.hdr.hwndFrom = GetParent()->m_hWnd;
dispinfo.hdr.idFrom = GetDlgCtrlID();
dispinfo.hdr.code = LVN_ENDLABELEDIT;
dispinfo.item.mask = LVIF_TEXT;
dispinfo.item.iItem = m_iItem;
dispinfo.item.iSubItem = m_iSubItem;
dispinfo.item.pszText = m_bESC ? NULL : LPTSTR((LPCTSTR)str);
dispinfo.item.cchTextMax = str.GetLength();
// Send this Notification to parent of ListView ctrl
CWnd* pWndViewAttachmentsDlg = GetParent()->GetParent();
if ( pWndViewAttachmentsDlg )
{
pWndViewAttachmentsDlg->SendMessage(
WM_NOTIFY_DESCRIPTION_EDITED,
GetParent()->GetDlgCtrlID(),
(LPARAM)&dispinfo );
}
}
// Called when application requests the Windows window be created by calling
// Create/CreateEx member function.
int CInPlaceEdit::OnCreate(LPCREATESTRUCT lpCreateStruct)
{
if (CEdit::OnCreate(lpCreateStruct) == -1)
{
return -1;
}
// Set the proper font
CFont* font = GetParent()->GetFont();
SetFont( font );
SetWindowText( m_sInitText );
SetFocus();
SetSel( 0, -1 );
return 0;
}
Step 4: Add the CEditableListCtrl as a control variable
In the main CEditableListControlDlg class, add CEditableListCtrl as a control variable:
CEditableListCtrl m_EditableList;
And modify DoDataExchange accordingly:
void CEditableListControlDlg::DoDataExchange(CDataExchange* pDX)
{
CDialogEx::DoDataExchange(pDX);
DDX_Control(pDX, IDC_LIST1, m_EditableList);
}
And in OnInitDialog let's add a few sample list control entries:
BOOL CEditableListControlDlg::OnInitDialog()
{
CDialogEx::OnInitDialog();
// Add "About..." menu item to system menu.
// IDM_ABOUTBOX must be in the system command range.
ASSERT((IDM_ABOUTBOX & 0xFFF0) == IDM_ABOUTBOX);
ASSERT(IDM_ABOUTBOX < 0xF000);
CMenu* pSysMenu = GetSystemMenu(FALSE);
if (pSysMenu != NULL)
{
BOOL bNameValid;
CString strAboutMenu;
bNameValid = strAboutMenu.LoadString(IDS_ABOUTBOX);
ASSERT(bNameValid);
if (!strAboutMenu.IsEmpty())
{
pSysMenu->AppendMenu(MF_SEPARATOR);
pSysMenu->AppendMenu(MF_STRING, IDM_ABOUTBOX, strAboutMenu);
}
}
// Set the icon for this dialog. The framework does this automatically
// when the application's main window is not a dialog
SetIcon(m_hIcon, TRUE); // Set big icon
SetIcon(m_hIcon, FALSE); // Set small icon
// TODO: Add extra initialization here
CRect rect;
CWnd *pWnd = this->GetDlgItem( IDC_LIST1 );
pWnd->GetWindowRect(&rect);
this->ScreenToClient(&rect); //optional step - see below
m_xoffset = rect.left;
m_yoffset = rect.top;
LVCOLUMN lvColumn;
int nCol;
lvColumn.mask = LVCF_FMT | LVCF_TEXT | LVCF_WIDTH;
lvColumn.fmt = LVCFMT_LEFT;
lvColumn.cx = 150;
lvColumn.pszText = "Name";
nCol = m_EditableList.InsertColumn(0, &lvColumn);
lvColumn.mask = LVCF_FMT | LVCF_TEXT | LVCF_WIDTH;
lvColumn.fmt = LVCFMT_CENTER;
lvColumn.cx = 150;
lvColumn.pszText = "Occupation";
m_EditableList.InsertColumn(1, &lvColumn);
lvColumn.mask = LVCF_FMT | LVCF_TEXT | LVCF_WIDTH;
lvColumn.fmt = LVCFMT_LEFT;
lvColumn.cx = 150;
lvColumn.pszText = "Country";
m_EditableList.InsertColumn(2, &lvColumn);
m_EditableList.SetExtendedStyle(m_EditableList.GetExtendedStyle() | LVS_EX_FULLROWSELECT | LVS_EDITLABELS);
// Insert a few example list items
int l_iItem = m_EditableList.InsertItem(LVIF_TEXT|LVIF_STATE, 0, "Andrew", 0, LVIS_SELECTED, 0, 0);
m_EditableList.SetItemText( l_iItem, 1, "Bricklayer" );
m_EditableList.SetItemText( l_iItem, 2, "Australia" );
l_iItem = m_EditableList.InsertItem(LVIF_TEXT|LVIF_STATE, 0, "Peter", 0, LVIS_SELECTED, 0, 0);
m_EditableList.SetItemText( l_iItem, 1, "Lecturer" );
m_EditableList.SetItemText( l_iItem, 2, "New Zealand" );
l_iItem = m_EditableList.InsertItem(LVIF_TEXT|LVIF_STATE, 0, "Richard", 0, LVIS_SELECTED, 0, 0);
m_EditableList.SetItemText( l_iItem, 1, "Dentist" );
m_EditableList.SetItemText( l_iItem, 2, "Botswana" );
return TRUE; // return TRUE unless you set the focus to a control
}
Step 5: Introduce notifiers for handling updates and Windows messages
Beginning with the Windows message map:
BEGIN_MESSAGE_MAP(CEditableListControlDlg, CDialogEx)
ON_WM_SYSCOMMAND()
ON_WM_PAINT()
ON_WM_QUERYDRAGICON()
ON_NOTIFY(NM_CLICK, IDC_LIST1, OnNMClickList)
ON_MESSAGE(WM_NOTIFY_DESCRIPTION_EDITED, OnNotifyDescriptionEdited)
END_MESSAGE_MAP()
For when the user clicks on the editable list control in particular:
void CEditableListControlDlg::OnNMClickList(NMHDR *pNMHDR, LRESULT *pResult)
{
m_fClickedList = true;
m_EditableList.OnLButtonDown( MK_LBUTTON, InterviewListCursorPosition() );
*pResult = 0;
}
Also add a notifier for handling when the edit control has been updated:
LRESULT CEditableListControlDlg::OnNotifyDescriptionEdited(
WPARAM wParam,
LPARAM lParam)
{
// Get the changed Description field text via the callback
LV_DISPINFO* dispinfo = reinterpret_cast<LV_DISPINFO*>(lParam);
// Persist the selected attachment details upon updating its text
m_EditableList.SetItemText(
dispinfo->item.iItem,
dispinfo->item.iSubItem,
dispinfo->item.pszText );
return 0;
}
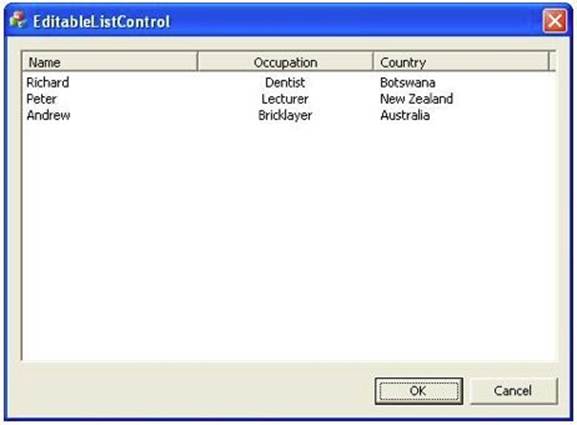
Run the sample project to see the default List Control entries displayed:
And then see how upon left-clicking individual cells, they become editable, an outline appearing around the editable control:
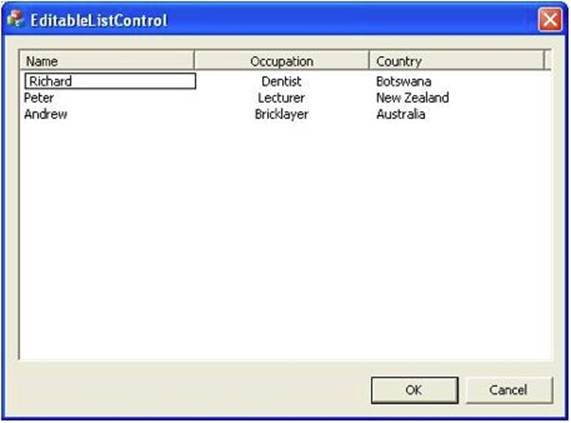
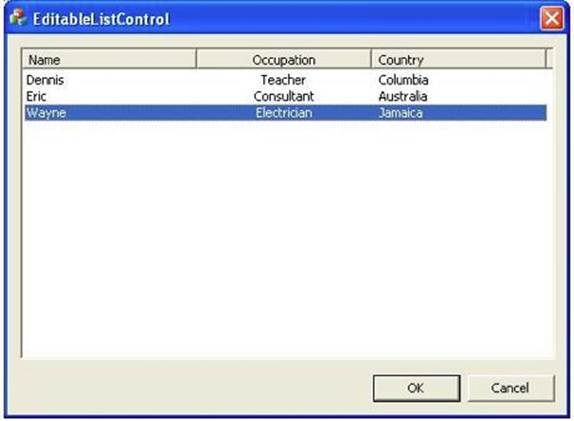
And that any of the fields can be edited if the user chooses:
Chapter Summary
To summarize in the first of these 10 master lessons, we have learned how to:
·Create our first Windows application with event handling.
·Create a dialog application both programmatically and by using the MFC Application Wizard.
·Add controls to dialog applications.
·Create customized MFC controls, such as the CListCtrl (ordinarily read-only), so that its individual grid items become modifiable.
All materials on the site are licensed Creative Commons Attribution-Sharealike 3.0 Unported CC BY-SA 3.0 & GNU Free Documentation License (GFDL)
If you are the copyright holder of any material contained on our site and intend to remove it, please contact our site administrator for approval.
© 2016-2026 All site design rights belong to S.Y.A.