Real World .NET, C#, and Silverlight: Indispensible Experiences from 15 MVPs (2012)
Chapter 6
Tips and Tricks for Designers and Developers
by Daron Yöndem
Building high-quality software is getting more and more complex every day. The customer expectations are rising as available tools and technologies evolve. Providing the best set of features or functionalities is just a starting point on the way to building premium quality software. Customers want to see a visually appealing interface, and they want to get in touch with the software in a sensational way.
With these requirements, where functionality meets beautifully designed interfaces, development teams face another design aspect called user experience (UX) design. It's not only about having the best set of colors or shapes on the screen. It's also about how you want your customers to use your software, or how you want them to feel using your software.
In this complex world, it is crucial to incorporate a different set of skills into one project. Creating stunning visuals, building animations, designing user interface (UI) controls, organizing the content, and integrating functionalities with back-end systems are just some of the tasks that should be successfully accomplished to create the best quality software.
The job is too much to be a one-man show. Different roles and people should be involved in the making of a great application. At the highest level, these roles are often defined as developers and designers.
The success of an end product developed by a group of people is mostly based on the collaboration skills of each member of the team. Developers and designers must work together seamlessly. The need for collaboration has always been there, but the available tools or technologies did not offer an efficient way to fulfill the promise. This is where Microsoft's UI platforms, Silverlight and Windows Presentation Foundation (WPF), take the stage.
Understanding the Differences Between Silverlight and WPF
The Extensible Application Markup Language (XAML) is the key for all collaboration features of both Silverlight and WPF. You need to understand the relationship between XAML and the back-end platform that can help to connect the design surface with the code written by a developer.
First, XAML is a markup language. That means it is both human-readable and computer-readable. Being human-readable is extremely important because the learning curve for a markup language is much smoother compared to the other programming languages. Many designers have no programming background but can write and manipulate markup languages such as HTML.
Second, it is not obligatory to learn the syntax of the markup because there is always a What-You-See-Is-What-You-Get (WYSIWYG) editor that can help designers or developers easily produce the XAML needed, and without errors.
Choosing XAML over Other Markups
XAML is not just a markup language representing visual elements. It's also a way to define behaviors, styles, triggers, control templates, data templates, data binding, and animation. All these features are easily accessible through WYSIWYG editors such as Microsoft Expression Blend. From a developer's perspective, you could consider XAML a declarative language, where it is possible to define custom controls developed separately.
Understanding the Separation of Concerns
I remember saying in a conference, “The only way you can have a designer and developer working together on a project is to let them work separately.” I think this is still true. Thanks to XAML, both Silverlight and WPF can offer an environment in which a developer can write code without tampering with the design, or a designer can create UIs that include animations and even simple data binding.
Tips and Tricks for Designers
With tools such as Expression Blend, whatever you design is a part of the real application! No one needs to transform, transport, or do any kind of additional process to get the visuals or the interface you create into the real application. You directly work on the real application, which runs when you press the F5 button within Expression Blend. With this in mind, to create developer-friendly designs, you should be aware of the tips and tricks presented here.
Naming Your Objects
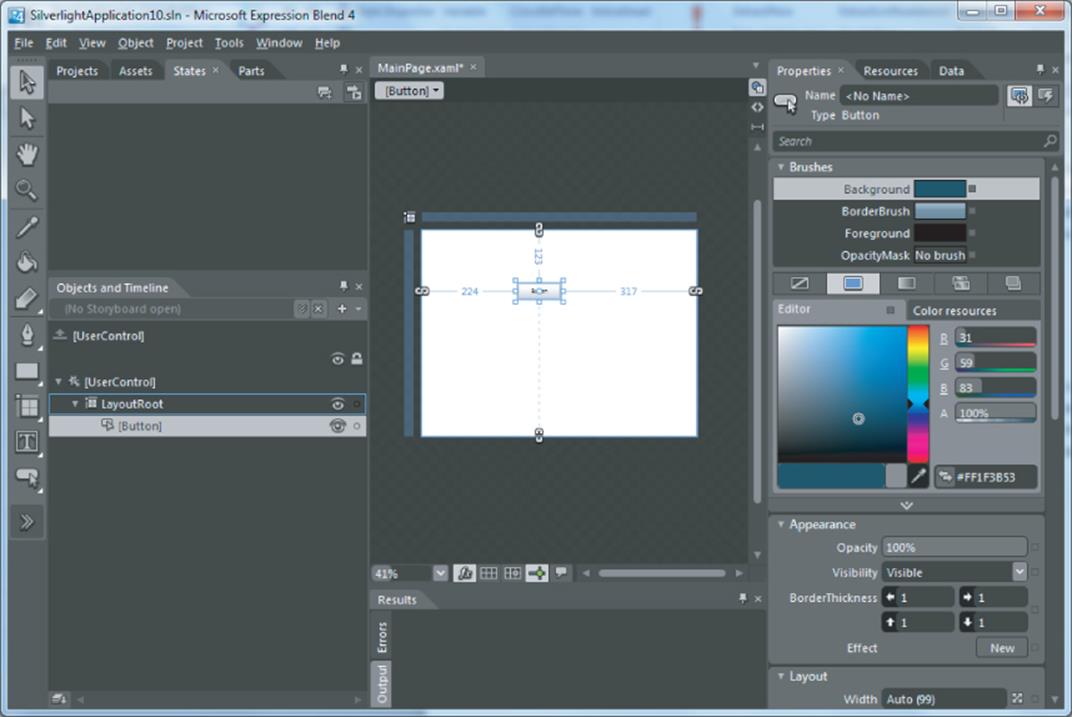
Every time you start to create a UI in Microsoft Expression Blend, such as the one shown in Figure 6.1, you should remember that whatever objects you put on screen, there is a big chance that developers on your team will use and access them. To let them access the visual objects you put on the screen, you must name the objects.
Figure 6.1 Naming objects on a screen interface
Check to see if your company has documentation about the naming conventions used by developers. Implement those conventions in Expression Blend while naming UI objects. If you don't have such documentation, it is time to create it so that you can be in sync with your team when starting to name your objects at this level of the development process.
Do not name everything you have on screen. First, if you start naming every object you use in your design, your developer will have a difficult time finding the right object name in a long list within Visual Studio. It is likely that you will have thousands of UI elements on screen, including every shape, rectangle, and line you used while creating the artwork.
If you are sure about an element that developers will never need to access or manipulate, don't name that element. This will also affect the performance of your application. There will be performance differences between having 1,000 UI elements with only 100 of them named and 1,000 elements with all of them named.
Designing in Photoshop
Microsoft Expression Studio has all the tools you need to design a UI. If you want a tool to create assets and vector artwork, Expression Design can help you with the support of XAML export, so you can use the assets in Expression Blend while creating the final user experience and the interactivity.
However, if you feel you are more comfortable using Photoshop, you can still create the design in that environment and then later import the design into Expression Blend. Keep in mind, however, that the design you create in Photoshop will still be used by developers on your team directly without any major changes or transformation.
You should definitely be familiar with and use layers in Photoshop. All the layers and folders you create in Photoshop will be UI elements in Silverlight/WPF, and developers can access the objects by calling the names you assign in Photoshop.
Moreover, the logic you use to group objects or create layers in Photoshop is far more important than simply being a design aspect. Creating a folder named Buttons and including an irrelevant image or design element in the folder can confuse the developers on your team. You can use the layers and folders in Photoshop as containers in Silverlight/WPF, which you can sometimes use to move objects or make them transparent from the end user's perspective.
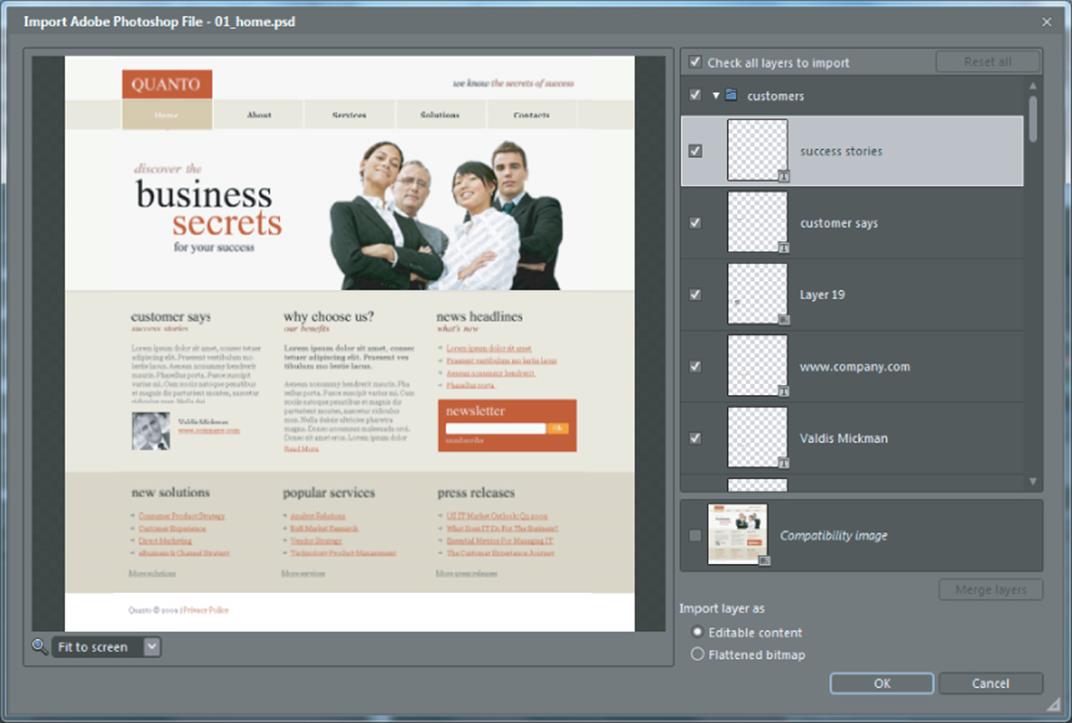
Importing Assets from Photoshop
As mentioned earlier, Expression Blend supports importing whole designs from Photoshop. During this import process, you face critical choices.
The first choice concerns the text elements. During the import process, the text elements you have in Photoshop can be converted to bitmap files, or kept as dynamic TextBlocks. The difference is that a bitmap is static with its content (in other words, it will just be an image), whereas a TextBlock is dynamic content (meaning that developers can change the text).
So, you might be wondering, why not make everything dynamic? Text in a dynamic TextBlock is rendered with a font file. You can include your font file inside your application, or use generic fonts accessible on all systems. However, if you use a custom font, and never plan to change the text, why would you carry that huge font file with you inside your application? A better choice is to just convert the text to an image, as shown in Figure 6.2, and keep it there as long as you need.
Figure 6.2 Converting text to an image for display
Using Sample Data for a Better Design Experience
Expression Blend supports providing sample data without any help from the developer, so you can build your design seeing the end-product in a real-life fashion. To create a sample data source, you must go to the Data tab inside Expression Blend, as shown on the right side of Figure 6.3.
Figure 6.3 Accessing the Data tab in Expression Blend
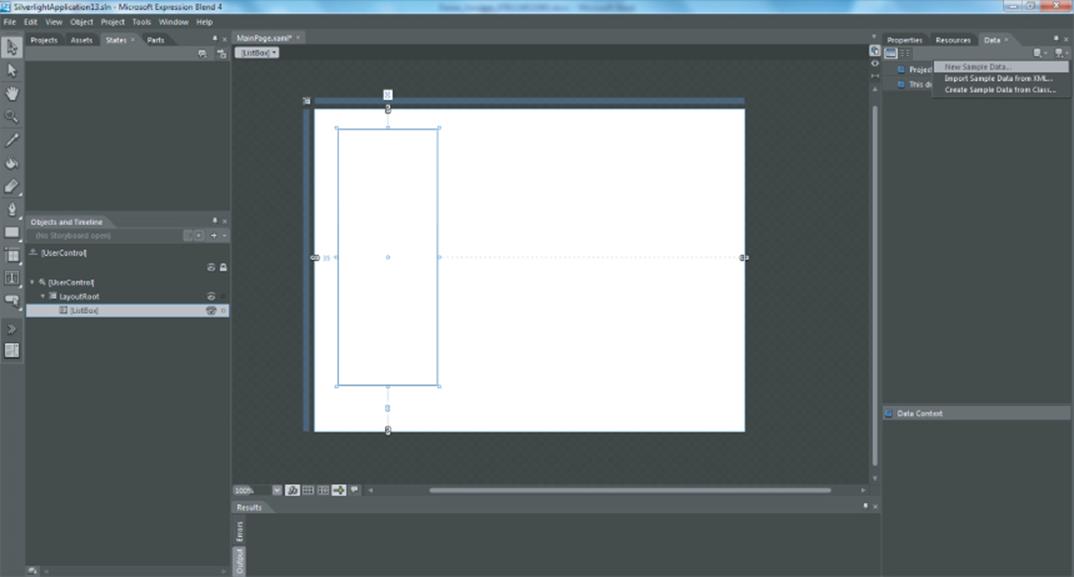
Inside the Data tab, click Create Sample Data → New Sample Data menu. Be sure to keep the Enable Sample Data When Application Is Running check box checked.
Now create a sample collection of items you need to give life to your design. For example, you can rename the collection you have to Products and start defining what a product is by specifying different properties. For this example, say that a product should have a name, perhaps a photo, and a price, as shown on the right side of Figure 6.4. The name should be a text string. The price should be a number, and the photo should be an image. All these implementations are already inside Expression Blend.
Figure 6.4 Collection of items in Expression Blend
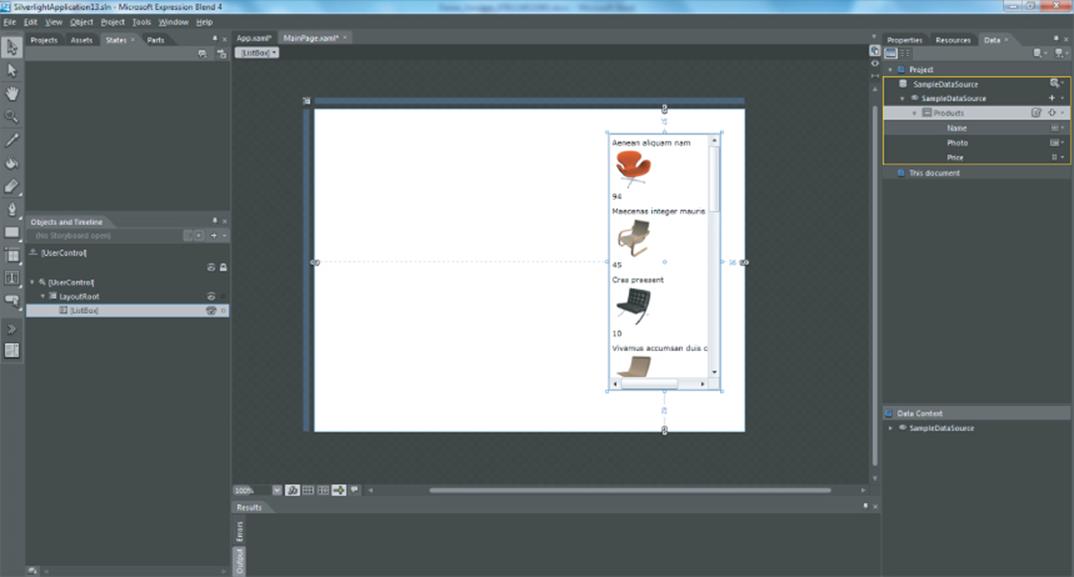
The final step is to drag and drop the collection onto a UI element that can show a list of items. A listbox, combobox, or a datagrid are just some of the controls you can use.
Tips and Tricks for Developers
What distinguishes Silverlight and WPF from all the other platforms where you can write C# code are the UI engine (the XAML) and the data-binding mechanism that enables you to separate the design and the development. Now take a look at some tips and tricks you can implement to be a designer-friendly developer.
Showing Sample Data in Design Mode
Say that you are writing full data-access or business logic code, or maybe developing some custom controls implementing visual elements as well. If your control shows some kind of data, the data most likely will be fetched from the source, and bound to the control when the project or application runs. This means that designers on your team cannot see that data while working in Expression Blend. They need to design the interface without seeing the content and then run the application to see everything filled in. Obviously, this is not good.
To improve the designer's experience, you can include some sample data in your project, or maybe change the way data access works when the project runs in Design mode. When a user control is opened inside Expression Blend, the state you are inside is called Design mode. If you can detect when the code runs in Design mode, you can simply fill in some sample data, as shown here:
if (System.ComponentModel.DesignerProperties.GetIsInDesignMode(this))
{
//This code runs in design mode (Blend)
}
In this code, you simply call the GetIsInDesignMode method providing a UIElement that you want to check to see whether it is running inside Expression Blend's design surface.
Using Behaviors to Make Things Easier
As a developer, perhaps you will never use a behavior. This is a feature that designers can use inside Expression Blend, which is exactly why developers should know what a behavior is.
A behavior is like a function in your code. You can specify parameters and give it a job to do. The difference is that this time the function you write will be used by designers on your team. You can delegate a lot of repetitive work to designers, and they can work independently from your code, without knocking on your door for millions of tiny coding requests.
A behavior encapsulates a functionality that can be triggered through another event. For example, you could create a simple MessageBox behavior that would show the regular MessageBox windows, but this time, a designer would do that inside of Expression Blend without writing one line of code.
To create a behavior, you must add the System.Windows.Interactivity reference to your project. The following code helps you inherit from a System.Windows.Interactivity.TriggerAction generic class:
public class MsgBoxTrigger :
System.Windows.Interactivity.TriggerAction<UIElement>
{
protected override void Invoke(object parameter)
{
}
}
You must create a new class by inheriting the System.Windows.Interactivity.TriggerAction generic class. To implement the new functionality you need, you override the Invoke method. However, in this example, you need some content or text to show with the MessageBox. To get that input from the designer, add a property to the MsgBoxTrigger class, as shown here:
public class MsgBoxTrigger :
System.Windows.Interactivity.TriggerAction<UIElement>
{
protected override void Invoke(object parameter)
{
}
public string MessageText { get; set; }
}
Finally, you must implement the functionality, which, in this case, is the following simple MessageBox code:
public class MsgBoxTrigger :
System.Windows.Interactivity.TriggerAction<UIElement>
{
protected override void Invoke(object parameter)
{
MessageBox.Show(MessageText);
}
public string MessageText { get; set; }
}
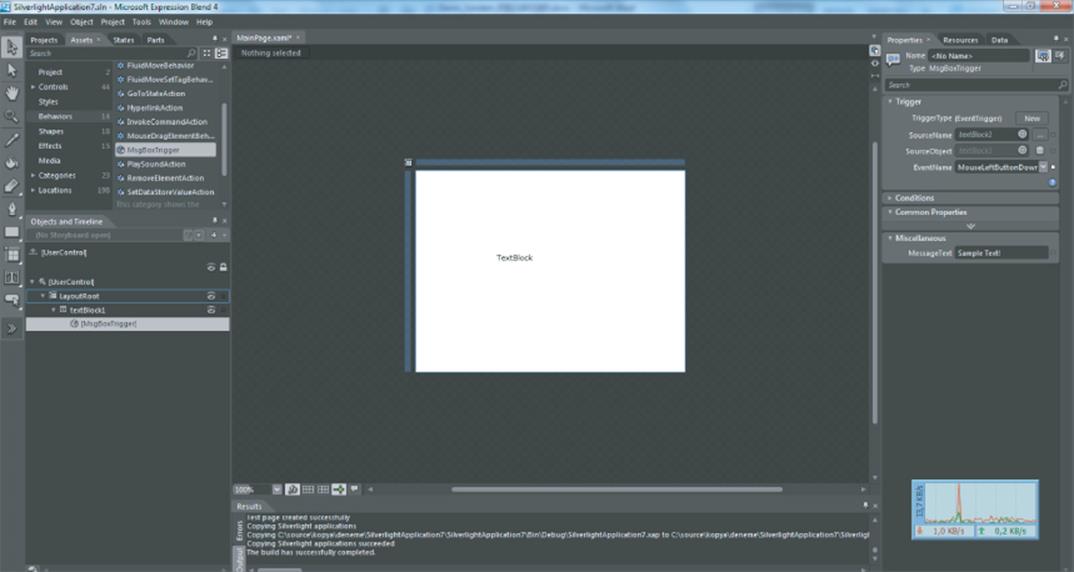
Now you are ready to deliver this code to your designer, or add it inside your project so that your designer can use the behavior in Expression Blend, as shown in Figure 6.5.
Figure 6.5 Using a behavior in Expression Blend
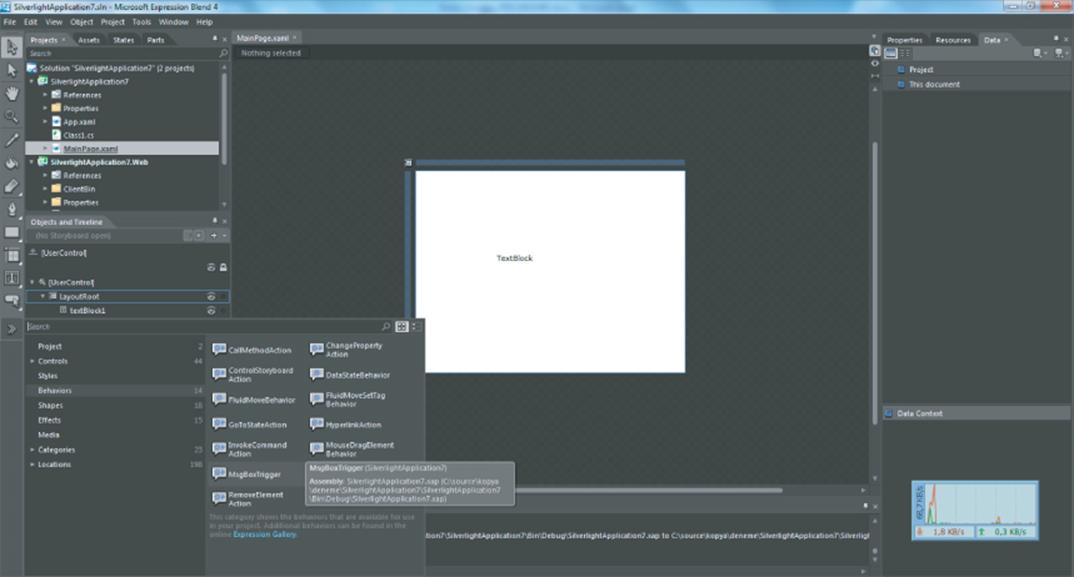
If you open the project in Expression Blend, you see your new behavior in the Assets Library under the Behaviors section, as shown on the left side of Figure 6.6. From now on, designers can drag and drop the behavior onto any UIElement, specify with which event they want to fire the MessageBox, and specify what text shows as the message.
Figure 6.6 Assets Library in the Behaviors section
Summary
Both WPF and Silverlight have the tools you need to collaborate and work together as a team with designers and developers. The rules you can follow as a team or individually can be different, and the tips and tricks are endless. In this chapter, you saw some of the major challenges and how to beat them.
About the Author
Daron Yöndem is the founder of Deveload Software, a UX company based in Turkey. He is a Microsoft Regional Director and received a Gold Global Impact Award in 2009 and 2010. As an international speaker, Yöndem has hosted sessions in conferences including TechEd, MSDays, DevReach, PDC, and OpenDoor. He is the INETA MEA President, a Silverlight MVP, author of two books on ASP.NET AJAX, and a book on HTML5. He is passionate about UX, and can host sessions everywhere, anytime. He hosted more than 180 sessions in 2010, including a full night of free Silverlight community training called SilverNight! You can follow his thoughts at http://daron.yondem.com.
All materials on the site are licensed Creative Commons Attribution-Sharealike 3.0 Unported CC BY-SA 3.0 & GNU Free Documentation License (GFDL)
If you are the copyright holder of any material contained on our site and intend to remove it, please contact our site administrator for approval.
© 2016-2026 All site design rights belong to S.Y.A.