Administering ArcGIS for Server (2014)
Chapter 7. Securing ArcGIS for Server
Data, information, and applications are the digital assets of an organization. As these pillars expand and are deployed across different nodes, communication between these nodes becomes vital, and with communication comes the risk of compromising the data exchanged in the process. Thus, securing data and the means of networking are an essential part of any product. Authentication is not only a security measure, but also a necessary feature. Making sure that no one can tap into the data unless permitted to is one of the critical requirements for a product. In the previous chapter, we implemented the clustering technique that helped distribute GIS services evenly across machines so that they run effectively. However, it is important as well to make sure that these GIS services are properly secured against unauthorized access. ArcGIS for Server depends heavily on networking, so your data can be delivered and consumed as GIS services. The silver lining is that there is a good set of security mechanisms that can be configured to protect your GIS services. There are two tiers that can be configured for authentication and security, the GIS server tier and web server tier. The GIS-tier is the built-in tier managed by ArcGIS for Server and uses the ArcGIS token technology for authentication, while the Web-tier leverages your dedicated Web server authentication mechanisms. In this chapter, we will learn how to secure ArcGIS for Server using these methods.
User and role stores
Before we get into defining the GIS-tier and the Web-tier, we should first discuss the user and role stores. To provide proper data and network security, ArcGIS for Server must identify requests that are made to the GIS services. This is done by cross-referencing a user with the roles granted to that user. By doing so, Server can authenticate requests and allow or deny access to the subject GIS service according to the assigned roles. To achieve that, Server requires two tables, the Users and Roles tables. Configuring these tables or stores can be done either by manually populating the users and roles stores, where the stores will be maintained by Server, or linking it to the Windows domain. We will discuss how to do this in the coming pages.
GIS server tier – ArcGIS token security
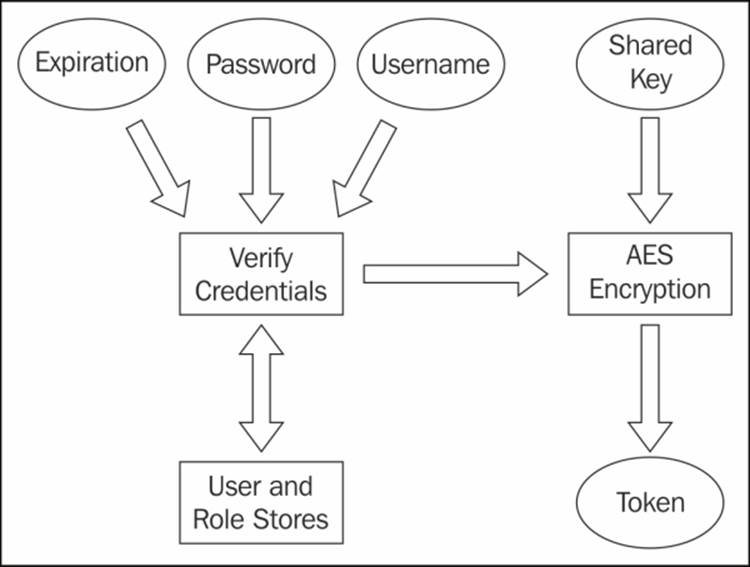
The ArcGIS for Server token method is a built-in security mechanism to authenticate requests made to the GIS services. Esri had to develop their own authentication method in order to not be dependent on an existing preparatory product. Here is how it works:
1. The client makes a request to consume a GIS service.
2. ArcGIS for Server prompts for the username and password.
3. The client supplies the credentials and then Server verifies that against the user store.
4. If the username and password are valid, the Server combines the username, the password, and the expiration period of the token, and applies the Advanced Encryption Standard (AES) along with a shared key to encrypt all that into a string, which is known as a token.
5. The token is then appended to each request until it expires.
The following diagram shows the entire process:
There are two types of tokens, short-lived and long-lived. The short-lived tokens have a relatively shorter expiration period; these are created by default if the expiration period is not specified while attempting to generate a token. Validity for short-lived tokens is measured in minutes, while that for long-lived tokens is measured in days. Since short-lived tokens expire quickly, they are more secure than long-lived tokens; however, this option requires the client to authenticate more frequently, which might become annoying in a less secure environment.
Enabling the ArcGIS token security
To configure ArcGIS for Server security to use the ArcGIS tokens and the built-in stores, log in to ArcGIS for Server Manager using your primary administrator account and then click on the Security tab as shown in the following screenshot:

On the Configuration Settings page, perform the following steps:
1. Click on the pen icon to start editing the security settings.
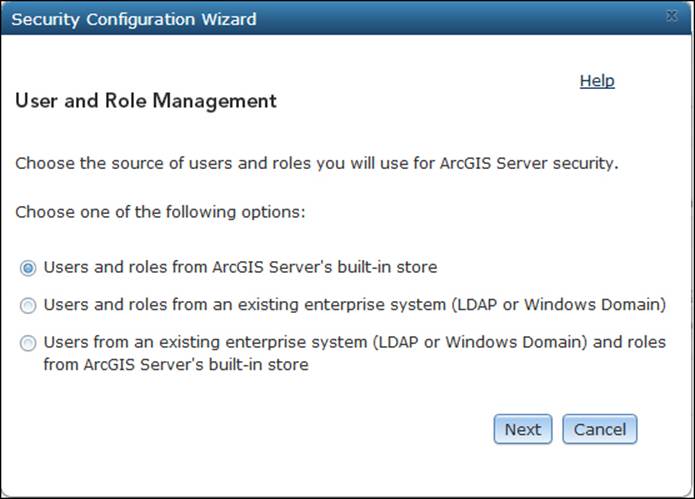
2. On the Security Configuration Wizard screen, choose Users and roles from ArcGIS Server's built-in store; this way, the users and roles will be managed by ArcGIS for Server, which means you have to add and maintain them manually.
3. Click on Next.
4. Click on Finish on the summary window.
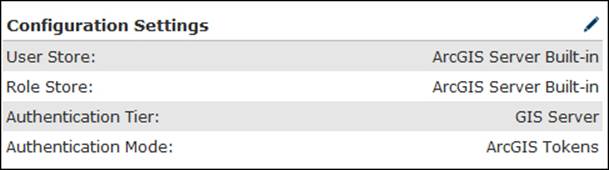
On the Configuration Settings page as shown in the following screenshot, you will see your new security settings. User Store, which is the user table that contains all the GIS users, and Role Store, which is the role table that contains the different roles configured in your ArcGIS for Server, are both using ArcGIS Server's built-in store. The Authentication Tier and Authentication Mode settings are set to use ArcGIS token on the GIS-tier.
Adding new users and roles
You have now configured your Server security to use a token, but we still have more work to do; we don't have any users or roles, so we are going to create some. Under the Security tab, activate the Users tab to view the user identity store; there are no apparent users, so go ahead and click on New User as shown:

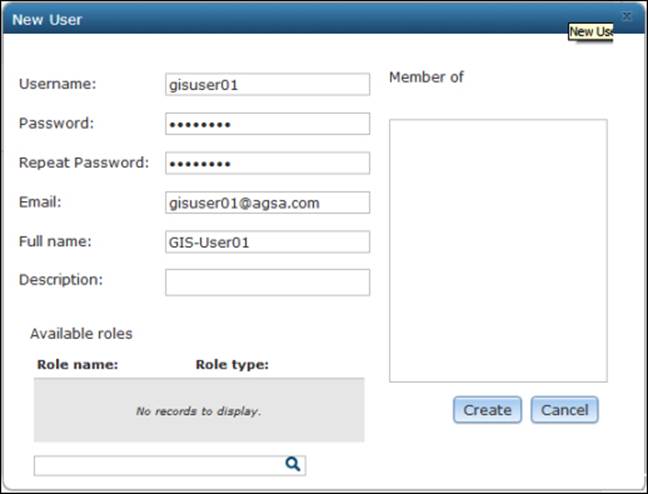
In the New User form, type gisuser01 in the Username field, choose a password, and an e-mail address. Note that there is a box for the roles; this is empty since we don't have any roles now, but it is there in order to assign the role directly as we create the user. Click on Create as shown in the following screenshot:
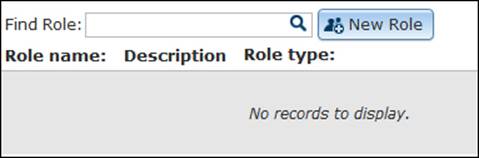
Now we have to add a new role and assign it to the user we just created; click on the Roles tab under Security, and then click on the New Role button as shown in the following screenshot:
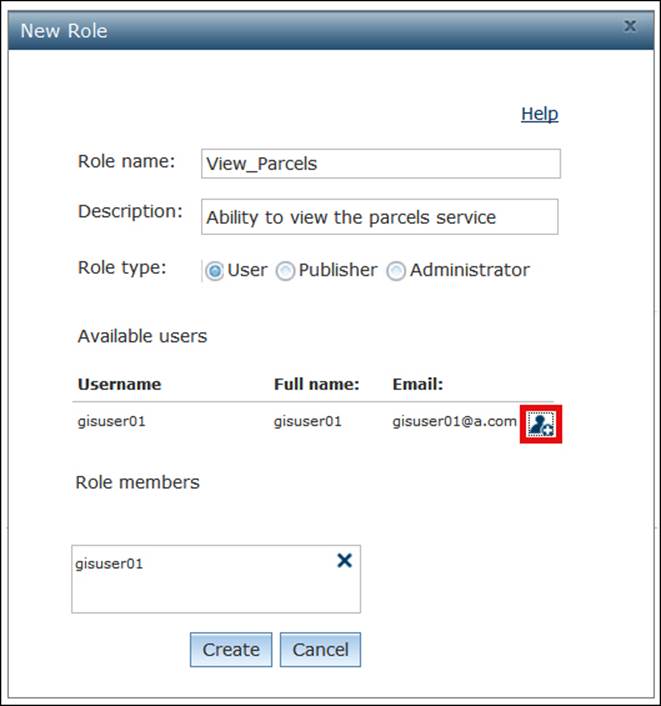
In the New Role form, type View_Parcels in the Role Name field and type Ability to view the parcels service in the Description field. This is where it gets interesting. There are three types of roles: Administrator, Publisher, and User. The Administrator is a role that grants full administrator privileges to the Server site: users with the administrator role type can do whatever the primary administrator can do. There is the publisher role type, which gives the granted users the ability to publish services. The last one is the user role type, which is a custom role used by applications and the one we are going to select. From the Role type radio buttons, select User. You will see the user we just created—gisuser01—in the list below; click on the plus sign beside the user to assign it to the role.
Click on Create to save as shown in the following screenshot:
Enabling security on GIS services
Although we have configured the security on ArcGIS for Server, we haven't explicitly enabled any security or authentication mechanisms on our services. Services are public by default and can be accessed by any client. We have to set security for each GIS service by assigning a set of roles to the service. Let us go to our Parcels service and enable the security so that only people with the View_Parcels role can view this service. To do that, log in to ArcGIS for Server Manager, go to Services, and take a look at the Parcelsservice. You will notice the unlocked icon representing unsecured GIS services as shown in the following screenshot; this means it is available to anyone.
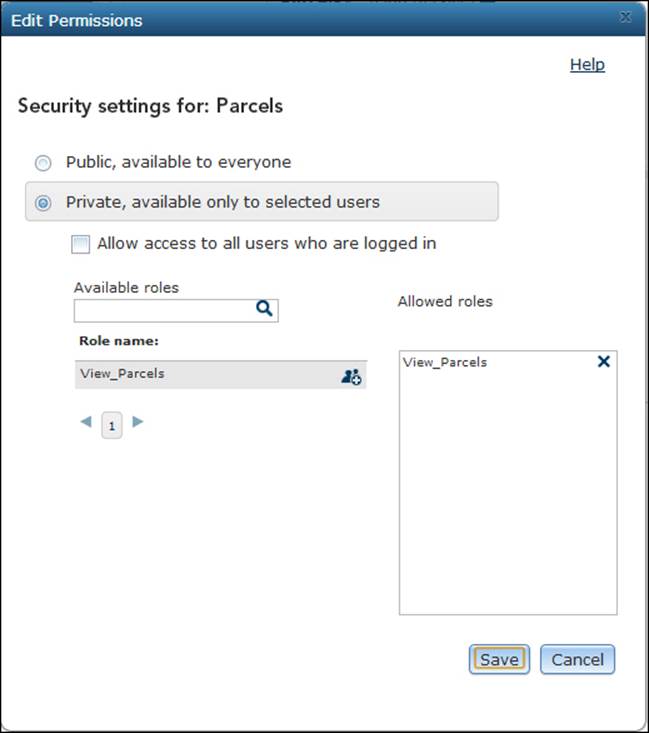
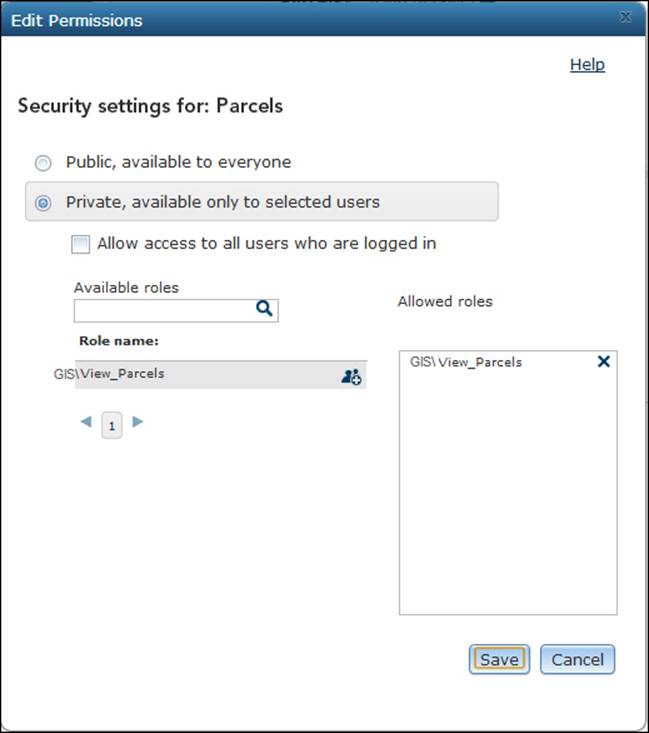
To edit the service security, click on the open lock icon; you will be prompted with the Edit Permissions form, where the default security setting is set to Public, available to everyone. Change that to Private, available only to selected users and then addView_Parcels to the roles of the service. A service with no roles assigned can only be viewed by administrators and publishers; this, of course, includes the primary site administrator. The Edit Permissions form now looks as follows:
You have to be careful who you give the publisher role to, because they can view, edit, and delete all kinds of services. An interesting idea on this subject has been discussed on ArcGIS Ideas. The topic suggests adding different admin levels to the ArcGIS for Server roles to allow more diversity in security. The topic can be found at http://bit.ly/JUvJhW; you may log in and vote on the idea.
Note
You can only assign security roles to a service. To allow a single user to read a service, you have to create a role, add that user to that role, and assign the role to the service. This makes configuration easier as it allows multiple users by adding those users to the roles without reconfiguring the services.
Connecting to a secured service
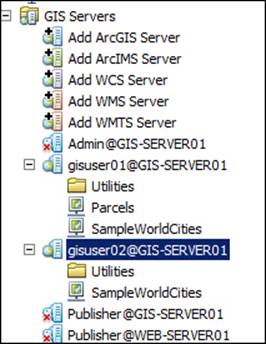
We will now connect to the secured service we just published from ArcMap. Since this service is secured, we will need to specify the username and password to establish the connection. Do you remember how to establish a connection to the service Site from ArcMap? Open ArcMap and make sure the ArcCatalog window is displayed by clicking on the Windows menu and then choose Catalog. Expand the GIS Servers node and double-click on Add ArcGIS Server. Since we will be consuming a new service, choose the Use GIS services option and click on Next. In the General form, type your Server URL address; you will now find two fields we usually keep empty in the Authentication frame: User Name and Password. It is time for you to use which user wants to connect to the server. We will use gisuser01 for this purpose as shown in the following screenshot:

Click on Finish to create the connection and rename the connection to gisuser01@GIS-SERVER01, depending on the server you have used.
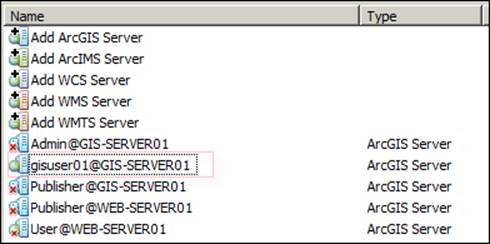
Double-click on the new connection and drag the Parcels GIS service to the map to add it; you won't feel much of a difference in performance, but your parcels layer is now authenticated, and only admins, publishers, and gisuser01 can see it. To test this, jump to ArcGIS for Server Manager and create a new user—gisuser02—don't assign him any roles yet. Try to reconnect, this time with gisuser02; as shown in the following screenshot. You will notice that you cannot see the Parcels service.
Similarly, you could access secured resources through code and the server will prompt you for credentials. Back in Chapter 3, Consuming GIS Services, we managed to connect to a GIS service using an ArcGIS JavaScript API; when the service you are about to consume is secured, the Server responds with the question "Who are you? Please enter your username and password." Let us use this code to achieve that; this is an OnlineMode example, so you will need the Internet to execute it. From the supporting files in7364EN_07_Files\AGSA\Code, open the OnlineMode.html file. The content of the file are as follows:
<html>
<header>
<scriptsrc="http://js.arcgis.com/3.5/"></script>
<link rel="stylesheet" href="http://js.arcgis.com/3.5/js/dojo/dijit/themes/claro/claro.css">
<script>
dojo.require("esri.map");
functionstartup()
{
var map = new esri.Map("MapCanvas");
var layer = new esri.layers.ArcGISDynamicMapServiceLayer("http://GIS-SERVER01:6080/arcgis/rest/services/Parcels/MapServer");
map.addLayer(layer);
}
dojo.addOnLoad(startup);
</script>
</header>
<body>
<div id ="MapCanvas" style = "height: 100%;width:100%" ></div>
</body>
</html>
If you compare this file with the one you have in Chapter 3, Consuming GIS Services, you will see this additional style file added. This file is required for the styling of the form which will ask you to enter the username and password. The additional code part is as follows:
<link rel="stylesheet" href="http://js.arcgis.com/3.5/js/dojo/dijit/themes/claro/claro.css">
If you run the file, you will be prompted to enter the username and password because you are trying to access a secured resource. The prompt looks like this:
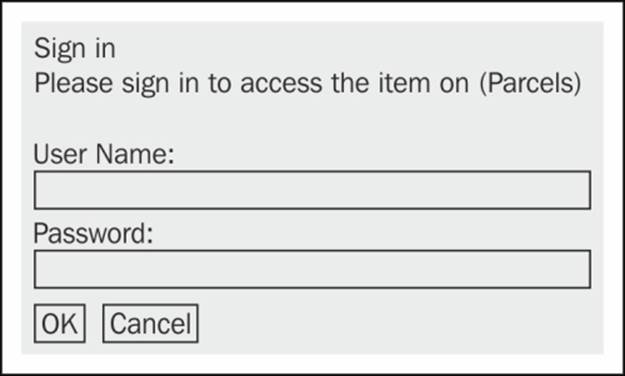
Using gisuser01 will grant access to the resource; however, if you are planning to connect to the resource implicitly, you might want to consider another piece of code if you don't want to bore the user with prompts. This, of course, generates a short-lived token and it will be lost when you refresh the page.
Shared key security
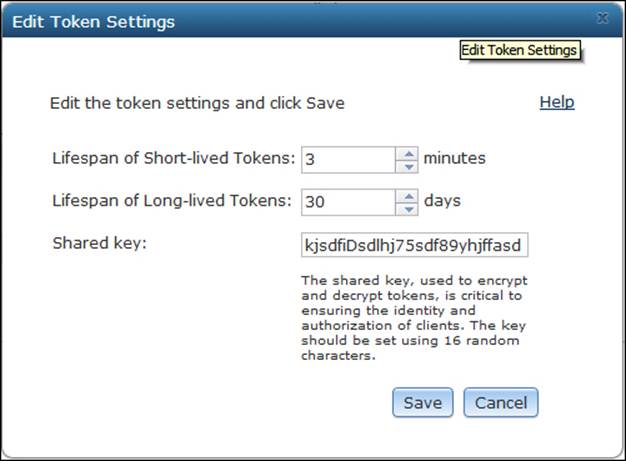
A shared key is a string used to securely generate the token. Since AES—the method used for encryption in Server—is a symmetric-key encryption algorithm, this key is used to both encrypt and decrypt information. This means that if someone managed to get hold of this key, he/she could intercept and decipher the token, acquiring the username and password in plain text. That is why changing the shared key is a good practice to prevent such cases. You can change the shared key along with the lifespan of the tokens from ArcGIS for Server Manager. From the Security tab, edit Token Settings by clicking on the pen icon. Change them based on how high you want your security level.
Tip
Best practice
Make sure to change the shared key regularly to provide sustainable security.
Use a random selection of 16 characters to change the shared key from time to time. Remember that you have to update all your applications, if you have any, to use the new shared key since they use it to generate the token. Don't use predicable text that can be compromised using brute force or guessed by a dictionary; use random characters so as to make the life of whoever is eavesdropping on you much harder. The Edit Token Settings form looks as follows:
Web-tier – Web server security
ArcGIS token is an efficient authentication method; it comes built in with Server and provides you with basic security. However, it might not be the most effective security mechanism. In some instances, you will have security in place, you will have roles and users set up on an LDAP or Windows domain, and it will become hectic to repopulate those into ArcGIS for Server. That is why Server provides a channel to connect your Server site to the Windows domain where you can inherit all the configurations and let the Web server do the authentication every time someone requests a secured resource.
Enabling Web Security
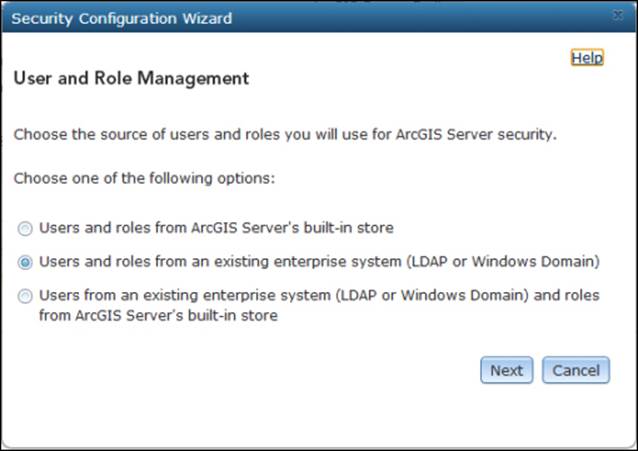
To configure Web server security instead of tokens, access ArcGIS for Server Manager, click on Security, and edit Configuration Settings by clicking on the edit button. Choose the second option, Users and roles from an existing enterprise system (LDAP or Windows Domain), and then click on Next.
Server gives you the option to use an existing Windows domain or even configure your own LDAP server. For this exercise, we will use the Windows domain; make sure you have an active domain for this. Select Windows Domain and click on Next as shown in the following screenshot:

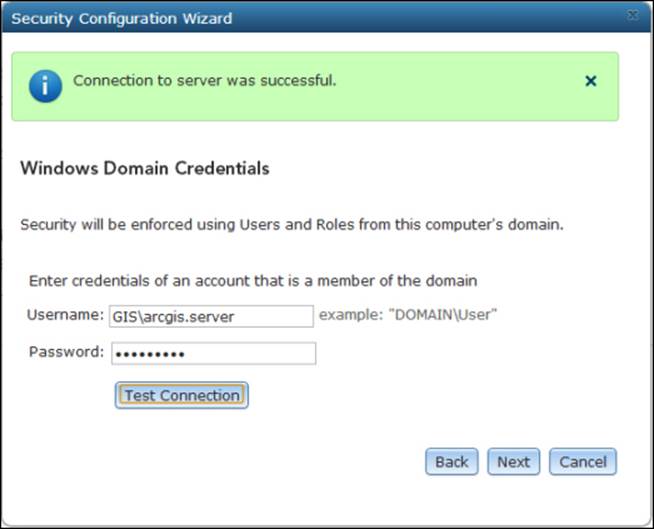
Next, you will have to enter a user that belongs to the domain; you want to pull this entire configuration from the domain, including users, permissions, and roles. It is important to note that this user must have basic permissions to read the domain information. Type the user credentials, click on Test Connection as shown in the following screenshot, and then click on Next if the test was successful.
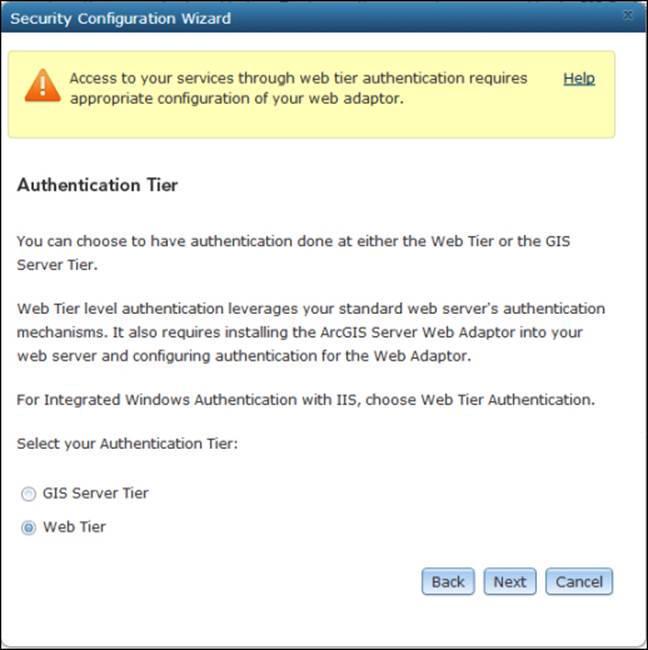
You will be prompted with an interesting choice: to use GIS server tier authentication or to use Web Tier authentication. GIS server tier is basically the token authentication; this will allow you to take advantage of the built-in token authentication while using your domain users instead of recreating your users and roles. The other option is Web Tier, which allows you to leave it for the Web server to do the authentication; in this case, IIS takes over and authenticates for you. Configuring Web Tier apparently requires you to do some configuration on the Web Adaptor, which makes sense as it is the link between your dedicated Web server and your GIS server. We will choose Web Tier for this exercise; click on Next as shown in the following screenshot and then click on Finish to save.
Configuring IIS
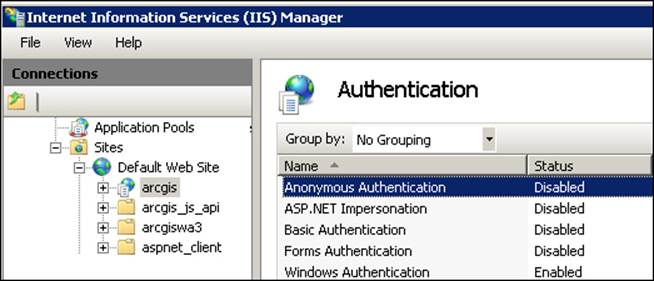
Note that the configuration settings have changed and users and roles are all pointing to the Windows domain; this will save huge administration tasks and will help centralize security. However, there is some work that needs to be done. First, the Web tier authentication requires a Web server, a dedicated one, which in turn requires a Web Adaptor to talk to. Therefore, before changing this security, you have to install the Web Adaptor. Return to Chapter 1, Best Practices for Installing ArcGIS for Server, for details regarding Web Adaptors. From your Windows Control Panel, open Internet Information Services Manager, expand the Default Web Site option, and select your Web Adaptor. Mine is arcgis; yours might be wa or waadmin. Then, double-click on Authentication, disable Anonymous Authentication, and enable Windows Authentication as shown in the following screenshot. This way, you force all authentications to come through Web server.
Adding new users and roles
You cannot use the role and user settings in ArcGIS for Server to modify roles; they have to be managed from the Windows Domain Manager window, where you will add roles and users to the domain. Use it to create the View_Parcels role.
Enabling security on GIS services
To enable security on the GIS services, click on the locked icon and assign the GIS\View_Parcels role to the Parcels GIS service as shown in the following screenshot. You have to make sure that the right users are assigned to this role or group in order to view them.
Connecting to a secured service
Using the same exercise in the GIS server tier – ArcGIS token security section, add a new role and assign it to your domain user. Then, log in to your machine using the domain user that has that role. You may use the same role name, GIS\View_Parcels. After following the same configuration, you will notice that the Web server doesn't even challenge the credentials; it just knows you from the Windows domain, which goes a long way towards saving time and efforts, and is much more secure and less annoying. Try accessing your Parcels web service from the Web using the URL http://GIS-SERVER01/wa/rest/services/Parcels/MapServer, for instance. Here, wa is the Web Adaptor you used. Domain users who are not authorized to view the Parcels web service will get the messageError: User does not have permissions to access 'parcels.mapserver'.
ArcGIS for Server Manager distilled
In versions 10.1 and 10.2, ArcGIS for Server has been completely rewritten to use pure web services in order to migrate to a potential Restful Service Oriented Architecture. Functionalities that have been written in the legacy distributed component object model(DCOM) back in ArcGIS Server 9.1 have been causing limitations and security issues, not to mention delays in the 64-bit architecture. When Esri moved away from DCOM, it allowed more flexibility to almost everything in Server, including Manager. You can now call any method in Server using an API, which really gave room to developers to do more and more with Server.
Creating users and roles
One of the best ways to control the ArcGIS for Server environment is to assign different users to each task. In the following exercise, we will create two user groups: Administrators, which will get the administrator role, and Authors, which will get the publisher role. This way, you can monitor everything based on the user credentials from the logs generated by Server. We will see this in Chapter 8, Server Logs.
Note
You can add also Reviewers group, which is a special user role that can view all services.
The various roles are as follows:
· The administrator role: Users assigned to this role can do anything the primary administrator account can, including creating and deleting users and roles, publishing services, deleting services, editing security parameters, and so on
· The publisher role: Users with a publisher role can delete and publish any service, but they cannot change security parameters in Manager
· The user role: This role can be assigned to a service so as to know who is allowed to use it
Testing access control
We will now create the following publishers and administrators for our Server site. From the ArcGIS for Server Manager window, log in to the site using the primary administrator account and go to Security.
Navigate to Roles | New Role and add the following role:
|
Name |
Admins |
|
Description |
Site Administrators |
|
Role Type |
Administrator |
Click on New Role and add the following role:
|
Name |
Authors |
|
Description |
Service Authors |
|
Role Type |
Publisher |
Navigate to Users | New User and add the following user:
|
Username |
dave |
|
Password |
dave |
|
|
<dave@agsa.com> |
|
Full name |
Dave |
|
Member of |
Admins |
Similarly, add the following users:
|
Username |
kim |
angel |
anila |
|
Password |
kim |
angel |
anila |
|
|
<kim@agsa.com> |
<angel@agsa.com> |
<anila@agsa.com> |
|
Full name |
Kim |
Angel |
Anila |
|
Member of |
Admins |
Authors |
Authors |
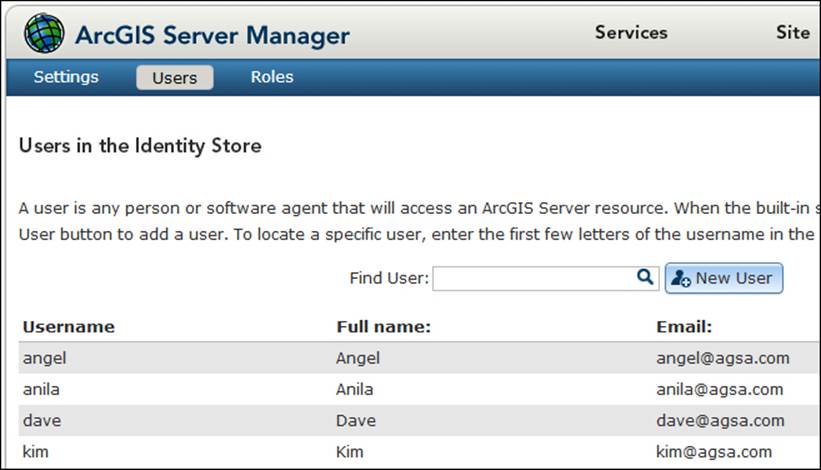
Your users list should look as the following screenshot shows after you finish:
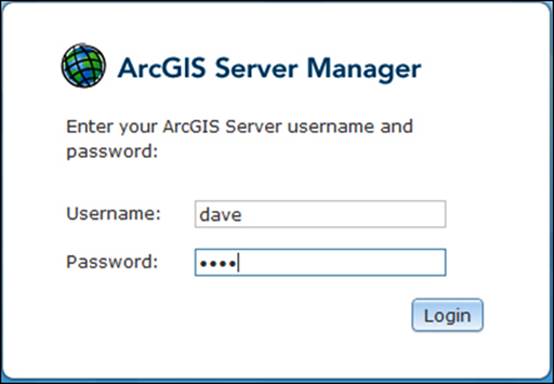
Go back to Manager, sign out of the primary administrator, and log in with dave instead. You will notice the exact same layout as shown in the following screenshot; you can still do pretty much whatever the primary admin can.
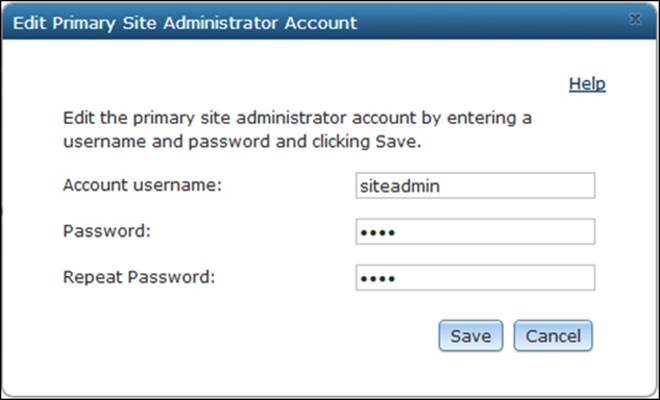
Go to Security and change the password for the primary administrator account, and then click on Save as shown in the following screenshot. Note that dave is a user with an administrator role and he can change the master super user.
Log out from the Manager and log in using the Anila credentials. Anila is an author, which means she is not supposed to change security settings, but she could stop and start services and even delete services. Note that you will see the following message when you log in. This means that some of the features are disabled.
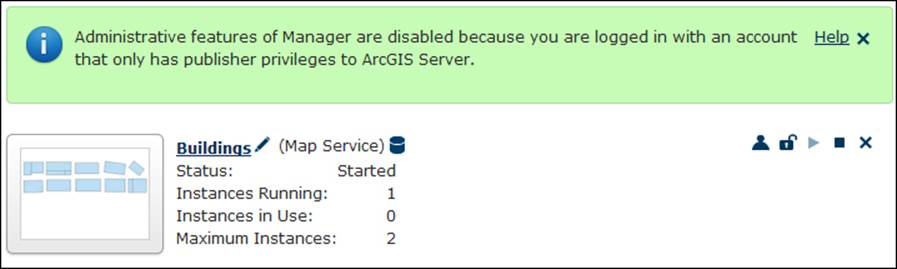
Try to click on Security and change the configuration settings; you will notice that it is grayed out, meaning that Anila does not have the privilege to change security settings in Manager.

This is interesting because you now have control over users. One disadvantage, though, is that it is kind of unfair that publishers and administrators can have unrestricted control over services; any publisher or administrator can stop, delete, and start any service in the Site. This causes some control problems for those who want to tighten security. It would be great to add another layer of roles, where publishers can create new services but cannot delete services created by other publishers.
The administrator directory
The administrator directory is a backend, high-level access that grants you to do much more with your Server site. ArcGIS for Server Manager is an application developed on top of the administrator directory and is limited to whatever has been developed. There are many things you cannot do with the ArcGIS for Server Manager, such as deleting the Site or disabling the Primary Administration Account. You will be able to do that and much more using the Administrator API. To log in to the Administrator Directory form, type the following URL:
http://GIS-SERVER01:6080/arcgis/admin
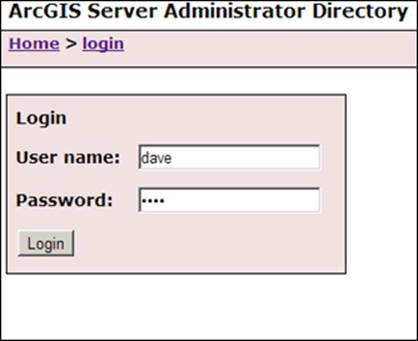
You will get the following prompt. Log in with an administrator account; use dave.
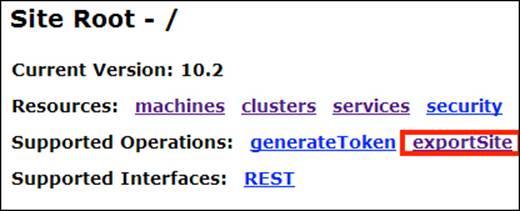
There are three main objects, which are as follows:
· Resources: This shows the available resources such as the machines, clusters, services, and so on
· Supported Operations: This shows the operations supported on these resources
· Supported Interfaces: This is REST most of the time since ArcGIS for Server is a RESTful system
Let us back up our Server site by exporting it to a file. From the Supported Operations list, click on exportSite and then click on Export. Note that this option is only available for Version 10.2 onwards.
You will get a message with a link to download the exporting file, which will take you to a temporary location. Click on the link and then download the file.
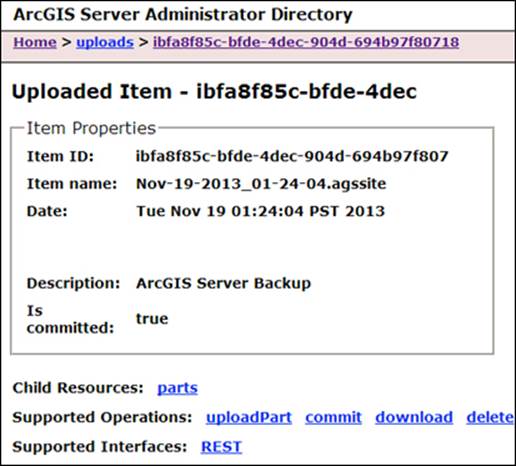
You can use the admin directory to import the site back on a fresh installation and save a lot of time. Since this is all exposed to REST, you can write the code to access the Admin API and do monthly or weekly site backups in batch mode.
Disabling the primary administrator account
Your site now has three administrators—the two you created and the primary administrator. The primary administrator is a generic user; those with access to this account can do whatever they want, and it is hard to trace who did what as anybody from the system administrator team could have leaked these credentials. However, creating a dedicated account for individual users can create more control. This way, any action taken by an admin is recorded in the logfiles that we will discuss in the next chapter. This is why disabling the primary administrator account is a good practice. Perform the following steps to disable the primary administrator account:
1. Log in to the administrator directory using an administrator account, and from the site root resources, click on Security.
2. Click on PSA, which stands for Primary System Administrator.
3. From the supported operations, click on Disable.

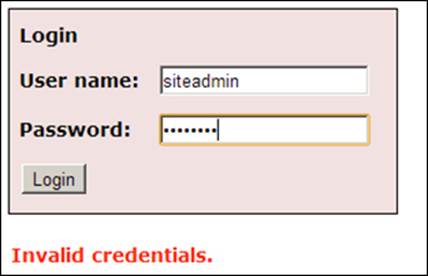
Note that the status of the account is now disabled. To test if that worked, log out of the current session and log in using the primary system administrator account. You will see the following message, which prevents the primary administrator from accessing any resources:
Hypertext Transfer Protocol Secure (HTTPS)
Whatever authentication method you have used to secure your GIS services, it will eventually achieve the one thing it is intended to, authentication. However, after authentication, the transmission of packets between client and server is all done in naked plain text. If you used tokens, someone can intercept and start working on breaking your token into its main components: the username and the password. If it is a long-lived token, chances are that it might be broken. Another eavesdropper might not even need to break the token; he/she will simply listen to the transmission, borrow the token, and re-use it in a reply attack. The same applies on the Web tier security, which is why securing the very channel on which the whole thing is staged is essential to protect all communication, and this is done using the HTTPS protocol.
Note
A reply attack is a malicious network data transmission that seems valid. It is performed by repeating the request by changing a few of the transmission parameters for the attackers' advantage.
Summary
In this chapter, you have learned that ArcGIS for Server offers a good security mechanism to protect your GIS services, which are distributed across the network infrastructure. You now know that there are three methods to secure ArcGIS for Server. The first method, the GIS-tier, uses native ArcGIS token security, which does protection at the GIS service-level; the second one, the Web-tier, is the Web server security, which is applied at the Web server level; and the last one is the protocol security securing the transmission of the GIS data. The Web-tier security proves to be a better choice in an environment where security is crucial, while GIS-tier can be used for small-scale organizations. In the next chapter, you will learn how to analyze log messages generated by Server to find patterns that may help you optimize your environment.
All materials on the site are licensed Creative Commons Attribution-Sharealike 3.0 Unported CC BY-SA 3.0 & GNU Free Documentation License (GFDL)
If you are the copyright holder of any material contained on our site and intend to remove it, please contact our site administrator for approval.
© 2016-2026 All site design rights belong to S.Y.A.