Mastering Elasticsearch, Second Edition (2015)
Chapter 9. Developing Elasticsearch Plugins
In the previous chapter, we were focused on the performance and scaling of our Elasticsearch clusters. We looked at how doc values can help us improve query performance and lower the memory for queries, which deals with field data cache at the cost of slightly slower indexing. We looked at how garbage collector works and what to look at when changing its configuration. We've benchmarked our queries, and we've seen what Hot Threads API gives us. Finally, we discussed how to scale Elasticsearch. By the end of this chapter, you will have learned:
· How to set up the Apache Maven project for Elasticsearch plugins' development
· How to develop a custom REST action plugin
· How to develop a custom analysis plugin extending Elasticsearch analysis capabilities
Creating the Apache Maven project structure
Before we start with showing you how to develop a custom Elasticsearch plugin, we would like to discuss a way to package it so that it can be installed by Elasticsearch using the plugin command. In order to do that, we will use Apache Maven (http://maven.apache.org/), which is designed to simplify software projects' management. It aims to make your build process easier, provide a unifying build system, manage dependencies, and so on.
Note
Please note that the chapter you are currently reading was written and tested using Elasticsearch 1.4.1.
Also remember that the book you are holding in your hands is not about Maven but Elasticsearch, and we will keep Maven-related information to the required minimum.
Note
Installing Apache Maven is a straightforward task; we assume that you already have it installed. However, if you have problems with it, please consult http://maven.apache.org/ for more information.
Understanding the basics
The result of a Maven build process is an artifact. Each artifact is defined by its identifier, its group, and its version. This is crucial when working with Maven, because every dependency you'll use will need to be identified by these three mentioned properties.
The structure of the Maven Java project
The idea behind Maven is quite simple—you create a project structure that looks something like this:
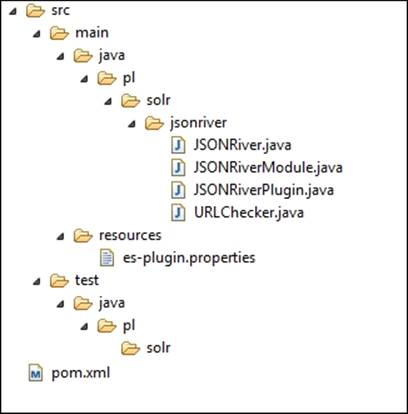
You can see that the code is placed in the src folder—the code is in the main folder and the unit tests are located in the test folder. Although you can change the default layout, Maven tends to work best with the default layout.
The idea of POM
In addition to the code, you can see a file named pom.xml that is located in the root directory in the previous image. This is a project object model file that describes the project, its properties, and its dependencies. That's right—you don't need to manually download dependencies if they are present in one of the available Maven repositories—during its work, Maven will download them, put them in your local repository on your hard disk, and use it when needed. All you need to care about is writing an appropriate pom.xml section that will inform Maven which dependencies should be used.
For example, this is an example Maven pom.xml file:
<project xmlns="http://maven.apache.org/POM/4.0.0" xmlns:xsi="http://www.w3.org/2001/XMLSchema-instance"
xsi:schemaLocation="http://maven.apache.org/POM/4.0.0 http://maven.apache.org/xsd/maven-4.0.0.xsd">
<modelVersion>4.0.0</modelVersion>
<groupId>pl.solr</groupId>
<artifactId>analyzer</artifactId>
<version>1.0-SNAPSHOT</version>
<packaging>jar</packaging>
<name>analyzer</name>
<url>http://solr.pl</url>
<properties>
<elasticsearch.version>1.4.1</elasticsearch.version>
<project.build.sourceEncoding>UTF-8</project.build.sourceEncoding>
</properties>
<dependencies>
<dependency>
<groupId>org.elasticsearch</groupId>
<artifactId>elasticsearch</artifactId>
<version>${elasticsearch.version}</version>
</dependency>
</dependencies>
</project>
This is a simplified version of a pom.xml file that we will extend in the rest of the chapter. You can see that it starts with the root project tag and then defines the group identifier, the artifact identifier, the version, and the packaging method (in our case, the standard build command will create a jar file). In addition to this, we've specified a single dependency—the Elasticsearch library Version 1.4.1.
Running the build process
In order to run the build process, what we need to do is simply run the following command in the directory where the pom.xml file is present:
mvn clean package
It will result in running Maven. It will clean all the generated content in the working directory, compile and package our code. Of course, if we have unit tests, they will have to pass in order for the package to be built. The built package will be written into the targetdirectory created by Maven.
Note
If you want to learn more about the Maven life cycle, please refer to http://maven.apache.org/guides/introduction/introduction-to-the-lifecycle.html.
Introducing the assembly Maven plugin
In order to build the ZIP file that will contain our plugin code, we need to package it. By default, Maven doesn't support pure ZIP files' packaging, so in order to make it all work, we will use the Maven Assembly plugin (you can find more about the plugin athttp://maven.apache.org/plugins/maven-assembly-plugin/). In general, the described plugin allows us to aggregate the project output along with its dependencies, documentations, and configuration files into a single archive.
In order for the plugin to work, we need to add the build section to our pom.xml file that will contain information about the assembly plugin, the jar plugin (which is responsible for creating the proper jar), and the compiler plugin, because we want to be sure that the code will be readable by Java 7. In addition to this, let's assume that we want our archive to be put into the target/release directory of our project. The relevant section of the pom.xml file should look as follows:
<build>
<plugins>
<plugin>
<groupId>org.apache.maven.plugins</groupId>
<artifactId>maven-jar-plugin</artifactId>
<version>2.3</version>
<configuration>
<finalName>elasticsearch-${project.name}-${elasticsearch.version}</finalName>
</configuration>
</plugin>
<plugin>
<groupId>org.apache.maven.plugins</groupId>
<artifactId>maven-assembly-plugin</artifactId>
<version>2.2.1</version>
<configuration>
<finalName>elasticsearch-${project.name}-${elasticsearch.version}</finalName>
<appendAssemblyId>false</appendAssemblyId>
<outputDirectory>${project.build.directory}/release/</outputDirectory>
<descriptors>
<descriptor>assembly/release.xml</descriptor>
</descriptors>
</configuration>
<executions>
<execution>
<id>generate-release-plugin</id>
<phase>package</phase>
<goals>
<goal>single</goal>
</goals>
</execution>
</executions>
</plugin>
<plugin>
<artifactId>maven-compiler-plugin</artifactId>
<configuration>
<source>1.7</source>
<target>1.7</target>
</configuration>
</plugin>
</plugins>
</build>
If you look closely at the assembly plugin configuration, you'll notice that we specify the assembly descriptor called release.xml in the assembly directory. This file is responsible for specifying what kind of archive we want to have as the output. Let's put the followingrelease.xml file in the assembly directory of our project:
<?xml version="1.0"?>
<assembly>
<id>bin</id>
<formats>
<format>zip</format>
</formats>
<includeBaseDirectory>false</includeBaseDirectory>
<dependencySets>
<dependencySet>
<unpack>false</unpack>
<outputDirectory>/</outputDirectory>
<useProjectArtifact>false</useProjectArtifact>
<useTransitiveFiltering>true</useTransitiveFiltering>
<excludes>
<exclude>org.elasticsearch:elasticsearch</exclude>
</excludes>
</dependencySet>
</dependencySets>
<fileSets>
<fileSet>
<directory>${project.build.directory}/</directory>
<outputDirectory>/</outputDirectory>
<includes>
<include>elasticsearch-${project.name}-${elasticsearch.version}.jar</include>
</includes>
</fileSet>
</fileSets>
</assembly>
Again, we don't need to know all the details; however, it is nice to understand what is going on, even on the general level. The preceding code file tells the Maven Assembly plugin that we want our archive to be packed with ZIP (<format>zip</format>), and we want Elasticsearch libraries to be excluded (the exclude section), because they will already be present in Elasticsearch, where we will install the plugin. In addition to this, we've specified that we want our project jar to be included (the includes section).
Note
If you want to see the full project structure with the full pom.xml file and all the needed files, please look at the code provided with the book for Chapter 9, Developing Elasticsearch Plugins.
Creating custom REST action
Let's start the journey of extending Elasticsearch by creating a custom REST action. We've chosen this as the first extension, because we wanted to take the simplest approach as the introduction to extending Elasticsearch.
Note
We assume that you already have a Java project created and that you are using Maven, just like we did in the Creating the Apache Maven project structure section in the beginning of this chapter. If you would like to use an already created and working example and start from there, please look at the code for Chapter 9, Developing Elasticsearch Plugins that is available with the book.
The assumptions
In order to illustrate how to develop a custom REST action, we need to have an idea of how it should work. Our REST action will be really simple—it should return names of all the nodes or names of the nodes that start with the given prefix if the prefix parameter is passed to it. In addition to that, it should only be available when using the HTTP GET method, so POST requests, for example, shouldn't be allowed.
Implementation details
We will need to develop two Java classes:
· A class that extends the BaseRestHandler Elasticsearch abstract class from the org.elasticsearch.rest package that will be responsible for handling the REST action code—we will call it a CustomRestAction.
· A class that will be used by Elasticsearch to load the plugin—this class needs to extend the Elasticsearch AbstractPlugin class from the org.elasticsearch.plugin package—we will call it CustomRestActionPlugin.
In addition to the preceding two, we will need a simple text file that we will discuss after implementing the two mentioned Java classes.
Using the REST action class
The most interesting class is the one that will be used to handle the user's requests—we will call it CustomRestAction. In order to work, it needs to extend the BaseRestHandler class from the org.elasticsearch.rest package—the base class for REST actions in Elasticsearch. In order to extend this class, we need to implement the handleRequest method in which we will process the user request and a three argument constructor that will be used to initialize the base class and register the appropriate handler under which our REST action will be visible.
The whole code for the CustomRestAction class looks as follows:
public class CustomRestAction extends BaseRestHandler {
@Inject
public CustomRestAction(Settings settings, RestController
controller, Client client) {
super(settings, controller, client);
controller.registerHandler(Method.GET,"/_mastering/nodes", this);
}
@Override
public void handleRequest(RestRequest request, RestChannel
channel, Client client) {
final String prefix = request.param("prefix", "");
client.admin().cluster().prepareNodesInfo().all().execute(new
RestBuilderListener<NodesInfoResponse>(channel) {
@Override
public RestResponse buildResponse(
NodesInfoResponse response, XContentBuilder builder)
throws Exception {
List<String> nodes = new ArrayList<String>();
for (NodeInfo nodeInfo : response.getNodes()) {
String nodeName = nodeInfo.getNode().getName();
if (prefix.isEmpty()) {
nodes.add(nodeName);
} else if (nodeName.startsWith(prefix)) {
nodes.add(nodeName);
}
}
builder.startObject()
.field("nodes", nodes)
.endObject();
return new BytesRestResponse(RestStatus.OK, builder);
}
});
}
}
The constructor
For each custom REST class, Elasticsearch will pass three arguments when creating an object of such type: the Settings type object, which holds the settings; the RestController type object that we will use to bind our REST action to the REST endpoint; and theClient type object, which is an Elasticsearch client and entry point for cooperation with it. All of these arguments are also required by the super class, so we invoke the base class constructor and pass them.
There is one more thing: the @Inject annotation. It allows us to inform Elasticsearch that it should put the objects in the constructor during the object creation. For more information about it, please refer to the Javadoc of the mentioned annotation, which is available at https://github.com/elasticsearch/elasticsearch/blob/master/src/main/java/org/elasticsearch/common/inject/Inject.java.
Now, let's focus on the following code line:
controller.registerHandler(Method.GET, "/_mastering/nodes", this);
What it does is that it registers our custom REST action implementation and binds it to the endpoint of our choice. The first argument is the HTTP method type, the REST action will be able to work with. As we said earlier, we only want to respond to GET requests. If we would like to respond to multiple types of HTTP methods, we should just include multiple registerHandler method invocations with each HTTP method. The second argument specifies the actual REST endpoint our custom action will be available at; in our case, it will available under the /_mastering/nodes endpoint. The third argument tells Elasticsearch which class should be responsible for handling the defined endpoint; in our case, this is the class we are developing, thus we are passing this.
Handling requests
Although the handleRequest method is the longest one in our code, it is not complicated. We start by reading the request parameter with the following line of code:
String prefix = request.param("prefix", "");
We store the prefix request parameter in the variable called prefix. By default, we want an empty String object to be assigned to the prefix variable if there is no prefix parameter passed to the request (the default value is defined by the second parameter of theparam method of the request object).
Next, we retrieve the NodesInfoResponse object using the Elasticsearch client object and its abilities to run administrative commands. In this case, we have used the possibility of sending queries to Elasticsearch in an asynchronous way. Instead of the callexecute().actionGet() part, which waits for a response and returns it, we have used the execute() call, which takes a future object that will be informed when the query finishes. So, the rest of the method is in the buildResponse() callback of the RestBuilderListenerobject. The NodesInfoResponse object will contain an array of NodeInfo objects, which we will use to get node names. What we need to do is return all the node names that start with a given prefix or all if the prefix parameter was not present in the request. In order to do this, we create a new array:
List<String> nodes = new ArrayList<String>();
We iterate over the available nodes using the following for loop:
for (NodeInfo nodeInfo : response.getNodes())
We get the node name using the getName method of the DiscoveryNode object, which is returned after invoking the getNode method of NodeInfo:
String nodeName = nodeInfo.getNode().getName();
If prefix is empty or if it starts with the given prefix, we add the name of the node to the array we've created. After we iterate through all the NodeInfo objects, we call the are starting build the response and sent it through the HTTP.
Writing response
The last thing regarding our CustomRestAction class is the response handling, which is the responsibility of the last part of the buildResponse() method that we created. It is simple because an appropriate response builder is already provided by Elasticsearch under thebuilder argument. It takes into consideration the format parameter used by the client in the call, so by default, we send the response in a proper JSON format just like Elasticsearch does and also take the YAML (http://en.wikipedia.org/wiki/YAML) format for free.
Now, we use the builder object we got to start the response object (using the startObject method) and start a nodes field (because the value of the field is a collection, it will automatically be formatted as an array). The nodes field is created inside the initial object, and we will use it to return matching nodes names. Finally, we close the object using the endObject method.
After we have our object ready to be sent as a response, we return the BytesRestResponse object. We do this in the following line:
return new BytesRestResponse(RestStatus.OK, builder);
As you can see, to create the object, we need to pass two parameters: RestStatus and the XContentBuilder, which holds our response. The RestStatus class allows us to specify the response code, which is RestStatus.OK in our case, because everything went smoothly.
The plugin class
The CustomRestActionPlugin class will hold the code that is used by Elasticsearch to initialize the plugin itself. It extends the AbstractPlugin class from the org.elasticsearch.plugin package. Because we are creating an extension, we are obliged to implement the following code parts:
· constructor: This is a standard constructor that will take a single argument; in our case, it will be empty
· The onModule method: This is the method that includes the code that will add our custom REST action so that Elasticsearch will know about it
· The name method: This is the name of our plugin
· The description method: This is a short description of our plugin
The code of the whole class looks as follows:
public class CustomRestActionPlugin extends AbstractPlugin {
@Inject
public CustomRestActionPlugin(Settings settings) {
}
public void onModule(RestModule module) {
module.addRestAction(CustomRestAction.class);
}
@Override
public String name() {
return "CustomRestActionPlugin";
}
@Override
public String description() {
return "Custom REST action";
}
}
The constructor, name, and description methods are very simple, and we will just skip discussing them, and we will focus on the onModule method. This method takes a single argument: the RestModule class object, which is the class that allows us to register our custom REST action. Elasticsearch will call the onModule method for all the modules that are available and eligible (all REST actions). What we do is just a simple call to the RestModule addRestAction method, passing in our CustomRestAction class as an argument. That's all when it comes to Java development.
Informing Elasticsearch about our REST action
We have our code ready, but we need one additional thing; we need to let Elasticsearch know what the class registering our plugin is—the one we've called CustomRestActionPlugin. In order to do this, we create an es-plugin.properties file in the src/main/resourcesdirectory with the following content:
plugin=pl.solr.rest.CustomRestActionPlugin
We just specify the plugin property there, which should have a value of the class we use to register our plugins (the one that extends the Elasticsearch AbstractPlugin class). This file will be included in the jar file that will be created during the build process and will be used by Elasticsearch during the plugin load process.
Time for testing
Of course, we could leave it now and say that we are done, but we won't. We would like to show you how to build each of the plugins, install it, and finally, test it to see whether it actually works. Let's start with building our plugin.
Building the REST action plugin
We start with the easiest part—building our plugin. In order to do this, we run a simple command:
mvn compile package
We tell Maven that we want the code to be compiled and packaged. After the command finishes, we can find the archive with the plugin in the target/release directory (assuming you are using a project setup similar to the one we've described at the beginning of the chapter).
Installing the REST action plugin
In order to install the plugin, we will use the plugin command that is located in the bin directory of the Elasticsearch distributable package. Assuming that we have our plugin archive stored in the /home/install/es/plugins directory, we will run the following command (we run it from the Elasticsearch home directory):
bin/plugin --install rest --url file:/home/install/es/plugins/elasticsearch-rest-1.4.1.zip
We need to install the plugin on all the nodes in our cluster, because we want to be able to run our custom REST action on each Elasticsearch instance.
Note
In order to learn more about installing Elasticsearch plugins, please refer to our previous book, Elasticsearch Server Second Edition, or check out the official Elasticsearch documentation at http://www.elasticsearch.org/guide/reference/modules/plugins/.
After we have the plugin installed, we need to restart our Elasticsearch instance we were making the installation on. After the restart, we should see something like this in the logs:
[2014-12-12 21:04:48,348][INFO ][plugins ] [Archer] loaded [CustomRestActionPlugin], sites []
As you can see, Elasticsearch informed us that the plugin named CustomRestActionPlugin was loaded.
Checking whether the REST action plugin works
We can finally check whether the plugin works. In order to do that, we will run the following command:
curl -XGET 'localhost:9200/_mastering/nodes?pretty'
As a result, we should get all the nodes in the cluster, because we didn't provide the prefix parameter and this is exactly what we've got from Elasticsearch:
{
"nodes" : [ "Archer" ]
}
Because we only had one node in our Elasticsearch cluster, we've got the nodes array with only a single entry.
Now, let's test what will happen if we add the prefix=Are parameter to our request. The exact command we've used was as follows:
curl -XGET 'localhost:9200/_mastering/nodes?prefix=Are&pretty'
The response from Elasticsearch was as follows:
{
"nodes" : [ ]
}
As you can see, the nodes array is empty, because we don't have any node in the cluster that would start with the Are prefix. At the end, let's check another format of response:
curl -XGET 'localhost:9200/_mastering/nodes?pretty&format=yaml'
Now the response is not in a JSON format. Look at the example output for a cluster consisting of two nodes:
---
nodes:
- "Atalon"
- "Slapstick"
As we can see, our REST plugin is not so complicated but already has several features.
Creating the custom analysis plugin
The last thing we want to discuss when it comes to custom Elasticsearch plugins is the analysis process extension. We've chosen to show how to develop a custom analysis plugin because this is sometimes very useful, for example, when you want to have the custom analysis process that you use in your company introduced, or when you want to use the Lucene analyzer or filter that is not present in Elasticsearch itself or as a plugin for it. Because creating an analysis extension is more complicated compared to what we've seen when developing a custom REST action, we decided to leave it until the end of the chapter.
Implementation details
Because developing a custom analysis plugin is the most complicated, at least from the Elasticsearch point of view and the number of classes we need to develop, we will have more things to do compared to previous examples. We will need to develop the following things:
· The TokenFilter class extension (from the org.apache.lucene.analysis package) implementation that will be responsible for handling token reversing; we will call it CustomFilter
· The AbstractTokenFilterFactory extension (from the org.elasticsearch.index.analysis package) that will be responsible for providing our CustomFilter instance to Elasticsearch; we will call it CustomFilterFactory
· The custom analyzer, which will extend the org.apache.lucene.analysis.Analyzer class and provide the Lucene analyzer functionality; we will call it CustomAnalyzer
· The analyzer provider, which we will call CustomAnalyzerProvider, which extends AbstractIndexAnalyzerProvider from the org.elasticsearch.index.analysis package, and which will be responsible for providing the analzyer instance to Elasticsearch
· An extension of AnalysisModule.AnalysisBinderProcessor from the org.elasticsearch.index.analysis package, which will have information about the names under which our analyzer and token filter will be available in Elasticsearch; we will call itCustomAnalysisBinderProcessor
· An extension of the AbstractComponent class from the org.elasticsearch.common.component package, which will inform Elasticsearch which factories should be used for our custom analyzer and token filter; we will call it CustomAnalyzerIndicesComponent
· The AbstractModule extension (from the org.elasticsearch.common.inject package) that will inform Elasticsearch that our CustomAnalyzerIndicesComponent module should be a singleton; we will call it CustomAnalyzerModule
· Finally, the usual AbstractPlugin extension (from the org.elasticsearch.plugins package) that will register our plugin; we will call it CustomAnalyzerPlugin
So let's start discussing the code.
Implementing TokenFilter
The funniest thing about the currently discussed plugin is that the whole analysis work is actually done on a Lucene level, and what we need to do is write the org.apache.lucene.analysis.TokenFilter extension, which we will call CustomFilter. In order to do this, we need to initialize the super class and override the incrementToken method. Our class will be responsible for reversing the tokens, so that's the logic we want our analyzer and filter to have. The whole implementation of our CustomFilter class looks as follows:
public class CustomFilter extends TokenFilter {
private final CharTermAttribute termAttr = addAttribute(CharTermAttribute.class);
protected CustomFilter(TokenStream input) {
super(input);
}
@Override
public boolean incrementToken() throws IOException {
if (input.incrementToken()) {
char[] originalTerm = termAttr.buffer();
if (originalTerm.length > 0) {
StringBuilder builder = new StringBuilder(new String(originalTerm).trim()).reverse();
termAttr.setEmpty();
termAttr.append(builder.toString());
}
return true;
} else {
return false;
}
}
}
The first thing we see in the implementation is the following line:
private final CharTermAttribute termAttr = addAttribute(CharTermAttribute.class);
It allows us to retrieve the text of the token we are currently processing. In order to get access to the other token information, we need to use other attributes. The list of attributes can be found by looking at the classes implementing Lucene'sorg.apache.lucene.util.Attribute interface (http://lucene.apache.org/core/4_10_0/core/org/apache/lucene/util/Attribute.html). What you need to know now is that by using the static addAttribute method, we can bind different attributes and use them during token processing.
Then, we have the constructor, which is only used for super class initialization, so we can skip discussing it.
Finally, there is the incrementToken method, which returns true when there is a token in the token stream left to be processed, and false if there is no token left to be processed. So, what we do first is we check whether there is a token to be processed by calling theincrementToken method of input, which is the TokenStream instance stored in the super class. Then, we get the term text by calling the buffer method of the attribute we bind in the first line of our class. If there is text in the term (its length is higher than zero), we use aStringBuilder object to reverse the text, we clear the term buffer (by calling setEmpty on the attribute), and we append the reversed text to the already emptied term buffer (by calling the append method of the attribute). After this, we return true, because our token is ready to be processed further—on a token filter level, we don't know whether the token will be processed further or not, so we need to be sure we return the correct information, just in case.
Implementing the TokenFilter factory
The factory for our token filter implementation is one of the simplest classes in the case of the discussed plugins. What we need to do is create an AbstractTokenFilterFactory (from the org.elasticsearch.index.analysis package) extension that overrides a singlecreate method in which we create our token filter. The code of this class looks as follows:
public class CustomFilterFactory extends AbstractTokenFilterFactory {
@Inject
public CustomFilterFactory(Index index, @IndexSettings Settings indexSettings, @Assisted String name, @Assisted Settings settings) {
super(index, indexSettings, name, settings);
}
@Override
public TokenStream create(TokenStream tokenStream) {
return new CustomFilter(tokenStream);
}
}
As you can see, the class is very simple. We start with the constructor, which is needed, because we need to initialize the parent class. In addition to this, we have the create method, in which we create our CustomFilter class with the provided TokenStream object.
Before we go on, we would like to mention two more things: the @IndexSettings and @Assisted annotations. The first one will result in index settings being injected as the Settings class object to the constructor; of course, this is done automatically. The @Assisted keyword results in the annotated parameter value to be injected from the argument of the factory method.
Implementing the class custom analyzer
We wanted to keep the example implementation as simple as possible and, because of that, we've decided not to complicate the analyzer implementation. To implement our analyzer, we need to extend an abstract Analyzer class from Lucene'sorg.apache.lucene.analysis package, and we did that. The whole code of our CustomAnalyzer class looks as follows:
public class CustomAnalyzer extends Analyzer {
public CustomAnalyzer() {
}
@Override
protected TokenStreamComponents createComponents(String field, Reader reader) {
final Tokenizer src = new WhitespaceTokenizer(reader);
return new TokenStreamComponents(src, new CustomFilter(src));
}
}
Note
If you want to see more complicated analyzer implementations, please look at the source code of Apache Lucene, Apache Solr, and Elasticsearch.
The createComponent method is the one we need to implement, and it should return a TokenStreamComponents object (from the org.apache.lucene.analysis package) for a given field name (the String type object—the first argument of the method) and data (the Reader type object—the second method argument). What we do is create a Tokenizer object using the WhitespaceTokenizer class available in Lucene. This will result in the input data to be tokenized on whitespace characters. Then, we create a Lucene TokenStreamComponentsobject, to which we give the source of tokens (our previously created Tokenizer object) and our CustomFilter object. This will result in our CustomFilter object to be used by CustomAnalyzer.
Implementing the analyzer provider
Let's talk about another provider implementation in addition to the token filter factory we've created earlier. This time, we need to extend AbstractIndexAnalyzerProvider from the org.elasticsearch.index.analysis package in order for Elasticsearch to be able to create our analyzer. The implementation is very simple, as we only need to implement the get method in which we should return our analyzer. The CustomAnalyzerProvider class code looks as follows:
public class CustomAnalyzerProvider extends AbstractIndexAnalyzerProvider<CustomAnalyzer> {
private final CustomAnalyzer analyzer;
@Inject
public CustomAnalyzerProvider(Index index, @IndexSettings Settings indexSettings, Environment env, @Assisted String name, @Assisted Settings settings) {
super(index, indexSettings, name, settings);
analyzer = new CustomAnalyzer();
}
@Override
public CustomAnalyzer get() {
return this.analyzer;
}
}
As you can see, we've implemented the constructor in order to be able to initialize the super class. In addition to that, we are creating a single instance of our analyzer, which we will return when Elasticsearch requests it. We do this because we don't want to create an analyzer every time Elasticsearch requests it; this is not efficient. We don't need to worry about multithreading because our analyzer is thread-safe and, thus, a single instance can be reused. In the get method, we are just returning our analyzer.
Implementing the analysis binder
The binder is a part of our custom code that informs Elasticsearch about the names under which our analyzer and token filter will be available. Our CustomAnalysisBinderProcessor class extends AnalysisModule.AnalysisBinderProcessor fromorg.elasticsearch.index.analysis, and we override two methods of this class: processAnalyzers in which we will register our analyzer and processTokenFilters in which we will register our token filter. If we had only an analyzer or only a token filter, we would only override a single method. The code of CustomAnalysisBinderProcessor looks as follows:
public class CustomAnalysisBinderProcessor extends AnalysisModule.AnalysisBinderProcessor {
@Override
public void processAnalyzers(AnalyzersBindings analyzersBindings) {
analyzersBindings.processAnalyzer("mastering_analyzer", CustomAnalyzerProvider.class);
}
@Override
public void processTokenFilters(TokenFiltersBindings tokenFiltersBindings) {
tokenFiltersBindings.processTokenFilter("mastering_filter", CustomFilterFactory.class);
}
}
The first method—processAnalyzers—takes a single AnalysisBinding object type, which we can use to register our analyzer under a given name. We do this by calling the processAnalyzer method of the AnalysisBinding object and pass in the name under which our analyzer will be available and the implementation of AbstractIndexAnalyzerProvider, which is responsible for creating our analyzer, which in our case, is the CustomAnalyzerProvider class.
The second method—procesTokenFilters—again takes a single TokenFiltersBindings class, which enables us to register our token filter. We do this by calling the processTokenFilter method and passing the name under which our token filter will be available and the token filter factory class, which in our case, is CustomFilterFactory.
Implementing the analyzer indices component
Now, we need to implement a node level component that will allow our analyzer and token filter to be reused. However, we will tell Elasticsearch that our analyzer should be reusable only on the indices level and not globally (just to show you how to do it). What we need to do is extend the AbstractComponent class from the org.elasticsearch.common.component package. In fact, we only need to develop a constructor for the class we called CustomAnalyzerIndicesComponent. The whole code for the mentioned class looks as follows:
public class CustomAnalyzerIndicesComponent extends AbstractComponent {
@Inject
public CustomAnalyzerIndicesComponent(Settings settings, IndicesAnalysisService indicesAnalysisService) {
super(settings);
indicesAnalysisService.analyzerProviderFactories().put(
"mastering_analyzer",
new PreBuiltAnalyzerProviderFactory("mastering_analyzer", AnalyzerScope.INDICES, new CustomAnalyzer()));
indicesAnalysisService.tokenFilterFactories().put("mastering_filter",
new PreBuiltTokenFilterFactoryFactory(new TokenFilterFactory() {
@Override
public String name() {
return "mastering_filter";
}
@Override
public TokenStream create(TokenStream tokenStream) {
return new CustomFilter(tokenStream);
}
}));
}
}
First of all, we pass the constructor arguments to the super class in order to initialize it. After that, we create a new analyzer, which is our CustomAnalyzer class, by using the following code snippet:
indicesAnalysisService.analyzerProviderFactories().put(
"mastering_analyzer",
new PreBuiltAnalyzerProviderFactory("mastering_analyzer", AnalyzerScope.INDICES, new CustomAnalyzer()));
As you can see, we've used the IndicesAnalysisService object and its analyzerProviderFactories method to get the map of PreBuiltAnalyzerProviderFactory (as a value and the name as a key in the map), and we've put a newly created PreBuiltAnalyzerProviderFactoryobject with the name of mastering_analyzer. In order to create the PreBuiltAnalyzerProviderFactory we've used our CustomAnalyzer and AnalyzerScope.INDICES enum values (from the org.elasticsearch.index.analysis package). The other values of AnalyzerScope enum areGLOBAL and INDEX. If you would like the analyzer to be globally shared, you should use AnalyzerScope.GLOBAL and AnalyzerScope.INDEX, both of which should be created for each index separately.
In a similar way, we add our token filter, but this time, we use the tokenFilterFactories method of the IndicesAnalysisService object, which returns a Map of PreBuiltTokenFilterFactoryFactory as a value and a name (a String object) as a key. We put a newly createdTokenFilterFactory object with the name of mastering_filter.
Implementing the analyzer module
A simple class called CustomAnalyzerModule extends AbstractModule from the org.elasticsearch.common.inject package. It is used to tell Elasticsearch that our CustomAnalyzerIndicesComponent class should be used as a singleton; we do this because it's enough to have a single instance of that class. Its code looks as follows:
public class CustomAnalyzerModule extends AbstractModule {
@Override
protected void configure() {
bind(CustomAnalyzerIndicesComponent.class).asEagerSingleton();
}
}
As you can see, we implement a single configure method, which tells you to bind the CustomAnalyzerIndicesComponent class as a singleton.
Implementing the analyzer plugin
Finally, we need to implement the plugin class so that Elasticsearch knows that there is a plugin to be loaded. It should extend the AbstractPlugin class from the org.elasticsearch.plugins package and thus implement at least the name and descriptions methods. However, we want our plugin to be registered, and that's why we implement two additional methods, which we can see in the following code snippet:
public class CustomAnalyzerPlugin extends AbstractPlugin {
@Override
public Collection<Class<? extends Module>> modules() {
return ImmutableList.<Class<? extends Module>>of(CustomAnalyzerModule.class);
}
public void onModule(AnalysisModule module) {
module.addProcessor(new CustomAnalysisBinderProcessor());
}
@Override
public String name() {
return "AnalyzerPlugin";
}
@Override
public String description() {
return "Custom analyzer plugin";
}
}
The name and description methods are quite obvious, as they are returning the name of the plugin and its description. The onModule method adds our CustomAnalysisBinderProcessor object to the AnalysisModule object provided to it.
The last method is the one we are not yet familiar with: the modules method:
public Collection<Class<? extends Module>> modules() {
return ImmutableList.<Class<? extends Module>>of(CustomAnalyzerModule.class);
}
We override this method from the super class in order to return a collection of modules that our plugin is registering. In this case, we are registering a single module class—CustomAnalyzerModule—and we are returning a list with a single entry.
Informing Elasticsearch about our custom analyzer
Once we have our code ready, we need to add one additional thing: we need to let Elasticsearch know what the class registering our plugin is—the one we've called CustonAnalyzerPlugin. In order to do that, we create an es-plugin.properties file in thesrc/main/resources directory with the following content:
plugin=pl.solr.analyzer.CustomAnalyzerPlugin
We just specify the plugin property there, which should have a value of the class we use to register our plugins (the one that extends the Elasticsearch AbstractPlugin class). This file will be included in the JAR file that will be created during the build process and will be used by Elasticsearch during the plugin load process.
Testing our custom analysis plugin
Now, we want to test our custom analysis plugin just to be sure that everything works. In order to do that, we need to build our plugin, install it on all nodes in our cluster, and finally, use the Admin Indices Analyze API to see how our analyzer works. Let's do that.
Building our custom analysis plugin
We start with the easiest part: building our plugin. In order to do that, we run a simple command:
mvn compile package
We tell Maven that we want the code to be compiled and packaged. After the command finishes, we can find the archive with the plugin in the target/release directory (assuming you are using a project setup similar to the one we've described at the beginning of the chapter).
Installing the custom analysis plugin
To install the plugin, we will use the plugin command, just like we did previously. Assuming that we have our plugin archive stored in the /home/install/es/plugins directory, would run the following command (we run it from the Elasticsearch home directory):
bin/plugin --install analyzer --url file:/home/install/es/plugins/elasticsearch-analyzer-1.4.1.zip
We need to install the plugin on all the nodes in our cluster, because we want Elasticsearch to be able to find our analyzer and filter no matter on which node the analysis process is done. If we don't install the plugin on all nodes, we can be certain that we will run into issues.
Note
In order to learn more about installing Elasticsearch plugins, please refer to our previous book, Elasticsearch Server Section Edition, by Packt Publishing or refer to the official Elasticsearch documentation.
After we have the plugin installed, we need to restart our Elasticsearch instance we were creating the installation on. After the restart, we should see something like this in the logs:
[2014-12-03 22:39:11,231][INFO ][plugins ] [Tattletale] loaded [AnalyzerPlugin], sites []
With the preceding log line, Elasticsearch informs us that the plugin named AnalyzerPlugin was successfully loaded.
Checking whether our analysis plugin works
We can finally check whether our custom analysis plugin works as it should. In order to do that, we start with creating an empty index called analyzetest (the index name doesn't matter). We do this by running the following command:
curl -XPOST 'localhost:9200/analyzetest/'
After this we use the Admin Indices Analyze API (http://www.elasticsearch.org/guide/en/elasticsearch/reference/current/indices-analyze.html) to see how our analyzer works. We do that by running the following command:
curl -XGET 'localhost:9200/analyzetest/_analyze?analyzer=mastering_analyzer&pretty' -d 'mastering elasticsearch'
So, what we should see in response is two tokens: one that should be reversed—mastering—gniretsam and another one that should also be reversed—elasticsearch—hcraescitsale. The response Elasticsearch returns looks as follows:
{
"tokens" : [ {
"token" : "gniretsam",
"start_offset" : 0,
"end_offset" : 9,
"type" : "word",
"position" : 1
}, {
"token" : "hcraescitsale",
"start_offset" : 10,
"end_offset" : 23,
"type" : "word",
"position" : 2
} ]
}
As you can see, we've got exactly what we expected, so it seems that our custom analysis plugin works as intended.
Summary
In this chapter, we were focused on developing custom plugins for Elasticsearch. We learned how to properly set up your Maven project to be able to automatically build your Elasticsearch plugins. You saw how to develop a custom REST action plugin, and we extended Elasticsearch analysis capabilities by creating a plugin that included a custom token filter and new analyzer.
We've reached the end of the book, and we wanted to write a small summary and say a few words to the brave reader who managed to get to the end. We decided to write the second edition of Mastering Elasticsearch after writing Elasticsearch Server Second Edition. We thought that we had left a number of topics uncovered, and we wanted to write them in this book. We went from introducing Apache Lucene and Elasticsearch to querying and data handling—both on the Lucene index and the Elasticsearch level. We hope that, by now, you know how Lucene works and how Elasticsearch uses it, and you will find this knowledge worthy in your journey with this great search engine. We talked about some topics that can be useful when things are hot, such as I/O throttling, Hot Threads API, and how to speed up your queries. We also concentrated on things such as choosing the right query for the use case and Elasticsearch scaling.
Finally, we dedicated one chapter to discussing Java development on how to extend Elasticsearch with your own plugins. In the first version of the book, we also described the Java API briefly, but we decided it doesn't make sense. The API would require its own book and showing only some things regarding them just feels wrong. Hopefully, you'll be able to write your own plugins and even though we didn't write about all the possibilities, we hope that you'll be able to find the things we didn't write about.
Thank you for reading the book; we hope that you like it and that it brought you some knowledge that you were seeking, and that you'll be able to use it whether you use Elasticsearch professionally or just as a hobby.
Finally, please stop by at http://elasticsearchserverbook.com/ from time to time. In addition to the usual posts we make, we will publish the book fragments that didn't make it to the book or were cut down because the book would be too broad.
All materials on the site are licensed Creative Commons Attribution-Sharealike 3.0 Unported CC BY-SA 3.0 & GNU Free Documentation License (GFDL)
If you are the copyright holder of any material contained on our site and intend to remove it, please contact our site administrator for approval.
© 2016-2026 All site design rights belong to S.Y.A.