Mastering Elasticsearch, Second Edition (2015)
Chapter 4. Improving the User Search Experience
In the previous chapter, we extended our knowledge about query handling and data analysis. We started by looking at the query rescore that can help us when we need to recalculate the score of the top documents returned by a query. We controlled multi matching in Elasticsearch queries and looked at two new exciting aggregation types: significant terms aggregation and top hits aggregation. We discussed the differences in relationship handling and, finally, we extended our knowledge about the Elasticsearch scripting module and learned what the changes introduced were after the release of Elasticsearch 1.0. By the end of this chapter, we will have covered the following topics:
· Using the Elasticsearch Suggest API to correct user spelling mistakes
· Using the term suggester to suggest single words
· Using the phrase suggester to suggest whole phrases
· Configuring suggest capabilities to match your needs
· Using the completion suggester for the autocomplete functionality
· Improving query relevance by using different Elasticsearch functionalities
Correcting user spelling mistakes
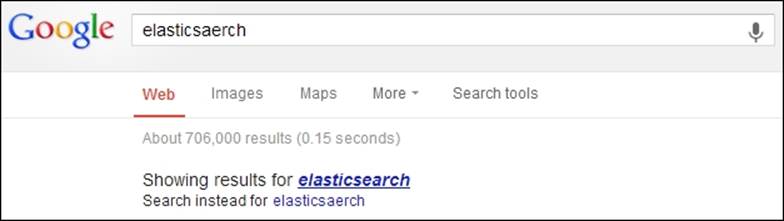
One of the simplest ways to improve the user search experience is to correct their spelling mistakes either automatically or by just showing the correct query phrase and allowing the user to use it. For example, this is what Google shows us when we type inelasticsaerch instead of Elasticsearch:
Starting from 0.90.0 Beta1, Elasticsearch allows us to use the Suggest API to correct the user spelling mistakes. With the newer versions of Elasticsearch, the API was changed, bringing new features and becoming more and more powerful. In this section, we will try to bring you a comprehensive guide on how to use the Suggest API provided by Elasticsearch, both in simple use cases and in ones that require more configuration.
Testing data
For the purpose of this section, we decided that we need a bit more data than a few documents. In order to get the data we need, we decided to use the Wikipedia river plugin (https://github.com/elasticsearch/elasticsearch-river-wikipedia) to index some public documents from Wikipedia. First, we need to install the plugin by running the following command:
bin/plugin -install elasticsearch/elasticsearch-river-wikipedia/2.4.1
After that, we run the following command:
curl -XPUT 'localhost:9200/_river/wikipedia_river/_meta' -d '{
"type" : "wikipedia",
"index" : {
"index" : "wikipedia"
}
}'
After that, Elasticsearch will start indexing the latest English dump from Wikipedia. If you look at the logs, you should see something like this:
[2014-08-28 22:35:01,566][INFO ][river.wikipedia ] [Thing] [wikipedia][Wikipedia_river] creating wikipedia stream river for [http://download.wikimedia.org/enwiki/latest/enwiki-latest-pages- articles.xml.bz2]
[2014-08-28 22:35:01,568][INFO ][river.wikipedia ] [Thing] [wikipedia][Wikipedia_river] starting wikipedia stream
As you can see, the river has started its work. After some time, you will have the data indexed in the index called wikipedia. If you want all data from the latest English Wikipedia dump to be indexed, you have to be patient, and we are not. The number of documents when we decided to cancel the indexation was 7080049. The index had about 19 GB in total size (without replicas).
Getting into technical details
Introduced in Version 0.90.3, the Suggest API is not the simplest one available in Elasticsearch. In order to get the desired suggest, we can either add a new suggest section to the query, or we can use a specialized REST endpoint that Elasticsearch exposes. In addition to this, we have multiple suggest implementations that allow us to correct user spelling mistakes, create the autocomplete functionality, and so on. All this gives us a powerful and flexible mechanism that we can use in order to make our search better.
Of course, the suggest functionality works on our data, so if we have a small set of documents in the index, the proper suggestion may not be found. When dealing with a smaller data set, Elasticsearch has fewer words in the index and, because of that, it has fewer candidates for suggestions. On the other hand, the more data, the bigger the possibility that we will have data that has some mistakes; however, we can configure Elasticsearch internals to handle such situations.
Note
Please note that the layout of this chapter is a bit different. We start by showing you a simple example on how to query for suggestions and how to interpret the Suggest API response without getting too much into all the configuration options. We do this because we don't want to overwhelm you with technical details, but we want to show you what you can achieve. The nifty configuration parameters come later.
Suggesters
Before we continue with querying and analyzing the responses, we would like to write a few words about the available suggester types—the functionality responsible for finding suggestions when using the Elasticsearch Suggest API. Elasticsearch allows us to use three suggesters currently: the term one, the phrase one, and the completion one. The first two allow us to correct spelling mistakes, while the third one allows us to develop a very fast autocomplete functionality. However, for now, let's not focus on any particular suggester type, but let's look on the query possibilities and the responses returned by Elasticsearch. We will try to show you the general principles, and then we will get into more details about each of the available suggesters.
Using the _suggest REST endpoint
There is a possibility that we can get suggestions for a given text by using a dedicated _suggest REST endpoint. What we need to provide is the text to analyze and the type of used suggester (term or phrase). So if we would like to get suggestions for the words graphics desiganer (note that we've misspelled the word on purpose), we would run the following query:
curl -XPOST 'localhost:9200/wikipedia/_suggest?pretty' -d '{
"first_suggestion" : {
"text" : "wordl war ii",
"term" : {
"field" : "_all"
}
}
}'
As you can see, each suggestion request is send to Elasticsearch in its own object with the name we chose (in the preceding case, it is first_suggestion). Next, we specify the text for which we want the suggestion to be returned using the text parameter. Finally, we add the suggester object, which is either term or phrase currently. The suggester object contains its configuration, which for the term suggester used in the preceding command, is the field we want to use for suggestions (the field property).
We can also send more than one suggestion at a time by adding multiple suggestion names. For example, if in addition to the preceding suggestion, we would also include a suggestion for the word raceing, we would use the following command:
curl -XPOST 'localhost:9200/wikipedia/_suggest?pretty' -d '{
"first_suggestion" : {
"text" : "wordl war ii",
"term" : {
"field" : "_all"
}
},
"second_suggestion" : {
"text" : "raceing",
"term" : {
"field" : "text"
}
}
}'
Understanding the REST endpoint suggester response
Let's now look at the example response we can expect from the _suggest REST endpoint call. Although the response will differ for each suggester type, let's look at the response returned by Elasticsearch for the first command we've sent in the preceding code that used the term suggester:
{
"_shards" : {
"total" : 5,
"successful" : 5,
"failed" : 0
},
"first_suggestion" : [ {
"text" : "wordl",
"offset" : 0,
"length" : 5,
"options" : [ {
"text" : "world",
"score" : 0.8,
"freq" : 130828
}, {
"text" : "words",
"score" : 0.8,
"freq" : 20854
}, {
"text" : "wordy",
"score" : 0.8,
"freq" : 210
}, {
"text" : "woudl",
"score" : 0.8,
"freq" : 29
}, {
"text" : "worde",
"score" : 0.8,
"freq" : 20
} ]
}, {
"text" : "war",
"offset" : 6,
"length" : 3,
"options" : [ ]
}, {
"text" : "ii",
"offset" : 10,
"length" : 2,
"options" : [ ]
} ]
}
As you can see in the preceding response, the term suggester returns a list of possible suggestions for each term that was present in the text parameter of our first_suggestion section. For each term, the term suggester will return an array of possible suggestions with additional information. Looking at the data returned for the wordl term, we can see the original word (the text parameter), its offset in the original text parameter (the offset parameter), and its length (the length parameter).
The options array contains suggestions for the given word and will be empty if Elasticsearch doesn't find any suggestions. Each entry in this array is a suggestion and is characterized by the following properties:
· text: This is the text of the suggestion.
· score: This is the suggestion score; the higher the score, the better the suggestion will be.
· freq: This is the frequency of the suggestion. The frequency represents how many times the word appears in documents in the index we are running the suggestion query against. The higher the frequency, the more documents will have the suggested word in its fields and the higher the chance that the suggestion is the one we are looking for.
Note
Please remember that the phrase suggester response will differ from the one returned by the terms suggester, and we will discuss the response of the phrase suggester later in this section.
Including suggestion requests in query
In addition to using the _suggest REST endpoint, we can include the suggest section in addition to the query section in the normal query sent to Elasticsearch. For example, if we would like to get the same suggestion we've got in the first example but during query execution, we could send the following query:
curl -XGET 'localhost:9200/wikipedia/_search?pretty' -d '{
"query" : {
"match_all" : {}
},
"suggest" : {
"first_suggestion" : {
"text" : "wordl war ii",
"term" : {
"field" : "_all"
}
}
}
}'
As you would expect, the response for the preceding query would be the query results and the suggestions as follows:
{
"took" : 5,
"timed_out" : false,
"_shards" : {
"total" : 5,
"successful" : 5,
"failed" : 0
},
"hits" : {
"total" : 7080049,
"max_score" : 1.0,
"hits" : [
...
]
},
"suggest" : {
"first_suggestion" : [ {
"text" : "wordl",
"offset" : 0,
"length" : 5,
"options" : [ {
"text" : "world",
"score" : 0.8,
"freq" : 130828
}, {
"text" : "words",
"score" : 0.8,
"freq" : 20854
}, {
"text" : "wordy",
"score" : 0.8,
"freq" : 210
}, {
"text" : "woudl",
"score" : 0.8,
"freq" : 29
}, {
"text" : "worde",
"score" : 0.8,
"freq" : 20
} ]
}, {
"text" : "war",
"offset" : 6,
"length" : 3,
"options" : [ ]
}, {
"text" : "ii",
"offset" : 10,
"length" : 2,
"options" : [ ]
} ]
}
}
As we can see, we've got both search results and the suggestions whose structure we've already discussed earlier in this section.
There is one more possibility—if we have the same suggestion text, but we want multiple suggestion types, we can embed our suggestions in the suggest object and place the text property as the suggest object option. For example, if we would like to get suggestions for the wordl war ii text for the text field and for the _all field, we could run the following command:
curl -XGET 'localhost:9200/wikipedia/_search?pretty' -d '{
"query" : {
"match_all" : {}
},
"suggest" : {
"text" : "wordl war ii",
"first_suggestion" : {
"term" : {
"field" : "_all"
}
},
"second_suggestion" : {
"term" : {
"field" : "text"
}
}
}
}'
We now know how to make a query with suggestions returned or how to use the _suggest REST endpoint. Let's now get into more details of each of the available suggester types.
The term suggester
The term suggester works on the basis of the edit distance, which means that the suggestion with fewer characters that needs to be changed or removed to make the suggestion look like the original word is the best one. For example, let's take the words worl andwork. In order to change the worl term to work, we need to change the l letter to k, so it means a distance of one. Of course, the text provided to the suggester is analyzed and then terms are chosen to be suggested. Let's now look at how we can configure the Elasticsearch term suggester.
Configuration
The Elasticsearch term suggester supports multiple configuration properties that allow us to tune its behavior to match our needs and to work with our data. Of course, we've already seen how it works and what it can give us, so we will concentrate on configuration now.
Common term suggester options
The common term suggester options can be used for all the suggester implementations that are based on the term suggester. Currently, these are the phrase suggester and, of course, the base term suggester. The available options are:
· text: This is the text we want to get the suggestions for. This parameter is required in order for the suggester to work.
· field: This is another required parameter. The field parameter allows us to set which field the suggestions should be generated for. For example, if we only want to consider title field terms in suggestions, we should set this parameter value to the title.
· analyzer: This is the name of the analyzer that should be used to analyze the text provided in the text parameter. If not set, Elasticsearch will use the analyzer used for the field provided by the field parameter.
· size: This is the maximum number of suggestions that are allowed to be returned by each term provided in the text parameter. It defaults to 5.
· sort: This allows us to specify how suggestions are sorted in the result returned by Elasticsearch. By default, this is set to a score, which tells Elasticsearch that the suggestions should be sorted by the suggestion score first, suggestion document frequency next, and finally, by the term. The second possible value is the frequency, which means that the results are first sorted by the document frequency, then by score, and finally, by the term.
· suggest_mode: This is another suggestion parameter that allows us to control which suggestions will be included in the Elasticsearch response. Currently, there are three values that can be passed to this parameter: missing, popular, and always. The defaultmissing value will tell Elasticsearch to generate suggestions to only those words that are provided in the text parameter that doesn't exist in the index. If this property will be set to popular, then the term suggester will only suggest terms that are more popular (exist in more documents) than the original term for which the suggestion is generated. The last value, which is always, will result in a suggestion generated for each of the words in the text parameter.
Additional term suggester options
In addition to the common term suggester options, Elasticsearch allows us to use additional ones that will only make sense for the term suggester itself. These options are as follows:
· lowercase_terms: When set to true, this will tell Elasticsearch to make all terms that are produced from the text field after analysis, lowercase.
· max_edits: This defaults to 2 and specifies the maximum edit distance that the suggestion can have for it to be returned as a term suggestion. Elasticsearch allows us to set this value to 1 or 2. Setting this value to 1 can result in fewer suggestions or no suggestions at all for words with many spelling mistakes. In general, if you see many suggestions that are not correct, because of errors, you can try setting max_edits to 1.
· prefix_length: Because spelling mistakes usually don't appear at the beginning of the word, Elasticsearch allows us to set how much of the suggestion's initial characters must match with the initial characters of the original term. By default, this property is set to 1. If we are struggling with the suggester performance increasing, this value will improve the overall performance, because less suggestions will be needed to be processed by Elasticsearch.
· min_word_length: This defaults to 4 and specifies the minimum number of characters a suggestion must have in order to be returned on the suggestions list.
· shard_size: This defaults to the value specified by the size parameter and allows us to set the maximum number of suggestions that should be read from each shard. Setting this property to values higher than the size parameter can result in more accurate document frequency (this is because of the fact that terms are held in different shards for our indices unless we have a single shard index created) being calculated but will also result in degradation of the spellchecker's performance.
· max_inspections: This defaults to 5 and specifies how many candidates Elasticsearch will look at in order to find the words that can be used as suggestions. Elasticsearch will inspect a maximum of shard_size multiplied by the max_inspections candidates for suggestions. Setting this property to values higher than the default 5 may improve the suggester accuracy but can also decrease the performance.
· min_doc_freq: This defaults to 0, which means not enabled. It allows us to limit the returned suggestions to only those that appear in the number of documents higher than the value of this parameter (this is a per-shard value and not a globally counted one). For example, setting this parameter to 2 will result in suggestions that appear in at least two documents in a given shard. Setting this property to values higher than 0 can improve the quality of returned suggestions; however, it can also result in some suggestion not being returned because it has a low shard document frequency. This property can help us with removing suggestions that come from a low number of documents and may be erroneous. This parameter can be specified as a percentage; if we want to do this, its value must be less than 1. For example, 0.01 means 1 percent, which again means that the minimum frequency of the given suggestion needs to be higher than 1 percent of the total term frequency (of course, per shard).
· max_term_freq: This defaults to 0.01 and specifies the maximum number of documents the term from the text field can exist for it to be considered a candidate for spellchecking. Similar to the min_doc_freq parameter, it can be either provided as an absolute number (such as 4 or 100), or it can be a percentage value if it is beyond 1 (for example, 0.01 means 1 percent). Please remember that this is also a per-shard frequency. The higher the value of this property, the better the overall performance of the spellchecker will be. In general, this property is very useful when we want to exclude terms that appear in many documents from spellchecking, because they are usually correct terms.
· accuracy: This defaults to 0.5 and can be a number from 0 to 1. It specifies how similar the term should be when compared to the original one. The higher the value, the more similar the terms need to be. This value is used in comparison during string distance calculation for each of the terms from the original input.
· string_distance: This specifies which algorithm should be used to compare how similar terms are when comparing them to each other. This is an expert setting. These options are available: internal, which is the default comparison algorithm based on an optimized implementation of the Damerau Levenshtein similarity algorithm; damerau_levenshtein, which is the implementation of the Damerau Levenshtein string distance algorithm (http://en.wikipedia.org/wiki/Damerau%E2%80%93Levenshtein_distance); levenstein, which is the implementation of the Levenshtein distance (http://en.wikipedia.org/wiki/Levenshtein_distance), jarowinkler, which is an implementation of the Jaro-Winkler distance algorithm (http://en.wikipedia.org/wiki/Jaro%E2%80%93Winkler_distance), and finally, ngram, which is an N-gram based distance algorithm.
Note
Because of the fact that we've used the terms suggester during the initial examples, we decided to skip showing you how to query term suggesters and how the response looks. If you want to see how to query this suggester and what the response looks like, please refer to the beginning of the Suggesters section in this chapter.
The phrase suggester
The term suggester provides a great way to correct user spelling mistakes on a per-term basis. However, if we would like to get back phrases, it is not possible to do that when using this suggester. This is why the phrase suggester was introduced. It is built on top of the term suggester and adds additional phrase calculation logic to it so that whole phrases can be returned instead of individual terms. It uses N-gram based language models to calculate how good the suggestion is and will probably be a better choice to suggest whole phrases instead of the term suggester. The N-gram approach divides terms in the index into grams—word fragments built of one or more letters. For example, if we would like to divide the word mastering into bi-grams (a two letter N-gram), it would look like this: ma as st te er ri in ng.
Note
If you want to read more about N-gram language models, refer to the Wikipedia article available at http://en.wikipedia.org/wiki/Language_model#N-gram_models and continue from there.
Usage example
Before we continue with all the possibilities, we have to configure the phrase suggester; let's start with showing you an example of how to use it. This time, we will run a simple query to the _search endpoint with only the suggests section in it. We do this by running the following command:
curl -XGET 'localhost:9200/wikipedia/_search?pretty' -d '{
"suggest" : {
"text" : "wordl war ii",
"our_suggestion" : {
"phrase" : {
"field" : "_all"
}
}
}
}'
As you can see in the preceding command, it is almost the same as we sent when using the term suggester, but instead of specifying the term suggester type, we've specified the phrase type. The response to the preceding command will be as follows:
{
"took" : 58,
"timed_out" : false,
"_shards" : {
"total" : 5,
"successful" : 5,
"failed" : 0
},
"hits" : {
"total" : 7080049,
"max_score" : 1.0,
"hits" : [
...
]
},
"suggest" : {
"our_suggestion" : [ {
"text" : "wordl war ii",
"offset" : 0,
"length" : 12,
"options" : [ {
"text" : "world war ii",
"score" : 7.055394E-5
}, {
"text" : "words war ii",
"score" : 2.3738032E-5
}, {
"text" : "wordy war ii",
"score" : 3.575829E-6
}, {
"text" : "worde war ii",
"score" : 1.1586584E-6
}, {
"text" : "woudl war ii",
"score" : 1.0753317E-6
} ]
} ]
}
}
As you can see, the response is very similar to the one returned by the term suggester, but instead of a single word being returned as the suggestion for each term from the text field, it is already combined and Elasticsearch returns whole phrases. Of course, we can configure additional parameters in the phrase section and, now, we will look at what parameters are available for usage. Of course, the returned suggestions are sorted by their score by default.
Configuration
The phrase suggester configuration parameter can be divided into three groups: basic parameters that define the general behavior, the smoothing models configuration to balance N-grams' weights, and candidate generators that are responsible for producing the list of terms suggestions that will be used to return final suggestions.
Note
Because the phrase suggester is based on the term suggester, it can also use some of the configuration options provided by it. These options are text, size, analyzer, and shard_size. Refer to the term suggester description earlier in this chapter to find out what they mean.
Basic configuration
In addition to properties mentioned in the preceding phrase, the suggester exposes the following basic options:
· highlight: This allows us to use suggestions highlighting. With the use of the pre_tag and post_tag properties, we can configure what prefix and postfix should be used to highlight suggestions. For example, if we would like to surround suggestions with the <b>and </b> tags, we should set pre_tag to <b> and post_tag to </b>.
· gram_size: This is the maximum size of the N-gram that is stored in the field and is specified by the field property. If the given field doesn't contain N-grams, this property should be set to 1 or not passed with the suggestion request at all. If not set, Elasticsearch will try to detect the proper value of this parameter by itself. For example, for fields using a shingle filter (http://www.elasticsearch.org/guide/en/elasticsearch/reference/current/analysis-shingle-tokenfilter.html), the value of this parameter will be set to the max_shingle_size property (of course, if not set explicitly).
· confidence: This is the parameter that allows us to limit the suggestion based on its score. The value of this parameter is applied to the score of the input phrase (the score is multiplied by the value of this parameter), and this score is used as a threshold for generated suggestions. If the suggestion score is higher than the calculated threshold, it will be included in the returned results; if not, then it will be dropped. For example, setting this parameter to 1.0 (which is the default value of it) will result in suggestions that are scored higher than the original phrase. On the other hand, setting it to 0.0 will result in the suggester returning all the suggestions (limited by the size parameter) no matter what their score is.
· max_errors: This is the property that allows us to specify the maximum number (or the percentage) of terms that can be erroneous (not correctly spelled) in order to create a correction using it. The value of this property can be either an integer number such as1 or 5, or it can be a float between 0 and 1, which will be treated as a percentage value. If we will set it as a float, it will specify the percentage of terms that can be erroneous. For example, a value of 0.5 will mean 50 percent. If we specify an integer number, such as 1 or 5, Elasticsearch will treat it as a maximum number of erroneous terms. By default, it is set to 1, which means that at most, a single term can be misspelled in a given correction.
· separator: This defaults to a whitespace character and specifies the separator that will be used to divide terms in the resulting bigram field.
· force_unigrams: This defaults to true and specifies whether the spellchecker should be forced to use a gram size of 1 (unigram).
· token_limit: This defaults to 10 and specifies the maximum number of tokens the corrections list can have in order for it to be returned. Setting this property to a value higher than the default one may improve the suggester accuracy at the cost of performance.
· collate: This allows us to check each suggestion against a specified query (using the query property inside the collate object) or filter (using the filter property inside the collate object). The provided query or filter is run as a template query and exposes the{{suggestion}} variable that represents the currently processed suggestion. By including an additional parameter called prune (in the collate object) and setting it to true, Elasticsearch will include the information if the suggestion matches the query or filter (this information will be included in the collate_match property in the results). In addition to this, the query preference can be included by using the preference property (which can take the same values as the ones used during the normal query processing).
· real_word_error_likehood: This is a percentage value, which defaults to 0.95 and specifies how likely it is that a term is misspelled even though it exists in the dictionary (built of the index). The default value of 0.95 tells Elasticsearch that 5% of all terms that exist in its dictionary are misspelled. Lowering the value of this parameter will result in more terms being taken as misspelled ones even though they may be correct.
Let's now look at an example of using some of the preceding mentioned parameters, for example, suggestions highlighting. If we modify our initial phrase suggestion query and add highlighting, the command would look as follows:
curl -XGET 'localhost:9200/wikipedia/_search?pretty' -d '{
"suggest" : {
"text" : "wordl war ii",
"our_suggestion" : {
"phrase" : {
"field" : "_all",
"highlight" : {
"pre_tag" : "<b>",
"post_tag" : "</b>"
},
"collate" : {
"prune" : true,
"query" : {
"match" : {
"title" : "{{suggestion}}"
}
}
}
}
}
}
}'
The result returned by Elasticsearch for the preceding query would be as follows:
{
"took" : 3,
"timed_out" : false,
"_shards" : {
"total" : 5,
"successful" : 5,
"failed" : 0
},
"hits" : {
"total" : 7080049,
"max_score" : 1.0,
"hits" : [
...
]
},
"suggest" : {
"our_suggestion" : [ {
"text" : "wordl war ii",
"offset" : 0,
"length" : 12,
"options" : [ {
"text" : "world war ii",
"highlighted" : "<b>world</b> war ii",
"score" : 7.055394E-5,
"collate_match" : true
}, {
"text" : "words war ii",
"highlighted" : "<b>words</b> war ii",
"score" : 2.3738032E-5,
"collate_match" : true
}, {
"text" : "wordy war ii",
"highlighted" : "<b>wordy</b> war ii",
"score" : 3.575829E-6,
"collate_match" : true
}, {
"text" : "worde war ii",
"highlighted" : "<b>worde</b> war ii",
"score" : 1.1586584E-6,
"collate_match" : true
}, {
"text" : "woudl war ii",
"highlighted" : "<b>woudl</b> war ii",
"score" : 1.0753317E-6,
"collate_match" : true
} ]
} ]
}
}
As you can see, the suggestions were highlighted.
Configuring smoothing models
A Smoothing model is a functionality of the phrase suggester whose responsibility is to measure the balance between the weight of infrequent N-grams that don't exist in the index and the frequent ones that exist in the index. It is rather an expert option and if you want to modify these N-grams, you should check suggester responses for your queries in order to see whether your suggestions are proper for your case. Smoothing is used in language models to avoid situations where the probability of a given term is equal to zero. The Elasticsearch phrase suggester supports multiple smoothing models.
Note
You can find out more about language models at http://en.wikipedia.org/wiki/Language_model.
In order to set which smoothing model we want to use, we need to add an object called smoothing and include a smoothing model name we want to use inside of it. Of course, we can include the properties we need or want to set for the given smoothing model. For example, we could run the following command:
curl -XGET 'localhost:9200/wikipedia/_search?pretty&size=0' -d '{
"suggest" : {
"text" : "wordl war ii",
"generators_example_suggestion" : {
"phrase" : {
"analyzer" : "standard",
"field" : "_all",
"smoothing" : {
"linear" : {
"trigram_lambda" : 0.1,
"bigram_lambda" : 0.6,
"unigram_lambda" : 0.3
}
}
}
}
}
}'
There are three smoothing models available in Elasticsearch. Let's now look at them.
Stupid backoff is the default smoothing model used by the Elasticsearch phrase suggester. In order to alter it or force its usage, we need to use the stupid_backoff name. The stupid backoff smoothing model is an implementation that will use a lower ordered N-gram (and will give it a discount equal to the value of the discount property) if the higher order N-gram count is equal to 0. To illustrate the example, let's assume that we use the ab bigram and the c unigram, which are common and exist in our index used by the suggester. However, we don't have the abc trigram present. What the stupid backoff model will do is that it will use the ab bigram model, because abc doesn't exist and, of course, the ab bigram model will be given a discount equal to the value of the discount property.
The stupid backoff model provides a single property that we can alter: discount. By default, it is set to 0.4, and it is used as a discount factor for the lower ordered N-gram model.
You can read more about N-gram smoothing models by looking at http://en.wikipedia.org/wiki/N-gram#Smoothing_techniques and http://en.wikipedia.org/wiki/Katz's_back-off_model (which is similar to the stupid backoff model described).
The Laplace smoothing model is also called additive smoothing. When used (to use it, we need to use the laplace value as its name), a constant value equal to the value of the alpha parameter (which is by 0.5 default) will be added to counts to balance weights of frequent and infrequent N-grams. As mentioned, the Laplace smoothing model can be configured using the alpha property, which is set to 0.5 by default. The usual values for this parameter are typically equal or below 1.0.
You can read more about additive smoothing at http://en.wikipedia.org/wiki/Additive_smoothing.
Linear interpolation, the last smoothing model, takes the values of the lambdas provided in the configuration and uses them to calculate weights of trigrams, bigrams, and unigrams. In order to use the linear interpolation smoothing model, we need to provide the name of linear in the smoothing object in the suggester query and provide three parameters: trigram_lambda, bigram_lambda, and unigram_lambda. The sum of the values of the three mentioned parameters must be equal to 1. Each of these parameters is a weight for a given type of N-gram; for example, the bigram_lambda parameter value will be used as a weights for bigrams.
Configuring candidate generators
In order to return possible suggestions for a term from the text provided in the text parameter, Elasticsearch uses so-called candidate generators. You can think of candidate generators as term suggesters although they are not exactly the same—they are similar, because they are used for every single term in the query provided to suggester. After the candidate terms are returned, they are scored in combination with suggestions for other terms from the text, and this way, the phrase suggestions are built.
Currently, direct generators are the only candidate generators available in Elasticsearch, although we can expect more of them to be present in the future. Elasticsearch allows us to provide multiple direct generators in a single phrase suggester request. We can do this by providing the list named direct_generators. For example, we could run the following command:
curl -XGET 'localhost:9200/wikipedia/_search?pretty&size=0' -d '{
"suggest" : {
"text" : "wordl war ii",
"generators_example_suggestion" : {
"phrase" : {
"analyzer" : "standard",
"field" : "_all",
"direct_generator" : [
{
"field" : "_all",
"suggest_mode" : "always",
"min_word_len" : 2
},
{
"field" : "_all",
"suggest_mode" : "always",
"min_word_len" : 3
}
]
}
}
}
}'
The response should be very similar to the one previously shown, so we decided to omit it.
Configuring direct generators
Direct generators allow us to configure their behavior by using a parameter similar to that exposed by the terms suggester. These common configuration parameters are field (which is required), size, suggest_mode, max_edits, prefix_length, min_word_length (in this case, it defaults to 4), max_inspections, min_doc_freq, and max_term_freq. Refer to the term suggester description to see what these parameters mean.
In addition to the mentioned properties, direct generators allow us to use the pre_filter and post_filter properties. These two properties allow us to provide an analyzer name that Elasticsearch will use. The analyzer specified by the pre_filter property will be used for each term passed to the direct generator, and the filter specified by the post_filter property will be used after it is returned by the direct generator, just before these terms are passed to the phrase scorer for scoring.
For example, we could use the filtering functionality of the direct generators to include synonyms just before the suggestions are passed to the direct generator using the pre_filter property. For example, let's update our wikipedia index settings to include simple synonyms, and let's use them in filtering. To do this, we start with updating the settings with the following commands:
curl -XPOST 'localhost:9200/wikipedia/_close'
curl -XPUT 'localhost:9200/wikipedia/_settings' -d '{
"settings" : {
"index" : {
"analysis": {
"analyzer" : {
"sample_synonyms_analyzer": {
"tokenizer": "standard",
"filter": [
"sample_synonyms"
]
}
},
"filter": {
"sample_synonyms": {
"type" : "synonym",
"synonyms" : [
"war => conflict"
]
}
}
}
}
}
}'
curl -XPOST 'localhost:9200/wikipedia/_open'
First, we need to close the index, update the setting, and then open it again because Elasticsearch won't allow us to change analysis settings on opened indices. Now we can test our direct generator with synonyms with the following command:
curl -XGET 'localhost:9200/wikipedia/_search?pretty&size=0' -d '{
"suggest" : {
"text" : "wordl war ii",
"generators_with_synonyms" : {
"phrase" : {
"analyzer" : "standard",
"field" : "_all",
"direct_generator" : [
{
"field" : "_all",
"suggest_mode" : "always",
"post_filter" : "sample_synonyms_analyzer"
}
]
}
}
}
}'
The response to the preceding command should be as follows:
{
"took" : 47,
"timed_out" : false,
"_shards" : {
"total" : 5,
"successful" : 5,
"failed" : 0
},
"hits" : {
"total" : 7080049,
"max_score" : 0.0,
"hits" : [ ]
},
"suggest" : {
"generators_with_synonyms" : [ {
"text" : "wordl war ii",
"offset" : 0,
"length" : 12,
"options" : [ {
"text" : "world war ii",
"score" : 7.055394E-5
}, {
"text" : "words war ii",
"score" : 2.4085322E-5
}, {
"text" : "world conflicts ii",
"score" : 1.4253577E-5
}, {
"text" : "words conflicts ii",
"score" : 4.8214292E-6
}, {
"text" : "wordy war ii",
"score" : 4.1216194E-6
} ]
} ]
}
}
As you can see, instead of the war term, the conflict term was returned for some of the phrase suggester results. So, our synonyms' configuration was taken into consideration. However, please remember that the synonyms were taken before the scoring of the fragments, so it can happen that the suggestions with the synonyms are not the ones that are scored the most, and you will not be able to see them in the suggester results.
The completion suggester
With the release of Elasticsearch 0.90.3, we were given the possibility to use a prefix-based suggester. It allows us to create the autocomplete functionality in a very performance-effective way because of storing complicated structures in the index instead of calculating them during query time. Although this suggester is not about correcting user spelling mistakes, we thought that it will be good to show at least a simple example of this highly efficient suggester.
The logic behind the completion suggester
The prefix suggester is based on the data structure called Finite State Transducer (FST) (http://en.wikipedia.org/wiki/Finite_state_transducer). Although it is highly efficient, it may require significant resources to build on systems with large amounts of data in them: systems that Elasticsearch is perfectly suitable for. If we would like to build such a structure on the nodes after each restart or cluster state change, we may lose performance. Because of this, the Elasticsearch creators decided to use an FST-like structure during index time and store it in the index so that it can be loaded into the memory when needed.
Using the completion suggester
To use a prefix-based suggester we need to properly index our data with a dedicated field type called completion. It stores the FST-like structure in the index. In order to illustrate how to use this suggester, let's assume that we want to create an autocomplete feature to allow us to show book authors, which we store in an additional index. In addition to authors' names, we want to return the identifiers of the books they wrote in order to search for them with an additional query. We start with creating the authors index by running the following command:
curl -XPOST 'localhost:9200/authors' -d '{
"mappings" : {
"author" : {
"properties" : {
"name" : { "type" : "string" },
"ac" : {
"type" : "completion",
"index_analyzer" : "simple",
"search_analyzer" : "simple",
"payloads" : true
}
}
}
}
}'
Our index will contain a single type called author. Each document will have two fields: the name field, which is the name of the author, and the ac field, which is the field we will use for autocomplete. The ac field is the one we are interested in; we've defined it using thecompletion type, which will result in storing the FST-like structure in the index. In addition to this, we've used the simple analyzer for both index and query time. The last thing is payload, which is the additional information we will return along with the suggestion; in our case, it will be an array of book identifiers.
Note
The type property for the field we will use for autocomplete is mandatory and should be set to completion. By default, the search_analyzer and index_analyzer properties will be set to simple and the payloads property will be set to false.
Indexing data
To index the data, we need to provide some additional information in addition to what we usually provide during indexing. Let's look at the following commands that index two documents describing authors:
curl -XPOST 'localhost:9200/authors/author/1' -d '{
"name" : "Fyodor Dostoevsky",
"ac" : {
"input" : [ "fyodor", "dostoevsky" ],
"output" : "Fyodor Dostoevsky",
"payload" : { "books" : [ "123456", "123457" ] }
}
}'
curl -XPOST 'localhost:9200/authors/author/2' -d '{
"name" : "Joseph Conrad",
"ac" : {
"input" : [ "joseph", "conrad" ],
"output" : "Joseph Conrad",
"payload" : { "books" : [ "121211" ] }
}
}'
Notice the structure of the data for the ac field. We provide the input, output, and payload properties. The payload property is used to provide additional information that will be returned. The input property is used to provide input information that will be used to build the FST-like structure and will be used to match the user input to decide whether the document should be returned by the suggester. The output property is used to tell the suggester which data should be returned for the document.
Note
Please remember that the payload property must be a JSON object that starts with a { character and ends with a } character.
If the input and output property is the same in your case and you don't want to store payloads, you may index the documents just like you usually index your data. For example, the command to index our first document would look like this:
curl -XPOST 'localhost:9200/authors/author/3' -d '{
"name" : "Stanislaw Lem",
"ac" : [ "Stanislaw Lem" ]
}'
Querying data
Finally, let's look at how to query our indexed data. If we would like to find documents that have authors starting with fyo, we would run the following command:
curl -XGET 'localhost:9200/authors/_suggest?pretty' -d '{
"authorsAutocomplete" : {
"text" : "fyo",
"completion" : {
"field" : "ac"
}
}
}'
Before we look at the results, let's discuss the query. As you can see, we've run the command to the _suggest endpoint, because we don't want to run a standard query; we are just interested in autocomplete results. The rest of the query is exactly the same as the standard suggester query run against the _suggest endpoint, with the query type set to completion.
The results returned by Elasticsearch for the preceding query look as follows:
{
"_shards" : {
"total" : 5,
"successful" : 5,
"failed" : 0
},
"authorsAutocomplete" : [ {
"text" : "fyo",
"offset" : 0,
"length" : 3,
"options" : [ {
"text" : "Fyodor Dostoevsky",
"score" : 1.0,
"payload":{"books":["123456","123457"]}
} ]
} ]
}
As you can see, in response, we've got the document we were looking for along with the payload information, which is the identifier of the books for that author.
Custom weights
By default, the term frequency will be used to determine the weight of the document returned by the prefix suggester. However, this may not be the best solution when you have multiple shards for your index, or your index is composed of multiple segments. In such cases, it is useful to define the weight of the suggestion by specifying the weight property for the field defined as completion; the weight property should be set to a positive integer value and not a float one like the boost for queries and documents. The higher theweight property value, the more important the suggestion is. This gives us plenty of opportunities to control how the returned suggestions will be sorted.
For example, if we would like to specify a weight for the first document in our example, we would run the following command:
curl -XPOST 'localhost:9200/authors/author/1' -d '{
"name" : "Fyodor Dostoevsky",
"ac" : {
"input" : [ "fyodor", "dostoevsky" ],
"output" : "Fyodor Dostoevsky",
"payload" : { "books" : [ "123456", "123457" ] },
"weight" : 80
}
}'
Now, if we would run our example query, the results would be as follows:
{
"_shards" : {
"total" : 5,
"successful" : 5,
"failed" : 0
},
"authorsAutocomplete" : [ {
"text" : "fyo",
"offset" : 0,
"length" : 3,
"options" : [ {
"text" : "Fyodor Dostoevsky",
"score" : 80.0,
"payload":{"books":["123456","123457"]}
} ]
} ]
}
See how the score of the result changed. In our initial example, it was 1.0 and, now, it is 80.0; this is because we've set the weight parameter to 80 during the indexing.
Additional parameters
There are three additional parameters supported by the suggester that we didn't mention till now. They are max_input_length, preserve_separators, and preserve_position_increments. Both preserve_separators and preserve_position_increments can be set to true or false. When setting the preserve_separators parameter to false, the suggester will omit separators such as whitespace (of course, proper analysis is required). Setting the preserve_position_increments parameter to false is needed if the first word in the suggestion is a stop word and we are using an analyzer that throws stop words away. For example, if we have The Clue as our document and the The word will be discarded by the analyzer by setting preserve_position_increments to false, the suggester will be able to return our document by specifying c as text.
The max_input_length property is set to 50 by default and specifies the maximum input length in UTF-16 characters. This limit is used at indexing time to limit the total number of characters stored in the internal structures.
Improving the query relevance
Elasticsearch and search engines in general are used for searching. Of course, some use cases may require browsing some portion of the indexed data; sometimes, it is even needed to export whole query results. However, in most cases, scoring is one of the factors that play a major role in the search process. As we said in the Default Apache Lucene scoring explained section of Chapter 2, Power User Query DSL, Elasticsearch leverages the Apache Lucene library document scoring capabilities and allows you to use different query types to manipulate the score of results returned by our queries. What's more, we can change the low-level algorithm used to calculate the score that we will describe in the Altering Apache Lucene scoring section of Chapter 6, Low-level Index Control.
Given all this, when we start designing our queries, we usually go for the simplest query that returns the documents we want. However, given all the things we can do in Elasticsearch when it comes to scoring control, such queries return results that are not the best when it comes to the user search experience. This is because Elasticsearch can't guess what our business logic is and what documents are the ones that are the best from our point of view when running a query. In this section, we will try to follow a real-life example of query relevance tuning. We want to make this chapter a bit different compared to the other ones. Instead of only giving you an insight, we have decided to give you a full example of when the query tuning process may look like. Of course, remember that this is only an example and you should adjust this process to match your organization needs. Some of the examples you find in this section may be general purpose ones, and when using them in your own application, make sure that they make sense to you.
Just to give you a little insight into what is coming, we will start with a simple query that returns the results we want, we will alter the query by introducing different Elasticsearch queries to make the results better, we will use filters, we will lower the score of the documents we think of as garbage, and finally, we will introduce faceting to render drill-down menus for users to allow the narrowing of results.
Data
Of course, in order to show you the results of the query modifications that we perform, we need data. We would love to show you the real-life data we were working with, but we can't, as our clients wouldn't like this. However, there is a solution to that: for the purpose of this section, we have decided to index Wikipedia data. To do that, we will reuse the installed Wikipedia river plugin that we installed in the Correcting user spelling mistakes section earlier in this chapter.
The Wikipedia river will create the wikipedia index for us if there is not an existing one. Because we already have such an index, we will delete it. We could go with the same index, but we know that we will need to adjust the index fields, because we need some additional analysis logic, and in order to not reindex the data, we create the index upfront.
Note
Remember to remove the old river before adding the new one. To remove the old river, you should just run the following command:
curl -XDELETE 'localhost:9200/_river/wikipedia_river'
In order to reimport documents, we use the following commands:
curl -XDELETE 'localhost:9200/wikipedia'
curl -XPOST 'localhost:9200/wikipedia' -d'{
"settings": {
"index": {
"analysis": {
"analyzer": {
"keyword_ngram": {
"filter": [
"lowercase"
],
"tokenizer": "ngram"
}
}
}
}
},
"mappings": {
"page": {
"properties": {
"category": {
"type": "string",
"fields": {
"untouched": {
"type": "string",
"index": "not_analyzed"
}
}
},
"disambiguation": {
"type": "boolean"
},
"link": {
"type": "string",
"index": "not_analyzed"
},
"redirect": {
"type": "boolean"
},
"redirect_page": {
"type": "string"
},
"special": {
"type": "boolean"
},
"stub": {
"type": "boolean"
},
"text": {
"type": "string"
},
"title": {
"type": "string",
"fields": {
"ngram": {
"type": "string",
"analyzer": "keyword_ngram"
},
"simple": {
"type": "string",
"analyzer": "simple"
}
}
}
}
}
}
}'
For now, what we have to know is that we have a page type that we are interested in and whether that represents a Wikipedia page. We will use two fields for searching: the text and title fields. The first one holds the content of the page and the second one is responsible for holding its title.
What we have to do next is start the Wikipedia river. Because we were interested in the latest data in order to instantiate the river and start indexing, we've used the following command:
curl -XPUT 'localhost:9200/_river/wikipedia/_meta' -d '{
"type" : "wikipedia"
}'
That's all; Elasticsearch will index the newest Wikipedia dump available to the index called wikipedia. All we have to do is wait. We were not patient, and we decided that we'll only index the first 10 million documents and, after our Wikipedia river hit that number of documents, we deleted it. We checked the final number of documents by running the following command:
curl -XGET 'localhost:9200/wikipedia/_search?q=*&size=0&pretty'
The response was as follows:
{
"took" : 5,
"timed_out" : false,
"_shards" : {
"total" : 5,
"successful" : 5,
"failed" : 0
},
"hits" : {
"total" : 10425136,
"max_score" : 0.0,
"hits" : [ ]
}
}
We can see that we have 10,425,136 documents in the index.
Note
When running examples from this chapter, please consider the fact that the data we've indexed changes over time, so the examples shown in this chapter may result in a different document if we run it after some time.
The quest for relevance improvement
After we have our indexed data, we are ready to begin the process of searching. We will start from the beginning using a simple query that will return the results we are interested in. After that, we will try to improve the query relevance. We will also try to pay attention to performance and notice the performance changes when they are most likely to happen.
The standard query
As you know, Elasticsearch includes the content of the documents in the _all field by default. So, why do we need to bother with specifying multiple fields in a query when we can use a single one, right? Going in that direction, let's assume that we've constructed the following query and now we send it to Elasticsearch to retrieve our precious documents using the following command:
curl -XGET 'localhost:9200/wikipedia/_search?fields=title&pretty' -d'
{
"query": {
"match": {
"_all": {
"query": "australian system",
"operator": "OR"
}
}
}
}'
Because we are only interested in getting the title field (Elasticsearch will use the _source field to return the title field, because the title field is not stored), we've added the fields=title request parameter and, of course, we want it to be in a human-friendly formatting, so we added the pretty parameter as well.
However, the results were not as perfect as we would like them to be. The first page of documents were as follows (the whole JSON response can be found in the response_query_standard.json file provided with the book):
Australian Honours System
List of Australian Awards
Australian soccer league
Australian football league system
AANBUS
Australia Day Honours
Australian rating system
TAAATS
Australian Arbitration system
Western Australian Land Information System (WALIS)
While looking at the title of the documents, it seems that some of these that contain both words from the query have a lower rank than the others. Let's try to improve things.
The multi match query
What we can do first is not use the _all field at all. The reason for this is that we need to tell Elasticsearch what importance each of the fields has. For example, in our case, the title field is more important than the content of the field, which is stored in the text field. In order to inform this to ElasticSearch, we will use the multi_match query. To send such a query to Elasticsearch, we will use the following command:
curl -XGET 'localhost:9200/wikipedia/_search?fields=title&pretty' -d'
{
"query": {
"multi_match": {
"query": "australian system",
"fields": [
"title^100",
"text^10",
"_all"
]
}
}
}'
The first page of results of the preceding query was as follows (the whole JSON response can be found in the response_query_multi_match.json file provided with the book):
Australian Antarctic Building System
Australian rating system
Australian Series System
Australian Arbitration system
Australian university system
Australian Integrated Forecast System
Australian Education System
The Australian electoral system
Australian preferential voting system
Australian Honours System
Instead of running the query against a single _all field, we chose to run it against the title, text, and _all fields. In addition to this, we introduced boosting: the higher the boost value, the more important the field will be (the default boost value for a field is 1.0). So, we said that the title field is more important than the text field, and the text field is more important than _all.
If you look at the results now, they seem to be a bit more relevant but still not as good as we would like them to be. For example, look at the first and second documents on the results list. The first document's title is Australian Antarctic Building System, the second document's title is Australian rating system, and so on. I would like the second document to be higher than the first one.
Phrases comes into play
The next idea that should come into our minds is the introduction of phrase queries so that we can overcome the problem that was described previously. However, we still need the documents that don't have phrases included in the results just below the ones with the phrases present. So, we need to modify our query by adding the bool query on top. Our current query will come into the must section and the phrase query will go into the should section. An example command that sends the modified query would look as follows:
curl -XGET 'localhost:9200/wikipedia/_search?fields=title&pretty' -d'
{
"query": {
"bool": {
"must": [
{
"multi_match": {
"query": "australian system",
"fields": [
"title^100",
"text^10",
"_all"
]
}
}
],
"should": [
{
"match_phrase": {
"title": "australian system"
}
},
{
"match_phrase": {
"text": "australian system"
}
}
]
}
}
}'
Now, if we look at the top results, they are as follows (the whole response can be found in the response_query_phrase.json file provided with the book):
Australian honours system
Australian Antarctic Building System
Australian rating system
Australian Series System
Australian Arbitration system
Australian university system
Australian Integrated Forecast System
Australian Education System
The Australian electoral system
Australian preferential voting system
We would really like to stop further query optimization, but our results are still not as good as we would like them to be, although they are a bit better. This is because we don't have all the phrases matched. What we can do is introduce the slop parameter, which will allow us to define how many words in between can be present for a match to be considered a phrase match. For example, our australian system query will be considered a phrase match for a document with the australian education system title and with a slopparameter of 1 or more. So, let's send our query with the slop parameter present by using the following command:
curl -XGET 'localhost:9200/wikipedia/_search?fields=title&pretty' -d'
{
"query": {
"bool": {
"must": [
{
"multi_match": {
"query": "australian system",
"fields": [
"title^100",
"text^10",
"_all"
]
}
}
],
"should": [
{
"match_phrase": {
"title": {
"query": "australian system",
"slop": 1
}
}
},
{
"match_phrase": {
"text": {
"query": "australian system",
"slop": 1
}
}
}
]
}
}
}'
Now, let's look at the results (the whole response can be found in the response_query_phrase_slop.json file provided with the book):
Australian Honours System
Australian honours system
Wikipedia:Articles for deletion/Australian university system
Australian rating system
Australian Series System
Australian Arbitration system
Australian university system
Australian Education System
The Australian electoral system
Australian Legal System
It seems that the results are now better. However, we can always do some more tweaking and see whether we can get some more improvements.
Let's throw the garbage away
What we can do now is that we can remove the garbage from our results. We can do this by removing redirect documents and special documents (for example, the ones that are marked for deletion). To do this, we will introduce a filter so that it doesn't mess with the scoring of other results (because filters are not scored). What's more, Elasticsearch will be able to cache filter results and reuse them in our queries and speed up their execution. The command that sends our query with filters will look as follows:
curl -XGET 'localhost:9200/wikipedia/_search?fields=title&pretty' -d'
{
"query": {
"filtered": {
"query": {
"bool": {
"must": [
{
"multi_match": {
"query": "australian system",
"fields": [
"title^100",
"text^10",
"_all"
]
}
}
],
"should": [
{
"match_phrase": {
"title": {
"query": "australian system",
"slop": 1
}
}
},
{
"match_phrase": {
"text": {
"query": "australian system",
"slop": 1
}
}
}
]
}
},
"filter": {
"bool": {
"must_not": [
{
"term": {
"redirect": "true"
}
},
{
"term": {
"special": "true"
}
}
]
}
}
}
}
}'
The results returned by it will look as follows:
Australian honours system
Australian Series System
Australian soccer league system
Australian Antarctic Building System
Australian Integrated Forecast System
Australian Defence Air Traffic System
Western Australian Land Information System
The Australian Advanced Air Traffic System
Australian archaeology
Australian Democrats
Isn't it better now? We think it is, but we can still make even more improvements.
Now, we boost
If you ever need to boost the importance of the phrase queries that we've introduced, we can do that by wrapping a phrase query with the function_score query. For example, if we want to have a phrase for the title field to have a boost of 1000, we need to change the following part of the preceding query:
...
{
"match_phrase": {
"title": {
"query": "australian system",
"slop": 1
}
}
}
...
We need to replace the preceding part of the query with the following one:
...
{
"function_score": {
"boost_factor": 1000,
"query": {
"match_phrase": {
"title": {
"query": "australian system",
"slop": 1
}
}
}
}
}
...
After introducing the preceding change, the documents with phrases will be scored even higher than before, but we will leave it for you to test.
Performing a misspelling-proof search
If you look back at the mappings, you will see that we have the title field defined as multi field and one of the fields is analyzed with a defined ngram analyzer. By default, it will create bigrams, so from the system word, it will create the sy ys st te em bigrams. Imagine that we could drop some of them during searches to make our search misspelling-proof. For the purpose of showing how we can do this, let's take a simple misspelled query sent with the following command:
curl -XGET 'localhost:9200/wikipedia/_search?fields=title&pretty' -d'
{
"query": {
"query_string": {
"query": "austrelia",
"default_field": "title",
"minimum_should_match": "100%"
}
}
}'
The results returned by Elasticsearch would be as follows:
{
"took" : 10,
"timed_out" : false,
"_shards" : {
"total" : 5,
"successful" : 5,
"failed" : 0
},
"hits" : {
"total" : 0,
"max_score" : null,
"hits" : [ ]
}
}
We've sent a query that is misspelled against the title field and because there is no document with the misspelled term, we didn't get any results. So now, let's leverage the title.ngram field capabilities and omit some of the bigrams so that Elasticsearch can find some documents. Our command with a modified query looks as follows:
curl -XGET 'localhost:9200/wikipedia/_search?fields=title&pretty' -d'
{
"query": {
"query_string": {
"query": "austrelia",
"default_field": "title.ngram",
"minimum_should_match": "85%"
}
}
}'
We changed the default_field property from title to title.ngram in order to inform Elasticsearch, the one with bigrams indexed. In addition to that, we've introduced the minimum_should_match property, and we've set it to 85 percent. This allows us to inform Elasticsearch that we don't want all the terms produced by the analysis process to match but only a percentage of them, and we don't care which terms these are.
Note
Lowering the value of the minimum_should_match property will give us more documents but a less accurate search. Setting the value of the minimum_should_match property to a higher one will result in the decrease of the documents returned, but they will have more bigrams similar to the query ones and, thus, they will be more relevant.
The top results returned by the preceding query are as follows (the whole result's response can be found in a file called response_ngram.json provided with the book):
Aurelia (Australia)
Australian Kestrel
Austrlia
Australian-Austrian relations
Australia-Austria relations
Australia–Austria relations
Australian religion
CARE Australia
Care Australia
Felix Austria
If you would like to see how to use the Elasticsearch suggester to handle spellchecking, refer to the Correcting user spelling mistakes section in this chapter.
Drill downs with faceting
The last thing we want to mention is faceting and aggregations. You can do multiple things with it, for example, calculating histograms, statistics for fields, geo distance ranges, and so on. However, one thing that can help your users get the data they are interested in is terms faceting. For example, if you go to amazon.com and enter the kids shoes query, you would see the following screenshot:

You can narrow down the results by the brand (the left-hand side of the page). The list of brands is not static and is generated on the basis of the results returned. We can achieve the same with terms faceting in Elasticsearch.
Note
Please note that we are showing both queries with faceting and with aggregations. Faceting is deprecated and will be removed from Elasticsearch at some point. However, we know that our readers still use it and for that, we show different variants of the same query.
So now, let's get back to our Wikipedia data. Let's assume that we like to allow our users to choose the category of documents they want to see after the initial search. In order to do that, we add the facets section to our query (however, in order to simplify the example, let's use the match_all query instead of our complicated one) and send the new query with the following command:
curl -XGET 'localhost:9200/wikipedia/_search?fields=title&pretty' -d '{
"query": {
"match_all": {}
},
"facets": {
"category_facet": {
"terms": {
"field": "category.untouched",
"size": 10
}
}
}
}'
As you can see, we've run the facet calculation on the category.untouched field, because terms faceting is calculated on the indexed data. If we run it on the category field, we will get a single term in the faceting result, and we want the whole category to be present. The faceting section of the results returned by the preceding query looks as follows (the entire result's response can be found in a file called response_query_facets.json provided with the book):
"facets" : {
"category_facet" : {
"_type" : "terms",
"missing" : 6175806,
"total" : 16732022,
"other" : 16091291,
"terms" : [ {
"term" : "Living people",
"count" : 483501
}, {
"term" : "Year of birth missing (living people)",
"count" : 39413
}, {
"term" : "English-language films",
"count" : 22917
}, {
"term" : "American films",
"count" : 16139
}, {
"term" : "Year of birth unknown",
"count" : 15561
}, {
"term" : "The Football League players",
"count" : 14020
}, {
"term" : "Main Belt asteroids",
"count" : 13968
}, {
"term" : "Black-and-white films",
"count" : 12945
}, {
"term" : "Year of birth missing",
"count" : 12442
}, {
"term" : "English footballers",
"count" : 9825
} ]
}
}
By default, we've got the faceting results sorted on the basis of the count property, which tells us how many documents belong to that particular category. Of course, we can do the same with aggregations by using the following query:
curl -XGET 'localhost:9200/wikipedia/_search?fields=title&pretty' -d '{
"query": {
"match_all": {}
},
"aggs": {
"category_agg": {
"terms": {
"field": "category.untouched",
"size": 10
}
}
}
}'
Now, if our user wants to narrow down its results to the English-language films category, we need to send the following query:
curl -XGET 'localhost:9200/wikipedia/_search?fields=title&pretty' -d '{
"query": {
"filtered": {
"query" : {
"match_all" : {}
},
"filter" : {
"term": {
"category.untouched": "English-language films"
}
}
}
},
"facets": {
"category_facet": {
"terms": {
"field": "category.untouched",
"size": 10
}
}
}
}'
We've changed our query to include a filter and, thus, we've filtered down the documents set on which the faceting will be calculated.
Of course, we can do the same with aggregations by using the following query:
curl -XGET 'localhost:9200/wikipedia/_search?fields=title&pretty' -d '{
"query": {
"filtered": {
"query" : {
"match_all" : {}
},
"filter" : {
"term": {
"category.untouched": "English-language films"
}
}
}
},
"aggs": {
"category_agg": {
"terms": {
"field": "category.untouched",
"size": 10
}
}
}
}'
Summary
In this chapter, we learned how to correct user spelling mistakes both by using the terms suggester and the phrase suggester, so now we know what to do in order to avoid empty pages that are a result of misspelling. In addition to that, we improved our users' query experience by improving the query relevance. We started with a simple query; we added multi match queries, phrase queries, boosts, and used query slops. We saw how to filter our garbage results and how to improve the phrase match importance. We used N-grams to avoid misspellings as an alternate method to using Elasticsearch suggesters. We've also discussed how to use faceting to allow our users to narrow down search results and thus simplify the way in which they can find the desired documents or products.
In the next chapter, we will finally get into performance-related topics, starting with discussions about Elasticsearch scaling. Then, we will discuss how to choose the right amount of shards and replicas for our deployment, and how routing can help us in our deployment. We will alter the default shard allocation logic, and we will adjust it to match our needs. Finally, we will see what Elasticsearch gives us when it comes to query execution logic and how we can control that to best match our deployment and indices architecture.
All materials on the site are licensed Creative Commons Attribution-Sharealike 3.0 Unported CC BY-SA 3.0 & GNU Free Documentation License (GFDL)
If you are the copyright holder of any material contained on our site and intend to remove it, please contact our site administrator for approval.
© 2016-2026 All site design rights belong to S.Y.A.