Learning OpenShift (2014)
Chapter 2. Creating and Managing Applications
We got our feet wet in Chapter 1, Creating Your First OpenShift Application, by creating and deploying a simple sample application to the OpenShift Online platform. In this chapter, we are going to dive all the way in and learn the essential commands for the RHC client tools that will allow us to effectively create and manage applications. We will also explore the embedded cartridge system that will enable us to add additional functionality, such as databases and task scheduling, to our applications. Having these skills and building blocks will allow us to move beyond a simple static application into the world of creating interactive applications that can save application state.
Learning the essential RHC commands
As you learned in the previous chapter, the RHC tool is an umbrella command that will allow us to perform many different operations on the OpenShift platform. It is critical that you understand the most commonly used parameters in order to be effective with the OpenShift Online platform. Developers interact with the RHC toolset using the convention of the following command:
$ rhc command action arguments
The essential commands that we will cover in this chapter are app and cartridge. The app command will allow us to create and manage applications on the platform, while the cartridge command will allow us to add and manage embeddable cartridges. Given that the conventions are listed, we can further build out the entered text we issue by adding the command that we want to perform an action on. For instance, if we want to perform an action on an application, the command will be as follows:
$ rhc app action
Now that we have specified the command (app) that we want to perform an action on, we can then specify the action that we want by using the correct argument associated with the command. The available actions for the app command are listed in the following table:
|
Action |
Description |
|
configure |
This allows the developer to modify configuration items for an application such as auto-deployment, namespace, and deployment type. |
|
create |
This allows the developer to create a new application on the OpenShift Online Platform. |
|
delete |
This allows the developer to delete an application from the OpenShift Online server. The Git repository on the local filesystem will not be modified. |
|
deploy |
This deploys a Git reference or binary file. |
|
force-stop |
This forces the stopping of all application processes. |
|
reload |
This reloads the application configuration. |
|
restart |
This restarts the application. |
|
show |
This shows information about the application such as domain, date created, the Git URL, and cartridges in use by the application. |
|
start |
This starts the application. |
|
stop |
This stops the application. |
|
tidy |
This allows the developer to clean the application logs, tmp directories, and the Git repository on the OpenShift server. |
Tip
You can view a list of all actions available for the rhc app command by entering in the following command:
$ rhc app
Displaying information about an application
Let's test out the new commands you have just learned by displaying the information for the application we created in the previous chapter. Open up your terminal prompt and enter in the following command:
$ rhc app show
After entering in this command, you probably saw an error message. Why is this? In order for the RHC tool to know which application you want to display information about, you must also provide the name of the application. Given that we named our application myphpapp in the previous chapter, let's modify the command to include the application name:
$ rhc app show myphpapp
Tip
The RHC tool is context aware, which means that if you are in the directory that contains the Git source code repository, you will not need to specify the application name. It will default to the application of the directory you are currently working from.
If you have forgotten the name of your application, or just want to view a list containing all of your applications, you can enter in the follow command:
$ rhc apps
Once the command has been executed, you should see an output that is similar to the following:
myphpapp @ http://myphpapp-packt.rhcloud.com/ (uuid: 52bf4758e0b8cd189d0000d9)
------------------------------------------------------------------------------
Domain: packt
Created: Jan 10, 2014 8:49 PM
Gears: 1 (defaults to small)
Git URL: ssh://52bf4758e0b8cd189d0000d9@myphpapp-packt.rhcloud.com/~/git/myphpapp.git/
SSH: 52bf4758e0b8cd189d0000d9@myphpapp-packt.rhcloud.com
Deployment: auto (on git push)
php-5.3 (PHP 5.3)
-----------------
Gears: 1 small
The essential information that a developer would want to know about their application is displayed in the output provided. Given this output, a developer will have the necessary information required to SSH to the application gear, clone the Git source repository, and know the cartridges that the application gear is consuming.
Deleting applications
OpenShift Online is a great platform for quickly spinning up a new development stack in order to try out a new piece of technology or to prototype ideas rapidly. While this is a great use of the platform, you have to keep in mind that while on the free tier, you are limited to having three gears at any point in the time. In order to manage your system usage appropriately, the RHC toolset provides users a way to delete applications once they are no longer in use. This will free up a gear on the server that has been allocated to your account, which in turn will allow you to have room to create a new application. In the previous chapter, we created two applications that we will no longer use. Let's free up the resources for our account by deleting both of them. In order to delete an application, issue the following command in your terminal prompt:
$ rhc app delete myphpapp
Note
Deleting an application cannot be reversed. While the source code repository on your local machine will not be altered, it is important to understand that once you delete an application, it is completely removed from the OpenShift servers.
After you enter in the previous command, the system will prompt you to ensure that you want to delete the application. Type yes to confirm that you want to delete it and press the Enter key. After the application has been deleted, you will see an output message that confirms the delete operation was successful.
The rhc app delete command can also be passed a flag that will notify the system that you want to bypass the confirmation message prompt. Let's delete the blog application we created in the previous chapter while bypassing the confirmation prompt:
$ rhc app delete myblog --confirm
Tip
If you no longer need the source code for the application you deleted, make sure you remove the directories from your local filesystem.
Understanding cartridges
When I hear the word cartridge, I often think back to when I was kid and all the enjoyment I had while playing the original 8-bit Nintendo Entertainment System (NES). One of the great things about the NES was the ability to play a plethora of games simply by inserting a new game cartridge into the system. Plugging one of the game cartridges into the console changed the state of the system by allowing the consumer to utilize added functionality on top of the core console. The cartridge was the delivery mechanism for the game software that made the system usable. Without a game cartridge, NES would have been a pretty boring game console.
Just as with video game consoles that most people have played, OpenShift supports a cartridge system that will allow developers to change the state of the platform to meet their specific needs and requirements. Using one of these cartridges is what makes the platform usable.
There are two types of cartridges that are available for the OpenShift Online platform:
· Web cartridges
· Add-on cartridges
Web cartridges
You can think of a web cartridge as the language runtime (server) that you will be using for your application development. A common example for Java-based applications would be the Tomcat web cartridge. Each application that you create on the platform must include one web cartridge. At the time of writing, the available web cartridges for use by developers are shown in the following table:
|
Cartridge name |
Developers |
|
jbossas-7 |
JBoss Application Server 7 |
|
jbosseap-6 |
JBoss Enterprise Application Platform 6 |
|
jenkins-1 |
Jenkins servers that provides continuous integration functionality |
|
nodejs-0.10 |
Version .10 of the popular node.js runtime |
|
zend-6.1 |
The popular Zend Server for PHP applications |
|
php-5.3 |
PHP 5.3 |
|
php-5.4 |
PHP 5.4 |
|
ruby-1.8 |
Ruby 1.8 |
|
ruby-1.9 |
Ruby 1.9 |
|
perl-5.10 |
Perl 5.10 |
|
python-2.6 |
Python 2.6 |
|
python-2.7 |
Python 2.7 |
|
python-3.3 |
Python 3.3 |
|
jbossews-1.0 |
Tomcat 6 |
|
jbossews-2.0 |
Tomcat 7 |
|
diy-0.1 |
This is an empty gear that will allow you to install and run a custom runtime |
Note
Keep in mind that the version number of a specific application runtime that is offered is a fast moving target. Don't be surprised if newer versions of a runtime show up once they are generally available to the public.
Add-on cartridges
To further expand the functionality of the web cartridge, a developer can also embed an add-on cartridge to their application gear. These add-on cartridges provide features that complement the core web cartridge that you have chosen for your application. For example, most modern web applications rely on a database to store and retrieve information that is required for the application to run. Common examples of add-on cartridges will include databases, database management tools, and job schedulers.
Note
A developer may embed multiple add-on cartridges into a single application. For instance, you can use both the MySQL and MongoDB databases with the same application.
At the time of writing, the available add-on cartridges for use by developers are shown as follows:
|
Cartridge name |
Description |
|
10gen-mms-agent-0.1 |
This is a tenth generation Mongo Monitoring Service Agent |
|
cron-1.4 |
This is the popular task schedule for Unix-based systems |
|
jenkins-client-1 |
This Jenkins client is used with continuous integration |
|
mongodb-2.4 |
This is Version 2.4 of the popular MongoDB NoSQL database |
|
mysql-5.1 |
This is Version 5.1 of the MySQL database |
|
mysql-5.5 |
This is Version 5.5 of the MySQL database |
|
phpmyadmin-4 |
This is a popular web-based frontend for the MySQL database |
|
postgresql-8.4 |
This is Version 8.4 of the popular PostgreSQL relational database |
|
postgresql-9.2 |
This is Version 9.2 of the popular PostgreSQL relational database |
|
rockmongo-1.1 |
This is a web frontend to manage an embedded MongoDB database |
Tip
To view a complete list of all cartridges currently available on the platform, you can issue the following command:
$ rhc cartridge list
Using cartridges
Now that you understand that a cartridge allows the developers to change the features available on the platform, let's dig in and learn some of the basic cartridge commands. To interact with cartridges, use the following syntax:
$ rhc cartridge action
The available actions for the cartridge command are listed in the following table:
|
Action |
Description |
|
add |
This allows the developer to add a cartridge to an existing application. |
|
list |
This lists all of the available supported cartridges on the platform. |
|
reload |
This allows the developer to reload the configuration for the cartridge. |
|
remove |
This allows the developer to remove a cartridge from an existing application. |
|
scale |
This allows the developer to specify the configuration for how many gears the application can consume while scaling. |
|
show |
This shows information about a cartridge. For instance, if you issue the command to show information about a database cartridge, such as mysql, the username and password for the database will be displayed. |
|
start |
This allows the developer to start the cartridge. |
|
status |
This displays the current status of the cartridge state, for instance, if the cartridge is in a running or stopped state. |
|
stop |
This stops the cartridge. |
|
storage |
This allows the developer to view and modify the storage configuration for the cartridge. |
Tip
You can view a list of all actions available for the rhc cartridge command by entering in the following command:
$ rhc cartridge
Adding cartridges
One of the most popular development stacks in existence today is called the LAMP stack. During the remainder of this chapter, we will build out a full LAMP stack using the OpenShift Online platform.
Note
The LAMP acronym refers to the first letters of each technology that is used for one of the most popular programming stacks in existence. The technologies that commonly make up the LAMP stack are Linux, Apache, MySQL, and PHP, Perl, or Python.
The first thing we need to do in order to build this stack is to create a new application using the PHP runtime. Open up your terminal window and enter in the following command, ensuring that you are in the directory where you want the source code repository to reside:
$ rhc app create lampstack php-5.4
Given the information you learned previously in this chapter, we can map this command to the standard convention of the RHC command action arguments as follows:
|
Component |
Type |
Description |
|
rhc |
Umbrella command |
This is the umbrella command for all RHC tools |
|
app |
Command |
This notifies the RHC toolset that is going to perform actions for applications |
|
create |
Action |
This specifies that we want the create action to spin up a new application gear |
|
lampstack |
Argument |
This is the argument that specifies we are going to name our application lampstack |
|
php-5.4 |
Argument |
This is the argument that specifies we are going use the PHP-5.4 web cartridge |
The previous command created a new application with all of the components required for a LAMP stack, except for the MySQL database. In order to add this functionality to our application stack, we can embed the MySQL add-on cartridge with the following command:
$ rhc cartridge add mysql-5.5 -a lampstack
Once the previous command has completed successfully, you will see an output that is similar to the following:
MySQL 5.5 database added. Please make note of these credentials:
Root User: adminbrePNb2
Root Password: FMsgJpTHEwYd
Database Name: lampstack
Connection URL: mysql://$OPENSHIFT_MYSQL_DB_HOST:$OPENSHIFT_MYSQL_DB_PORT/
You can manage your new MySQL database by also embedding phpmyadmin.
The phpmyadmin username and password will be the same as the MySQL credentials above.
Congratulations! You have just spun up an entire LAMP stack in a record amount of time.
Note
The RHC toolset is a very powerful command line utility. One of the features it provides is the ability to chain cartridges together. For instance, to create a complete LAMP stack with a single command, we can use the following syntax:
$ rhc app create lampstack php-5.4 mysql-5.5
Using databases with your application
In the previous section, we created a new application called lampstack and deployed it to the public cloud. In this section, we are going make use of the MySQL database cartridge that we added by creating a web application that will display information that our application code retrieves from this embedded cartridge. We are also going to embed a popular MySQL database management tool called phpMyAdmin.
Note
Although we will be using the phpMyAdmin tool during this section, it is important to remember that you can use any database management tool, including the MySQL command line utility, to connect to and manage your database.
Adding the phpMyAdmin add-on cartridge
As you learned previously in this chapter, OpenShift Online provides a wide assortment of cartridges that you can use to provide more functionality to your web applications. A common application that most PHP developers use to manage their database is called phpMyAdmin. In this section, we are going to embed this popular application to our lampstack application. In order to add this cartridge to our application, open up your terminal prompt and enter in the following command:
$ rhc cartridge add phpmyadmin-4 -a lampstack
After the command has executed, make a note of the username and password that is provided. The output provided should look similar to the following:
Adding phpmyadmin-4 to application 'lampstack' ... done
phpmyadmin-4 (phpMyAdmin 4.0)
-----------------------------
Gears: Located with php-5.4, mysql-5.5
Connection URL: https://lampstack-packt.rhcloud.com/phpmyadmin/
Please make note of these MySQL credentials again:
Root User: adminRapRWMM
Root Password: JerElgadNgFP
URL: https://lampstack-packt.rhcloud.com/phpmyadmin/
Open up your web browser and point the location to the URL that is provided in the output.
Tip
Ensure that you are using the correct URL and not the one provided previously as an example.
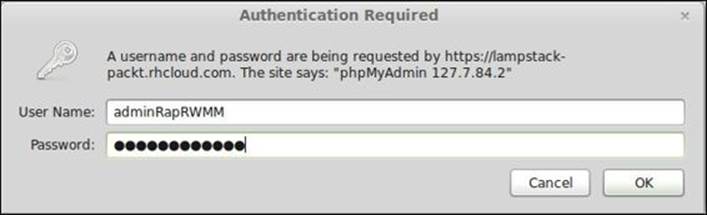
Once the web page has loaded, you will be presented with an authentication dialog box where you will need to enter in the credentials provided when you added the cartridge to your application. For example, in the previous output, the username is adminRapRWMM and the password isJerElgadNgFP.
After you have authenticated to the phpMyAdmin application, you will see the main dashboard for the application, which lists all of the available databases for your MySQL instance. You will notice that OpenShift created a default database for you with the same name as the application you created, lampstack. This default database can be seen on the left hand side of the screen as shown in the following screenshot:

Click on the database named lampstack so that we can create a new table that will hold the information we want to display from our web application. Create a table named users with two columns and click on the Go button.

After creating the table, phpMyAdmin will present you with a screen where you will need to define the columns that the table will contain. We want to create a basic users table that will only hold the username and e-mail address of a user. In order to accomplish this, create a usernamecolumn of type varchar with a length of 50, create an email column of type varchar with a length of 150, and then click on the Save button, as shown in the following screenshot:

Now that we have a users table created, we can insert a few basic rows. Click on the SQL tab at the top of the screen in order to open up an interactive SQL command window where we can perform database statements, as shown in the following screenshot:

Enter in the following SQL statements to create a few rows in the users table and then click on the Go button:
INSERT INTO users VALUES ('author', 'author@grantshipley.com');
INSERT INTO users VALUES ('OpenShift Help', 'openshift@redhat.com');

Tip
Downloading the example code
You can download the example code files for all Packt books you have purchased from your account at http://www.packtpub.com. If you purchased this book elsewhere, you can visit http://www.packtpub.com/support and register to have the files e-mailed directly to you.
Once you click on the Go button, you can verify that the records were saved to the database by clicking on the Browse button at the top of the screen, as shown in the following screenshot:

Now we have some information in the database, we can create a simple application that will display the results to the user.
Note
This section only touches the surface of the phpMyAdmin tool. For a more comprehensive tutorial on learning this application, you can read Mastering phpMyAdmin 3.4 for Effective MySQL Management, Marc Delisle, Packt Publishing.
Developing the application
At this point, we should have a LAMP stack fully deployed as well as a database that contains a few records. We will now develop a simple PHP application that authenticates to the database and displays the information contained in the users table that we created in the previous section.
Change to the root directory of your lampstack application by using the following command:
$ cd ~/code/lampstack
Once you are in this directory, create a new file called hellodb.php using the text editor of your choice, with the following source code:
<?php
$dbhost = getenv("OPENSHIFT_MYSQL_DB_HOST");
$dbuser = getenv("OPENSHIFT_MYSQL_DB_USERNAME");
$dbpassword = getenv("OPENSHIFT_MYSQL_DB_PASSWORD");
$dbname = getenv("OPENSHIFT_APP_NAME");
mysql_connect($dbhost, $dbuser, $dbpassword) or die(mysql_error());
mysql_select_db($dbname) or die(mysql_error());
$result = mysql_query("SELECT * FROM users") or die(mysql_error());
echo "<table border cellpadding=3>";
echo "<tr><td>Username</td>";
echo "<td>Email Address</td></tr>";
while($currentRow = mysql_fetch_array( $result ))
{
echo "<tr>";
echo "<td>".$currentRow['username']."</td>";
echo "<td>".$currentRow['email']."</td>";
echo "</tr>";
}
echo "</table>";
Save your changes and then perform the following commands to deploy your new source file to your OpenShift gear:
$ git add .
$ git commit –am "Adding a file to print information from the users database table"
$ git push
If this is the first time you are using Git on your machine, you may see the following error message:
*** Please tell me who you are.
Run
git config --global user.email "you@example.com"
git config --global user.name "Your Name"
to set your account's default identity.
Omit --global to set the identity only in this repository.
fatal: unable to auto-detect email address (got 'gshipley@author-workstation.(none)')
With a newer version of the Git revision control system, you need to identify yourself before you can commit changes to your repository. In order to do this, enter in the following command supplying your correct e-mail address:
$ git config --global user.email "author@grantshipley.com"
Once your application has deployed, open your web browser and point it to the http://lampstack-youNameSpace.rhcloud.com/hellodb.php URL of your application.
Once the page loads, you should see the following output:

Understanding the code
Now that we have created the new source file and deployed the changes, let's take a closer look at the code so that you understand all of the pieces.
The first block of code that we need to examine and understand is where we define our connection information for the database, as shown in the following code:
$dbhost = getenv("OPENSHIFT_MYSQL_DB_HOST");
$dbuser = getenv("OPENSHIFT_MYSQL_DB_USERNAME");
$dbpassword = getenv("OPENSHIFT_MYSQL_DB_PASSWORD");
$dbname = getenv("OPENSHIFT_APP_NAME");
This probably looks a bit strange to you in that we are not actually specifying the connection information that has been provided to us. What we are doing instead is referencing environment variables that the OpenShift Online platform created for us to reference the resources available to our application. This is an important concept to understand, because it is suggested that you never hardcode any IP addresses or authorization credentials in your application. The reason for this is that if your application scales, the IP information for your particular host may change. Using environment variables also provides the mechanism that makes your application portable to a new host.
Note
We will discuss the available environment variables in more depth in the next chapter.
mysql_connect($dbhost, $dbuser, $dbpassword) or die(mysql_error());
mysql_select_db($dbname) or die(mysql_error());
In the previous two statements, we connect to our database, providing the information from the environment variables as well as printing out an error message if the application code could not establish a connection. We then specify the database name that we will be working with for our queries.
Note
The database name we get from the OPENSHIFT_APP_NAME environment variable is the name of our application, lampstack.
The next thing we want to do is to execute a query on the database server that will return all of the users:
$result = mysql_query("SELECT * FROM users") or die(mysql_error());
The previous command line is where we actually perform the SQL query that will return all rows and columns from the users tables. We store the returned values in a variable named result. The code is as follows:
echo "<table border cellpadding=3>";
echo "<tr><td>Username</td>";
echo "<td>Email Address</td></tr>";
The next three lines of code is some simple markup to lay out the information we are going to present to the user in HTML. We create a table and then specify the header information for the columns using the following code:
while($currentRow = mysql_fetch_array( $result ))
{
echo "<tr>";
echo "<td>".$currentRow['username']."</td>";
echo "<td>".$currentRow['email']."</td>";
echo "</tr>";
}
Once we have our database connection and the simple markup defined, we are going to iterate over each of the rows returned from the database. For each row that has been returned, we create a new table row and output the username and e-mail address for each entry in our database, as shown in the following code:
echo "</table>";
The last thing we do is close our table tag and end the PHP script.
The cron cartridge
Developers routinely come across a scenario when they need to perform a job at certain time intervals. One popular example that I come across is the need to send an e-mail communication out to users at a scheduled frequency. Some language frameworks include this scheduling ability as part of the core distribution while other languages require that you download additional packages to achieve this functionality.
OpenShift Online provides an add-on cartridge that will allow you to schedule jobs at the operating system level using the popular cron utility that is standard on most Linux distributions. To demonstrate the cron add-on cartridge, we are going to create a simple job that will add the current date and time to a file that we can view in the web browser.
Adding the cron cartridge
To get started with the cron add-on cartridge, the first thing we need to do is embed it into our lampstack application. This can be achieved using the following command:
$ rhc cartridge add cron-1.4 -a lampstack
Once you have executed that command, you should get the following output:
Adding cron-1.4 to application 'lampstack' ... done
cron-1.4 (Cron 1.4)
-------------------
Gears: Located with php-5.4, mysql-5.5, phpmyadmin-4
To schedule your scripts to run on a periodic basis, add the scripts to
your application's .openshift/cron/{minutely,hourly,daily,weekly,monthly}/
directories (and commit and redeploy your application).
Example: A script .openshift/cron/hourly/crony added to your application
will be executed once every hour.
Similarly, a script .openshift/cron/weekly/chronograph added
to your application will be executed once every week.
Once you have embedded the cron add-on cartridge into your application, you can create a job by placing an executable script in the appropriate directory for the schedule that you want to create. The cartridge looks for these files under the .openshift/cron directory in your applications root folder. If we take a closer look at the directory structure of the .openshift/cron directory, we will see the options shown in the following screenshot:

Tip
If you don't see the .openshift directory in your file browser, it is because the directory is a hidden one. In order to see this directory, you will need to enable the visibility of hidden directories on your operating system. If using the command line on Linux or OS X, you can list all of the files—including hidden ones—with the following command:
$ ls –a
As we can see in the previous screenshot, we have directories available for scheduling jobs based upon minutes, hours, days, weeks, and months. This system provides all of the available options that you would need to schedule your job at the appropriate time interval.
Adding a cron job
Change to the lampstack/.openshift/cron/minutely directory by using the following command:
$ cd ~/code/lampstack/.openshift/cron/minutely
Once you are inside of this directory, create a new file called crondate.sh and add the following content:
date >> $OPENSHIFT_REPO_DIR/crontest.txt
The previous command will create a new file, if required, and append the current output of the Linux date command. Once you have created and saved this file, add it to your repository and deploy the change:
$ git add .
$ git commit -am "Adding cron job to echo the date"
$ git push
After you have deployed the change, open up your web browser and view the output by pointing your browser to the following URL:
http://lampstack-yourNameSpace.rhcloud.com/crontest.txt
Keep refreshing the page to see new entries added every minute as the scheduled job is executed by the platform as shown in the following screenshot:

Tip
Note that the date is the server date/time and not the value from your local machine. Keep this is mind when developing applications that relies on timestamps.
Summary
In this chapter, you got a lot of information that is critical to being effective while using the OpenShift Online platform. You learned the essential RHC commands to create and interact with applications and cartridges. You also learned the difference between web and add-on cartridges as well as how to add cartridges to an existing application. We discussed the OpenShift provided environment variables and why it is good practice to use these variables instead of hardcoding the authorization credentials and host information for your application. You also learned how to use the cron cartridge in order to add scheduled job to an application.
In the next chapter, we will go more in depth and discuss the common application maintenance operations, such as viewing logfiles and connecting to the remote gear via SSH. We will also explore environment variables on the OpenShift Online platform.
All materials on the site are licensed Creative Commons Attribution-Sharealike 3.0 Unported CC BY-SA 3.0 & GNU Free Documentation License (GFDL)
If you are the copyright holder of any material contained on our site and intend to remove it, please contact our site administrator for approval.
© 2016-2026 All site design rights belong to S.Y.A.