RESTful Web Services with Dropwizard (2014)
Chapter 10. The User Interface - Views
Our web service client fetches information regarding a contact and presents it to the user as plain text. We are going to use Mustache, a template engine that is part of the dropwizard-views-mustache module, in order to create HTML views.
Building a user interface for the web service client
We will build a user interface for the web service client that consists of an HTML page that will be used to render a contact's details within a table.
Getting ready
Not surprisingly, the first thing we need to do is to add the dropwizard-views and dropwizard-assets dependencies in our pom.xml:
<dependency><groupId>io.dropwizard</groupId><artifactId>dropwizard-views-mustache</artifactId><version>0.7.0-SNAPSHOT</version></dependency>
<dependency><groupId>io.dropwizard</groupId><artifactId>dropwizard-assets</artifactId><version>0.7.0-SNAPSHOT</version></dependency>
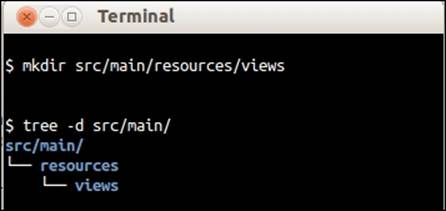
Also, we will need to create a folder where we will store our template files. Create the [ProjectRoot]/src/main/resources/views folder as shown in the following screenshot:
How to do it…
1. Enable the Views bundle by adding it to your application's bootstrap in the #initialize() method of the App class. During the initialization phase (that is, when the #initialize() method is executed), we can use the bootstrap object to register additional modules with our application, such as bundles or commands. This has to be done before the service is actually started (that is, before the #run() method gets called). You will need to import io.dropwizard.views.ViewBundle:
2. @Override
3. public void initialize(Bootstrap<PhonebookConfiguration> b) {
4. b.addBundle(new ViewBundle());
}
5. Create a new package called com.dwbook.phonebook.views with the ContactView class in it. The class must extend View and its constructor will expect a Contact instance. Also, you must call the superclass's constructor specifying the template file for this class (in this case, contact.mustache, which is stored in the directory we created before). You can reference the view file using an absolute path, where the root is the [ProjectRoot]/src/main/resources/views folder. A getter for the contact object is needed so that it can be accessed by the template engine:
6. package com.dwbook.phonebook.views;
7.
8. import com.dwbook.phonebook.representations.Contact;
9. import io.dropwizard.views.View;
10.
11. public class ContactView extends View {
12. private final Contact contact;
13.
14. public ContactView(Contact contact) {
15. super("/views/contact.mustache");
16. this.contact = contact;
17. }
18.
19. public Contact getContact() {
20. return contact;
21. }
}
22. Now, let's create our template, contact.moustache, which will be a plain HTML file that renders a table with a contact's details. Remember to store it inside the views folder we created at the beginning. Take a look at the following code snippet:
23. <html>
24. <head>
25. <title>Contact</title>
26. </head>
27. <body>
28. <table border="1">
29. <tr>
30. <th colspan="2">Contact ({{contact.id}})</th>
31. </tr>
32. <tr>
33. <td>First Name</td>
34. <td>{{contact.firstName}}</td>
35. </tr>
36. <tr>
37. <td>Last Name</td>
38. <td>{{contact.lastName}}</td>
39. </tr>
40. <tr>
41. <td>Phone</td>
42. <td>{{contact.phone}}</td>
43. </tr>
44. </table>
45. </body>
</html>
The Mustache tags, that is, the double-curly-braces-wrapped text, will be replaced with the actual values of the contact object's properties on runtime automatically. Mustache provides many tag types that you can use in your template, such as conditionals andloops. You may refer to http://mustache.github.io/mustache.5.html for detailed information about Mustache's tag types and advanced usage.
46. Let's modify the ClientResource class now by changing the @Produces annotation so that it uses the View class to generate HTML instead of plain text:
@Produces(MediaType.TEXT_HTML)
47. Modify the #showContact method so that it returns a ContactView instance initialized with the contact representation fetched using the Jersey client. Import com.dwbook.phonebook.views.ContactView first:
48. @GET
49. @Path("showContact")
50. public ContactView showContact(@QueryParam("id") int id) {
51. WebResource contactResource = client.resource("http://localhost:8080/contact/"+id);
52. Contact c = contactResource.get(Contact.class);
53. return new ContactView(c);
}
How it works…
Let's test the UI. Rebuild the application, run it, and point your browser to http://localhost:8080/client/showContact?id=2. Instead of seeing the plain text response of the client, we now see an HTML table being rendered with the details of the contact with an ID equal to 2, as shown in the following screenshot:

When we access the client's URL, it fetches the data by calling the appropriate service. The data is then passed as a Contact instance to the ContactView class that extends View, which uses the template engine to parse the designated template file, contact.mustache, and generate the HTML markup. The file extension indicates the template engine that shall be used.
There's more…
Mustache is not the only template engine supported by Dropwizard; there's also Freemarker. We chose Mustache over Freemarker to demonstrate Dropwizard's template capabilities since Mustache is a more logicless, agnostic programming language, and has implementations available for many programming languages.
On the other hand, Freemarker is Java-bound, has more programming capabilities, and can perform more complex tasks such as sanitizing the produced output.
If we were using Freemarker instead of Mustache for the previous example, the main table of the template would be the following:
<table border="1">
<tr>
<th colspan="2">Contact (${contact.id})</th>
</tr>
<tr>
<td>First Name</td>
<td>${contact.firstName?html}</td>
</tr>
<tr>
<td>Last Name</td>
<td>{contact.lastName?html}</td>
</tr>
<tr>
<td>Phone</td>
<td>${contact.phone?html}</td>
</tr>
</table>
As you can see, the syntax of both template engines is similar. Note that while Mustache escapes variables by default, with Freemarker, you have to instruct the processor to sanitize the output by suffixing the variables with ?html.
Serving static assets
There are cases where along with the HTML-based views, you need to serve static assets, such as CSS stylesheets, JavaScript files, or any other file that may be used by your application.
To do so, you may add an AssetsBundle instance on the #bootstrap() method, specifying the folder from where you can serve static files and also the URI that this folder will be mapped to. We will first need to import io.dropwizard.assets.AssetsBundle and modify thepom.xml file accordingly, declaring a dependency to the artifact dropwizard-assets.
For instance, if you want to serve a static stylesheet file named stylesheet.css, you'll have to store it under src/main/java/resources/assets.
b.addBundle(new AssetsBundle());
The stylesheet.css file would now be accessible from the http://localhost:8080/assets/stylesheet.css URL.
All materials on the site are licensed Creative Commons Attribution-Sharealike 3.0 Unported CC BY-SA 3.0 & GNU Free Documentation License (GFDL)
If you are the copyright holder of any material contained on our site and intend to remove it, please contact our site administrator for approval.
© 2016-2026 All site design rights belong to S.Y.A.