Getting Started with SOQL (2014)
Chapter 6. Tools with Installation Guidelines
We need some tools in order to execute SOQL statements. This chapter deals with the installation guidelines of some of the tools that are available. This chapter covers some basic tips that we can use during the installation of tools. It provides everything you need to complete the installation, from initial setup to the final SOQL execution. The chapter focuses on tools software and covers all recommended guidelines to be followed.
Using the Force.com Explorer software
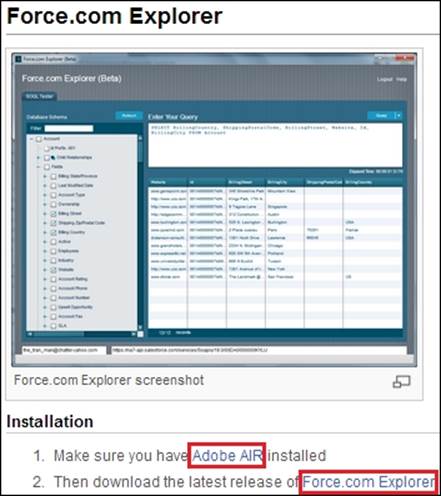
Using the Force.com Explorer software, we can build and test our SOQL queries. It also allows us to export the queried data in the Comma Separated Value (CSV) format. It's an AIR application. So, you need to install Adobe AIR before installing it. The Force.com Explorer software is mainly used for a smaller set of records. It cannot be used for bulk operations. For bulk operations, Apex Data Loader is the best tool.
We can edit and delete records using the Force.com Explorer software.
Installing Force.com Explorer
The steps to install the Force.com Explorer software are as follows:
1. Go to http://wiki.developerforce.com/page/ForceExplorer.
2. Install Adobe Air first and then Force.com Explorer. Without installing Adobe AIR, we will not be able to open the Force.com Explorer AIR file, as shown in the following screenshot:
3. Open the Force.com Explorer window using the shortcut menu on the desktop or from the Start menu.
4. Enter your Username, Password, and Security Token (in case you are accessing from outside IP ranges).
5. Select an Environment (Production or Sandbox) option in Advanced Options as shown in the following screenshot:

6. Click on the Login button.
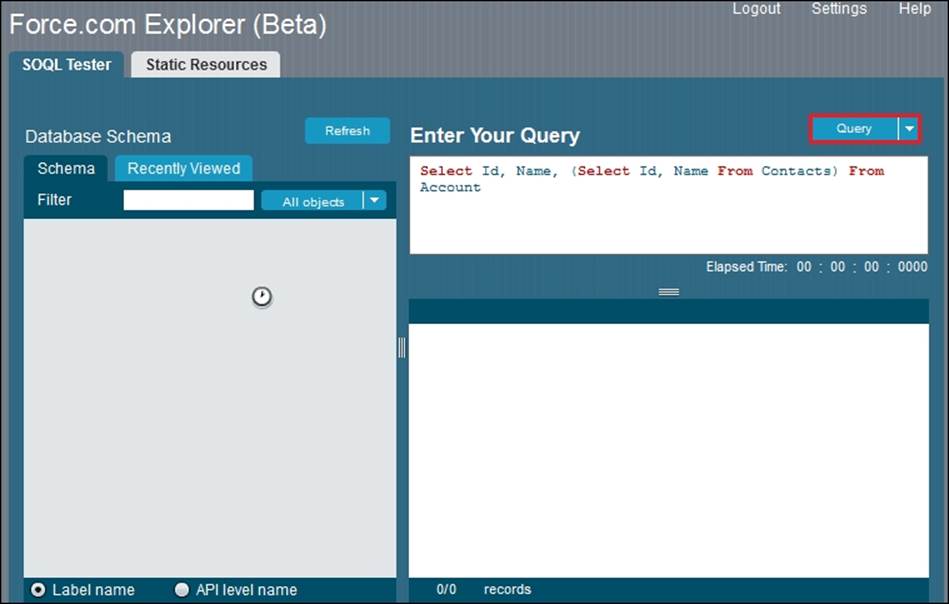
7. Build your query and click on the Query button to view the result as shown in the following screenshot:
The Force.com Explorer also lists the static resources used in our Salesforce.com organization.
To update the record using Force.com Explorer, perform the following steps:
1. Log in to Force.com Explorer.
2. Query some records.
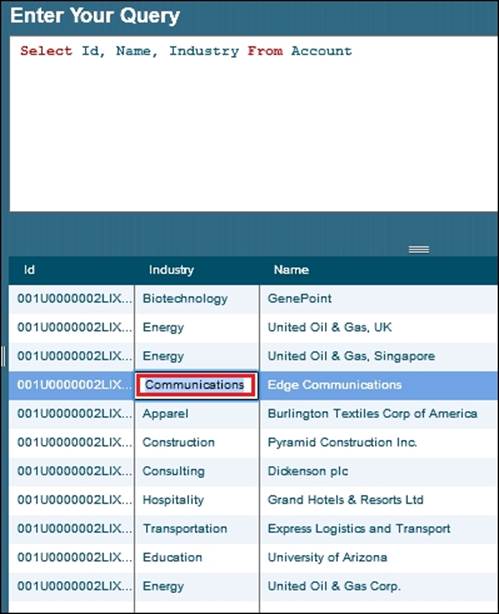
3. Double-click on the value to edit it. It will be highlighted as shown in the following screenshot:
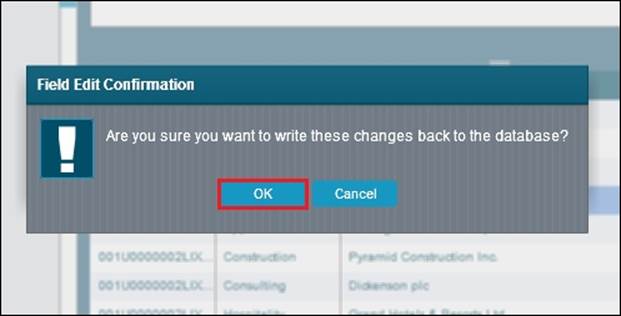
4. Enter the new value and press Enter; you will get the Save and Cancel options.
5. Click on Save to update the new value entered into our organization.

6. You will get an alert message showing whether the record has been saved successfully. Click on OK to resume. Refer to the following screenshot:
Workbench
Workbench is a simple web-based tool that is very useful for Salesforce administrators and developers to interact with Salesforce organizations via the Force.com APIs. Workbench allows us to execute Salesforce Object Search Language (SOSL). Unlike SOQL, which can only query one object at a time and multiple objects only if they have a relationship, SOSL enables you to search text, e-mail, and phone fields for multiple objects simultaneously.
To get started with Workbench, perform the following steps:
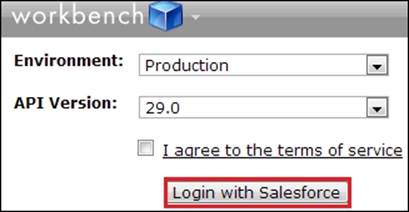
1. Go to https://workbench.developerforce.com/login.php.
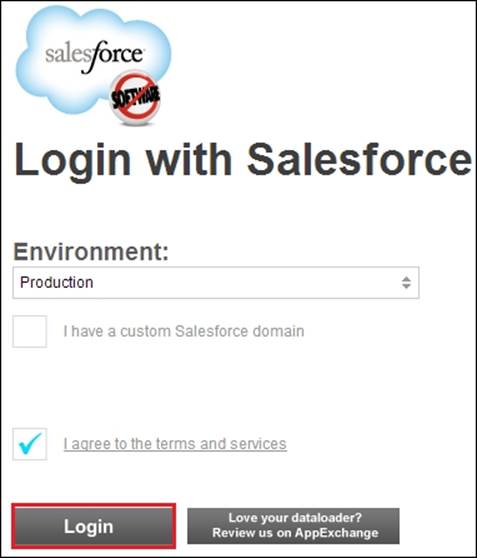
2. Select an Environment option, API Version, check the I agree to the terms of service checkbox, and click on the Login with Salesforce button as shown in the following screenshot:
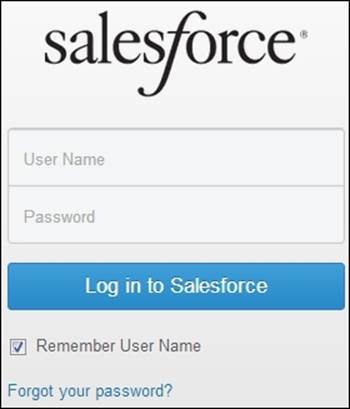
3. Enter your username and password and click on the Log in to Salesforce button as shown in the following screenshot:
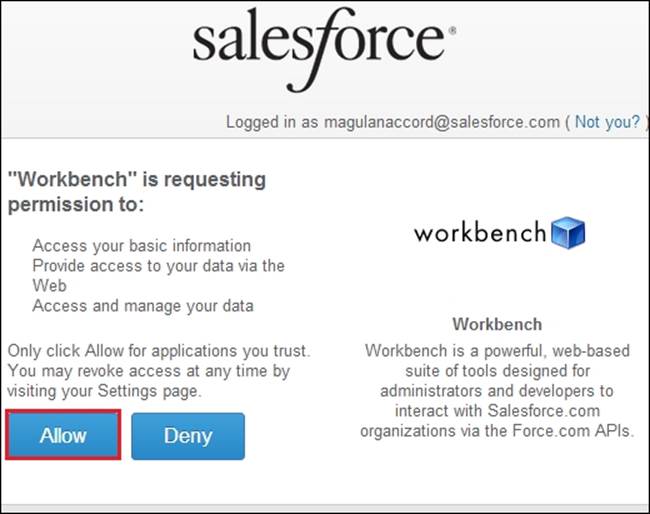
4. Click on the Allow button as shown in the following screenshot:
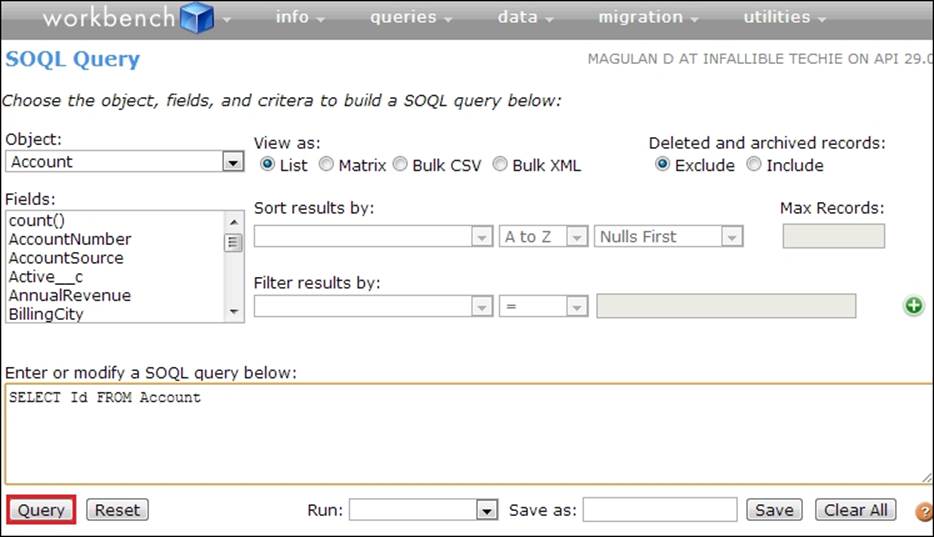
5. Enter your query and click on the Query button, as shown in the following screenshot, to view the result:
Parent-child relationship queries are not supported in Workbench before setting them first. Perform the following steps to enable parent-child relationship queries in Workbench:
1. Navigate to the Settings tab of Workbench as shown in the following screenshot:
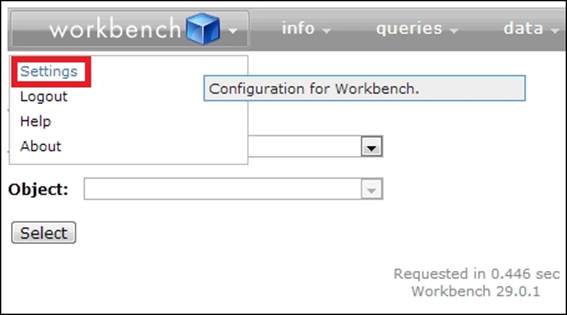
2. In Query & Search Options, check the Allows SOQL Parent Relationship Queries checkbox and click on Apply Settings as shown in the following screenshot:
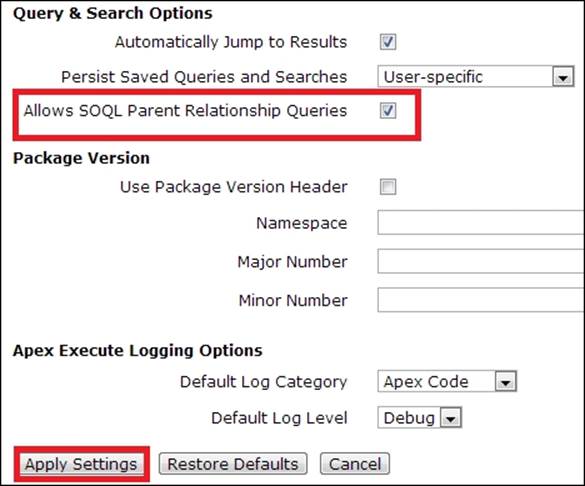
3. Now we will be able to access the parent relationship queries.
Dataloader.io
Use Dataloader.io to import, export, and delete data from Salesforce. Everything is online in Data Loader. There will be no software hassle if we use Dataloader.io. A browser and an Internet connection are more than enough to use this feature provided by a third party. It is not a Salesforce tool.
To use Dataloader.io, perform the following steps:
1. Go to https://dataloader.io/.
2. Click on the Login with Salesforce button.
3. Select an Environment option and click on the Login button as shown in the following screenshot:
4. Enter your username and password and click on the Log in to Salesforce button as shown in the following screenshot:
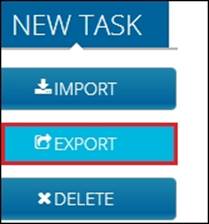
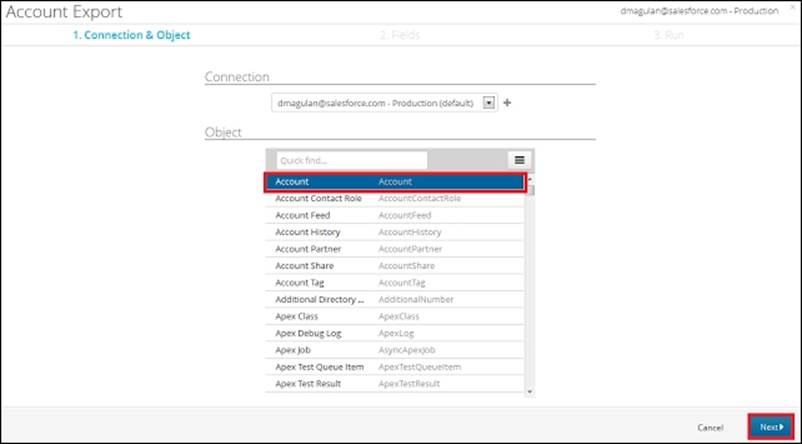
5. Select Export under New Task as shown in the following screenshot:
6. Select Object and click on the Next button as shown in the following screenshot:
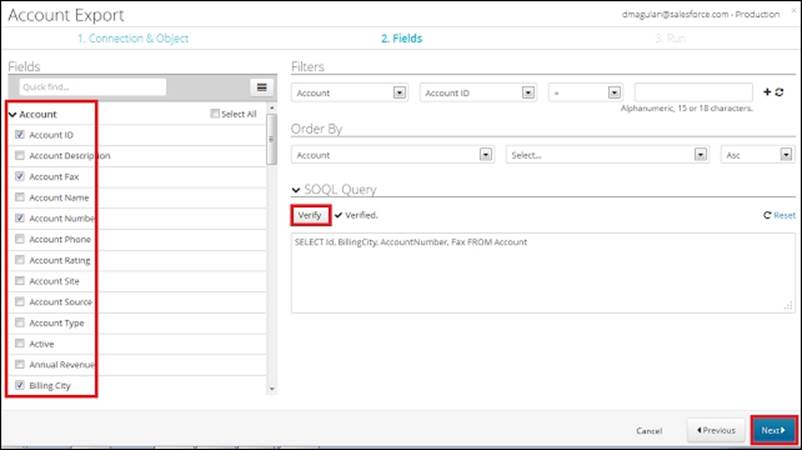
7. Select the fields and build your SOQL query; click on the Verify button to verify your query and then click on the Next button as shown in the following screenshot:
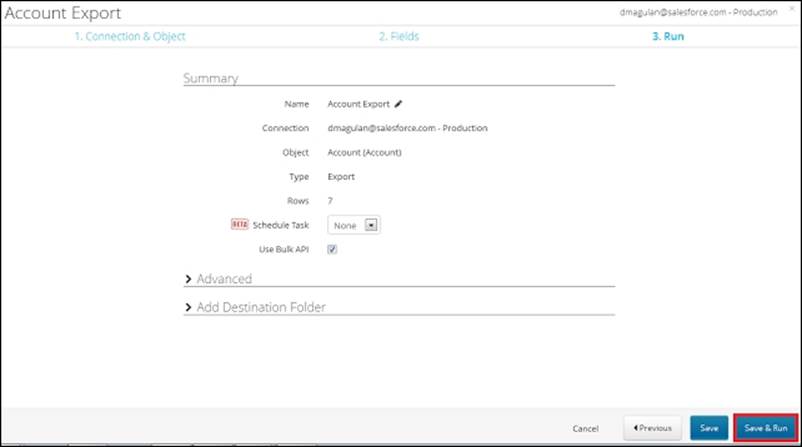
8. Schedule or run the query to be exported. Refer to the following screenshot:
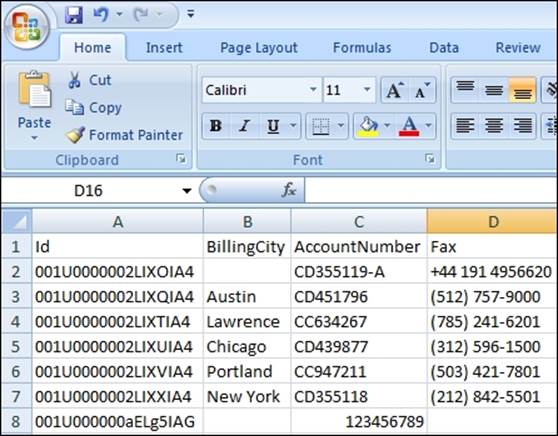
9. After execution, it shows the successfully extracted records. Refer to the following screenshot:

10. We can open this file at any time by logging in to Dataloader.io. Refer to the following screenshot:
The Apex Data Loader tool
The Data Loader tool is used to export, update, insert, and delete records. It's mainly used for bulk operations.
The operations that can be performed using Apex Data Loader are as follows:
· Insert: On using this operation, we can insert new records into our Salesforce organization.
· Update: On using this operation, we can update existing records in our Salesforce organization.
· Upsert: On using this operation, we can insert new records into our Salesforce organization and update existing records in our Salesforce organization; in other words, Upsert is a combination of Insert and Update.
The Upsert operation makes use of the Object record's primary key (Salesforce's record ID) or the external ID, if specified, to determine whether new records should be created; otherwise, we will have to update the existing records . The following conditions explain when the Upsert operation creates a new record or updates the existing record:
· If the key is not matched, a new record is created
· If the key is matched once, the existing record is updated
· If the key is matched multiple times, an error is generated and the object record is neither inserted nor updated
· Delete: On using the Delete operation, we can delete existing records from our Salesforce organization. The deleted records will be available in the Recycle Bin for 15 days.
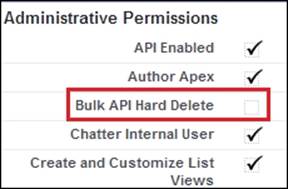
· Hard Delete: On using the Hard Delete operation, we can delete existing records from our Salesforce organization permanently. The deleted records will not be available in the Recycle Bin. The Bulk API Hard Delete checkbox should be enabled, as shown in the following screenshot, in the user profile for permanently deleting records:
· Export: On using this operation, we can extract data from our Salesforce organization.
· Export All: On using this operation, we can extract data from our Salesforce organization. The extracted data contains the records from the Recycle Bin too, that is, soft-deleted records will be extracted.
The system requirements for installing Apex Data Loader are as follows:
· Microsoft Windows 7 or Windows XP
· 120 MB free disk space
· 256 MB available memory
· Java JRE 1.6 or later (Windows 7 or Windows XP)
· Sun JVM 1.6 or later (Windows 7 or Windows XP)
· Administrator privileges on the machine
To download the data loader, navigate to Administer | Data Management | Data Loader as shown in the following screenshot:

Click on the Download the Data Loader link as shown in the following screenshot to download Apex Data Loader:

Downloading Data Loader without the Salesforce.com login
Perform the following steps to download the Data Loader setup without a Salesforce.com login:
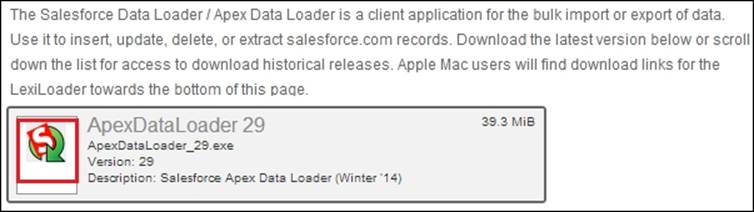
1. Go to http://www.cloudsuccess.com/resource-centre/apex-data-loader-archive/.
2. Select the latest version to download. Refer to the following screenshot:
The steps for installation are as follows:
1. Double-click on the downloaded file to launch the installation wizard.
2. Click on the Next button.
3. Accept the license agreement and click on the Next button.
4. Accept the default installation directory or click on Change… to choose another directory. Click on the Next button.
5. Click on the Install button.
6. Click on the Finish button.
To start using Apex Data Loader, perform the following steps:
1. Install Apex Data Loader.
2. Open Apex Data Loader.
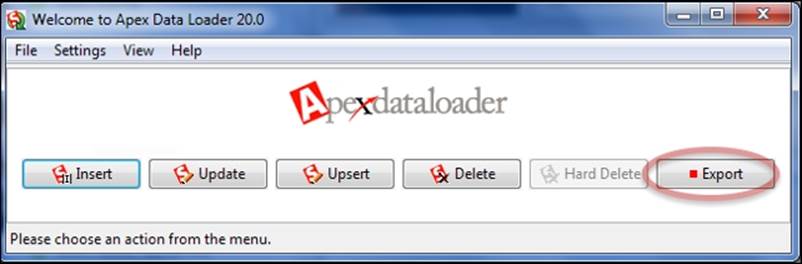
3. Click on the Export button as shown in the following screenshot:
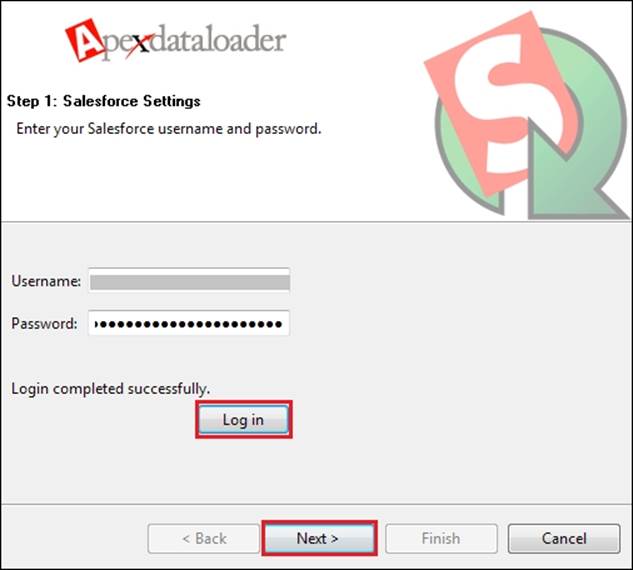
4. Enter your username, password, and security token (in case you are accessing outside the IP ranges). Click on the Login button. Once login is successfully completed, click on the Next button as shown in the following screenshot:
5. Select an object and click on the Next button.
6. Build your query to fetch the required data. We can filter the records to be fetched using the filter logic available.
7. Click on the Next button.
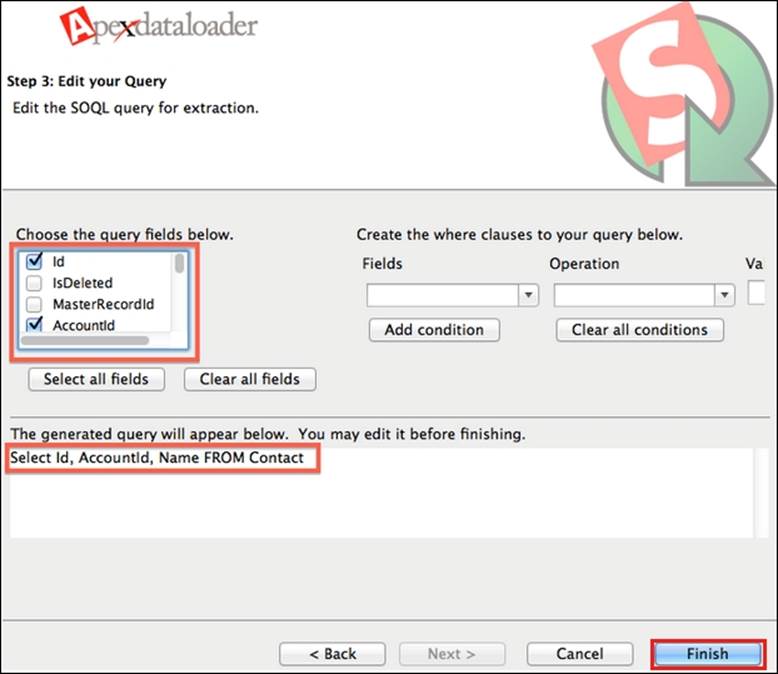
8. Click on the Finish button to extract the data as shown in the following screenshot:
9. The exported data will be in CSV format. We can use Excel to open the extracted file.
10. It also has a built-in CSV format file viewer to view the extracted records.
Summary
In this chapter, we came to know about many applications that are available for querying records from Salesforce objects using SOQL. The step-by-step installation guide helps avoid problems during installation. These are free versions of software and a few other software options are provided by Salesforce.com for free. These recommended guidelines help practitioners to install the software by choosing the appropriate setups. These software are also used for data migration from legacy systems to Salesforce.
The Data Loader software can also be used for extracting or performing DML operations on bulk data. The Force.com Explorer software gives us an option to perform the DML operation on a single record at a time. This software is mainly used for handling lesser amounts of data. The Dataloader.io tool allows us to save and export data for future reference, and it also allows us to schedule export jobs.
All materials on the site are licensed Creative Commons Attribution-Sharealike 3.0 Unported CC BY-SA 3.0 & GNU Free Documentation License (GFDL)
If you are the copyright holder of any material contained on our site and intend to remove it, please contact our site administrator for approval.
© 2016-2026 All site design rights belong to S.Y.A.