Make: 3D Printing (2014)
Part I. Hardware
Chapter 2. 3D Printer Guide
Hands-on experiences with 11 3D printers.
In September 2012, MAKE invited Matt Griffin to put together a team of reviewers from the 3D printing community to advise MAKE’s readers about the 3D printing state of the art.
The team investigated 15 of the most promising fused-filament fabrication (FFF) printers on the market—devices that melt and extrude plastic filament to form solid objects, layer by layer—the most popular method of 3D printing. We reached back to 2010 and into the future, previewing still-under-wraps machines weeks before their launch at World Maker Faire New York.
A lot has changed since those tests: there are new printers on the market, some printers are no longer for sale, and many have improved. This chapter distills the original reviews into stories of hands-on experiences with the 11 3D printers that, at the time of this publication, are still for sale. If you want the most up-to-date reviews, check out the latest edition of our Make: Ultimate Guide to 3D Printing; if you want to learn what it’s like to explore a printer from the moment it comes out of the box, read on!
|
|
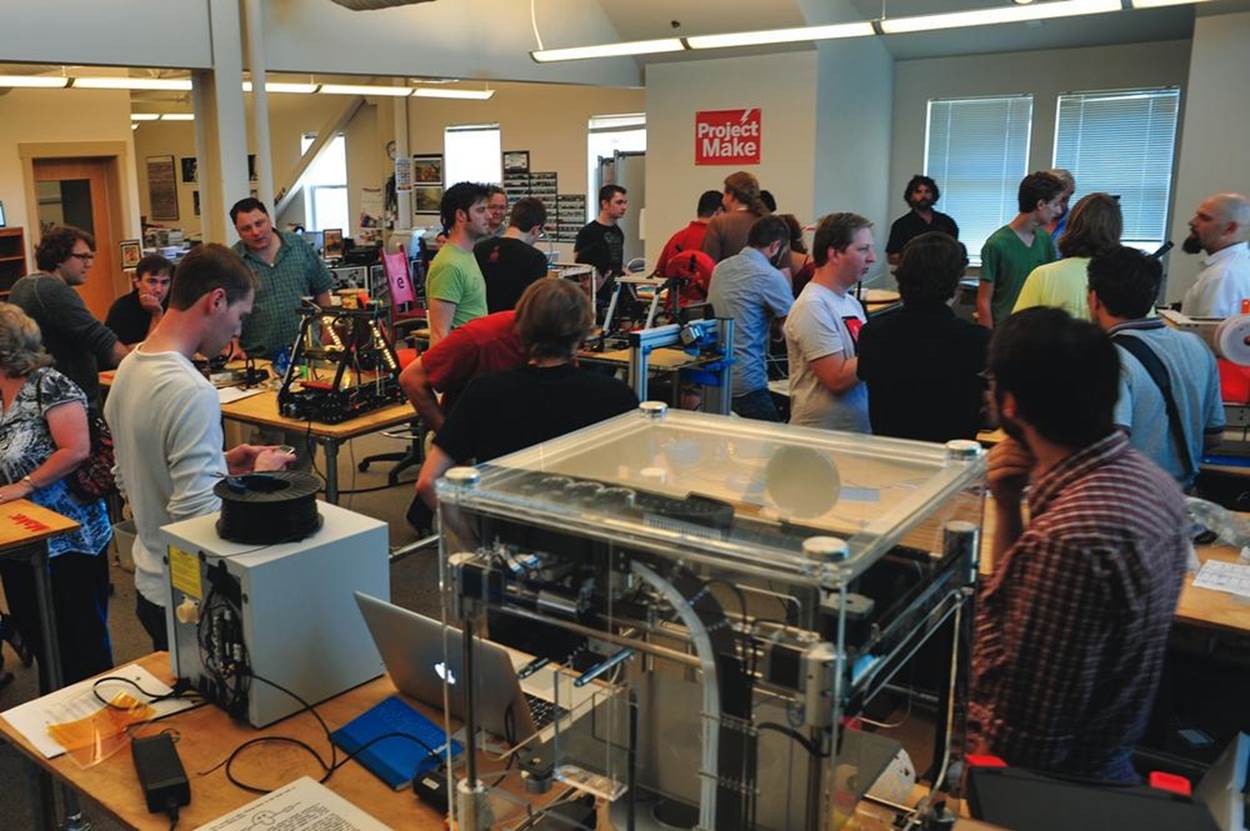
Figure 2-1. During the testing, the MAKE offices became a vortex of 3D printers and the geeks who love them
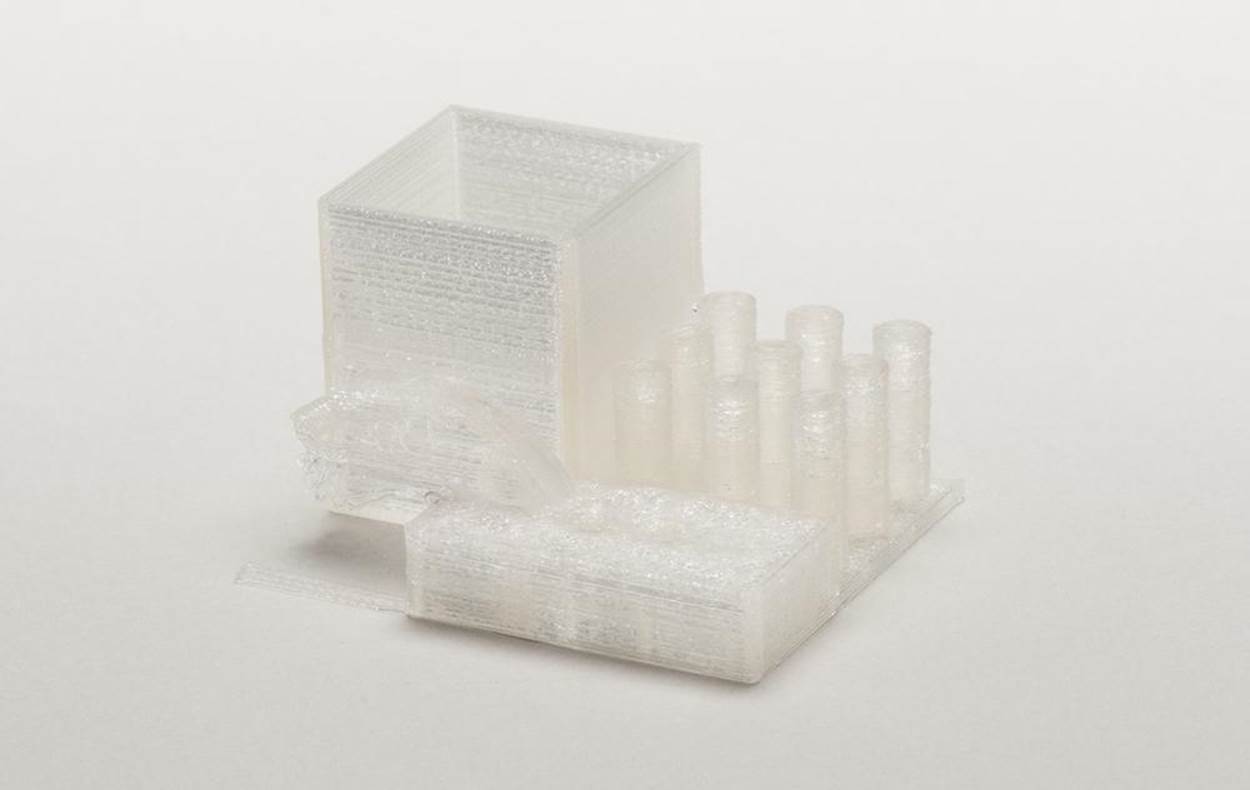
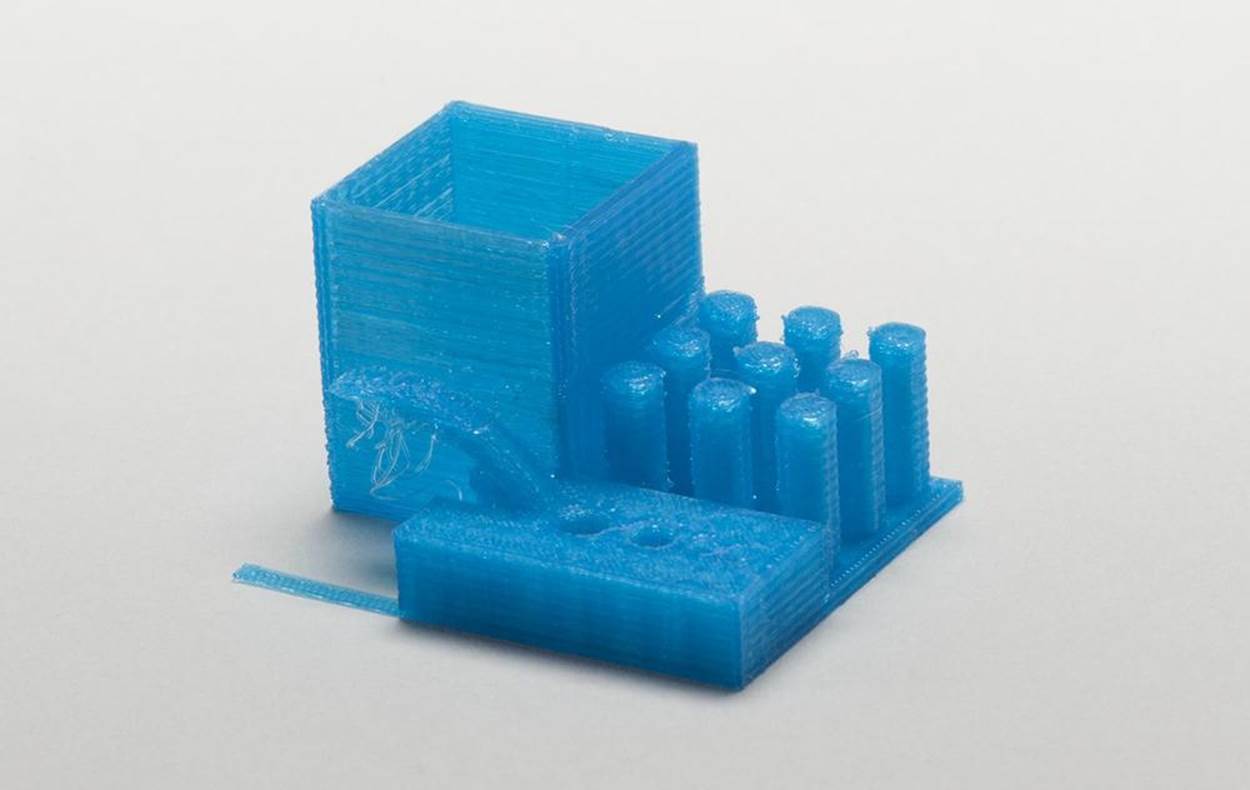
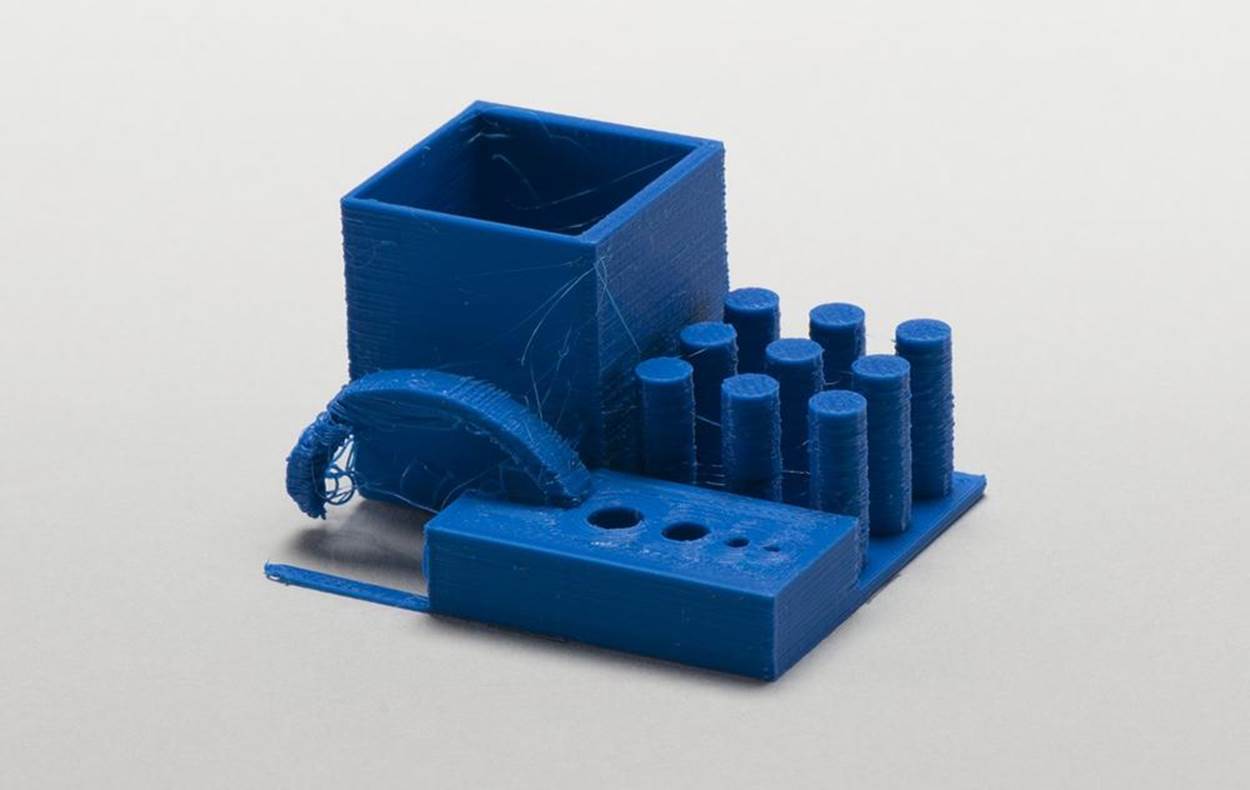
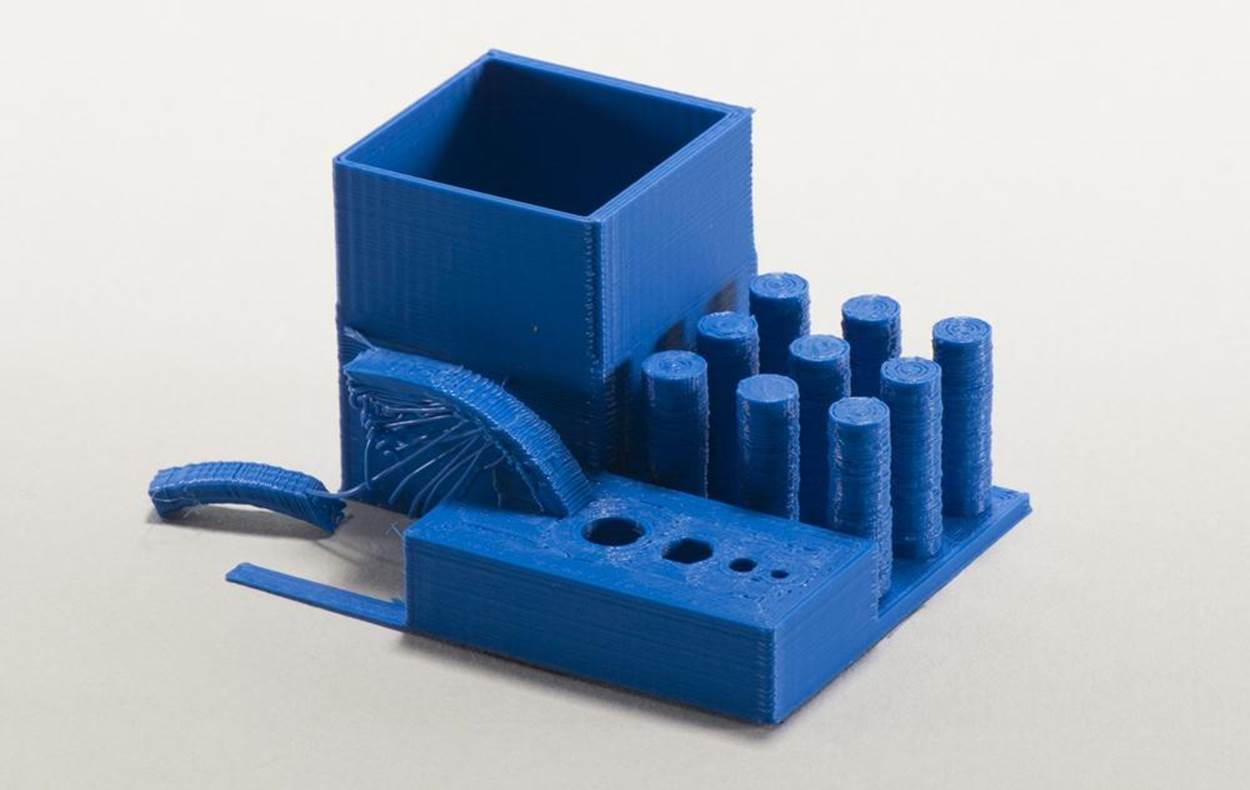
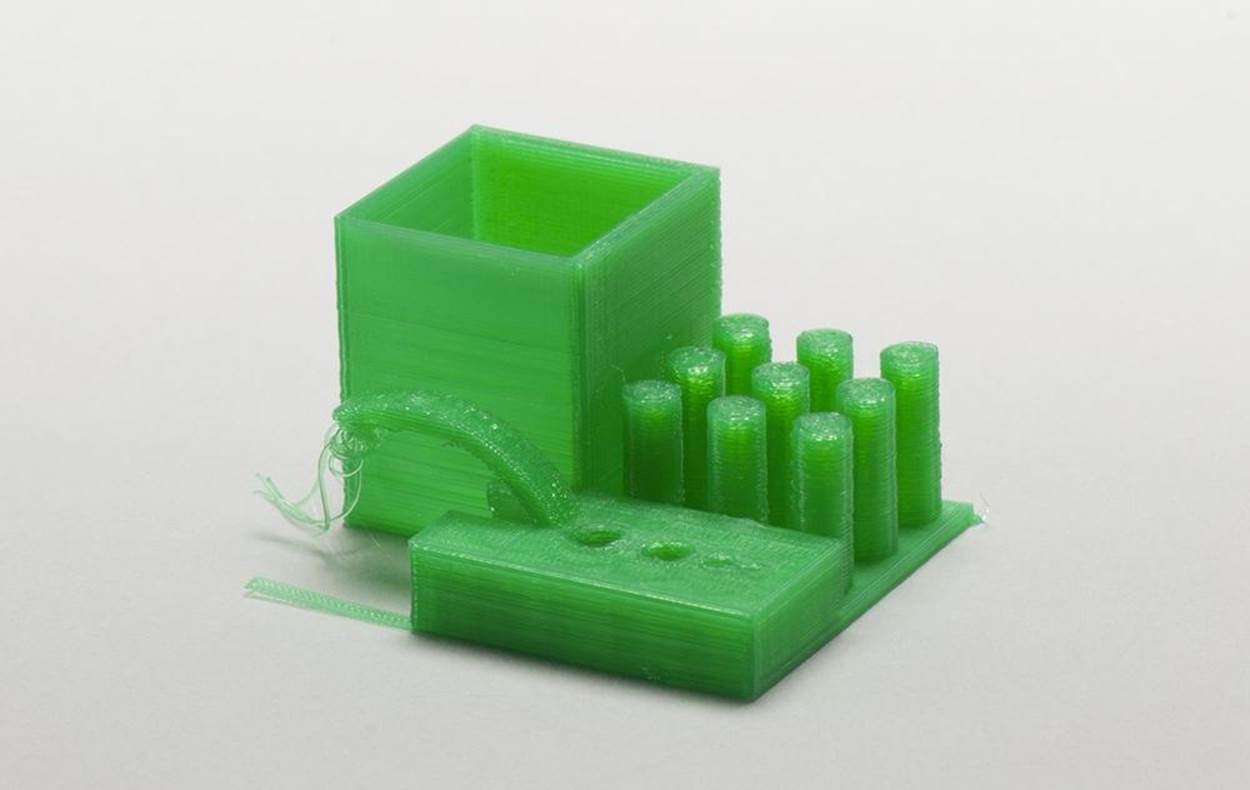
The Challenge Prints
Here are the objects we used in our testing.
Snake
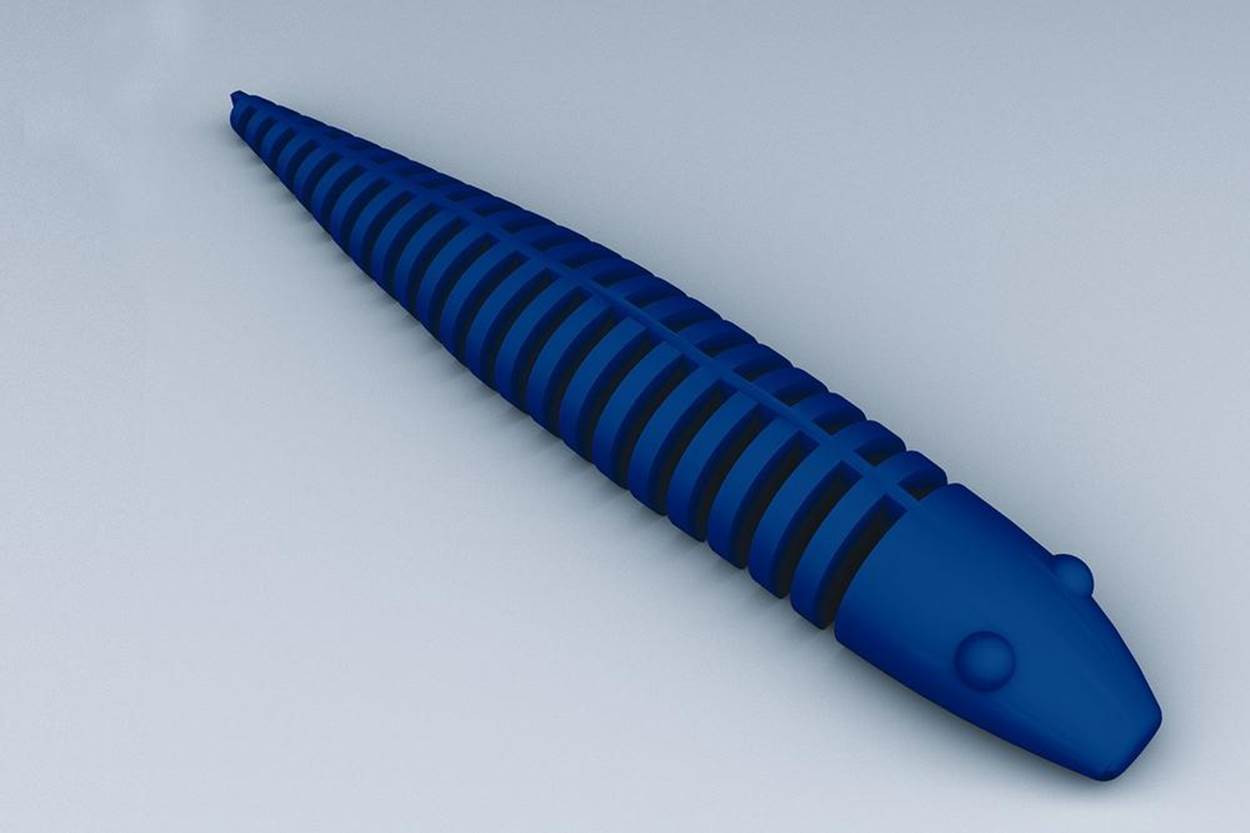
by Zomboe
This reinterpretation of a classic wooden toy features flexible ribs that are a great test for both horizontal accuracy on the plate (are the ribs evenly spaced and complete out to their tips?) and vertical registration (does each layer match perfectly with the one beneath?).
Owl Statue
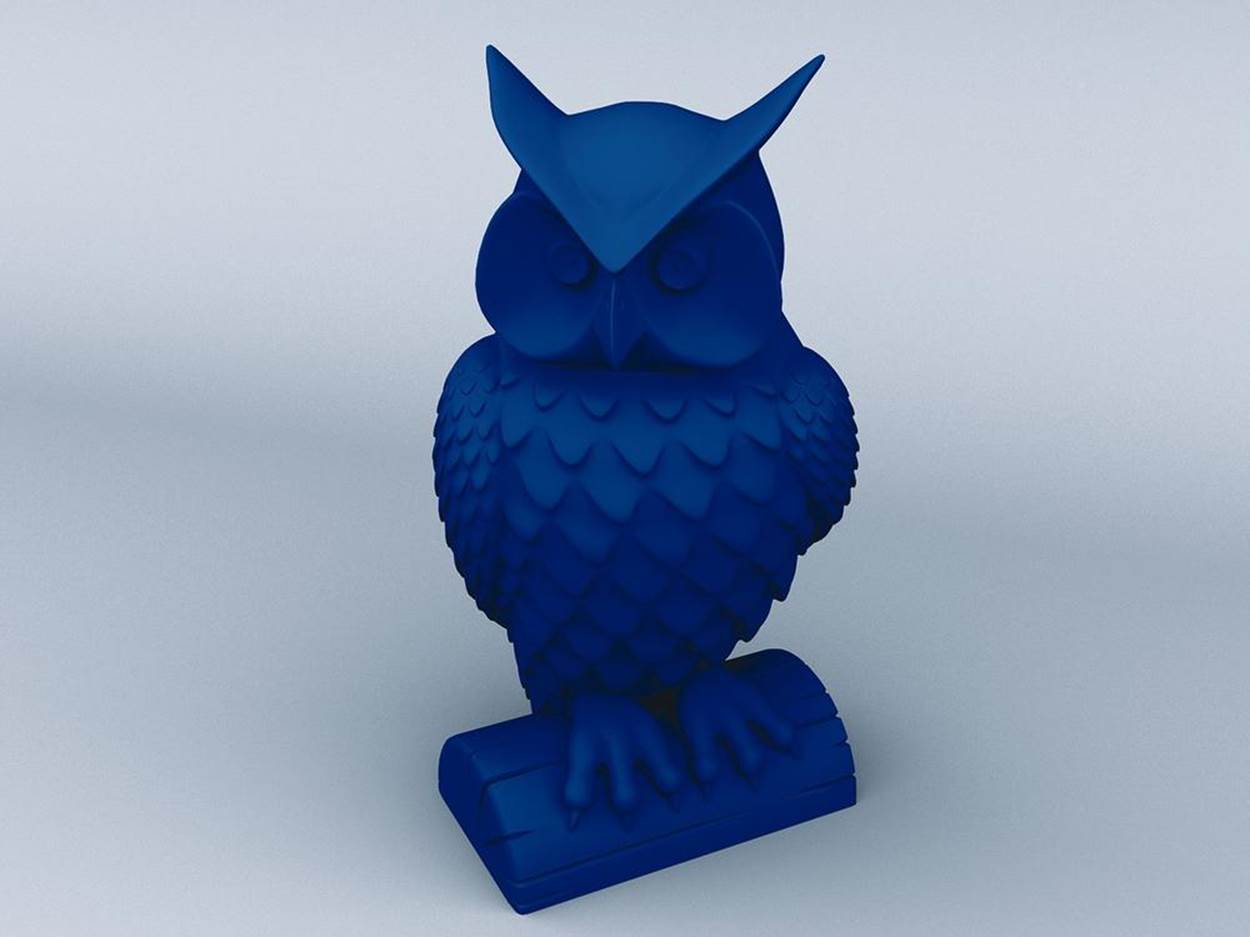
by Tom Cushwa
Designer Cushwa borrowed stone-cutting techniques to render feathers and character features for this popular owl figurine and modeled them to look great on a well-tuned printer. Printers that choke on these details may not be suitable for character and sculptural work.
Nautilus Gears
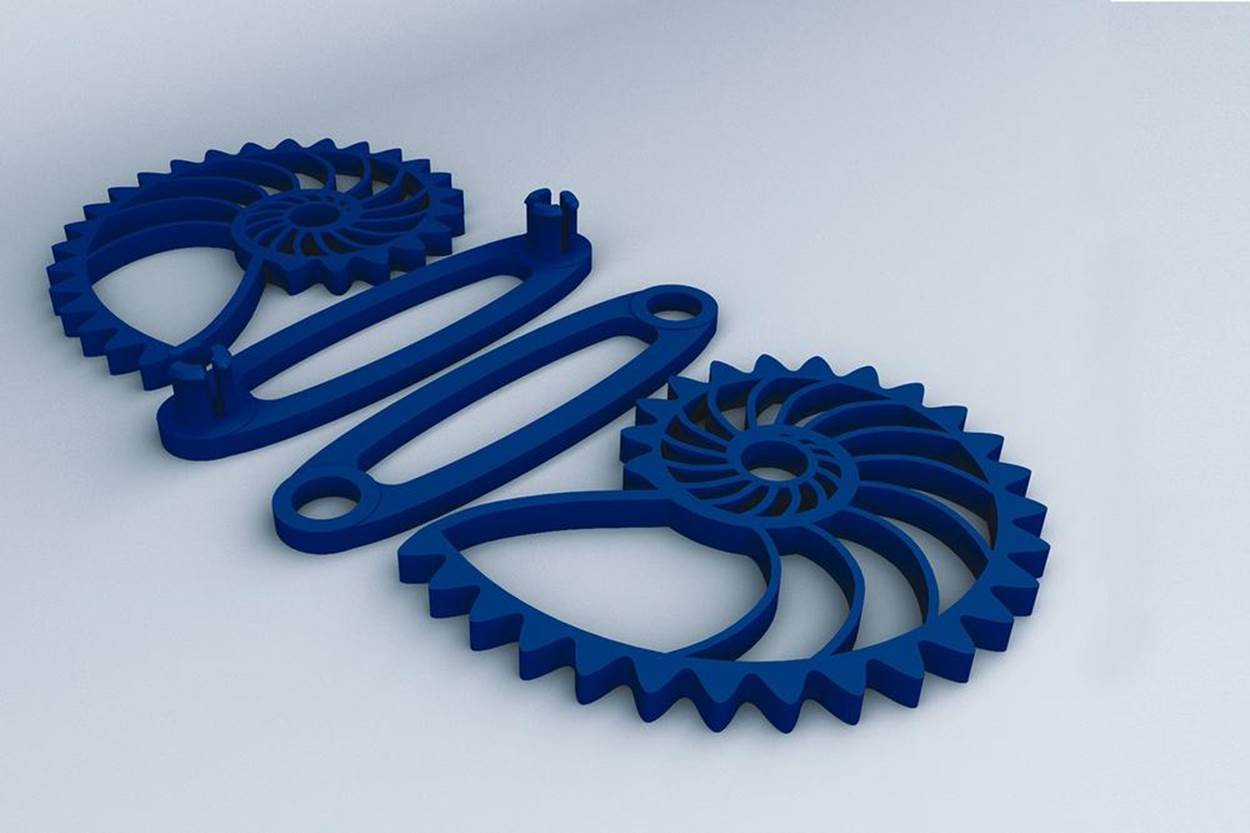
by Misha T.
This model gives character to the classic snap-together gears that are a popular test object for 3D printers. It’s quick to print, and you can tell instantly how well the machine reproduced the parts from how accurately the teeth mesh and the snaps snap, and whether the gears can rotate through more than one revolution without binding.
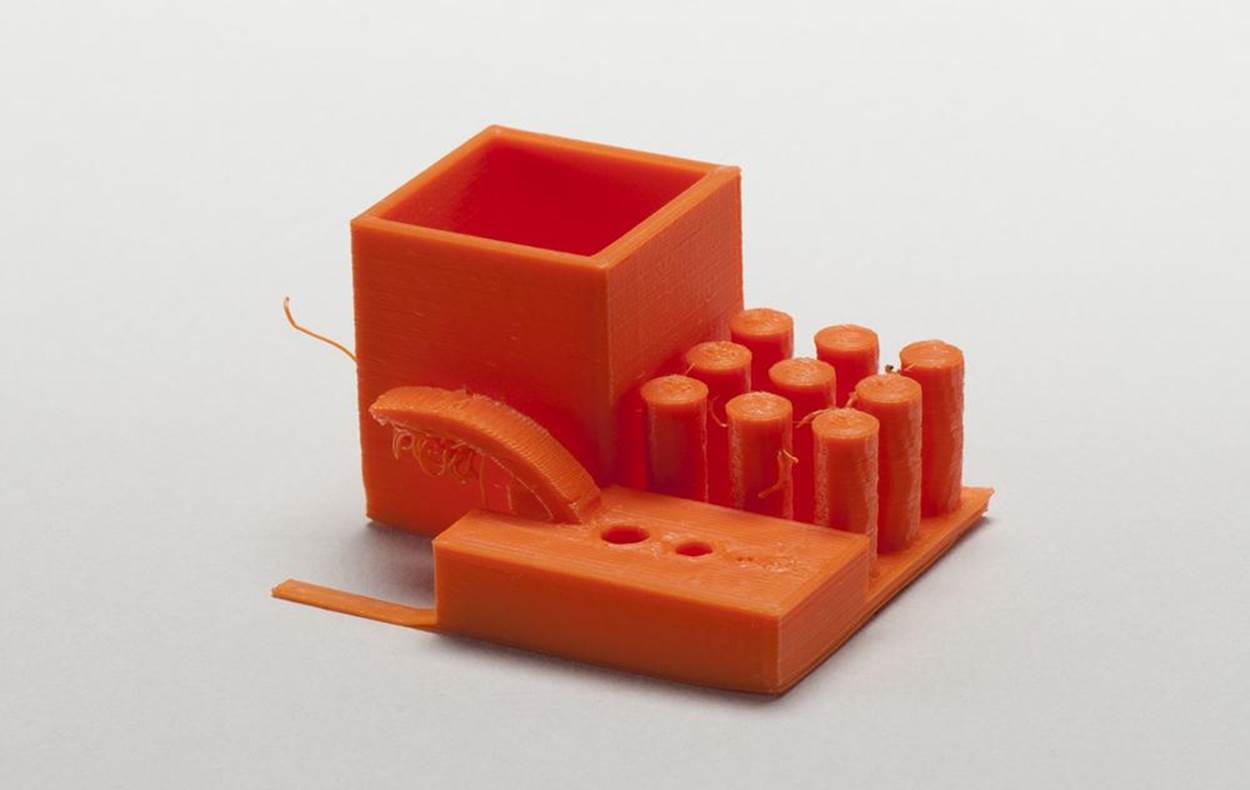
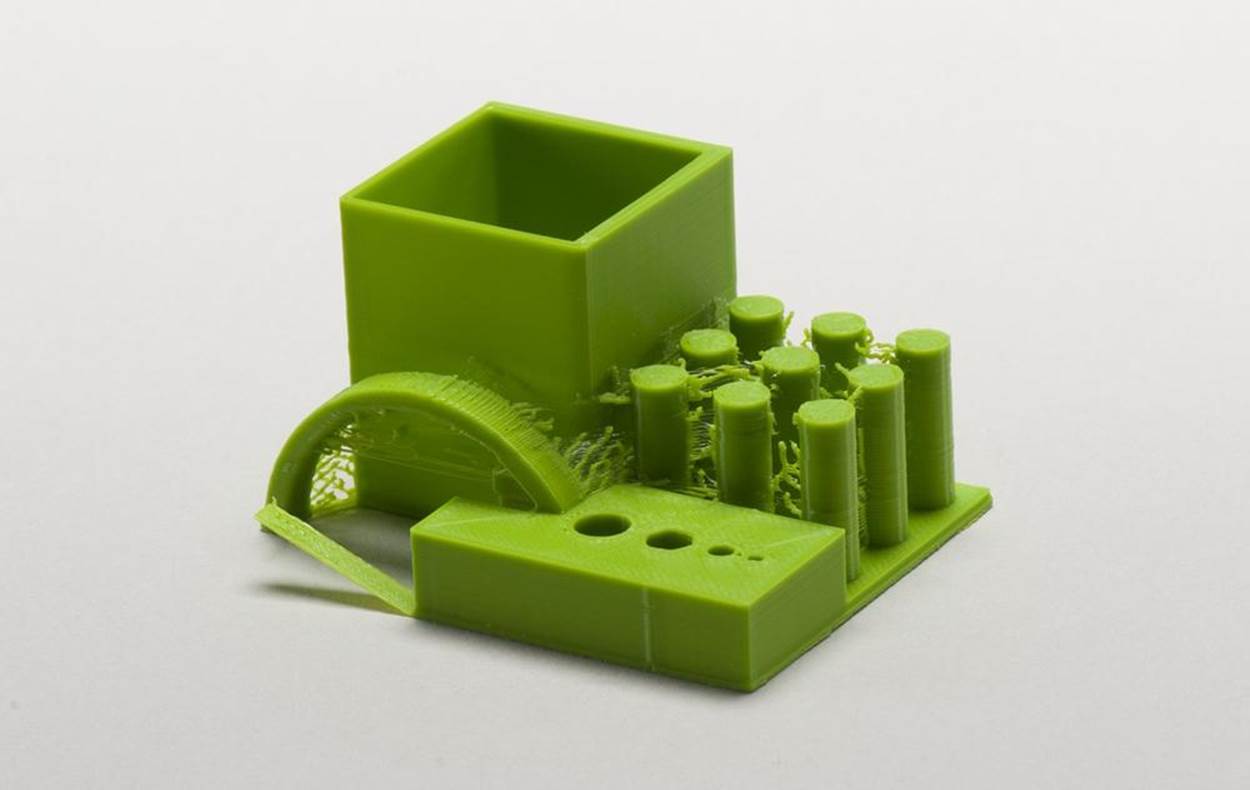
Dimension Torture Test
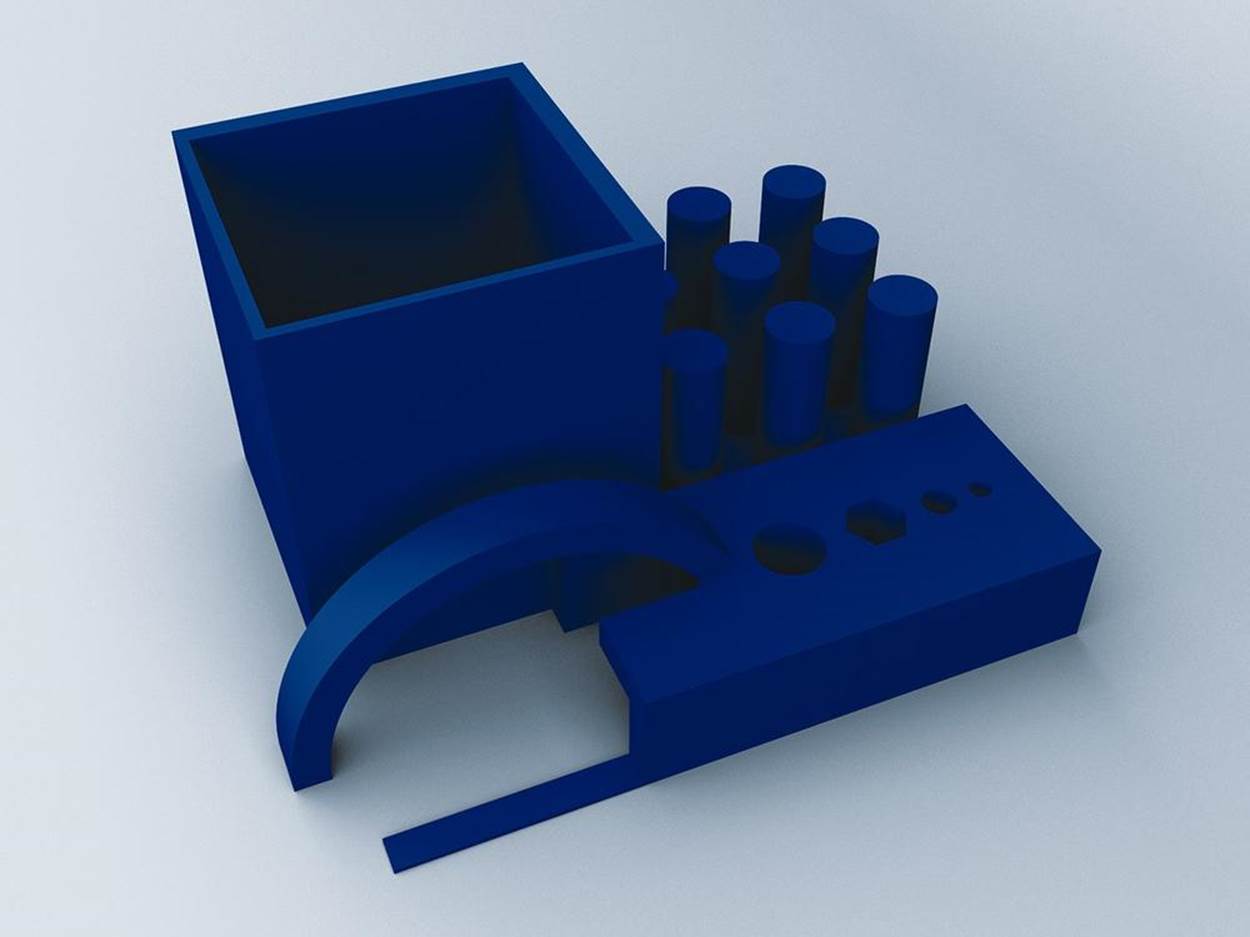
by Cliff L. Biffle
To create a real “torture test”—a model guaranteed to challenge all FFF printers—engineer Cliff L. Biffle built a Frankenstein’s monster containing all the geometry we needed to see in one small package. Thin and fat features, slopes and overhangs, bolt holes with precise dimensions, arcs, and separate towers all conspire to push a machine to its limits.
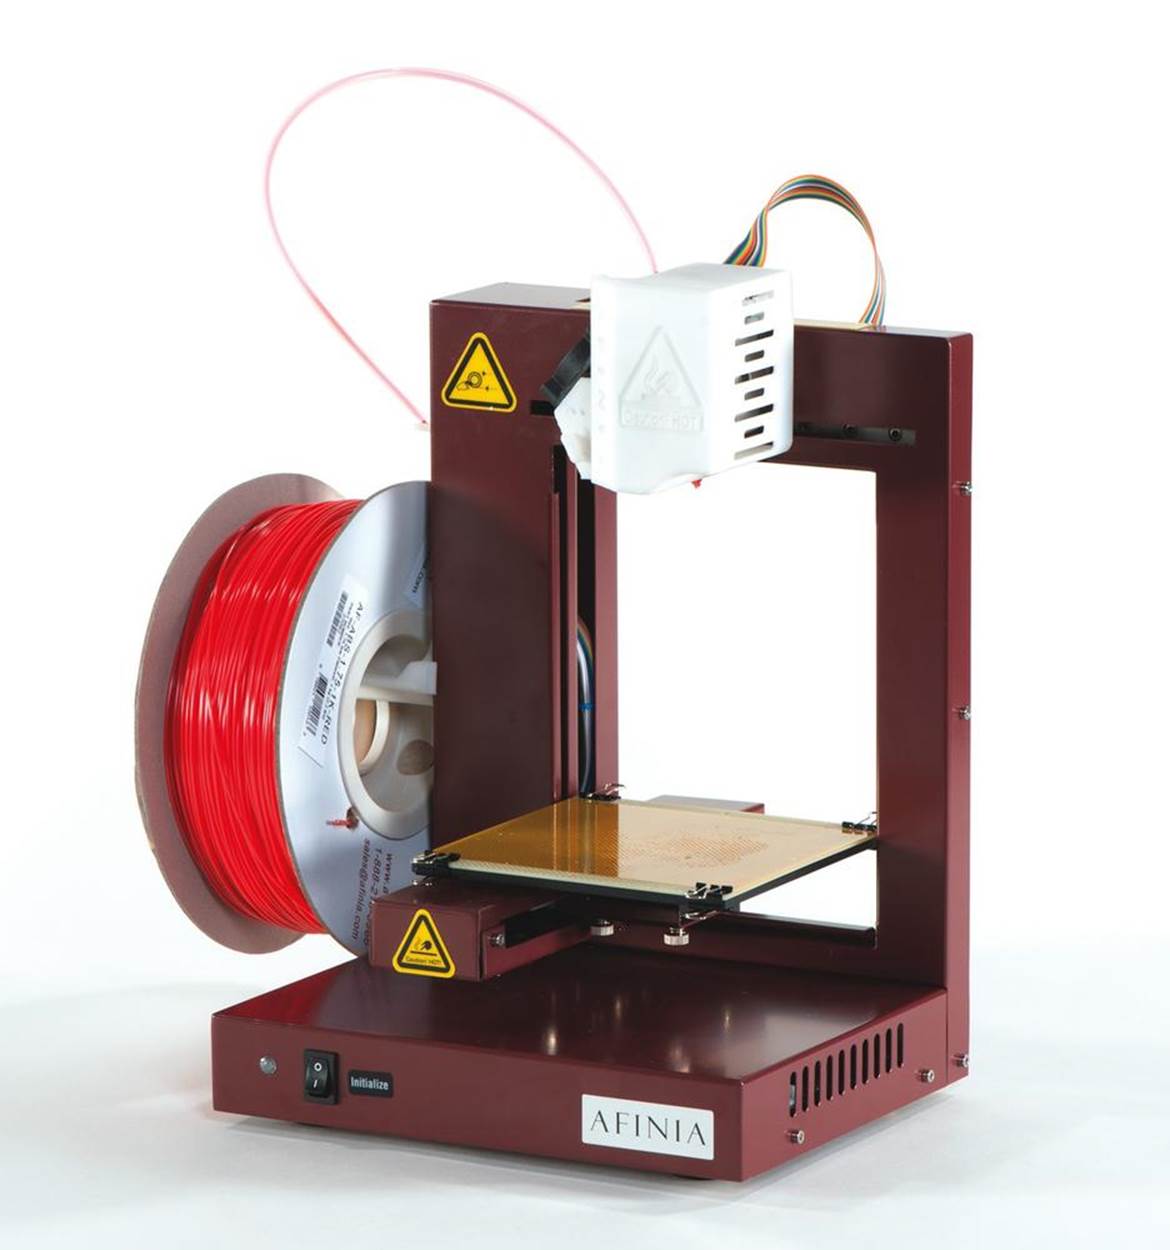
Afinia H-Series
§ http://afinia.com
§ Written by Keith Ozar
§ Tested by Keith Ozar and Eric Weinhoffer
The compact H-Series is a version of PP3DP’s UP! Plus 3D printer, rebranded for the US market. It’s got a single extruder and runs via USB off Mac or Windows machines, with no onboard controls except an initialize button and a flashing status indicator. But despite the no-frills hardware, it’s a surprising little performer that’s ideal for beginners.
The printer sits about 10"×10"×14” high on the desktop, weighs just 11lbs, and is sturdy for transport. It ships fully assembled and takes only a few minutes to set up. Loading the filament, leveling the platform, and calibrating the machine were easy, thanks to its straightforward documentation.
The Afinia 3D proprietary software package slices, generates support, duplicates, and can place multiple models for printing—all automatically. Once your design is to your liking, it’s as easy as pressing Print.
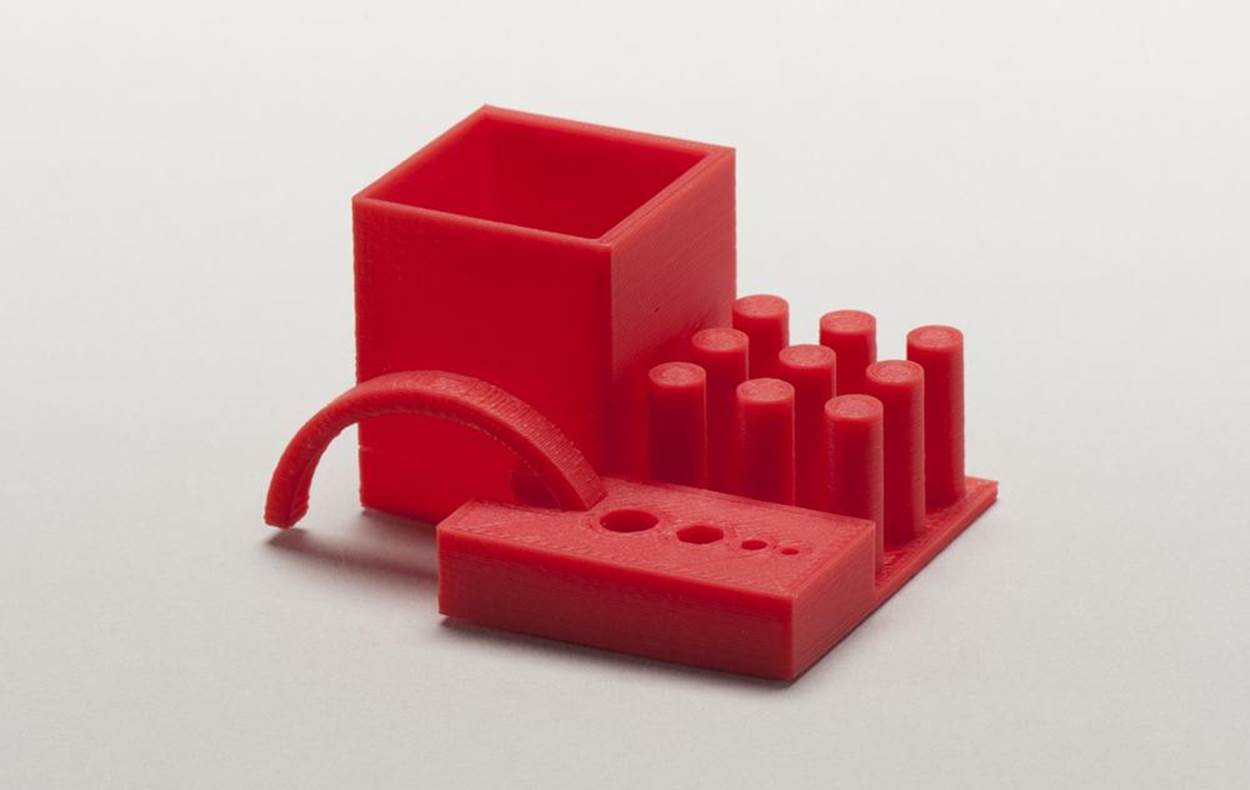
Print quality was quite good—we were surprised by how great the first print looked (the snake). And subsequent prints like the owl confirmed it: sharp corners, clean overhangs, and true vertical and horizontal surfaces. Dimensional accuracy was off by about 1% on our torture-test object, with holes slightly undersized, though this might be due to shrinkage of ABS plastic. The Afinia was reliable, too; we didn’t have to babysit it.
Unfortunately, there is no SD card or USB flash drive on the Afinia. You can print from your computer via USB and disconnect once the job has started printing, though.
The status light indicators can be confusing if you don’t have the manual in front of you, and are a constant reminder of the lack of an onboard control panel. The machine also makes a loud beeping sound as it begins printing, which reminded us of a truck backing up, though it prints quietly.
Though it printed slower than many of the printers we tested, the H-Series stood out as one of our favorites. Straight out of the box, using the default 0.2 mm resolution settings, we printed some of the best-looking challenge prints.
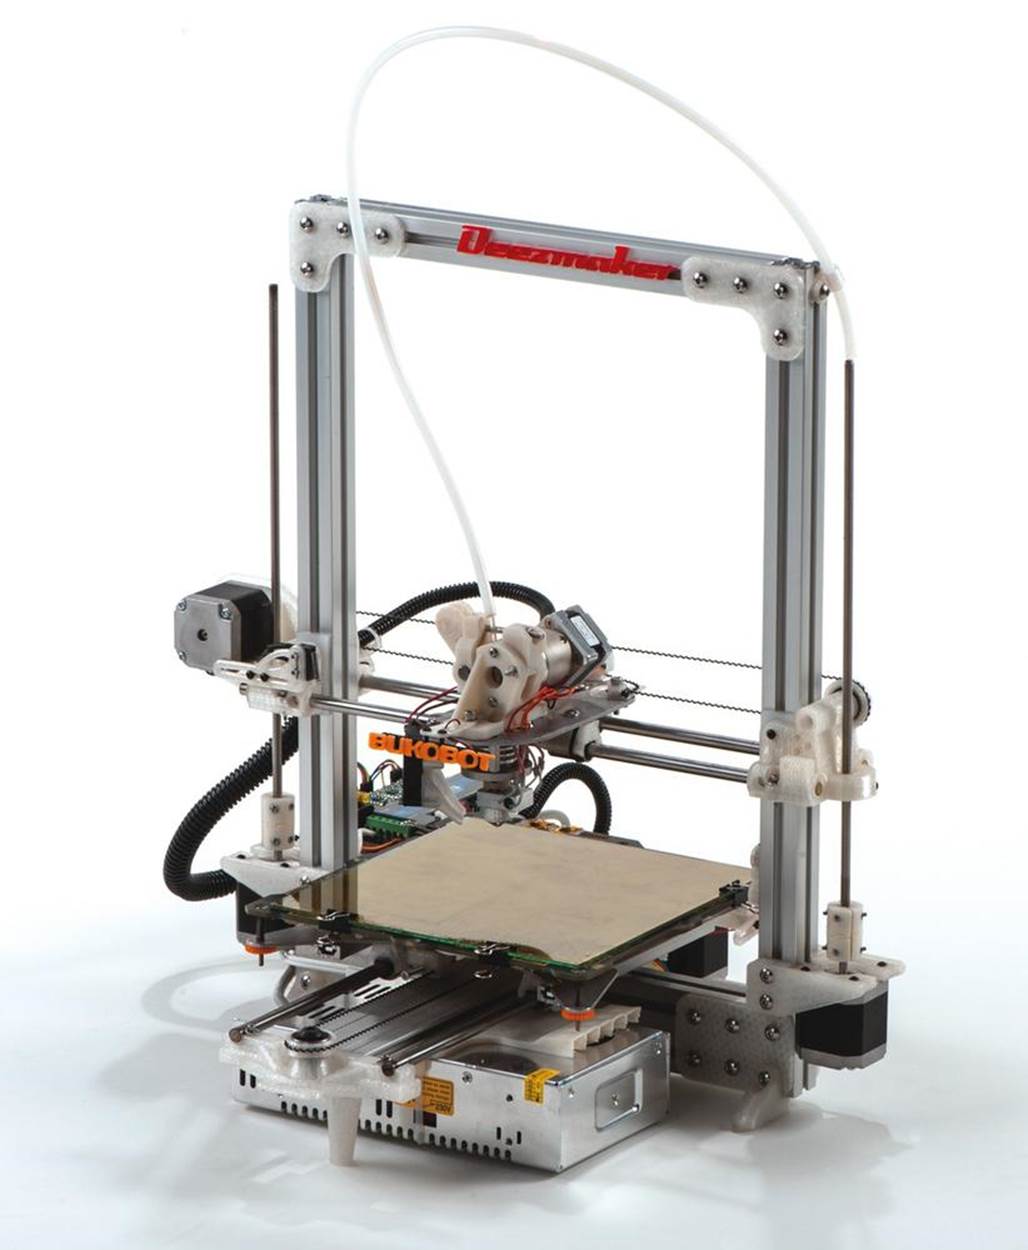
Bukobot 8
§ http://deezmaker.com
§ Written by Matt Griffin
§ Tested by Matt Griffin and John Abella
We tested the Bukobot 8 Vanilla version, with a single extruder; the Duo version offers two extruders. Setup took only about a half hour, and the documentation included with the printer provided most of the information necessary to tune the machine, though we did have to seek help to figure out the baud rate.
A great touch: printed cable tensioner disks make it easy to perform small dialing-in adjustments. The version we tested had no SD card reader, but the current version includes it for untethered printing. The Budaschnozzle hot-end has an idler latch for easy filament swapping mid-print.
While we felt confident the gantry was square to the plate, we had adhesion troubles with both ABS and PLA until we covered the platform with blue painter’s tape—a common solution out in the field for printers that extrude PLA. This improved adhesion significantly, and we were able to print a fine-looking snake using Printbl’s new Diamond Age PLA, which Deezmaker included with the unit.
After shifting to the printed fan shroud attachment, which allows for active cooling of the top printed layer, we had our best successes printing PLA. The torture-test results were promising: adhesion issues knocked off the base of the unsupported arch, but the vertical and horizontal surfaces were all true.
Printing results generally were better than average, and the owl statue in particular, while not the best in our test, promises that this unit, when really dialed in by an operator, will compete aggressively for quality at its price point.
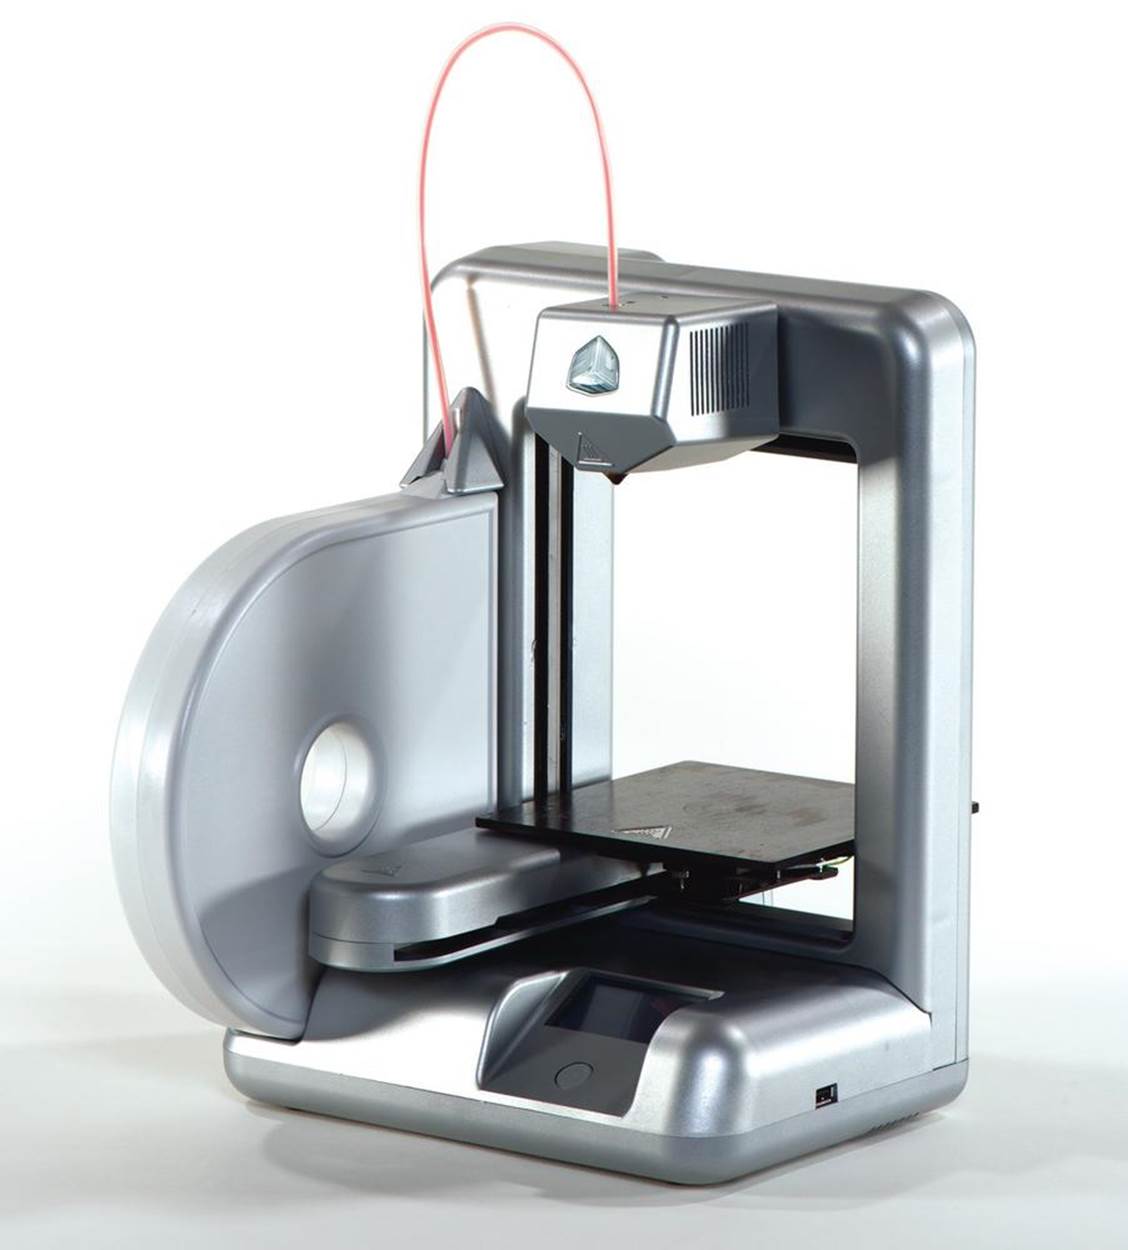
Cube
§ http://cubify.com/cube
§ Written by John Abella
§ Tested by John Abella and Matt Griffin
The first thing you notice about the Cube is its style. No plywood, loose wires, or zip ties: it’s more a consumer appliance than a hacker plaything. This level of design quality carries into the included documentation, which was among the most thorough.
The Cube brings a mix of unique features as well, including the ability to print via WiFi or USB, a well laid-out touchscreen control panel, and a completely new item that no other manufacturer had: “Magic Cube Glue.”
The Cube can use your WiFi network, but we had better luck printing via its ad hoc network. You’ll have to disconnect briefly from any other WiFi network to use it, though.
Like most ABS printers, the Cube uses a heated build platform to help prints stick and to prevent warping. Also, the included “magic glue” worked great to keep prints stuck to the build surface. This mystery substance washes away with water to cleanly release prints from the removable platform.
The device is driven by a touchscreen interface that allows the user to configure nozzle height, WiFi settings, and other details, as well as showing the status of current print progress and other system indicators.
Out of the box, the Cube was a bit slow. By default it enables rafts and support structures, both of which add to printing time and post-processing time, but which helped in the most demanding print tests. Both options can be turned off, but doing so will generally degrade the print quality. While many 3D printing software packages allow for endless tweaking, the Cubify package has basic switches for toggling support and rafts, but not much control over other settings.
The Cubify software works with standard STL files but also supports proprietary .creation files. 3D Systems has a website where you can buy creations. Each new printer comes with 25 free files, and some additional designs are free. The Cube works with filament cartridges available only from 3D Systems. At $50 for about 1 pound of usable ABS, they are pricier than other suppliers.
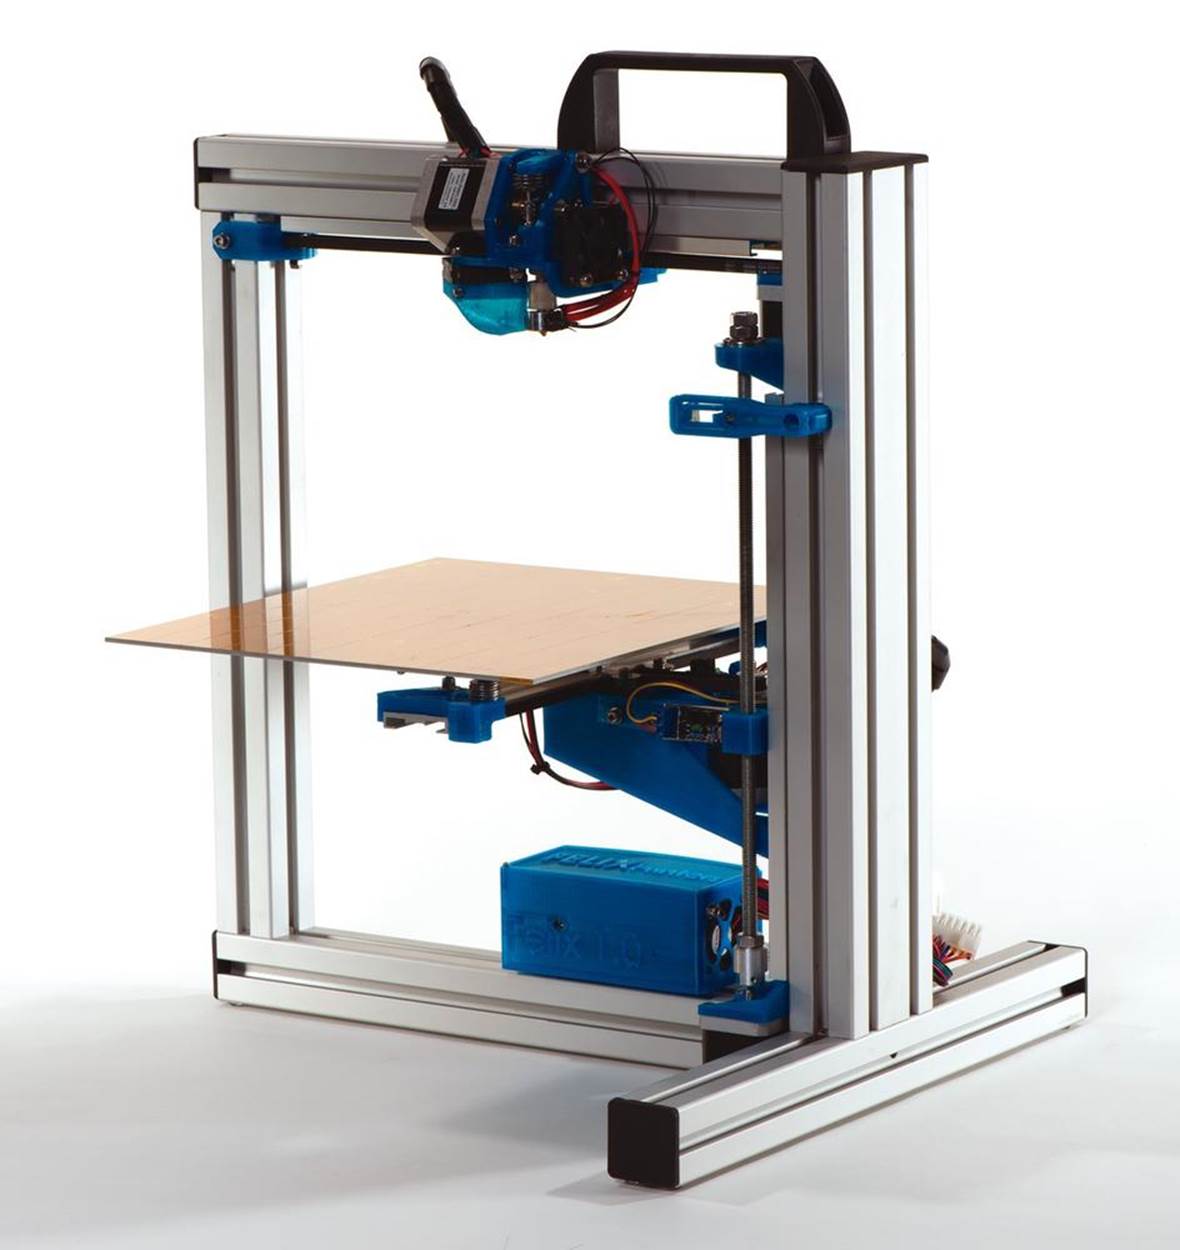
Felix 1.0
§ http://felixprinters.com
§ Written by Eric Chu
§ Tested by Eric Chu and Brian Melani
The Felix is based on RAMPS 1.4 electronics, has a rigid frame made of aluminum extrusion, and has a generous build volume. It took us longer than the estimated 5–10 hours to finish this build, and we’ve built kit printers before.
The Felix version of Repetier bundles Skeinforge and Slic3r under the Repetier frontend, so you can choose one or the other when slicing your STL file. Felix came with a handful of slicing profiles, as well.
Leveling the bed and setting the Z height were a bit of a challenge. You use a wrench to loosen a nut under each of the three leveling screws until the aluminum bed is leveled.
The Z limit switch is an optical endstop that’s triggered when an opaque object blocks its IR beam. An LED on it should turn off when the endstop is triggered, but ours only got very dim, making it hard to know exactly where the Z home position was triggered. However, the X and Y belts are extremely easy to tension: just turn one screw on each axis to tighten them.
The Felix’s extruder uses a spring-loaded tensioning mechanism that presses a ball bearing against the filament and extruder gear. We finally got the proper tension when we set it so that the ball bearing rests against the extruder gear before putting in the filament.
The Felix is a pretty speedy machine. Its print quality is great when the belts and Z lead screw are properly tensioned and aligned. Aligning the Z lead screw is the hardest part of getting a great print; if it’s off, there will be ridges between the layers, an effect known as Z wobble.
The Felix was designed to print in PLA. While it has a heated bed, its open-case design doesn’t allow the bed to get hot enough for printing ABS. The bed also needs to be slightly leveled every couple of prints, and it can warp due to the flexing of the aluminum.
Felix’s best feature is that it’s extremely quiet. DryLin polymer bushings glide along the linear rails so stealthily that even at high speeds, it’s quiet.
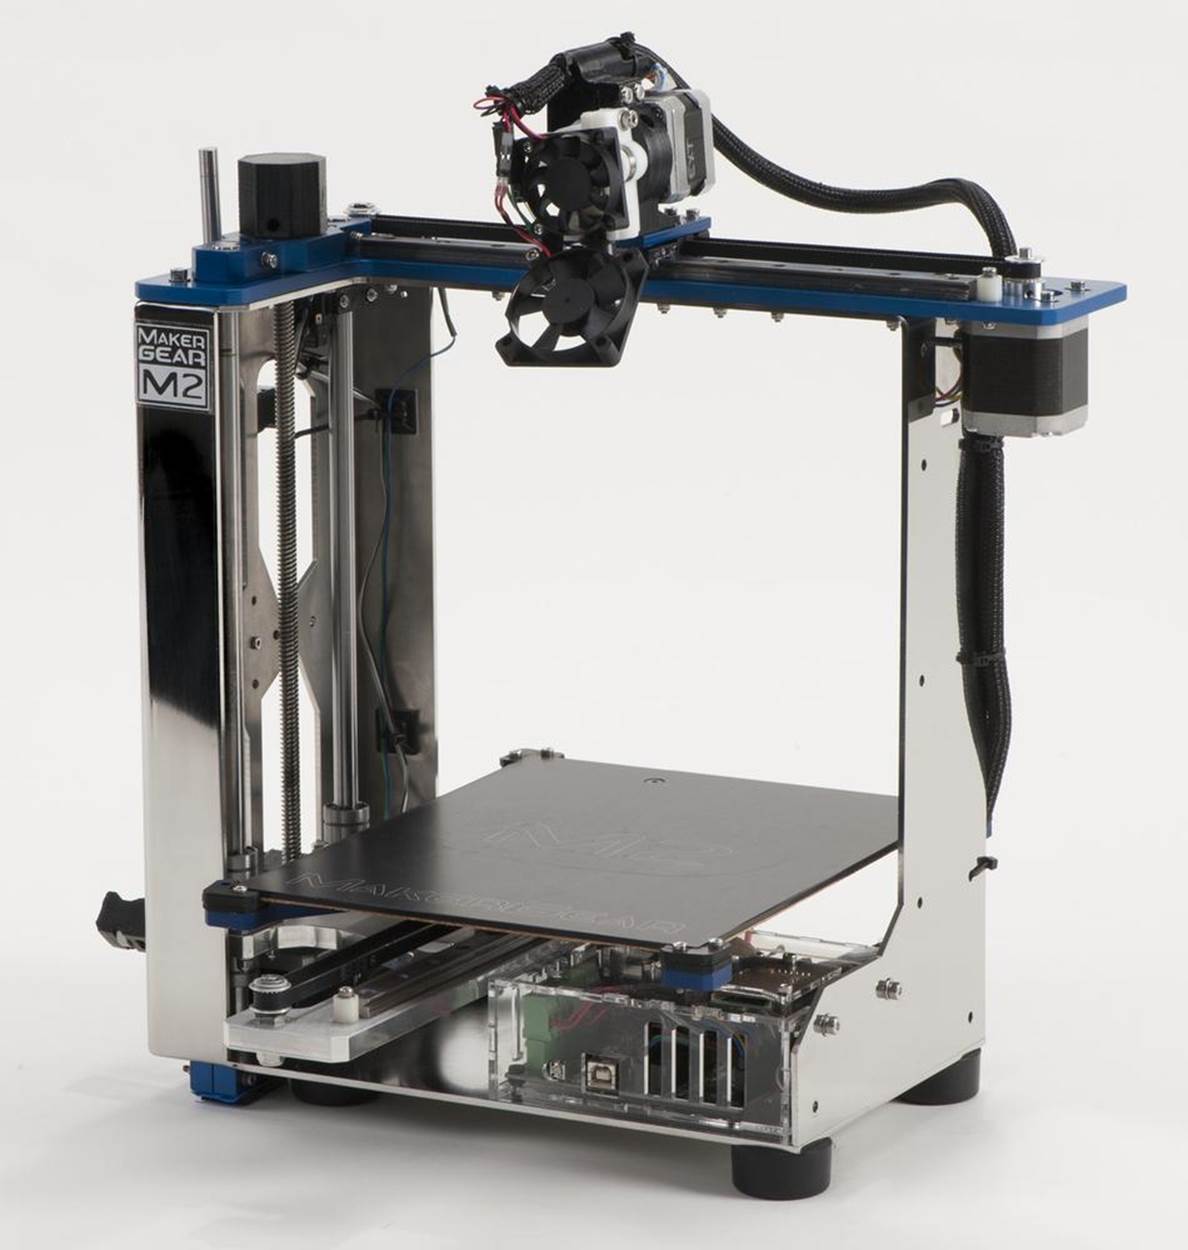
MakerGear M2
§ http://makergear.com
§ Written by Paul Leonard
§ Tested by Paul Leonard
This printer’s frame is stainless steel, and the rest of the structural elements are stainless and anodized aluminum. The print volume is 8"×10"×8”—one of the biggest in its price range. The rest of the printer is built with premium parts, and its motion is smooth.
MakerGear’s geared stepper motor extruder comes with their groove-mount hot-end. The heated build platform is a sandwich of cork insulation, polyamide heating element, and laser-engraved aluminum, topped off with a sheet of borosilicate glass.
UltiMachine’s RAMBo board, a refinement of the popular RAMPS, controls the printer. It supports dual extruders, so you could upgrade to dual-extruders without upgrading the electronics.
The kit is very well organized and includes every tool you need except an adjustable wrench. Kit documentation is very nice—animated videos, subassembly drawings, explicit instructions for critical steps—but also has confusing gaps. That said, MakerGear tech support answered questions quickly on IRC.
Setup is simple: you can unpack, adjust the stops, load the software, and start printing the included samples in less than an hour. Find a sturdy table—the M2’s metal construction makes it reassuringly heavy, and it shakes a bit when it runs at high speeds.
The M2 ships with an SD card reader and a card loaded with sample G-code files to verify that your printer is working. They also include a 1 kg spool of PLA. Although it ships well calibrated, there’s a learning curve. Before you print, visit MakerGear’s Google Groups to learn about the settings and options available, especially for different materials and build surfaces.
After I positioned the Z endstop and leveled the bed, the M2 printed great. I experimented with different layer heights, speeds, and temperatures, and I’ve yet to experience the M2’s full capabilities. Not only can I adjust the software settings to get even better output, but because the machine accommodates improvements in extrusion technology, I’ll be able to keep on upgrading!
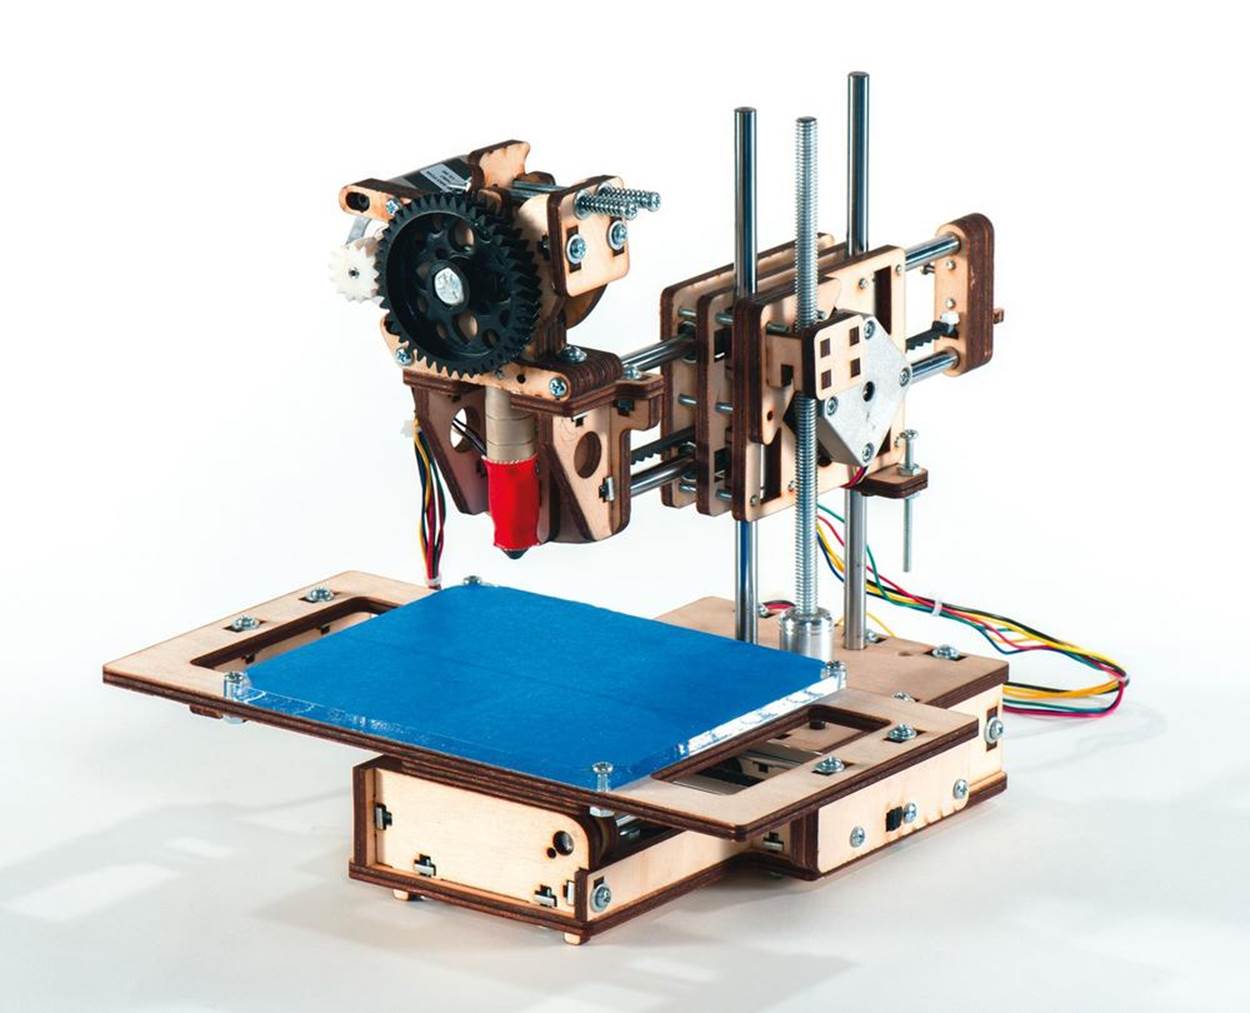
Printrbot Jr. (v1)
§ http://printrbot.com
§ Written by Lyra Levin and Matt Griffin
§ Tested by Lyra Levin, Cliff L. Biffle, Emmanuel Mota, and Blake Maloof
One of the tiniest and least expensive 3D printers, the Jr. is a baby-scale version of the original Printrbot. (Some of the other printers could probably print a full-scale model of the Printrbot Jr. in one go.)
When fully open, the diminutive machine fits easily on a corner of your desk, and most of its footprint is the 4"×4"×4” printing volume. When folded for travel, a good third of the volume is packed in, with most of the fiddly bits protected by the bed. It easily slips into a backpack.
The unit comes with a standard PC ATX power supply, but there’s another option for power: a rechargeable lithium polymer (LiPo) battery as an optional add-on to supply power when printing in the field. We ran some of our final test prints using a LiPo quadcopter battery (soldering required), and were amazed to realize we could just as easily be printing them on top of a mountain somewhere.
Simplicity is a design feature for this printer, and while it ships assembled, videos of Drumm quickly disassembling and reassembling the unit demonstrate how carefully the machine has been reduced to the fewest moving parts possible.
In his quest for simplicity, however, Drumm sacrificed some bells and whistles: the Jr. prints only PLA, doesn’t have a heated platform or a fan, and has a simplified gantry system.
The first prints we rolled off the Jr. were officially “not bad.” Following these, we took time to carefully level the platform by eye, running the nozzle horizontally across the plate to make sure the path was parallel.
The torture test printed decently on a third attempt, but the slicing profile was perhaps too conservative in terms of layer height, so the results were coarse; and the printer extruded more plastic than necessary, resulting in constrained bolt holes and runny vertical features. The printed nautilus gears worked immediately upon assembly, showing off the Jr.’s ability to print thin, stable walls.
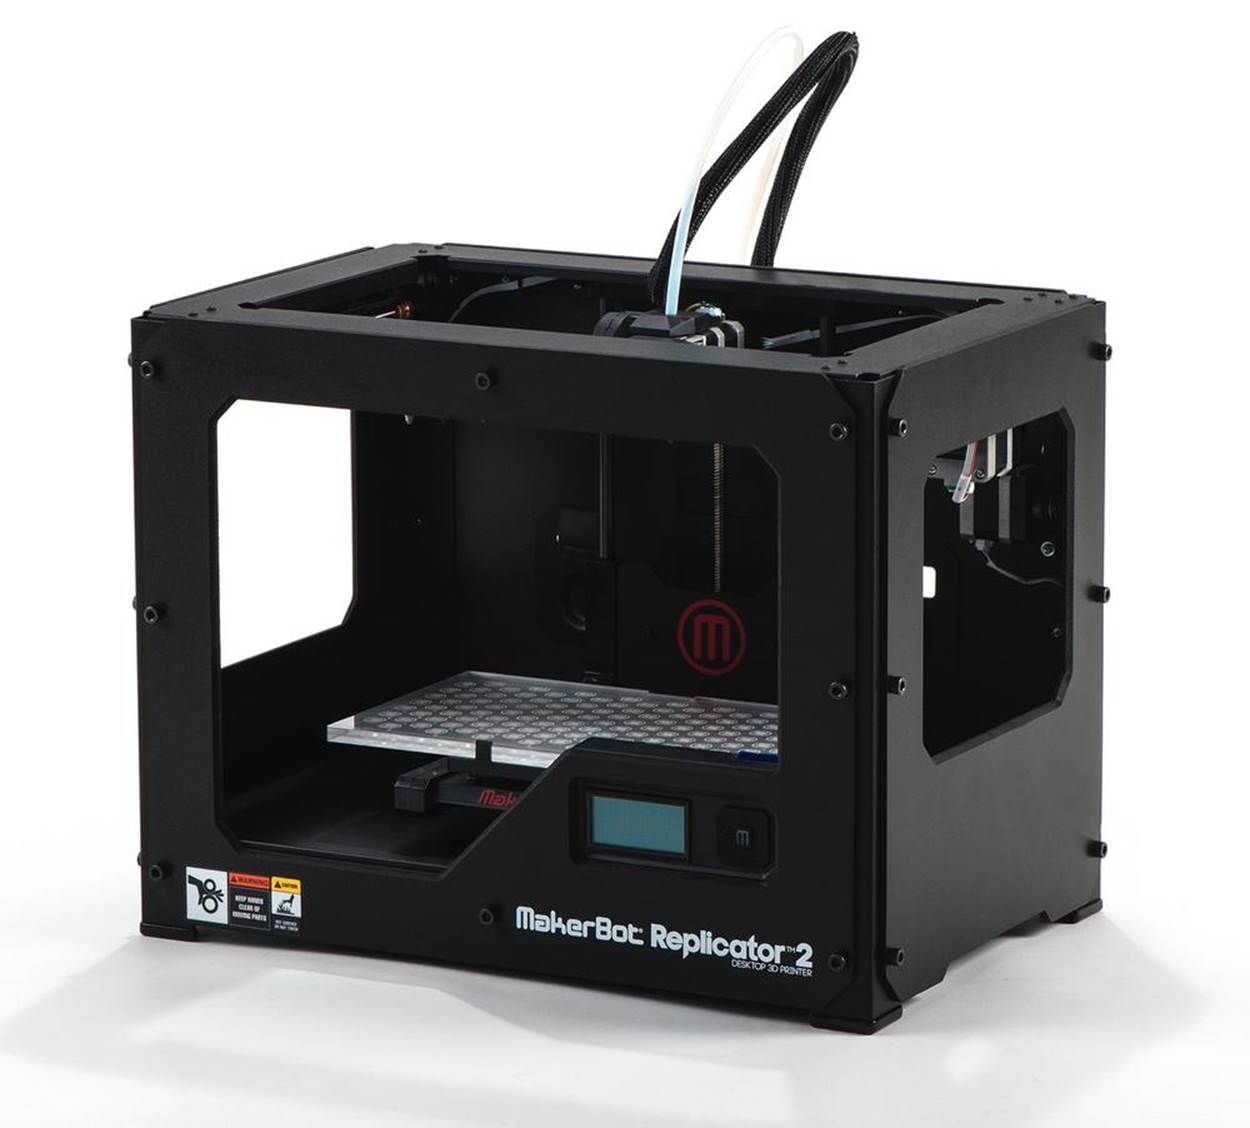
Replicator 2
§ http://makerbot.com
§ Tested by Emmanuel Mota and Eric Weinhoffer
§ Written by Emmanuel Mota
Faster, quieter, and with a paper-thin 100-micron minimum layer height, the Replicator 2 is worthy of its 2.0 badge. It sports a new steel frame, oil-impregnated bronze linear bearings, and a 37% larger build volume, and it’s optimized for PLA.
The Replicator 2 has a sleek modern look with an all-black powder-coated steel frame and has kept the same overall footprint and basic design while enlarging the build volume. A larger, more responsive LCD panel with a keypad on the front-right corner allows for easy control and monitoring of the machine.
A highlight is the new Cold Pause feature that pauses the print, cools the extruder, and waits for you to resume where you left off, which can come in handy.
Another fun, though perhaps less useful, function of the keypad is the ability to select the color of the interior LED lighting to suit your mood. The build area of the Replicator 2 is now inhabited by a quick-release, frosted acrylic bed specifically made for use with PLA (polylactic acid) plastic.
Without the need to wait for a heated bed, the Replicator 2’s warmup time to start a print is much shorter than MakerBot’s previous ABS-printing models.
Bed leveling is easier, thanks to the new three-point bed leveling system. Instead of one adjustment screw in each of the four corners, three screws are arranged in a triangular shape, widening the center point; a twist of two screws can quickly level the bed.
The upgraded features on the machine are complemented by brand-new software. MakerBot’s new MakerWare replaces ReplicatorG, with a cleaner and more intuitive user interface that lets you scale, rotate, and arrange multiple models on the build platform. Slicing is now performed by the Miracle-Grue engine within MakerWare, which is significantly faster than Skeinforge.
The Replicator 2’s initial setup, out-of-box to first print, was simple and quick—it took us less than 15 minutes, including attaching the extruder and loading the filament.
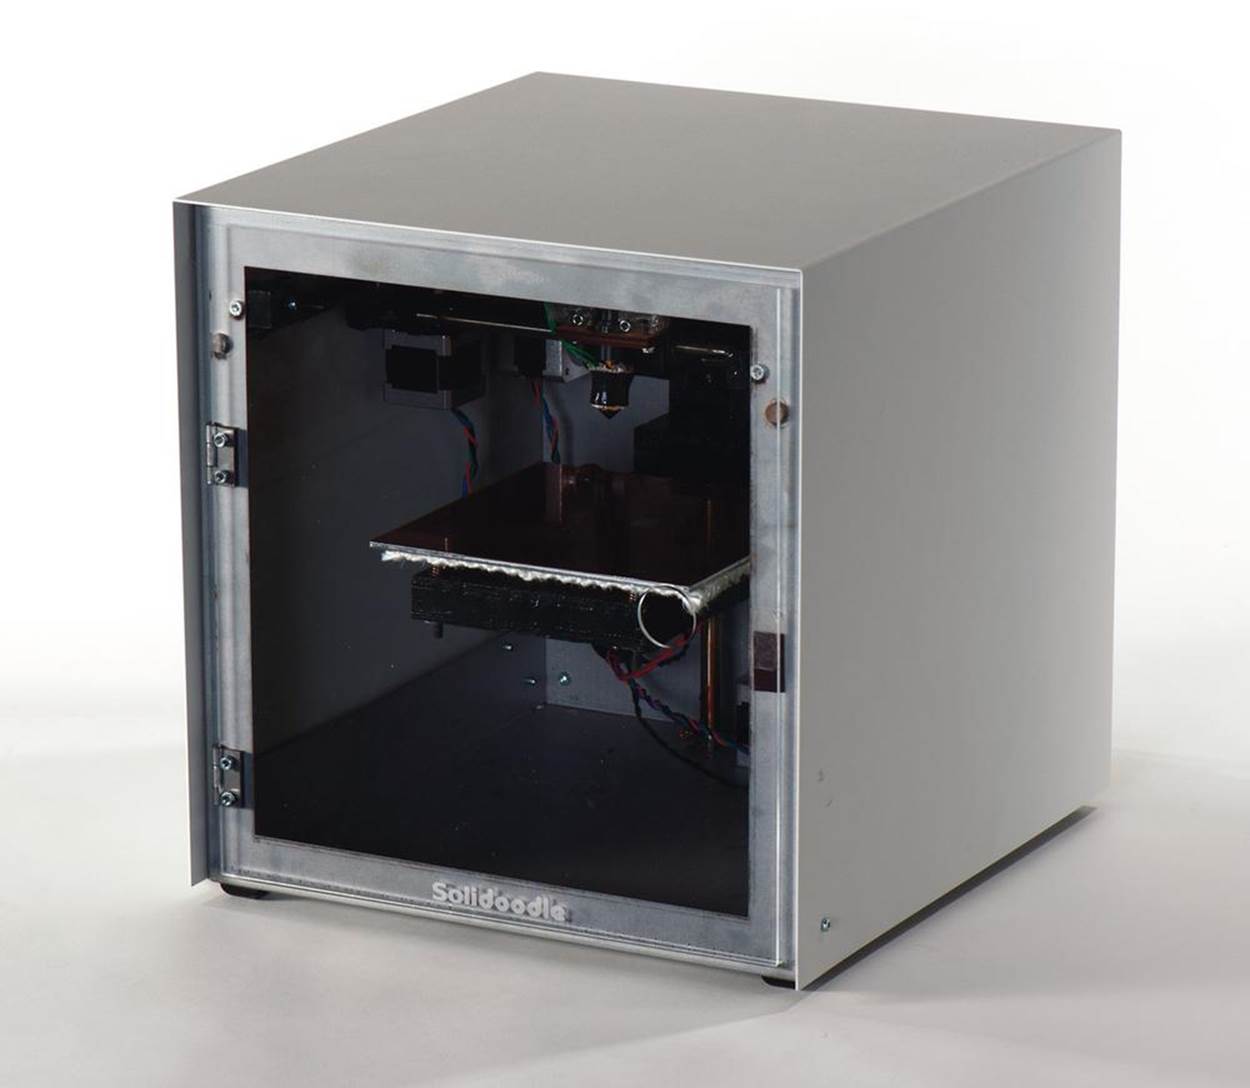
Solidoodle 2
§ http://solidoodle.com
§ Written by Ethan Hartman
§ Tested by Ethan Hartman and Eric Chu
Solidoodle is the company started by Sam Cervantes, an early MakerBot alumnus. Solidoodle has adopted what’s become a popular standard: Sanguinololu electronics and Repetier Host.
To keep the price low, it cut some corners, and for the most part, they were the right ones. The frame is a basic welded box. Rods are secured by hose clamps. A number of brackets and parts are 3D printed and ugly, though this is standard practice for RepRaps. (We’d like to see designs for these made available, just in case.) The Solidoodle isn’t the prettiest, but none of this should have any functional impact: score one for frugality.
While it’s doubtful that unboxing will generate the sort of loving pictorials given to new Apple products, the basics are there: assembled printer, USB cable, printed startup guide, one replacement Kapton sheet for the build surface, and a tiny supply of 1.75 mm ABS filament. (The Solidoodle will also take PLA, but ABS is recommended.)
There are a few pain points, however. You can’t load or change filament with the metal enclosure in place, so grab your screwdriver, and be careful—tilt too much as you’re removing the top, and you’ll tweak the USB connector on the electronics sitting exposed on the back of the machine.
So how does it print? Not too bad, though a bit more tuning could go a long way. The single profile included with the Solidoodle resulted in prints that were below average for the printers we tested. Extruder temperature seemed very high, despite nominally being set to a low 190°C. The output was wavy, and overhangs dropped a bit: the owl feathers were among the worst of the bunch.
Dialing down the temperature improved things, but we could have spent a lot more time tweaking. On the upside, the machine was fast and reliable; once we figured out that the build plate temperature has to be set manually, we had no trouble. The build plate was well leveled from the factory.
Visit the websites associated with the printer, and you’ll see that the community is hard at work improving the default profiles. For example, http://solidoodletips.wordpress.com abounds with tweaks.
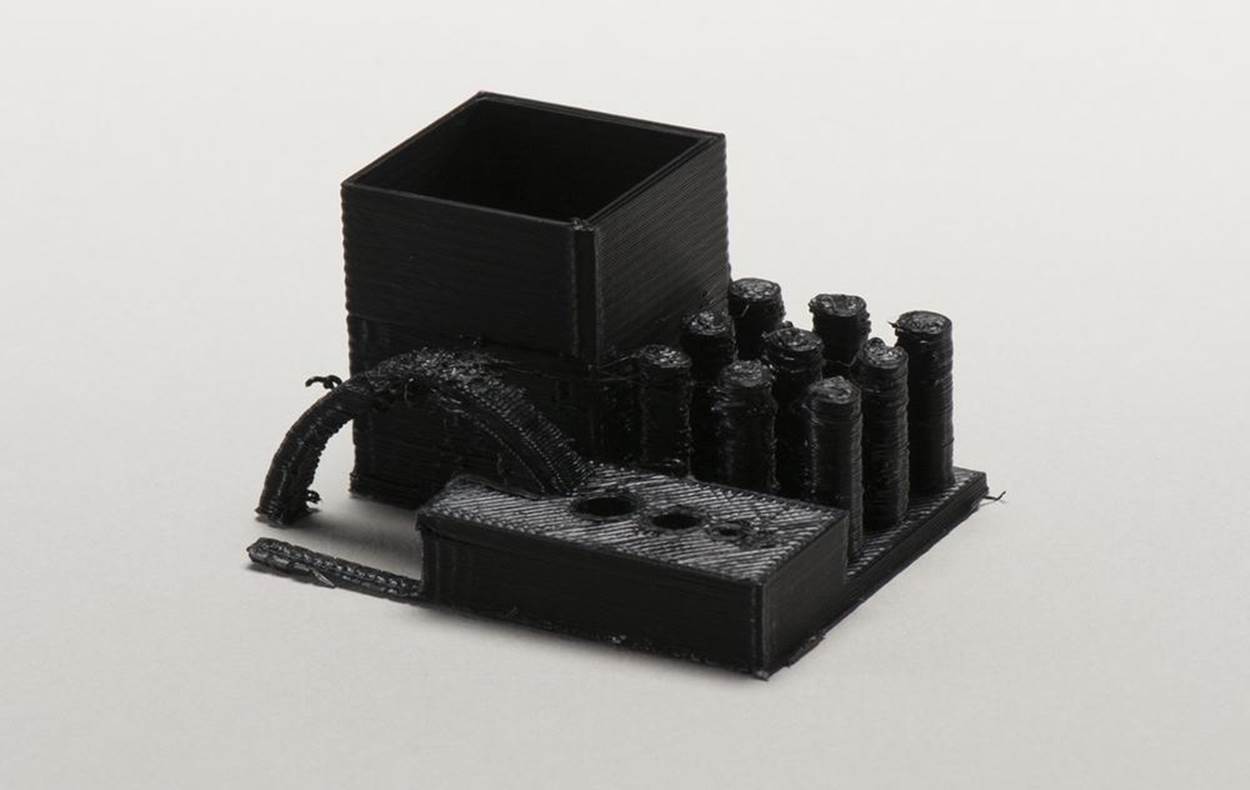
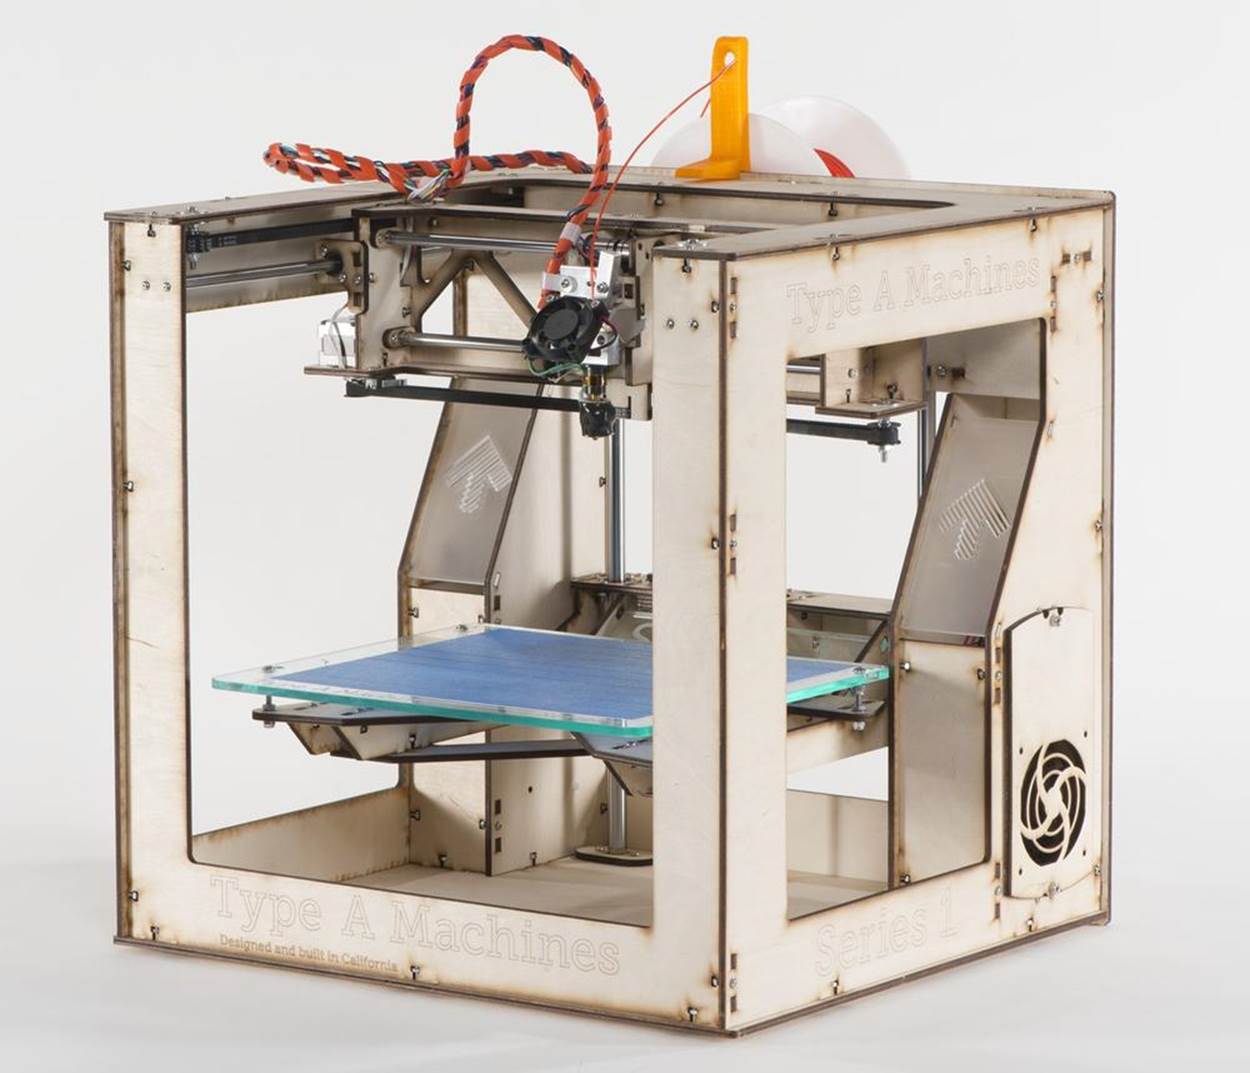
Type A Series
§ http://typeamachines.com
§ Written by Eric Weinhoffer
§ Tested by Eric Weinhoffer and Keith Ozar
Type A Machines’ Series 1 is one of the largest 3D printers we reviewed. Based in San Francisco, Type A’s tiny crew of Andrew Rutter and a handful of hackers out of Noisebridge and TechShop began constructing Series 1 prototypes in August 2011. By the time Maker Faire Bay Area 2012 rolled around, the team had several iterations of their machine on view.
The Series 1 is an open hardware product, meaning you can download the pertinent case and equipment files, build your own, and make modifications at will. Like MakerBot’s Replicator 2, the Type A Series 1 is optimized to print in PLA plastic.
The machine’s 9"-cubed build volume is so big (1.2 liters) that one of the “bonus” prints we did during our review weekend was a full-scale, wearable hat. The jumbo volume is also perfect for printing multiple parts or even whole assemblies at once. The build platform is made of laser-cut acrylic, and it’s held in place on the Z stage between the head of a bolt and a spring at each corner. To level it, you simply adjust these four bolts; to remove it, just pull it toward you to move larger slots over the four bolts, and lift it free.
Changing filament is a breeze: pull the lever back and slide the filament out. It’s completely exposed, which leads us to believe it’ll be easy to troubleshoot.
Another benefit of the Series 1’s construction: speed. The Type A crew claims their frame design can clock in at printing speeds of 90 mm/sec and travel speeds of 250 mm/sec. It’s also quite accurate—it will print beautifully at a layer thickness of 0.1 mm and will happily go all the way down to 0.05 mm (50 microns), where the stepping of layers is difficult to detect.
The Series 1 performed extremely well in our test prints. The large bed let us print all the parts of the nautilus gears in one go, the owl came out beautifully, and achieving a perfect snake print was no challenge. However, like many of the other machines, the Series 1 wasn’t able to handle the extremely small arch in our “torture test.”
The Series 1 has a few downsides. Our demo unit was loud, especially when moving at high speeds—a problem that might be minimized with grease and the tightening of bolts.
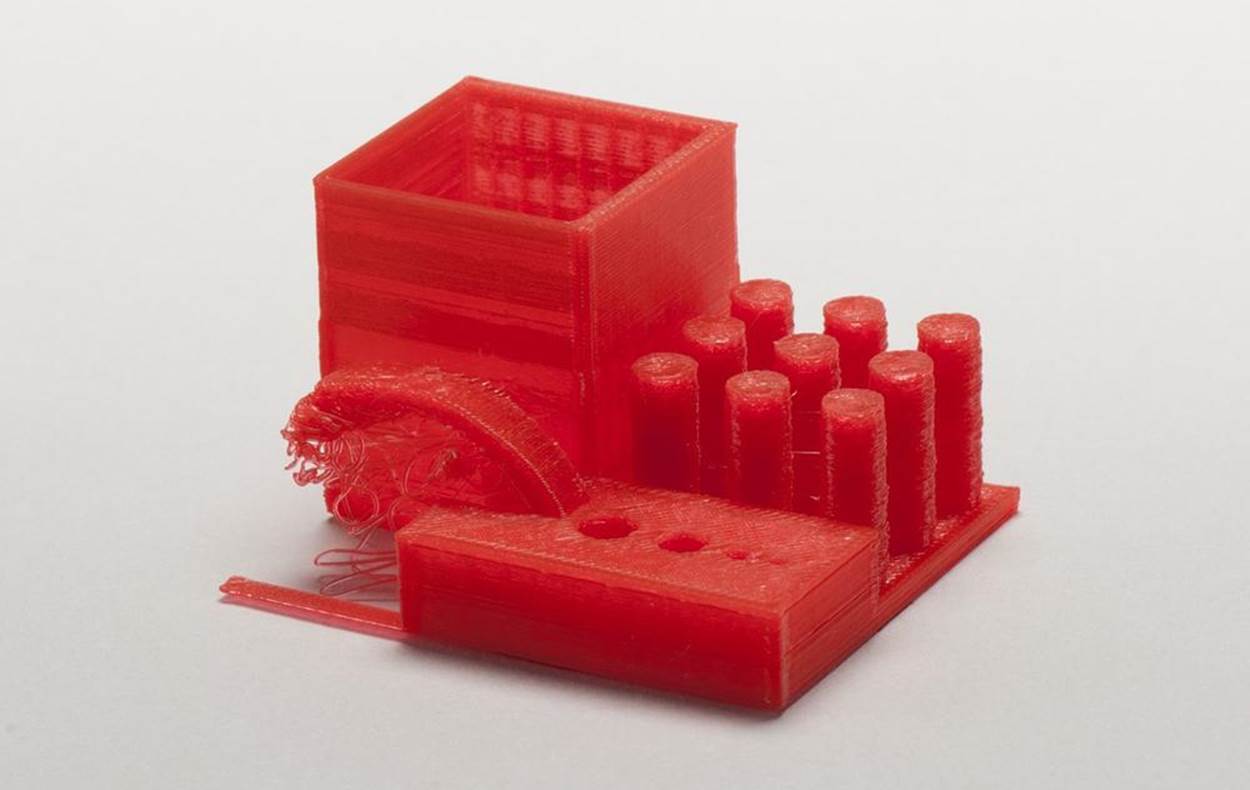
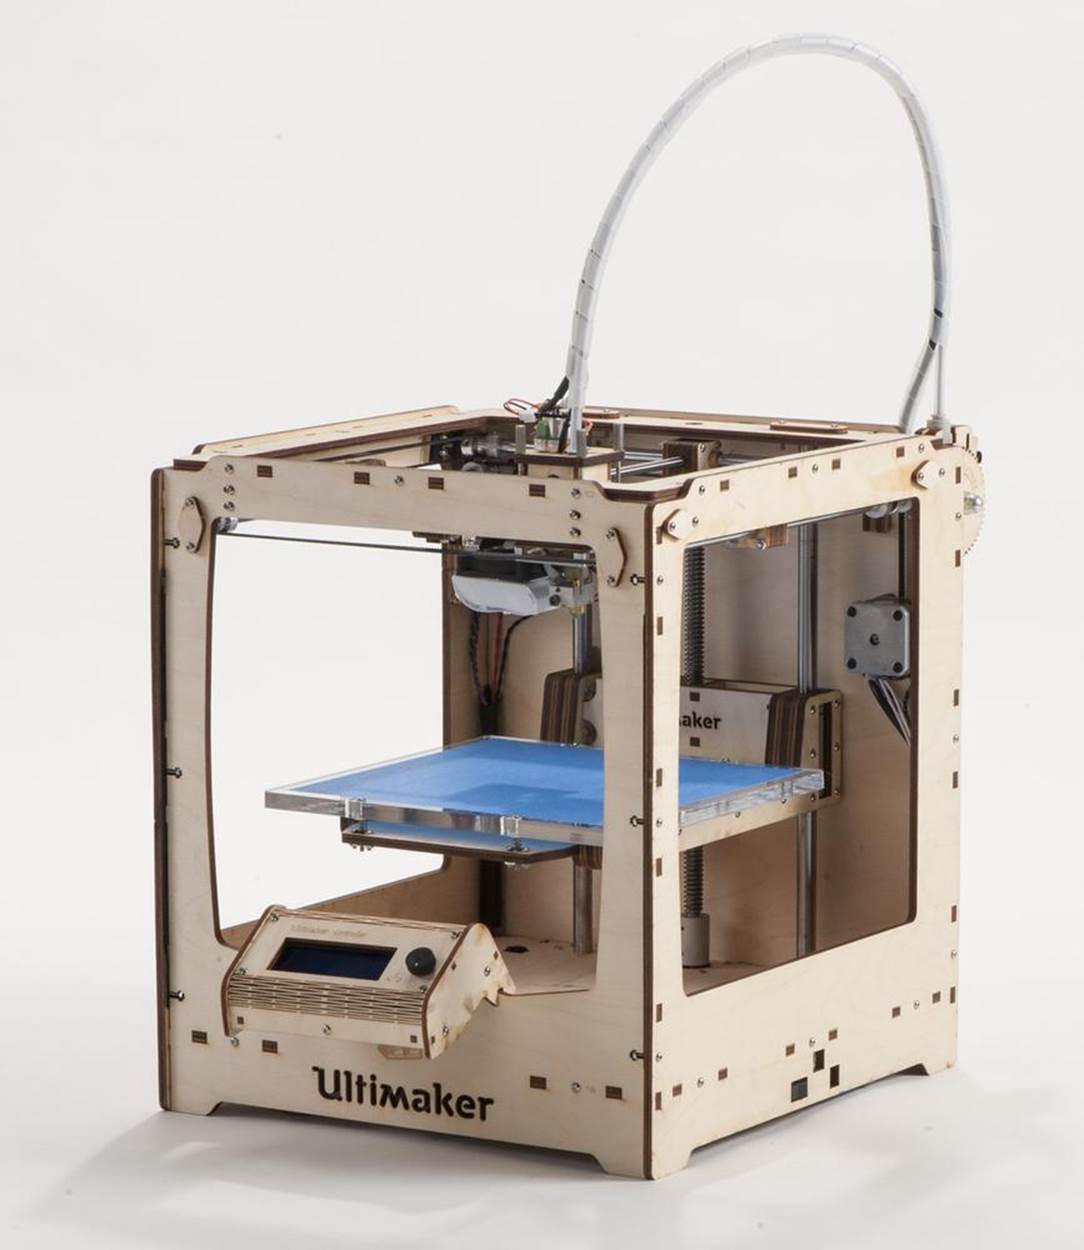
Ultimaker
§ http://ultimaker.com
§ Written and Tested by John Abella, Eric Chu, and Matt Griffin
Ultimaker was founded in the Netherlands by one of the most active RepRap advocates and developers, Erik de Bruijn, joined by Siert Wijnia and Martijn Elserman. The first Ultimaker kits shipped in early 2011, and the company has grown to more than 20 people.
The Ultimaker was the only printer we reviewed to feature a Bowden-style extruder, where the filament drive mechanism is physically separated from the extrusion nozzle. As a result, none of the motors add to the toolhead’s weight. A low-mass toolhead and stationary motors results in a lightweight gantry system, ideal for fast prints.
Updated parts, including new drive bolts and the new V2 hot-end, show a constant drive to improve the product and extend its life. The electronics have been redesigned and updated numerous times. Our review unit also included the UltiController, an add-on that lets you adjust print speed and temperature on the fly, print from an SD card, monitor builds, and do other maintenance tasks untethered to a computer.
While the Ultimaker can print in ABS or PLA, it’s engineered primarily for PLA, so there isn’t a heated build platform—a near-requirement for large ABS prints.
The Ultimaker remains a great kit for buyers looking to get under the hood. The newest kits ship with the latest parts, and makers can upgrade as new parts become available.
Setup was moderately easy. The print bed’s leveling process is less fussy than that of some other printers, and it tends to stay level without much intervention. Belts for the x- and y-axes are tensioned with just a hex driver and tend to stay calibrated, but there’s no easy way to finely adjust the z-axis limit switch.
We achieved excellent quality prints after getting the Ultimaker dialed in—once calibrated, it’s the most accurate of the DIY printers. The snake and owl came out great, but the torture test had lots of stringing, mainly due to retraction being disabled by default.
John Abella is an obsessive hobbyist and 3D printer enthusiast who has run 3D Printer Village at World Maker Faire New York since 2010. He’s currently teaching 3D printer assembly workshops with BotBuilder.net.
Cliff L. Biffle is an engineer at Google and a member of Ace Monster Toys, a hackerspace in Oakland, California. He enjoys using science as a verb.
Eric Chu is a MAKE Labs Alumnus, an engineering student, yo-yo hacker, robot builder, and fried rice aficionado.
Matt Griffin is the Director of Community & Support at Adafruit Industries, a former MakerBot community manager, and author of the forthcoming MAKE book Design and Modeling for 3D Printing.
Ethan Hartman is a customer service and documentation specialist for technology companies. He worked for MakerBot from 2009 until August 2012.
Lyra Levin is a climber, aerialist, contortionist, parkour noob, and Ninja 500 rider. She is a compulsive builder of things and member of industrial arts collective Ardent Heavy Industries.
Blake Maloof is a game designer at Toys for Bob (Skylanders).
Brian Melani builds 120-pound robots in his free time. He is a MAKE engineering intern.
Emmanuel Mota is the Director of Maker Camp at Maker Media, filmmaker, photographer, and full-time geek. He got into 3D printing in 2012 when he built a RepRap from scratch.
Keith Ozar is a creative marketing professional from Brooklyn, NY. He empowers makers through special projects that highlight the potential of 3D printing.
Eric Weinhoffer is MAKE’S product development engineer for the Maker Shed. He’s been an owner-operator of 3D printers since interning at MakerBot in 2009.
All materials on the site are licensed Creative Commons Attribution-Sharealike 3.0 Unported CC BY-SA 3.0 & GNU Free Documentation License (GFDL)
If you are the copyright holder of any material contained on our site and intend to remove it, please contact our site administrator for approval.
© 2016-2026 All site design rights belong to S.Y.A.