Idiot's Guides: 3D Printing (2015)
PART 3
Setting Up and Printing
CHAPTER 14
Troubleshooting Your Prints
In This Chapter
![]()
· How to identify print problems
· Extrusion, temperature, and adhesion issues
· Fixing other common print quality issues
3D printing is pretty complicated, and that means there are a lot of problems you can run into. A few small tweaks in your settings can easily make the difference between a high-quality print and one that’s going to get thrown away. But because there are so many factors, it can be difficult to figure out what the problem is. In this chapter, I walk you through some common issues and what you can do to fix them.
What’s the Problem?
Obviously, there are a whole lot of things that can go wrong in the course of your 3D printing journey. If you’re familiar with Murphy’s Law, you know that anything that can go wrong will. These problems can be as minor as poor surface quality (like ripples) to major problems that cause your entire print to fail.
![]()
FASCINATING FACT
You can hold on to your failed prints for use in the future. They can be used to make ABS glue and even your own filament. If you do make your own filament, however, keep in mind that you shouldn’t use more than 10 percent recycled plastic. If you don’t have the ability to make filament yourself, you can drop the used ABS off at your local hackerspace or makerspace for them to use.
Most people will spend a great deal of time fine-tuning their settings to get really high-quality prints. But what if your parts are coming out terribly? It can be very frustrating if this is happening and you can’t even achieve mediocre results.
Complete failures of prints like this are not uncommon.
Luckily, these issues can usually be identified fairly easily by comparing your bad print to known problems. Once you’ve figured out what the primary cause of the problem is, you can adjust your settings to fix it. Actually getting the settings right might take a little trial and error, but at least you’ll know where to focus your attention.
Extrusion Problems
Extrusion problems are those caused by improper filament extrusion. As you’ve learned multiple times in this book, extrusion is the key to FFF 3D printing. However, the slicing software has to make a lot of calculations based on many parameters in order to determine how much filament needs to be extruded. For the most part, the slicing software is good at these calculations, but with so many parameters, it’s easy for one small error to result in a failed print.
Overextrusion
Overextrusion is when too much filament is pushed through the nozzle. It usually causes the surface of the print to look lumpy, uneven, and sloppy. This is almost always caused by a setting that was entered incorrectly though, in some very rare cases, it could be a hardware problem.
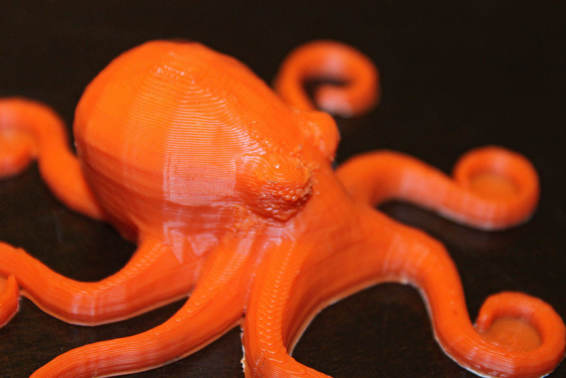
Overextrusion causes surface quality problems, like the bubbling around the octopus’s eye.
The most common setting that causes this problem is the filament diameter. In order to fix this, you have to actually measure your filament’s diameter (preferably in multiple places) in order to get an accurate number. Other settings that can cause this: the extrusion multiplier being set too high, the nozzle diameter being set too small, manual extrusion settings (try changing them to auto), and the extruder steps per mm (your extruder should be calibrated).
Underextrusion
The opposite of overextrusion is underextrusion, which is when too little filament is extruded. The effect of underextrusion is usually visible gaps between lines of filament. In extreme cases, this can cause a complete failure of the part, because layers don’t adhere well enough to each other.
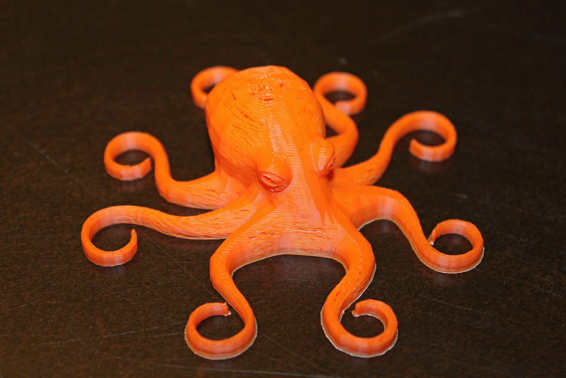
Underextrusion makes the filament strands too thin, causing gaps, as you can see in this printout of an octopus.
The causes of underextrusion are pretty much the same as overextrusion. It will just be in the opposite direction. For example, if you set your filament diameter too low, it will cause overextrusion. But, if you set it too high, it will cause underextrusion. The solution is simple: measure your filament’s diameter and enter that.
Jamming
The most drastic (and obvious) extrusion problem is jamming or clogging. Either the printer will stop extruding altogether, intermittently stop extruding, or extrude thin and uneven lines of filament. This usually ends up completely ruining the part.
Jams usually happen when the filament gets twisted up in the cold end. This is easy enough to fix by just pulling it out, cleaning out the cold end, and starting over. Clogs in the nozzle are more difficult to deal with. They usually happen when the hot end temperature is too low, dust or dirt gets into the hot end, or the quality of the filament is low.
Jammed extruders and clogged nozzles can cause the printer to stop extruding completely. This will cause surfaces to be thin instead of solid, as you can see with this part.
![]()
WATCH OUT!
Low-quality filament, especially in dark colors, is often difficult to melt and extrude properly. There is just too much nonplastic junk in the filament, and it causes the nozzle to clog.
When your nozzle becomes clogged with ABS, the best solution is to remove it and soak it in acetone in order to clean it out. For PLA or other materials, you can heat up the hot end and stick a piece of filament into it. Allow it to cool to about 150°C, and then pull the piece of filament out. You may need to repeat this a few times, but you can usually pull out the clog.
Poor Dimensional Accuracy
You may notice that your parts are coming out with the dimensions slightly off. Or you might try to fit two printed parts together only to find they don’t fit. There are usually three possible culprits:
· Your steps aren’t calibrated.
· Some part of your drive system is loose.
· The slicer isn’t handling the slicing correctly.
When it comes to the first issue, each axis has to have the number of steps per millimeter calibrated. If it’s not right, the lengths on that axis will be too short or too long. Most people notice this when circular features (like holes) end up coming out as ovals. That’s because one axis is moving too far (or not far enough), causing the circle to become elongated. You can find the information for correct calibration from the manufacturer of your 3D printer or on community forums (see Appendix B).
In terms of the second issue, the drive system becoming loose can cause unintended movement, resulting in poor accuracy. Fixing this is usually a simple matter of tightening up all of your screws and making sure your belts are nice and taut.
And finally, the most frustrating cause is the slicing software itself. The shape of the filament as it’s deposited is fairly difficult to account for mathematically, and many slicers don’t quite get it right. This can make your part slightly too big (usually by a fraction of a millimeter). The only real solution to this is to try another slicer or to turn down your extrusion multiplier setting in order to slightly underextrude and make the part smaller.
Temperature Problems
The temperatures of the hot end and heated bed both play important roles in the quality of the printed part. Pretty obvious, right? But it’s not always obvious when a temperature problem is the culprit for a particular problem, so I’m going to cover what common temperature-related problems look like.
Hot End Is Too Hot
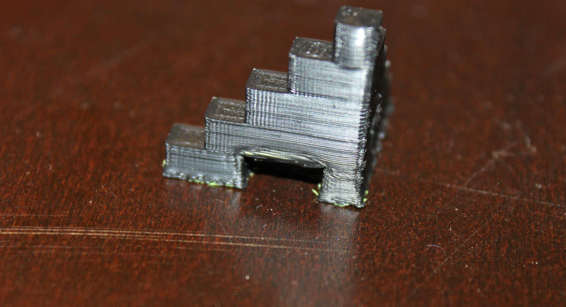
The filament has to be melted just enough to flow freely out of the nozzle but still has to be able to quickly cool once it’s been deposited. If the hot end is too hot, the filament won’t cool quickly enough. The effect is that the part tends to look slightly melted (though it may only look this way in certain spots). The same problem can occur if the layer is small, because it doesn’t have time to cool before a new layer is added.
If it’s consistent (not just on small layers), you can turn your hot end temperature down. If it’s just on small layers, you can use a fan for cooling or slow down small layers in your settings.

If the hot end is too hot or the layers are small without adequate cooling, the part will develop a melted appearance like the top of this one.
![]()
HOT TIP
Extreme hot end temperature problems are often caused by problems with the thermistor. This is usually either because the thermistor has failed or has come loose. If it’s loose, it can be affixed with Kapton tape. If that’s not the problem, the thermistor can be replaced. (They’re usually only a few dollars.) Contact the manufacturer for information on replacing the thermistor and to see if it will be covered under a warranty.
Hot End Is Too Cold
If the hot end is too cold, it tends to produce results similar to nozzle clogs. Either filament won’t extrude at all or it will extrude inconsistently. All you have to do is simply turn the temperature of the hot end up.
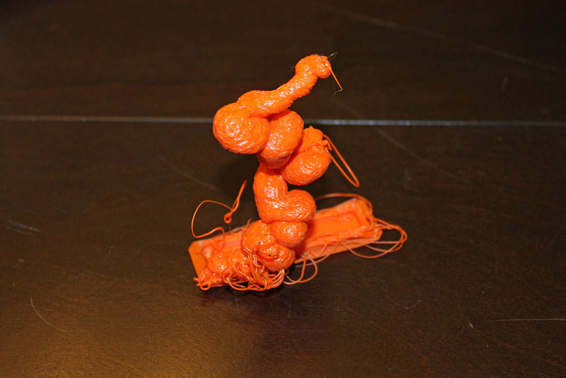
When the hot end temperature is too low, it results in inconsistent extrusion. This part shows how messy this issue can look.
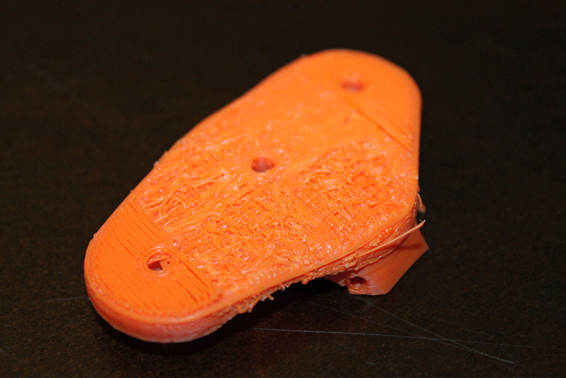
Cracking of Part Due to Cooling
A part cracking is a common problem when you print large parts in ABS. This is because the ABS cools and contracts, splitting the part horizontally between layers. While this is a difficult problem to overcome, there are a few potential ways you can try to avoid this.
Because print fans and even drafts in the room can cool a part and cause contractions that lead to cracks, one solution is to keep the part from cooling off as much as possible. Enclosures (especially heated enclosures) are the best way to overcome this. However, if that’s not feasible for you, you can try using a tall skirt to act as a shield around the print. Another option to avoid cracks is to design the part itself so it doesn’t have any long, tall, horizontal surfaces in order to reduce the stress from contraction.
The contraction of the plastic as it cools can cause a part to crack horizontally between the layers.
Discoloration of Filament Due to Heat
If you’re using a light-colored filament (especially white), you may notice the part becomes discolored. This is caused by heat, either from the heated bed or the hot end.
If it’s just on the bottom of the part, it’s the heated bed; if it’s everywhere, it’s the hot end. In both cases, it could signal the temperature is dramatically too high, meaning you should turn down the temperature. Sometimes with the hot end, however, your extrusion speed may be too slow and the filament could be sitting in the hot end too long. If that’s the case, try speeding up your prints.
Adhesion Problems
You’ve learned in previous chapters how important it is for the filament to stick well to the bed. Those times when it doesn’t can be a big headache for you. For most people, adhesion problems are the biggest source of frustration in 3D printing. This is because there are so many potential causes and so many potential solutions. Here, you learn what the results of poor adhesion are and what to do about them.
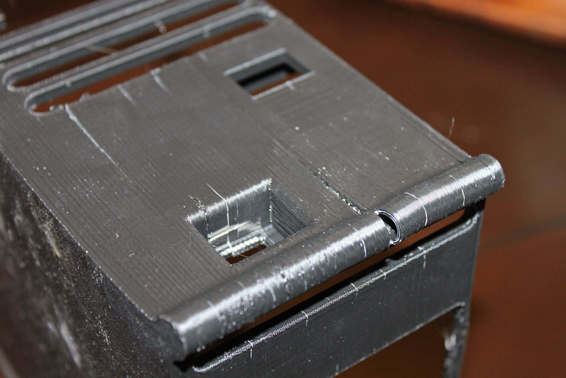
Warping
The same contraction that causes cracking also causes the part to warp. This is usually made evident when the bottom of the part curves (especially at the edges). This can be solved the same way as cracking—enclosures and designs that limit long, horizontal surfaces—but you can also dramatically reduce it by increasing bed adhesion.
The contraction on this ABS part caused extreme warping.
To increase adhesion between the first layer of filament and the bed, take a look at the surface treatment options mentioned in Chapter 8. Heated beds help a lot, as well as tapes, films, glue, and even hairspray.
Part Comes Loose
If your surface adhesion is really poor, the entire part might come off the bed during the print. Usually, this happens when your Z height is too high, or when you don’t have any surface treatments at all. If you’re using the propersurface treatments, try lowering your Z height a little bit to fix this issue.
![]()
FASCINATING FACT
Auto-leveling systems do a very good job of alleviating problems caused by improperly adjusted Z heights, because they allow you to set exactly how high it should be in the software. Even if your 3D printer didn’t come with auto-leveling, it’s possible that it could be available as an upgrade. If you’re having frequent problems with setting the Z height on your printer, it might be worth checking to see if that’s an option available to you.
Part Breaks During Removal
Sometimes your part might actually stick too well. This can cause the part to break during removal or even to break glass beds in extreme cases.
This particular problem is often caused by overuse of ABS juice/glue—a case of going a little overboard with a surface treatment. You should only use a thin layer of ABS juice to avoid this. However, good adhesion isn’t a bad thing, so another option is to try using a flat tool to pry the part off without breaking it.
Other Printer Problems
Some problems just don’t fit neatly into a predefined category. These are the issues that tend to come out of left field and often throw you for a loop. Most of these won’t result in a complete failure of the print, but they’re still irritating and affect the quality of the part.
Blobs
If you notice little blobs of plastic on the surface of the part, it’s usually caused by either lack of retraction, overextrusion, or a hot end that’s set too high.
I’ve already covered solutions for the latter two causes, and the first one is easy enough to fix in your settings. Simply turn on retraction in your slicer settings (1mm to 2mm usually does the trick).
Stringing
Stringing looks like you’d expect: thin strands of filament between features on the part. The causes for this are lack of retraction or the hot end’s temperature being set too high. This can be solved by turning on retraction or lowering the temperature of the hot end.
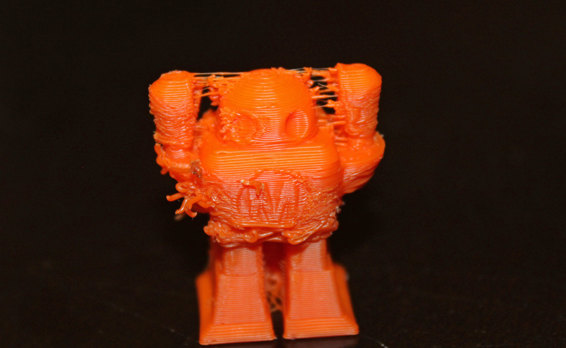
Turning on retraction will usually fix stringing problems like what’s shown on this robot.
Drooping
Bridges are features where a new layer is placed over empty space. For these features, the printer has to extrude filament across the chasm from one solid to another. Ideally, these should turn out nice and flat. But if you notice they’re drooping, it’s usually caused by a lack of cooling. You might also see this same problem happen on other overhanging features.
Using a print fan will do a lot to reduce drooping on bridges and overhangs similar to this.
To fix this, you need to make sure your print fan is turned on. If you don’t have a print fan, you’ll have to add one. If the fan is on but the problem still occurs, you should make sure it’s turned all the way up. If it’s still occurring even after that, you should look into printable fan shrouds for your 3D printer, which more effectively direct the air from the fan to the part.
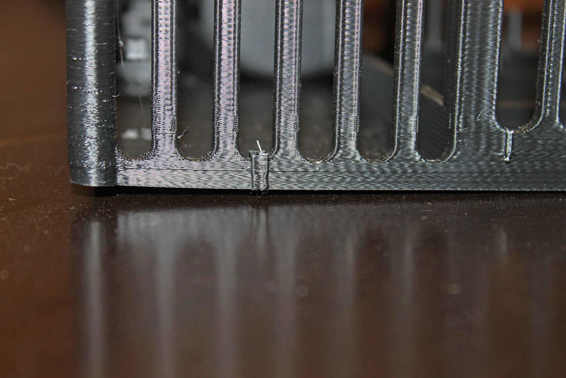
Ghosting
Ghosting is when faint lines appear on the surface offset around features, something usually only visible on fairly flat surfaces that are next to perpendicular features. It’s caused by vibrations from the weight of the extruder carriage as it’s moving back and forth.
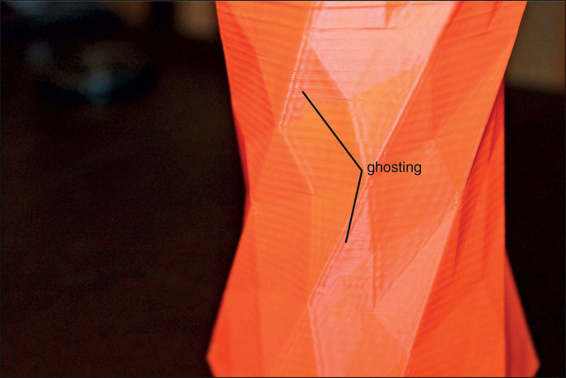
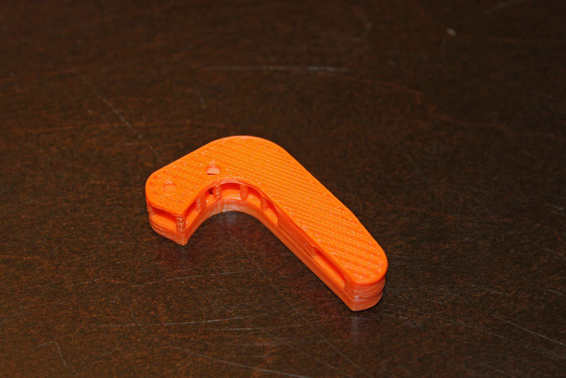
Ghosting like you see on this pencil holder can usually only be fixed by reducing print speed and/or acceleration.
The only way to fix this without modifying your printer’s hardware is to slow down the print speed or to experiment with the acceleration settings. The acceleration settings might be hidden in an advanced area of your slicer’s settings, but they determine how fast the printer can speed up and slow down as it moves an axis. Lowering the acceleration will allow the printer to still move quickly on long stretches but will make the changes in direction lessabrupt.
The Least You Need to Know
· Incorrect settings can easily introduce many different kinds of print quality problems.
· Most print quality problems can be fixed by tweaking the print settings.
· In extreme cases, bad print settings can result in a complete failure of the print.
All materials on the site are licensed Creative Commons Attribution-Sharealike 3.0 Unported CC BY-SA 3.0 & GNU Free Documentation License (GFDL)
If you are the copyright holder of any material contained on our site and intend to remove it, please contact our site administrator for approval.
© 2016-2026 All site design rights belong to S.Y.A.