The DSLR Filmmaker’s Handbook: Real-World Production Techniques, Second Edition (2015)
Chapter 13. Compressing Your Film
At this point, you have spent days, weeks, or even months carefully planning and executing your shots. You have spent countless hours editing and making sure your scenes work just right, not to mention the hours perfecting the color grading and the look of your film. Now what? Just send it out so everyone can see your masterpiece? If you do an uncompressed output from your nonlinear editor (NLE), then the file will be far too large to stream or share with just about everyone. So, the real question is, how do you compress your film so that it looks as close to the uncompressed version you edited and can be viewed in the best compressed quality possible no matter where you show it?
Understanding Compression
In simple terms, video compression is taking the full-resolution video and squeezing it down to a smaller file size. During compression, each frame is compared to the frames right before and after it to determine whether any information in common can be discarded.
Most video compression is lossy compression, which means it might reduce quality in the video in order to achieve a smaller file size. This contrasts with lossless compression, which saves less on file size because it does not give up any quality.
When doing any video compression, you are balancing image compression and motion compensation.
1. Spatial Compression This means that in any given frame you can discard data without too dramatically affecting the visual perception of the image. If you remember from Chapter 12, “Color Correction and Grading,” the human eye can easily distinguish a change in brightness but cannot easily detect subtle changes in color. So, image compression is more or less the dropping of data throughout the frame to lower the size of the overall file.
2. Temporal Compression This refers to any change of motion between frames. In many shots, there is little to no movement within the frame, and data can be compressed more aggressively to take advantage of the lack of motion change. During this process, consecutive frames where there is a lot of motion get rewritten, whereas areas that have little to no motion more or less get referenced to the previous frame. This shortcut allows a ton of data to be referenced as opposed to individually being stored in your final compressed video. This means a much smaller file size. If you have a shot that has more motion—a car chase, someone running, and so on—then you need to adjust your compression settings accordingly.
For almost all compression, you will be using spatial compression and not temporal compression. Temporal compression works best if there is very little change from frame to frame. For instance, if you have a person standing in front of a building and the only thing that moves is the actor, then temporal compression could work great. This would allow you to have a much higher bit rate and still maintain a small file size. The reason you will be using spatial compression most of the time is that almost no projects are made mostly of images with very little change from frame to frame. Even if that is true for one scene, it is not likely to be the case for the whole project.
When using spatial compression, you need to see how much you can lower the bit rate or frame size until you feel you are losing the quality you want to maintain. Remember, any compression means you are losing data and therefore lowering the overall quality of your footage. How much you can get away with depends on what type of footage you have, where the end project is being shown, and your personal taste and tolerance for image loss.
Two-Pass or Multipass Compression/Encoding
Compression or encoding takes a long time. The longer your edited piece or the larger the files, the longer this process takes. Most people are in a hurry and select a single-pass encode to quickly compress their video.
Unless the file you are compressing is just a sample or proof, always select a multipass encode when compressing a final output. The first pass through basically analyzes the video and makes a game plan for how to compress. This allows for a more strategic compression process that best uses each frame and maximizes your end result.
As you move down the rabbit hole of video compression, keep asking yourself this simple question: “How much information can I throw away without affecting the visual perception of the footage?” You are simply trying to find the right mix of factors based on the type of footage you have to work with.
With all of the previous stated, you won’t see these terms in any software that you will be using to compress your video. The “big three” you will find and need to know are bit rate (data rate), frame rate, and frame size. You will mix and match these three settings to find the best compression settings for your final output.
1. Bit Rate or Data Rate This is simply the number of bits that are processed per unit of time. When talking about video, bit rate is the number of bits used per second of playback time. When you set your encoding rate for your compression, you are taking the size of your video file in bytes divided by the total time of the clip (calculated in seconds). Basically, this comes down to the higher the bit rate (data rate), the more information per second you are adding to the compressed file. This makes for a much higher-quality video image but also raises the total size of the compressed video, which may be too large depending on your final output.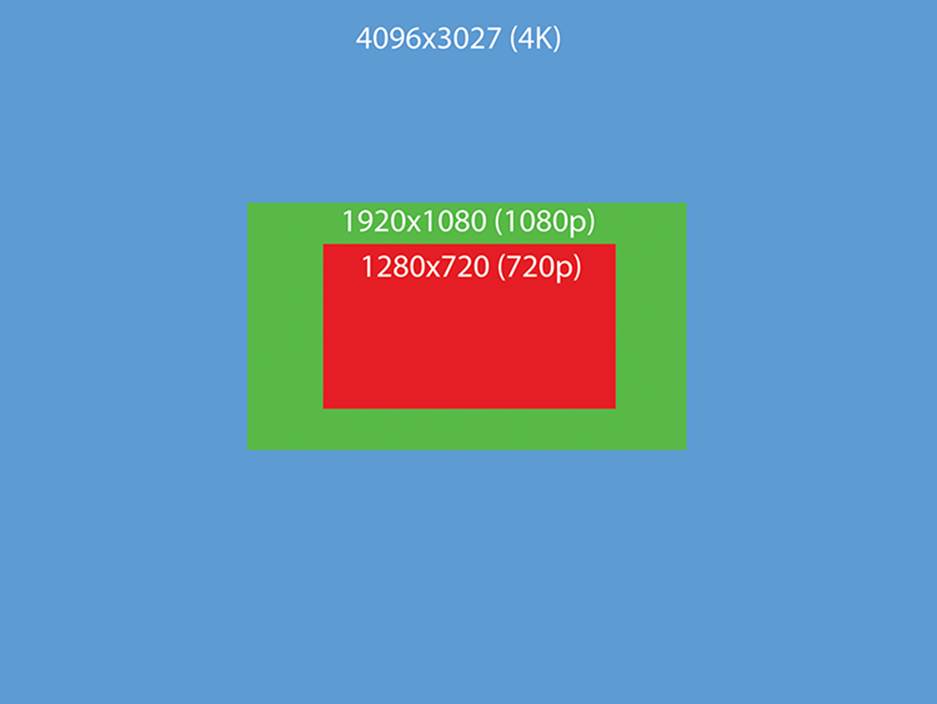
Figure 13-1: Frame size differences among 4K, 1080, and 720 video
2. Frame Rate This is the number of frames per second in your clip. This setting is determined when you select the number of frames per second the original footage is captured with. There are some limited uses for which you may want to change your frame rate from your original capture source, but for most people it will be 24, 25, or 30 fps.
3. Frame Size This is the actual size of the video clip (Figure 13-1). On your DSLR, it will be either 1920×1280 or 720×480 (and in many cases now 4096×3072, aka 4K video). The larger the frame size, the larger the final compressed video will be. When you are ready to output your final compressed video, check out what the largest frame size that can be handled is and set your compression settings to that. If you make it any larger, you are wasting data that you could use in upping your bit/data rate.
You most likely won’t be changing your frame rate after you have completed shooting, except in cases where you are mixing footage from cameras that don’t have matching frame rates. With that said, you most likely will not change the frame rates to save on the size of the final output of the video files. So, for the discussion of compression, leave that off your checklist to deal with here.
Bit rate or data rate is definitely something you will be adjusting to get the optimum output quality for your finished project. As we already stated, in general, the higher the bit rate/data rate, the higher the resolution of the final video and therefore the larger the final video size.
Frame size is another way you can cut down on file size for your final output. Just because your camera shoots in 1920×1280 doesn’t mean your final project should be 1920×1280. A standard DVD is only 720×480, and for most applications this is more than high enough resolution.
There is no one size fits all for all applications, so this process is like a giant trial-and-error exercise. With that said, Table 13-1 shows some good guidelines you can use as a starting point.
Table 13-1: Recommended settings for various outputs
|
Destination |
Frame size |
Bit rate |
|
YouTube |
Will automatically convert for you |
~4500 |
|
Vimeo |
Will automatically convert for you |
~4500 |
|
|
Will automatically convert for you |
~4500 |
|
Personal website |
1920×1080 |
6500 |
|
DVD |
720×480 |
4500 |
|
Blu-ray |
1920×1080 |
6500 |
YouTube, Vimeo, Facebook, and other video-sharing sites are set up to take whatever files you upload and convert them for you. In these cases, you are not in control of the final compression as you would be if you uploaded your file to your own personal website. In these cases, it is best to upload as high-quality a file as you can, staying within the file size limits of the website, and let the site do the conversion. This way, you don’t compress your video and then let, say, YouTube recompress your compressed file.
Later in this chapter, we will walk you through setting up your export settings and outputting a final video, so don’t worry if your head already hurts. Compression is a very complex and almost never-ending maze of new codecs and video specs. We are trying to set you up with a good foundation and some step-by-step processes for common output formats.
There are several in-depth books you can read if you want to dive deeper into understanding what is happening during video compression. We recommend Andy Beach’s Real World Video Compression (Peachpit, 2008) as a great resource.
Outputting Your Video
If you have never been through this process, you might think that you can just export your video and you are finished. However, in today’s world, there are many platforms where you can show or distribute your film. Your options include YouTube, Google, Apple TV, DVD, Blu-ray, full 1920×1280 HD, and now 4K video. To get the best quality from all the possible platforms, you can’t create a one-size-fits-all output. You will have to decide whether you are just going to be outputting for the Web, making a DVD or Blu-ray disc, outputting for broadcast television, or creating a 4K digital-ready print for digital distribution.
Creating a Self-Contained Master Digital File
Before you create all the various movie files, you should create a single master file. From this master file you’ll create all of your other movies. The reason you create a self-contained master file is to get away from exporting from your editing program. Just like when editing film, you make your edits on a work print and conform to a master print. From that print, you make all of your other optical prints and send them to theaters.
Conforming can mean one of two things in the world of video editing. The first is if you are doing an offline edit and working with low-resolution video. When you finish your edit or lock your edit, you need to go back and re-create the edit with the higher-resolution footage. This is one instance of conforming during your post-production process. The other is when you are dealing with footage that varies in frame rate, resolution, size, and so on. You cannot have various frame rates, sizes, and resolutions and export them and have it work. You must pick the final standards you want and adjust the footage to match. For instance, if you want your frame rate to be 29.97, you would conform any footage shot in 30 or 24 to conform to 29.97 before you start your edit.
In Final Cut Pro 7, to create your master video file, you should do the following:
1. In Final Cut Pro, choose File ⇒ Export ⇒ QuickTime Movie (on the Mac, you can use the keyboard shortcut Command+M).
2. Name your movie (Figure 13-2) and select your destination folder.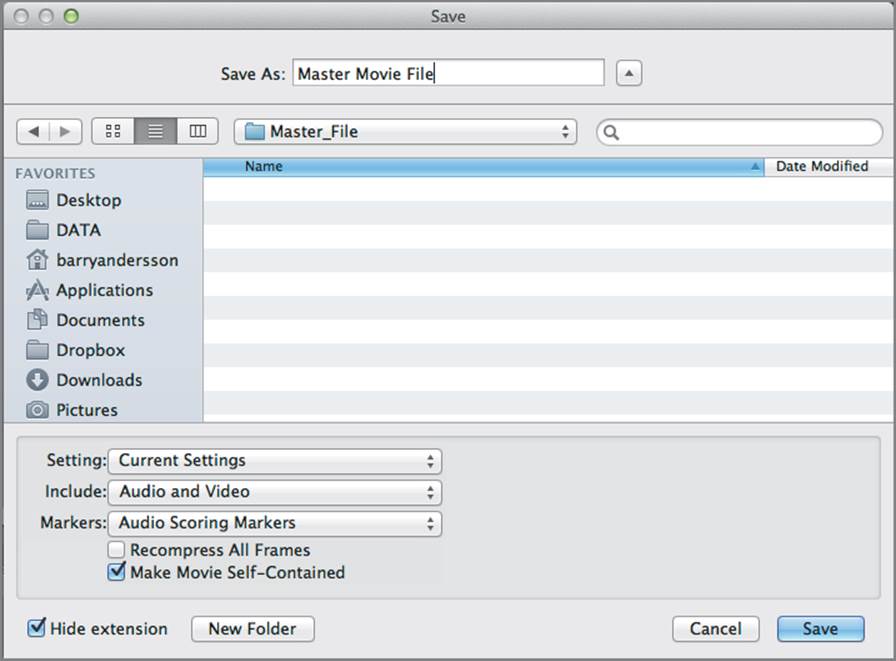
Figure 13-2: Setting up a QuickTime export
3. Set the Setting option to Current Settings, and set Include to Audio And Video.
4. Unless you set markers specifically for your master file, set Markers to None (Figure 13-3).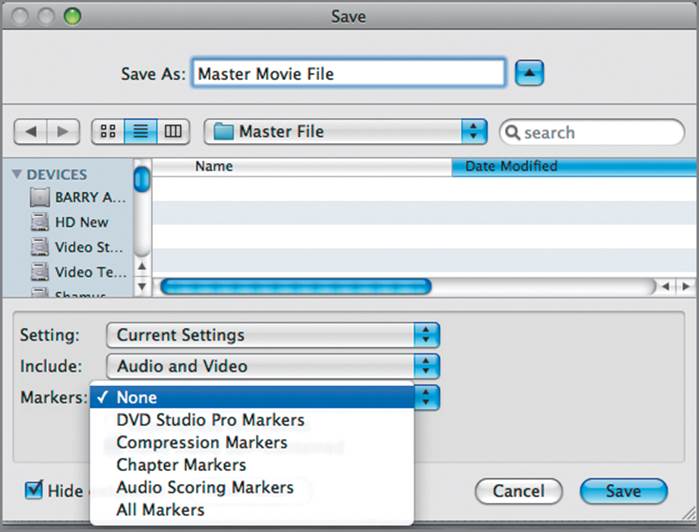
Figure 13-3: Choose None if you have no markers set.
5. Make sure to click Make Movie Self-Contained. If you don’t click this, it will create a reference movie that will look for original clips on your desktop and won’t work to upload and share on the Web.
6. Click Save to create the movie.
Be aware that your current settings are the settings from the timeline in your project file. If you are editing your movie with lower-resolution files and not at the highest-quality settings, then you need to set up a new project with the highest resolution possible and reconform the project. If you don’t, you are making your master file at less than the highest possible resolution. If you are using the native H.264 movie files in Premiere Pro CS5, then you have the highest resolution possible; if you are working in Final Cut Pro, we recommend Apple ProRes 4444 or the CineForm codec. Either will give you the maximum resolution for your converted files.
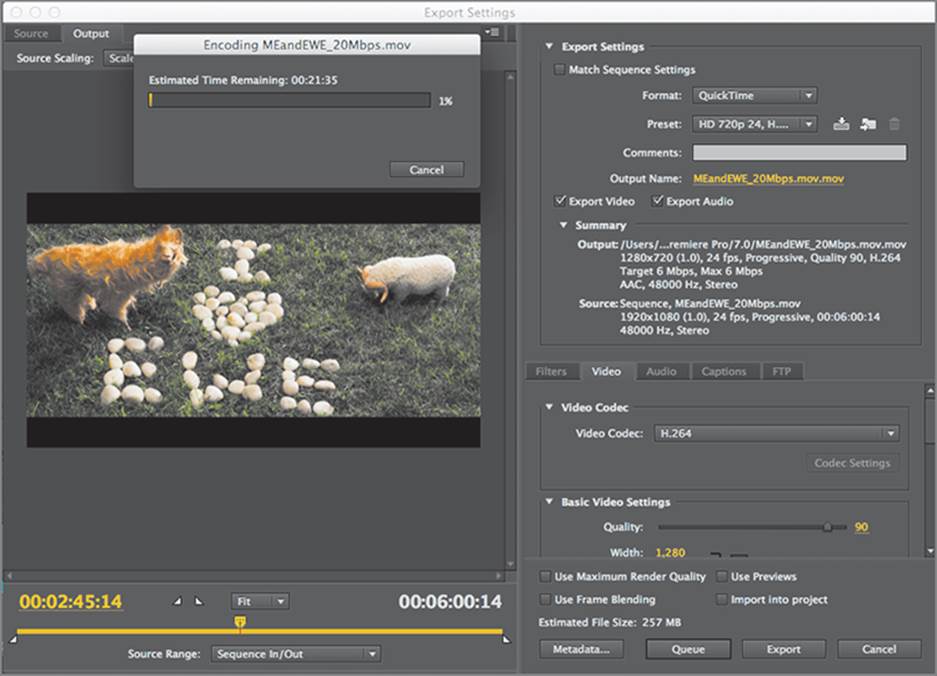
In Premiere Pro CC, you should follow these instructions to create a high-resolution master file:
1. In Premiere Pro CC, choose File ⇒ Export ⇒ Media (on the Mac, you can use the keyboard shortcut Command+M).
2. Name your movie (Figure 13-4) and select your destination folder. Click Save.
3. In the upper-left corner of the Export Settings dialog, check the Match Sequence Settings box (Figure 13-5).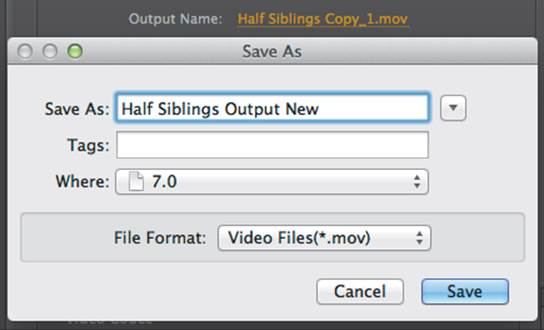
Figure 13-4: Changing the name of your final output file
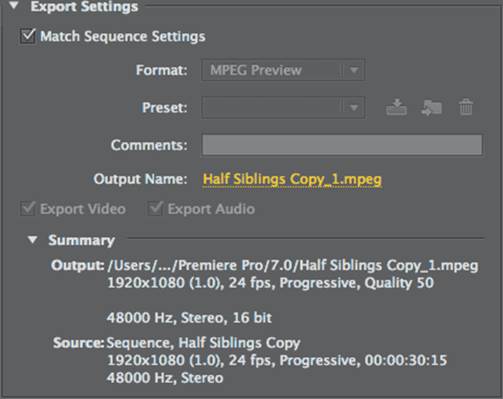
Figure 13-5: Make sure you have Match Sequence Settings checked.
4. Click the Export button and save your movie.
After you create your master file, you will have one master digital file at the highest resolution that can be repurposed for all your other formats you will need. In the future, when another new media platform comes along, you can quickly and easily create any new format you may need directly from this master file without returning to your edit project file.
Creating a DVD or Blu-ray Disc
You can’t get by without making a DVD of your movie. Almost everyone has a DVD player, computer, or gaming console that will play a DVD. It makes your film a little more real to people to have a physical copy of your hard work. The major drawback, however, is that DVDs are standard definition and, as such, don’t take advantage of the full quality that your DSLR camera captured.
Blu-ray is not as widely available, and there are far fewer machines that can play a Blu-ray disc. On the flip side, Blu-ray is 1920×1280—the same resolution as your DSLR camera. If you want to show the very best version of your film and need a physical copy to present, make a Blu-ray version.
Unless you have a major distribution deal and will be making thousands of discs, you will be making the DVD and/or Blu-ray discs yourself. This is a two-step process.
In step 1 you compress or convert your movie into a DVD-compatible format. A standard DVD’s video file format is MPEG-2, which is a super-compressed, standard-definition video format. If you want to create a standard DVD, you must author in MPEG-2.
There is limited space on a standard DVD. If you are including special features, extras, or any high-quality graphics and animations for your menus, you may want to pay attention to how big your files will be. A neat trick is to author your audio in AC-3, also known as Dolby Digital files. Besides supporting surround sound, AC-3 files are much smaller than AIFF or WAV files that many people use when mastering a DVD.
When mastering a Blu-ray disc, you will use the H.264 format. Don’t let the H.264 format confuse you, because it is slightly different from the H.264 compression that is used in DSLR cameras. However, you can see how closely the resolution and format match your raw files, and you will be able to show your work in true HD and at the full quality at which you shot your footage in the first place.
In step 2 you actually author the disc. This process involves creating the menus and any interactive features you will be including on the disc. This is what allows users to navigate and play your DVD or Blu-ray disc.
Compressing Your Footage
There are many different software tools to convert your footage into the appropriate file format. As we discussed earlier, when converting your raw footage, you could use a program such as MPEG Streamclip. You can set up and automate the process and let it run in the background.
Other programs to consider are Apple’s Compressor, Adobe Media Encoder, QuickTime Pro, and your editing software (if you didn’t create a master). If you are working on a Mac, all of these programs are an option; if you are working in Windows, then all of them are available to you except for Apple Compressor. Use what you are comfortable using or have available and start compressing your files.
Authoring Your DVD/Blu-ray Disc
Now that you have your files converted and encoded, you are ready to actually author your disc. The process of authoring again starts with designing your menus, interactive features, and special features. When someone inserts a DVD, after the previews, they normally come to a menu where they can play the movie, select language preferences, or watch special features. These are all created in the authoring process.
The great news is that many software programs don’t involve much, if any, actual coding. They are designed for users to be able to choose from templates or create limited custom designs.
1. DVD Studio Pro (Mac) This is Apple’s professional DVD-authoring software. You can choose from a myriad of templates or custom create your own interface.
2. Adobe Encore (Mac and PC) This is Adobe’s professional DVD and Blu-ray authoring tool. With Adobe Encore CS6, there are a ton of new features from 24p to AVCHD to Blu-ray output, so this is a great option for your DVD authoring needs. Just note that Adobe did not update Encore for the Creative Cloud because Adobe is focusing on streaming video and moving away from physical disc production in its software.
3. Roxio Toast 12 Titanium (Mac) Mac users might better know Roxio Toast as CD- and DVD-burning software. The latest Pro version allows you to master Blu-ray and HD discs.
4. Roxio Creator NXT 2 (PC) This is Roxio’s option for Windows users. Creator 2011 allows you to author your DVD, Blu-ray, and even 3D discs.
If you want to be far more original and complex in your designs, you will have some more complex steps and may be dealing with other software.
In addition to DVD/Blu-ray versions of your film, you will need to create several different versions for the Web; these could include online dailies, low-resolution rough cuts, teaser videos, and even full HD versions.
Publishing to the Web
Think of the DSLR revolution as the Wild West, where the rules are always changing and where it seems every day new technologies change what and how things work together. The Web, on the other hand, is the ultimate permanent Wild West. There are so many competing video formats and video players that there is no one right way to output for the Web. Your choice is totally dependent on where you will be publishing your work and what video formats those locations support or require.
1. Adobe Flash Flash Video is the dominant video format on the Web. You come across it in almost every major website from YouTube to Facebook. Additionally, video-sharing sites from Vimeo to SmugMug use Flash.
2. Apple QuickTime QuickTime video is also very broadly used on the Web. QuickTime, however, is not totally accurate as a video codec because it actually supports many codecs ranging from .mov to .mp4 files (think iTunes).
3. Windows Media Video Windows Media Video (WMV files) has the advantage of being able to be played on all Windows computers. Any PC with Windows comes preloaded with Windows Media Player and doesn’t require any additional players.
4. H.264 This is becoming the standard because it creates a high-quality image in a small video file size. H.264 files are used in DSLR cameras, in Blu-ray machines, and now with a variety of other video players (such as the new HTML5 video players). The best argument for H.264 files is they can be full HD, are small, and can be streamed on the Web.
YouTube
Currently YouTube accepts high-definition video formats, up to 2 GB in size and less than 15 minutes. There is a new feature called Advanced Video Upload that allows the user to upload clips up to 128 GB. Note that YouTube also has begun accepting 4K videos, so the outlets for high-resolution videos are on the rise (note that the 2 GB file size still applies to 4K videos.) Raw 4K video is approximately 2 GB per minute of footage.
To upload with this option, users need to have Java version 1.5 or newer. Because YouTube accepts a wide variety of formats, you can go ahead and upload your final output.
As with most online services, YouTube will compress your video file with its own proprietary compression settings before it can be viewed online. If you are unhappy with the results, try creating a new movie with a different codec and re-upload it. This sort of testing will allow you to get the settings you are happy with for people to view your video clips.
1. You need to start by creating, or signing into, your Google account in order to upload videos to YouTube (Figure 13-6). Then click the Upload button at the top of the page.![]()
Figure 13-6: Sign in and then click Upload.
2. Click the Upload Video button in the center of the page (Figure 13-7).
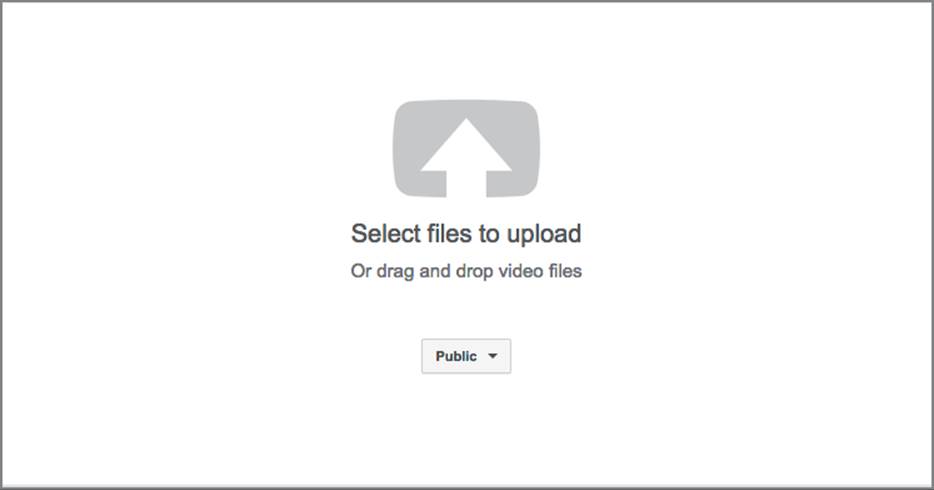
Figure 13-7: Click the Upload Video button.
3. Navigate to the file you want to upload. Click Open, and the file will automatically start to upload (Figure 13-8).
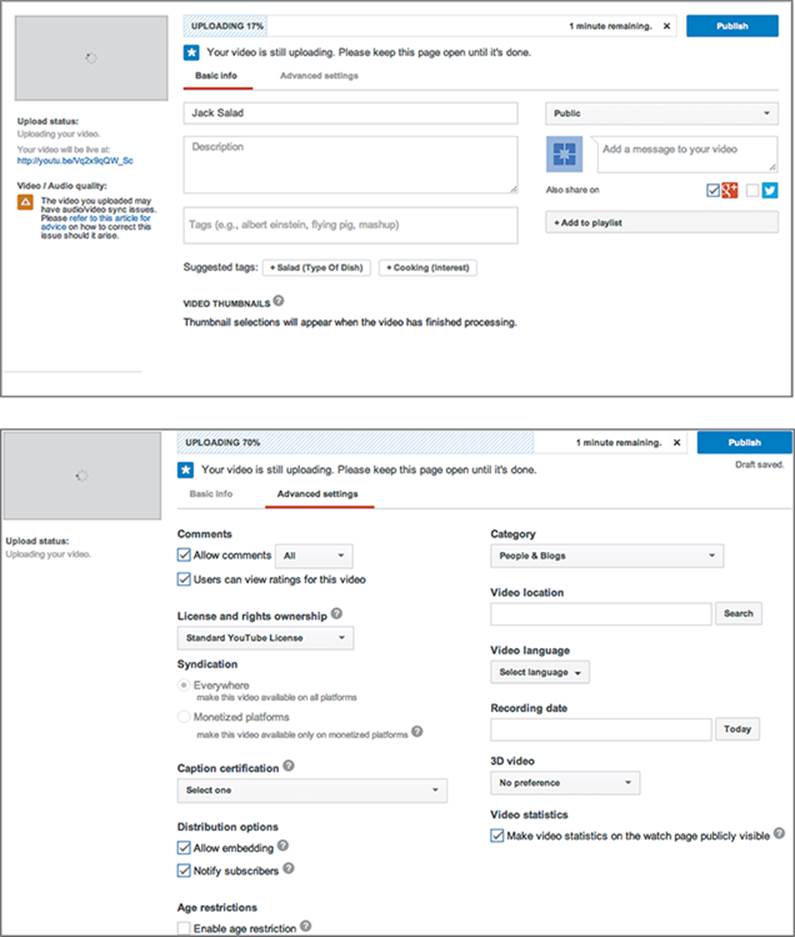
Figure 13-8: You can add details and options about your video as it uploads.
Increase Your Limit for Videos Longer Than 15 Minutes
You now have the ability to increase the limit of the length of your videos to more than 15 minutes. On the Video Upload page you will see an Increase Your Limit link (Figure 13-9). When you click this link, you will have to verify your account via your mobile number and enter a code (Figure 13-10).
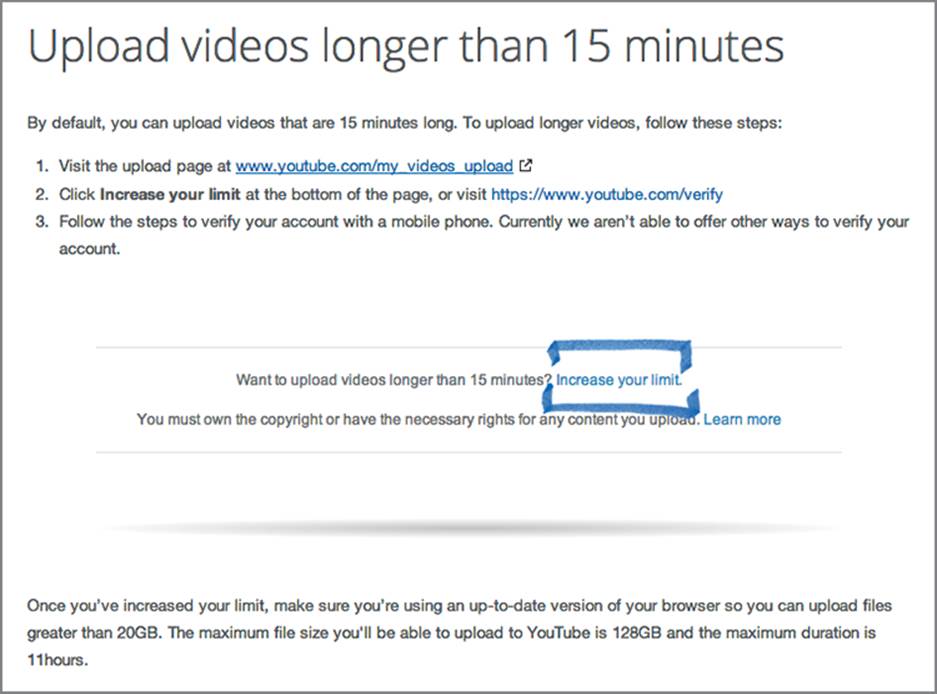
Figure 13-9: You can actually upload more than the 15-minute limit.

Figure 13-10: Verify your account via your mobile number and enter a code.
So, if you want to upload a video that is more than 15 minutes in length, either you can break it up into parts that are less than 15 minutes in total length or you can use the Advanced Video Upload feature and verify your account.
You are not going to create and upload your entire movie to Facebook, but you are going to upload video clips for sure. As your production moves along, you can upload some sample shots to tease fans about the film as it is in production. You can do the same through the post-production process, by uploading short snippets of edited scenes. Regardless of what you are uploading, you need to follow some rules.
Facebook supports all major video formats but converts any video you upload to Adobe Flash. Because the video you are uploading is not the one that will actually be seen, you need to upload the highest-quality video to start with. Facebook does another conversion that will lower the quality of the video.
1. From your Facebook home page, at the top, click Add Photos/Video (Figure 13-11). This will allow you to either record a video from your webcam or upload a video you have created.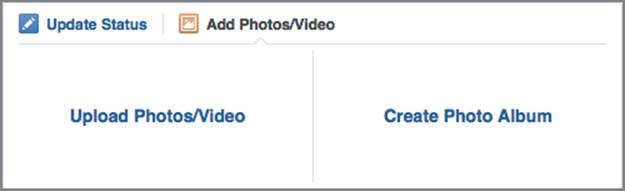
Figure 13-11: When you click Add Photos/Video you can choose Upload Photos/Video, Use Webcam, or Create Photo Album.
2. When you click Upload Photos/Video, you can browse to the file on your hard drive and select your compressed video you want to share with your friends and family. The video file needs to be smaller than 1,024 MB and less than 20 minutes in total length.
3. If you want, you can add a note or title of the video and hit Share. It will take a few minutes to upload, and you are finished.
Websites such as Facebook, Vimeo, and other video-sharing sites convert your video after you upload. For these sites, we recommend you upload a higher-resolution H.264 file so you get the best possible video quality after they convert your file.
Vimeo, SmugMug, and Other Video-Sharing Sites
Several video-sharing websites, such as Vimeo and SmugMug (Figure 13-12), are geared to more professional users. Whereas YouTube and Facebook videos are mostly made up of cell phone or home camcorder videos, these sites cater to people using higher-quality cameras and high-definition footage. Again, most of these sites will do some sort of compression on their end, but the results are often some of the best on the Web.
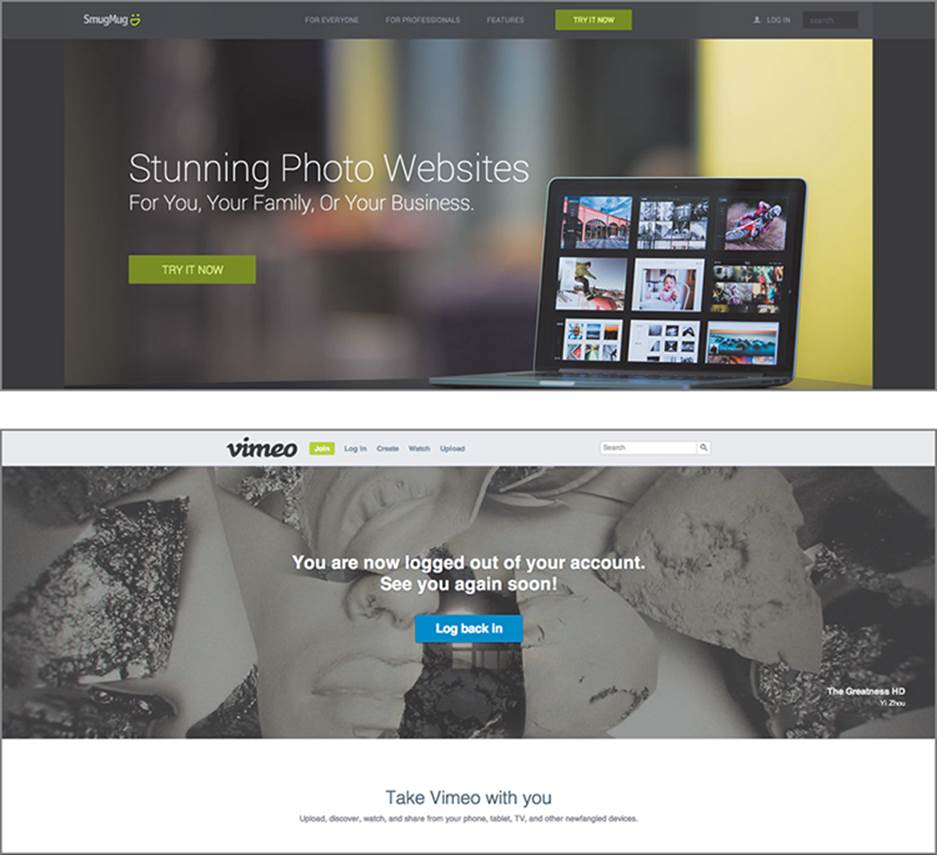
Figure 13-12: You can also distribute your video through Vimeo or SmugMug.
All materials on the site are licensed Creative Commons Attribution-Sharealike 3.0 Unported CC BY-SA 3.0 & GNU Free Documentation License (GFDL)
If you are the copyright holder of any material contained on our site and intend to remove it, please contact our site administrator for approval.
© 2016-2026 All site design rights belong to S.Y.A.