Canon EOS 70D: The Guide to Understanding and Using Your Camera (2014)
Chapter 11. The Shoot4 Menu
Shoot4

Figure 11-1. The Shoot4 tab
Picture Style
With Picture Style, you can apply certain picture-enhancing actions in the areas of Sharpness, Contrast, Saturation, and Color Tone. This is a feature for those who shoot in JPEG, though most JPEG shooters who use their computer for post-processing will have little or no use for it.
Canon has seven predefined sets of these styles, including a Monochrome set, and space to store three user-defined sets. In determining which set to use, consider these characteristics:

Figure 11-2. Selecting the Picture Style option
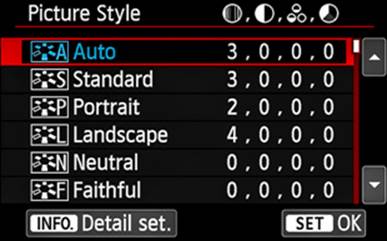
Figure 11-3. The first page of available styles
Auto: The camera determines color tone based on the scene. Colors will be vivid.
Standard: Image will look vivid, sharp, and crisp.
Portrait: Produces good skin tones and softens the picture.
Landscape: Very sharp and crisp images; produces vivid blues and greens.
Neutral: Minimal enhancement, yielding natural colors.
Faithful: Intended for images that will be post-processed in a computer.
Monochrome: This feature produces black-and-white images, and allows for applying filter effects and toning effects.
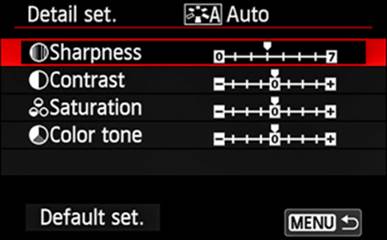
Figure 11-4. An example of a Picture Style’s Detail Settings
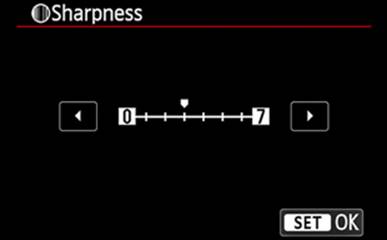
Figure 11-5. Setting a Sharpness value
In the Shoot4 menu, touch the Picture Style option, or select the Picture Style option and press SET. Use the touch feature, Quick Control Dial, or the Multi-controller to select the desired style. Note the red bar down the right side of the panel in Figure 11-3; this is an indication that there are more styles than can be displayed on one screen. Touch the up/down arrows to the right of the red bar or simply continue to rotate the Quick Control Dial or press the Multi-controller to access those styles. Once you have selected the desired style, you can modify the parameters for that set by pressing the INFO button, which will open a panel similar to the panel in Figure 11-4. (Be careful: touching the selected option does not open the configuration panel, but does establish that option as the current picture style before returning you to the parent menu.) Having opened the Detail Set screen for the selected picture style, you can use the touch feature, the Quick Control Dial, or the Multi-controller to select the parameter you want to modify, and then (unless you used the touch feature) press SET. Again, use the touch feature, the Quick Control Dial, or the Multi-controller to alter the parameter’s values, then touch the SET icon or press the SET button. Touch the MENU icon or press the MENU button to return to the Picture Style menu.
This Picture Style option also allows you to create and save as many as three User Defined styles. You are allowed to select one of the predefined styles as a base, and then use the normal process for modifying that style to conform it to your needs. With seven predefined Picture Styles, you may wonder about the need for user-defined styles, but consider the possible combinations available. There are nine potential settings for each of these styles, except for Sharpness, which provides only eight. That provides over 1500 possible combinations. If there are up to three Picture Style combinations that you frequently use, create a unique User Defined Picture Style for each.
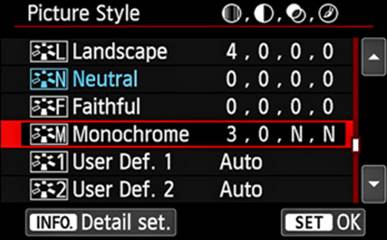
Figure 11-6. Selecting the Monochrome Picture Style option
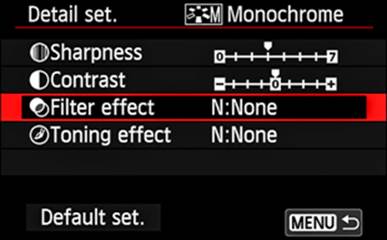
Figure 11-7. Selecting Filter Effect on the Monochrome Detail Set screen
The exception to this list of styles is the Monochrome entry: in place of the normal Saturation and Color Tone parameters, the Monochrome entry introduces the Filter Effect and Toning Effect parameters, as shown in Figure 11-7. The Filter Effect parameter places a color filter in front of the lens; remember, this is in monochrome mode, so the color of the filter is not applied on top of the image—that’s done with the Toning Effect option. Instead, the filter simply alters the spectrum of color that the monochrome conversion works with. You can choose from Yellow, Orange, Red, and Green. The Toning Effect parameter applies a mild color tone to the captured image. The available colors are Sepia, Blue, Green, and Purple.
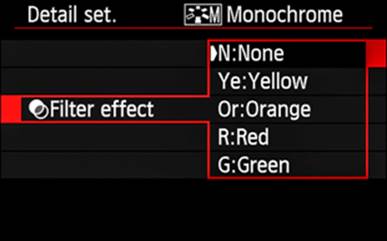
Figure 11-8. The list of Filter Effect options
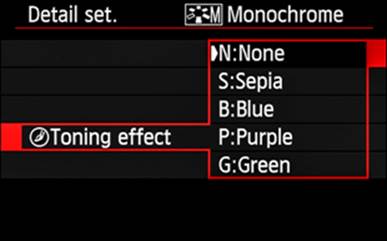
Figure 11-9. The list of Toning Effect options
Long Exp. Noise Reduction
Digital cameras are subject to a phenomenon known as noise. This is a result of having some photocells in the image sensor always producing a low-grade pixel-image. The result is cumulative; the longer the exposure, the more likely it is that you will see this noise. The Long Exp. Noise Reduction feature attempts to compensate for the noise by creating two exposures. The first exposure is your composed photograph that had a shutter speed of one second or longer. The second exposure is created with the shutter closed, but with the same shutter speed. Whatever image is created in this second exposure is subtracted from the image created by the first exposure, effectively erasing the noise. The problem with using this feature is the extended time for which the camera will be unavailable to you. The second exposure is the same duration as the first exposure, so if your first exposure is 24 seconds, then the second exposure will also be 24 seconds, and the camera will not be available to capture another image until that second exposure is complete.
The EOS 70D offers an option in the Shoot4 menu to help with this noise problem when exposures are one full second or longer.
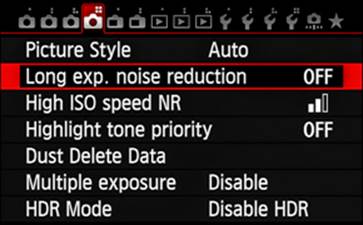
Figure 11-10. Selecting the Long Exp. Noise Reduction option
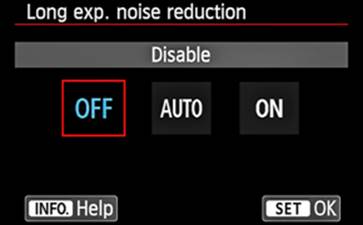
Figure 11-11. Choosing a Long Exp. Noise Reduction value
In the Shoot4 menu, select the Long Exp. Noise Reduction option, and then press SET. As shown in Figure 11-11, there are three parameters to choose from. If you never take long exposures, leave this panel set to OFF. Conversely, if you frequently take long exposures, the ON parameter is probably correct for you. And, if you occasionally take long exposures, especially with high ISO, you’ll probably want to use the AUTO setting and let the camera determine whether the probability of noise justifies implementing this noise reduction feature.
High ISO Speed NR
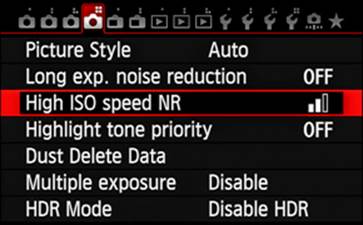
Figure 11-12. Selecting the High ISO Speed NR option
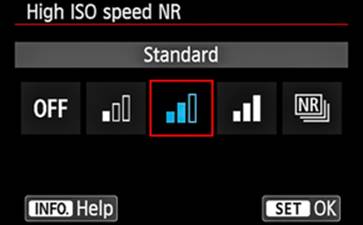
Figure 11-13. Choosing a High ISO Speed NR setting
When a high ISO speed is set, the amplifiers for the image sensor’s photocells are turned way up, further aggravating noise-generation. The image-subtraction method used for long-exposure noise reduction does not work very well for high ISO-caused noise, but this option on the Shoot4 menu will significantly reduce such noise.
On the Shoot4 menu, touch the High ISO Speed NR option, or select the High ISO Speed NR option and then press SET. In addition to the OFF setting and the Multi Shot Noise Reduction setting, Figure 11-13 shows three incremental parameters to choose from. This choice can be a bit subjective, so I recommend that you experiment a bit with these values before committing yourself to using them on a critical shoot.
Highlight Tone Priority
The purpose of this feature is to expand the dynamic range of a captured image, with particular focus on those sections of the photograph that range from 18% gray to blown-out bright. The objective is to retain detail that is lost in overly bright areas.
In the Shoot4 menu, touch the Highlight Tone Priority option, or select the Highlight Tone Priority option and then press SET. Figure 11-15 shows the two available choices, plus access to option-specific help via the INFO button. After selecting your choice, touch the SET icon or press the SET button, which will register your selection and return you to the Shoot4 menu.
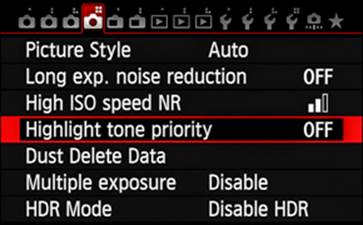
Figure 11-14. Selecting the Highlight Tone Priority option
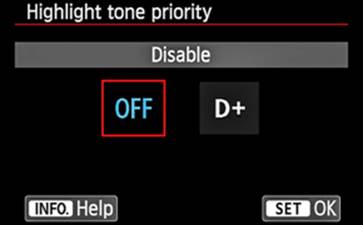
Figure 11-15. Choosing a Highlight Tone Priority setting
Dust Delete Data
The EOS 70D’s image sensor is fitted with a self-cleaning mechanism that, by default, is run every time the power switch is used to turn the camera on or off. So long as a contaminant is perfectly dry, it will generally be shaken loose. But in areas of high humidity, some contaminants absorb moisture and adhere to the sensor. This is usually a job for Canon technicians to handle for you, but until then, you can use this feature to effectively remove dust spots from your images. The trick is to capture a reference photograph in which the only discernible images are caused by the dust on the sensor. This rather small picture file is integrated with subsequent captures, both RAW and JPEG. Canon’s Digital Photo Pro (DPP) software (part of the software that accompanies the camera) can then be used to subtract the dust-only image from the related photograph, removing all evidence of those dust spots.
In preparing to capture this dust delete data, set up your camera with a 50mm or longer lens, set the lens’s focus mode switch to MF, focus the lens at infinity, and place a sheet of clean, white paper eight to twelve inches from the front of the lens.
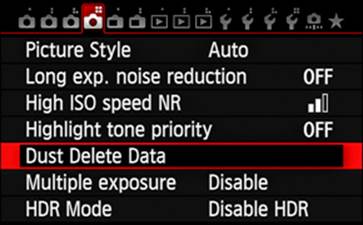
Figure 11-16. Selecting the Dust Delete Data option

Figure 11-17. Indication of successful operation
In the Shoot4 menu, select the Dust Delete Data option, and then press SET. Touch the OK icon or use the Quick Control Dial or the Multi-controller to highlight the OK option and then press SET. The camera will take two or three seconds to prepare for capturing the dust data, making a few clicks along the way. You’ll see a screen instructing you to press the Shutter button all the way down. This is when the actual image of the dust data is captured. The screen will change to inform you that the camera is busy; then it will display a screen like the one in Figure 11-17 stating “Data obtained” if successful. Otherwise, the screen will state: “Could not obtain the data. Try again.” In that case, you probably need more light (the camera stops the lens down to f/22 for this activity, so it requires more light than most users would expect).
Multiple Exposure
With the DIGIC 5+ image processor, the EOS 70D is capable of shooting multiple exposures, which are then processed into a single image. The image quality can be any of the camera-supported settings, including settings in both JPEG and RAW, though M-RAW or S-RAW images will be converted to RAW in the merged image.
On the Shoot4 menu, shown in Figure 11-18, either touch the Multiple Exposure option, or select the Multiple Exposure option and then press SET. By default, the Multiple Exposure setting, shown in Figure 11-19, is set to Disable. With this setting selected, either touch the Multiple Exposure option or press the SET button. Now, either touch the Enable setting or select Enable and press the SET button. On the Multi-Expos Ctrl screen (Figure 11-20), select the control method you wish to use.
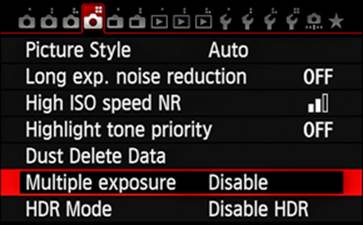
Figure 11-18. Selecting the Multiple Exposure option
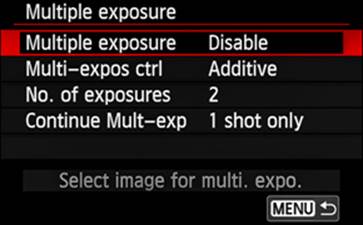
Figure 11-19. Choosing a Multiple Exposure setting
The Multi-Expos Ctrl option offers a bit of assistance in creating the final merged image. The Additive parameter assumes you have made whatever exposure adjustments you want, and will make no additional adjustments to the exposure. This step simply captures a group of images and adds them together.
The Average option employs the camera in determining what exposure compensation should be made, and the number of exposures to be made. This is certainly the less-error-prone manner, and requires less intervention on your part. However, it uses a simple algorithm for determining the exposure adjustment, and applies that one correction value to each exposure, unlike the Additive method, which allows you to apply a different correction value to any exposure involved in this Multiple Exposure effort.
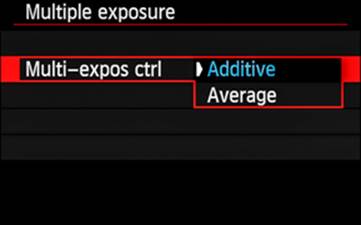
Figure 11-20. Setting the Multiple Exposure Ctrl parameter
The No. Of Exposures option, shown in Figure 11-21, allows you to specify the number of exposures that are required to create the merged image. Using the touch feature, Quick Control Dial, or the Multi-controller, any value from two through nine may be selected (Figure 11-22).
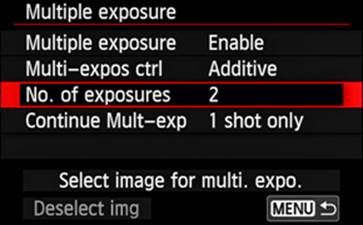
Figure 11-21. Choosing the No. Of Exposures setting
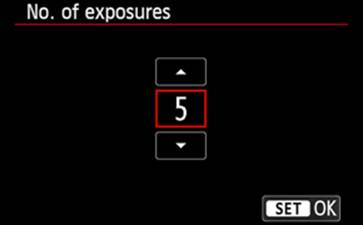
Figure 11-22. Setting the No. Of Exposures value
With its drive mode set to one of the Single Shooting settings, the camera will capture one image each time you press the Shutter button, up to the number of exposures specified. That allows you the opportunity to use the Image Review to evaluate each image before proceeding with the next exposure. (Be careful: If you have set the Continue Mult-Exp option to Continuously, there will be a brief pause while the merged image is written to the memory card. Then the camera is set to start over with the next multi-exposure sequence. If the multi-exposure icon is flashing on the LCD Panel or in the viewfinder, the camera is working on a sequence of exposures; if the icon is not blinking, it is prepared to begin a new sequence.)
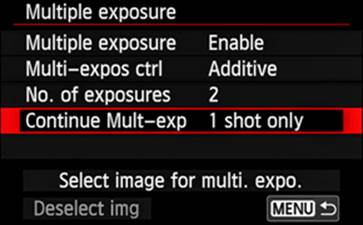
Figure 11-23. Choosing the Continue Mult-exp setting

Figure 11-24. Setting the Continue Mult-exp value
If you have the drive mode set to one of the Continuous Shooting modes, you can press the Shutter button and hold it down until all the specified exposures have been captured; the camera will automatically terminate the capture when that number of exposures has been taken, even if the Continue Mult-Exp option is set to Continuously. Be aware that because of internal image processing, the time required for each image capture is appreciably longer than normal for continuous shooting.
After the exposures have been captured, regardless of which option was chosen, you will notice the access lamp glowing red for a much longer time than normal. During this time, the camera is merging the individual exposures into the final image and writing that final image to the memory card.
Though the EOS 5D Mark III and the EOS-1D X provide a Save Source Imgs option that allows the camera to record the individual images used to create the merged file, the EOS 70D does not. This camera will save only the resulting merged file.
The Continue Mult-Exp option, selected in Figure 11-23, has nothing to do with the drive mode’s Continuous Shooting options. This option allows you to overrule the default action, which is to reset the Multiple Exposure option to Disable. Setting this option to Continuously leaves all Multiple Exposure settings in place, which is very handy if you have a number of images to capture and merge; however, it can be a significant irritant if you forget you have the camera set up to capture nine images, and are using Average for the Multi-expos Ctrl option. A merged image of nine unrelated images, each suffering from 4 1/2-stop underexposure, is not going to make your day, and none of the original images (though grossly underexposed) will be available on the memory card.
The line of text that reads “Select image for multi. expo.” looks more like an instruction, but it’s really just another selectable option, as shown in Figure 11-25. If you wish, you can use this option to locate the RAW image on your memory card that will be the first image used in creating a merged image. Proceed with capturing the remaining images; this selected image counts as the first image in the number of exposures specified in the No. Of Exposures option. In this case, the original also remains on the card.
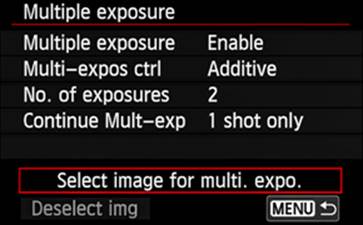
Figure 11-25. Choosing the Select Image For Multi. Expo. setting
HDR Mode
It seems that far too many photographs have either areas of shadow that are essentially black, or areas of brightness that are completely blown out. Human eyesight shares this problem with photography, but most of us will simply change the aperture of our eyes to let in more light so we can distinguish objects and details in dark shadows, or we squint to reduce the amount of light in order to see detail in very bright areas. This all happens so quickly that we’re seldom aware of it, and it is generally accepted as part of our normal visual dynamic range. HDR photography attempts to apply the same technique. If you are using post-processing software for HDR, you can capture several images to work with, possibly using all seven images allowed by the EOS 70D’s bracketing. If you are using this built-in feature, you will have input from three images, one at normal exposure, one underexposed, and one overexposed, but you get to determine the degree of over- or underexposure. In either case, the process is to find the best-exposed portions of each of the input images, and build an output image that is the aggregate of all these best bits.
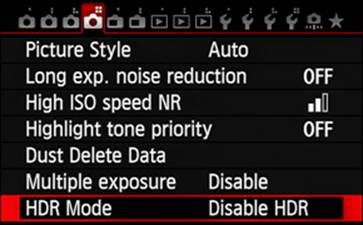
Figure 11-26. Selecting the HDR Mode option
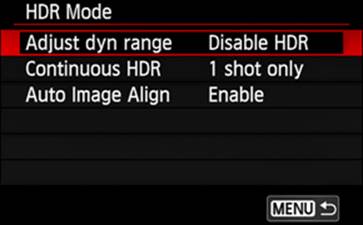
Figure 11-27. Choosing the Adjust Dyn Range setting
Though the EOS 5D Mark III is capable of capturing and saving the initial images as RAW files, then creating the final HDR file as a JPEG file, the EOS 70D requires that the initial images be shot as JPEG files. They are not saved, though the final HDR file is saved in JPEG format. If Image Quality is set to capture any form of RAW image, alone or in combination with any form of JPEG format, the HDR Mode option shown in Figure 11-26 will be grayed out, making it unavailable until the Image Quality problem is resolved. You cannot use flash with this feature. Further, this in-camera HDR feature cannot be used with Automatic Exposure Bracketing, White Balance Bracketing, Multi-Shot Noise Reduction, Multiple Exposures, Bulb Exposure, or Movie Shooting.
In the Shoot4 menu, touch the HDR Mode option at the bottom of the screen, or scroll down to select it and then press the SET button. On the HDR Mode screen, shown in Figure 11-27, touch Adjust Dyn Range, or select it and then press the SET button. The parameters displayed inFigure 11-28 let you fine-tune the operation a bit. As might be expected, the Disable HDR parameter simply terminates the HDR function in the camera. The Auto parameter allows the camera to look at the input images and make a determination regarding the extent of under- and overexposure appropriate for optimal dynamic range. The three EV parameters let you select the degree of under- and overexposure to be provided. Use the touch feature, the Quick Control Dial, or the Multi-controller to select a value, and then press the SET button.
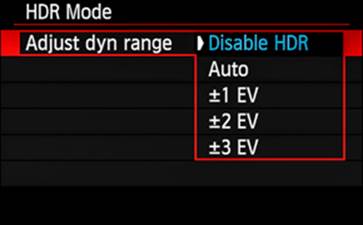
Figure 11-28. Choosing a dynamic range value
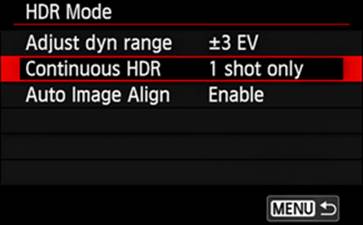
Figure 11-29. Choosing the Continuous HDR setting
The Continuous HDR option defaults to 1 Shot Only, which essentially resets the Adjust Dyn Range option to Disable HDR after each HDR exposure. If you wish, you can select the Every Shot parameter, which will invoke the HDR feature for every depression of the Shutter button, until you reset the parameter to 1 Shot Only.
One of the great challenges in collecting several images and creating a single resulting image is attempting to have all the input images perfectly registered so that there are no ghosts, or blurred edges, caused by misaligned images in the stack. The most common tools to avoid this are a good tripod and short exposures, although there can still be some misalignment. The HDR feature in this camera can attempt to manage this problem, but if the misalignment is too great, nothing is going to help. Figure 11-30 introduces the Auto Image Align option, which has only two parameters: Enable and Disable.
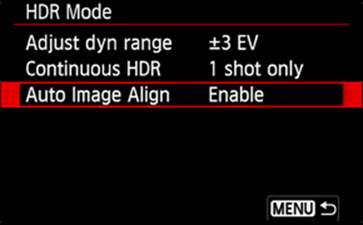
Figure 11-30. Selecting the Auto Image Align option
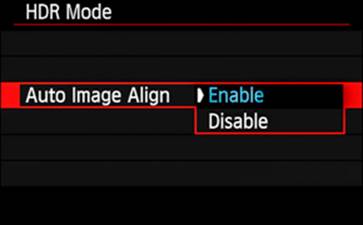
Figure 11-31. Selecting the Auto Image Align setting
I asked photographer Marlin Harms to capture the three images shown in Figure 11-32 to show the images the camera would use to create the final HDR image shown in Figure 11-33.
The center image is a normal exposure: f/8.0, 1.3 seconds, ISO 400.
The left-most image is a bit overexposed: f/8.0 at 4.0 seconds, ISO 400.
The right-most image is a bit underexposed: f/8.0 at 0.4 seconds, ISO 400.
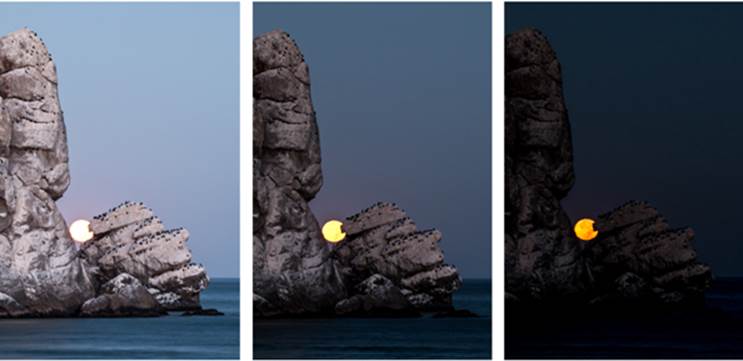
Figure 11-32. The individual images used to create the finale HDR
Though the EOS 70D won’t save a copy of the individual images for you, it captures images just like the three shown in Figure 11-32 (based on your HDR settings), holds those three images in the internal cache while it selects the appropriately exposed portions of each, then creates the final HDR image, as shown in Figure 11-33. Note the detail of the moon’s surface in the right-most image in Figure 11-32, and the detail of the rock and birds in the left-most image, and consider how those were merged into the image in Figure 11-33.
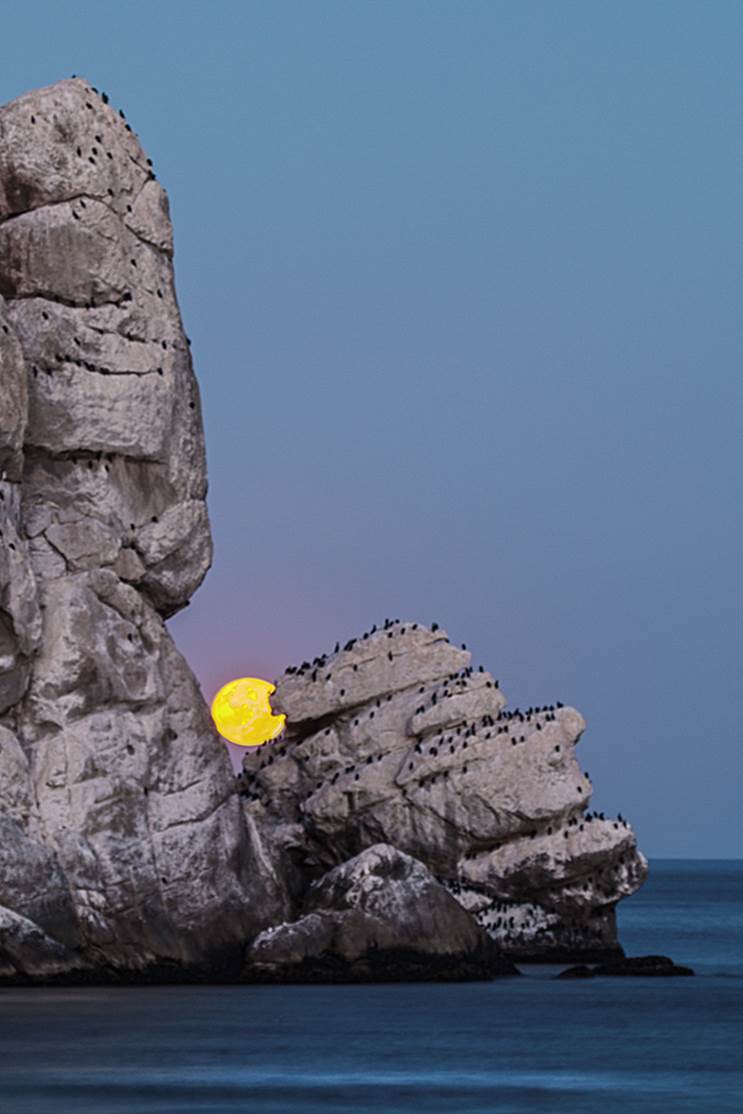
Figure 11-33. The final HDR image, created in-camera
All materials on the site are licensed Creative Commons Attribution-Sharealike 3.0 Unported CC BY-SA 3.0 & GNU Free Documentation License (GFDL)
If you are the copyright holder of any material contained on our site and intend to remove it, please contact our site administrator for approval.
© 2016-2026 All site design rights belong to S.Y.A.