Canon EOS 70D: The Guide to Understanding and Using Your Camera (2014)
Chapter 13. The Movie-Mode Specific Menus

ShootMovie1

Figure 13-1. The ShootMovie1 tab
Rotate the Live View/Movie shooting switch, and you’ll notice that the Live View Shooting tab icons on the menu bar are replaced with the Movie Shooting tab icons.
AF Method
Having selected the ShootMovie1 tab, touch the AF Method line, or select AF Method and then press the SET button. Touch one of the three parameters to select and set it, or use the Quick Control Dial or the Multi-controller to select a setting. Then press the SET button.
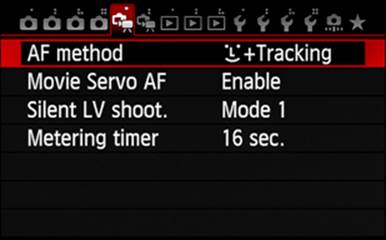
Figure 13-2. Selecting the AF Method option
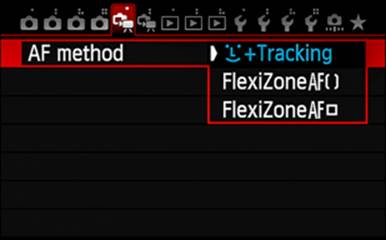
Figure 13-3. Selecting an AF Method setting
In FlexiZone-Multi, the image sensor is used for focusing. A white-bordered rectangle will appear in the center of the screen, and it will function as the AF point. You can use the Multi-controller to position that AF point rectangle where you want to focus (pressing the SET button returns the AF point to the center of the screen). Now, when you press the Shutter button halfway, the camera attempts to focus. If it’s successful, the white border on the rectangle turns green; otherwise it turns orange. With a green border on the AF point, press the Start/Stop button to begin recording the movie.
You can use Face Detection+Tracking for shooting video in the same way you use it for Live View photos. Press the Shutter button halfway; if the white border of the segmented square (![]() ) turns green, press the Start/Stop button to begin recording the movie. If the border of that segmented square turns orange, focus could not be achieved; resolve that problem and try again. Again, a face may not be recognized as a face if it is very small or very large, too bright or too dark, if it is turned away from the camera, or if the head is tilted to the horizontal or diagonal plane. If multiple faces are detected, arrows are added to the white-bordered square (
) turns green, press the Start/Stop button to begin recording the movie. If the border of that segmented square turns orange, focus could not be achieved; resolve that problem and try again. Again, a face may not be recognized as a face if it is very small or very large, too bright or too dark, if it is turned away from the camera, or if the head is tilted to the horizontal or diagonal plane. If multiple faces are detected, arrows are added to the white-bordered square (![]() ) to identify which of the multiple faces will be used for focus. Use the Multi-controller to move the white focusing square to border the face that will be used for focusing (attempting to use the touch feature to transfer focus to another face does not work, but will allow you to manually select a focus point other than a face; that non-facial focus point will be identified with a double-framed, segmented white-bordered square (
) to identify which of the multiple faces will be used for focus. Use the Multi-controller to move the white focusing square to border the face that will be used for focusing (attempting to use the touch feature to transfer focus to another face does not work, but will allow you to manually select a focus point other than a face; that non-facial focus point will be identified with a double-framed, segmented white-bordered square (![]() )). Note that if you are panning while in Face Detection+Tracking, the camera will transfer focus from the face that is no longer in frame to the next face visible in the LCD Monitor as you move your shot.
)). Note that if you are panning while in Face Detection+Tracking, the camera will transfer focus from the face that is no longer in frame to the next face visible in the LCD Monitor as you move your shot.
The third option for AF Method is FlexiZone-Single, which provides a single focus point that can be positioned by using the touch feature or the Multi-controller. If using the Multi-controller, you will find you can also use the diagonal keys for positioning.
Movie Servo AF
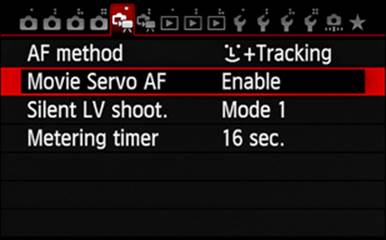
Figure 13-4. Selecting the Movie Servo AF option
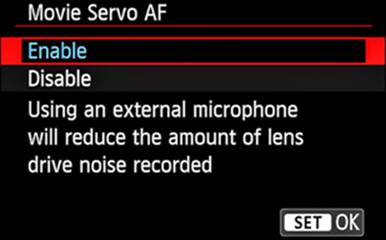
Figure 13-5. Selecting the Movie Servo AF setting
Enabling Movie Servo AF allows the autofocus system to seek focus continuously, even when you’re not looking at the LCD Monitor or pressing the Shutter button halfway. Of course, that’s just what you want when shooting a video of a moving subject. But, that constant lens motion while reseeking focus can consume a significant portion of your battery charge. Except for the new STM (stepping motor) lenses, such as the kit lenses for this camera, lens focusing can generate noise that in some cases is captured as part of the video. Consider adding an external microphone to help with that problem.
Silent LV Shoot.

Figure 13-6. Selecting the Silent LV Shoot. option
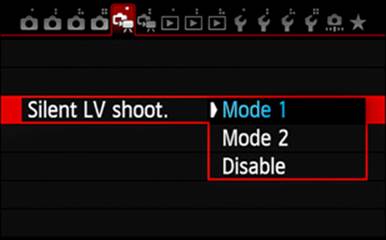
Figure 13-7. Selecting a Silent LV Shoot. setting
This menu option applies to Live View shooting, not to Movie shooting. (I have no idea why Canon replicated it onto this menu.)
Metering Timer
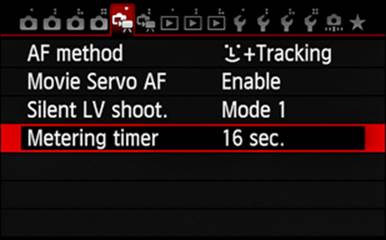
Figure 13-8. Selecting the Metering Timer option
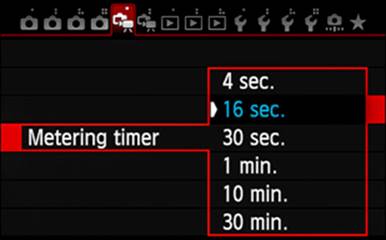
Figure 13-9. Choosing a Metering Timer setting
When shooting a movie, you can press the AE Lock button to lock the exposure; this lock is not released until you press the AE Lock button again. Assuming you use the AE Lock button to meter the view before starting to record a movie, this option defines the amount of time that the exposure setting is displayed at the bottom of the LCD Monitor.
ShootMovie2

Figure 13-10. The ShootMovie2 tab
Grid Display
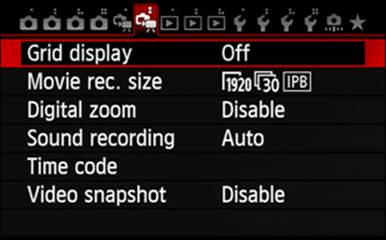
Figure 13-11. Selecting the Grid Display option
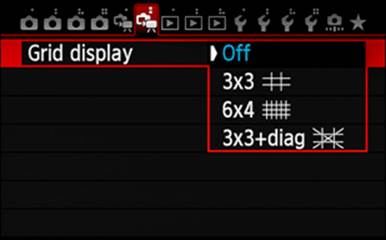
Figure 13-12. Selecting a Grid Display setting
Though having grid lines superimposed on the image of your subject can make for a cluttered LCD Monitor, they can certainly help in leveling the camera vertically or horizontally, or both. I’m not wild about the 3x3+Diag setting; it really does start to overpower the view of the image on the LCD Monitor.
Movie Rec. Size
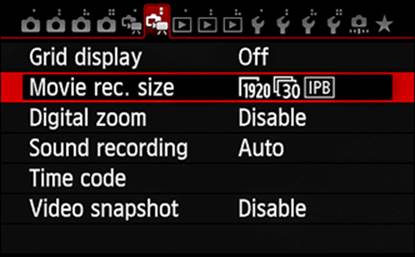
Figure 13-13. Selecting the Movie Rec. Size option
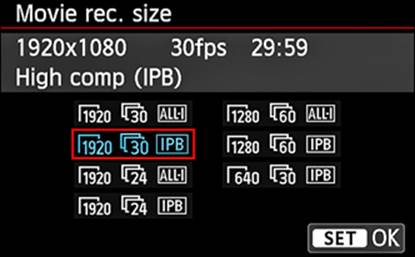
Figure 13-14. Selecting a Movie Rec. Size setting
The Movie Rec. Size option gives you access to all the movie-recording sizes supported by the camera. There are three factors to consider:
Image size: This can be 1920 × 1080, 1280 × 720, or 640 × 480. At 1920 × 1080, recording is Full High-Definition, and the aspect ratio is 16:9 (wide screen). At 1280 × 720, the recording quality drops to High Definition, with an aspect ratio of 16:9. At 640 × 480, recording quality drops further to Standard Definition, and the aspect ratio is 4:3 (standard, nearly square screen, most commonly found on tube-type televisions and computer monitors).
Frame rate: The frame rate can be 60 frames per second (fps), 30 fps, or 24 fps, if the Video System option in the Set Up3 menu is set to NTSC. If the Video System option is set to PAL, the frame rate can be 50 fps, 25 fps, or 24 fps. In either video system, available frame rates are dependent on the choice of image size.
Compression rate: This can be High (IPB) or Low (ALL-I). Using IPB as the compression rate will cause multiple frames to be compressed at a time, producing smaller file sizes, which in turn allow for longer recording. The ALL-I setting will compress each frame individually, so the file sizes are larger, but editing of the final recording is much easier.
Digital Zoom
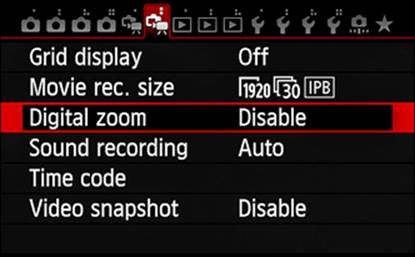
Figure 13-15. Selecting the Digital Zoom option
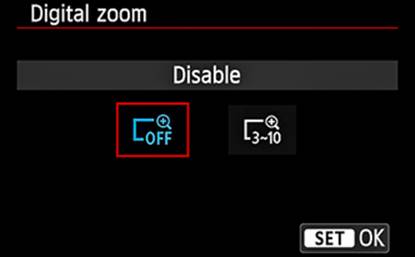
Figure 13-16. Selecting the Digital Zoom setting
As with still photography, digital zoom should be reserved for worst-case scenarios. Using a lens for zooming will refocus light, but the resulting image size will be a matter of the image sensor; with digital zooming, image enlargement is a matter of cropping the image coming from the image sensor, significantly reducing the number of pixels in the final captured image. The degree of compromise is pretty much a linear reduction as more of the digital zoom effect is applied. But, if you really need to zoom beyond the range of your lens, this is a readily available tool.
You should be aware that if you are shooting with Movie Servo AF, it will stop functioning while Digital Zoom is enabled. Also, the camera will not be using the default fast-focusing phase-difference detection autofocus system, but will revert to the slower, contrast detection system, which may cause visible loss of smooth transitions. This feature is available only when movie size is set to 1920 × 1080.
Sound Recording
In most cases, movies are recorded along with ambient sound. However, if there is reason not to capture that sound, touch the Sound recording line, then touch the Sound rec. line, and then touch the MENU icon. Alternatively, select the Sound recording option and then press the SET button, select the Sound rec. setting and then press the SET button. Select the Disable setting, press the SET button, then press the MENU button.
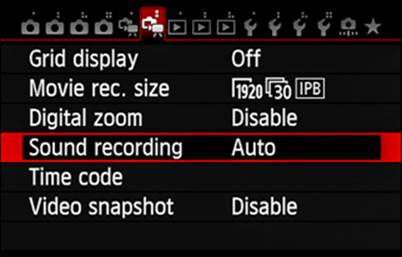
Figure 13-17. Selecting the Sound Recording option

Figure 13-18. Monitoring the recording levels while in Auto mode
If you intend to record sound, either through the built-in stereo microphone or through an optional external stereo microphone, you can choose the Auto setting or (if you’re knowledgeable about sound recording) the Manual setting. With the Manual setting, you will have access to the Rec. Level setting, which is grayed out for the Auto setting. The objective in sound recording, regardless of the setting chosen, is to have your loudest sounds reach about −12 on the level meters at the bottom of the screen. If sounds are detected that are between −12 and zero, a yellow rectangle is posted at that level for about three seconds to advise you that sound recording is approaching distortion. If the sound level reaches zero on a level meter, a red rectangle is posted there for three seconds, indicating that distortion has occurred (see the graph for the left channel inFigure 13-18).
If you are shooting in an area with significant wind, the built-in microphone may record wind noise, causing some loss of quality. To help reduce the extent of this kind of problem, set the Wind Filter option to Enable. Be aware that with Wind Filter set to Enable, you will lose some low bass sounds.
If you anticipate sudden, loud sounds, you will probably want to enable the Attenuator option.
Time Code
A time code is automatically recorded, and is expressed as: hours:minutes:seconds:frames. It is used to synchronize the movie with its soundtrack, but most users encounter it during editing.
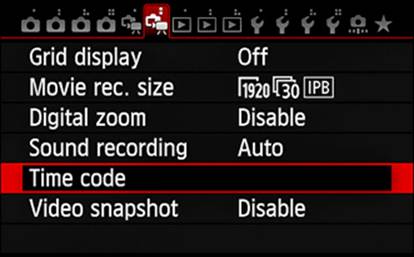
Figure 13-19. Selecting the Time Code option
Count Up
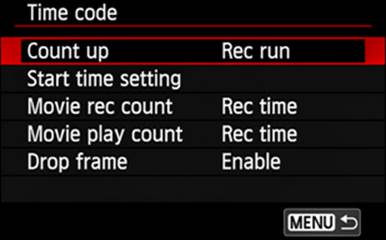
Figure 13-20. Selecting the Count Up option
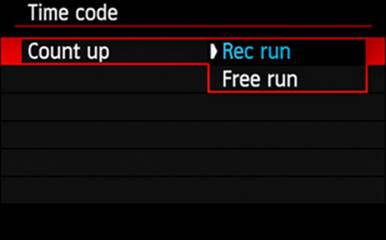
Figure 13-21. Choosing a Count Up setting
Once you have selected the Time Code option on the ShootMovie2 menu, you’ll see that there are actually five items that can be specified. The first is the Count Up setting, which can be set to Rec Run or Free Run. With Rec Run, the time code counts up only when the camera is recording a movie, but Free Run continues to advance its count even if the camera is not recording a movie. The Free Run option becomes important when several cameras are involved, in order to have a single time reference when editing.
Start Time Setting
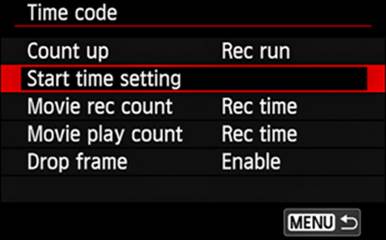
Figure 13-22. Selecting the Start Time Setting option
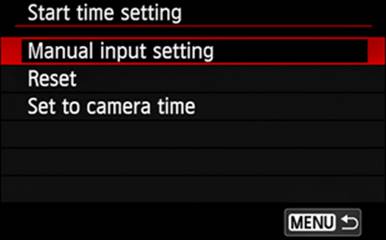
Figure 13-23. Selecting a Start Time Setting setting
The Start Time Setting option has three available settings:
Manual Input Setting: This setting lets you set the hour, minute, seconds, and frames to whatever values you feel are appropriate. This becomes particularly important when you attempt to synchronize clips from other cameras.
Reset: This setting resets the time (as set by Manual Input Setting or by Set To Camera Time) to all zeros (00:00:00:00).
Set To Camera Time: This setting sets the hour, minute, and seconds to match the camera’s internal clock, and frames will be set to zero.
Movie Rec Count
The Movie Rec Count setting identifies what to display on the movie-shooting screen. If you choose Rec Time, you should expect to see the elapsed time for this recording displayed, but if Time Code is selected, the display should be the SMPTE (Society of Motion Picture and Television Engineers) time code, which is conventional time-of-day time. Note that the frame count is not displayed on the movie-shooting screen during recording, or on the playback screen, but it is captured with the movie to facilitate editing.
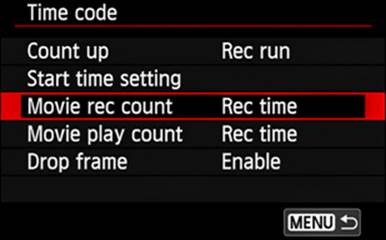
Figure 13-24. Selecting the Movie Rec Count option
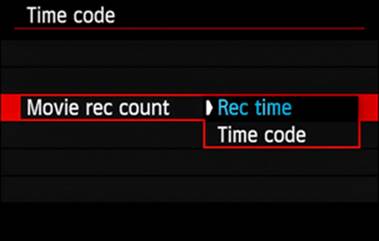
Figure 13-25. Choosing a Movie Rec Count setting
Movie Play Count
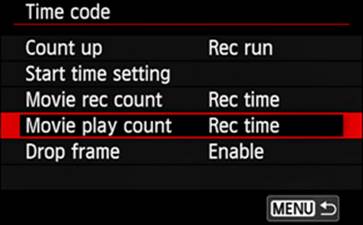
Figure 13-26. Selecting the Movie Play Count option

Figure 13-27. Selecting a Movie Play Count setting
The Movie Play Count setting controls what is displayed in the upper-left corner of the screen during playback of the movie. In Rec Time, the playback time is displayed as minutes and seconds. In Time Code, the time code (essentially the wall-clock time in 24-hour format) is displayed during the playback of a movie as hours:minutes:seconds:frames.
Drop Frame
Though we talk in terms of 30 fps or 60 fps, in reality the recording is done at 29.97 fps or 59.94 fps. This introduces the problem of the time code’s frame count differing between the actual time and the time code. When you select the Enable setting for Drop Frame, the camera can automatically correct this by judiciously skipping some time-code numbers (no, there are no frames actually dropped, just an adjustment in the internal frame-counting system). If Disable is selected for Drop Frame, no correction is made.

Figure 13-28. Selecting the Drop Frame option

Figure 13-29. Selecting a Drop Frame setting
Video Snapshot
Do not confuse a video snapshot with a still photo. A video snapshot is a video, albeit a very brief one.
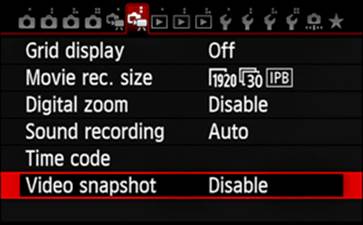
Figure 13-30. Selecting the Video Snapshot option

Figure 13-31. Selecting a Video Snapshot setting
This relatively new feature allows you to grab several short movie sequences, each being two, four, or eight seconds in length. Each can be stored in an album, and an entire album can be selected for playback. All snapshots in an album must be the same length. Canon’s ImageBrowser EX software also provides a feature called EOS Video Snapshot Task, which lets you edit a snapshot album.
All materials on the site are licensed Creative Commons Attribution-Sharealike 3.0 Unported CC BY-SA 3.0 & GNU Free Documentation License (GFDL)
If you are the copyright holder of any material contained on our site and intend to remove it, please contact our site administrator for approval.
© 2016-2026 All site design rights belong to S.Y.A.