Canon EOS 70D: The Guide to Understanding and Using Your Camera (2014)
Chapter 14. The Playback Menu

Above is a hand-held, in-camera HDR image captured at ISO 2500. Below is the same image treated with the in-camera Art Bold Effect creative filter, applied during playback.

First off, I don’t have much use for a great majority of the options available in the Playback menus; I would much prefer to sit down at my computer and perform these tasks. However, if you have a specific need, it’s nice to know that this camera can provide a great deal of image management for the images on the memory card.
Play1 Menu

Figure 14-1. The Play1 tab
Protect Images
If you plan to do a lot of work in the Playback menu, you may want to protect certain high-value images from inadvertent deletion. While protected, an image cannot be erased, but it will be lost if you format the memory card.
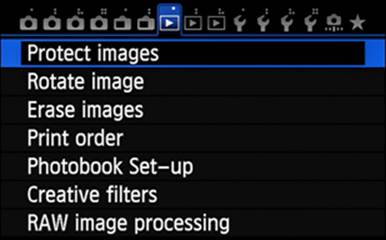
Figure 14-2. Selecting the Protect Images option
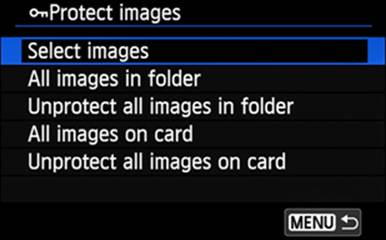
Figure 14-3. Choosing Select Images
As shown in Figure 14-3, you can select specific images, all images in a specific folder, or even all images on the card. Touch the Select Images line, or select the Select Images option and press the Set button to access the images in the current folder. You can now swipe your finger across the LCD Monitor or use the Quick Control Dial or Multi-controller to scroll through the images in the current folder. For each image to be protected, touch the SET icon or press the SET button. This SET action is a toggle: pressing it once will mark the image for protection, and pressing it again will reset that action. When you protect individual images, you will notice that a small, white-bordered black rectangle containing a white key is superimposed at the top of the image, as shown in Figure 14-4 (the blue rectangle containing a white key is a reminder that you are in the procedure for selecting an image for protection).
You may not see the change as it occurs, but if you select a folder or the entire memory card for protection, that same little icon is displayed at the top center of each image to indicate that it is protected from erasure.
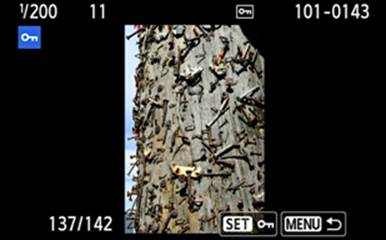
Figure 14-4. An image chosen for protection
To remove protection from an entire folder or memory card, select the Unprotect All Images option. If you wish to protect all but a few images, select the All Images option to protect all those images, then use the Select Images option to deselect those few that you do not want to protect by touching the SET icon or pressing the SET button for each to turn off the image-protected icon at the top-center of each image. Similarly, if you have used the Select Images option to select several images for protection, but are now ready to remove that protection, you don’t have to scroll through that folder or memory card to reset each image. Instead, simply select the appropriate Unprotect All Images option to unprotect any and all images in that folder or memory card.
Rotate Image
You may want to view recorded images with the image rotated 90 degrees to the right or to the left. With the Rotate Images option, shown in Figure 14-5, you can select individual images, and use the SET icon or the SET button to rotate them 90 degrees to the right, 90 degrees to the left, and back to 0 degrees. The chosen rotation for that image will be recorded on the memory card. Whichever you choose here will dictate how that image is displayed in playback.
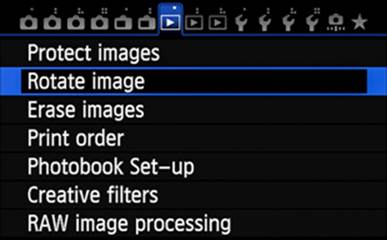
Figure 14-5. Choosing Rotate Image
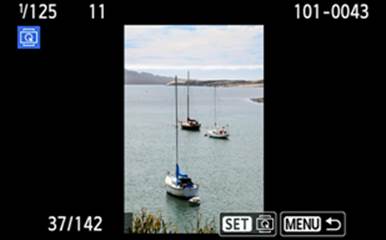
Figure 14-6. A portrait image at captured rotation
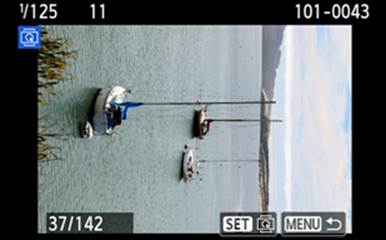
Figure 14-7. That same image, rotated
Erase Images
In short, don’t.
Unless you have run out of space on your memory card, I encourage you to wait until you get back to the computer to delete images; it’s too easy to accidentally delete images you really wanted to keep, and there’s no recycle bin from which you can recover accidentally deleted images.
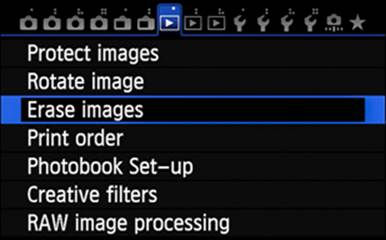
Figure 14-8. Selecting the Erase Images option
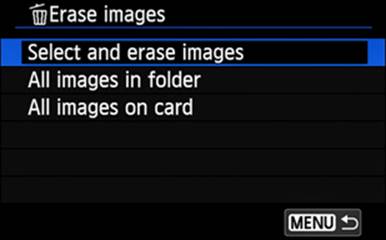
Figure 14-9. Choosing the Select and Erase Images setting
However, if conditions dictate that you must use the camera to delete images, the Erase Images option (shown in Figure 14-8) allows you to select specific images for deletion. If you have only a very few images you’d like to erase, you may want to simply scroll the playback to one of those images, press the Erase button (the garbage-can icon), touch the Erase icon, or use the Quick Control Dial or the Multi-controller to select the Erase option, and press the SET button. Repeat for the next image to be deleted.
Before I use this option to erase either a folder or an entire memory card, I quickly view every image to ensure that I don’t forget the few outstanding images among all the disposable turkeys. I use the Protect Images feature at the top of the Play1 menu to mark the images I want to keep, and then proceed with the deletion of the folder or memory card. Remember: protected images will not be erased.
When selecting individual images for deletion, you’ll see a superimposed graphic in the upper-left quadrant that shows a garbage can icon followed by a black rectangle; after you touch the SET icon or press the SET button to select the image for deletion, that black rectangle will change to include a white checkmark. You’ll see an integer value displayed at the right of this garbage can graphic, which is the number of images you have selected for erasure. When you have finished selecting images for deletion, touch the OK icon or press the Erase button on the lower-center of the camera body. Touch the OK icon, or select the OK option on the screen and press the SET button.
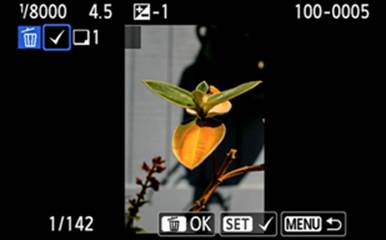
Figure 14-10. An image selected for erasure
This Erase operation will not erase images that have been marked as Protected. If your intent is to remove everything from the memory card, use the Format Card option in the Setup1 menu; it’s fast, and ensures that the card is totally erased and optimized for efficient use.
Print Order
This is formally known as Digital Print Order Format, or DPOF. The Print Order option, shown in Figure 14-11, provides a means for identifying a JPEG image or a group of JPEG images (individually selected, all in a folder, or all on the memory card) that you wish to print. It also provides specific setup options. There is a lot of variability in what some printers can support; if you wish to use this option, I encourage you to study the subject, covered on pages 355 through 358 of the Instruction Manual, especially the highlighted material on page 356.
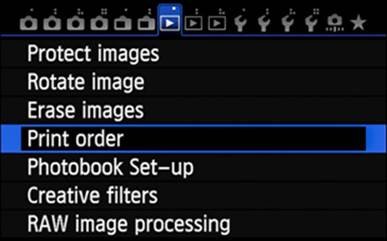
Figure 14-11. Selecting the Print Order option
The order that you create with this option is actually a file that resides on the memory card along with the images that the order specifies. You can use this memory card to print from your computer to your DPOF-capable printer, or take the card to a commercial printer who has the ability to process DPOF files.
In Figure 14-12, you can see that Standard (full-page) prints have been ordered using an image-selection process previously discussed for protecting and erasing images, as displayed in Figure 14-13.
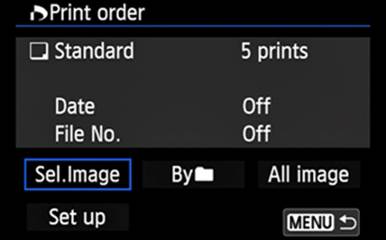
Figure 14-12. Creating a print order
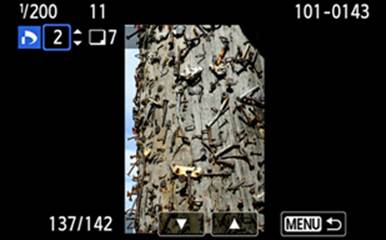
Figure 14-13. An image showing DPOF selection status
Photobook Set-up
Given the popularity of personalized photobooks, especially as family gifts, Canon has provided this camera-based option to work with the EOS Utility software. The image-selection process is similar to the one used for protecting or erasing images, except that the selected JPEG-only files are marked for transfer via the EOS Utility to a user-selected folder on a personal computer.
Again, given the advantages of image selection on a 24-inch computer screen, I elect to skip this option, and do it all on my computer.
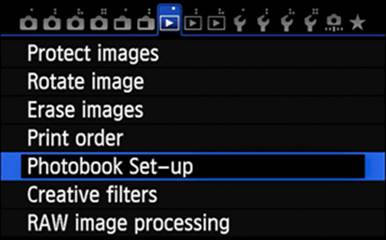
Figure 14-14. Selecting the Photobook Set-Up option
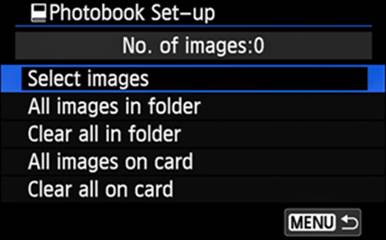
Figure 14-15. Choosing the Select Images setting
Creative Filters
For RAW or JPEG images that the camera has recorded to the memory card, the Playback menus give you the ability to do a bit of in-camera post-processing. Again, I choose to use the large screen on my computer, but I will concede that there can be times that it is necessary to use the tools available, which may only include the camera. For those instances, Creative Filters can help you apply some very interesting effects to copies of your current images.
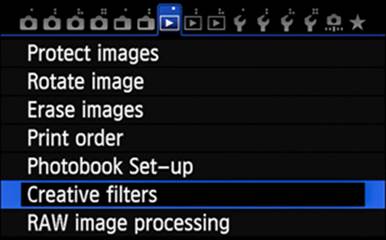
Figure 14-16. Selecting the Creative Filters option
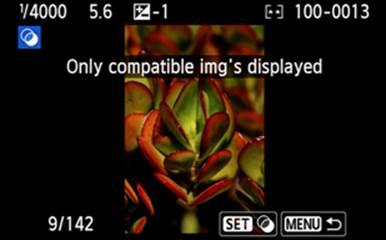
Figure 14-17. Starting the search for an appropriate image
Touch the Creative Filters line, or use the Quick Control Dial or Multi-controller to select the Creative Filters option and then press the SET button. As shown in Figure 14-17, the camera will display the last saved image (or the most recently reviewed image, if you have been using the Playback button in this power-on session). From here you can scan to find the image to which you want to apply a creative filter.
The application of a filter is real-time, allowing you to get a reasonable idea of the end result just by watching the LCD Monitor. Be patient. Depending on the filter being applied, it can take a full two seconds to complete the effect.
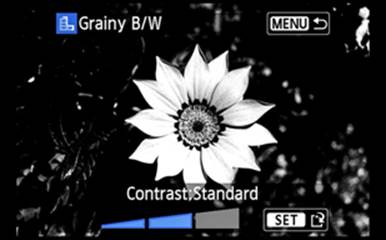
Figure 14-18. Example of applying the Grainy B/W filter, with Standard Contrast
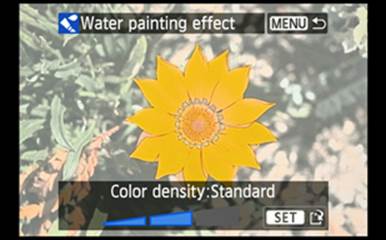
Figure 14-19. Example of applying the Water Painting Effect filter, with Standard Color Density
Note that while Wi-Fi is being used, creative filters cannot be applied. Also, be aware that all files saved as a result of using the Creative Filters option are saved as JPEG files, and are in addition to the original files: the original files are not changed or replaced.
RAW Image Processing
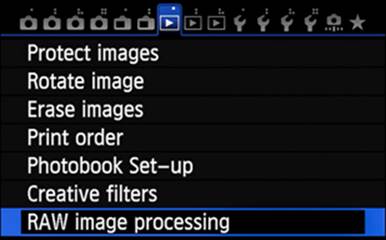
Figure 14-20. Selecting the RAW Image Processing option

Figure 14-21. Status report when no RAW files are found
The RAW Image Processing option, shown in Figure 14-20, allows you to work with a RAW image (but not with an M-RAW or S-RAW image), apply several adjustments, and save the results as one or more JPEG images. These adjustments are not applied to, nor stored with, the RAW image. As shown in Figure 14-21, if there are no RAW images in the selected folder on the memory card, the operation cannot proceed.
Figure 14-22 shows the icons for the various adjustments that can be applied, and Figure 14-23 is an example of the preview for selecting the Adobe RGB color space setting.
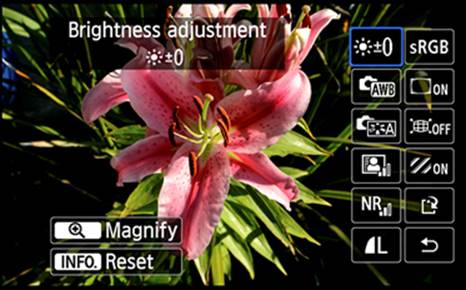
Figure 14-22. The array of adjustments available
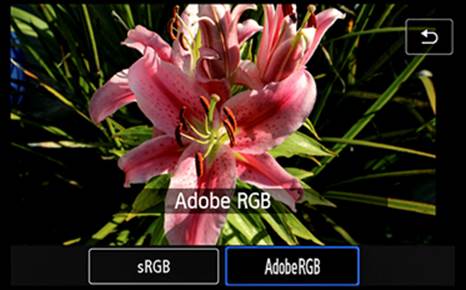
Figure 14-23. Result of selecting the Adobe RGB color space setting
Play2 Menu

Figure 14-24. The Play2 tab
Resize
The Resize option, shown in Figure 14-25, does not apply to RAW, M-RAW, S-RAW, or S3 JPEG images, as indicated in Figure 14-26. For other JPEG images, you can select a smaller size (see Figure 14-27) and a copy of the image will be saved to the same folder (see Figure 14-28), but with the next available image number. The original image remains unchanged.

Figure 14-25. Selecting the Resize option
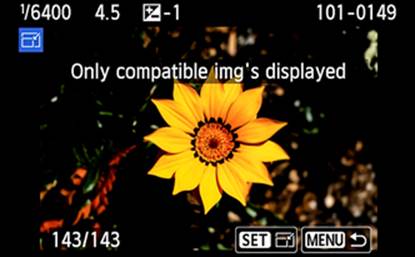
Figure 14-26. Only L, M, S1, and S2 JPEGs can be resized
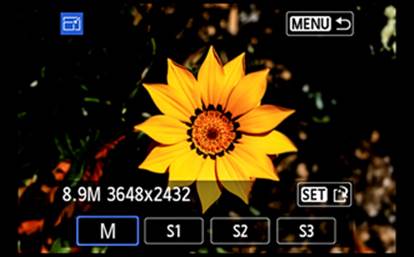
Figure 14-27. Target sizes include M, S1, S2, and S3 JPEGs only
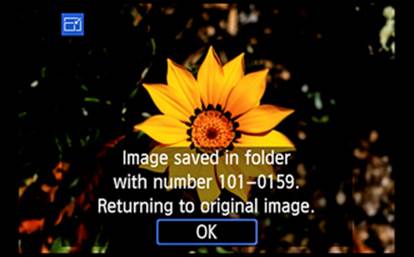
Figure 14-28. Notice of new file being created
Note that resizing is not supported when Wi-Fi is used.
Rating
Rating your images allows for an even more detailed system for sorting them. Even Windows (as of Windows Vista) gives you the opportunity to select images based on their rating.
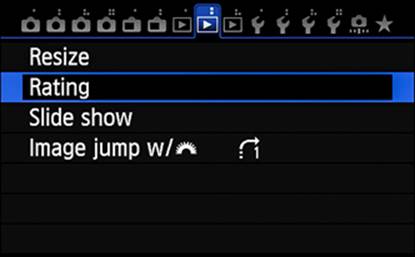
Figure 14-29. Selecting the Rating option
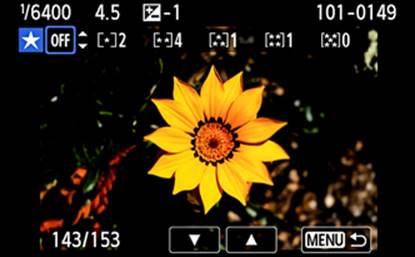
Figure 14-30. Choosing a star rating
You can touch the Rating line shown in Figure 14-29, or you can select the Rating option and press the SET button. A modified version of the Playback screen is displayed. Use the touch feature, Quick Control Dial, the Main Dial, or the Multi-controller to scroll through the recorded images. When you find an image you would like to rate, you will see a white star on a blue background (as seen in Figure 14-30). The star is followed by the word OFF, meaning that this image has not yet been rated. Press the Multi-controller upwards to change the word OFF to any of a progression of stars, ranging from one to five; after five stars, it returns to OFF. Conversely, pressing the Multi-controller downwards will range from five stars to one, with OFF being the setting following the single star setting. You can hold the Multi-controller in the up or down position and let the stars scroll by, or repetitively press the Multi-controller to incrementally add stars. To rate additional images, simply scroll to the next image to be rated, and then use the Multi-controller to assign the rating, and repeat as necessary. To terminate this rating activity but preserve the rating, touch the MENU icon or press the MENU button.
The integer to the right of the bracketed star group (as seen at the top of Figure 14-30) tells you the number of images you’ve rated at each star level. In Figure 14-30, two images have been rated with a single star, four images have been rated with two stars, etc. Each time you rate an image, the number next to that respective star group will increase accordingly.
Slide Show
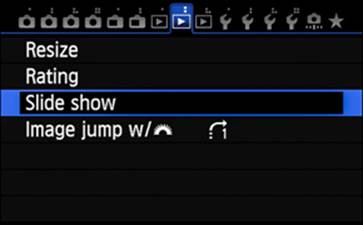
Figure 14-31. Selecting the Slide Show option
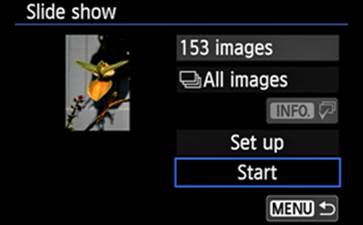
Figure 14-32. The opening screen for the Slide Show option
When you select the Slide Show option in the Play2 menu, as shown in Figure 14-31, it offers the Start function (Figure 14-32) as preselected and awaiting a touch or press of the SET button. Be careful; unless you’ve previously set up the slide show parameters, you’re not really ready to start the slide show. Instead, touch Set Up, or choose Set Up and press the SET button.
Figure 14-33 shows the setup options available for the Slide Show function. You can specify how long each image should be displayed, whether or not the slide show should automatically restart at the end, what kind of slide-to-slide transition you’d like, and whether or not you want the slide show to be accompanied by background music.
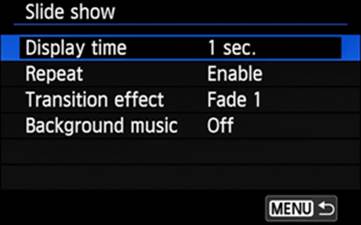
Figure 14-33. The various Slide Show setup options
In Figure 14-32, you can see a line reading All Images. Use the touch feature, or use the Quick Control Dial or the Multi-controller to select that line and press the SET button. You will see a pair of arrowheads at the right end of the line that indicates a scrollable list of items for review and selection. You can use either the Multi-controller or the Quick Control Dial to scroll through that list. The list presents the ways you can refine the selection of displayed images. Use the INFO button to access sub-lists within the filtering items to further refine the selection.
Having considered and applied appropriate changes to each of these Set Up parameters, you can now touch the MENU icon or press the MENU button, and then touch the Start icon or select the Start option and press the SET button.
Image Jump W/![]()
If you frequently have dozens or even hundreds of images on a memory card, you can use this Image jump w/![]() option to search through a large group of images quickly. If you’re looking for a unique image that has nothing in common with any adjacent images, this option probably won’t be of much value to you. There are some filters, such as image rating, date, and folder that can help. When I choose Display By Date, it’s nice to be able to use the Main Dial while in playback to display the first image taken on every date represented on the memory card. When I find an image that is part of a group I want to further explore, I use the Quick Control Dial or the Multi-controller to scroll through those images one by one.
option to search through a large group of images quickly. If you’re looking for a unique image that has nothing in common with any adjacent images, this option probably won’t be of much value to you. There are some filters, such as image rating, date, and folder that can help. When I choose Display By Date, it’s nice to be able to use the Main Dial while in playback to display the first image taken on every date represented on the memory card. When I find an image that is part of a group I want to further explore, I use the Quick Control Dial or the Multi-controller to scroll through those images one by one.
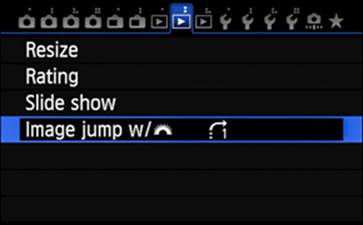
Figure 14-34. Selecting the Image Jump option
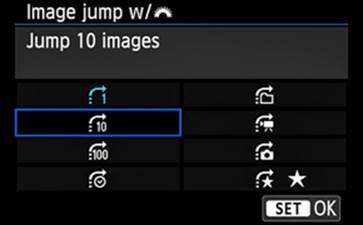
Figure 14-35. The array of Image Jump settings, with jump by 10 being selected
Play3 Menu

Figure 14-36. The Play3 tab
Highlight Alert
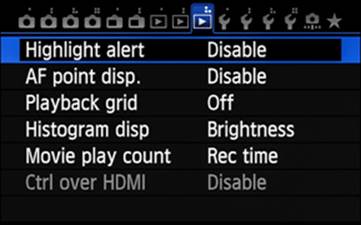
Figure 14-37. Selecting the Highlight Alert option
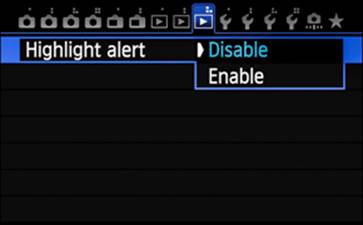
Figure 14-38. Choosing a Highlight Alert setting
This can be one of the quickest ways to improve your photography if you are often faced with blown-out highlights. Use the screen shown in Figure 14-38 to set Highlight Alert to Enable. Blown-out highlights will become immediately apparent on the Image Review screen (or the Playback screen at zero magnification) as slowly blinking black patches. That’s your hint to dial down one of the exposure factors.
AF Point Disp.
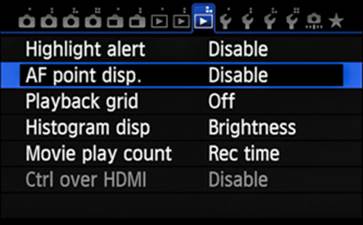
Figure 14-39. Selecting the AF Point Disp. option
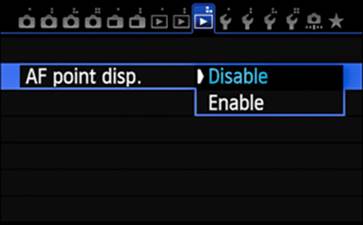
Figure 14-40. Choosing an AF Point Disp. setting
Setting the AF Point Display option to Enable results in the focus point being displayed on the image, in either Image Review or playback, as a small, red-bordered box. The exception is when you are using Automatic AF Point Selection: in that case, you’ll see several red-bordered boxes representing the numerous focus points that were used for the image.
Playback Grid

Figure 14-41. Selecting the Playback Grid option
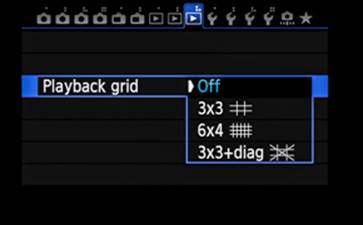
Figure 14-42. Choosing a Playback Grid setting
I feel that the availability of these grids during the shooting phase is nice, but I see little purpose for them during playback and Image Review, other than to confirm that you did capture the alignment you had intended.
Histogram Disp
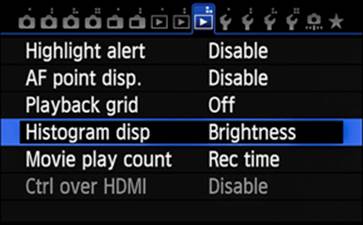
Figure 14-43. Selecting the Histogram Disp option
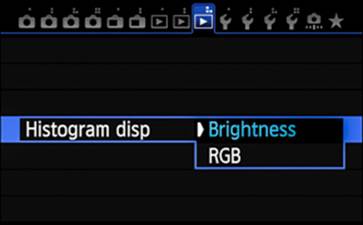
Figure 14-44. Choosing a Histogram Disp setting
In playback, when you press the INFO button repeatedly, you cycle through a four-step series of displays. One of those displays shows the image in one quarter of the screen, a histogram in the quarter to the right of the image, and various data in the lower half of the screen. By default, the histogram displayed on this screen is the Brightness histogram, which serves most people quite well. However, some sophisticated color aficionados spend more time exploring the RGB histogram—for them, this Histogram Display option can be used to select the RGB item, which results in the RGB histogram being displayed instead.
This is essentially a moot point from my perspective, as pressing the INFO button one more time gives me both histograms, albeit with the loss of some textual data. Either way, the arrangement of histograms on the two-histogram screen is constant, with the RGB histogram on top, and the Brightness histogram on the bottom.
Movie Play Count
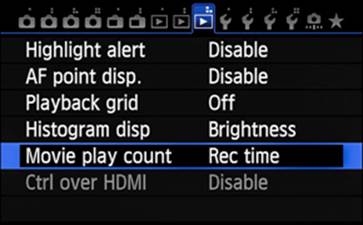
Figure 14-45. Selecting the Movie Play Count option
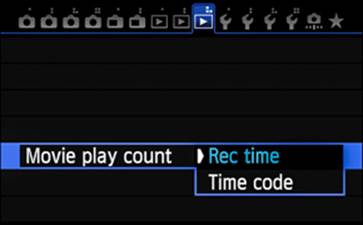
Figure 14-46. Choosing a Movie Play Count setting
The Movie Play Count option provides two settings that will be reflected during movie playback on the LCD Monitor: Rec Time (recording time) and Time Code. This same option is available in the Time Code option of the Movie Shoot2 menu (accessible when the Live View/Movie shooting switch is set to Movie shooting). Any changes made in one of these places are also made in the other. I recommend you ignore this option in the Play3 menu, and keep as many movie-related settings together as possible.
Ctrl Over HDMI
If your TV has an HDMI CEC (Consumer Electronics Control) connection, you can connect the camera to the TV using an HDMI cable, then use the TV’s remote to control the camera during playback. To do this, set the Ctrl Over HDMI to Enable.
If an HDMI cable is currently plugged into the camera, this command is displayed in gray (as shown in Figure 14-37 and other option-selection figures), indicating that the command cannot be executed at the moment. Therefore, you will want to enable this option before attaching the HDMI cable to the camera.
All materials on the site are licensed Creative Commons Attribution-Sharealike 3.0 Unported CC BY-SA 3.0 & GNU Free Documentation License (GFDL)
If you are the copyright holder of any material contained on our site and intend to remove it, please contact our site administrator for approval.
© 2016-2026 All site design rights belong to S.Y.A.