Creative flash photography : great lighting with small flashes: 40 flash workshops (2014)
Part I. What Every Strobist Needs to Know
Chapter 2. Choosing Your Equipment: What’s in the Bag?
▸ How to select the right gear and avoid purchasing the wrong things
▸ Packing for a location shoot
▸ Using studio light modifiers with on-camera flash
Unlike hobbies such as golf and paragliding, photography is relatively cheap, especially now that the costs of film and developing have disappeared. However, today’s photographers often collect large amounts of gear in hopes of gaining flexibility and capturing better images—I am no exception. But do you really need all those accessories? Sometimes a homemade solution is not only cheaper, but may also be better than a commercially produced gadget. A good example is the Spin-Light 360 EXTREME, which is nothing more than a commercial version of Neil van Niekerk’sblack foamie thing (http://neilvn.com/tangents/the-black-foamie-thing/), which takes five minutes to build, costs two or three dollars, and fits in any photo bag. The 360 EXTREME is heavy, clunky, conspicuous, and costs 50 times as much (www.spinlight360.com/shop/spinlight-360-extreme).
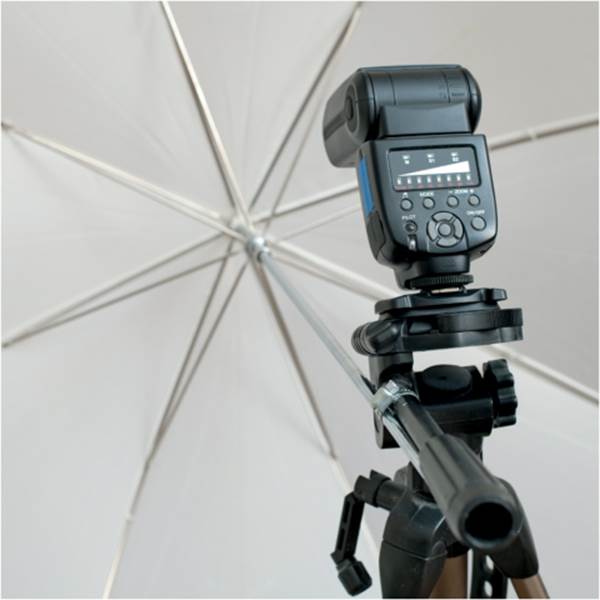
A common hose clamp simply and reliably attaches an umbrella to a tripod. It may not be the prettiest solution, but it’s far cheaper than anything else.
In this chapter and in the 40 workshops that follow, I mention only the gear I have found to be genuinely useful. Wherever possible, I will suggest inexpensive alternatives to the commercial products.
Starting Out on the Cheap
Perhaps surprisingly, flagship flash units, such as the Nikon SB-910, the Canon Speedlite 600EX-RT, or the Metz mecablitz 58 AF-2 digital, can easily cost more than a basic studio flash setup. However, if you are just starting out, I recommend that you start with a low-cost non-TTL flash. It will save you money and force you to learn manual flash settings, which will accelerate your learning. If you always set your camera to programmed auto mode using TTL flash, you’ll miss out on lots of creative opportunities.
Non-TTL flashes from Asian manufacturers cost as little as $35 on eBay. A full starter kit can include two flashes (the Yongnuo YN-460, for example, has an optical slave cell built in), a couple of sheets of Styrofoam, two umbrella diffusers, and two stands (old camera tripods will do). The simplest way to fix your umbrellas to stands is to use hose clamps from a hardware store.
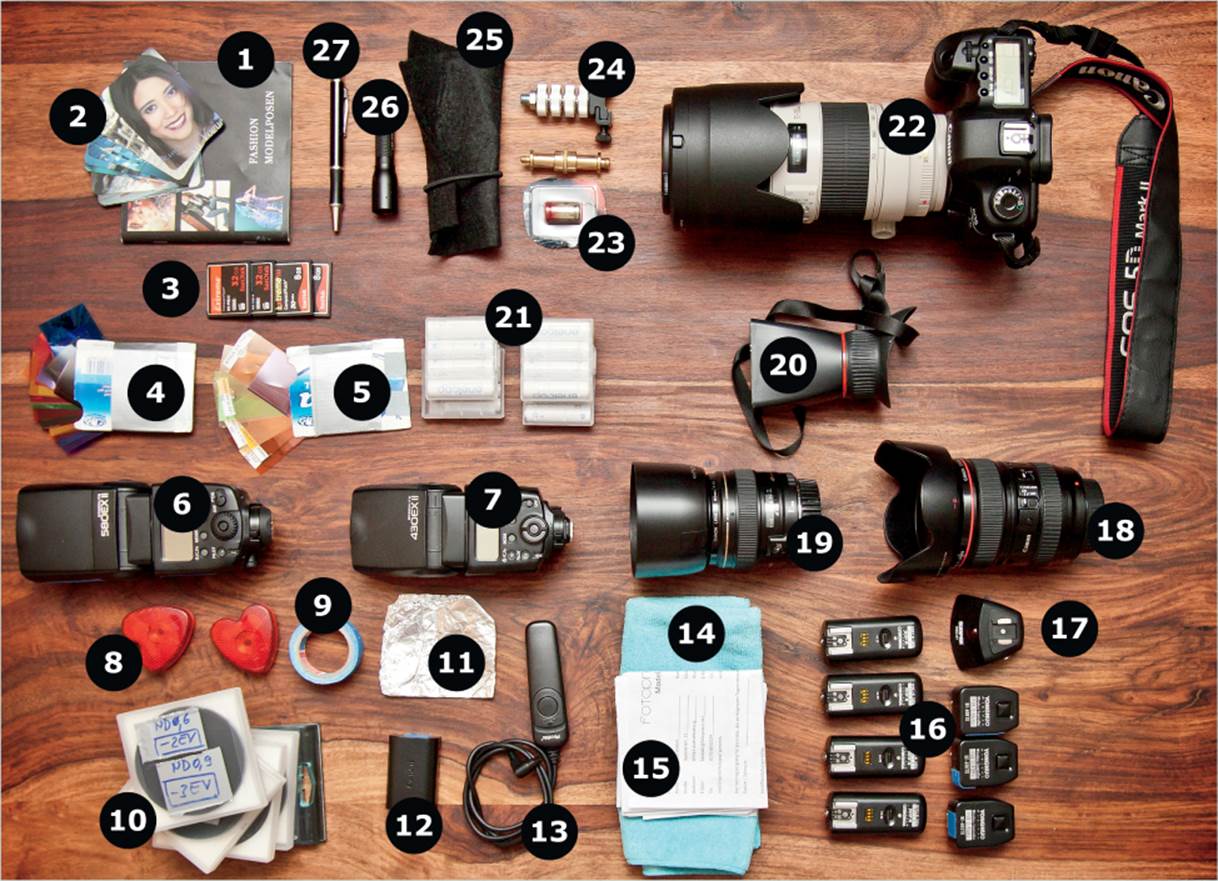
1 Little posing guide (homemade)
2 Business cards
3 SanDisk CompactFlash (CF) memory cards
4 LEE color filters
5 LEE color temperature orange (CTO) and other special-purpose filters
6 Canon Speedlite 580EX II flash
7 Canon Speedlite 430EX II flash
8 LED flashing hearts (useful as focusing aid)
9 Tape
10 Various ND filters (B+W, Hoya)
11 Aluminum foil
12 Extra Canon camera battery
13 Phottix camera cable release
14 Microfiber lens cleaning cloth
15 Model release forms
16 Yongnuo RF-602 radio trigger
17 SUNPAK DSU-01 optical trigger
18 Canon EF 24–105mm f/4L lens
19 Canon EF 85mm f/1.8 lens
20 LCDVF display loupe
21 Eneloop AA and AAA rechargeable batteries
22 Canon EOS 5D Mark II with EF 70–200mm f/2.8 IS II
23 Spare battery for flash trigger
24 Camera screws (1/4˝), cold shoe, spigot
25 Black foamie thing (felt)
26 LED LENSER P3 flashlight
27 Pen
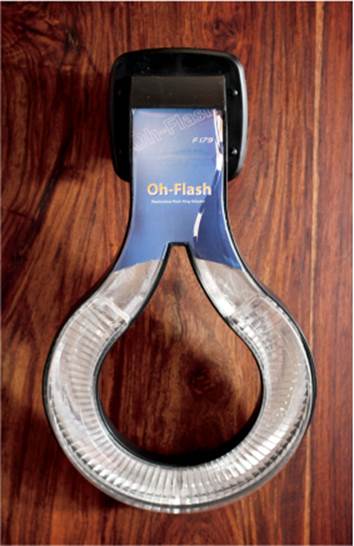
Oh-Flash ring flash adapter by Phottix. Though this accessory is not the highest quality and is sometimes a bit shaky, at least it’s inexpensive.

The Aurora Bracket1 for Walimex, Bowens, and Jinbei light shapers makes a good alternative to the more complex flash2softbox system
This basic kit is sufficient for shooting food, products, and portraits at home. Location shoots can be more of a challenge because optical flash triggers aren’t as reliable outside, and cheap tripods might not be stable enough. But even these challenges can be solved at relatively little cost. The most important things to acquire are a radio receiver (such as the Yongnuo RF-602), two or three 8–10 ft light stands (Walimex is a good value brand), and a couple of good umbrella adapters (Manfrotto 026, for example). You will also need a softbox (flash2softbox, Lastolite Ezybox, Aurora Firefly XL, etc.). You will quickly find out what types of subjects you like to shoot and then you can invest in the gear you really need. I use beauty dishes, clamps, adapters, ball heads, snoots, honeycombs, and other light modifiers from Manfrotto, Novoflex, and Lastolite.
If you want to shoot at weddings and other public events, sooner or later you’ll need to use TTL equipment. It takes too long to adjust manual settings, and it distracts you from capturing important moments. The downside of using TTL gear is its price. A TTL flash can easily cost six or eight times as much as a non-TTL model, and reliable radio controllers cost extra too (for example PocketWizard TT1/TT5 or the Canon 600EXRT system). However, depending on how you use your equipment, it can quickly pay for itself. Other specialized macro or high-speed gear can be expensive too. In the workshops later in this book you will find the gear I used listed in each individual workshop.
My Everyday Backpack
I use a Lowepro SlingShot 302 AW backpack, which easily holds a full-frame DSLR with a 70–200mm lens attached. I fill the rest of my pack with other equipment that is fairly standard, although the lenses I take with me vary from shoot to shoot. I usually end up using 70–200mm and 24–105mm zooms and a 50mm or 85mm prime (or a Lensbaby).
Tripods and Stands
I use a travel or sports bag to carry my tripods and stands. Some of my stands are too long to fit in the bag, but it offers plenty of extra space for my flashes and other accessories. Dedicated tripod bags from Calumet offer good value if you don’t want to improvise. I carry larger accessories, like my Duke Nukem (see workshops 5 and 6 later in the book) and my beauty dish, separately.
Other Accessories
In workshop 2, I used the Sambesi flash2softbox system. The system components are solid and flexible. A bayonet mount is available separately; I use it to mount my homemade Chinatown Special beauty dish (http://vimeo.com/9577963). The system also includes an adapter for Bowens and Walimex VC accessories.
Various adapters are available for mounting light shapers on system flashes—for example, the Aurora Bracket can be used to mount Bowens accessories, and the Hedler FlashEule can be used to mount Hedler products. And be careful: there are lots of different mounts on the market, so ask your supplier for details if you are not sure which accessories fit your system.
Various companies (Ray Flash, enlight photo, and others) manufacture value-priced ring light adapters for system flashes. Although these units produce much less output than proprietary ring flashes and neon ring lights, they are fun to experiment with. I sometimes use the low-end Oh-Flash from Phottix. It is a good value for the money, but it won’t stay on my flash unit unless I use a lot of tape!
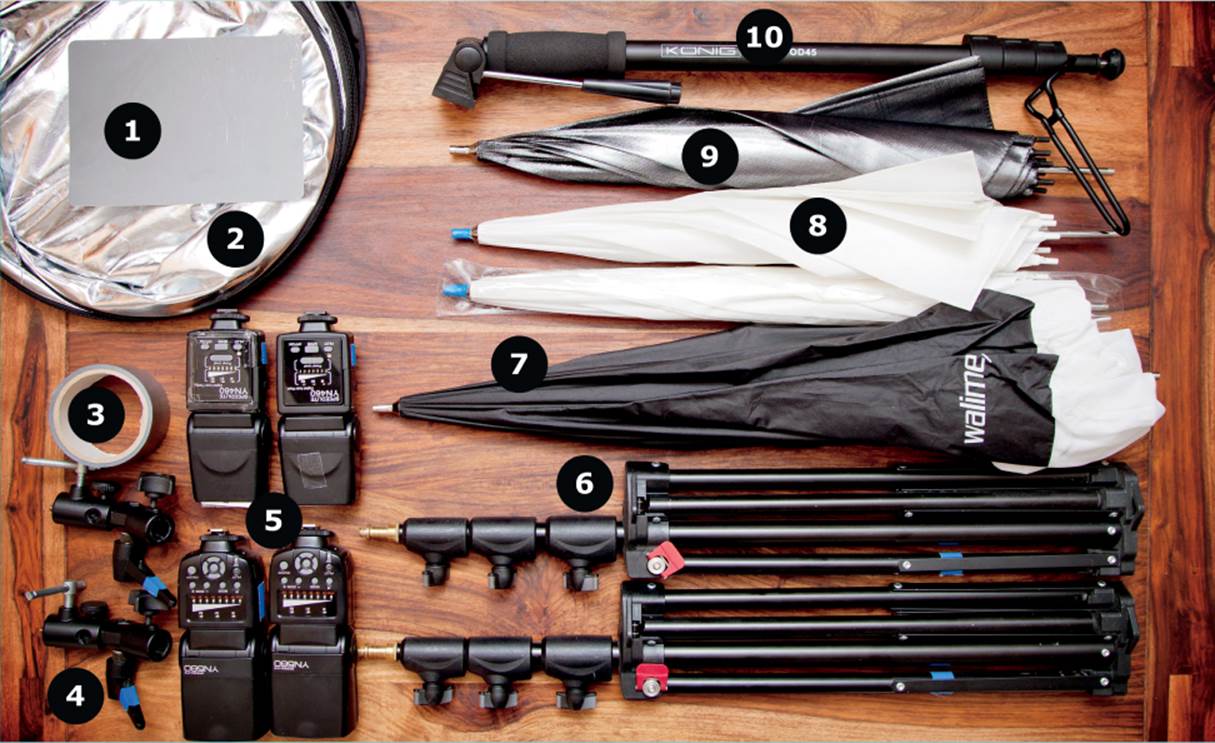
The contents of my stands bag (my Walimex light stands are not included in the figure)
1 Novoflex gray card
2 Delamax 5-in-1 reflector
3 Tape (as usual, nearly all used!)
4 Manfrotto 026 umbrella adapters
5 Four Yongnuo flashes
6 Two Manfrotto 1052BAC mini light stands
7 Walimex brolly box
8 Two Walimex white shoot-through umbrellas
9 Walimex silver reflector umbrella
10 Koenig boom stick/monopod
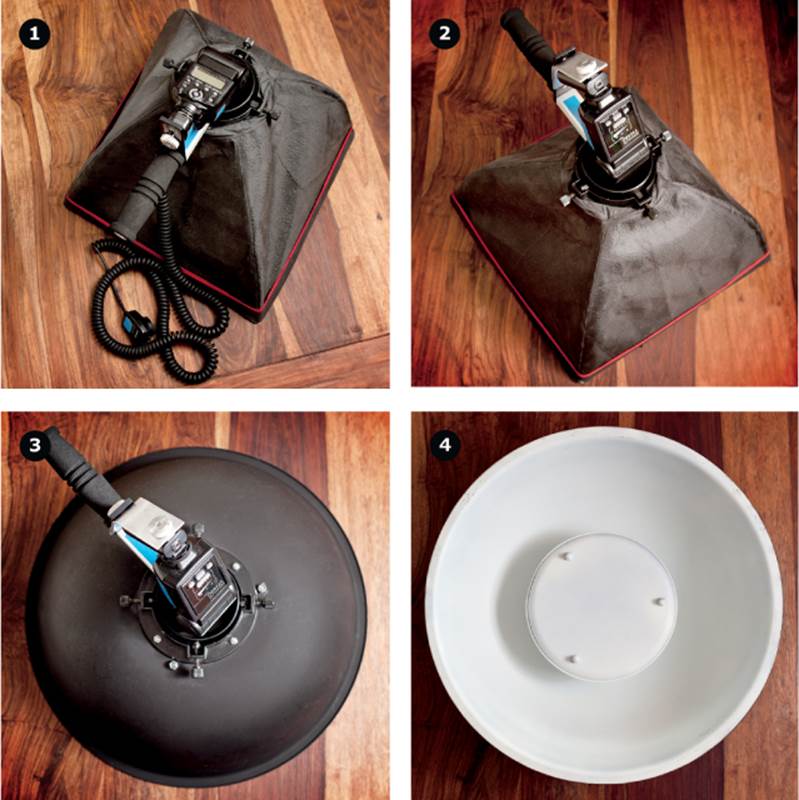
The flash2softbox system:
1 Softbox mounted on a Canon flash
2 Softbox mounted on a Yongnuo flash with an adapter
3 With my homemade Chinatown Special beauty dish
4 The front of the Chinatown Special beauty dish
Over the years I have collected a lot of clamps, goosenecks, tabletop tripods, and I found Manfrotto and Novoflex accessories to be the best.
Additional Equipment
Some pieces of equipment require special knowledge for them to be useful. Here are a few tips:
▸The cheapest Yongnuo flashes like the YN-462 are adjusted with a rotating knob that has no click stops. This is not a reliable way to shoot, so you should avoid them. Make sure your flash unit has clear click stops at whole EV increments (i.e., 1/1, 1/2, 1/4 output).
▸If you use the Manfrotto 026 umbrella adapter, make sure the umbrella stem is at an angle and the flash points toward the center of the umbrella—otherwise you’ll be labeled as a newbie. At least, that’s what happened to me.
▸Many experienced strobists prefer Eneloop batteries. They have a high charge capacity and a very low discharge rate when they’re not in use. In spite of their lower nominal voltage, they provide just as much power as conventional batteries (see the test results published atwww.flickr.com/photos/galllo/7883565718/). Make sure you use a charger that supports single-cell charging. Always use Eneloop batteries in complete sets and store them in the provided plastic box. Don’t mix batteries from different sets; label them, along with the purchase date, to be sure. If you are shooting at an event where you need to take lot of flash shots at short intervals, try using an external battery pack. The Yongnuo YN-560 and the Canon Speedlite 580EX II have connectors for attaching external power sources.
▸If you want to prevent your umbrellas from falling over and breaking when you are out and about, try weighing down your stands by taping a gallon water jug to the base, or use tent pegs to fasten them down. If it’s simply too windy, then shoot without light modifiers. Hard light can look cool too.
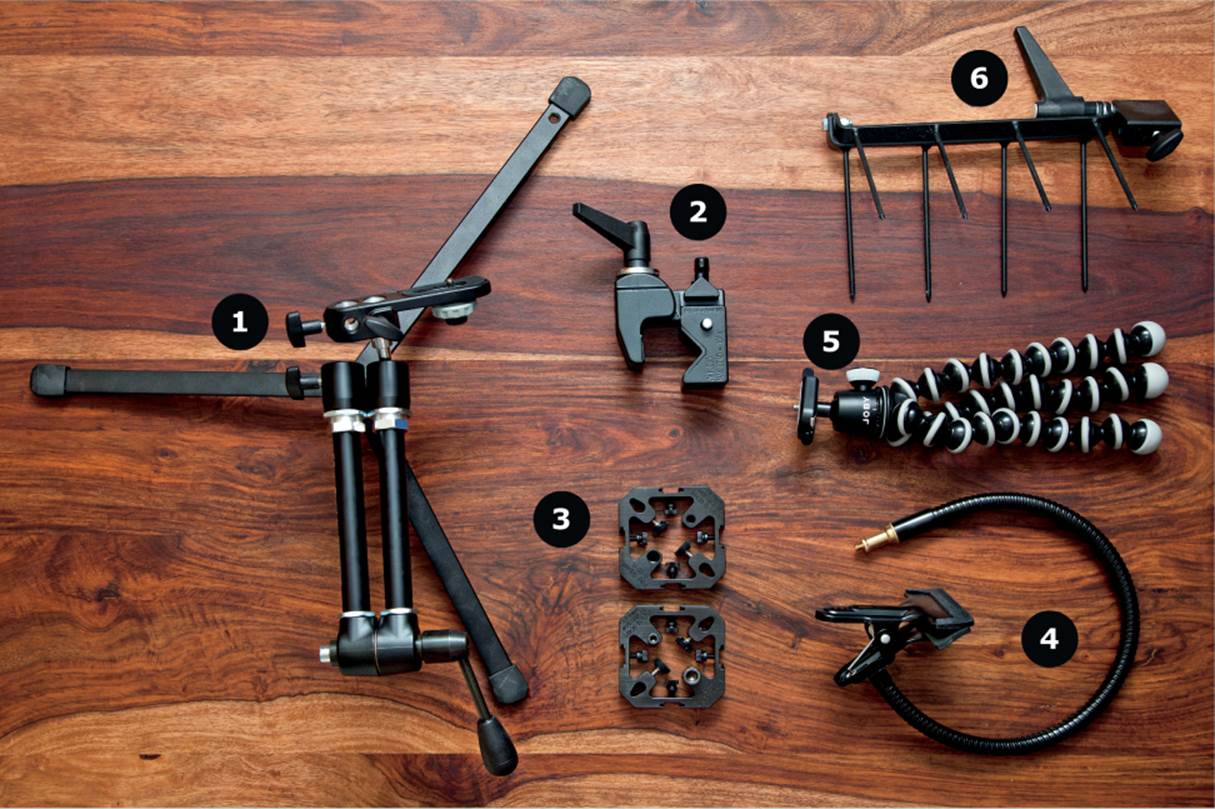
Various clamp and holder systems
1 Manfrotto Magic Arm (available separately or in the set shown here with a stand and a Super Clamp)
2 Manfrotto Super Clamp 035
3 Two FourSquare flash adapters, each for four flashes
4 Walimex gooseneck with table clamp
5 Joby SLR-Zoom GorillaPod
6 Double Styrofoam fork from proxistar
▸ If you are shooting using optical slave triggers or Nikon CLS system flashes, make sure you have a clear line of sight between your master and slave flashes. Different flash models (sometimes even from the same manufacturer) have optical receivers in different places, so make sure you know where you are aiming. In tricky situations, you can use aluminum foil to deflect the trigger signals to the right place.
▸ If you are shooting in a group, clearly label your equipment with colored tape so you’ll know which components are yours when everybody is packing up.
▸ When you’re shooting outdoors and in the rain, protect your flashes with freezer bags.
▸ Flashes and radio receivers often come with their own carrying bags, ministands, and other bits and pieces. I prefer to premount my lights (a stand with an umbrella swivel, a receiver, a flash, and an umbrella) and carry them in my tripod bag, ready to shoot, with the umbrella folded down. That way, I am ready to go when I reach the location. Most gear is stable enough to be transported this way.
▸ If you read about them online, Walimex and Yongnuo products don’t have very good reputations. I have found, however, that they offer great value for the money. Plus they’re not expensive to replace if they get lost or damaged, and they can often be repaired quite easily (see example instructions for the YN-460: www.flickr.com/photos/galllo/4732637702/ [scroll down for English text]).
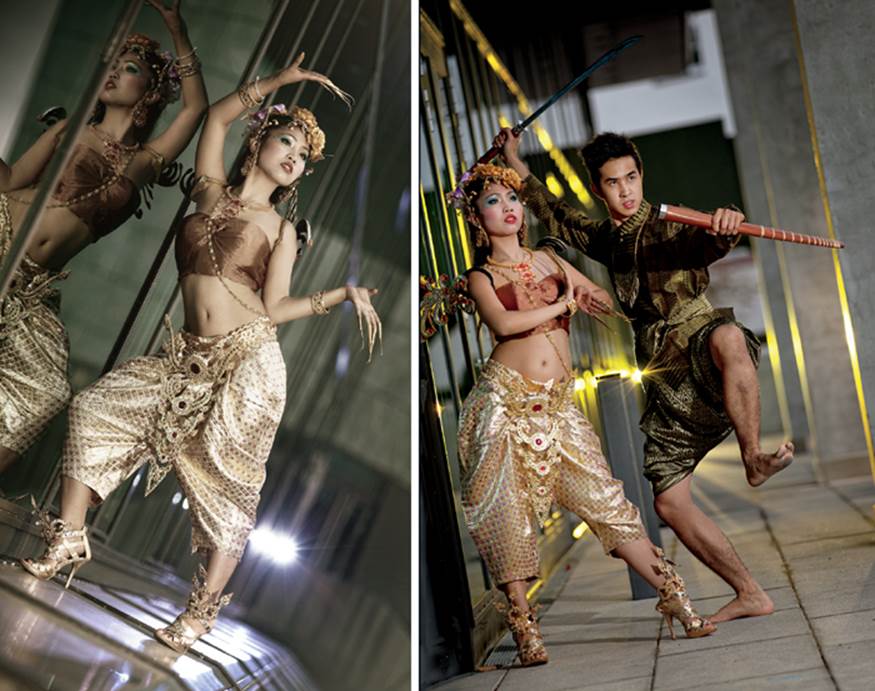
Many scenes seem ordinary at first, but they really begin to shine with flash. For this shot I used multiple off-camera flashes and color filters. The setup is similar to the one described in workshop 7. (Models: Tiney and “Mr. M”)
All materials on the site are licensed Creative Commons Attribution-Sharealike 3.0 Unported CC BY-SA 3.0 & GNU Free Documentation License (GFDL)
If you are the copyright holder of any material contained on our site and intend to remove it, please contact our site administrator for approval.
© 2016-2026 All site design rights belong to S.Y.A.