The Traveling Photographer: A Guide to Great Travel Photography (2014)
14. In the Best Light
Early Mornings and Late Evenings
It’s quite simple: without light, there is no photo, and that doesn’t just apply in a technical sense. The quantity and, above all, the quality of light determines whether a photo exists, is good, or is extraordinary. There’s a reason photography literally means “painting with light.” When you’re creating your images, the light is at least as important as the concept and technology behind your shot. The lighting conditions of a specific location at a specific time affect the colors and clarity of your subject, in addition to what appears illuminated and what appears in shadows. In short, light plays an essential role in the look and feel of a photo and the mood that an image conveys.
Early risers and night owls often encounter rich lighting conditions. It’s for good reason that nature photographers swear by the moments just after sunrise and just before sunset as the best time of day to work (“two hours after sunrise and two hours before sunset”). They rave about the soft, flattering light and the warm colors that cameras tend to depict more intensely than the human eye, which is regulated by the brain.
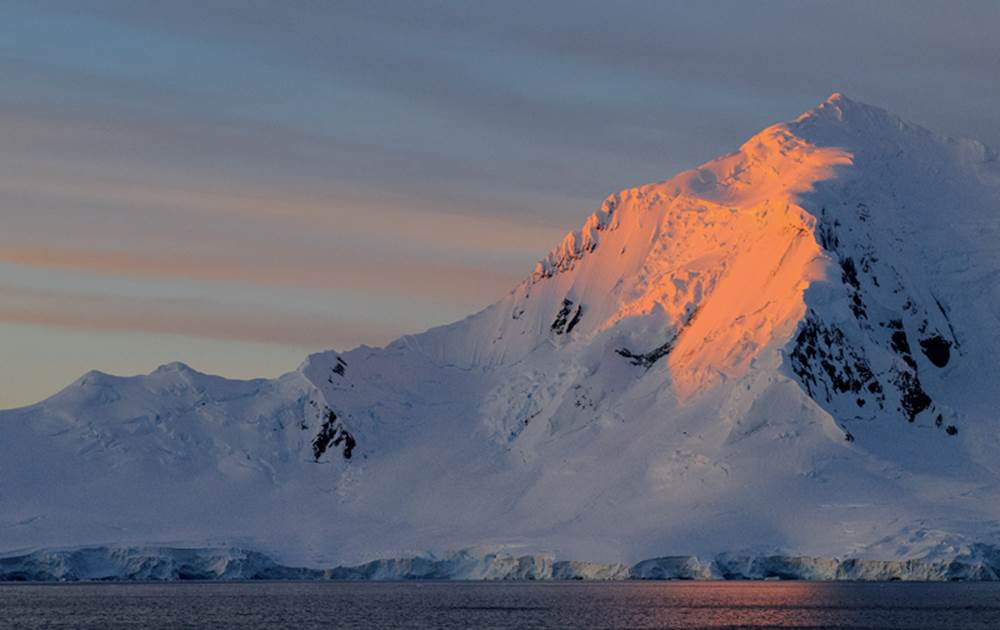
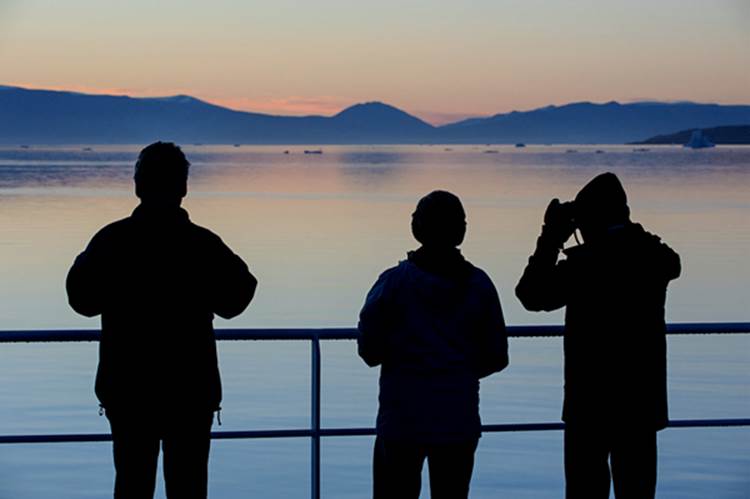
Ice-cold glow: The sun sends the day’s last rays over the peaks around Port Lockroy, Antarctica. Nikon D300 • 100 mm • 1/800 s • f/4.5 • ISO 800

The three Buddhas and the light: An evening detail shot from Vientiane, the capital of Laos. | Nikon D300 • 105 mm • 1/800 s • f/14 • ISO 250
Contrasts are not as extreme in the early morning and late evening as they are during the middle of the day. The warmer mood of light improves the look of most subjects. Mornings often offer up mist or fog, creating unusual lighting conditions, while many evenings provide an attractive play of colors and clouds. And don’t forget about the “blue hour,” that brief moment of transformation when it’s no longer day but also not quite night that engenders such rich and evocative pictures.
The enchanted light of morning generally appears before sunrise, which is why it is useful to be on location before the sun climbs up over the horizon. Similarly, it’s often beneficial to stay out a while after sunset – you might end up capturing a slight reflection in the clouds or on mountain peaks.
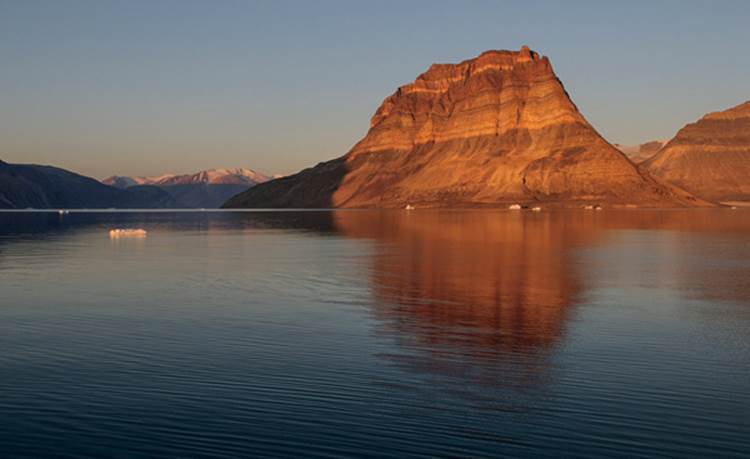
An ability and readiness to wait for the light is a key virtue for photographers, whether traveling or not, especially in the realm of nature photography. This patience often reveals itself in the photos. Pictures featuring exceptional lighting conditions may arise from coincidence, but in most cases, they are the result of watchful waiting. Once the right moment is at hand, however, speedy action is required. Light changes by the minute, if not by the second, especially during the hours of the early morning and late evening. The two pictures of the Teufelsschloss (Devil’s Castle,page 127), a prominent rock formation in eastern Greenland, were taken within eleven minutes of each other. The light goes away just as quickly as it comes.
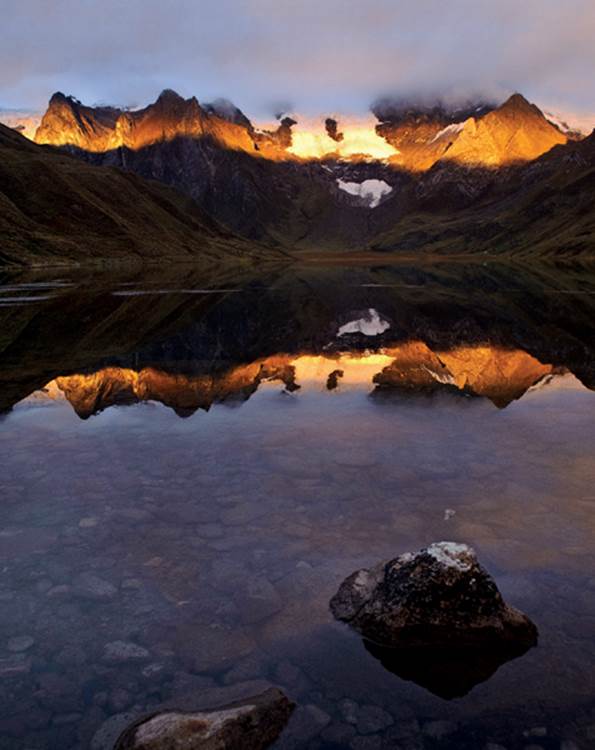
Sunrise at Cordillera Huayhuash, Peru. | Nikon D700 • 24 mm • 1/80 s • f/4.5 • ISO 2000 • freehand
If you are given the opportunity to photograph during the morning or evening hours, it’s a chance you should grab. When traveling, however, you don’t always have the ability to determine where you want to be at a specific time to take advantage of a particular quality of light. And on top of that challenge, the weather might not cooperate. (Taking pictures under adverse weather conditions is covered in the chapter “There Is No Such Thing as Bad Weather,” starting on page 132.) If you have the time to wait for the lighting to improve in a particular location, it’s worth it. A tiny bit of patience can make a huge difference. And if you have the opportunity, you can also revisit a particular site when the light is better and try again.
Often you’ll be forced to make do with the ambient lighting conditions, though. The good news is that exciting, appealing images can be created around the clock. You should take pictures whenever you can and want to, and try to make the best of whatever conditions are at hand. Train yourself to spot lighting that is not only beautiful but also unusual in some way. Unconventional lighting poses a challenge for photographers, but it often produces better results than you might first expect. On a cold, rainy morning that you’ve more or less written off for photography purposes, a sudden bluish-white morning fog starts to rise up from the river – not particularly attractive lighting, but a beautiful atmosphere where the blue conveys the coldness of the morning. During thunderstorms, rain showers, or changes in the weather, lighting conditions can change so frequently that it’s worth paying close attention to what’s going on in case you find yourself in the middle of something glorious.
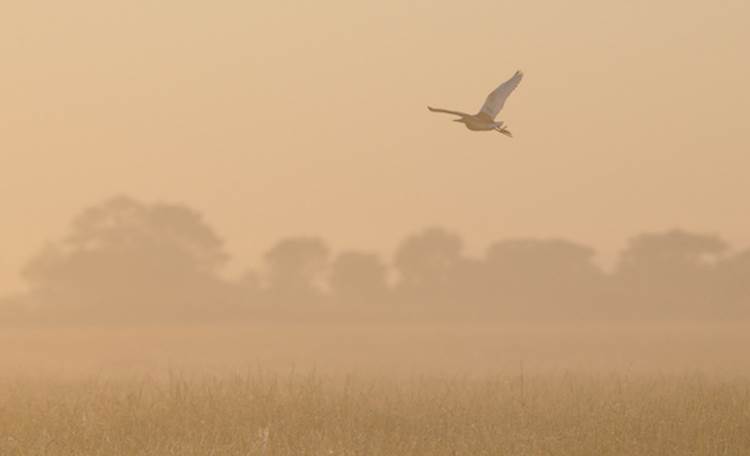
The early photographer gets the light: A beautiful morning on the Busanga Plains, Zambia. Nikon D300 • 375 mm • 1/1000 s • f/5.6 • ISO 400
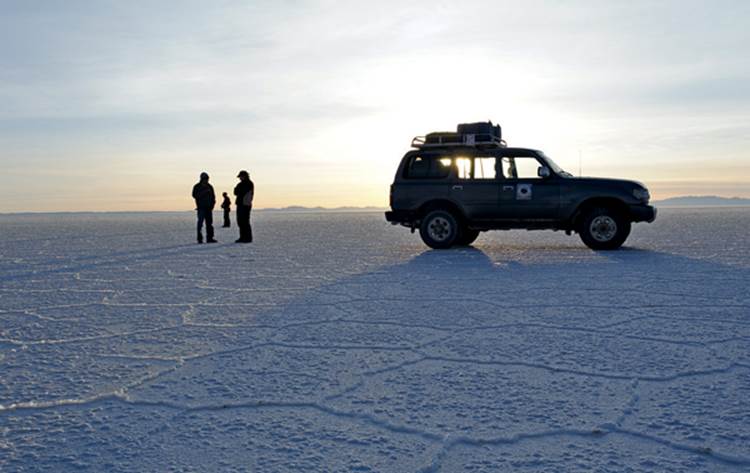
A play of shadows on Salar de Uyuni, Bolivia – just after sunrise on the largest salt flat in the world. Nikon D700 • 35 mm • 1/640 s • f/13 • ISO 800
Harsh midday light is a challenge. Unfortunately, soon after sunrise the light often already has the same qualities as that of the noon hour, so you need to learn how to adapt. It’s important to know that midday light often leads to black shadows and white highlights because cameras are less adept at perceiving light and shadow than human eyes. While we can still detect detail in bright and dark areas, the camera has significantly fewer brightness levels at its disposal. This limitation can be put to good use, however. When striking forms are combined with high-contrast lighting, it’s often possible to include attractive silhouettes in your images.
If you need to take a portrait during broad daylight, it’s better not to attempt your shot in open sunlight. If you move to the shade, the subject won’t have to squint his or her eyes as much and the contrast will be more manageable. You can also use indirect lighting by making use of sunlight reflected off a wall. Keep in mind, however, that light reflected off colored surfaces can produce color casts in pictures.
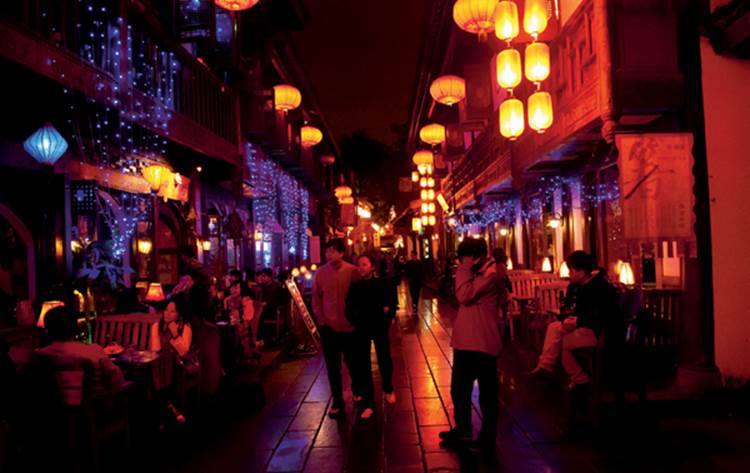
A nighttime stroll through the historic quarter of Chengdu, China. The city’s youngsters sit in cafés or walk through streets that are decorated with lanterns. | Nikon D700 • 24 mm • 1/60 s • f/4 • ISO 6400 • freehand

Easter Island icons: Here the famous stone figures, the Moai, are photographed in four different lighting conditions. In the first image, the sun is hiding behind a cloud; in the second image, it’s pouring rain. You can only try to make the best of it and, for example...
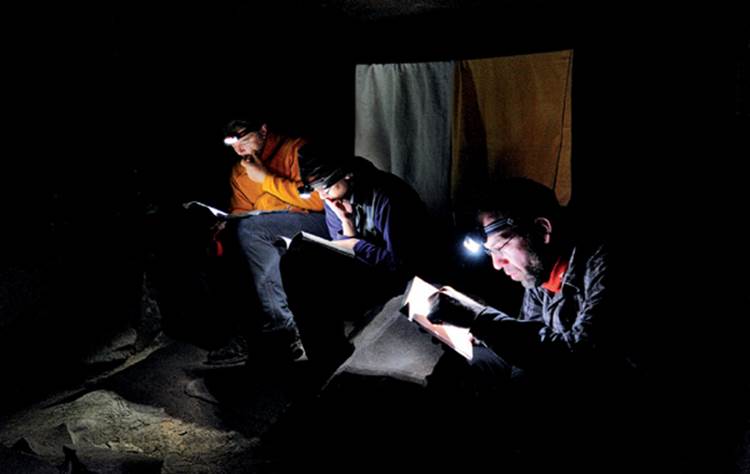
Evening reading hour on a trekking tour of Auyán-tepui, Venezuela. The headlamps and pages are blown out but that doesn’t detract from the picture’s feel. | Nikon D700 • 35 mm • 1/20 s • f/2.8 • ISO 6400 • freehand
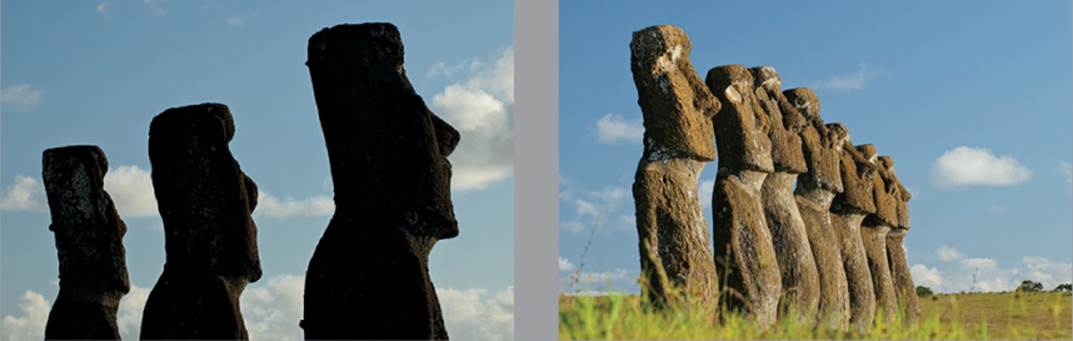
...make use of the silhouette to depict the characteristic shape of the statue when the light is poor. Or you can wait for better weather. Maybe the sun will come out again (and the polarizer will go on your lens).
Bright background + dark foreground = silhouette: This equation doesn’t apply only to eastern Greenland. If you brighten up the foreground with a flash, you’ll lose the emphasis on the graphical outline of the foreground subjects. | Nikon D700 • 105 mm • 1/400 s • f/10 • ISO 2000
As an alternative during the daylight hours, you can focus on details that are located in the shade or that allow themselves to be shaded. Dark interiors can benefit from a calculated accent of incoming daylight. Overcast skies are practical for detail photographs in which specific characteristics of your subject need to be accentuated, and also for portraits in diffuse, even light. Light striking your subject from the side emphasizes structure and texture, while backlighting emphasizes shape and outline.
You can even create exciting pictures in pitch-black darkness with artificial light sources. Such photographs almost always necessitate the use of a tripod or at least a steady perch for your camera, as well as a cable or remote trigger (or the self-timer if you’re in pinch), since even at high ISO settings the lack of ambient light may make it impossible to take sharp pictures otherwise.
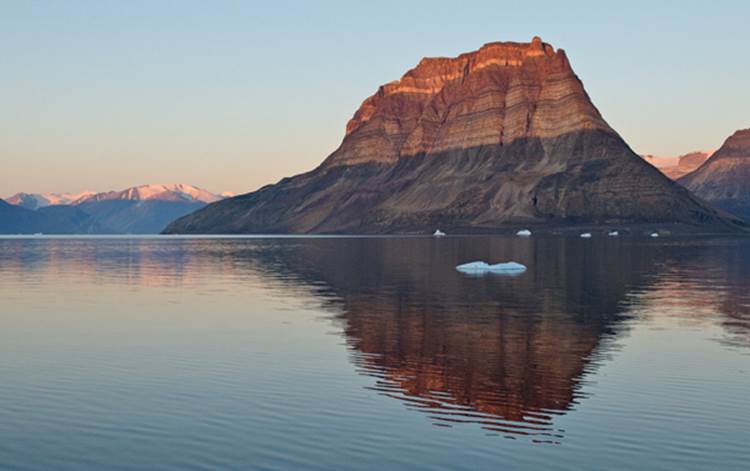
Opposite page: Waiting for the light – eleven minutes separate these two photos of the Teufelsschloss (Devil’s Castle) in eastern Greenland. | Top: Nikon D700 • 29 mm • 1/250 s • f/5.6 • ISO 500. Bottom: Nikon D700 • 24 mm • 1250 s • f/8 • ISO 400

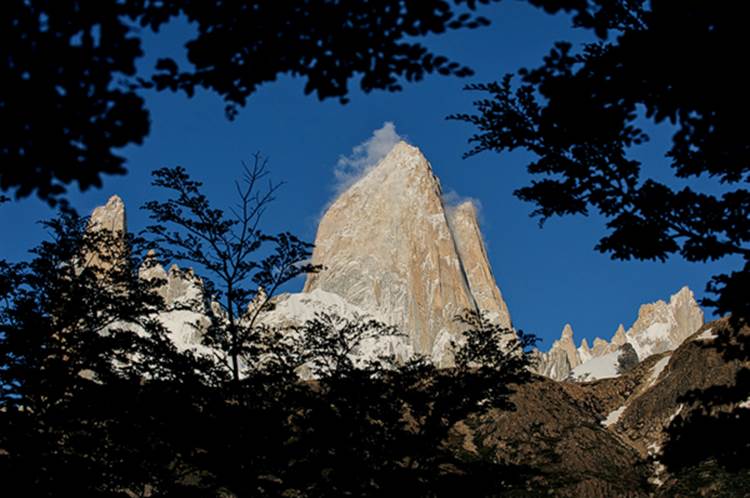
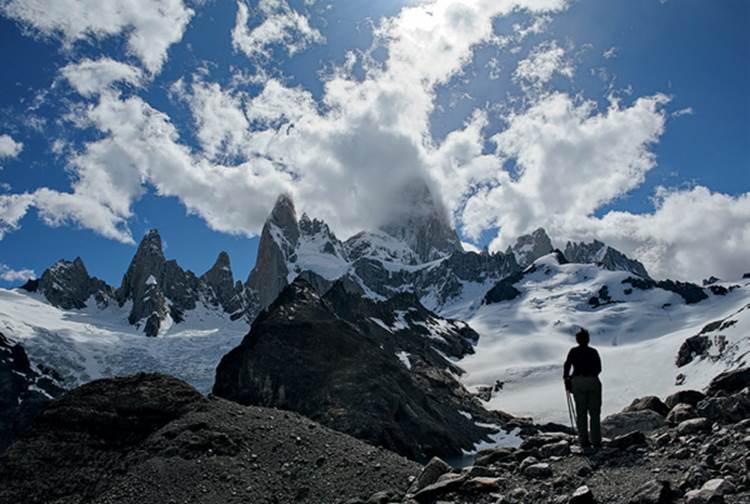
Four times Fitz Roy: On this spread, one of the most famous peaks of Patagonia is shown in various lighting conditions. | Top (time of exposure 6:11 a.m.): Nikon D700 • 115 mm • 1/500 s • f/11 • ISO 200. Bottom (8:46 a.m.): Nikon D700 • 70 mm • 1/500 s • f/11 • ISO 400.
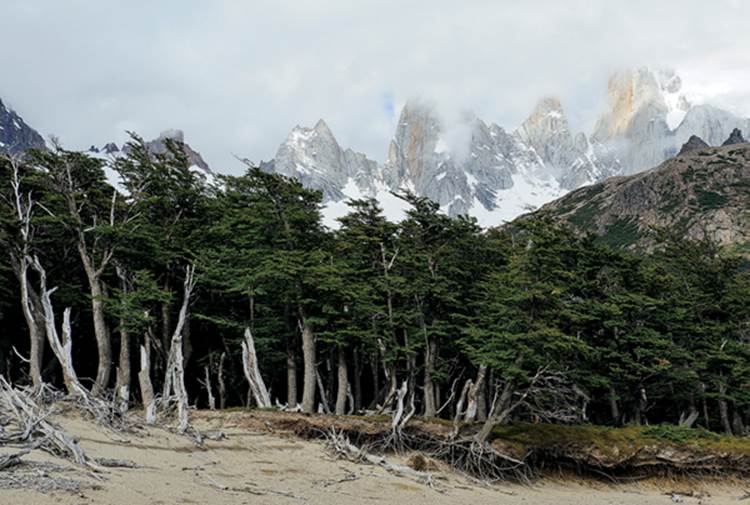
It often pays off to revisit the same place at a different time of the day to get different, and maybe better, light. | Top (time of exposure 6:42 a.m.): Nikon D700 • 85 mm • 1/640 s • f/11 • ISO 200. Bottom (this photo was taken in the afternoon on the day before at 5:04 p.m.): Nikon D700 • 27 mm • 1/500 s • f/11 • ISO 200
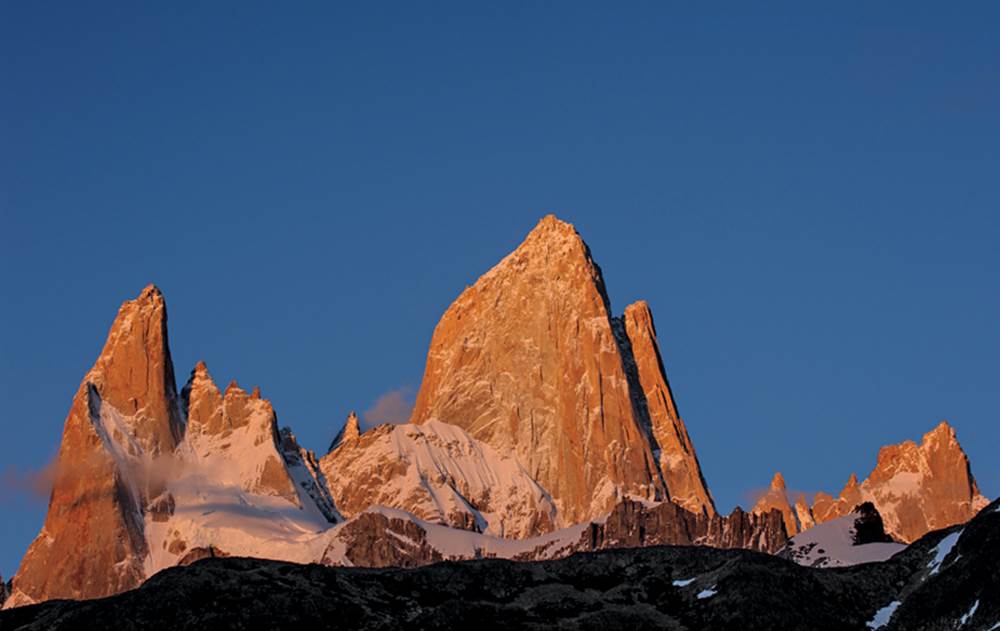
The reward for getting up very early: The first rays of sunlight touch the Fitz Roy massif, Patagonia. | Nikon D700 • 86 mm • 1/80 s • f/11 • ISO 200
All materials on the site are licensed Creative Commons Attribution-Sharealike 3.0 Unported CC BY-SA 3.0 & GNU Free Documentation License (GFDL)
If you are the copyright holder of any material contained on our site and intend to remove it, please contact our site administrator for approval.
© 2016-2026 All site design rights belong to S.Y.A.