The Traveling Photographer: A Guide to Great Travel Photography (2014)
22. Better Safe Than Sorry
Transporting and Protecting Photographic Equipment
As little as possible, as much as necessary, and above all, what you really need: the same general rules that apply when selecting your photography equipment for traveling apply when transporting and protecting your gear. Choosing a photo case or backpack is just as personal a matter as deciding whether to store your camera away after each shot or carry it around in your hand. Asking around about the best rain shield (and if you even need one) will produce as many different responses as asking about a favorite lens. This chapter describes various possibilities based on my personal experience, so that you can have a slightly easier time deciding on a practical solution for your equipment and your travels.
Bag, Backpack, Holster, Hand
Anyone who wants to bring more than a compact camera quickly comes to appreciate the question of how to transport gear. Whether you decide on a photo backpack or a case depends on the amount of gear you’re traveling with, the location to which you’re traveling, and the kind of travels you do. It’s also important to think about how often you need to quickly reach for a camera or a lens.
With this in mind, a shoulder bag, such as the classic reporter bag, can’t be beat; and fortunately, they are available in designs that don’t scream out, “I’m a photo bag!” They are practical for short urban trips with a limited amount of equipment, but if the bag becomes too heavy or large, it quickly loses its advantages. When purchasing a bag you should also make sure that all of your equipment fits comfortably, since while you’re on the go, you often need to fit one or two other small items in it.
A backpack is often a more practical solution while traveling, if for no other reason than it divides the weight over both shoulders and can often accommodate additional objects such as a raincoat, water bottle, and travel guide. A photo backpack should combine a reasonably good level of comfort with an easily accessible and practical division of interior compartments for your camera and lenses, as well as additional space for all the other necessities. Larger backpacks should come equipped with a hip belt that provides stability and comfort in addition to transferring a significant amount of the weight. The overall padding as well as that for the individual compartments should be practical but not excessive; this isn’t a bag that you’re going to be throwing around carelessly.
It may seem that having countless individual compartments and exterior pockets would be desirable for storing accessories, but in reality, I’ve found that it’s more convenient to have a few decent-sized compartments that can accommodate typical odds and ends such as batteries, memory cards, filters, cables, and power cords.
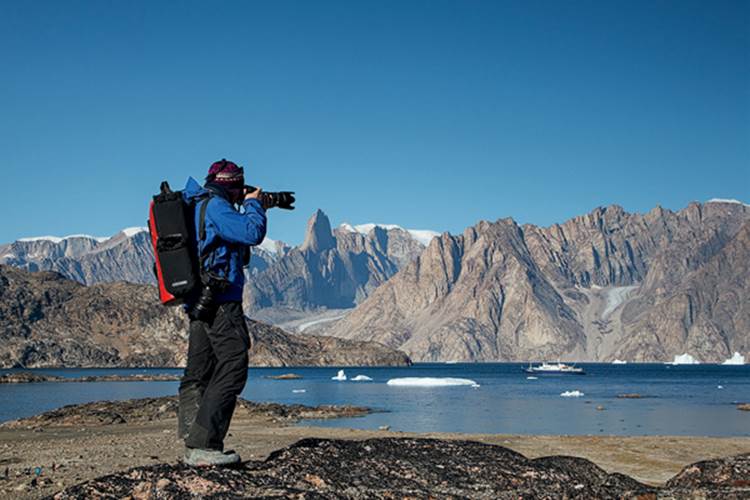
On a photo tour of Greenland: That’s me with both cameras on hand and my 500 mm lens in a waterproof backpack. Photo by Michael Lohmann. | Canon EOS 1D Mk IV • 130 mm • 1/800 s • f/8 • ISO 250
One of my favorite photo backpacks has three removable secondary compartments in addition to the main one; these smaller pockets can easily hold a 100 mm-wide standard graduated ND filter in its case.
If you’re planning on taking a tripod with you and you don’t want to hold it in your hands at all times, then a tripod holder will be of special interest to you. And if you’d like to use your photo bag as carry-on luggage while traveling by plane, you will want to factor in the airlines’ size limitations when deciding what to purchase.
If you don’t want to buy a backpack specifically designed for camera gear, then you can equip a standard hiking backpack with a camera insert. This is particularly practical if carrying comfort is critical – for example, if you’re going on a long hiking trip. And the less a camera equipment bag looks like a camera equipment bag, the better off you are in terms of the risk of theft.
A holster case is yet another option that can be especially useful if you’re traveling with a single DSLR and a general-use lens, a combination that is common for trekking or hiking tours. You can sling this type of bag over your shoulder or attach it to your belt or hiking bag and you’ll have easy access to your camera, which still benefits from some protection. If you have more equipment, however, holster cases are less useful. With that said, you could store a camera with a wide-angle or standard lens in the holster and keep an additional tele-photo zoom lens in your regular backpack, pulling it out as needed and then returning it for safekeeping. (Many holsters allow for a side-mounted lens case for just this purpose. If you are simply storing your lens in your general backpack, you don’t necessarily need a special lens case. If you’re adequately careful, wrapping your lens with a neoprene cloth will provide sufficient protection.)
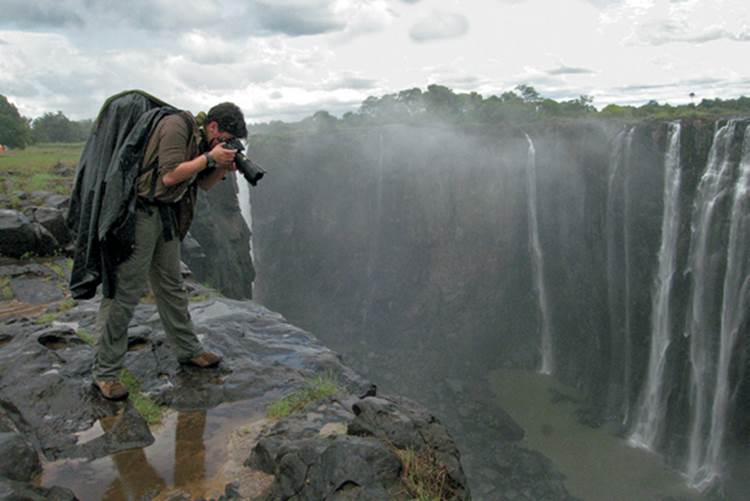
The backpack hides under the poncho while the camera has to rough it out in the spray of Victoria Falls, Zimbabwe. Photo by Jörg Ehrlich. | Canon PowerShot S80 • 28 mm • 1/1000 s • f/6.3 • ISO unrecorded
By now I’m sure that there is no such thing as the perfect photo backpack that serves all purposes or the consummate photo case that is the right choice for every situation. Photographers have to settle for some sort of compromise; the main thing is to make sure it’s not a bad compromise.
Eventually, the futile search for the perfect photo bag has led me to carry my camera in hand or wear it around my neck most of the time. If you tend to carry your camera on a strap over your shoulder, I recommend hanging it with the lens facing your body, which may seem odd at first glance but is more stable in my experience. It’s also best to hold heavy telephoto lenses in your hand so that the lens mount isn’t under an inordinate amount of stress.
Sand, Dust, and Water
Cameras and lenses are fairly particular – they don’t like dust, sand, or moisture. Consequently, it’s up to the photographer to protect his or her equipment from such dangers, both when the camera is in use and when it’s not.
When it comes to protection from water, a trusty umbrella is valuable when taking pictures; there are even tripod mounts that can hold it so you can work with your hands free. In strong wind, though, you’ll need to come up with another solution. Rain shields made of transparent plastic material that cover your camera and lens barely hinder your ability to manipulate your camera. In a pinch, you can also do pretty well with a do-it-yourself solution using a plastic bag and some cable ties, both of which should have a regular place in your equipment bag. With a touch of ingenuity and improvisation you can actually manage quite well in the rain. Even a neoprene lens cloth can serve as protection from the weather. Packets of silica gel help to absorb moisture in your photo bag; they can be dried out and reused. A few packets fit into even the smallest equipment bags.
A rain cover for your entire photo bag won’t make it completely waterproof, but it’s better than nothing. A large, robust garbage bag is also effective during a rain shower if you put it over your entire photo bag. In more challenging circumstances or continued torrential rain, a robust, waterproof dry bag with a roll closure or a waterproof zipper is your best bet. These bags are pretty easy to use as long as you’ve chosen a model that’s large enough – put your camera bag (or camera) in and then roll the top closed. Dry bags are relatively easy on your budget and fairly sturdy if you don’t choose the ultra-lightweight versions.
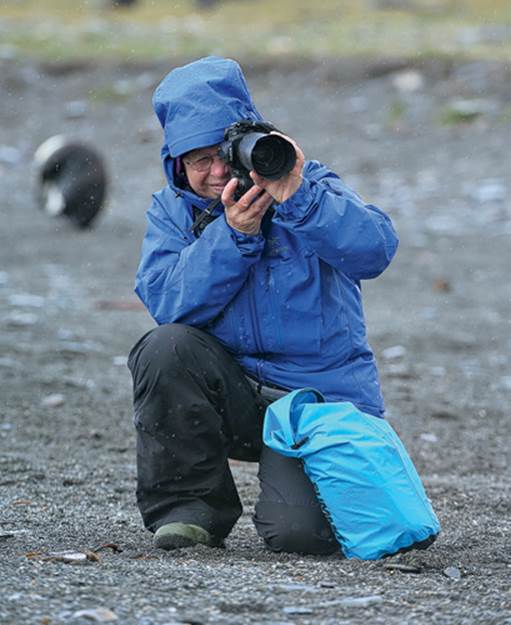
A practical solution for inclement weather such as here in South Georgia: After the shot, the camera went back into its waterproof dry bag. | Nikon D700 • 360 mm • 1/1000 s • f/7.1 • ISO 1600
When you really wish to pack your equipment in a waterproof or dustproof bag but also need to retain fairly easy access, you don’t have many options. There are a few waterproof photo bags or expedition-grade plastic cases available. I’ve had good experiences with König Photobags, which use tough semi-truck tarps as a base material and feature stable, padded, and adjustable compartments. Lowepro and Sagebrush Dry, a small manufacturer in Alaska that specializes in gear for water sports and fishing, also offer waterproof photo backpacks.
The question of whether to use an underwater case in severe weather conditions often comes up. Underwater housings for DSLRs are bulky, heavy, and expensive. They’re really only designed for divers and snorkelers who can get the most out of such high-tech gear. The relatively affordable and easy-to-handle plastic housings for compact cameras, in contrast, prove worthwhile even in sandy environments. If you’re considering taking your camera swimming or snorkeling or planning a desert trip, these are worth looking into.
If your equipment does get wet, dry it off as soon as possible. After carefully absorbing all of the moisture present on the outside of the camera and lens, leave some time for the interior elements to dry out. If your camera gets really wet (and perhaps even stops working), take the battery and memory card out, save your image files, and don’t try to turn your camera back on immediately. Doing so can cause damage to the interior electronics if moisture has worked its way in that far. Give your gear some time to dry out, ideally over night, and then try to power it up again in a dry place. Cameras often recover surprisingly well after contact with rainwater, even if they give out at first.
Saltwater is a much more serious problem. If your camera’s exterior gets splashed with saltwater, clean it as soon as possible to prevent the abrasive salt from settling. If your camera gets doused in saltwater, there is often no way to save it, so take special precautions when shooting near saltwater.
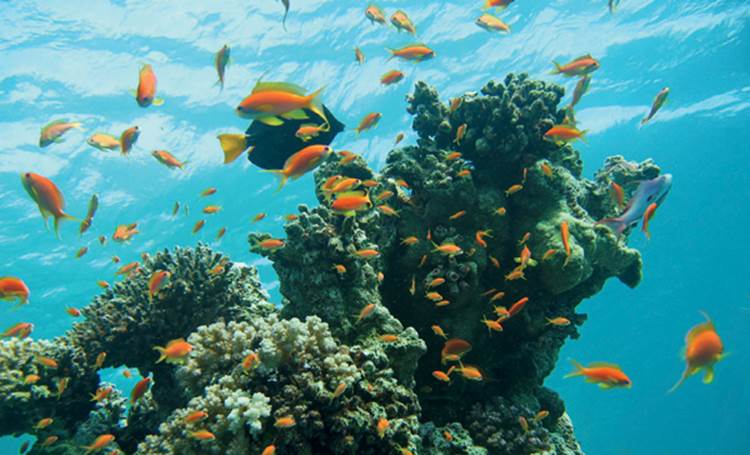
Only recommended with underwater housing rated for diving: This picture of a coral reef with Damselfish and a Purple Tang was shot at a depth of about five meters in the Red Sea, Egypt. | Canon Ixus 750 • 37 mm • 1/160 s • f/2.8 • ISO unrecorded • underwater housing
Everything about water also goes for dust and sand. The particles find their way into the smallest openings and settle unmercifully on everything. To prevent this from causing damage, store your camera and lenses in a dust-proof or dust resistant case. You also need to protect your camera while it’s in your hands. You might, for example, wrap a towel around it or fashion a “camera shield” out of a pillowcase.
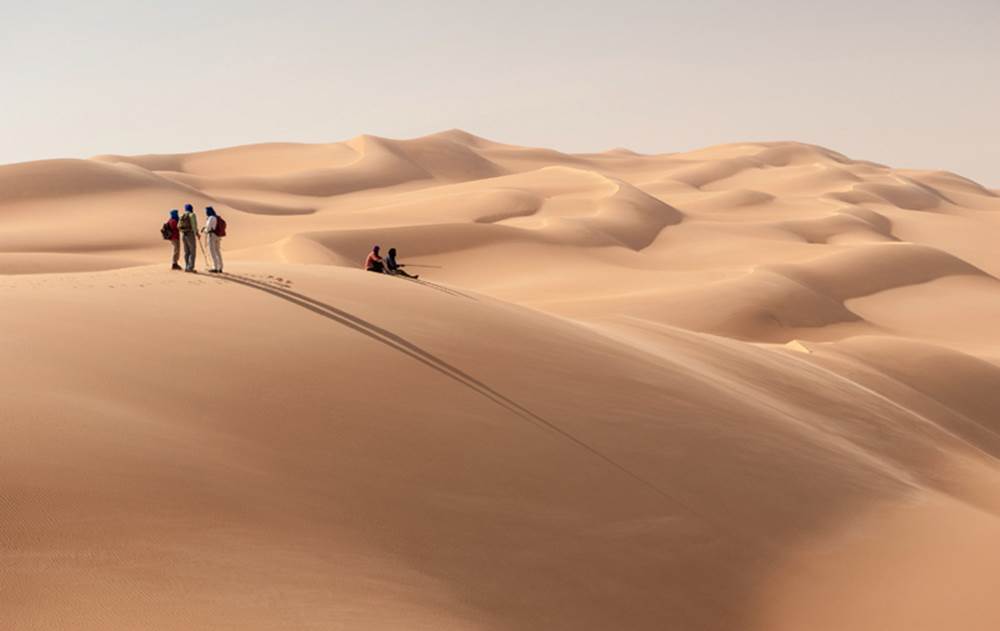
In deserts, at the beach, or in any location where fine sand is prevalent, you should take care not to set your camera case or backpack on the ground, especially if it’s windy. The wind blows strongest at ground level, and that’s also where it carries the most sand particles. If you attempt to shoot on the ground (trying to get a low angle), you’ll feel properly sand-blasted afterward.
It should go without saying that it’s a good idea to perform some regular cleaning maintenance on your cameras and lenses with a bellows and a brush. Stubborn dirt on the front lens element can be treated with a LensPen, which is a type of fine eraser. You can use cotton swabs with a cleaning solution (a mixture of isopropyl and rubbing alcohols) to clean filters. I generally don’t attempt to clean the sensor while traveling because it’s difficult to find a dust-free environment. The camera’s automatic sensor cleaning process usually does the trick, even if I have to run it several times in a row.
When you hear scraping and crunching indicating that the dust and sand have settled, the only recourse is to conduct a thorough cleaning when you get home. I leave this up to professionals who disassemble and clean the camera and lens. This is not an inexpensive process, but it costs less than a new camera or lens.
Cameras and lenses aren’t the only pieces of gear you’ll want to protect; memory cards also appreciate some protection from the elements. My CF and SD cards are sorted and stored in a memory card case that can hold up to 10 cards in transparent compartments and can be folded for transport. This saves me from having to fiddle with dozens of cases, and I’m able to keep the full and empty cards separated.
Safe, Safer, Insured?
I don’t believe that a photographer behaves any less carefully with his or her equipment as soon as it’s insured; at least, that hasn’t been the case for me. But knowing that damage to my cameras, lenses, and accessories won’t send me into a financial disaster has made me a bit more relaxed while traveling. And I do believe that this sort of peace of mind benefits one’s photography and creativity. Insuring your equipment helps to remove some of your worries without making you careless.
For someone like me who is frequently on the road in different parts of the world, it’s practical to have photo insurance that covers misfortunes at home as well as abroad. If you don’t require worldwide coverage, many policies allow you to limit their territorial scope.
It’s also critically important to me that an insurance policy covers damages or accidents regardless of how they occur. Whether resulting from the carelessness of the photographer (e.g., you drop your equipment or leave it somewhere) or theft from a locked car or open tent, the insurance should have you covered without any ifs or buts.
Since each insurance company writes contracts differently and offers different types of coverage in its policies, it’s important to read the fine print and compare coverage with regard to both price and the services offered. This isn’t fun, but it’s the only way to find out exactly what you’re paying for. For example, you’ll want to know who is considered liable if you check-in insured gear with an airline and it gets stolen while in the airline’s possession. Since airlines offer only meager compensation for the loss or damage of baggage (unless you have upped the standard insurance rate with them), you may end up getting stuck with the bill if your insurance company doesn’t cover this type of thing.
Whether you decide to insure all of your gear at a specific total value or insure each item individually will depend on a few factors. If you itemize your insured gear, you can easily include or exclude pieces as wanted (which affects your premium), but setting up and maintaining such a policy requires a bit more work.
Some insurance companies use the retail price of equipment as the sum insured. For someone like me who often purchases (expensive) lenses secondhand, this isn’t ideal because it can drive up the premiums. I have accordingly opted for a policy that allows me to set the sum insured for each individual piece of equipment depending on the purchase price or the value I attach to the item. The price for the item if I were to purchase it new is the upper limit.
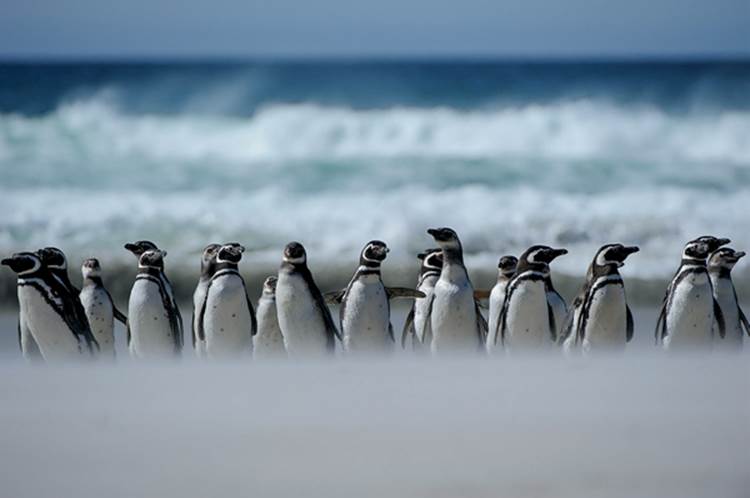
Sand-blasting for free: The blurred lines hiding the penguins’ feet are caused by sand blowing about on the ground. I was lying in the middle of it. | Nikon D700 • 400 mm • 1/2500 s • f/5.6 • ISO 200

One more thought on safeguarding your belongings: Cameras, lenses, tripods, filters – all of these things are replaceable, even if losing them is painful. There’s no insurance for lost pictures, however. This is one more reason that data backup while traveling (and everywhere else) should be given special attention (see the following chapter “Safeguarding Data” on page 206).
All materials on the site are licensed Creative Commons Attribution-Sharealike 3.0 Unported CC BY-SA 3.0 & GNU Free Documentation License (GFDL)
If you are the copyright holder of any material contained on our site and intend to remove it, please contact our site administrator for approval.
© 2016-2026 All site design rights belong to S.Y.A.