The Traveling Photographer: A Guide to Great Travel Photography (2014)
3. Off Center
Why Subjects Should Move a Bit to the Side
When you take a picture, where do you instinctively position your main subject – the center of your image? Smack-dab in the middle, where the central autofocus point or area makes it easiest to get a sharp image; where the subject – whether it’s a person, flower, building, or mountain – receives undivided attention; where nothing will challenge its dominance. You place it where the logical position for your main subject seems to be.
But only at first glance. If you end up with a bull’s eye composition for all of your photos, they will all look the same – predictable, monotonous, outright boring. After the first look, the viewer will discover the main subject in the obvious position, and won’t have any reason to continue engaging with the photo to discover what else might be there. It’s an image composition devoid of tension, and what’s even more, you’re robbing yourself of all other creative composition possibilities. Always opting for central positioning means disregarding the endless play between the main subject and secondary details, and missing the opportunity to create a balanced, but nonetheless exciting, image composition.
So, if you’d like to go beyond that, where do you position your main subject? It’s up to you: Even a modest shift is sufficient to move your subject off-center, but you may also opt for an extreme composition by placing it next to the image border or into one corner. It all depends on the image, your intention, your willingness to experiment, and the circumstances. In most cases, a slight shift of the main subject is enough to provide a more engaging composition, which brings us to a popular design technique: the rule of thirds.
I’m rather reluctant to use terms like “rules of design.” A rule can be seen as a helpful hint but also as something that comes close to a commandment. Aside from that, following formal rules of design won’t necessarily lead to pleasing photographs. Nevertheless, I consider it important and highly useful to be familiar with these design rules – universal aesthetic principles that can provide a basis for composing attractive, harmonious, interesting photos – and how they work, even if it’s only so you can intentionally overstep and play with them.
The rule of thirds is based on the proportions of the golden ratio, an aesthetic concept that was well known in antiquity. It is based on a specific aspect ratio and comes up often in the natural world as well as in the world of art. As a simplified principle of design it’s easy to remember, and it can be applied before an exposure is made as well as (within limits) afterwards during the post-processing stage. Divide any photo with two sets of evenly spaced parallel lines – one pair horizontal and the other vertical – and you’ll end up with nine square areas of the same size (see bottom photo on page 31). The height and width of the image area will be cut into thirds. Now position your subject at one of the intersections, along the lines, or even somewhere near one of the intersections or lines, and you’ll automatically avoid positioning your subject in the center.
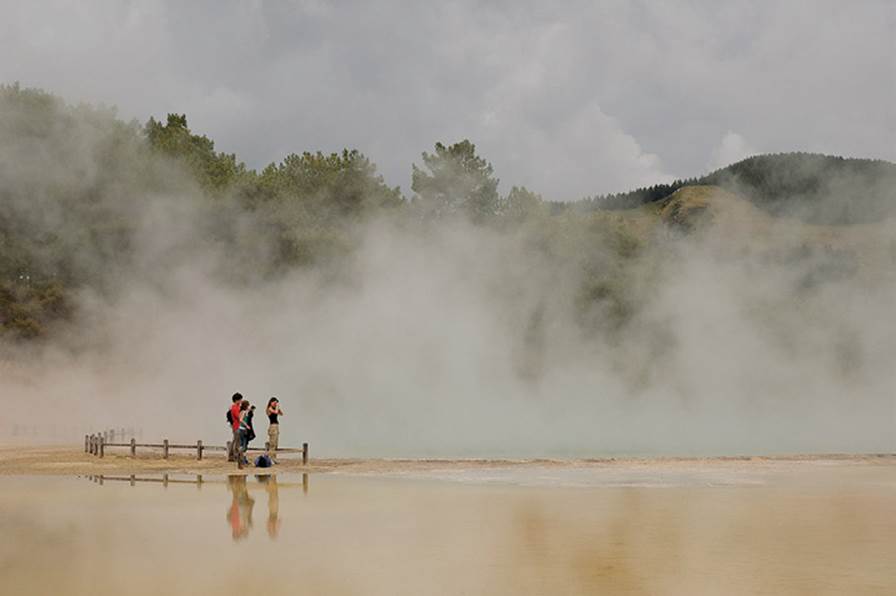
Earth is alive: A scene from the “thermal wonderland” Wai-O-Tapu on the north island of New Zealand. | Nikon D70 • 66 mm • 1/250 s • f/8 • ISO 200
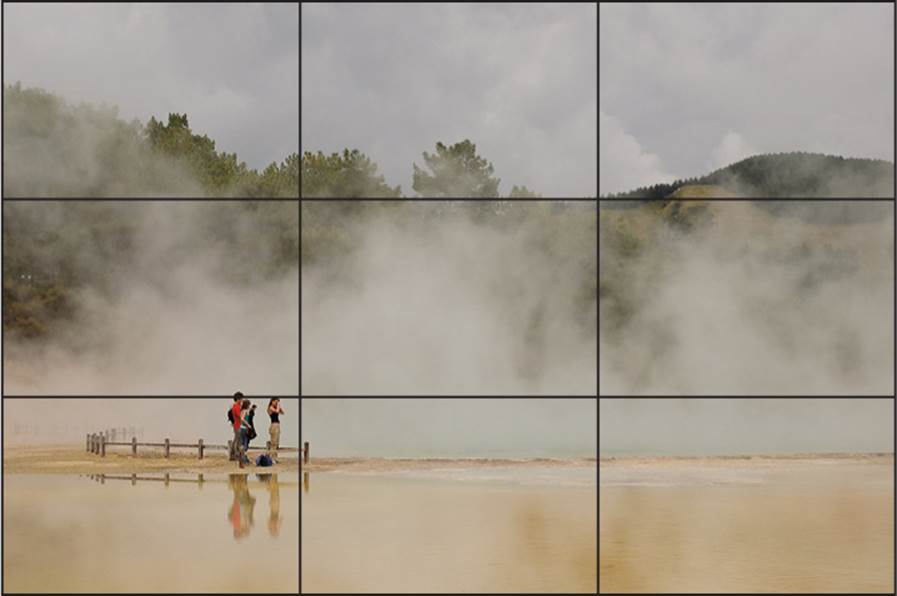
Below: Guiding lines divide the image into nine equal areas. According to the rule of thirds, important subjects should be positioned near to where the lines intersect.
With time, it becomes second nature for many photographers to generally avoid a bull’s eye composition, and it is just as natural for them as it is for beginning photographers to center their subjects.
Evaluate your photos and those of others to figure out how they work, especially if you’re just getting your toes wet in the field of photography. Ask yourself questions about what you see: Does this picture appeal to me? If so, why? What feeling does it convey? How does it affect me? Where did the photographer position the main subject, and are there reasons for this indicated within the picture?
Examining as many different pictures as possible enables you to develop more and more confidence in your ability to evaluate scenes and subjects, which will in turn improve your own photography. Examining the work of other photographers is just as applicable for advanced photographers, by the way; everyone can benefit from outside ideas at any time.
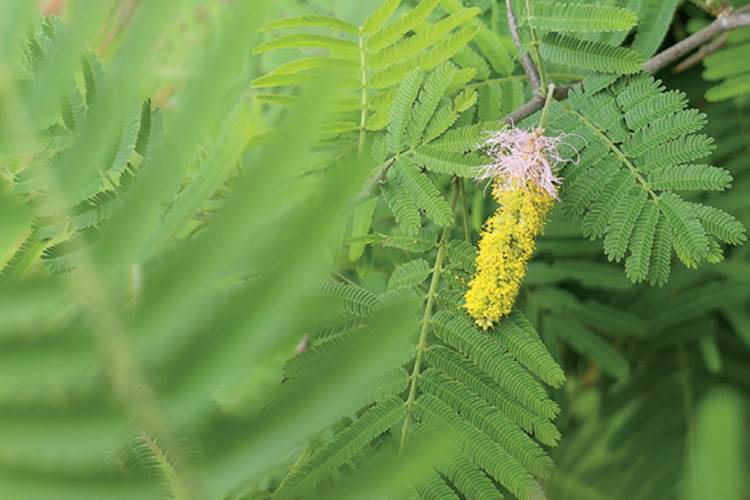
Floral fascination in Zimbabwe: The main subject is positioned away from the center, and the blurry leaves in the foreground provide depth. | Leica D-LUX 5 • 70 mm • 1/125 s • f/3 • ISO 80
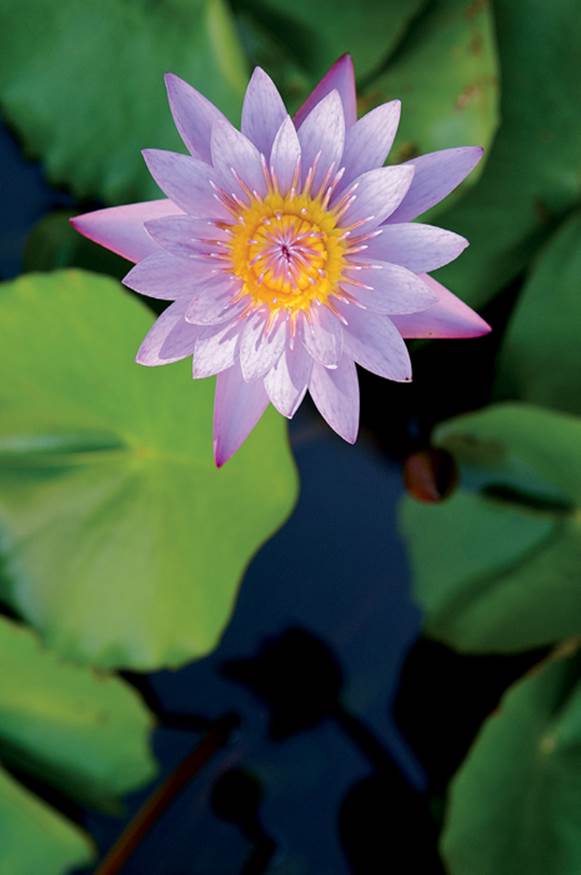
Water lily, Zimbabwe. | Nikon D300 • 67 mm • 1/160 s • f/4 • ISO 400
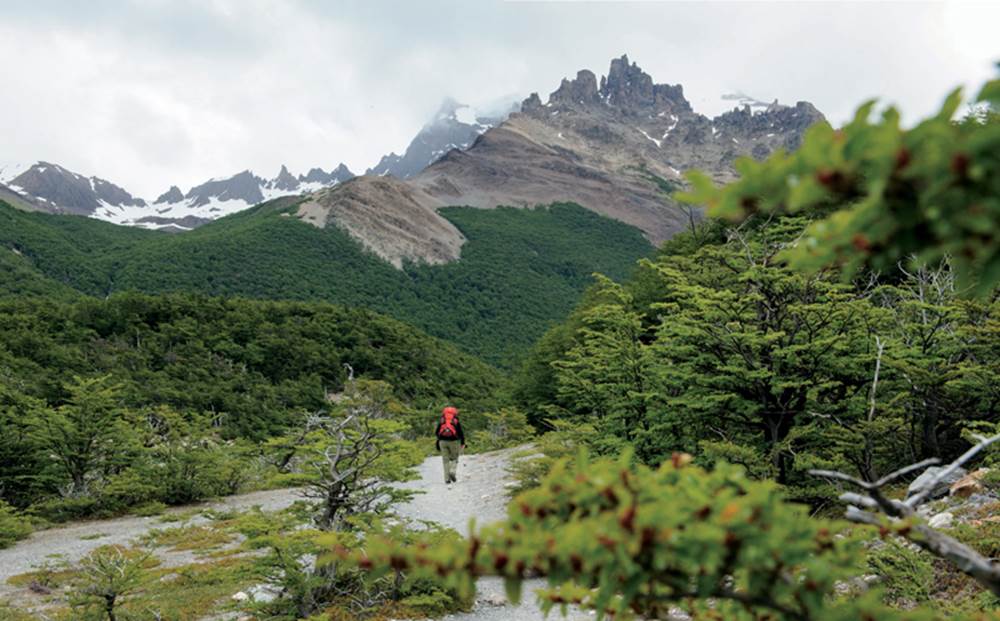
Off-center, but in the middle: Sometimes all it takes is a minor shift away from center for the main anchor point within an image to create a more exciting design. Without the red backpack, this exposure in the Los Glaciares National Park in Argentina would have been not much more than a depiction of murky weather. Nikon D700 • 38 mm • 1/500 s • f/11 • ISO 800
Getting back to your own images and the urge you might feel to center your photos around the main subject: If you are not sure about your composition, take a moment before you press the shutter button to examine the positioning of your subject. Try moving it out of the middle, unless there’s a good reason not to. With more experience this process will become automatic, and it almost always results in a more appealing composition.
Having said all this, it’s important to state that there’s no rule without exceptions. Certain subjects more or less require a central positioning or a symmetric composition, otherwise they will appear as failed attempts. There are many examples of such subjects, including interior and architectural photos of spaces such as libraries, naves, and church domes; reflections as the one in the bottom photo; geometric shapes, such as the rear view of the tour bus in New Zealand (page 175); and detail exposures.
You also might want to design an image with its subject in the middle or create a symmetrical composition to deliberately break up a series of photos with off-center subjects – or if you have another good reason for doing so. Think of the rule of thirds as a suggestion rather than an obligation. It’s ultimately up to you what style of design and composition best suits the picture at hand and your intentions for it.
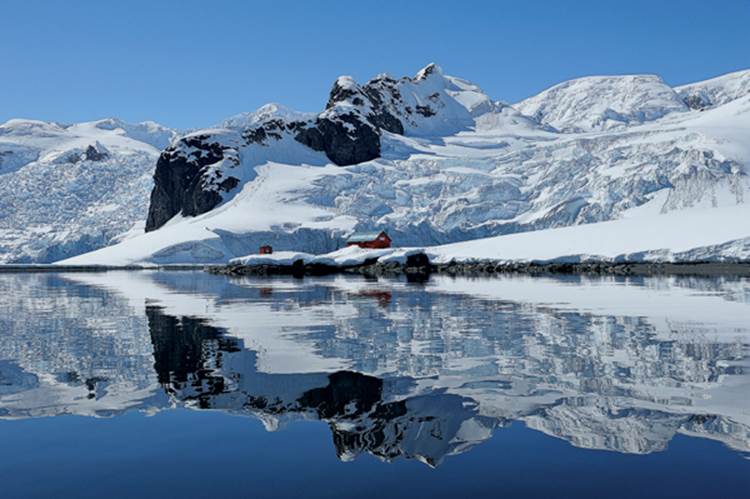
Antarctic reflection: A building belonging to the Argentine research station Almirante Brown on the Antarctic Peninsula. I made this picture from a zodiac, a sturdy rubber dinghy. Nikon D700 • 32 mm • 1/800 s • f/6.3 • ISO 200
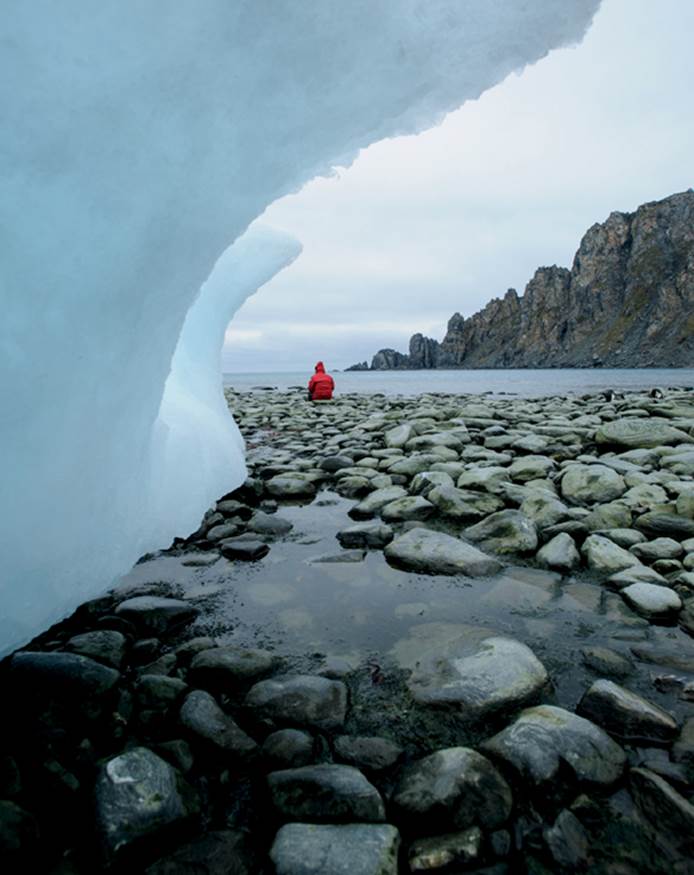
A splash of color: My fellow traveler walked into the picture unknowingly – she couldn’t see me because I was crouched behind and below the sculpture of ice – and then sat down right in the middle of my view. Sometimes, all you need as a photographer is a bit of luck. Elephant Island, Antarctica. Nikon D700 • 17 mm • 1/1000 s • f/8 • ISO 800
All materials on the site are licensed Creative Commons Attribution-Sharealike 3.0 Unported CC BY-SA 3.0 & GNU Free Documentation License (GFDL)
If you are the copyright holder of any material contained on our site and intend to remove it, please contact our site administrator for approval.
© 2016-2026 All site design rights belong to S.Y.A.