Game Programming Algorithms and Techniques: A Platform-Agnostic Approach (2014)
Chapter 13. Sample Game: Side-Scroller for iOS
A side-scroller is a game where the action is viewed from the side. An endless scroller is a variation in which the game world continues to scroll until the player loses. An example of a very popular endless scroller is Jetpack Joyride.
In this chapter, we take a look at a sample implementation of a 2D space-based endless scroller called Ship Attack. The code for this game was written in Objective-C using the cocos2d framework, and is for iOS devices.
Overview
This chapter is intended to be read while reviewing the source code for the game, which is available on the book’s website at http://gamealgorithms.net/source-code/shipattack/. Because this game is for iOS, in order to run the code you need a Mac (running Mountain Lion or higher) as well as Xcode (which can be downloaded for free from the App Store). The code unfortunately cannot be tested on a Windows machine.
The control scheme for Ship Attack is fairly simple. Hold the iPhone horizontally and slide your left thumb up and down on the left part of the screen in order to move the ship. To fire, hold down your right thumb on the right part of the screen. The objective of the game is to avoid enemy projectiles while destroying them with your lasers.
The sprites for Ship Attack were created by Jacob Zinman-Jeanes and are used under the CC-By license. A link to the sprites is provided on the book’s website. These sprites were packed into a sprite sheet using TexturePacker. For more information on sprite sheets, refer back to the section on it in Chapter 2, “2D Graphics.”
Now, before we review the source code in detail, let’s first take a look at the technologies used to create Ship Attack, shown in Figure 13.1.
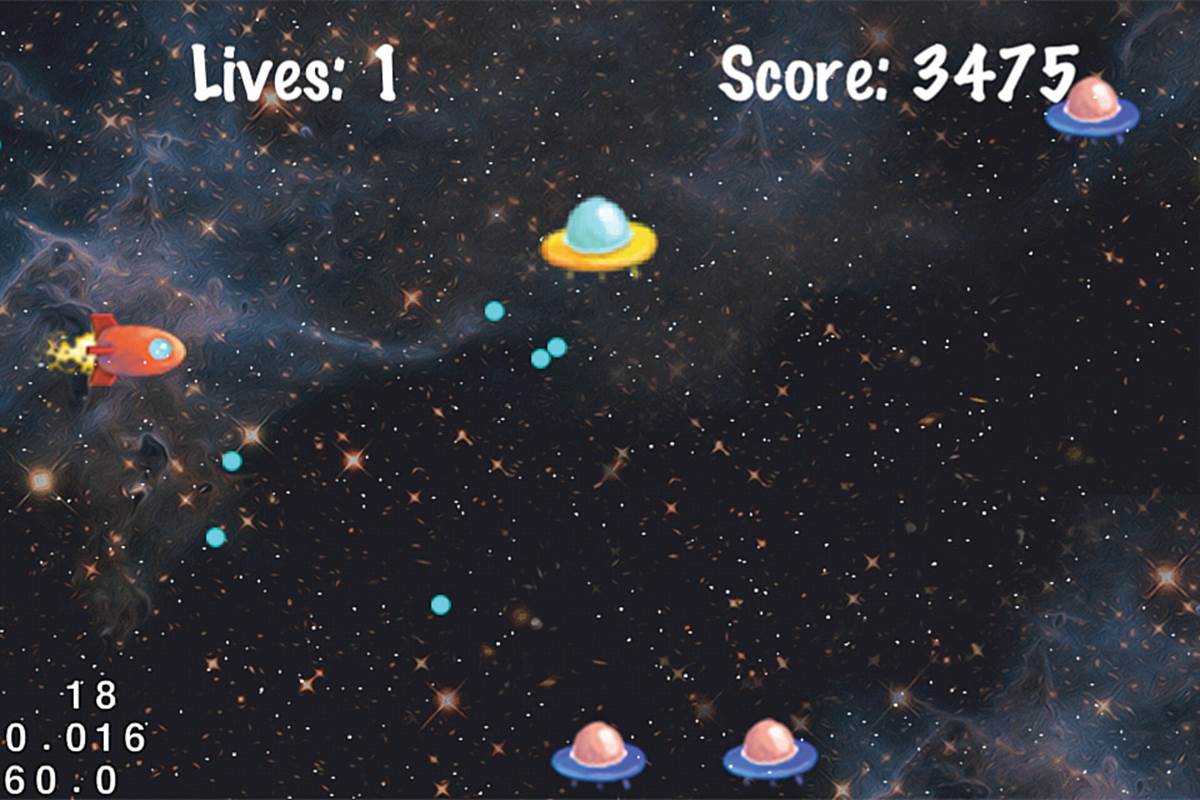
Figure 13.1 Screenshot of Ship Attack.
Objective-C
The Objective-C language was originally developed in the early 1980s with the goal of adding object-oriented concepts to C. It was developed around roughly the same time as C++, though at different laboratories by different researches. Objective-C really was not used very much until NeXT, a company started by Steve Jobs, licensed the language for their new platform. Although NeXT never really gained that much popularity, as part of Jobs’ return to Apple in 1996, NeXT came with him. The NeXT operating system was then used as the base for Mac OS X, and later the iOS operating system. Today, all GUI programs developed for the Mac and any iOS device must use Objective-C on at least some level.
There are some notable differences been C++ and Objective-C, most notably Objective-C technically does not have the concept of member functions. Rather, classes are sent messages and then respond to them—this means that all messages must be passed and processed dynamically, whereas in C++ member functions are only dynamic if the virtual keyword is utilized. Even though they aren’t technically member functions, during this chapter I will still refer to them as such because the terminology is more familiar.
The syntax for message passing in Objective-C might be a little odd for someone used to the C++/Java language style. To call a member function in C++, one might use the following:
myClass->myFunction(arg);
But to pass an equivalent message in Objective-C, the syntax is this instead:
[myClass myMessage: arg];
While browsing through the code, you may also notice that function declarations have either a + or - in front of them. A + signifies the method is a class method (which you can think of as a static function in C++), whereas a - signifies the method is an instance method (or a regular member function). Here’s an example of each:
// Class method (essentially a static function)
+(void) func1;
// Instance method (regular member function)
-(void) funct2;
If you find yourself confused by the syntax of Objective-C, note that it is possible to limit the usage of Objective-C in an iOS app. This is because it plays nicely with C++ code, with a few restrictions. So it is absolutely possible to write 90% of the code for an app in C++ and then only use Objective-C where it must interface with the operating system. This is the recommended approach for a mobile game that you might want to later release on the Android platform, because it will reduce the amount of code that must be rewritten. However, because Ship Attack uses the coco2d framework, it is written 100% in Objective-C.
cocos2d
Cocos2d (available at www.cocos2d-iphone.org) is a 2D game framework that targets both the Mac and iOS platforms. Because it’s only for these two platforms, its interfaces are all written in Objective-C. Cocos2d provides a lot of built-in functionality for 2D sprites, so it makes creating 2D games fairly painless.
A core concept in cocos2d is the base CCNode class, which represents a scene node, or an object that has a position and can be drawn onscreen. From CCNode there are several children, including CCScene (an overall scene), CCLayer (a specific layer in a scene), and CCSprite (a sprite object). At a minimum, a cocos2d game must have one CCScene and one CCLayer, though most games will have more than this.
A CCScene can be thought of as a specific state of the game. For example, in Ship Attack there is a main menu scene as well as a gameplay scene. A CCScene must be associated with at least one CCLayer, though it’s possible to have several CCLayers with different z-ordering. The gameplay scene has three different layers: a far-away nebula, a main object layer, and a faster scrolling star field. You normally also might have a separate layer for the UI, but because this game is so simple it did not seem necessary to separate the UI.
CCSprite is used for all of the moving and interactive objects in the game. This includes the player’s ship, lasers, enemy projectiles, and enemy flying saucers. Rather than storing each sprite in an individual file, I used sprite sheets, which were generated via TexturePacker. Conveniently, cocos2d can automatically import sprite sheets created by TexturePacker, so it makes the process of loading and animating said sprites relatively straightforward.
One drawback of using cocos2d is that it’s limited to only the two Apple platforms. However, a C++ port of the library called cocos2d-x is now available that supports a long list of platforms, including all the major mobile and desktop ones. Although the class and function names are almost identical in cocos2d-x, there are some differences in how they are used simply due to language differences. For example, cocos2d-x has STL at its disposal, whereas cocos2d must use NSMutableArray and the like. For Ship Attack, I chose to use base cocos2d because less documentation is available for the newer cocos2d-x. However, as more books on cocos2d-x enter the market, this will become less of an issue.
Code Analysis
Now that we’ve covered the technologies behind Ship Attack, we can take a deeper look at the source code and how its systems are implemented. Overall, the code for this game is definitely simpler than the code for the game in the following chapter. This makes sense because the mechanics of Ship Attack are far simpler than that of the tower defense game in Chapter 14, “Sample Game: Tower Defense for PC/Mac.”
If you browse all the folders in the project, you might see a huge number of files, most of which are in the libs directory. But all of these source files are the base cocos2d files; they are not files that were created specifically for Ship Attack. Therefore, don’t bother looking through those source files. You are only interested in the handful of files that are in the main shipattack directory.
AppDelegate
The AppDelegate class contains didFinishLaunchingWithOptions, which is the (rather verbose) entry point of any iOS program. For the purposes of a cocos2d game, almost all of the code related to the AppDelegate is auto-generated. The AppDelegate created by the template normally launches into a scene called HelloWorld. For this game, I’ve modified it so that the first scene it goes into is instead the main menu.
The only other change made to the auto-generated AppDelegate code was to enable multitouch, which is what allows the game to respond to multiple finger presses. Without multitouch, the control scheme for this game would not function properly, because one finger controls movement and the other controls firing.
MainMenuLayer
MainMenuLayer has a class method called scene that returns a CCScene that contains MainMenuLayer as its only CCLayer. This is the recommended approach in cocos2d when a scene has only one layer. The layer itself has very little code in it. All it does is show the title of the game and creates a menu with one option (to start the game). Menus can be set up in cocos2d using CCMenu and CCMenuItem, and a particular menu item can have a segment of code that is executed when the item is selected. In this case, when the Start Game option is selected, the game transitions into the GameplayScene.
GameplayScene
As you might expect, the GameplayScene is the scene representing the main gameplay. If you look at this file, you’ll see that there are three different layers: two ScrollingLayers and the ObjectLayer. The two ScrollingLayers are used for the nebula and star field, whereas the ObjectLayer is where all the objects in the world (as well as the score display) reside.
GameplayScene really does not do much else other than have an update function that gets called every frame. This function, in turn, updates the layers. Finally, a sprite frame cache loads in the sprite sheet and allows other classes to grab the correct sprites.
ScrollingLayer
ScrollingLayer is a generic class I created that allows for two or more screen-sized segments to scroll infinitely. To construct a ScrollingLayer, you pass in an array that lists out all of the background sprite names, as well as the speed (pixels/second) at which the layer should scroll. To simplify things, ScrollingLayer assumes that there is enough memory to load in all of the backgrounds at the same time.
The update function is where most of the work happens in this file. What it does is shift the positions of all the background sprites by however many pixels have been traversed on a particular frame. Once a background sprite fully scrolls off the screen, it has its position moved to be all the way to the right of any other background sprites. This way, when it’s time for a particular image to appear onscreen again, it will slide in properly.
When I originally implemented the nebula scrolling layer, there was an issue with a seam (a one pixel vertical line) visible when the nebula wrapped back to the beginning (see Figure 13.2). After poring over the code I became frustrated because I did not see any issue with the implementation of ScrollingLayer. However, one of my technical reviewers pointed out that the issue was actually in the nebula image files I was using. It turned out that one of the files had a vertical line of gray pixels that was causing the issue. Once the grey pixels were eliminated from the image file, the nebula scrolled perfectly. Let this be a lesson that you should always double-check your content and make sure it’s not causing any issues!
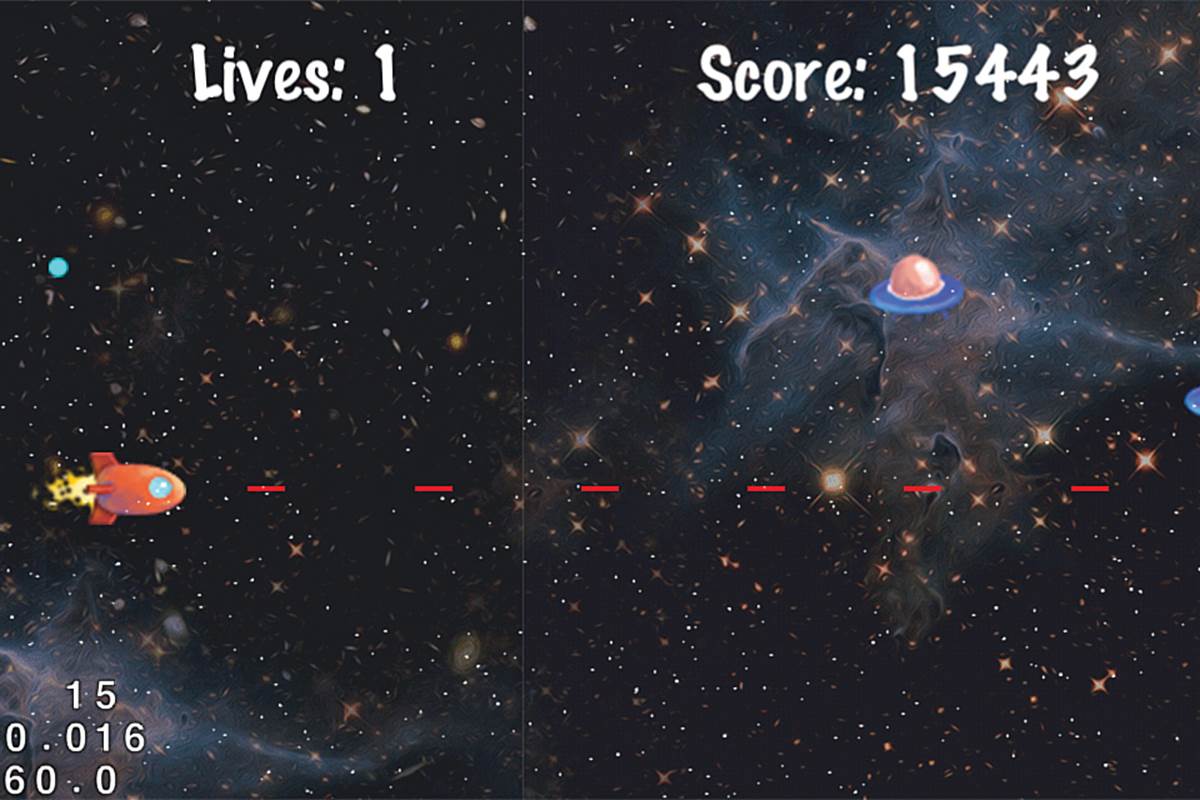
Figure 13.2 A seam is visible between scrolling layers in an earlier version of Ship Attack.
In any event, Ship Attack uses two layers scrolling at different speeds in order to create a parallax effect (as covered in Chapter 2). The star field scrolls much more quickly than the nebula, thus giving the perception that the star field is closer than the nebula.
Ship
One thing you might notice about this game’s code is there isn’t a class that’s called “GameObject.” Instead, the code uses CCSprite (a cocos2d class that represents a sprite object) as the base class for objects in the game. So for the case of the player’s ship, the Ship class inherits directly from CCSprite, as opposed to any other intermediary class.
The init function for Ship sets up a looping animation for the Ship using actions, which comprise a cocos2d system for having a CCNode do something. For example, there are actions to run an animation, move to a specific location, and so on. These actions very much simplify certain behaviors because it’s possible to give a command and hand it off to cocos2d.
All the update function does in Ship is move the ship vertically toward the target point, which is the point where the left thumb of the player is. As the player moves his thumb, the target point changes, which in turn causes the ship to move toward the target point. The movement to the thumb is not instant so as to prevent teleporting. But at the same time it’s fast enough that the player should feel that the controls are responsive.
Projectiles
The Projectile class inherits from CCSprite and is the base class used for both the ship’s lasers as well as the enemy’s projectiles. The update function for Projectile is extremely simple. First, it updates the position of the projectile using Euler integration (which was discussed in Chapter 7, “Physics”). Then, it checks to see whether or not the projectile has moved outside the bounds of the screen. Once a projectile moves outside the bounds, its despawn function is called.
Two classes inherit from Projectile: The first is Laser (which is the ship’s laser) and the second is EnemyProj (which is an enemy projectile). These inherited classes only have to do two things: set the correct sprite and overload the despawn function that removes the particular projectile from the ObjectLayer.
Enemy
The Enemy class is the most complex of the object classes. Right now, the enemy supports two different types of behaviors: a figure-eight path (which is performed by the larger, yellow flying saucers) and a “post” route (which the regular blue enemies use). The two functions that set up these paths are setupFigure8Route and setupPostRoute.
Note that for both routes, I utilize actions to set up the entire path. When an Enemy is spawned by ObjectLayer, it sets up the correct route for the enemy and then the actions will dictate what it does. In the case of the post route, the enemies will move toward the middle of the screen and then exit from either the top or the bottom. In the case of the figure eight, the enemy will endlessly perform the figure eight until it’s finally defeated.
The firing patterns of the two types of enemies are also different. The post route enemy will only fire once in the negative x-direction, whereas the figure-eight enemy will fire a projectile at the position of the player. This behavior is contained in the fire function, which uses some basic vector math to determine the direction of the projectile.
The other functions in Ship are more or less helper functions. One sets up the correct animation set, depending on the color of the ship, and the other generates a list of CCMoveTo actions when given a list of points to travel toward.
ObjectLayer
The ObjectLayer is the main layer that controls gameplay, and you’ll notice a lot of member variables in this class. Most notably, it has a pointer to the Ship and arrays for the player’s lasers, the enemies, and the enemy projectiles. Beyond that, several parameters are used to control the basic behavior of the game, such as the speed of the ship, the respawn time, the interval between enemy spawns, and so on. These variables can be modified in order to tweak the difficulty of the game.
The update function in ObjectLayer is responsible for updating all of the game objects that are currently active. So it loops through the arrays that contain said objects and executes each object’s update member function. Once all of the objects have been updated, the code performs some collision checks. Using AABBs (which were covered in Chapter 7), the code first checks to see if the active lasers intersect with any enemies. If an enemy is hit by a laser, the laser dies and the enemy loses some health. If the enemy’s health hits zero, it dies and is removed from the world. Similarly, the lasers are checked for collisions against the enemy projectiles, and both the laser and the projectile get destroyed if a collision is detected. Finally, the update function checks to see if any enemy projectiles are colliding with the player’s ship, in which case the player loses a life.
The enemy spawning is configured so there’s a spawnEnemy function that’s called every X seconds. That X value decreases as the player gets further and further in the game. When an enemy is spawned, it’s placed at a random y-position using arc4random, which is a high-quality random number generator. The game also tracks how many enemies it has spawned, and after a certain number of enemies a boss enemy will spawn. A boss enemy is one of the larger enemies in yellow that performs a figure eight.
In cocos2d, a layer can be configured to receive touch events. This is done with the setTouchEnabled call toward the top of init. Once this is configured, you can then have functions that get called based on specific touch events. When the player first initiates a touch, a call toccTouchBegan is triggered. The code in this function checks whether the touch is on the left or the right part of the screen. A touch event on the left part of the screen is saved into m_MoveTouch, because it’s a touch that’s trying to control ship movement. A touch on the right part of the screen is instead saved into m_FireTouch.
We save these off because the same touch object will be used as the player moves his finger across the screen. Every time an active touch has its position changed, the ccMoveTouch function gets called. Notice how the code in this function checks to see if the touch that moved is the one that controls the ship movement—if the position of m_MoveTouch changes, that should modify the target position of the ship, as well. All other touches are ignored because we don’t care about the positional change of any touch that’s not the one tied to player movement.
0nce the player lifts his finger and the touch is no longer active, ccTouchEnded is called. In the case of ObjectLayer, all that it does is check to see whether it was the m_MoveTouch or m_FireTouch that ended and clear out that touch object reference, as appropriate.
Finally, there are functions in ObjectLayer whose purpose is to track the state of the game. These include functions that grant the player points for killing enemies as well as keeping track of the number of lives the player has. If the player’s life total hits zero, the game ends and a “game over” menu is displayed.
Exercises
Now that you’ve taken a look at the code, here are a couple features that could be added to this game:
1. More Enemy Types
Having only two types of enemies makes the game fairly repetitive. The simplest way to add more enemy types would be to add an additional route function to the Enemy class. Then this route could be activated based on a variety of conditions. You could add more enemy images by dropping the files into Resources/sprites and then loading the space.tps file into TexturePacker. From TexturePacker, you can then click “publish” to generate new sprite sheets.
2. Have Structured Waves
If you play a classic wave-based shoot-‘em-up game such as 1942, you will notice set wave patterns where different types of enemies approach at different points in time. If you replay a level over and over again, you will notice the waves of enemies are always the same. This is more interesting than the approach used in Ship Attack, where enemies only spawn on a set timer.
In order to have structured waves, you want to add some sort of class to manage the spawning of waves. You also need some way to define the timing of enemies spawning. One way to d this would be to have a list of all the enemy spawns, essentially detailing the point in time, the type of enemy, and the position of the spawn. The spawn manager then could keep track of the overall elapsed time and spawn the appropriate enemies.
Summary
Our discussion of Ship Attack should have given you an idea of how to implement a simple-yet-interesting 2D side-scroller. Because it’s a 2D game, it employs many of the techniques discussed in Chapter 2. This discussion also touched on a bit of physics (which was covered in Chapter 7) through the use of Euler integration as well as AABB collision detection. From the basic building blocks provided by this game, it would certainly be possible to create more complex and interesting versions.
All materials on the site are licensed Creative Commons Attribution-Sharealike 3.0 Unported CC BY-SA 3.0 & GNU Free Documentation License (GFDL)
If you are the copyright holder of any material contained on our site and intend to remove it, please contact our site administrator for approval.
© 2016-2026 All site design rights belong to S.Y.A.