Games, Design and Play: A detailed approach to iterative game design (2016)
Part II: Process
 Chapter 5: The Iterative Game Design Process
![]() Chapter 6: Design Values
Chapter 6: Design Values
![]() Chapter 7: Game Design Documentation
Chapter 7: Game Design Documentation
![]() Chapter 8: Collaboration and Teamwork
Chapter 8: Collaboration and Teamwork
Chapter 5. The Iterative Game Design Process
Making games is an iterative process that helps game designers understand and refine their games. This chapter introduces the steps in the iterative cycle: conceptualize, prototype, playtest, and evaluate.
The Origins of Iterative Design
Designing games is challenging—think no further than the concepts and principles introduced in the four chapters of Part I—the basic elements that make up games, the tools we have to design play experiences, the incredible range of play types, not to mention the things videogames ask of players. Compounding all this is the fact that game designers can’t really “see” their designs until they are played, and their games can’t be played until they are made.
This is where the iterative design process comes in handy (see Figure 5.1). Iterative design is a cycle of conceptualization, prototyping, testing, and evaluation. Iteration is an adaptive process whereby designers move through cycles of conceiving of an idea, creating a prototype that embodies the idea, running playtests with the prototype to see the idea in action, and then evaluating the results to make the idea better. Adaptive processes stand in contrast to predictive processes in which the final product is well understood and can be produced without having to make changes to its design. Where predictive processes assume the designer is going to be right the first time around, adaptive processes leave room for error, but also new ideas that can improve upon the original.
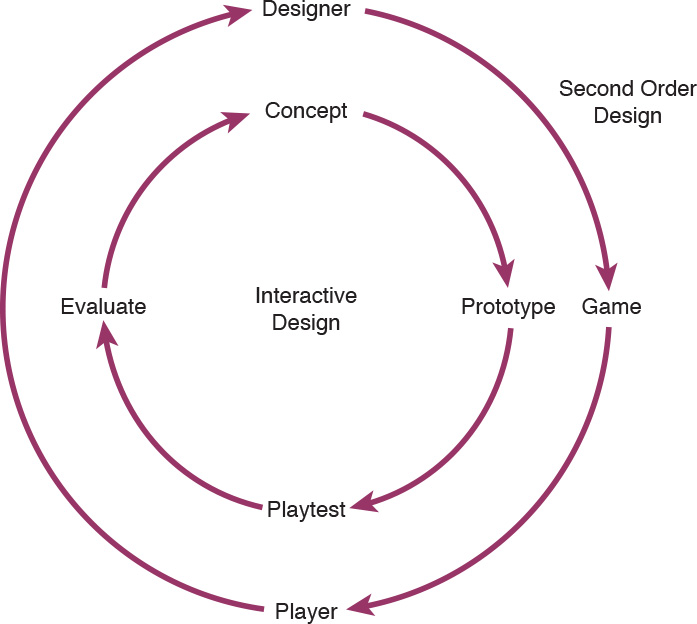
Figure 5.1 Second order design diagram nested in an iterative design diagram.
An early version of iterative design comes from Walter Shewhart’s work at Bell Labs in the first half of the twentieth century: the “Plan-Do-Study-Act” cycle.1 Shewhart wanted a process that increased the quality and consistency of Bell Lab’s products and services. So he created a modified version of the scientific method that would help the company improve upon those metrics:
1 Andrew Walter Shewhart, Statistical Method from the Viewpoint of Quality Control. 1939.
![]() Plan: Identify the problem that needs attention.
Plan: Identify the problem that needs attention.
![]() Do: Design a solution to the problem.
Do: Design a solution to the problem.
![]() Study: Develop statistical tools for analyzing the success or failure of the design.
Study: Develop statistical tools for analyzing the success or failure of the design.
![]() Act: Repeat the cycle if the results of the study find problems with the design solution.
Act: Repeat the cycle if the results of the study find problems with the design solution.
Around the same time, the industrial and theatrical designer Henry Dreyfuss began to approach product design from a similar perspective.2 Instead of focusing solely on the object, Dreyfuss wanted to take into account the person who used the telephone, vacuum cleaner, or typewriter he designed. His goal was simple but unexpected: understand the experiences his designs provided, and refine the design to better meet the functional needs of the end user. Dreyfuss’s process involved a similar set of steps to Shewhart’s (not a surprise, as Dreyfuss likely worked under Shewhart at Bell Labs):
2 Henry Dreyfuss, Designing for People. 1955.
![]() Think: Consider the cause of the problem, and then use brainstorming techniques to consider solutions.
Think: Consider the cause of the problem, and then use brainstorming techniques to consider solutions.
![]() Sketch: Develop the most simple and efficient means of exploring the most promising solutions.
Sketch: Develop the most simple and efficient means of exploring the most promising solutions.
![]() Show: Share the sketches, whatever form they may take, with stakeholders (clients, potential users, and so on).
Show: Share the sketches, whatever form they may take, with stakeholders (clients, potential users, and so on).
![]() Evaluate: Reflect on the responses from the designers, clients, and users to determine the effectiveness of the solution and to more fully understand the problem.
Evaluate: Reflect on the responses from the designers, clients, and users to determine the effectiveness of the solution and to more fully understand the problem.
In both Shewhart’s and Dreyfuss’s models, the design process unfolds in an incremental, cyclical process. Where Shewhart relied on hard data to improve product consistency, Dreyfuss used the then-emerging fields of ergonomics and human factors to consider the functional, experiential, and emotional responses to his products.
A more recent influence on the iterative game design process comes from software development and Human-Computer Interaction (HCI). Both of these use approaches derived from Shewhart and Dreyfuss:
![]() Requirements: What is the function of the software or hardware?
Requirements: What is the function of the software or hardware?
![]() Prototype: Based on the requirements, create a functional prototype.
Prototype: Based on the requirements, create a functional prototype.
![]() Review: Have all stakeholders use the prototype and provide feedback.
Review: Have all stakeholders use the prototype and provide feedback.
![]() Revise: Based on the feedback, revise the requirements and plan.
Revise: Based on the feedback, revise the requirements and plan.
It is from these three foundations that the iterative game design process emerges. While some people approach game design from a perspective of metrics and statistics, most gamemakers take a more intuitive approach. And while some use a more traditional predictive process, most embrace the adaptive methods of iteration that allow game designers to design and refine the game through successive iterative loops.
This is because, unlike phone infrastructure, typewriters, and ATM machines, games are experiences and expressions more than tools or functional products. Games are about the play-driven moment-to-moment events, while typewriters and ATMs are a means to an end. Game designers are therefore addressing a mix of gamemaker intention and player experience. As a result, the four-step iterative game design process (see Figure 5.2) is a little different:
![]() Conceptualize: Develop an idea for the game and its play experience.
Conceptualize: Develop an idea for the game and its play experience.
![]() Prototype: Make some aspect of the game’s design into a “playable” form.
Prototype: Make some aspect of the game’s design into a “playable” form.
![]() Playtest: Have players play the prototype to see what kind of experience they have.
Playtest: Have players play the prototype to see what kind of experience they have.
![]() Evaluate: Review the results of the playtest to better understand and strengthen the game’s design.
Evaluate: Review the results of the playtest to better understand and strengthen the game’s design.
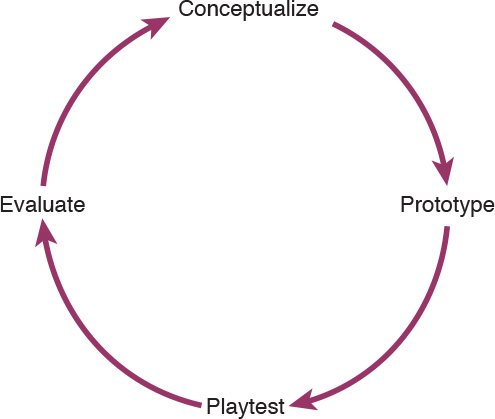
Figure 5.2 Iterative design diagram.
This is how the iterative game design process works: a series of steps toward the complete design of a game. Each loop through the cycle is an iteration on the design of a game: an incremental step toward better understanding the game being made so that the designer can work out the full design of the play experience. Sometimes an iterative loop will help the designer flesh out and tighten up the game’s design; sometimes an iterative loop will point out problems that break aspects of the design. Either way, it’s all part of the process toward a finished game.
The Four Steps
Let’s look at each of the four steps in more detail: conceptualize, prototype, playtest, and evaluate.
Step 1: Conceptualize
In the beginning, there’s just an idea (see Figure 5.3). And it could come from anywhere. Maybe it’s a dream about unicorns jousting with dinosaurs. Or, it’s something from everyday experience, like walking through the park or having a difficult conversation with a loved one. Maybe it starts with an idea for a cool action or an unusual use of a common game object. Maybe it starts with the need to explore or share a feeling that is difficult to put into words. In other words, a game concept can start from anything.
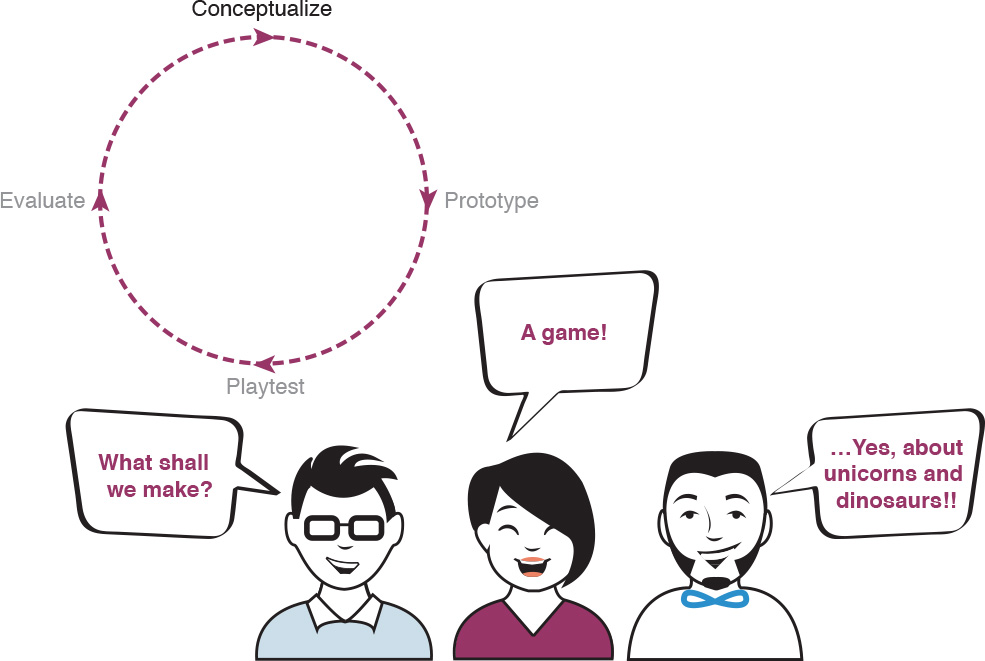
Figure 5.3 Conceptualize, the first step in the iterative cycle.
The conceptualization of a game begins with a number of different techniques to generate and shape ideas at the beginning of the game design process and continue to support the design through successive iterative loops. The main thing to keep in mind is that all that’s needed is a kernel of an idea. It’s not important to have every detail figured out. In fact, the thing to arrive at in this earliest stage is not an answer, but a simple, “How might we...” question.3 For example, “How might we make a game where unicorns joust with dinosaurs?” or “How might we share the feeling of walking through the first snow of the year?” This question will become more refined with time and will generate even more questions. But at the start of the game design process, all that is needed is this one question.
3 This question is from a method used by the design consultancy IDEO, and one we find incredibly helpful in the conceptualization stage of the game. “How might we” and other design exercises can be found on IDEO’s DESIGN KIT project: www.designkit.org/methods/3.
Once a basic question is in place, the next step is brainstorming. Brainstorming is a process with specific rules meant to help participants explore all the possibilities around an idea or question. In fact, brainstorming is like a game—one that generates as many concepts as possible. And those concepts come in the form of even more questions, ones that begin with “what if...?” For example, “what if unicorns and dinosaurs joust while driving monster trucks along a rickety bridge?”
Another important point about the conceptualization phase is that there is a difference between a game’s concept and a game’s design. The concept is just that—an idea, a theory about what might make a good game. As we discussed in the Introduction to this book, game design is the creation of “blueprints” for a game. Turning an idea into a design requires that the designer structure the idea so that it can be used to produce prototypes, which are then playtested, the results of which are then evaluated to see what they say about the original idea. And from there, the process loops back around to conceptualize and the expansion, revision, or refinement of the game’s design. Part of this process involves thinking through and answering more questions in the design process, including using design values as a way to identify the experiential and formal characteristics of the game.
We’ll go into more detail on conceptualizing and designing in Chapter 9, “Conceptualizing Your Game,” and design values in Chapter 6, “Design Values,” but for now, the important thing to know is that a designer doesn’t need much more than an idea and a question to get started creating a game.
Step 2: Prototype
The second step in the iterative game design process is turning the game idea into a prototype (see Figure 5.4). The best way to figure out how the game will look, feel, and act is to dive in and start making it. The faster the game moves from the pure ether of ideas and into a prototype, the closer the game will get to showing the kind of play experiences it can generate. The key to prototyping is to turn the most promising “what if...” question from the brainstorm, or a combination of “what ifs,” into something tangible. That could be paper, quick and dirty code, even the designer’s own body performing the actions of the game. The cool thing about prototyping is that it will help ideas get even more developed and might even lead to a discovery that would have never come up during the concepting phase. This is the point of the iterative process. Every step along the way initial ideas evolve—from a pie-in-the-sky idea about jousting unicorns to a fully designed game. It isn’t necessary to figure it all out in the beginning; being open to the whole process and where it takes the game is the important thing.
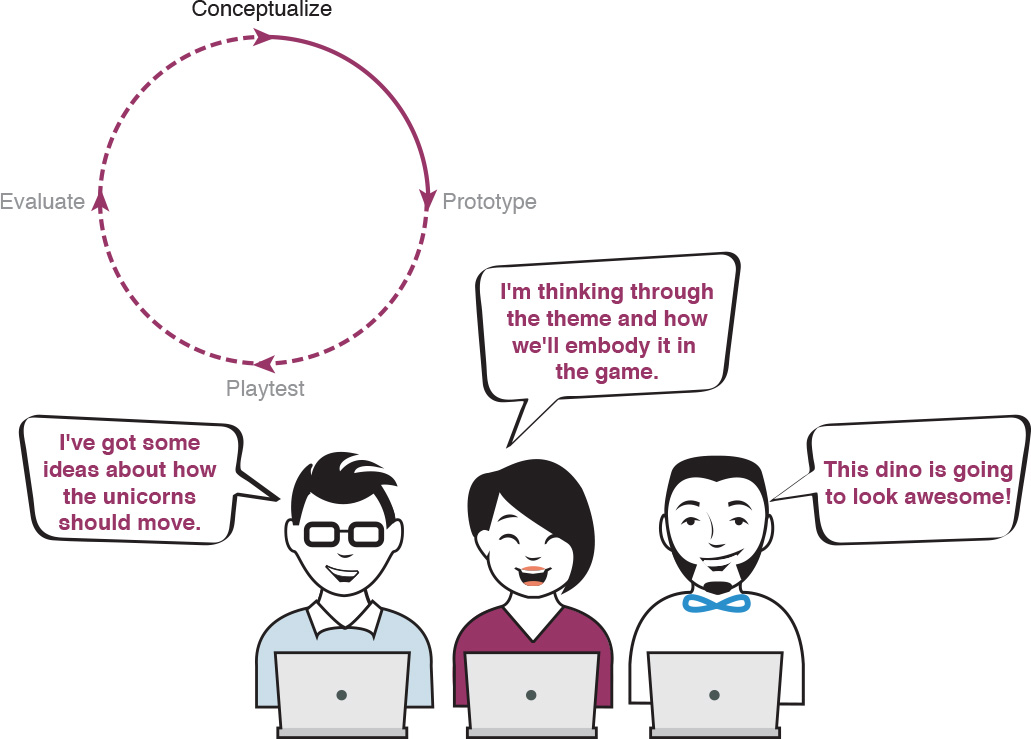
Figure 5.4 Prototype, the second step in the iterative cycle.
Prototypes should remain focused on the ideas and questions from the concepting phase, including the “what if...?” question. Prototyping requires a game designer to get more concrete. So, in the jousting unicorns and dinosaurs example, prototyping around “what if unicorns jousted with dinosaurs?” requires some understanding of what it means for these creatures to joust, where it would happen, and how players would participate. To keep things focused, the team might decide to prototype on paper by making little cutout unicorns and dinosaurs that they move around on a table. Or maybe they get some rough illustrations moving in 2D onscreen.
There are a lot of different kinds of prototypes, each suitable for different stages and questions. We’ll go more into these and the prototyping process in general in Chapter 10, “Prototyping Your Game.” For now, the most important thing to know is that the faster prototypes are made, the more quickly the game’s design will start to take shape.
Step 3: Playtest
Once a game designer has a prototype made, they will want to playtest (see Figure 5.5). After all, a game designer doesn’t really know what the game is until they test it. Playtests reveal what is or isn’t working in a game’s design. In other words, the playtest is the answer to the “what if...?” question the prototype asks. In fact, playtesting is the one step in the process that we end with answers, rather than questions. And not only answers in the form of seeing what happens when playing with a prototype that asks “what if unicorns jousted with dinosaurs...?” Answers to other questions as well, like, “Do players understand the goal of the game, and what they are striving for? Do players have the hoped-for emotional response? Do players get the game’s message? Is the user interface clear or difficult to understand? And, is there clear feedback about how well the player is doing in the game?”
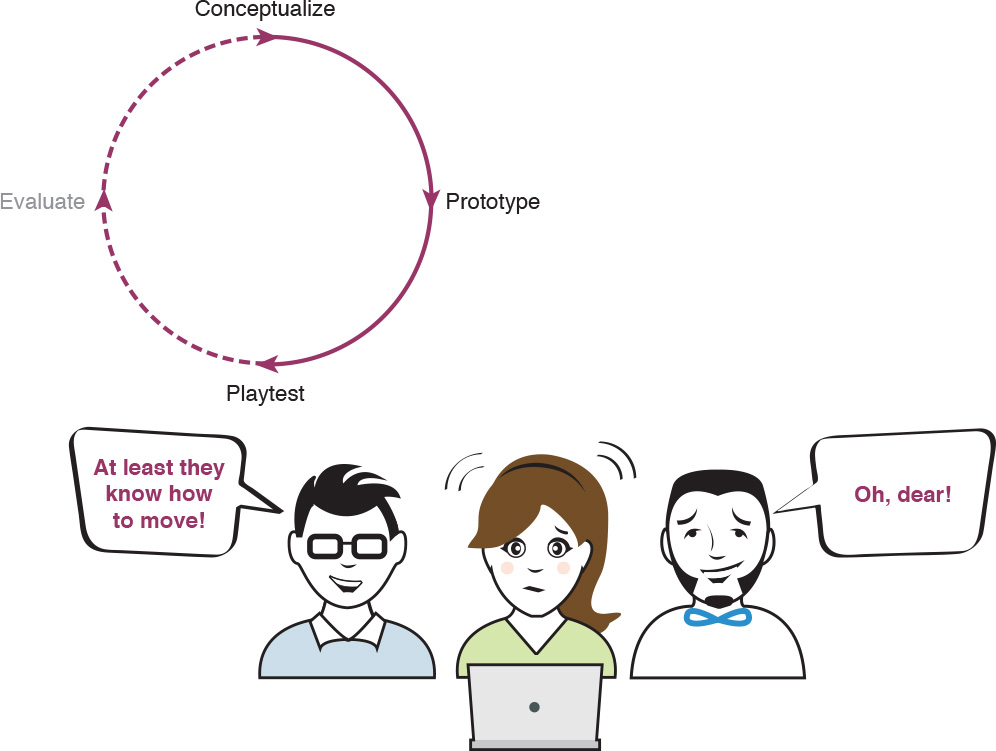
Figure 5.5 Playtest, the third step in the iterative cycle.
Playtesting is often the hardest and most revealing part of the iterative game design process. Often, what seems like a great idea that makes sense in a prototype falls apart when players get ahold of it. This might feel like a bad thing, but it’s really a blessing in disguise. Seeing what fails in a playtest also sheds light on what is needed to fix it and make the game better. Failure is just part of the process. This is the most important lesson of the iterative process.
In the same way that a prototype can take different forms, there are many different types of playtests. Two of the most basic kinds are internal and external playtests. Internal playtests among the designers of the game are essential—and often the first kind of playtest the team engages in. External playtests are equally important and can involve friends, other game designers, the target audience, and more. No matter the kind of playtest, one of the most important things to do is capture the results. Whether simply listing the comments from playtesters or problems the designer observed, it’s important to document the playtest to help in the next step in the iterative game design process: evaluate.
We look more closely at playtesting in Chapter 11, “Playtesting Your Game.”
Step 4: Evaluate
Once a game designer finishes a round of playtesting, they evaluate the results to assess the game’s design (see Figure 5.6). The art of evaluating the results of a playtest is taking what playtesters did and said and determining if and how the feedback necessitates changes to the game’s design. For example, remember the dinosaur-unicorn jousting game? Let’s say we observed players having a difficult time understanding how to get the creatures to pick up their lances. Evaluating this observation involves more questions—this time along the lines of “why did players have a hard time grasping how a unicorn jousts?” or “how might we make it easier for players to understand how to get their brontosaurus to pick up a lance?” Does the “How might we...?” sound familiar? It should—once you have reached this last step of the iterative process, you return to the same kinds of questions we began with in conceptualize. The borders between evaluate and conceptualize can be a bit fuzzy—hence the circular nature of the process!
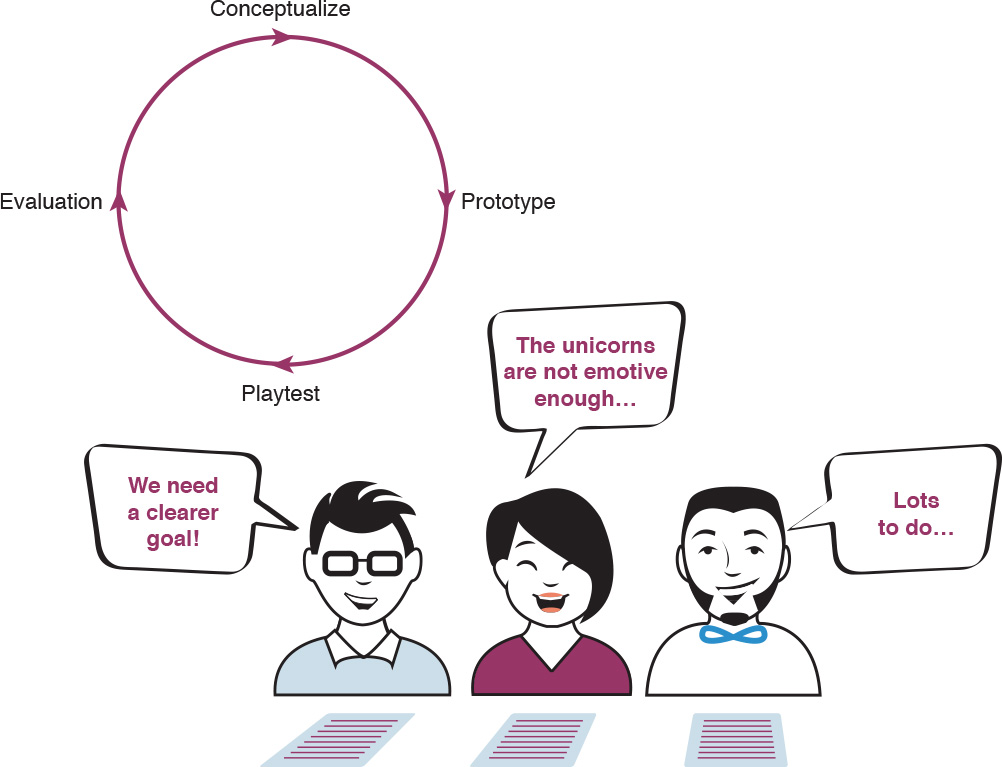
Figure 5.6 Evaluate, the fourth step in the iterative cycle.
The other part of evaluate involves taking some time to let the playtest results sink in while solutions begin to take form. Some designers take walks, some go running, some take a nap.4 Others talk to other game designers and friends about the design problems they are working out. Still other game designers play games, watch movies, or read books and generally look outside of games for inspiration and influence.
4 We know a game designer who ponders design problems by lying under his desk.
Being a game designer is not about coming up with perfect ideas right off the bat. The challenge of game design is paying close attention to how other people engage with game prototypes and then translating that feedback into design revisions to be tried out in the next prototype. Some of the feedback from players will be pretty straightforward. Other feedback is more difficult to diagnose, like, “I feel like this game is too intense.” It takes practice, kind of like a doctor hearing a patient talk about their symptoms and then from that, building up enough evidence to make a diagnosis. It involves not only listening to what the patient says, but observing them and including all of that into the evaluation. In Chapter 12, “Evaluating Your Game,” we look more closely at the role of evaluation in the iterative game design process.
A Repeated Process, Not a Single Cycle
Because there is no single motivation for creating games, no two games follow an identical iterative cycle. There are many paths the process can take, and they may loop through the iterative steps several times in different ways for different reasons (see Figure 5.7). The design of some games resolves quickly after three or four loops through the process. Other games take dozens of loops through the process. The most important thing to bring to the iterative game design process is patience. It takes time, but more often than not, the method brings great results. Iterative game design is a cycle that steers a game’s design in all sorts of directions the designer may never have imagined. For game designers who want to create a particular kind of play experience, the iterative cycle helps them home in on delivering exactly what they have in mind. For game designers who are more concerned with expression, the iterative cycle helps them find just the right way to do so. For game designers who just want people to enjoy themselves, the iterative cycle helps discover what players enjoy about a game. Ultimately, we iterate because we are making games, and to build them we need to prototype and playtest them to fully understand what they can do.
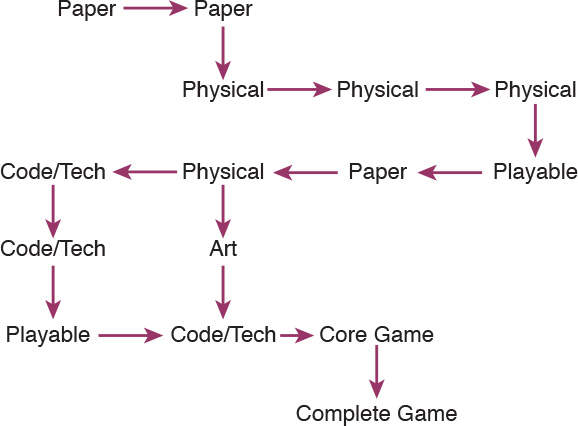
Figure 5.7 A theoretical path for the design of a game.
And, of course, there is life after game design. Indeed, the game design process is just the beginning, as a whole range of tasks remain—production, marketing, release, and then maintaining the game. We’ll get into some of this in Chapter 13, “Moving from Design to Production,” but mostly, we’re focused on the design process in this book and not production.
Embracing Failure to Succeed
In addition to patience, another key to the iterative game design process is being open to failure. It is going to happen. In fact, it is really important that it happens. Early in the design process, failure can make visible the problems in a game and help the designer find solutions for fixing them. Even the best game designers fail early in the design process. Reiner Knizia, a boardgame designer with dozens and dozens of successful games to his name, once said that all his game designs were perfect until they were playtested.5 That’s the power—and the pain—of the iterative game design process. A game designer has intuitions about their game, but until they get all the way through an iterative loop, they just don’t know what they have. That’s why game designers want to find the quickest way possible through early loops in the cycle so they can fail early and often.
5 Overheard at Practice 2012, a conference on game design hosted by New York University’s Game Center.
Failure is what helps us learn and make our games better. The key is to be aware that it will happen, and when it does happen, to address it as a team and identify possible solutions. The best way to leverage failure to improve the game’s design? By failing fast, with purpose, early in the game design process. This means doing your best not to get discouraged by it and view it as a learning experience. Another way to put it is that your first time at anything will inevitably involve learning from failure. Remember the first time you played your favorite videogame? When we play videogames, failure teaches us how the world works in the game. In game design, failure teaches us how to make better games.
The iterative design process can be used to support a wide range of creative intentions and play experiences. The next three chapters provide a set of useful tools for guiding the iterative process. Chapter 6, “Design Values,” introduces an important tool for capturing the important factors in a game’s design. Chapter 7, “Game Design Documentation,” outlines the three main tools for capturing a game’s design—design documents, schematics, and tracking spreadsheets. Chapter 8, “Collaboration and Teamwork,” rounds out Part II with a discussion of important considerations around working in teams.
Summary
Don’t worry about getting it right the first time. Making games is always an iterative process punctuated by failure and incremental improvement. Once you have conceptualized your game, you should move as quickly as possible to prototyping it. There’s no need to worry about coding your game at the start; prototype it on paper, with your body, any way you can. The key is to get it as quickly as possible to the playtesting stage. Here you will actually see your played game for the first time and see it for what it really is. In most cases, there will be some things about your design that fail. This is where you evaluate the results of your playtest and return to your initial concept, including your design values, and begin the process again.
![]() Conceptualize: The initial idea and the subsequent ideas about the game explored in prototyping and development.
Conceptualize: The initial idea and the subsequent ideas about the game explored in prototyping and development.
![]() Prototype: A form of some aspect of your game, or the entire game in a prerelease stage that helps you work through the design questions your game poses.
Prototype: A form of some aspect of your game, or the entire game in a prerelease stage that helps you work through the design questions your game poses.
![]() Playtest: An answer to the question the prototype poses, and a moment when you or other people play your prototype and you observe and document the reactions.
Playtest: An answer to the question the prototype poses, and a moment when you or other people play your prototype and you observe and document the reactions.
![]() Evaluate: Reviewing the playtest observations and diagnosing the results into next steps or new ideas.
Evaluate: Reviewing the playtest observations and diagnosing the results into next steps or new ideas.
Exercise
Find a partner and in 10 minutes, design a game the two of you can play using your own bodies and anything in the room. You will have to move quickly, coming up with an idea, prototyping it, playtesting between yourselves, and then refining it. Make note of each step in the process. At the end of 10 minutes, write down the rules to your game and give them to two other players to playtest. How did they interpret the rules? Did they discover anything new about the game? Did they use any strategies that might break the game or point in new directions for the design?
All materials on the site are licensed Creative Commons Attribution-Sharealike 3.0 Unported CC BY-SA 3.0 & GNU Free Documentation License (GFDL)
If you are the copyright holder of any material contained on our site and intend to remove it, please contact our site administrator for approval.
© 2016-2026 All site design rights belong to S.Y.A.