Android Application Development: A Beginner's Tutorial (2015)
Chapter 9. GridView
A GridView is a view that can display a list of scrollable items in a grid. It is like a ListVIew except that it display items in multiple columns, unlike a ListView where items are displayed in a single column. Like a ListView, a GridView too takes its data source and layout from aListAdapter.
This chapter shows how you can use the GridView widget and presents a sample application. You should have read Chapter 8, “ListView” before reading this chapter.
Overview
The android.widget.GridView class is the template for creating a GridView. Both the GridView and ListView classes are direct descendants of android.view.AbsListView. Like a ListView, a GridView gets its data source from a ListAdapter. Please refer to Chapter 8, “ListView” for more information on the ListAdapter.
You can use a GridView just like you would other views: by declaring a node in a layout file. In the case of a GridView, you would use this GridView element:
<GridView
android:id="@+id/gridView1"
android:layout_width="fill_parent"
android:layout_height="fill_parent"
android:columnWidth="120dp"
android:numColumns="auto_fit"
android:verticalSpacing="10dp"
android:horizontalSpacing="10dp"
android:stretchMode="columnWidth"
/>
You can then find the GridView in your activity class using findViewById and pass a ListAdapter to it.
GridView gridView = (GridView) findViewById(R.id.gridView1);
gridView.setAdapter(listAdapter);
Optionally, you can pass an AdapterView.OnItemClickListener to a GridView’s setOnItemClickListener method to respond to item selection:
gridview.setOnItemClickListener(
new AdapterView.OnItemClickListener() {
public void onItemClick(AdapterView<?> parent, View v, int
position, long id) {
// do something here
}
});
Using the GridView
The GridViewDemo1 application shows you how to use the GridView. The application only has an activity, which uses a GridView to fill its entire display area. The GridView in turn uses a custom ListAdapter for its items and layout.
Listing 9.1 shows the application manifest.
Listing 9.1: The AndroidManifest.xml file
<?xml version="1.0" encoding="utf-8"?>
<manifest xmlns:android="http://schemas.android.com/apk/res/android"
package="com.example.gridviewdemo1"
android:versionCode="1"
android:versionName="1.0" >
<uses-sdk
android:minSdkVersion="18"
android:targetSdkVersion="18" />
<application
android:allowBackup="true"
android:icon="@drawable/ic_launcher"
android:label="@string/app_name"
android:theme="@style/AppTheme" >
<activity
android:name="com.example.gridviewdemo1.MainActivity"
android:label="@string/app_name">
<intent-filter>
<action android:name="android.intent.action.MAIN"/>
<category
android:name="android.intent.category.LAUNCHER"/>
</intent-filter>
</activity>
</application>
</manifest>
The custom ListAdapter that feeds the GridView is an instance of GridViewAdapter, which is presented in Listing 9.2. GridViewAdapter extends android.widget.BaseAdapter, which in turn implements the android.widget.ListAdapter interface. Therefore, a GridViewAdapter is aListAdapter and can be passed to a GridView’s setAdapter method.
Listing 9.2: The GridViewAdapter class
package com.example.gridviewdemo1;
import android.content.Context;
import android.view.View;
import android.view.ViewGroup;
import android.widget.BaseAdapter;
import android.widget.GridView;
import android.widget.ImageView;
public class GridViewAdapter extends BaseAdapter {
private Context context;
public GridViewAdapter(Context context) {
this.context = context;
}
private int[] icons = {
android.R.drawable.btn_star_big_off,
android.R.drawable.btn_star_big_on,
android.R.drawable.alert_light_frame,
android.R.drawable.alert_dark_frame,
android.R.drawable.arrow_down_float,
android.R.drawable.gallery_thumb,
android.R.drawable.ic_dialog_map,
android.R.drawable.ic_popup_disk_full,
android.R.drawable.star_big_on,
android.R.drawable.star_big_off,
android.R.drawable.star_big_on
};
@Override
public int getCount() {
return icons.length;
}
@Override
public Object getItem(int position) {
return null;
}
@Override
public long getItemId(int position) {
return 0;
}
@Override
public View getView(int position, View convertView, ViewGroup parent) {
ImageView imageView;
if (convertView == null) {
imageView = new ImageView(context);
imageView.setLayoutParams(new GridView.LayoutParams(100, 100));
imageView.setScaleType(ImageView.ScaleType.CENTER_CROP);
imageView.setPadding(10, 10, 10, 10);
} else {
imageView = (ImageView) convertView;
}
imageView.setImageResource(icons[position]);
return imageView;
}
}
GridViewAdapter provides an implementation of the getView method that returns an ImageView displaying one of Android’s default drawables:
private int[] icons = {
android.R.drawable.btn_star_big_off,
android.R.drawable.btn_star_big_on,
android.R.drawable.alert_light_frame,
android.R.drawable.alert_dark_frame,
android.R.drawable.arrow_down_float,
android.R.drawable.gallery_thumb,
android.R.drawable.ic_dialog_map,
android.R.drawable.ic_popup_disk_full,
android.R.drawable.star_big_on,
android.R.drawable.star_big_off,
android.R.drawable.star_big_on
};
Now that you know what GridViewAdapter does, you can focus on the activity. The layout file for the activity is printed in Listing 9.3. It only consists of one component, a GridView.
Listing 9.3: The activity_main.xml file
<?xml version="1.0" encoding="utf-8"?>
<GridView xmlns:android="http://schemas.android.com/apk/res/android"
android:id="@+id/gridview"
android:layout_width="fill_parent"
android:layout_height="fill_parent"
android:columnWidth="90dp"
android:numColumns="auto_fit"
android:verticalSpacing="10dp"
android:horizontalSpacing="10dp"
android:stretchMode="columnWidth"
android:gravity="center"
/>
Listing 9.4 shows the MainActivity class.
Listing 9.4: The MainActivity class
package com.example.gridviewdemo1;
import android.app.Activity;
import android.os.Bundle;
import android.view.Menu;
import android.view.View;
import android.widget.AdapterView;
import android.widget.AdapterView.OnItemClickListener;
import android.widget.GridView;
import android.widget.Toast;
public class MainActivity extends Activity {
@Override
protected void onCreate(Bundle savedInstanceState) {
super.onCreate(savedInstanceState);
setContentView(R.layout.activity_main);
GridView gridview = (GridView) findViewById(R.id.gridview);
gridview.setAdapter(new GridViewAdapter(this));
gridview.setOnItemClickListener(new OnItemClickListener() {
public void onItemClick(AdapterView<?> parent,
View view, int position, long id) {
Toast.makeText(MainActivity.this, "" + position,
Toast.LENGTH_SHORT).show();
}
});
}
@Override
public boolean onCreateOptionsMenu(Menu menu) {
getMenuInflater().inflate(R.menu.menu_main, menu);
return true;
}
}
MainActivity is a simple class, with the bulk of its brain resides in its onCreate method. Here it loads the GridView from the layout and passes an instance of GridViewAdapter to the GridView’s setAdapter method. It also creates an OnItemClickListener for the GridView so that every time an item on the GridView is selected, the onItemClick method in the listener gets called. In this case, onItemClick simply creates a Toast that shows the position of the selected item.
Running GridViewDemo1 gives you an activity that looks like the one in Figure 9.1.
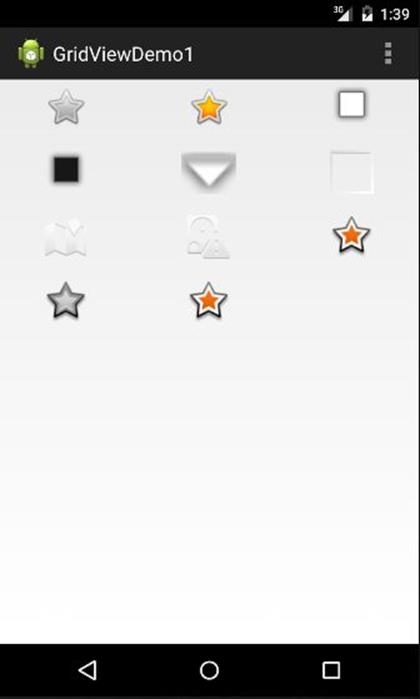
Figure 9.1: Using a GridView
Summary
A GridView is a view that contains a list of scrollable items displayed in a grid. Like a ListView, a GridView gets its data and layout from a ListAdapter. In addition, a GridView can also receive an AdapterView.OnItemClickListener to handle item selection.
All materials on the site are licensed Creative Commons Attribution-Sharealike 3.0 Unported CC BY-SA 3.0 & GNU Free Documentation License (GFDL)
If you are the copyright holder of any material contained on our site and intend to remove it, please contact our site administrator for approval.
© 2016-2026 All site design rights belong to S.Y.A.