Android Application Development: A Beginner's Tutorial (2015)
Chapter 18. Working with the Database
Android has its own technology for working with databases and it has nothing to do with Java Database Connectivity (JDBC), the technology Java developers use for accessing data in a relational database. In addition, Android ships with SQLite, an open source database.
This chapter shows how to work with the Android Database API and the SQLite database.
Overview
Android comes with its own Database API. The API consists of two packages, android.database and android.database.sqlite. Android ships with SQLite, an open source relational database that partially implements SQL-92, the third revision of the SQL standard.
Currently at version 3, SQLite offers a minimum number of data types: Integer, Real, Text, Blob, and Numeric. One interesting feature of SQLite is that an integer primary key is automatically auto-incremented when a row is inserted without passing a value for the field.
More information on SQLite can be found here:
http://sqlite.org
The Database API
The SQLiteDatabase and SQLiteOpenHelper classes, both part of android.database.sqlite, are the two most frequently used classes in the Database API. In the android.database package, the Cursor interface is one of the most important types.
The three types are discussed in detail in the following subsections.
The SQLiteOpenHelper Class
To use a database in your Android application, extend SQLiteOpenHelper to help with database and table creation as well as connecting to the database. In a subclass of SQLiteOpenHelper, you need to do the following.
§ Provide a constructor that calls its super, passing, among others, the Context and the database name.
§ Override the onCreate and onUpgrade methods.
For example, here is a constructor for a subclass of SQLiteOpenHelper.
public SubClassOfSQLiteOpenHelper(Context context) {
super(context,
"mydatabase", // database name
null,
1 // db version
);
}
The onCreate method that needs to be overridden has the following signature.
public void onCreate(SQLiteDatabase database)
The system will call onCreate the first time access to one of the tables is required. In this method implementation you should call the execSQL method on the SQLiteDatabase and pass an SQL statement for creating your table(s). Here is an example.
@Override
public void onCreate(SQLiteDatabase db) {
String sql = "CREATE TABLE " + TABLE_NAME
+ " (" + ID_FIELD + " INTEGER, "
+ FIRST_NAME_FIELD + " TEXT,"
+ LAST_NAME_FIELD + " TEXT,"
+ PHONE_FIELD + " TEXT,"
+ EMAIL_FIELD + " TEXT,"
+ " PRIMARY KEY (" + ID_FIELD + "));";
db.execSQL(sql);
}
SQLiteOpenHelper automatically manages connections to the underlying database. To retrieve the database instance, call one of these methods, both of which return an instance of SQLiteDatabase.
public SQLiteDatabase getReadableDatabase()
public SQLiteDatabase getWritableDatabase()
The first time one of these methods is called a database will be created if none exists. The difference between getReadableDatabase and getWritableDatabase is the former can be used for read-only whereas the latter can be used to read from and write to the database.
The SQLiteDatabase Class
Once you get a SQLiteDatabase from a SQLiteOpenHelper’s getReadableDatabase or getWritableDatabase method, you can manipulate the data in the database by calling the SQLiteDatabase’s insert or execSQL method. For example, to add a record, call the insert method whose signature is as follows.
public long insert (String table, String nullColumnHack,
ContentValues values)
Here, table is the name of the table and values is an android.content.ContentValues that contains pairs of field names/values to be inserted to the table. This method returns the row identifier for the new row.
For instance, the following code inserts a record into the employees table passing three field values.
SQLiteDatabase db = this.getWritableDatabase();
// this is an instance of SQLiteOpenHelper
ContentValues values = new ContentValues();
values.put("first_name", "Joe");
values.put("last_name", "Average");
values.put("position", "System Analyst");
long id = db.insert("employees", null, values);
db.close();
To update or delete a record, use the update or delete method, respectively. The signatures of these methods are as follows.
public int delete (java.lang.String table,
java.lang.String whereClause, java.lang.String[] whereArgs)
public int update (java.lang.String table,
android.content.ContentValues values,
java.lang.String whereClause, java.lang.String[] whereArgs)
Examples of the two methods are shown in the accompanying application.
To execute a SQL statement, use the execSQL method.
public void execSQL (java.lang.String sql)
Finally, to retrieve records, use one of the query methods. One of the method overloads has this signature.
public android.database.Cursor query(java.lang.String table,
java.lang.String[] columns, java.lang.String selection,
java.lang.String[] selectionArgs,
java.lang.String groupBy,
java.lang.String having,
java.lang.String orderBy, hava.lang.String limit)
You can find an example on how to use this method in the sample application accompanying this chapter.
One thing to note: The data returned by the query method is contained in an instance of Cursor, an interesting type explained in the next section.
The Cursor Interface
Calling the query method on a SQLiteDatabase returns a Cursor. A Cursor, an implementation of the android.database.Cursor interface, provides read and write access to the result set returned by a database query.
To read a row of data through a Cursor, you first need to point the Cursor to a data row by calling its moveToFirst, moveToNext, moveToPrevious, moveToLast, or moveToPosition method. moveToFirst moves the Cursor to the first row and moveToNext to the next row.moveToLast, you may have guessed correctly, moves it to the last record and moveToPrevious to the previous row. moveToPosition takes an integer and moves the Cursor to the specified position.
Once you move the Cursor to a data row, you can read a column value in the row by calling the Cursor’s getInt, getFloat, getLong, getString, getShort, or getDouble method, passing the column index.
An interesting aspect of Cursor is that it can be used as the data source for a ListAdapter, which in turn can be used to feed a ListView. The advantage of using a Cursor for a ListView is that the Cursor can manage your data. In other words, if the data is updated, the Cursor can self-refresh the ListView. This is a very useful feature as you then have one fewer thing to worry about.
Example
The DatabaseDemo1 application is an application for managing contacts in a SQLite database. A contact is a data structure that contains a person’s contact details. The application has three activities, MainActivity, AddContactActivity, and ShowContactActivity.
The main activity shows the list of contacts and is shown in Figure 18.1.
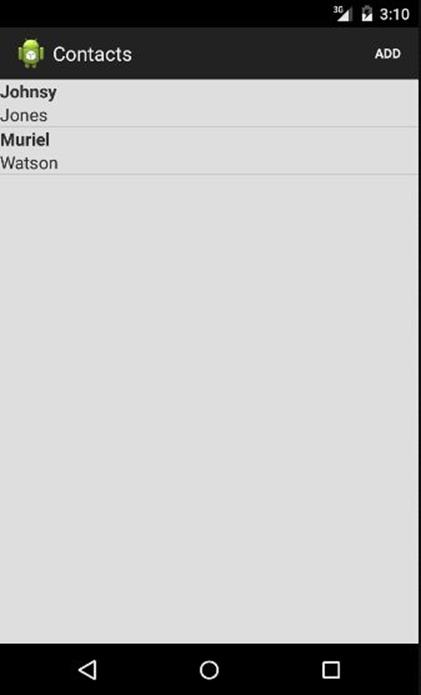
Figure 18.1: The main activity
The main activity offers an Add button on its action bar that will start the AddContactActivity activity if pressed. The latter activity contains a form for adding a new contact and is shown in Figure 18.2.
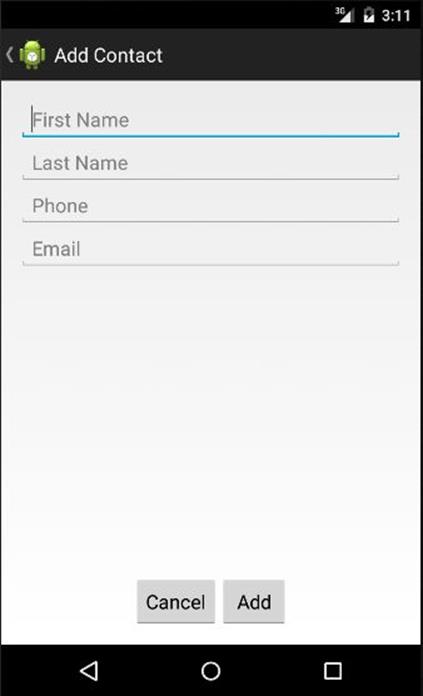
Figure 18.2: AddContactActivity
The main activity also uses a ListView to display all contacts in the database. Pressing an item on the list activates the ShowContactActivity activity, which is shown in Figure 18.3.
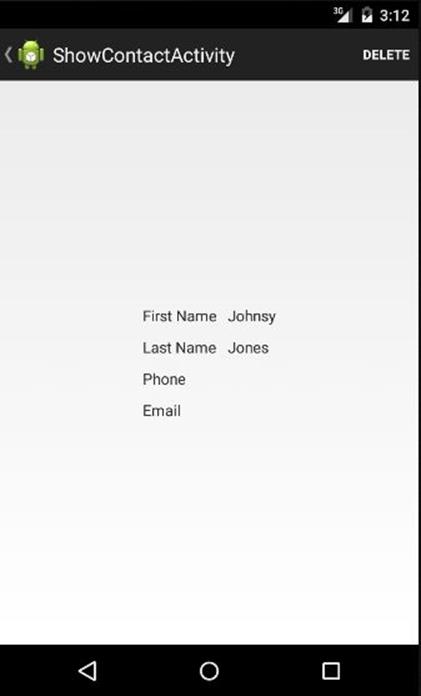
Figure 18.3: ShowContactActivity
The ShowContactActivity activity allows the user to delete the shown contact by pressing the Delete button on the action bar. Pressing the button prompts the user to confirm if he or she really wishes to delete the contact. The user can press the activity label to go back to the main activity.
The three activities in the application are declared in the manifest presented in Listing 18.1.
Listing 18.1: The AndroidManifest.xml file
<?xml version="1.0" encoding="utf-8"?>
<manifest xmlns:android="http://schemas.android.com/apk/res/android"
package="com.example.databasedemo1"
android:versionCode="1"
android:versionName="1.0" >
<uses-sdk
android:minSdkVersion="11"
android:targetSdkVersion="18" />
<application
android:allowBackup="true"
android:icon="@drawable/ic_launcher"
android:label="@string/app_name"
android:theme="@style/AppTheme" >
<activity
android:name=".MainActivity"
android:label="@string/app_name" >
<intent-filter>
<action android:name="android.intent.action.MAIN" />
<category
android:name="android.intent.category.LAUNCHER"/>
</intent-filter>
</activity>
<activity android:name=".AddContactActivity"
android:parentActivityName=".MainActivity"
android:label="@string/title_activity_add_contact">
</activity>
<activity android:name=".ShowContactActivity"
android:parentActivityName=".MainActivity"
android:label="@string/title_activity_show_contact" >
</activity>
</application>
</manifest>
DatabaseDemo1 is a simple application that features one object model, the Contact class in Listing 18.2. This is a POJO with five properties, id, firstName, lastName, phone, and email.
Listing 18.2: The Contact class
package com.example.databasedemo1;
public class Contact {
private long id;
private String firstName;
private String lastName;
private String phone;
private String email;
public Contact() {
}
public Contact(String firstName, String lastName,
String phone, String email) {
this.firstName = firstName;
this.lastName = lastName;
this.phone = phone;
this.email = email;
}
// get and set methods not shown to save space
}
Now comes the most important class in this application, the DatabaseManager class in Listing 18.3. This class encapsulates methods for accessing data in the database. The class extends SQLiteOpenHelper and implements its onCreate and onUpdate methods and provides methods for managing contacts, addContact, deleteContact, updateContact, getAllContacts, and getContact.
Listing 18.3: The DatabaseManager class
package com.example.databasedemo1;
import java.util.ArrayList;
import java.util.List;
import android.content.ContentValues;
import android.content.Context;
import android.database.Cursor;
import android.database.sqlite.SQLiteDatabase;
import android.database.sqlite.SQLiteOpenHelper;
import android.util.Log;
public class DatabaseManager extends SQLiteOpenHelper {
public static final String TABLE_NAME = "contacts";
public static final String ID_FIELD = "_id";
public static final String FIRST_NAME_FIELD = "first_name";
public static final String LAST_NAME_FIELD = "last_name";
public static final String PHONE_FIELD = "phone";
public static final String EMAIL_FIELD = "email";
public DatabaseManager(Context context) {
super(context,
/*db name=*/ "contacts_db2",
/*cursorFactory=*/ null,
/*db version=*/1);
}
@Override
public void onCreate(SQLiteDatabase db) {
Log.d("db", "onCreate");
String sql = "CREATE TABLE " + TABLE_NAME
+ " (" + ID_FIELD + " INTEGER, "
+ FIRST_NAME_FIELD + " TEXT,"
+ LAST_NAME_FIELD + " TEXT,"
+ PHONE_FIELD + " TEXT,"
+ EMAIL_FIELD + " TEXT,"
+ " PRIMARY KEY (" + ID_FIELD + "));";
db.execSQL(sql);
}
@Override
public void onUpgrade(SQLiteDatabase db, int arg1, int arg2) {
Log.d("db", "onUpdate");
db.execSQL("DROP TABLE IF EXISTS " + TABLE_NAME);
// re-create the table
onCreate(db);
}
public Contact addContact(Contact contact) {
Log.d("db", "addContact");
SQLiteDatabase db = this.getWritableDatabase();
ContentValues values = new ContentValues();
values.put(FIRST_NAME_FIELD, contact.getFirstName());
values.put(LAST_NAME_FIELD, contact.getLastName());
values.put(PHONE_FIELD, contact.getPhone());
values.put(EMAIL_FIELD, contact.getEmail());
long id = db.insert(TABLE_NAME, null, values);
contact.setId(id);
db.close();
return contact;
}
// Getting single contact
Contact getContact(long id) {
SQLiteDatabase db = this.getReadableDatabase();
Cursor cursor = db.query(TABLE_NAME, new String[] {
ID_FIELD, FIRST_NAME_FIELD, LAST_NAME_FIELD,
PHONE_FIELD, EMAIL_FIELD }, ID_FIELD + "=?",
new String[] { String.valueOf(id) }, null,
null, null, null);
if (cursor != null) {
cursor.moveToFirst();
Contact contact = new Contact(
cursor.getString(1),
cursor.getString(2),
cursor.getString(3),
cursor.getString(4));
contact.setId(cursor.getLong(0));
return contact;
}
return null;
}
// Getting All Contacts
public List<Contact> getAllContacts() {
List<Contact> contacts = new ArrayList<Contact>();
String selectQuery = "SELECT * FROM " + TABLE_NAME;
SQLiteDatabase db = this.getWritableDatabase();
Cursor cursor = db.rawQuery(selectQuery, null);
while (cursor.moveToNext()) {
Contact contact = new Contact();
contact.setId(Integer.parseInt(cursor.getString(0)));
contact.setFirstName(cursor.getString(1));
contact.setLastName(cursor.getString(2));
contact.setPhone(cursor.getString(3));
contact.setEmail(cursor.getString(4));
contacts.add(contact);
}
return contacts;
}
public Cursor getContactsCursor() {
String selectQuery = "SELECT * FROM " + TABLE_NAME;
SQLiteDatabase db = this.getWritableDatabase();
return db.rawQuery(selectQuery, null);
}
public int updateContact(Contact contact) {
SQLiteDatabase db = this.getWritableDatabase();
ContentValues values = new ContentValues();
values.put(FIRST_NAME_FIELD, contact.getFirstName());
values.put(LAST_NAME_FIELD, contact.getLastName());
values.put(PHONE_FIELD, contact.getPhone());
values.put(EMAIL_FIELD, contact.getEmail());
return db.update(TABLE_NAME, values, ID_FIELD + " = ?",
new String[] { String.valueOf(contact.getId()) });
}
public void deleteContact(long id) {
SQLiteDatabase db = this.getWritableDatabase();
db.delete(TABLE_NAME, ID_FIELD + " = ?",
new String[] { String.valueOf(id) });
db.close();
}
}
The DatabaseManager class is used by all the three activity classes. The MainActivity class employs a ListView that gets its data and layout from a ListAdapter that in turn gets its data from a cursor. The AddContactActivity class receives the details of a new contact and inserts it into the database by calling the DatabaseManager class’s addContact method. The ShowContactActivity class retrieves the details of the pressed contact item in the main activity and uses the DatabaseManager class’s getContact method to achieve this. If the user decides to delete the shown contact, ShowContactActivity will resort to DatabaseManager to delete it.
The MainActivity, AddContactActivity, and ShowContactActivity classes are given in Listing 18.4, Listing 18.5, and Listing 18.6, respectively.
Listing 18.4: The MainActivity class
package com.example.databasedemo1;
import android.app.Activity;
import android.content.Intent;
import android.database.Cursor;
import android.os.Bundle;
import android.support.v4.widget.CursorAdapter;
import android.view.Menu;
import android.view.MenuItem;
import android.view.View;
import android.widget.AdapterView;
import android.widget.AdapterView.OnItemClickListener;
import android.widget.ListAdapter;
import android.widget.ListView;
import android.widget.SimpleCursorAdapter;
public class MainActivity extends Activity {
DatabaseManager dbMgr;
@Override
protected void onCreate(Bundle savedInstanceState) {
super.onCreate(savedInstanceState);
setContentView(R.layout.activity_main);
ListView listView = (ListView) findViewById(
R.id.listView);
dbMgr = new DatabaseManager(this);
Cursor cursor = dbMgr.getContactsCursor();
startManagingCursor(cursor);
ListAdapter adapter = new SimpleCursorAdapter(
this,
android.R.layout.two_line_list_item,
cursor,
new String[] {DatabaseManager.FIRST_NAME_FIELD,
DatabaseManager.LAST_NAME_FIELD},
new int[] {android.R.id.text1, android.R.id.text2},
CursorAdapter.FLAG_REGISTER_CONTENT_OBSERVER);
listView.setAdapter(adapter);
listView.setChoiceMode(ListView.CHOICE_MODE_SINGLE);
listView.setOnItemClickListener(
new OnItemClickListener() {
@Override
public void onItemClick(AdapterView<?> adapterView,
View view, int position, long id) {
Intent intent = new Intent(
getApplicationContext(),
ShowContactActivity.class);
intent.putExtra("id", id);
startActivity(intent);
}
});
}
@Override
public boolean onCreateOptionsMenu(Menu menu) {
getMenuInflater().inflate(R.menu.menu_main, menu);
return true;
}
@Override
public boolean onOptionsItemSelected(MenuItem item) {
switch (item.getItemId()) {
case R.id.action_add:
startActivity(new Intent(this,
AddContactActivity.class));
return true;
default:
return super.onOptionsItemSelected(item);
}
}
}
Listing 18.5: The AddContactActivity class
package com.example.databasedemo1;
import android.app.Activity;
import android.os.Bundle;
import android.view.Menu;
import android.view.View;
import android.widget.TextView;
public class AddContactActivity extends Activity {
@Override
protected void onCreate(Bundle savedInstanceState) {
super.onCreate(savedInstanceState);
setContentView(R.layout.activity_add_contact);
}
@Override
public boolean onCreateOptionsMenu(Menu menu) {
getMenuInflater().inflate(R.menu.add_contact, menu);
return true;
}
public void cancel(View view) {
finish();
}
public void addContact(View view) {
DatabaseManager dbMgr = new DatabaseManager(this);
String firstName = ((TextView) findViewById(
R.id.firstName)).getText().toString();
String lastName = ((TextView) findViewById(
R.id.lastName)).getText().toString();
String phone = ((TextView) findViewById(
R.id.phone)).getText().toString();
String email = ((TextView) findViewById(
R.id.email)).getText().toString();
Contact contact = new Contact(firstName, lastName,
phone, email);
dbMgr.addContact(contact);
finish();
}
}
Listing 18.6: The ShowContactActivity class
package com.example.databasedemo1;
import android.app.Activity;
import android.app.AlertDialog;
import android.content.DialogInterface;
import android.os.Bundle;
import android.util.Log;
import android.view.Menu;
import android.view.MenuItem;
import android.widget.TextView;
public class ShowContactActivity extends Activity {
long contactId;
@Override
protected void onCreate(Bundle savedInstanceState) {
super.onCreate(savedInstanceState);
setContentView(R.layout.activity_show_contact);
getActionBar().setDisplayHomeAsUpEnabled(true);
Bundle extras = getIntent().getExtras();
if (extras != null) {
contactId = extras.getLong("id");
DatabaseManager dbMgr = new DatabaseManager(this);
Contact contact = dbMgr.getContact(contactId);
if (contact != null) {
((TextView) findViewById(R.id.firstName))
.setText(contact.getFirstName());
((TextView) findViewById(R.id.lastName))
.setText(contact.getLastName());
((TextView) findViewById(R.id.phone))
.setText(contact.getPhone());
((TextView) findViewById(R.id.email))
.setText(contact.getEmail());
} else {
Log.d("db", "contact null");
}
}
}
@Override
public boolean onCreateOptionsMenu(Menu menu) {
getMenuInflater().inflate(R.menu.show_contact, menu);
return true;
}
@Override
public boolean onOptionsItemSelected(MenuItem item) {
switch (item.getItemId()) {
case R.id.action_delete:
deleteContact();
return true;
default:
return super.onOptionsItemSelected(item);
}
}
private void deleteContact() {
new AlertDialog.Builder(this)
.setTitle("Please confirm")
.setMessage(
"Are you sure you want to delete " +
"this contact?")
.setPositiveButton("Yes",
new DialogInterface.OnClickListener() {
public void onClick(
DialogInterface dialog,
int whichButton) {
DatabaseManager dbMgr =
new DatabaseManager(
getApplicationContext());
dbMgr.deleteContact(contactId);
dialog.dismiss();
finish();
}
})
.setNegativeButton("No",
new DialogInterface.OnClickListener() {
public void onClick(
DialogInterface dialog,
int which) {
dialog.dismiss();
}
})
.create()
.show();
}
}
Summary
The Android Database API makes it easy to work with relational databases. The android.database and android.database.sqlite packages contains classes and interfaces that support access to a SQLite database, which is the default database shipped with Android. In this chapter you learned how to use the three most frequently used types in the API, the SQLiteOpenHelper class, the SQLiteDatabase class, and the Cursor interface.
All materials on the site are licensed Creative Commons Attribution-Sharealike 3.0 Unported CC BY-SA 3.0 & GNU Free Documentation License (GFDL)
If you are the copyright holder of any material contained on our site and intend to remove it, please contact our site administrator for approval.
© 2016-2026 All site design rights belong to S.Y.A.