Android Application Development: A Beginner's Tutorial (2015)
Chapter 1. Getting Started
You need the Android Software Development Kit (SDK) to develop, debug and test your applications. The SDK contains various tools including an emulator to help you test your applications without a physical device. Currently the SDK is available for Windows, Mac OS X and Linux operating systems.
You also need an integrated development environment (IDE) to speed up development. You could build applications without an IDE, but that would be more difficult and unwise. There are two IDEs currently available, both free:
§ Android Studio, which is based on IntelliJ IDEA, a popular Java IDE. This software suite includes the Android SDK.
§ The Android Developer Tools (ADT) Bundle, a bundle that includes the Android SDK and Eclipse. Eclipse is another popular Java IDE.
Released in December 2014, Android Studio is the preferred IDE and the ADT bundle will not be supported in the future. Therefore, you should start using Android Studio unless you have very good reasons to choose the ADT Bundle. This book assumes you are using Android Studio.
In this chapter you will learn how to download and install Android Studio. After you have successfully installed the IDE, you will write and build your first Android application and run it on the emulator.
Android application development requires a Java Development Kit (JDK). For Android 5 or later, or if you are developing using Android Studio, you need JDK 7 or later. For pre-5 Android, you need JDK 6 or later. If you do not have a JDK installed, make sure you download and install one by following the instructions in Appendix A, “Installing the JDK.”
Downloading and Installing Android Studio
You can download Android Studio from this web page:
http://developer.android.com/sdk/index.html
Android Studio is available for Windows, Mac OS X and Linux. Installing Android Studio also downloads and installs the Android SDK.
Installing on Windows
Follow these steps to install Android Studio on Windows.
1. Double-click the exe file you downloaded to launch the Setup wizard. The welcome page of the wizard is shown in Figure 1.1.
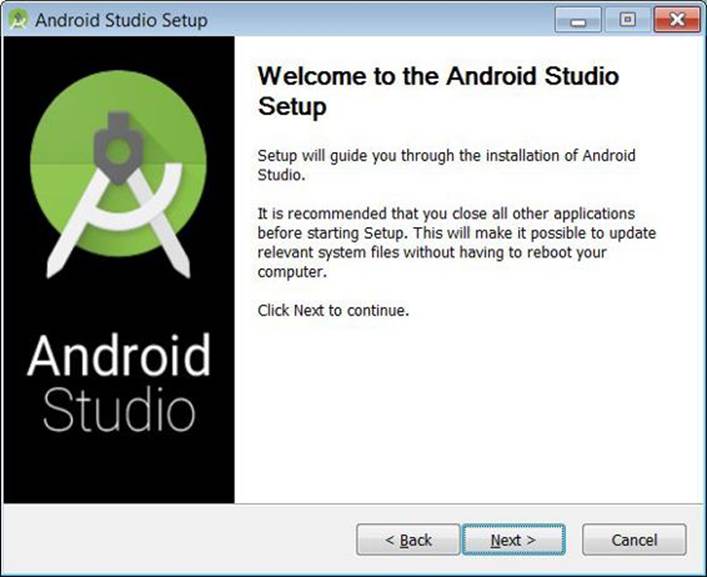
Figure 1.1: The Android Studio Setup program
2. Click Next to proceed.
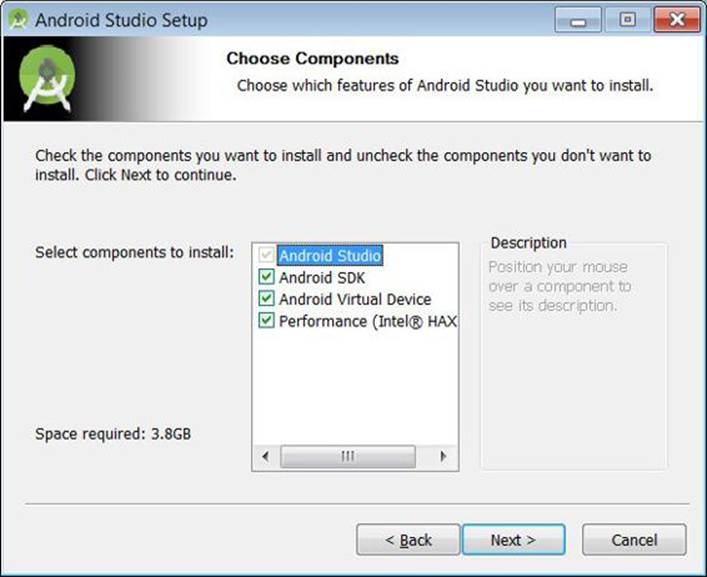
Figure 1.2: Choosing components
3. You will see the next dialog of the Setup wizard as shown in Figure 1.2. Here you can choose the components do install. Leave all components selected and click Next again.
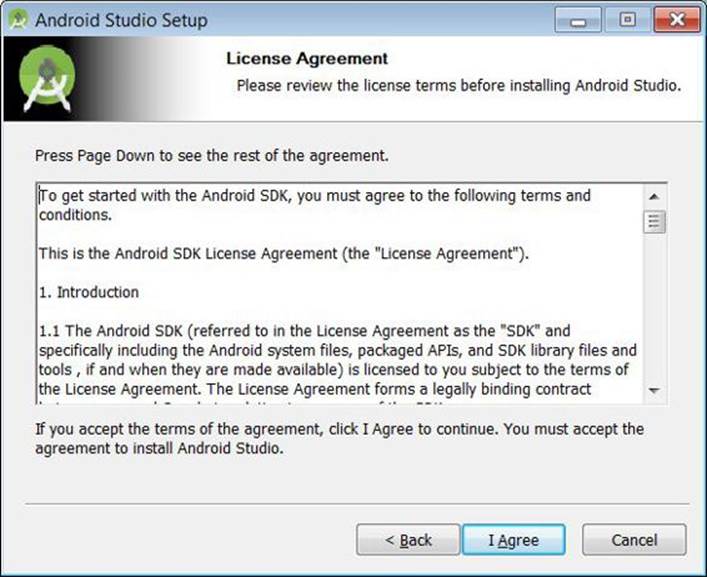
Figure 1.3: The license agreement
4. The next dialog, shown in Figure 1.3, shows the license agreement. You really have no choice but to agree on the license agreement if you wish to use Android Studio, in which case you have to click I Agree.
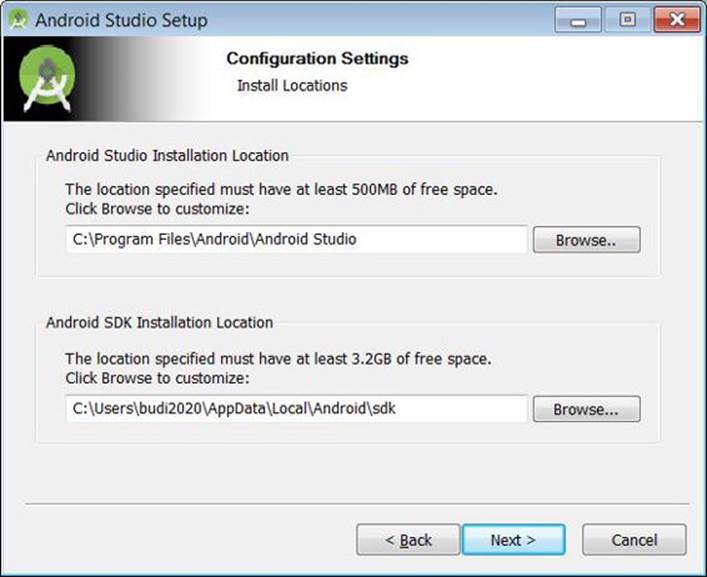
Figure 1.4: Choosing the install locations
5. In the next dialog that appears, which is shown in Figure 1.4, browse to the install locations for both Android Studio and the Android SDK. Android Studio should come with suggestions. It’s not a bad idea to accept the locations suggested. Once you find locations for the software, clickNext.
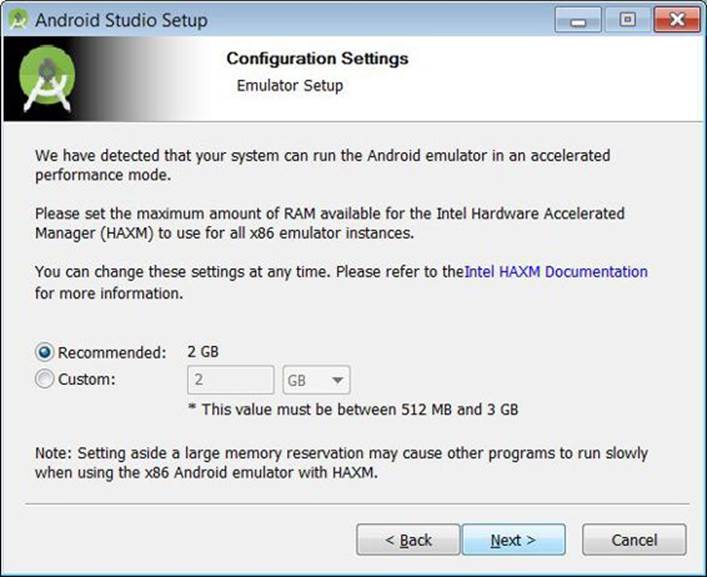
Figure 1.5: Emulator setup
6. The next dialog, presented in Figure 1.5, shows the configuration page for the emulator. Click Next.
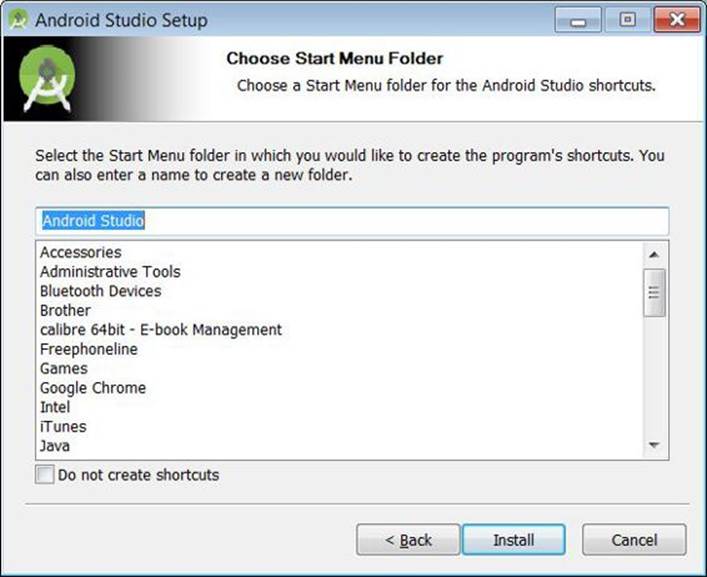
Figure 1.6: Choosing the Start menu folder
7. The next dialog, shown in Figure 1.6, is the last dialog before installation. Here you have to select a Start menu folder. Simply accept the default value and click Install. Android Studio will start to install.
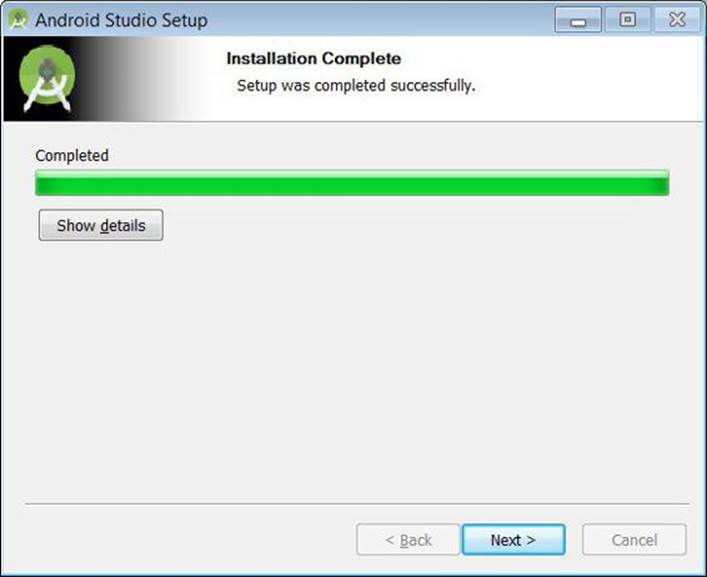
Figure 1.7: Installation complete
8. Once installation is complete, you will see another dialog similar to that in Figure 1.7. Click Next.
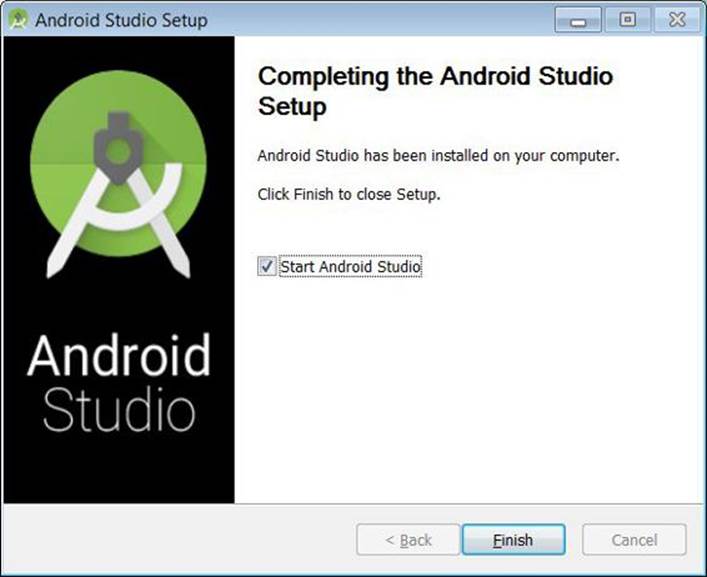
Figure 1.8: Setup is finished
9. On the next dialog, shown in Figure 1.8, click Finish, leaving the “Start Android Studio” checkbox checked. If you have installed a previous version of Android Studio, the Setup wizard will ask you if you want to import settings from the previous version of Android Studio. This is shown in Figure 1.9.
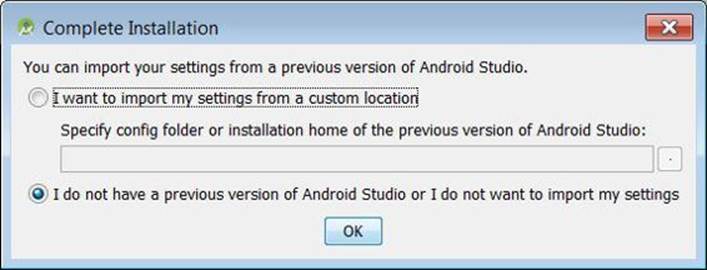
Figure 1.9: Deciding whether to import settings from another version of Android Studio
10. Leave the second radio button checked and click OK. The Setup wizard will quietly create an Android virtual device and report it to you once it’s finished. (See Figure 1.10).
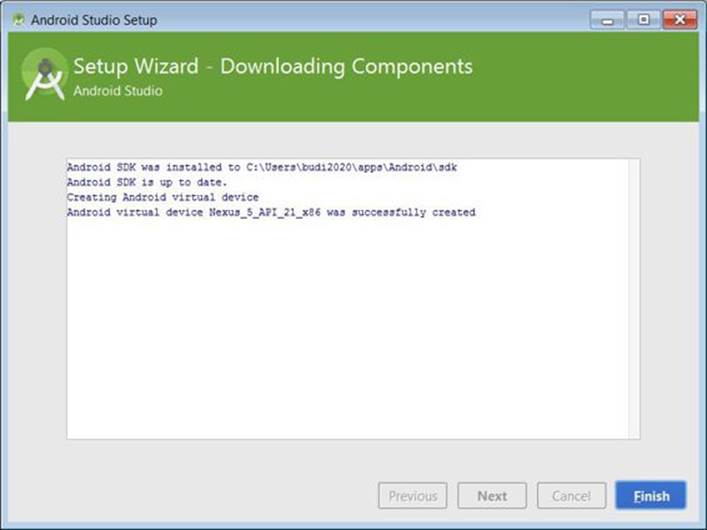
Figure 1.10: The Setup wizard has just created an AVD
11. Click Finish. Finally, Android Studio is ready to use. The welcome dialog is shown in Figure 1.11.
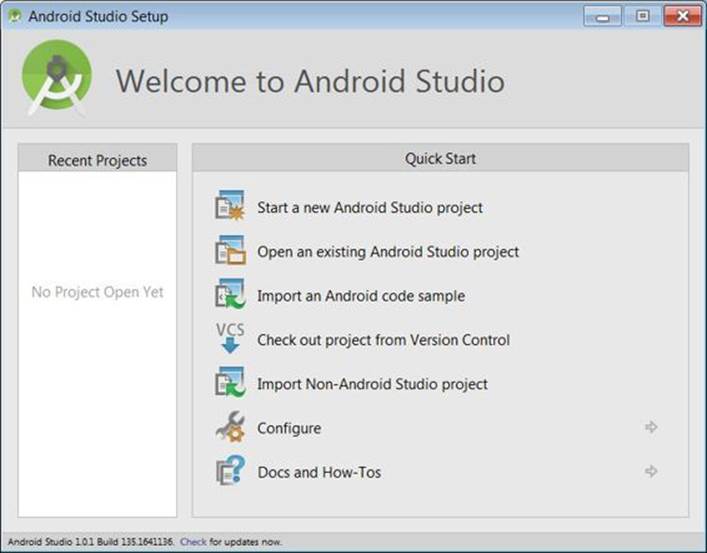
Figure 1.11: Android Studio’s welcome dialog
Installing on Mac OS X
To install Android Studio on a Mac OS X machine, follow these steps:
1. Launch the dmg file you downloaded.
2. Drag and drop Android Studio to the Applications folder.
3. Open Android Studio and follow the setup wizard to install the SDK.
Installing on Linux
On Linux, extract the downloaded zip file, open a terminal and change directory to the bin directory of the installation directory and type:
./studio.sh
Then, follow the setup wizard to install the SDK.
Creating An Application
Creating an Android application with Android Studio is as easy as a few mouse clicks. This section shows how to create a Hello World application, package it, and run it on the emulator. Make sure you have installed the Android SDK and Android Studio by following the instructions in the previous section.
Next, follow these steps.
1. Click the File menu in Android Studio and select New Project. The first dialog of the Create New Project wizard, shown in Figure 1.12, appears.
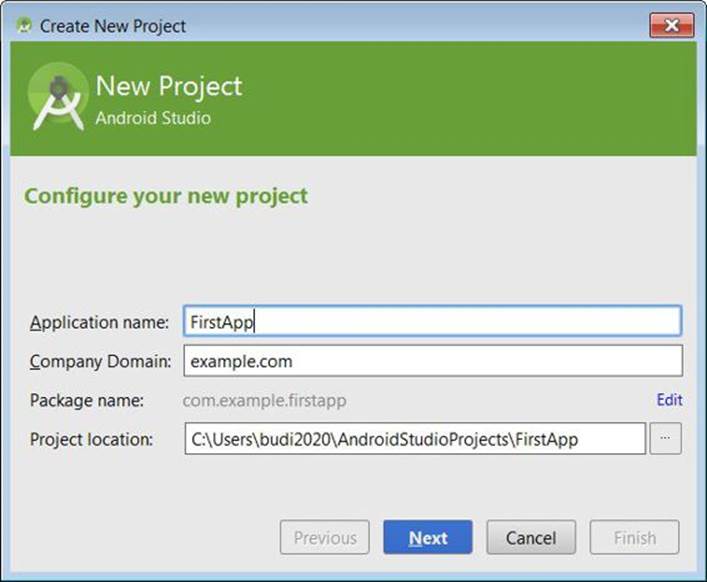
Figure 1.12: Entering application details
2. Enter the details of the new application. In the Application name field, type the name to appear on the Android device. In the Company Domain field, type your company’s domain. If you do not have one, just use example.com. The company domain in reverse order will be used as the base package name for the application. The package name uniquely identifies your application. You can change the package name by clicking the Edit button to the right of the field. By default, the project will be created under the AndroidStudioProjects directory created when you installed Android Studio. You can change the location too if you wish.
3. Click Next. The second dialog opens as shown in Figure 1.13. Here you need to select a target (phone and Tablet, TV, etc) and the minimum API level. This book only discusses Android application development for phones and tablets, so leave the selected option checked. As for the minimum API level, the lower the level, the more devices your application can run on, but the fewer features are available to you. For now, keep the API level Android Studio has selected for you.
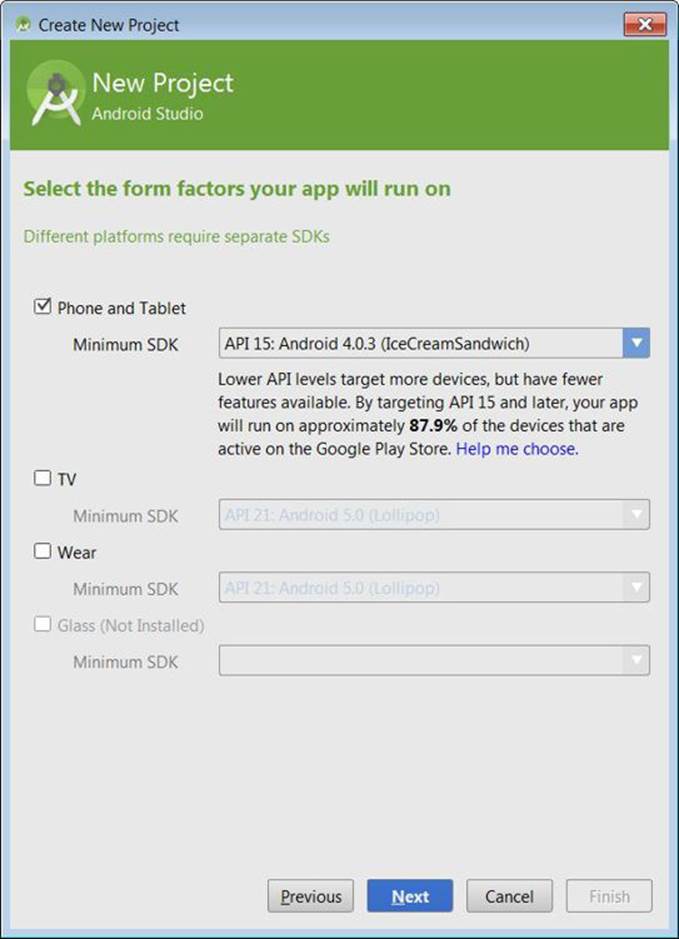
Figure 1.13: Selecting a target
4. Click Next again. A dialog similar to that in Figure 1.14 appears. Android Studio is asking you if you want to add an activity to your project and, if so, what kind of activity. At this stage, you probably do not know what an activity is. For now, think of it as a window, and add a blank activity to your project. So, accept the selected activity type.
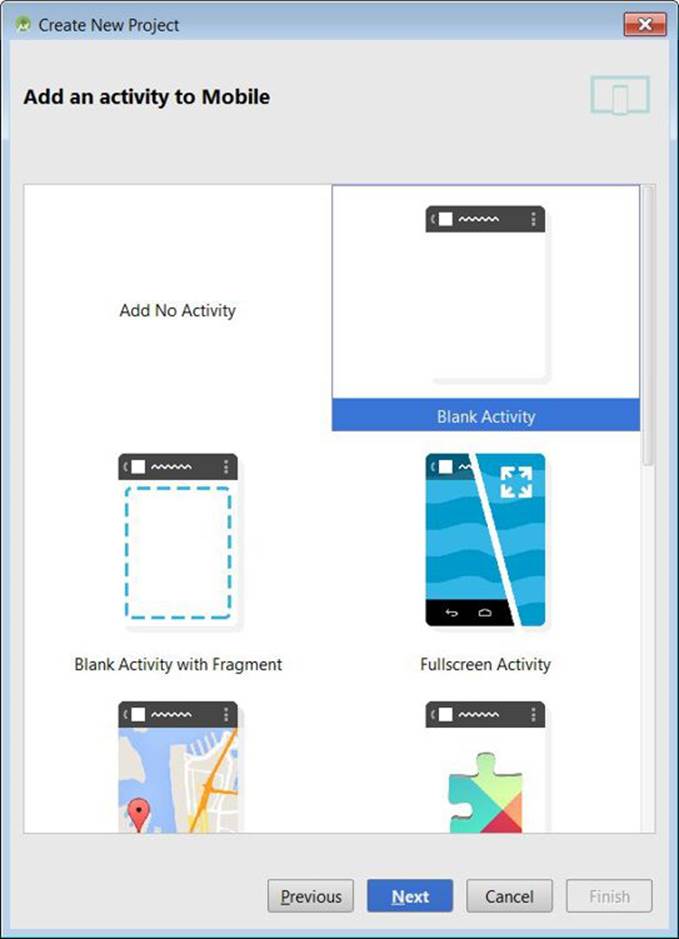
Figure 1.14: Adding an activity
5. Click Next again. The next dialog that appears looks like the dialog in Figure 1.15. In this dialog you can enter a Java class name for your activity class as well as a title for your activity window and a layout name. For now just accept the default.
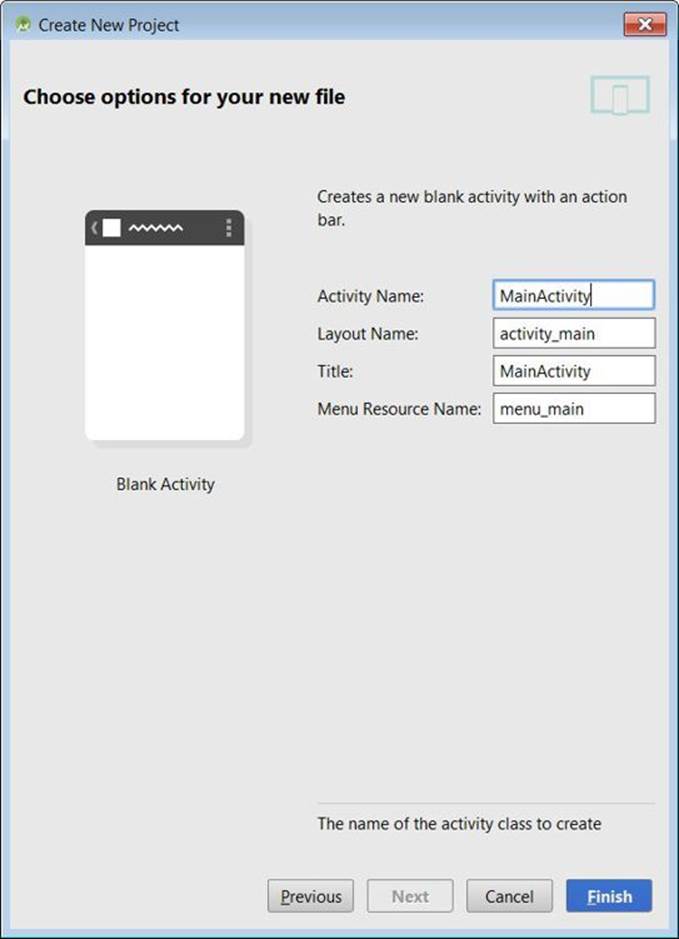
Figure 1.15: Entering the activity class name and other details
5. Click Finish. Android Studio will prepare your project and it may take a while. Finally, when it’s finished, you will see your project in Android Studio, like the one shown in Figure 1.16.
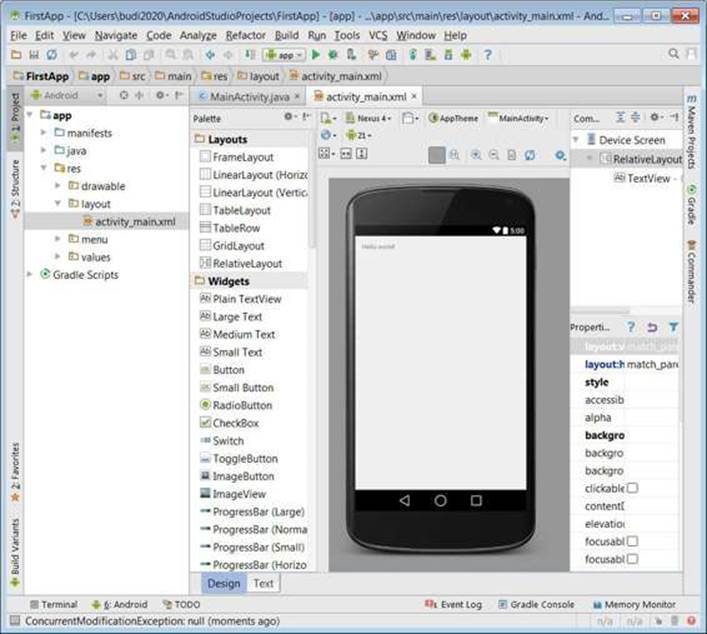
Figure 1.16: The new Android project
The next section shows you how you can run your application on the emulator.
Running the Application on the Emulator
Now that you have an application ready, you can run it by clicking the Run button. You will be asked to choose a device.
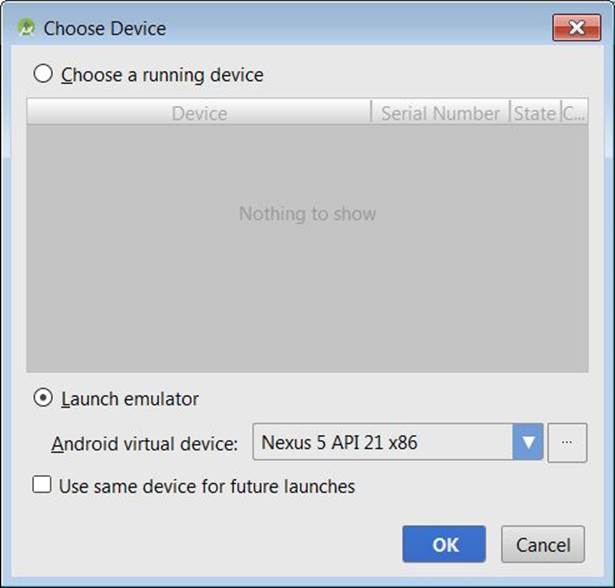
Figure 1.17: Selecting a device to run the application
If you have not created an emulator, do so now. If you have, you will see all running emulators. Or, you can launch one. Click “Use same device for future launches” to use the same emulator in the future.
Next, click OK.
It will take seconds to launch the AVD. As you know, the emulator emulates an Android device. Just like a physical device, you need to unlock the emulator’s screen when running your app for the first time.
If your application does not open automatically, locate the application icon and double-click on it. Figure 1.18 shows the application you just created.
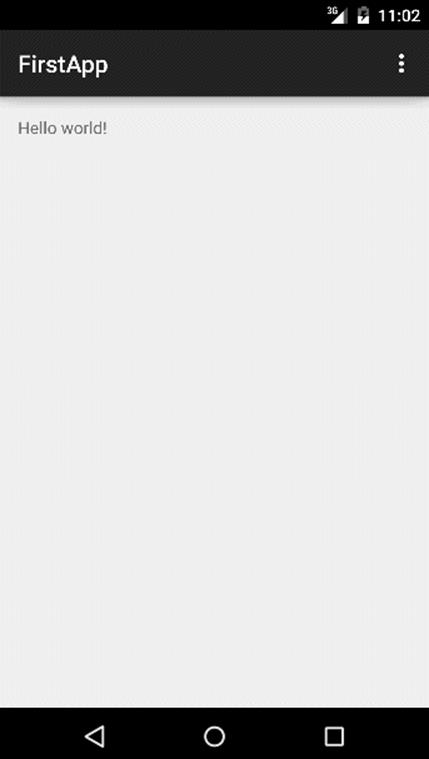
Figure 1.18: Your application running on the emulator
During development, leave the emulator running while you edit your code. This way, the emulator does not need to be loaded again every time you test your application.
The Application Structure
Now, after the little excitement of having just run your first Android application, let’s go back to Android Studio and take a look at the structure of an Android application. Figure 1.19 shows the left treeview that contains the project components.
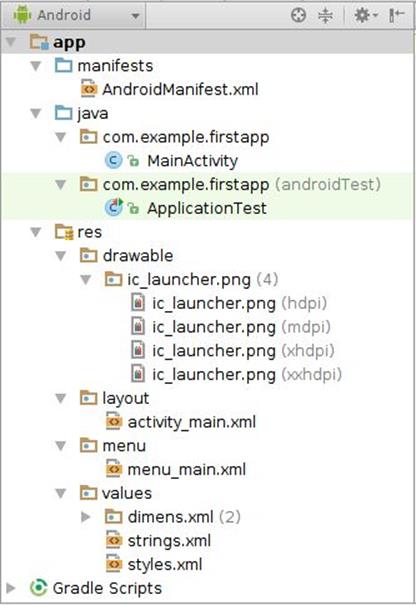
Figure 1.19: The application structure
There are two main nodes in the Project window in Android Studio, app and Gradle Scripts. The app node contains all the components in the application. The Gradle Scripts node contains the Gradle build scripts used by Android Studio to build your project. I will not discuss these scripts, but it would be a good idea for you to get familiar with Gradle.
There are three nodes under the app node:
§ manifests. Contains an AndroidManifest.xml file that describes your application. It will be explained in more detail in the next section “The Android Manifest.”
§ java. Contains all Java application and test classes.
§ res. Contains resource files. Underneath this directory are these directories: drawable (containing images for various screen resolutions), layout (containing layout files), menu (containing menu files) and values (containing string and other values).
The R Class
Not visible from inside Android Studio is a generated Java class named R, which can be found in the app/build/generated/source directory of the project. R contains nested classes that in turn contain all the resource IDs for all your resources. Every time you add, change or delete a resource, R is re-generated. For instance, if you add an image file named logo.png to the res/drawable directory, Android Studio will generate a field named logo under the drawable class, a nested class in R.
The purpose of having R is so that you can refer to a resource in your code. For instance, you can refer to the logo.png image file with R.drawable.logo.
The Android Manifest
Every Android application must have a manifest file called AndroidManifest.xml file that describes the application. Listing 1.1 shows a sample manifest file.
Listing 1.1: A sample manifest
<?xml version="1.0" encoding="utf-8"?>
<manifest xmlns:android="http://schemas.android.com/apk/res/android"
package="com.example.firstapp" >
<application
android:allowBackup="true"
android:icon="@drawable/ic_launcher"
android:label="@string/app_name"
android:theme="@style/AppTheme" >
<activity
android:name="com.example.firstapp.MainActivity"
android:label="@string/app_name" >
<intent-filter>
<action android:name="android.intent.action.MAIN" />
<category
android:name="android.intent.category.LAUNCHER" />
</intent-filter>
</activity>
</application>
</manifest>
A manifest file is an XML document with manifest as the root element. The package attribute of the manifest element specifies a unique identifier for the application. Android tools will also use this information to generate appropriate Java classes that are used from the Java source you write.
Under <manifest> is an application element that describes the application. Among others, it contains one or more activity elements that describe activities in your app. An application typically has a main activity that serves as the entry point to the application. The name attribute of anactivity element specifies an activity class. It can be a fully qualified name or just the class name. If it is the latter, the class is assumed to be in the package specified by the package attribute of the manifest element. In other words, the name attribute of the above activity element can be written as one of the following:
android:name="MainActivity"
android:name=".MainActivity"
You can reference a resource from your manifest file (and other XML files in the project) using this format:
@resourceType/name
For example, these are some of the attributes of the application element in Listing 1.1:
android:icon="@drawable/ic_launcher"
android:label="@string/app_name"
android:theme="@style/AppTheme"
The first attribute, android:icon, refers to a drawable named ic_launcher. If you browse the project in Android Studio, you can find an ic_launcher.png file under res/drawable.
The second attribute, android:label, refers to a string resource called app_name. All string resources are located in the strings.xml file under res/values.
Finally, the third attribute, android:theme, references a style named AppTheme. All styles are defined in the styles.xml file under res/values. Styles and themes are discussed in Chapter 10, “Styles and Themes.”
There are other elements that may appear in the Android manifest and you will learn to use many of them in this book. You can find the complete list of elements here:
http://developer.android.com/guide/topics/manifest/manifest-
element.html
The APK File
An Android application is packaged into an apk file, which is basically a zip file and can be opened using WinZip or a similar program. All applications are signed with a private key. This process sounds hard enough, but thankfully Android Studio takes care of everything. When you run an Android application from inside Android Studio, an apk file will be built and signed automatically. The file will be named app-debug.apk and stored in the app/build/outputs/apk directory under the project directory. Android Studio also notifies the emulator or the target device of the location so that the apk file can be found and executed.
The automatically generated apk file also contains debug information to enable running it in debug mode.
Figure 1.20 shows the structure of the apk file that is created when you run your application.
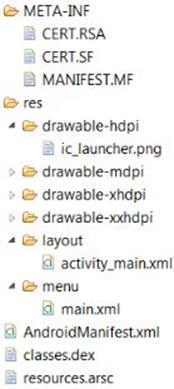
Figure 1.20: Android application structure
The manifest file is there and so are the resource files. The AndroidManifest.xml file is compiled so you cannot use a text editor to read it. There is also a classes.dex file that contains the binary translation of your Java classes into Dalvik executable. Note that even if you have multiple java files in your application, there is only one classes.dex file.
Debuging Your Application
Android Studio is full of useful features for rapidly developing and testing your application. One of the features is support for debugging.
The following are some of the ways you can debug your application.
Logging
The easiest way to debug an application is by logging messages. Java programmers like to use logging utilities, such as Commons Logging and Log4J, to log messages. The Android framework provides the android.util.Log class for the same purpose. The Log class comes with methods to log messages at different log levels. The method names are short: d (debug), i (info), v (verbose), w (warning), e (error), and wtf (what a terrible failure).
This methods allow you to write a tag and the text. For example,
Log.e("activity", "Something went wrong");
During development, you can watch the Android DDMS view at the bottom of Android Studio’s main screen.
The good thing about LogCat is that messages at different log levels are displayed in different colors. In addition, each message has a tag and this makes it easy to find a message. In addition, LogCat allows you to save messages to a file and filter the messages so only messages of interest to you are visible.
The LogCat view is shown in Figure 1.21.
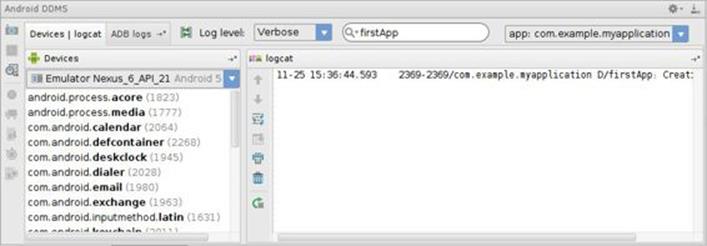
Figure 1.21: LogCat in Android DDMS
Any runtime exception thrown, including the stack trace, will also appear in LogCat, so you can easily identify which line of code is causing the problem.
Setting Breakpoints
The easiest way to debug an application is by logging messages. However, if this does not help and you need to trace your application, you can use other debugging tools in Android Studio.
Try adding a line breakpoint in your code by clicking on a line and selecting Run > Toggle Line Breakpoint. Figure 1.22 shows a line breakpoint in the code editor.
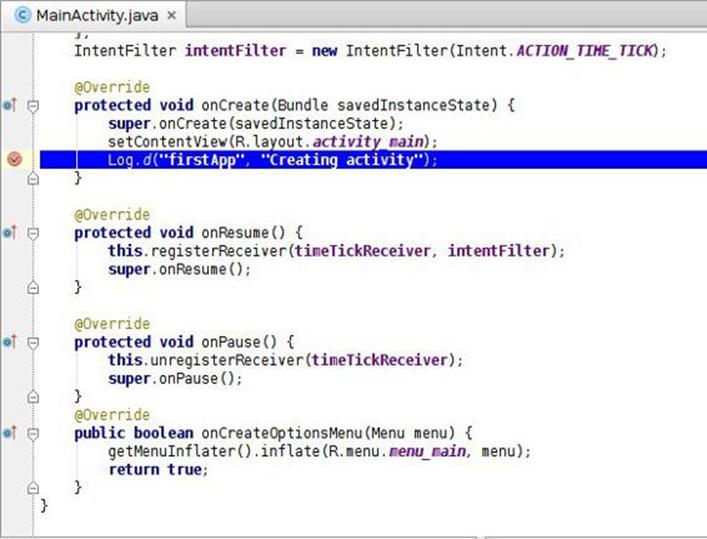
Figure 1.22: Setting a line breakpoint
Now, debug your application by selecting Run > Debug app.
The Debug view is shown in Figure 1.23.
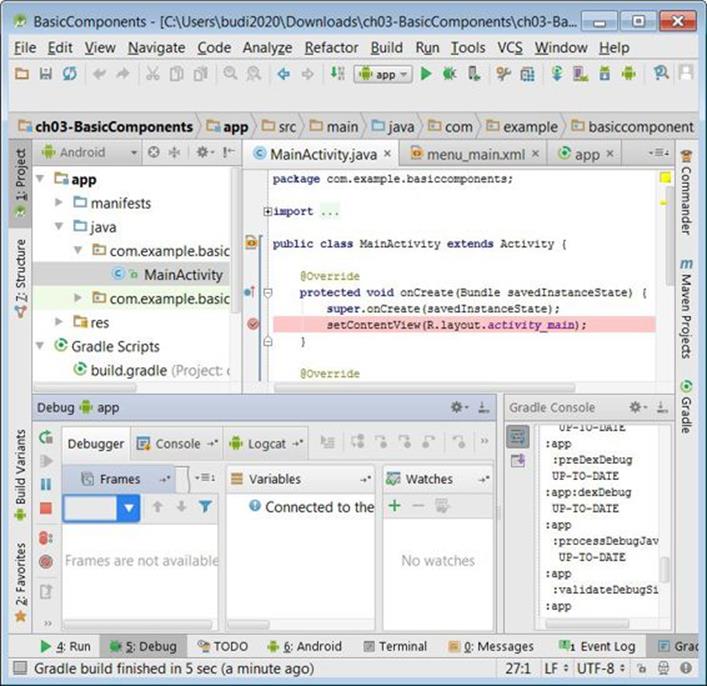
Figure 1.23: The Debug view
Here, you can step into your code, view variables, and so on.
The Android SDK Manager
When you install Android Studio, the setup program also downloads the latest version of the Android SDK. You can manage the packages in the Android SDK using the Android SDK Manager.
To launch the Android SDK Manager, in Android Studio click Tools > Android > SDK Manager. Alternatively, click the SDK Manager button on the toolbar.
The SDK Manager button is shown in Figure 1.24.
![]()
Figure 1.24: The SDK Manager button on the toolbar
The SDK Manager window is shown in Figure 1.25.
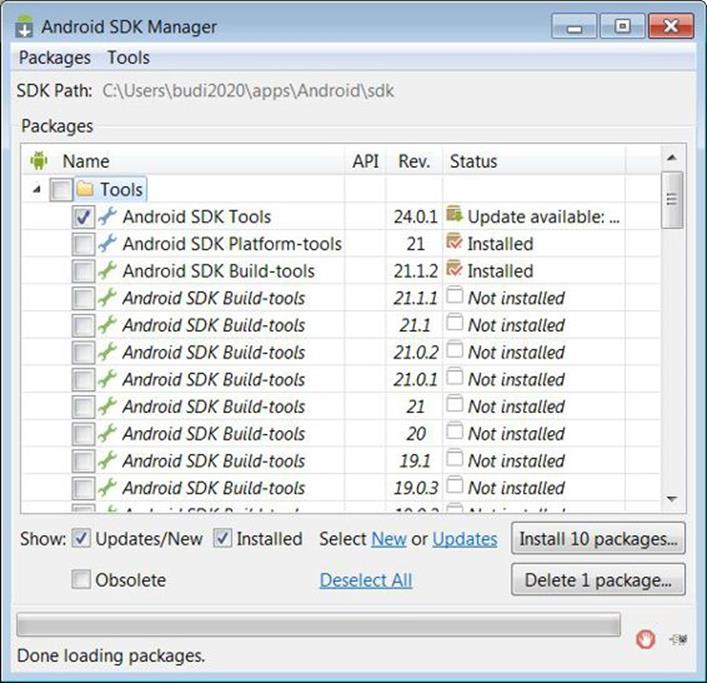
Figure 1.25: The Android SDK Manager window
In the Android SDK Manager, you can download other versions of the SDK or delete components you do not need.
Creating An Android Virtual Device
The SDK ships with an emulator so that you can test your applications without a physical device. The emulator can be configured to mimic various Android phones and tablets, from Nexus S to Nexus 9. Each instance of the configured emulator is called an Android virtual device (AVD). You can create multiple virtual devices and run them simultaneously to test your application in multiple devices.
When you install Android Studio, it also creates an Android virtual device. You can create more virtual devices using the Android Virtual Device (AVD) Manager.
To create an AVD, open the Android Virtual Device (AVD) Manager. You can open it by clicking Tools > Android > AVD Manager. Alternatively, simply click the AVD Manager button on the toolbar. Figure 1.26 shows the AVD Manager button
![]()
Figure 1.26: The AVD Manager button on the toolbar
If you have not created a single AVD in your machine, the first window of the AVD Manager will look like that in Figure 1.27. If you have created virtual devices before, the first window will list all the devices.
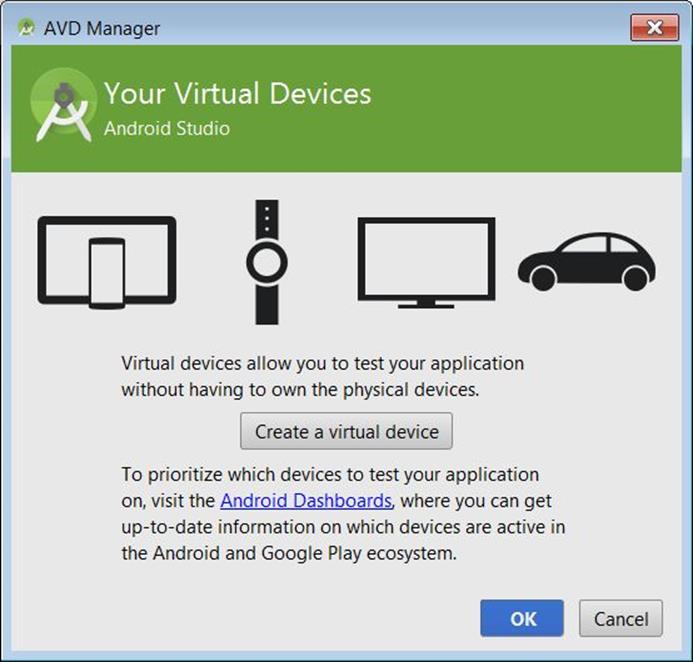
Figure 1.27: The AVD Manager’s welcome screen
To create an AVD, follow these steps.
1. Click the Create a virtual device button. You will see a window similar to that in Figure 1.28.
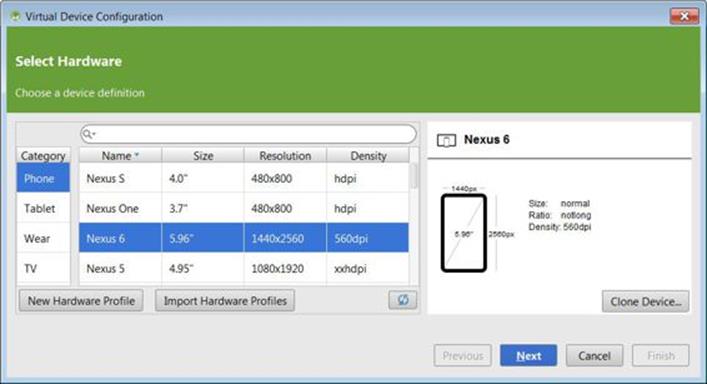
Figure 1.28: Selecting a phone profile
2. Select Phone from Category and then select a device from the center window. Next, click the Next button. The next window will show. See Figure 1.29.
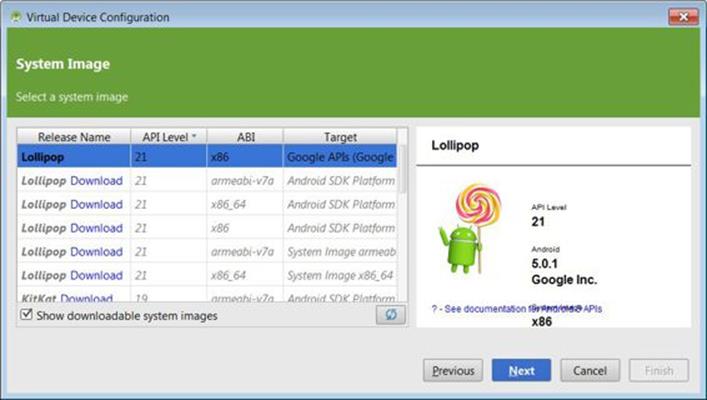
Figure 1.29: Selecting the API level and ABI
3. Select an API level and application binary interface (ABI). If you are using a 32-bit Intel CPU, then it must be x86. If it is a 64-bit Intel CPU, chances are you need the x86_64.
4. Click the Next button. In the next step you will be asked to verify the configuration details of the AVD you are creating. (See Figure 1.30.)
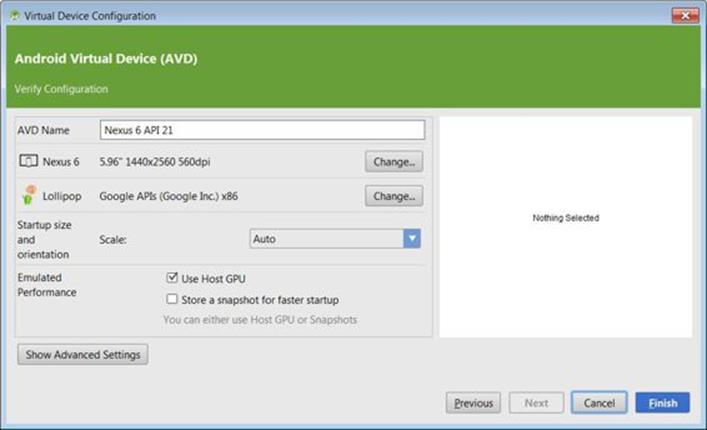
Figure 1.30: Verifying the details of the AVD
5. Click the Finish button. It will take more than a few seconds for the AVD Manager to create a new emulator. Once it’s finished, you will see a list like the one in Figure 1.31.
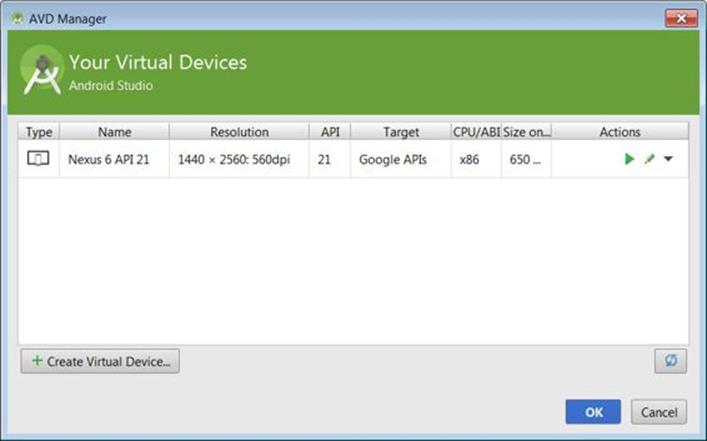
Figure 1.31: A list of available AVDs
For each AVD, there are three action buttons in the rightmost column. The first icon, a green arrow, is for launching the emulator. The second, a pencil, is for editing the emulator details. The last one, a down arrow, shows more actions such as Delete and View Details.
Running An Application on A Physical Device
There are a couple of reasons for wanting to test your application on a real device. The most compelling one is that you should test your applications on real devices before publishing them. Other reasons include speed. An emulator may not be as fast as a new Android device. Also, it is not always easy to simulate certain user inputs in an emulator. For example, you can change the screen orientation easily with a real device. On the emulator, you have to press Ctrl+F12.
To run your application on a real device, follow these steps.
1. Declare your application as debuggable by adding android:debuggable="true" in the application element in the manifest file.
2. Enable USB debugging on the device. On Android 3.2 or older, the option is under Settings > Applications > Development. On Android 4.0 and later, the option is under Settings > Developer Options. On Android 4.2 and later, Developer options is hidden by default. To make it visible, go to Settings > About phone and tap Build number seven times.
Next, set up your system to detect the device. The step depends on what operating system you’re using. For Mac users, you can skip this step. It will just work.
For Windows users, you need to install the USB driver for Android Debug Bridge (adb), a tool that lets you communicate with an emulator or connected Android device. You can find the location of the driver from this site.
http://developer.android.com/tools/extras/oem-usb.html
For Linux users, please see the instructions here.
http://developer.android.com/tools/device.html
Opening A Project in Android Studio
You can download the Android Studio projects accompanying this book from the publisher’s website. To open a project, select File > Open and browse to the application directory. Figure 1.32 shows how the Open File or Project window looks like.

Figure 1.32: Opening a project
Using Java 8
By default, Android Studio can compile sources with Java 7 language syntax. However, you can use Java 8 language features, even though Java 8 is not yet officially supported. It goes without saying that you need JDK 8 or later to use the higher language level. Also, even though you can use the Java 8 language features, you still cannot use the libraries that come with Java 8, such as the new Date Time API or the Stream API.
If you really want to use Java 8 to write Android applications, here is how you can change the Java language level from 7 to 8 in Android Studio.
1. Expand the Gradle Scripts node on the Project view. You will see two build.gradle nodes on the list. Double-click the second build file to open it. You will see something like this:
android {
compileSdkVersion 21
buildToolsVersion "19.1.0"
defaultConfig {
...
}
buildTypes {
...
}
}
2. Add the line in bold to the build file to change the language level to 7.
android {
compileSdkVersion 21
buildToolsVersion "19.1.0"
defaultConfig {
...
}
buildTypes {
...
}
compileOptions {
sourceCompatibility JavaVersion.VERSION_1_8
targetCompatibility JavaVersion.VERSION_1_8
}
}
As changing the language level adds complexity to a project, this book will stick with Java 7.
Getting Rid of the Support Library
When you create a new project with Android Studio, it structures the application to use the Android support library, so that your application can be run with a lower API level. While this might help, in many practical circumstances, you may not want the support library. Fortunately, you can remove the support library quite easily by following these steps.
1. In the app’s build.gradle file, remove the dependency on appcompat-v7 by removing or commenting out the corresponding line:
dependencies {
compile fileTree(dir: 'libs', include: ['*.jar'])
// compile 'com.android.support:appcompat-v7:21.0.2'
}
2. Save the build.gradle file. A message in light yellow background will appear on the top part of the editor, asking you to synchronize the project. Click Sync now.
3. In the res/values/styles.xml file, assign android:Theme.Holo or android:Theme.Holo.Light to the parent attribute, like so
<style name="AppTheme" parent="android:Theme.Holo">
<!-- Customize your theme here. -->
</style>
4. Change ActionBarActivity in every activity class to Activity and remove the import statement that imports ActionBarActivity. The shortcut for this in Android Studio is Ctrl+Alt+O.
5. In all the menu.xml files, replace app:showAsAction with android:showAsAction. For example, replace
app:showAsAction="never"
with
android:showAsAction="never"
6. Rebuild the project by selecting Project > Rebuild Project.
Summary
This chapter discusses how to install the required software and create your first application. You also learned how to create a virtual device so you can test your app in multiple devices without physical devices.
All materials on the site are licensed Creative Commons Attribution-Sharealike 3.0 Unported CC BY-SA 3.0 & GNU Free Documentation License (GFDL)
If you are the copyright holder of any material contained on our site and intend to remove it, please contact our site administrator for approval.
© 2016-2026 All site design rights belong to S.Y.A.