Android Application Development: A Beginner's Tutorial (2015)
Chapter 21. The Sound Recorder
The Android platform ships with a multitude of APIs, including one for recording audio and video. In this chapter you learn how to use the MediaRecorder class to sample sound levels. This is the same class you used for making videos in Chapter 20, “Making Videos.”
The MediaRecorder Class
Support for multimedia is rock solid in Android. There are classes that you can use to play audio and video as well as record them. In the SoundMeter project discussed in this chapter, you will use the MediaRecorder class to sample sound or noise levels.MediaRecorder is used to record audio and video. The output can be written to a file and the input source can be easily selected. It is relatively easy to use too. You start by instantiating the MediaRecorder class.
MediaRecorder mediaRecorder = new MediaRecorder();
Then, configure the instance by calling its setAudioSource, setVideoSource, setOutputFormat, setAudioEncoder, setOutputFile, or other methods. Next, prepare the MediaRecorder by calling its prepare method:
mediaRecorder.prepare();
Note that prepare may throw exception if the MediaRecorder is not configured property or if you do not have the right permissions.
To start recording, call its start method. To stop recording, call stop.
When you’re done with a MediaRecorder, call its reset method to return it to its initial state and its release method to release resources it currently holds.
mediaRecorder.reset();
mediaRecorder.release();
Example
Now that you know how to use the MediaRecorder, let’s take a look at the SoundMeter project. The application samples sound amplitudes at certain intervals and displays the current level as a bar.
As usual, let’s start by looking at the manifest (the AndroidManifest.xml file) for the project. It is given in Listing 21.1.
Listing 21.1: The manifest for SoundMeter
<?xml version="1.0" encoding="utf-8"?>
<manifest xmlns:android="http://schemas.android.com/apk/res/android"
package="com.example.soundmeter"
android:versionCode="1"
android:versionName="1.0" >
<uses-sdk
android:minSdkVersion="8"
android:targetSdkVersion="17" />
<uses-permission android:name="android.permission.RECORD_AUDIO" />
<application
android:allowBackup="true"
android:icon="@drawable/ic_launcher"
android:label="@string/app_name"
android:theme="@style/AppTheme" >
<activity
android:name="com.example.soundmeter.MainActivity"
android:label="@string/app_name" >
<intent-filter>
<action android:name="android.intent.action.MAIN"/>
<category android:name="android.intent.category.LAUNCHER" />
</intent-filter>
</activity>
</application>
</manifest>
One thing to note here is the use of the uses-permission element in the manifest to ask for the user’s permission to record audio. If you don’t include this element, your application will not work. Also, if the user does not consent, the application will not install.
There is only one activity in this project as can be seen in the manifest.
Listing 21.2 shows the layout file for the main activity. A RelativeLayout is used for the main display and it contains a TextView for displaying the current sound level and a button that will act as a sound indicator.
Listing 21.2: The res/layout/activity_main.xml file in SoundMeter
<RelativeLayout xmlns:android="http://schemas.android.com/apk/res/android"
xmlns:tools="http://schemas.android.com/tools"
android:layout_width="match_parent"
android:layout_height="match_parent"
android:paddingBottom="@dimen/activity_vertical_margin"
android:paddingLeft="@dimen/activity_horizontal_margin"
android:paddingRight="@dimen/activity_horizontal_margin"
android:paddingTop="@dimen/activity_vertical_margin"
tools:context=".MainActivity" >
<TextView
android:id="@+id/level"
android:layout_width="wrap_content"
android:layout_height="wrap_content" />
<Button
android:id="@+id/button1"
style="?android:attr/buttonStyleSmall"
android:layout_width="wrap_content"
android:layout_height="wrap_content"
android:layout_alignLeft="@+id/level"
android:layout_below="@+id/level"
android:background="#ff0000"
android:layout_marginTop="30dp" />
</RelativeLayout>
There are two Java classes in this application. The first one, given in Listing 21.3, is a class called SoundMeter that encapsulates a MediaRecorder and exposes three methods to manage it. The first method, start, creates an instance of MediaRecorder, configures it, and starts it. The second method, stop, stops the MediaRecorder. The third method, getAmplitude, returns a double indicating the sampled sound level.
Listing 21.3: The SoundMeter class
package com.example.soundmeter;
import java.io.IOException;
import android.media.MediaRecorder;
public class SoundMeter {
private MediaRecorder mediaRecorder;
boolean started = false;
public void start() {
if (started) {
return;
}
if (mediaRecorder == null) {
mediaRecorder = new MediaRecorder();
mediaRecorder.setAudioSource(
MediaRecorder.AudioSource.MIC);
mediaRecorder.setOutputFormat(
MediaRecorder.OutputFormat.THREE_GPP);
mediaRecorder.setAudioEncoder(
MediaRecorder.AudioEncoder.AMR_NB);
mediaRecorder.setOutputFile("/dev/null");
try {
mediaRecorder.prepare();
} catch (IllegalStateException e) {
e.printStackTrace();
} catch (IOException e) {
e.printStackTrace();
}
mediaRecorder.start();
started = true;
}
}
public void stop() {
if (mediaRecorder != null) {
mediaRecorder.stop();
mediaRecorder.release();
mediaRecorder = null;
started = false;
}
}
public double getAmplitude() {
return mediaRecorder.getMaxAmplitude() / 100;
}
}
The second Java class, MainActivity, is the main activity class for the application. It is presented in Listing 21.4.
Listing 21.4: The MainActivity class in SoundMeter
package com.example.soundmeter;
import android.app.Activity;
import android.os.Bundle;
import android.os.Handler;
import android.view.Menu;
import android.widget.Button;
import android.widget.TextView;
public class MainActivity extends Activity {
Handler handler = new Handler();
SoundMeter soundMeter = new SoundMeter();
@Override
protected void onCreate(Bundle savedInstanceState) {
super.onCreate(savedInstanceState);
setContentView(R.layout.activity_main);
}
@Override
public boolean onCreateOptionsMenu(Menu menu) {
// Inflate the menu; this adds items to the action bar if it
// is present.
getMenuInflater().inflate(R.menu.menu_main, menu);
return true;
}
@Override
public void onStart() {
super.onStart();
soundMeter.start();
handler.postDelayed(pollTask, 150);
}
@Override
public void onPause() {
soundMeter.stop();
super.onPause();
}
private Runnable pollTask = new Runnable() {
@Override
public void run() {
double amplitude = soundMeter.getAmplitude();
TextView textView = (TextView) findViewById(R.id.level);
textView.setText("amp:" + amplitude);
Button button = (Button) findViewById(R.id.button1);
button.setWidth((int) amplitude * 10);
handler.postDelayed(pollTask, 150);
}
};
}
The MainActivity class overrides two activity lifecycle methods, onStart and onPause. You may recall that the system calls onStart right after an activity was created or after it was restarted. The system calls onPause when the activity was paused because another activity was started or because an important event occurred. In the MainActivity class, the onStart method starts the SoundMeter and the onPause method stops it. The MainActivity class also uses a Handler to sample the sound level every 150 milliseconds.
Figure 21.1 shows the application. The horizontal bar shows the current sound amplitude.
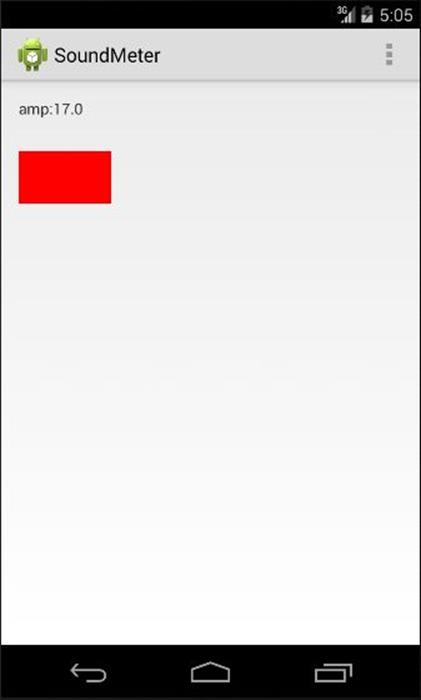
Figure 21.1: The SoundMeter application
Summary
In this chapter you learned to use the MediaRecorder class to record audio. You also created an application for sampling noise levels.
All materials on the site are licensed Creative Commons Attribution-Sharealike 3.0 Unported CC BY-SA 3.0 & GNU Free Documentation License (GFDL)
If you are the copyright holder of any material contained on our site and intend to remove it, please contact our site administrator for approval.
© 2016-2026 All site design rights belong to S.Y.A.