Android Application Development: A Beginner's Tutorial (2015)
Chapter 26. The Alarm Service
Android devices maintain an internal alarm service that can be used to schedule jobs. Amazingly, as you will find out in this chapter, the API is very easy to use, seamlessly hiding the complexity of its lower-level code. This chapter explains how to use it and presents an example.
Overview
One of the built-in services available to all Android developers is the alarm service. With it you can schedule an action to take place at a later time. The operation can be programmed to be carried out once or repeatedly. The Clock application, for example, includes an alarm clock that relies on this service.
It is extremely easy to use. All you need is encapsulate the operation you intend to schedule in a PendingIntent and pass it to the system-wide AlarmManager instance. The AlarmManager class is part of the android.app package and an instance is already there, maintained by the system. You can retrieve the AlarmManager by using this line of code:
AlarmManager alarmMgr =
(AlarmManager) getSystemService(Context.ALARM_SERVICE);
The PendingIntent is explained in Chapter 3, “UI Components,” but basically it is an intent to be invoked at a future time, hence the name PendingIntent. You can use a PendingIntent to start an activity, start a service, or broadcast a notification.
To schedule a job, call the set or setExact method of AlarmManager. Their signatures are as follows.
public void set(int type, long triggerTime, PendingIntent operation)
public void setExact(int type, long triggerTime,
PendingIntent operation)
As the name implies, setExact causes the system to try to deliver the alarm as close as possible to the specified trigger time. On the other hand, the delivery of the job passed to set may be deferred but will not be earlier.
For both methods, the type is one of the following constants declared in AlarmManager.
§ ELAPSED_REALTIME. The trigger time is a long representing the number of milliseconds that have elapsed since the last boot. It does no wake up the device if the alarm goes off while the device is asleep.
§ ELAPSED_REALTIME_WAKEUP. The trigger time is a long representing the number of milliseconds that have elapsed since the last boot It wakes up the device if the alarm goes off while the device is asleep.
§ RTC. The trigger time is a long representing the number of milliseconds that have elapsed since January 1, 1970 00:00:00.0 UTC. It does not wake up the device if the alarm goes off while the device is asleep.
§ RTC_WAKEUP. The trigger time is a long representing the number of milliseconds that have elapsed since January 1, 1970 00:00:00.0 UTC. It wakes up the device if the alarm goes off while the device is asleep.
For example, to schedule an job to start five seconds from now, use this:
alarmManager.set(AlarmManager.RTC, System.currentTimeMillis() +
5000, pendingIntent)
To schedule a repeating job, use the setRepeating or setInexactRepeating method. The signatures of these methods are as follows.
public void setInexactRepeating(int type, long triggerAtMillis,
long intervalMillis, PendingIntent operation)
public void setRepeating(int type, long triggerAtMillis,
long intervalMillis, PendingIntent operation)
In Android API levels lower than 19, setRepeating delivers an exact delivery time. However, starting the API level 19, setRepeating is also inexact, so it is the same as setInexactRepeating. For an exact repeating job, schedule it with setExact, and schedule a new job at the end of the execution of the current job.
Example
The following example shows how to schedule an alarm that sets off in five minutes. This is like the alarm clock in the Clock application, but setting an alarm is as simple as a touch of a button. The application also shows how to wake up an activity when the alarm sets off while the device is asleep.
The application has two activities, which are declared in the manifest in Listing 26.1. The first activity is the main activity that that will be launched when the user touches on the application icon on the Home screen. The second activity, called WakeUpActivity, is the activity that will be started when an alarm sets off.
Listing 26.1: The manifest
<?xml version="1.0" encoding="utf-8"?>
<manifest
xmlns:android="http://schemas.android.com/apk/res/android"
package="com.example.alarmmanagerdemo1" >
<uses-permission android:name="android.permission.WAKE_LOCK"/>
<application
android:allowBackup="true"
android:icon="@drawable/ic_launcher"
android:label="@string/app_name"
android:theme="@style/AppTheme" >
<activity
android:name=".MainActivity"
android:label="@string/app_name" >
<intent-filter>
<action android:name="android.intent.action.MAIN" />
<category
android:name="android.intent.category.LAUNCHER"/>
</intent-filter>
</activity>
<activity
android:name=".WakeUpActivity"
android:label="@string/title_activity_wake_up" >
</activity>
</application>
</manifest>
The main activity contains a button, which the user can press to set an alarm. The activity layout file is shown in Listing 26.2. Note that the button declaration includes the onClick attribute that refers the a setAlarm method.
Listing 26.2: The layout file of the main activity
<RelativeLayout
xmlns:android="http://schemas.android.com/apk/res/android"
xmlns:tools="http://schemas.android.com/tools"
android:layout_width="match_parent"
android:layout_height="match_parent"
android:paddingLeft="@dimen/activity_horizontal_margin"
android:paddingRight="@dimen/activity_horizontal_margin"
android:paddingTop="@dimen/activity_vertical_margin"
android:paddingBottom="@dimen/activity_vertical_margin"
tools:context=".MainActivity">
<Button
android:layout_width="wrap_content"
android:layout_height="wrap_content"
android:text="5 Minute Alarm"
android:id="@+id/button"
android:layout_alignParentLeft="true"
android:layout_alignParentStart="true"
android:layout_marginTop="77dp"
android:onClick="setAlarm"/>
</RelativeLayout>
Listing 26.3 presents the MainActivity class for the application.
Listing 26.3: The MainActivity class
package com.example.alarmmanagerdemo1;
import android.app.Activity;
import android.app.AlarmManager;
import android.app.PendingIntent;
import android.content.Context;
import android.content.Intent;
import android.os.Bundle;
import android.view.Menu;
import android.view.MenuItem;
import android.view.View;
import android.widget.Toast;
import java.util.Calendar;
import java.util.Date;
public class MainActivity extends Activity {
@Override
protected void onCreate(Bundle savedInstanceState) {
super.onCreate(savedInstanceState);
setContentView(R.layout.activity_main);
}
@Override
public boolean onCreateOptionsMenu(Menu menu) {
getMenuInflater().inflate(R.menu.menu_main, menu);
return true;
}
@Override
public boolean onOptionsItemSelected(MenuItem item) {
int id = item.getItemId();
if (id == R.id.action_settings) {
return true;
}
return super.onOptionsItemSelected(item);
}
public void setAlarm(View view) {
Calendar calendar = Calendar.getInstance();
calendar.add(Calendar.MINUTE, 5);
Date fiveMinutesLater = calendar.getTime();
Toast.makeText(this, "The alarm will set off at " +
fiveMinutesLater, Toast.LENGTH_LONG).show();
Intent intent = new Intent(this, WakeUpActivity.class);
PendingIntent sender = PendingIntent.getActivity(
this, 0, intent, 0);
AlarmManager alarmMgr = (AlarmManager) getSystemService(
Context.ALARM_SERVICE);
alarmMgr.set(AlarmManager.RTC_WAKEUP,
fiveMinutesLater.getTime(), sender);
}
}
Look at the setAlarm method in the MainActivity class. After creating a Date that points to a time five minutes from now, the method creates a PendingIntent encapsulating an Intent that will launch the WakeUpActivity activity.
Intent intent = new Intent(this, WakeUpActivity.class);
PendingIntent sender = PendingIntent.getActivity(
this, 0, intent, 0);
It then retrieves the AlarmManager and set an alarm by passing the time and the PendingIntent.
AlarmManager alarmMgr = (AlarmManager) getSystemService(
Context.ALARM_SERVICE);
alarmMgr.set(AlarmManager.RTC_WAKEUP,
fiveMinutesLater.getTime(), sender);
Finally, Listing 26.4 shows the WakeUpActivity class.
Listing 26.4: The WakeUpActivity class
package com.example.alarmmanagerdemo1;
import android.app.Activity;
import android.app.Notification;
import android.app.NotificationManager;
import android.os.Bundle;
import android.util.Log;
import android.view.Menu;
import android.view.MenuItem;
import android.view.View;
import android.view.Window;
import android.view.WindowManager;
public class WakeUpActivity extends Activity {
private final int NOTIFICATION_ID = 1004;
@Override
protected void onCreate(Bundle savedInstanceState) {
super.onCreate(savedInstanceState);
final Window window = getWindow();
Log.d("wakeup", "called. oncreate");
window.addFlags(
WindowManager.LayoutParams.FLAG_SHOW_WHEN_LOCKED
| WindowManager.LayoutParams.FLAG_DISMISS_KEYGUARD
| WindowManager.LayoutParams.FLAG_TURN_SCREEN_ON);
setContentView(R.layout.activity_wake_up);
addNotification();
}
@Override
public boolean onCreateOptionsMenu(Menu menu) {
getMenuInflater().inflate(R.menu.menu_wake_up, menu);
return true;
}
@Override
public boolean onOptionsItemSelected(MenuItem item) {
int id = item.getItemId();
if (id == R.id.action_settings) {
return true;
}
return super.onOptionsItemSelected(item);
}
public void dismiss(View view) {
NotificationManager notificationMgr = (NotificationManager)
getSystemService(NOTIFICATION_SERVICE);
notificationMgr.cancel(NOTIFICATION_ID);
this.finish();
}
private void addNotification() {
NotificationManager notificationMgr = (NotificationManager)
getSystemService(NOTIFICATION_SERVICE);
Notification notification = new Notification.Builder(this)
.setContentTitle("Wake up")
.setSmallIcon(android.R.drawable.star_on)
.setAutoCancel(false)
.build();
notification.defaults|= Notification.DEFAULT_SOUND;
notification.defaults|= Notification.DEFAULT_LIGHTS;
notification.defaults|= Notification.DEFAULT_VIBRATE;
notification.flags |= Notification.FLAG_INSISTENT;
notification.flags |= Notification.FLAG_AUTO_CANCEL;
notificationMgr.notify(NOTIFICATION_ID, notification);
}
}
At first blush, the WakeUpActivity class looks like other activities you’ve written so far, but take a close look at closely at the onCreate method. The following code that adds flags to the window is needed to wake up the device and show the activity if the device is asleep when the alarm sets off.
final Window window = getWindow();
Log.d("wakeup", "called. oncreate");
window.addFlags(
WindowManager.LayoutParams.FLAG_SHOW_WHEN_LOCKED
| WindowManager.LayoutParams.FLAG_DISMISS_KEYGUARD
| WindowManager.LayoutParams.FLAG_TURN_SCREEN_ON);
setContentView(R.layout.activity_wake_up);
It then calls the private addNotification method to add a notification. Remember that Chapter 3, “UI Components” explains how to use notifications.
Figure 26.1 shows the application’s main activity. Touch the button to set an alarm.
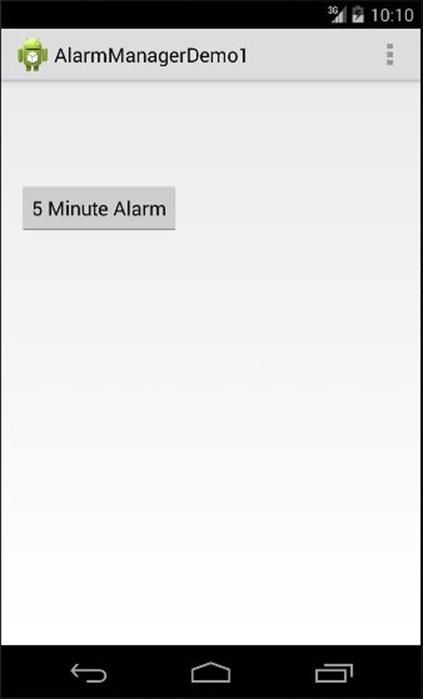
Figure 26.1: A 5-minute alarm
Summary
The alarm service is one of the built-in services available to Android developers. With it you can schedule an action to take place at a later time. The operation can be programmed to be carried out once or repeatedly.
All materials on the site are licensed Creative Commons Attribution-Sharealike 3.0 Unported CC BY-SA 3.0 & GNU Free Documentation License (GFDL)
If you are the copyright holder of any material contained on our site and intend to remove it, please contact our site administrator for approval.
© 2016-2026 All site design rights belong to S.Y.A.