Android Application Development: A Beginner's Tutorial (2015)
Appendix B. Using the ADT Bundle
This appendix shows how you can create an Android application using the ADT Bundle. It also explains how to setup an emulator so you can develop, test, debug, and run Android applications even if you do not have a real Android device.
Installing the ADT
If you already have Eclipse on your local machine, you can install the ADT plug-in only and work with your existing Eclipse. However, note that it is easier to install the ADT bundle. If you choose to install the ADT plug-in, information on how to proceed with it can be found here.
http://developer.android.com/sdk/installing/installing-adt.html
To install the ADT Bundle, first download the ADT bundle from this site.
http://developer.android.com/sdk/index.html
Unpack the downloaded package to your workspace. The main directory will contain two folders, eclipse and sdk. Navigate to the eclipse folder and double-click the Eclipse program to start it. You will be asked to select a workspace. After that, the Eclipse IDE will open. The main window is shown in Figure B.1. Note that the application icon of ADT Eclipse is different from that of “regular” Eclipse.
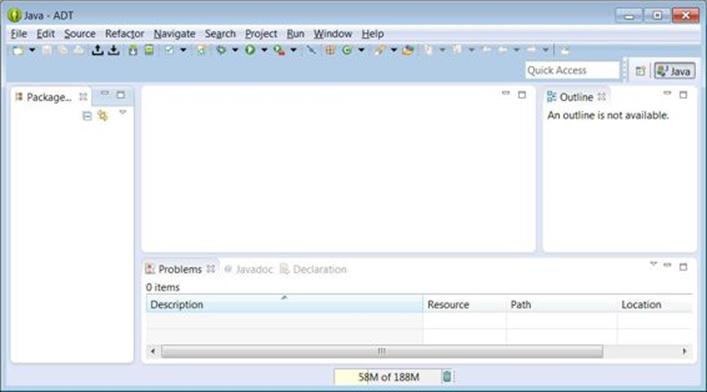
Figure B.1: The ADT window
Now you are ready to write your first Android application.
Creating An Application
Creating an Android application with the ADT Bundle is as easy as a few mouse clicks. This section shows how to create a Hello World application, package it, and run it on an emulator. Make sure you have installed the ADT Bundle by following the instructions in Introduction.
Next, follow these steps.
1. Click the New menu in Eclipse and select Android Application Project. Note that in this book Eclipse refers to the version of Eclipse included in the ADT Bundle or Eclipse with the ADT plug-in installed. The New Android Application window will open as shown in Figure B.2.
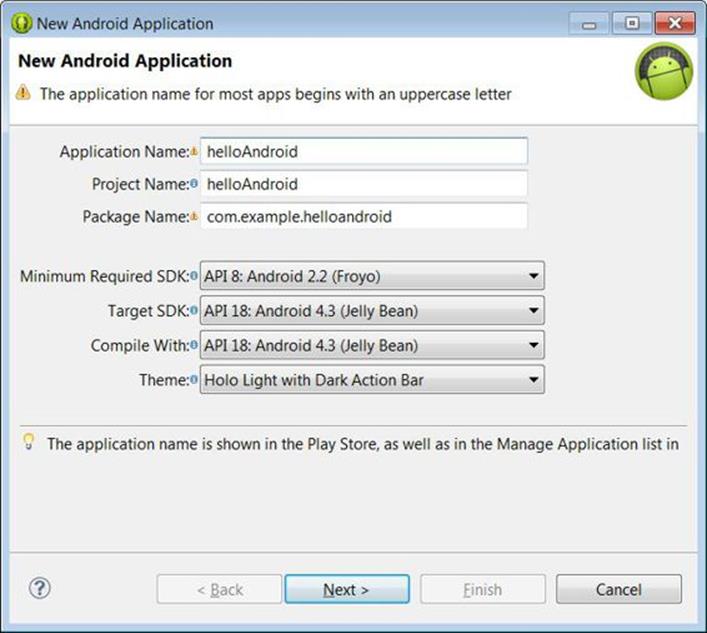
Figure B.2: The New Android Application window
2. Type in the details of the new application. In the Application Name field, enter the name you want your application to appear on the Android device. In the Project Name field, type a name for your project. This can be the same as the application name or a different name. Then, enter a Java package name in the Package Name field. The package name will uniquely identify your application. Even though you can use any string that qualifies as a Java package, the package name should be your domain name in reverse order. For example, if your domain name is example.com, your package name should be com.example, followed by the project name.
Now, right under the text boxes are four dropdown boxes. The Minimum Required SDK dropdown contains a list of Android SDK levels. The lower the level, the more devices your application can run on, but the fewer APIs and features you can use. The Target SDK box should be given the highest API level your application will be developed and tested against. The Compile With dropdown should contain the target API to compile your code against. Finally, the Theme dropdown should contain a theme for your application.
For your first application, use the same values as those shown in Figure B.2.
3. Click Next. You will see a window similar to the one in Figure B.3. Accept the default settings.
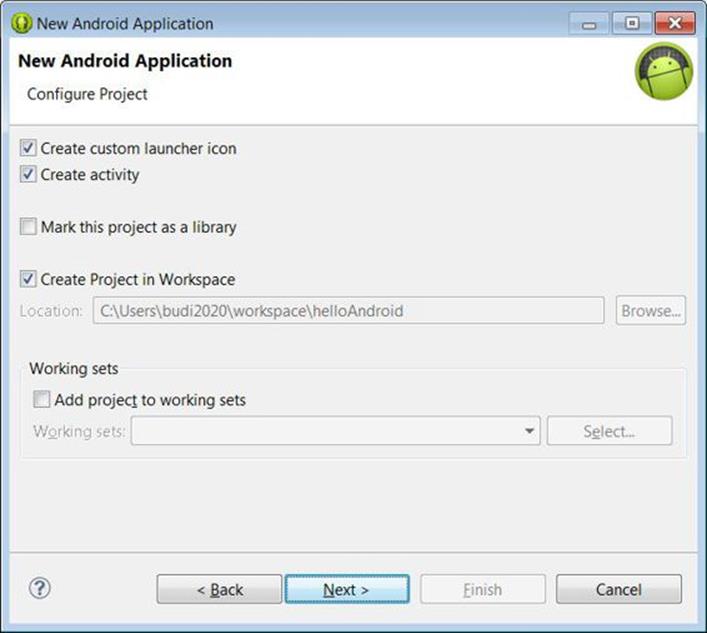
Figure B.3: Configuring your application
4. Click Next again. The next window that appears will look like the window in Figure B.4. Here you can choose an icon for your application. If you don’t like the default image icon, click Clipart and select one from the list. In addition, you can use text as your icon if you so wish.
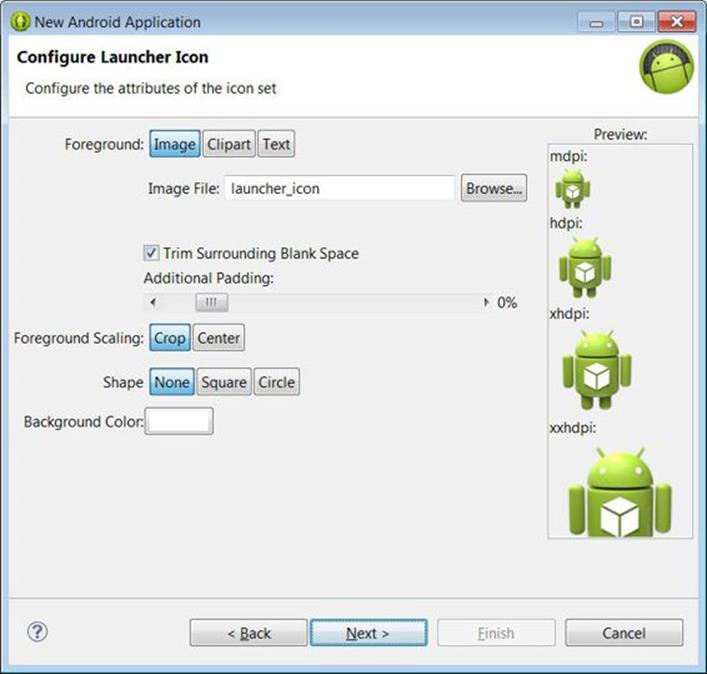
Figure B.4: Selecting a launcher icon
5. Click Next again and you will be prompted to select an activity (See Figure B.5). Leave Blank Activity selected.
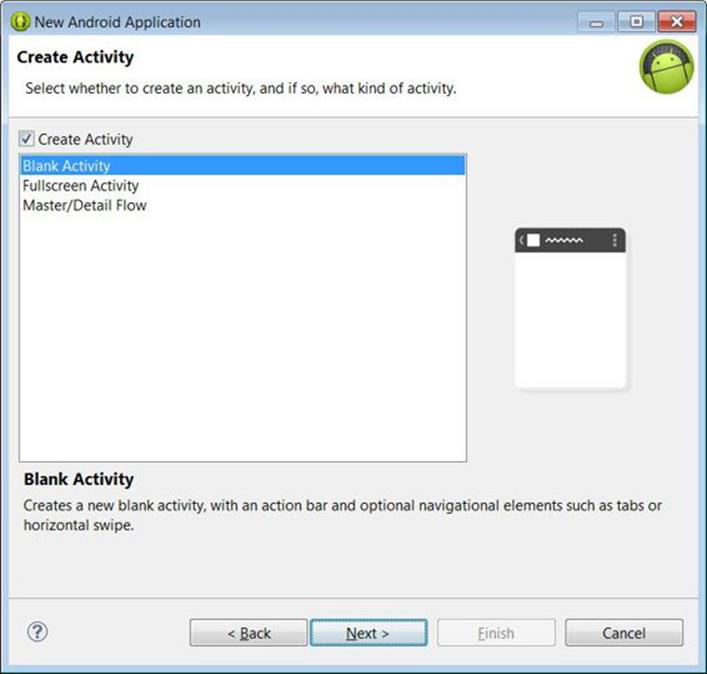
Figure B.5: Selecting an activity type
6. Click Next one more time. The next window will appear as shown in Figure B.6.

Figure B.6: Entering the activity and layout names
7. Accept the suggested activity and layout names and click Finish. The ADT Bundle will create your application and you’ll see your project like the screenshot in Figure B.7.
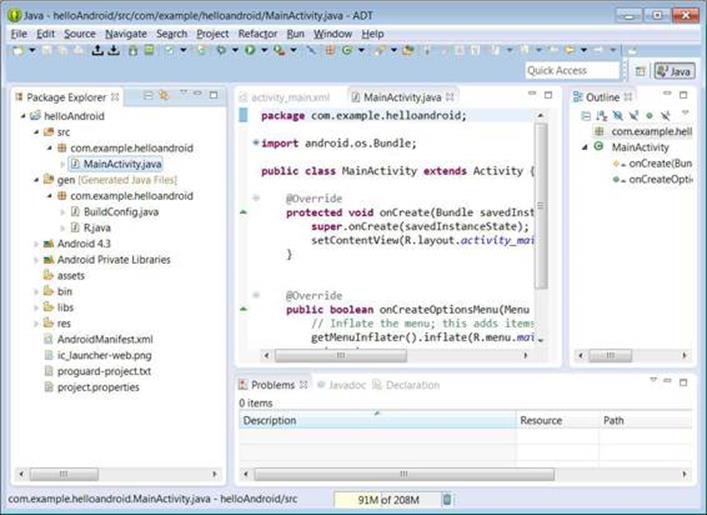
Figure B.7: The new Android project
In the root directory of Eclipse’s Package Explorer (on the left), you’ll find the following files:
§ AndroidManifest.xml file. This is an XML document that describes your application.
§ An icon file in PNG format.
§ A project.properties file that specifies the Android target API level.
On top of that, there are the following folders.
§ src. This is your source code folder.
§ gen. This is where generated Java classes are kept. The generated Java classes allow your Java source to use values defined in the layout file and other resource files. You should not edit generated files yourself.
§ bin. This is where the project build will be saved in. The application APK will also be found here after you have run your application successfully.
§ libs. Contains Android library files.
§ res. Contains resource files. Underneath this directory are these directories: drawable-xxx (containing images for various screen resolutions), layout (containing layout files), menu (containing menu files), and values (containing string and other values).
One of the advantages of developing Android applications with an IDE, such as ADT Eclipse, it knows when you add a resource under the res directory and responds by updating the R generated class so that you can easily load the resource from your program. You will learn this powerful feature in the chapters to come.
Running An Application on An Emulator
The ADT Bundle comes with an emulator to run your applications on if you don't have a real device. The following are the steps for running your application on an emulator.
1. Click the Android project on the Eclipse Project Explorer, then click Run > Run As > Android Application.
2. The Android Device Chooser window will pop up (see Figure B.8). (Once you configure it, it will not appear the next time you try to run your application).

Figure B.8: The Android Device Chooser window
3. Here you can choose to run your application on a real Android device (an Android phone or tablet) or an Android Virtual Device (emulator). In Figure B.8 you do not see a running Android device because no real device is connected, so click the Launch a new Android Virtual Deviceradio button, and click the Manager button on the right. The Android Virtual Device Manager window will appear (See Figure B.9).
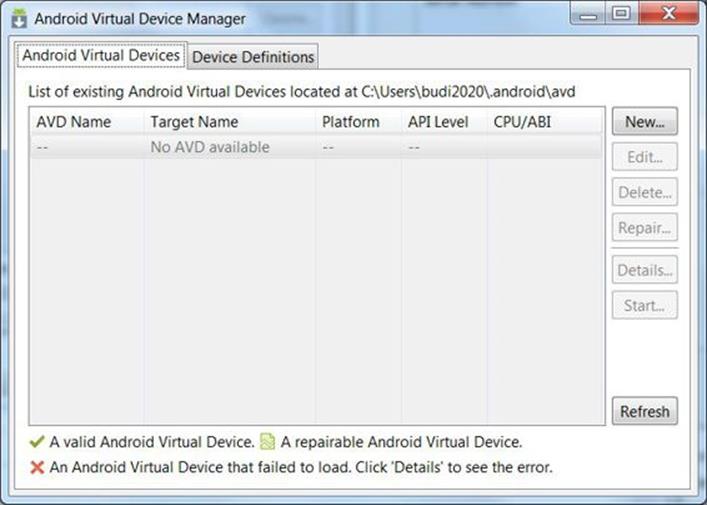
Figure B.9: Android Virtual Device Manager
4. Click New on the Android Virtual Devices pane to display the Create new AVD windows (See Figure B.10)
.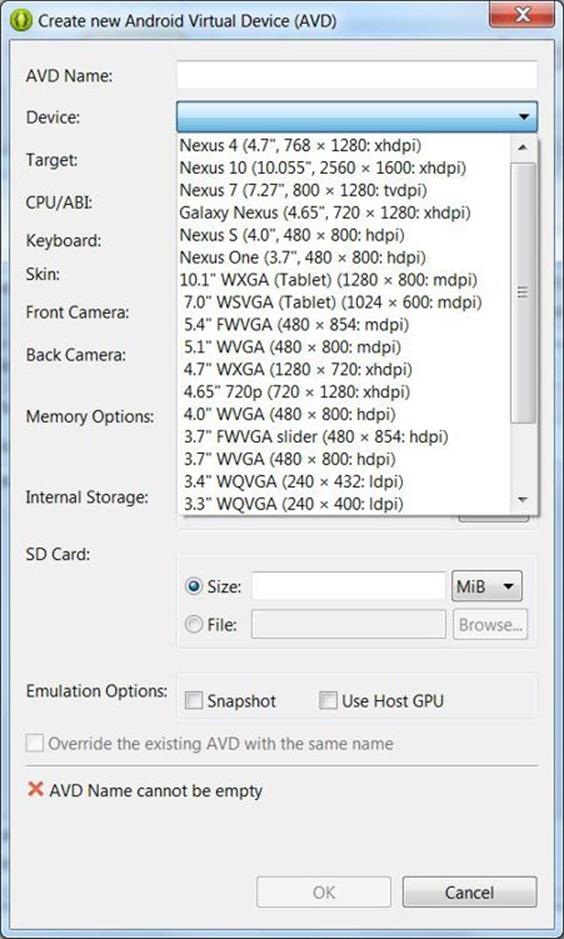
Figure B.10: Creating a new virtual device
5. Click the Device drop-down to view the list of virtual devices available. Here I choose Nexus 7. Then, give your device a name. The name must not contain spaces or any special characters.
6. Choose a target and if you’re using Windows, reduce the RAM to 768. For some reason, it may crash if you’re using more than 768MB RAM on Windows.
7. My options are shown in the screenshot in Figure B.11.
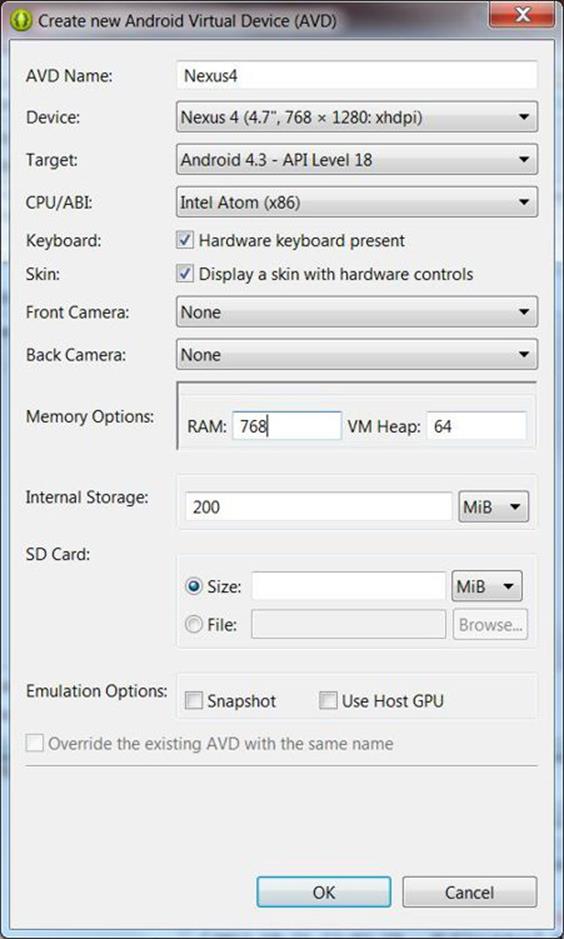
Figure B.11: Entering values for a new virtual device
8. Click OK. The Create new Android Virtual Device (AVD) window will close and you’ll be back at the Android Virtual Device Manager window. Your AVD will be listed there, as shown in Figure B.12.
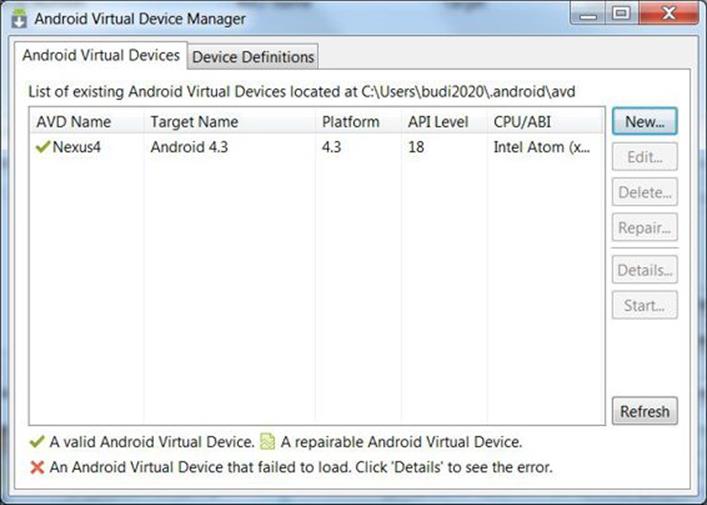
Figure B.12: The list of virtual devices available
9. Now, click the AVD name (Nexus7) to select it and the Start and other buttons will be enabled. Click the Start button to start the AVD. You will see the Launch Options popup like that in Figure B.13.
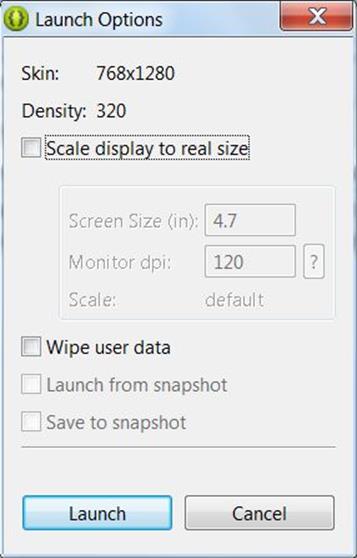
Figure B.13: The Launch Options popup
10. Click Launch to launch your AVD. You’ll see a window like that in Figure B.14 when it’s launching.
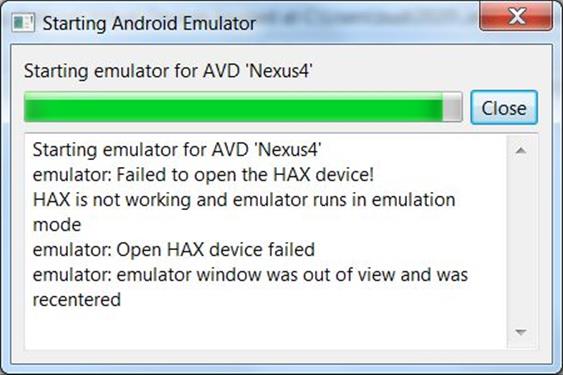
Figure B.14: Starting the emulator
It will take a few minutes or more depending on your computer speed. Figure B.15 shows the emulator when it is ready.

Figure B.15: The Android emulator
As you know, the emulator emulates an Android device. You need to unlock the screen by touching (or clicking) the blue circle at the bottom.
§ If your application does not open automatically, locate the application icon and double-click on it. Figure B.16 shows the HelloWorld application.
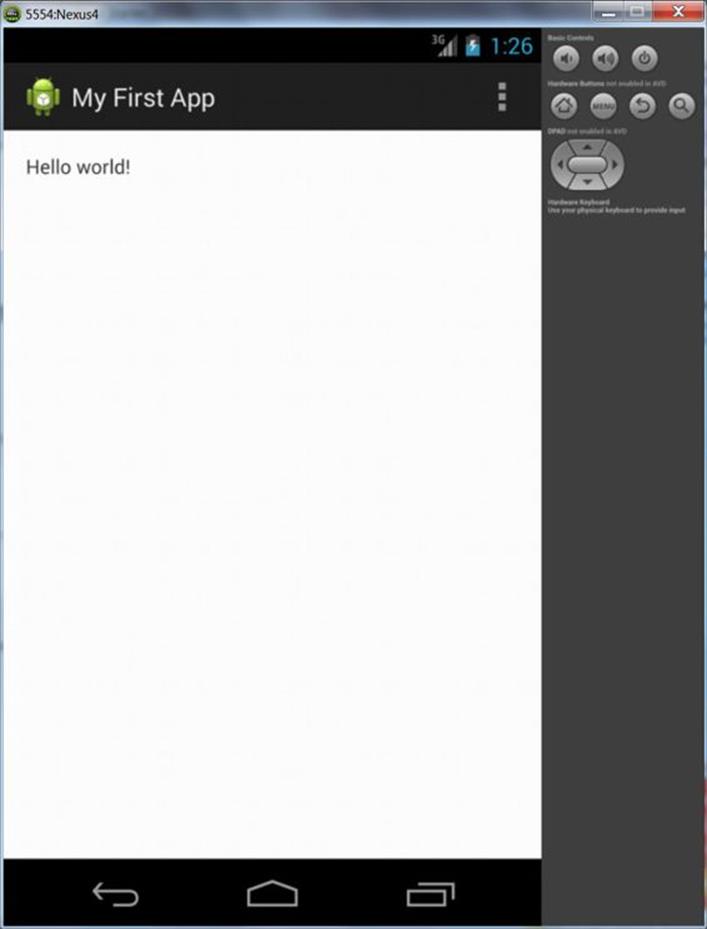
Figure B.16: Your first application on the emulator
During development, leave the emulator running while you edit your code. This way, the emulator does not need to be loaded again every time you run your application.
Logging
Java programmers like to use logging utilities, such as Commons Logging and Log4J, to log messages. The Android framework provides the android.util.Log class for the same purpose. The Log class comes with methods to log messages at different log levels. The method names are short:d (debug), i (info), v (verbose), w (warning), e (error), and wtf (what a terrible failure).
This methods allow you to write a tag and the text. For example,
Log.e("activity", "Something went wrong");
During development, messages logged using the Log class will appear in the LogCat view in Eclipse. If you don’t see it, click Window → Show View → LogCat or Window → Show View → Other → LogCat.
The good thing about LogCat is that messages at different log levels are displayed in different colors. In addition, each message has a tag and this makes it easy to find a message. In addition, LogCat allows you to save messages to a file and filter the messages so only messages of interest to you are visible.
The LogCat view is shown in Figure B.17.
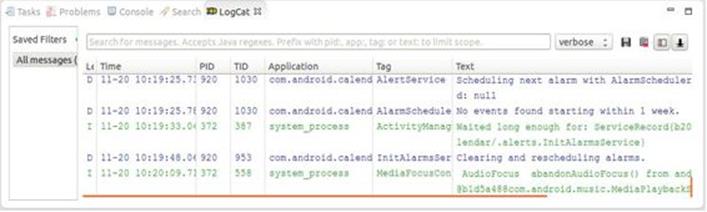
Figure B.17: The LogCat view
Any runtime exception thrown, including the stack trace, will also be shown in LogCat, so you can easily identify which line of code is causing the problem.
Debugging An Application
Even though Android applications do not run on the JVM, debugging an Android application in Eclipse does not feel that different from debugging Java applications.
The easiest way to debug an application is by printing messages using the Log class. However, if this does not help and you need to trace your application, you can use the debugging tools in Android.
Try adding a line break point in your code by double-clicking the bar to the left of the code editor. Figure B.18 shows a line breakpoint in the code editor.
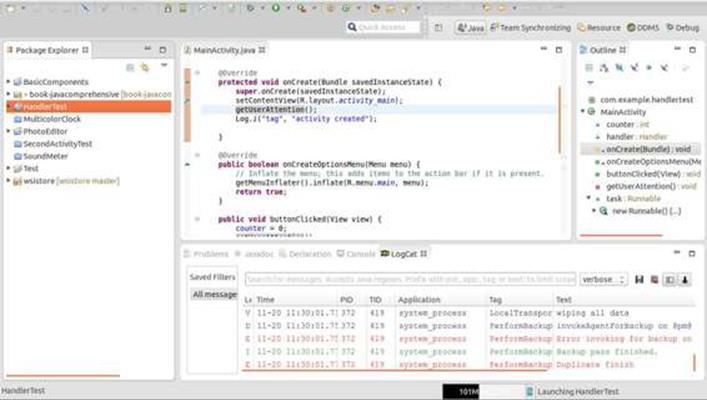
Figure B.18: A line breakpoint
Now, debug your application by clicking the project icon in the Project Explorer and selecting Run → Debug As → Android Application.
Eclipse will display a dialog asking you whether you want to open the Debug perspective. Click Yes, and you will see the Debug perspective like the one in Figure B.19.
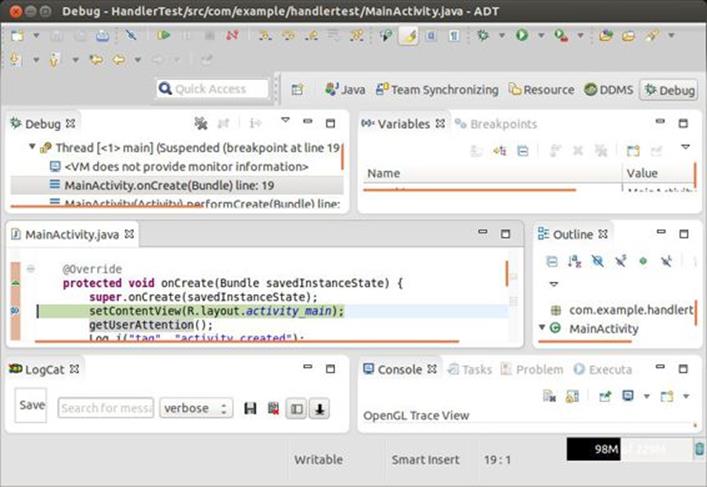
Figure B.19: The Debug perspective
Here, you can step into your code, view your variables, and so on.
In addition to a debugger, Android also ships with Dalvik Debug Monitor Server (DDMS), which consists of a set of debugging tools. You can display the DDMS in Eclipse by showing the DDMS perspective. (See Figure B.20).
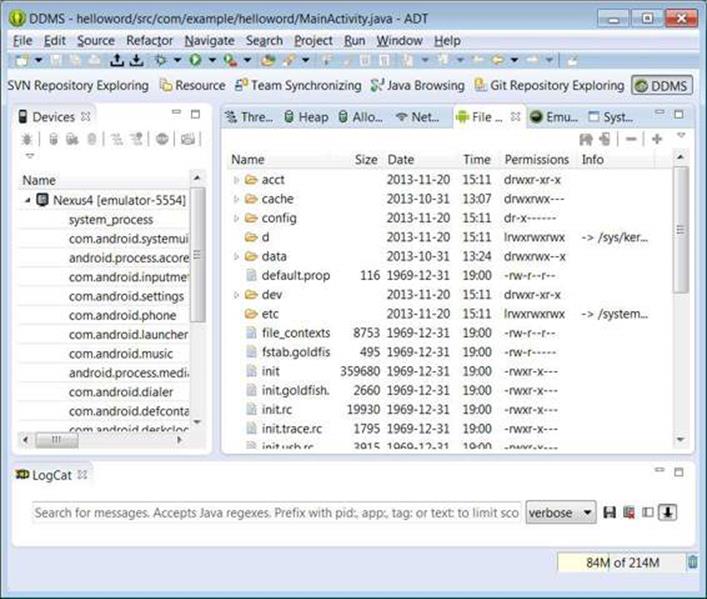
Figure B.20: The DDMS perspective in Eclipse
You will see LogCat as one of the views in the DDMS perspective. However, you can also use DDMS to do any of these:
§ Verify that a device is connected.
§ View heap usage for a process
§ Check object memory allocation
§ Browse the file system on a device
§ Examine thread information
§ Monitor network traffic
All materials on the site are licensed Creative Commons Attribution-Sharealike 3.0 Unported CC BY-SA 3.0 & GNU Free Documentation License (GFDL)
If you are the copyright holder of any material contained on our site and intend to remove it, please contact our site administrator for approval.
© 2016-2026 All site design rights belong to S.Y.A.