Android Application Development: A Beginner's Tutorial (2015)
Chapter 7. Menus
Menus are a common feature in many graphical user interface (GUI) systems. Their primary role is to provide shortcuts to certain actions.
This chapter looks at Android menus closely and provides three sample applications.
Overview
Pre-3.0 Android devices shipped with a (hardware) button for showing menus in the active application. Starting from Android 3.0, the action bar is the recommended way of achieving the same thing, in effect making a hardware Menu button redundant. With the hardware menu button gone, “soft” menus have become even more important than ever.
There are three types of menus in Android:
§ Options menu
§ Context menu
§ Popup menu
The options menu is the type of menu you normally incorporate in the action bar, as you have seen in Chapter 6, “The Action Bar.” In this chapter you will look at the options menu more closely and learn about the other two. Thankfully, no matter what kind of menu you’re using in your app, you use the same API. And, yes, you can use different types of menus in the same application.
Like many other things in Android, menus can be defined declaratively or programmatically. The first method offers more flexibility than the second because it allows you to change menu items using a text editor. Doing so programmatically, on the other hand, would require you to change your program and recompile every time you need to edit your menu.
Here are the three things you need to do when working with options and context menus.
1. Create a menu in an xml file and save it under the res/menu directory.
2. In your activity class, override either onCreateOptionsMenu or onCreateContextMenu, depending on the menu type. Then, in the overridden method, call getMenuInflater().inflate(), passing the menu to be used.
3. In your activity class, override either onOptionsItemSelected or onContextItemSelected, depending on the menu type.
Popup menus are a bit different. To work with them, do the following:
1. Create a menu in an xml file and save it under the res/menu directory.
2. In your activity class, create a PopupMenu object and a PopupMenu.OnMenuItemClickListener object. In the listener class you define a method that handles the click event that occurs when one of the popup menu items is selected.
The Menu File
To create a menu declaratively, start by creating an XML file and place it under the res/menu directory. The XML file must have the following structure.
<menu xmlns:android="http://schemas.android.com/apk/res/android">
<group>...</group>
<group>...</group>
...
<item>...</item>
<item>...</item>
...
</menu>
The root element is menu and it can contain any number of group and item elements. The group element represents a menu group and the item element represents a menu item.
For every menu file you create, Android Studio will add a field to your R.menu class so that you can load the menu in your application. The field name is the same as the XML file minus the extension. If the XML file is called main_activity_menu.xml, for example, the field in R.menuwill be called main_activity_menu.
Note
The R class was explained in Chapter 1, “Getting Started.”
The Options Menu
The OptionsMenuDemo application is a simple application that uses an options menu in its action bar. It is similar to the application that demonstrates the action bar in Chapter 6, “The Action Bar.”
The manifest (AndroidManifest.xml file) for this application is shown in Listing 7.1.
Listing 7.1: The manifest for OptionsMenuDemo
<?xml version="1.0" encoding="utf-8"?>
<manifest xmlns:android="http://schemas.android.com/apk/res/android"
package="com.example.optionsmenudemo"
android:versionCode="1"
android:versionName="1.0" >
<uses-sdk
android:minSdkVersion="18"
android:targetSdkVersion="18" />
<application
android:allowBackup="true"
android:icon="@drawable/ic_launcher"
android:label="@string/app_name"
android:theme="@style/AppTheme" >
<activity
android:name="com.example.optionsmenudemo.MainActivity"
android:label="@string/app_name" >
<intent-filter>
<action android:name="android.intent.action.MAIN"/>
<category
android:name="android.intent.category.LAUNCHER"/>
</intent-filter>
</activity>
</application>
</manifest>
The manifest declares an activity, whose class is called MainActivity.
The menu for this application is defined in the res/menu/options_menu.xml file in Listing 7.2. It has three menu items.
Listing 7.2: The options_menu.xml File
<menu xmlns:android="http://schemas.android.com/apk/res/android">
<item
android:id="@+id/action_capture"
android:orderInCategory="100"
android:showAsAction="ifRoom|withText"
android:icon="@drawable/icon1"
android:title="@string/action_capture"/>
<item
android:id="@+id/action_profile"
android:orderInCategory="200"
android:showAsAction="ifRoom|withText"
android:icon="@drawable/icon2"
android:title="@string/action_profile"/>
<item
android:id="@+id/action_about"
android:orderInCategory="50"
android:showAsAction="never"
android:title="@string/action_about"/>
</menu>
As explained in Chapter 4, “Layouts,” the plus sign in an id attribute indicates that the identifier is being added with the declaration.
The titles for the menu items reference the strings defined in the res/values/strings.xml file in Listing 7.3.
Listing 7.3: strings.xml for OptionsMenuDemo
<?xml version="1.0" encoding="utf-8"?>
<resources>
<string name="app_name">OptionsMenuDemo</string>
<string name="action_capture">Capture</string>
<string name="action_profile">Profile</string>
<string name="action_about">About</string>
<string name="hello_world">Hello world!</string>
</resources>
The activity class for the application, the MainActivity class, is shown in Listing 7.4.
Listing 7.4: MainActivity for OptionsMenuDemo
package com.example.optionsmenudemo;
import android.app.Activity;
import android.app.AlertDialog;
import android.os.Bundle;
import android.view.Menu;
import android.view.MenuItem;
public class MainActivity extends Activity {
@Override
protected void onCreate(Bundle savedInstanceState) {
super.onCreate(savedInstanceState);
setContentView(R.layout.activity_main);
}
@Override
public boolean onCreateOptionsMenu(Menu menu) {
getMenuInflater().inflate(R.menu.options_menu, menu);
return true;
}
@Override
public boolean onOptionsItemSelected(MenuItem item) {
// Handle click on menu items
switch (item.getItemId()) {
case R.id.action_profile:
showAlertDialog("Profile", "You selected Profile");
return true;
case R.id.action_capture:
showAlertDialog("Settings",
"You selected Settings");
return true;
case R.id.action_about:
showAlertDialog("About", "You selected About");
return true;
default:
return super.onOptionsItemSelected(item);
}
}
private void showAlertDialog(String title, String message) {
AlertDialog alertDialog = new
AlertDialog.Builder(this).create();
alertDialog.setTitle(title);
alertDialog.setMessage(message);
alertDialog.show();
}
}
To use the options menu you need to override the onCreateOptionsMenu and onOptionsItemSelected methods. The onCreateOptionsMenu method is called when the activity is built. You should call the menu inflater and inflate your menu here. In addition, the onOptionsItemSelectedmethod handles menu item selection.
Note that the options menu is integrated with the activity so that you do not need to create your own listener to handle item selection.
If you run the application, you will see an activity like the one in Figure 7.1. Take a look at the action bar and try selecting one of the menu items. Every time you select a menu item, an AlertDialog will be shown to notify what you have selected.
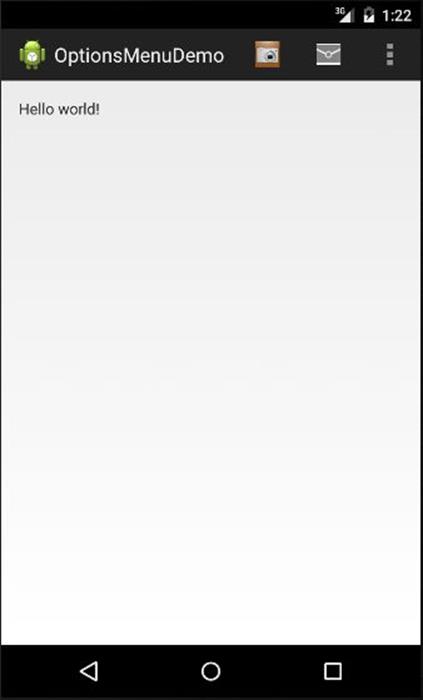
Figure 7.1: OptionsMenuDemo
In Figure 7.1 the buttons on the action bar are rendered without text because the application is running in a device with a low-resolution screen. If you run it in a device with a higher resolution screen, you may see text to the right of each button.
The Context Menu
The ContextMenuDemo application shows how you can use a context menu in your application. The main activity of the application features an image button that you can long-press to display a context menu.
The AndroidManifest.xml file for this application is printed in Listing 7.5.
Listing 7.5: AndroidMenifest.xml for ContextMenuDemo
<?xml version="1.0" encoding="utf-8"?>
<manifest xmlns:android="http://schemas.android.com/apk/res/android"
package="com.example.contextmenudemo"
android:versionCode="1"
android:versionName="1.0" >
<uses-sdk
android:minSdkVersion="18"
android:targetSdkVersion="18" />
<application
android:allowBackup="true"
android:icon="@drawable/ic_launcher"
android:label="@string/app_name"
android:theme="@style/AppTheme" >
<activity
android:name="com.example.contextmenudemo.MainActivity"
android:label="@string/app_name" >
<intent-filter>
<action android:name="android.intent.action.MAIN"/>
<category
android:name="android.intent.category.LAUNCHER"/>
</intent-filter>
</activity>
</application>
</manifest>
The context_menu.xml file in Listing 7.6 is a menu file that defines menu items for the context menu used in the application.
Listing 7.6: context_menu.xml for ContextMenuDemo
<menu xmlns:android="http://schemas.android.com/apk/res/android">
<item
android:id="@+id/action_rotate"
android:title="@string/action_rotate"/>
<item
android:id="@+id/action_resize"
android:title="@string/action_resize"/>
</menu>
The menu file defines two menu items, whose titles get their values from the res/values/strings.xml file in Listing 7.7.
Listing 7.7: strings.xml for ContextMenuDemo
<?xml version="1.0" encoding="utf-8"?>
<resources>
<string name="app_name">ContextMenuDemo</string>
<string name="action_settings">Settings</string>
<string name="action_rotate">Rotate</string>
<string name="action_resize">Resize</string>
<string name="hello_world">Hello world!</string>
</resources>
Finally, Listing 7.8 shows the MainActivity class for the application. There are two methods that you need to override to use a context menu, onCreateContextMenu and onContextItemSelected. The onCreateContextMenu method is called when the activity is built. You should inflate your menu here.
The onContextItemSelected method is called every time a menu item in the context menu is selected.
Listing 7.8: MainActivity for ContextMenuDemo
package com.example.contextmenudemo;
import android.app.Activity;
import android.app.AlertDialog;
import android.os.Bundle;
import android.view.ContextMenu;
import android.view.ContextMenu.ContextMenuInfo;
import android.view.MenuInflater;
import android.view.MenuItem;
import android.view.View;
import android.widget.ImageButton;
public class MainActivity extends Activity {
@Override
protected void onCreate(Bundle savedInstanceState) {
super.onCreate(savedInstanceState);
setContentView(R.layout.activity_main);
ImageButton imageButton = (ImageButton)
findViewById(R.id.button1);
registerForContextMenu(imageButton);
}
@Override
public void onCreateContextMenu(ContextMenu menu, View v,
ContextMenuInfo menuInfo) {
super.onCreateContextMenu(menu, v, menuInfo);
MenuInflater inflater = getMenuInflater();
inflater.inflate(R.menu.context_menu, menu);
}
@Override
public boolean onContextItemSelected(MenuItem item) {
switch (item.getItemId()) {
case R.id.action_rotate:
showAlertDialog("Rotate", "You selected Rotate ");
return true;
case R.id.action_resize:
showAlertDialog("Resize", "You selected Resize");
return true;
default:
return super.onContextItemSelected(item);
}
}
private void showAlertDialog(String title, String message) {
AlertDialog alertDialog = new
AlertDialog.Builder(this).create();
alertDialog.setTitle(title);
alertDialog.setMessage(message);
alertDialog.show();
}
}
Figure 7.2 shows the application. If you press (or click) the image button long enough, it will show the context menu. Note that the image comes from the Android system as is defined in the layout file.
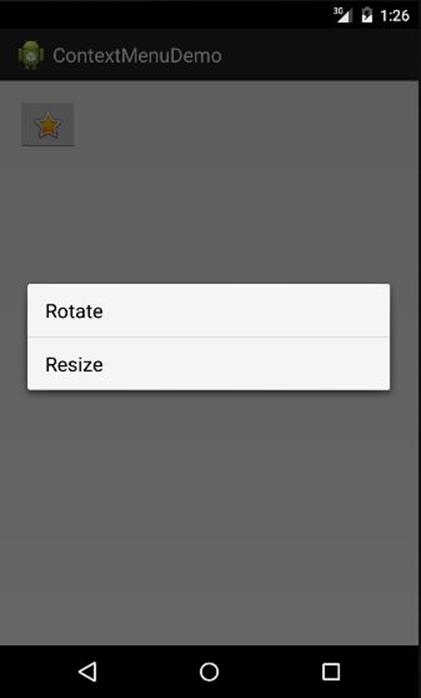
Figure 7.2: A context menu
The Popup Menu
A popup menu is associated with a view and is shown every time an event occurs to the view. The PopupMenuDemo application shows how to use a popup menu. It uses a button that displays a popup menu when it is clicked. Listing 7.9 shows the AndroidManifest.xml file forPopupMenuDemo.
Listing 7.9: AndroidMenifest.xml for PopupMenuDemo
<?xml version="1.0" encoding="utf-8"?>
<manifest xmlns:android="http://schemas.android.com/apk/res/android"
package="com.example.popupmenudemo"
android:versionCode="1"
android:versionName="1.0" >
<uses-sdk
android:minSdkVersion="18"
android:targetSdkVersion="18" />
<application
android:allowBackup="true"
android:icon="@drawable/ic_launcher"
android:label="@string/app_name"
android:theme="@style/AppTheme" >
<activity
android:name="com.example.popupmenudemo.MainActivity"
android:label="@string/app_name" >
<intent-filter>
<action android:name="android.intent.action.MAIN"/>
<category
android:name="android.intent.category.LAUNCHER"/>
</intent-filter>
</activity>
</application>
</manifest>
The manifest in Listing 7.9 is a standard XML file that you’ve seen many times. It has one activity with a button that will activate the menu shown in Listing 7.10.
Listing 7.10: popup_menu.xml for PopupMenuDemo
<menu xmlns:android="http://schemas.android.com/apk/res/android">
<item
android:id="@+id/action_delete"
android:title="@string/action_delete"/>
<item
android:id="@+id/action_copy"
android:title="@string/action_copy"/>
</menu>
The menu in Listing 7.10 has two menu items. The titles for the items refer to the strings defined in the res/values/strings.xml file in Listing 7.11.
Listing 7.11: strings.xml for PopupMenuDemo
<?xml version="1.0" encoding="utf-8"?>
<resources>
<string name="app_name">PopupMenuDemo</string>
<string name="action_settings">Settings</string>
<string name="action_delete">Delete</string>
<string name="action_copy">Copy</string>
<string name="show_menu">Show Popup</string>
</resources>
Finally, Listing 7.12 shows the MainActivity class for the application.
Listing 7.12: MainActivity for PopupMenuDemo
package com.example.popupmenudemo;
import android.app.Activity;
import android.os.Bundle;
import android.util.Log;
import android.view.MenuItem;
import android.view.View;
import android.widget.Button;
import android.widget.PopupMenu;
public class MainActivity extends Activity {
PopupMenu popupMenu;
PopupMenu.OnMenuItemClickListener menuItemClickListener;
@Override
protected void onCreate(Bundle savedInstanceState) {
super.onCreate(savedInstanceState);
setContentView(R.layout.activity_main);
menuItemClickListener =
new PopupMenu.OnMenuItemClickListener() {
@Override
public boolean onMenuItemClick(MenuItem item) {
switch (item.getItemId()) {
case R.id.action_delete:
Log.d("menu", "Delete clicked");
return true;
case R.id.action_copy:
Log.d("menu", "Copy clicked");
return true;
default:
return false;
}
}
};
Button button = (Button) findViewById(R.id.button1);
popupMenu = new PopupMenu(this, button);
popupMenu.setOnMenuItemClickListener(menuItemClickListener);
popupMenu.inflate(R.menu.popup_menu);
}
public void showPopupMenu(View view) {
popupMenu.show();
}
}
Unlike the options menu and context menu, the popup menu requires that you create a menu object and a listener object for handling item selection.
In the onCreate method of MainActivity, you create a PopupMenu object and a PopupMenu.OnMenuItemClickListener object. You then pass the listener to the PopupMenu. The listener class handles menu item clicks.
The showPopupMenu method in MainActivity is associated with the button using the onClick attribute of the button in the main activity layout file. The method shows the popup menu.
Figure 7.3 shows the popup menu that displays when the button is clicked.
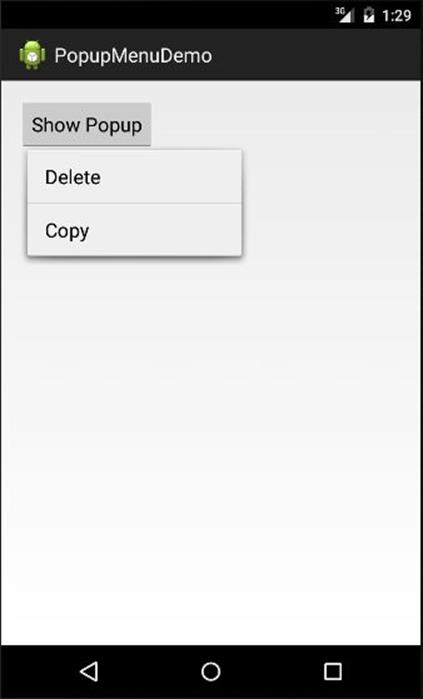
Figure 7.3: A popup menu
Summary
In this chapter you learned how to use menus to provide shortcuts to certain actions. There are three types of menus in Android, options menus, context menus, and popup menus.
All materials on the site are licensed Creative Commons Attribution-Sharealike 3.0 Unported CC BY-SA 3.0 & GNU Free Documentation License (GFDL)
If you are the copyright holder of any material contained on our site and intend to remove it, please contact our site administrator for approval.
© 2016-2026 All site design rights belong to S.Y.A.