Professional Android 4 Application Development (2012)
Chapter 6. Using Internet Resources
What's in this Chapter?
Connecting to Internet resources
Parsing XML resources
Using the Download Manager to download files
Querying the Download Manager
Using the Account Manager to authenticate with Google App Engine
This chapter introduces Android's Internet connectivity model and some of the Java techniques for parsing Internet data feeds. You'll learn how to connect to an Internet resource and how to use the SAX Parser and the XML Pull Parser to parse XML resources.
An earthquake-monitoring example will demonstrate how to tie together all these features, and forms the basis of an ongoing example that you'll improve and extend in later chapters.
This chapter introduces the Download Manager, and you learn how to use it to schedule and manage long-running downloads. You'll also learn how to customize its notifications and query the Downloads Content Provider to determine the status of your downloads.
Finally, this chapter introduces how to use the Account Manager to make authenticated requests from Google App Engine backends.
Downloading and Parsing Internet Resources
Android offers several ways to leverage Internet resources. At one extreme you can use a WebView to include a WebKit-based browser within an Activity. At the other extreme you can use client-side APIs, such as the Google APIs, to interact directly with server processes. Somewhere in between, you can process remote XML feeds to extract and process data using a Java-based XML parser, such as SAX or the XML Pull Parser.
With Internet connectivity and a WebKit browser, you might ask if there's any reason to create native Internet-based applications when you could make a web-based version instead.
There are a number of benefits to creating thick- and thin-client native applications rather than relying on entirely web-based solutions:
· Bandwidth—Static resources such as images, layouts, and sounds can be expensive on devices with bandwidth restraints. By creating a native application, you can limit the bandwidth requirements to changed data only.
· Caching—With a browser-based solution, a patchy Internet connection can result in intermittent application availability. A native application can cache data and user actions to provide as much functionality as possible without a live connection and synchronize with the cloud when a connection is reestablished.
· Reducing battery drain—Each time your application opens a connection to a server, the wireless radio will be turned on (or kept on). A native application can bundle its connections, minimizing the number of connections initiated. The longer the period between network requests, the longer the wireless radio can be left off.
· Native features—Android devices are more than simple platforms for running a browser. They include location-based services, Notifications, widgets, camera hardware, background Services, and hardware sensors. By creating a native application, you can combine the data available online with the hardware features available on the device to provide a richer user experience.
Modern mobile devices offer a number of alternatives for accessing the Internet. Broadly speaking, Android provides two connection techniques for Internet connectivity. Each is offered transparently to the application layer.
· Mobile Internet—GPRS, EDGE, 3G, 4G, and LTE Internet access is available through carriers that offer mobile data.
· Wi-Fi—Wi-Fi receivers and mobile hotspots are becoming increasingly common.
If you use Internet resources in your application, remember that your users' data connections are dependent on the communications technology available to them. EDGE and GSM connections are notoriously low-bandwidth, whereas a Wi-Fi connection may be unreliable in a mobile setting.
Optimize the user experience by limiting the quantity of data transmitted and ensure that your application is robust enough to handle network outages and bandwidth limitations.
Connecting to an Internet Resource
Before you can access Internet resources, you need to add an INTERNET uses-permission node to your application manifest, as shown in the following XML snippet:
<uses-permission android:name="android.permission.INTERNET"/>
Listing 6.1 shows the basic pattern for opening an Internet data stream.

Listing 6.1: Opening an Internet data stream
String myFeed = getString(R.string.my_feed);
try {
URL url = new URL(myFeed);
// Create a new HTTP URL connection
URLConnection connection = url.openConnection();
HttpURLConnection httpConnection = (HttpURLConnection)connection;
int responseCode = httpConnection.getResponseCode();
if (responseCode == HttpURLConnection.HTTP_OK) {
InputStream in = httpConnection.getInputStream();
processStream(in);
}
}
catch (MalformedURLException e) {
Log.d(TAG, "Malformed URL Exception.");
}
catch (IOException e) {
Log.d(TAG, "IO Exception.");
}
code snippet PA4AD_Ch06_Internet/src/MyActivity.java
![]()
Attempting to perform network operations on the main UI thread will cause a NetworkOnMainThreadException on the latest Android platform releases. Be sure to execute code, such as that shown in Listing 6.1, in a background thread, as described in Chapter 9, “Working in the Background.”
Android includes several classes to help you handle network communications. They are available in the java.net.* and android.net.* packages.
![]()
Later in this chapter is a working example that shows how to obtain and process an Internet feed to get a list of earthquakes felt in the last 24 hours. Chapter 16, “Bluetooth, NFC, Networks, and Wi-Fi,” features more information on managing specific Internet connections, including monitoring connection status and configuring Wi-Fi access point connections.
Parsing XML Using the XML Pull Parser
Although detailed instructions for parsing XML and interacting with specific web services are outside the scope of this book, it's important to understand the available technologies.
This section provides a brief overview of the XML Pull Parser, whereas the next section demonstrates the use of the DOM parser to retrieve earthquake details from the United States Geological Survey (USGS).
The XML Pull Parser API is available from the following libraries:
import org.xmlpull.v1.XmlPullParser;
import org.xmlpull.v1.XmlPullParserException;
import org.xmlpull.v1.XmlPullParserFactory;
It enables you to parse an XML document in a single pass. Unlike the DOM parser, the Pull Parser presents the elements of your document in a sequential series of events and tags.
Your location within the document is represented by the current event. You can determine the current event by calling getEventType. Each document begins at the START_DOCUMENT event and ends at END_DOCUMENT.
To proceed through the tags, simply call next, which causes you to progress through a series of matched (and often nested) START_TAG and END_TAG events. You can extract the name of each tag by calling getName and extract the text between each set of tags using getNextText.
Listing 6.2 demonstrates how to use the XML Pull Parser to extract details from the points of interest list returned by the Google Places API.
Listing 6.2: Parsing XML using the XML Pull Parser
private void processStream(InputStream inputStream) {
// Create a new XML Pull Parser.
XmlPullParserFactory factory;
try {
factory = XmlPullParserFactory.newInstance();
factory.setNamespaceAware(true);
XmlPullParser xpp = factory.newPullParser();
// Assign a new input stream.
xpp.setInput(inputStream, null);
int eventType = xpp.getEventType();
// Continue until the end of the document is reached.
while (eventType != XmlPullParser.END_DOCUMENT) {
// Check for a start tag of the results tag.
if (eventType == XmlPullParser.START_TAG &&
xpp.getName().equals("result")) {
eventType = xpp.next();
String name = "";
// Process each result within the result tag.
while (!(eventType == XmlPullParser.END_TAG &&
xpp.getName().equals("result"))) {
// Check for the name tag within the results tag.
if (eventType == XmlPullParser.START_TAG &&
xpp.getName().equals("name"))
// Extract the POI name.
name = xpp.nextText();
// Move on to the next tag.
eventType = xpp.next();
}
// Do something with each POI name.
}
// Move on to the next result tag.
eventType = xpp.next();
}
} catch (XmlPullParserException e) {
Log.d("PULLPARSER", "XML Pull Parser Exception", e);
} catch (IOException e) {
Log.d("PULLPARSER", "IO Exception", e);
}
}
code snippet PA4AD_ Ch6_Internet/src/MyActivity.java
Creating an Earthquake Viewer
In the following example you'll create a tool that uses a USGS earthquake feed to display a list of recent earthquakes. You will return to this earthquake application several times in the following chapters, gradually adding more features and functionality.
The earthquake feed XML is parsed here by the DOM parser. Several alternatives exist, including the XML Pull Parser described in the previous section. As noted, a detailed analysis of the alternative XML parsing techniques is beyond the scope of this book.
In this example you'll create a list-based Activity that connects to an earthquake feed and displays the location, magnitude, and time of the earthquakes it contains.
![]()
To simplify readability, each of these examples excludes the import statements. If you are using Eclipse, you can press Ctrl+Shift+o (or Cmd+Shift+o on Mac) to automatically populate the import statements required to support the classes used in your code.
1. Start by creating an Earthquake project featuring an Earthquake Activity.
2. Create a new EarthquakeListFragment that extends ListFragment. This Fragment displays your list of earthquakes.
public class EarthquakeListFragment extends ListFragment {
}
3. Modify the main.xml layout resource to include the Fragment you created in Step 2. Be sure to name it so that you can reference it from the Activity code.
<?xml version="1.0" encoding="utf-8"?>
<LinearLayout xmlns:android="http://schemas.android.com/apk/res/android"
android:orientation="vertical"
android:layout_width="match_parent"
android:layout_height="match_parent">
<fragment android:name="com.paad.earthquake.EarthquakeListFragment"
android:id="@+id/EarthquakeListFragment"
android:layout_width="match_parent"
android:layout_height="match_parent"
/>
</LinearLayout>
4. Create a new public Quake class. This class will be used to store the details (date, details, location, magnitude, and link) of each earthquake. Override the toString method to provide the string that will be used to represent each quake in the List View.
package com.paad.earthquake;
import java.util.Date;
import java.text.SimpleDateFormat;
import android.location.Location;
public class Quake {
private Date date;
private String details;
private Location location;
private double magnitude;
private String link;
public Date getDate() { return date; }
public String getDetails() { return details; }
public Location getLocation() { return location; }
public double getMagnitude() { return magnitude; }
public String getLink() { return link; }
public Quake(Date _d, String _det, Location _loc, double _mag, String _link) {
date = _d;
details = _det;
location = _loc;
magnitude = _mag;
link = _link;
}
@Override
public String toString() {
SimpleDateFormat sdf = new SimpleDateFormat("HH.mm");
String dateString = sdf.format(date);
return dateString + ": " + magnitude + " " + details;
}
}
5. In the EarthquakeListFragment, override the onActivityCreated method to store an ArrayList of Quake objects, and bind that to the underlying ListView using an ArrayAdapter:
public class EarthquakeListFragment extends ListFragment {
ArrayAdapter<Quake> aa;
ArrayList<Quake> earthquakes = new ArrayList<Quake>();
@Override
public void onActivityCreated(Bundle savedInstanceState) {
super.onActivityCreated(savedInstanceState);
int layoutID = android.R.layout.simple_list_item_1;
aa = new ArrayAdapter<Quake>(getActivity(), layoutID , earthquakes);
setListAdapter(aa);
}
}
6. Start processing the earthquake feed. For this example, the feed used is the one-day USGS feed for earthquakes with a magnitude greater than 2.5. Add the location of your feed as an external string resource. This lets you potentially specify a different feed based on a user's location.
<?xml version="1.0" encoding="utf-8"?>
<resources>
<string name="app_name">Earthquake</string>
<string name="quake_feed">
http://earthquake.usgs.gov/eqcenter/catalogs/1day-M2.5.xml
</string>
</resources>
7. Before your application can access the Internet, it needs to be granted permission for Internet access. Add the Internet uses-permission to the manifest:
<uses-permission android:name="android.permission.INTERNET"/>
8. Returning to the Earthquake List Fragment, create a new refreshEarthquakes method that connects to and parses the earthquake feed. Extract each earthquake and parse the details to obtain the date, magnitude, link, and location. As you finish parsing each earthquake, pass it in to a newaddNewQuake method. Note that the addNewQuake method is executed within a Runnable posted from a Handler object. This allows you to execute the refreshEarthquakes method on a background thread before updating the UI within addNewQuake. This will be explored in more detail in Chapter 9.
private static final String TAG = "EARTHQUAKE";
private Handler handler = new Handler();
public void refreshEarthquakes() {
// Get the XML
URL url;
try {
String quakeFeed = getString(R.string.quake_feed);
url = new URL(quakeFeed);
URLConnection connection;
connection = url.openConnection();
HttpURLConnection httpConnection = (HttpURLConnection)connection;
int responseCode = httpConnection.getResponseCode();
if (responseCode == HttpURLConnection.HTTP_OK) {
InputStream in = httpConnection.getInputStream();
DocumentBuilderFactory dbf = DocumentBuilderFactory.newInstance();
DocumentBuilder db = dbf.newDocumentBuilder();
// Parse the earthquake feed.
Document dom = db.parse(in);
Element docEle = dom.getDocumentElement();
// Clear the old earthquakes
earthquakes.clear();
// Get a list of each earthquake entry.
NodeList nl = docEle.getElementsByTagName("entry");
if (nl != null && nl.getLength() > 0) {
for (int i = 0 ; i < nl.getLength(); i++) {
Element entry = (Element)nl.item(i);
Element title = (Element)entry.getElementsByTagName("title").item(0);
Element g = (Element)entry.getElementsByTagName("georss:point").item(0);
Element when = (Element)entry.getElementsByTagName("updated").item(0);
Element link = (Element)entry.getElementsByTagName("link").item(0);
String details = title.getFirstChild().getNodeValue();
String hostname = "http://earthquake.usgs.gov";
String linkString = hostname + link.getAttribute("href");
String point = g.getFirstChild().getNodeValue();
String dt = when.getFirstChild().getNodeValue();
SimpleDateFormat sdf = new SimpleDateFormat("yyyy-MM-dd'T'hh:mm:ss'Z'");
Date qdate = new GregorianCalendar(0,0,0).getTime();
try {
qdate = sdf.parse(dt);
} catch (ParseException e) {
Log.d(TAG, "Date parsing exception.", e);
}
String[] location = point.split(" ");
Location l = new Location("dummyGPS");
l.setLatitude(Double.parseDouble(location[0]));
l.setLongitude(Double.parseDouble(location[1]));
String magnitudeString = details.split(" ")[1];
int end = magnitudeString.length()-1;
double magnitude = Double.parseDouble(magnitudeString.substring(0, end));
details = details.split(",")[1].trim();
final Quake quake = new Quake(qdate, details, l, magnitude, linkString);
// Process a newly found earthquake
handler.post(new Runnable() {
public void run() {
addNewQuake(quake);
}
});
}
}
}
} catch (MalformedURLException e) {
Log.d(TAG, "MalformedURLException");
} catch (IOException e) {
Log.d(TAG, "IOException");
} catch (ParserConfigurationException e) {
Log.d(TAG, "Parser Configuration Exception");
} catch (SAXException e) {
Log.d(TAG, "SAX Exception");
}
finally {
}
}
private void addNewQuake(Quake _quake) {
// TODO Add the earthquakes to the array list.
}
9. Update the addNewQuake method so that it takes each newly processed quake and adds it to the earthquake Array List. It should also notify the Array Adapter that the underlying data has changed.
private void addNewQuake(Quake _quake) {
// Add the new quake to our list of earthquakes.
earthquakes.add(_quake);
// Notify the array adapter of a change.
aa.notifyDataSetChanged();
}
10. Modify your onActivityCreated method to call refreshEarthquakes on startup. Network operations should always be performed in a background thread—a requirement that is enforced in API level 11 onwards.
@Override
public void onActivityCreated(Bundle savedInstanceState) {
super.onActivityCreated(savedInstanceState);
int layoutID = android.R.layout.simple_list_item_1;
aa = new ArrayAdapter<Quake>(getActivity(), layoutID , earthquakes);
setListAdapter(aa);
Thread t = new Thread(new Runnable() {
public void run() {
refreshEarthquakes();
}
});
t.start();
}
![]()
If your application is targeting API level 11 or above, attempting to perform network operations on the main UI thread will cause a NetworkOnMainThreadException. In this example a simple Thread is used to post the refreshEarthquakes method on a background thread.
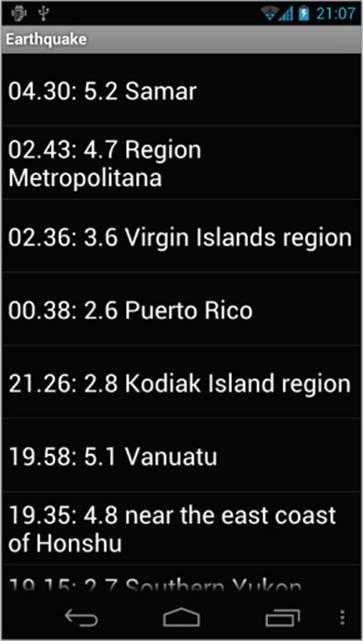
11. When you run your project, you should see a List View that features the earthquakes from the last 24 hours with a magnitude greater than 2.5 (Figure 6.1).
Figure 6.1
![]()
All code snippets in this example are part of the Chapter 6 Earthquake project, available for download at www.wrox.com.
Using the Download Manager
The Download Manager was introduced in Android 2.3 (API level 9) as a Service to optimize the handling of long-running downloads. The Download Manager handles the HTTP connection and monitors connectivity changes and system reboots to ensure each download completes successfully.
It's good practice to use the Download Manager in most situations, particularly where a download is likely to continue in the background between user sessions, or when successful completion is important.
To access the Download Manager, request the DOWNLOAD_SERVICE using the getSystemService method, as follows:
String serviceString = Context.DOWNLOAD_SERVICE;
DownloadManager downloadManager;
downloadManager = (DownloadManager)getSystemService(serviceString);
Downloading Files
To request a download, create a new DownloadManager.Request, specifying the URI of the file to download and passing it in to the Download Manager's enqueue method, as shown in Listing 6.3.

Listing 6.3: Listing 6 3: Downloading files using the Download Manager
String serviceString = Context.DOWNLOAD_SERVICE;
DownloadManager downloadManager;
downloadManager = (DownloadManager)getSystemService(serviceString);
Uri uri = Uri.parse("http://developer.android.com/shareables/icon_templates-v4.0.zip");
DownloadManager.Request request = new Request(uri);
long reference = downloadManager.enqueue(request);
code snippet PA4AD_ Ch6_DownloadManager/src/MyActivity.java
You can use the returned reference value to perform future actions or queries on the download, including checking its status or canceling it.
You can add an HTTP header to your request, or override the mime type returned by the server, by calling addRequestHeader and setMimeType, respectively, on your Request object.
You can also specify the connectivity conditions under which to execute the download. The setAllowedNetworkTypes method enables you to restrict downloads to either Wi-Fi or mobile networks, whereas the setAllowedOverRoaming method predictably enables you to prevent downloads while the phone is roaming.
The following snippet shows how to ensure a large file is downloaded only when connected to Wi-Fi:
request.setAllowedNetworkTypes(Request.NETWORK_WIFI);
Android API level 11 introduced the getRecommendedMaxBytesOverMobile convenience method, which is useful to determine if you should restrict a download to Wi-Fi by returning a recommended maximum number of bytes to transfer over a mobile data connection.
After calling enqueue, the download begins as soon as connectivity is available and the Download Manager is free.
To receive a notification when the download is completed, register a Receiver to receive an ACTION_DOWNLOAD_COMPLETE broadcast. It will include an EXTRA_DOWNLOAD_ID extra that contains the reference ID of the download that has completed, as shown in Listing 6.4.
Listing 6.4: Monitoring downloads for completion
IntentFilter filter = new IntentFilter(DownloadManager.ACTION_DOWNLOAD_COMPLETE);
BroadcastReceiver receiver = new BroadcastReceiver() {
@Override
public void onReceive(Context context, Intent intent) {
long reference = intent.getLongExtra(DownloadManager.EXTRA_DOWNLOAD_ID, -1);
if (myDownloadReference == reference) {
// Do something with downloaded file.
}
}
};
registerReceiver(receiver, filter);
code snippet PA4AD_ Ch6_DownloadManager/src/MyActivity.java
You can use Download Manager's openDownloadedFile method to receive a Parcel File Descriptor to your file, to query the Download Manager to obtain its location, or to manipulate it directly if you've specified a filename and location yourself.
It's also good practice to register a Receiver for the ACTION_NOTIFICATION_CLICKED action, as shown in Listing 6.5. This Intent will be broadcast whenever a user selects a download from the Notification tray or the Downloads app.
Listing 6.5: Responding to download notification clicks
IntentFilter filter = new IntentFilter(DownloadManager.ACTION_NOTIFICATION_CLICKED);
BroadcastReceiver receiver = new BroadcastReceiver() {
@Override
public void onReceive(Context context, Intent intent) {
String extraID = DownloadManager.EXTRA_NOTIFICATION_CLICK_DOWNLOAD_IDS;
long[] references = intent.getLongArrayExtra(extraID);
for (long reference : references)
if (reference == myDownloadReference) {
// Do something with downloading file.
}
}
};
registerReceiver(receiver, filter);
code snippet PA4AD_ Ch6_DownloadManager/src/MyActivity.java
Customizing Download Manager Notifications
By default, ongoing Notifications will be displayed for each download managed by the Download Manager. Each Notification will show the current download progress and the filename (Figure 6.2).
Figure 6.2

The Download Manager enables you to customize the Notification displayed for each download request, including hiding it completely. The following snippet shows how to use the setTitle and setDescription methods to customize the text displayed in the file download Notification. Figure 6.3 shows the result.
request.setTitle("Earthquakes");
request.setDescription("Earthquake XML");
Figure 6.3

The setNotificationVisibility method lets you control when, and if, a Notification should be displayed for your request using one of the following flags:
· Request.VISIBILITY_VISIBLE—An ongoing Notification will be visible for the duration that the download is in progress. It will be removed when the download is complete. This is the default option.
· Request.VISIBILITY_VISIBLE_NOTIFY_COMPLETED—An ongoing Notification will be displayed during the download and will continue to be displayed (until selected or dismissed) once the download has completed.
· Request.VISIBILITY_VISIBLE_NOTIFY_ONLY_COMPLETION—The notification will be displayed only after the download is complete.
· Request.VISIBILITY_HIDDEN—No Notification will be displayed for this download. In order to set this flag, your application must have the DOWNLOAD_WITHOUT_NOTIFICATION uses-permission specified in its manifest.
![]()
You will learn more about creating your own custom Notifications in Chapter 9.
Specifying a Download Location
By default, all Download Manager downloads are saved to the shared download cache using system-generated filenames. Each Request object can specify a download location, though all downloads must be stored somewhere on external storage and the calling application must have theWRITE_EXTERNAL_STORAGE uses-permission in its manifest:
<uses-permission android:name="android.permission.WRITE_EXTERNAL_STORAGE"/>
The following code snippet shows how to specify an arbitrary path on external storage:
request.setDestinationUri(Uri.fromFile(f));
If the downloaded file is to your application, you may want to place it in your application's external storage folder. Note that access control is not applied to this folder, and other applications will be able to access it. If your application is uninstalled, files stored in these folders will also be removed.
The following snippet specifies storing a file in your application's external downloads folder:
request.setDestinationInExternalFilesDir(this,
Environment.DIRECTORY_DOWNLOADS, "Bugdroid.png");
For files that can or should be shared with other applications— particularly those you want to scan with the Media Scanner—you can specify a folder within the public folder on the external storage. The following snippet requests a file be stored in the public music folder:
request.setDestinationInExternalPublicDir(Environment.DIRECTORY_MUSIC,
"Android_Rock.mp3");
![]()
See Chapter 7, “Files, Saving State, and Preferences,” for more details about external storage and the Environment static variables you can use to specify folders within it.
It's important to note that by default files downloaded by the Download Manager are not scanned by Media Scanner, so they might not appear in apps such as Gallery and Music Player.
To make downloaded files scannable, call allowScaningByMediaScanner on the Request object.
If you want your files to be visible and manageable by the system's Downloads app, you need to call setVisibleInDownloadsUi, passing in true.
Cancelling and Removing Downloads
The Download Manager's remove method lets you cancel a pending download, abort a download in progress, or delete a completed download.
As shown in the following code snippet, the remove method accepts download IDs as optional arguments, enabling you to specify one or many downloads to cancel:
downloadManager.remove(REFERENCE_1, REFERENCE_2, REFERENCE_3);
It returns the number of downloads successfully canceled. If a download is canceled, all associated files—both partial and complete—are removed.
Querying the Download Manager
You can query the Download Manager to find the status, progress, and details of your download requests by using the query method that returns a Cursor of downloads.
![]()
Cursors are a data construct used by Android to return data stored in a Content Provider or SQLite database. You will learn more about Content Providers, Cursors, and how to find data stored in them in Chapter 8, “Databases and Content Providers.”
The query method takes a DownloadManager.Query object as a parameter. Use the setFilterById method on a Query object to specify a sequence of download reference IDs, or use the setFilterByStatus method to filter on a download status using one of the DownloadManager.STATUS_*constants to specify running, paused, failed, or successful downloads.
The Download Manager includes a number of COLUMN_* static String constants that you can use to query the result Cursor. You can find details for each download, including the status, files size, bytes downloaded so far, title, description, URI, local filename and URI, media type, and Media Provider download URI.
Listing 6.6 expands on Listing 6.4 to demonstrate how to find the local filename and URI of a completed downloads from within a Broadcast Receiver registered to listen for download completions.
Listing 6.6: Finding details of completed downloads
@Override
public void onReceive(Context context, Intent intent) {
long reference = intent.getLongExtra(DownloadManager.EXTRA_DOWNLOAD_ID, -1);
if (reference == myDownloadReference) {
Query myDownloadQuery = new Query();
myDownloadQuery.setFilterById(reference);
Cursor myDownload = downloadManager.query(myDownloadQuery);
if (myDownload.moveToFirst()) {
int fileNameIdx =
myDownload.getColumnIndex(DownloadManager.COLUMN_LOCAL_FILENAME);
int fileUriIdx =
myDownload.getColumnIndex(DownloadManager.COLUMN_LOCAL_URI);
String fileName = myDownload.getString(fileNameIdx);
String fileUri = myDownload.getString(fileUriIdx);
// TODO Do something with the file.
}
myDownload.close();
}
}
code snippet PA4AD_ Ch6_DownloadManager/src/MyActivity.java
For downloads that are either paused or have failed, you can query the COLUMN_REASON column to find the cause represented as an integer.
In the case of STATUS_PAUSED downloads, you can interpret the reason code by using one of the DownloadManager.PAUSED_* static constants to determine if the download has been paused while waiting for network connectivity, a Wi-Fi connection, or pending a retry.
For STATUS_FAILED downloads, you can determine the cause of failure using the DownloadManager.ERROR_* codes. Possible error codes include lack of a storage device, insufficient free space, duplicate filenames, or HTTP errors.
Listing 6.7 shows how to find a list of the currently paused downloads, extracting the reason the download was paused, the filename, its title, and the current progress.
Listing 6.7: Finding details of paused downloads
// Obtain the Download Manager Service.
String serviceString = Context.DOWNLOAD_SERVICE;
DownloadManager downloadManager;
downloadManager = (DownloadManager)getSystemService(serviceString);
// Create a query for paused downloads.
Query pausedDownloadQuery = new Query();
pausedDownloadQuery.setFilterByStatus(DownloadManager.STATUS_PAUSED);
// Query the Download Manager for paused downloads.
Cursor pausedDownloads = downloadManager.query(pausedDownloadQuery);
// Find the column indexes for the data we require.
int reasonIdx = pausedDownloads.getColumnIndex(DownloadManager.COLUMN_REASON);
int titleIdx = pausedDownloads.getColumnIndex(DownloadManager.COLUMN_TITLE);
int fileSizeIdx =
pausedDownloads.getColumnIndex(DownloadManager.COLUMN_TOTAL_SIZE_BYTES);
int bytesDLIdx =
pausedDownloads.getColumnIndex(DownloadManager.COLUMN_BYTES_DOWNLOADED_SO_FAR);
// Iterate over the result Cursor.
while (pausedDownloads.moveToNext()) {
// Extract the data we require from the Cursor.
String title = pausedDownloads.getString(titleIdx);
int fileSize = pausedDownloads.getInt(fileSizeIdx);
int bytesDL = pausedDownloads.getInt(bytesDLIdx);
// Translate the pause reason to friendly text.
int reason = pausedDownloads.getInt(reasonIdx);
String reasonString = "Unknown";
switch (reason) {
case DownloadManager.PAUSED_QUEUED_FOR_WIFI :
reasonString = "Waiting for WiFi"; break;
case DownloadManager.PAUSED_WAITING_FOR_NETWORK :
reasonString = "Waiting for connectivity"; break;
case DownloadManager.PAUSED_WAITING_TO_RETRY :
reasonString = "Waiting to retry"; break;
default : break;
}
// Construct a status summary
StringBuilder sb = new StringBuilder();
sb.append(title).append("\n");
sb.append(reasonString).append("\n");
sb.append("Downloaded ").append(bytesDL).append(" / " ).append(fileSize);
// Display the status
Log.d("DOWNLOAD", sb.toString());
}
// Close the result Cursor.
pausedDownloads.close();
code snippet PA4AD_ Ch6_DownloadManager/src/MyActivity.java
Using Internet Services
Software as a service (SaaS) and cloud computing are becoming increasingly popular as companies try to reduce the cost overheads associated with installing, upgrading, and maintaining deployed software. The result is a range of rich Internet services with which you can build thin mobile applications that enrich online services with the personalization available from your smartphone or tablet.
The idea of using a middle tier to reduce client-side load is not a novel one, and happily there are many Internet-based options to supply your applications with the level of service you need.
The sheer volume of Internet services available makes it impossible to list them all here (let alone look at them in any detail), but the following list shows some of the more mature and interesting Internet services currently available.
· Google Services APIs—In addition to the native Google applications, Google offers web APIs for access to their Calendar, Docs, Blogger, and Picasa Web Albums platforms. These APIs collectively make use of a form of XML for data communication.
· Yahoo! Pipes—Yahoo! Pipes offers a graphical web-based approach to XML feed manipulation. Using pipes, you can filter, aggregate, analyze, and otherwise manipulate XML feeds and output them in a variety of formats to be consumed by your applications.
· Google App Engine—Using the Google App Engine, you can create cloud-hosted web services that shift complex processing away from your mobile client. Doing so reduces the load on your system resources but comes at the price of Internet-connection dependency. Google also offers Cloud Storage and Prediction API services.
· Amazon Web Services—Amazon offers a range of cloud-based services, including a rich API for accessing its media database of books, CDs, and DVDs. Amazon also offers a distributed storage solution (S3) and Elastic Compute Cloud (EC2).
Connecting to Google App Engine
To use the Google Play Store, users must be signed in to a Google account on their phones; therefore, if your application connects to a Google App Engine backend to store and retrieve data related to a particular user, you can use the Account Manager to handle the authentication.
The Account Manager enables you to ask users for permission to retrieve an authentication token, which, in turn, can be used to obtain a cookie from your server that can then be used to make future authenticated requests.
To retrieve accounts and authentication tokens from the Account Manager, your application requires the GET_ACCOUNTS uses-permission:
<uses-permission android:name="android.permission.GET_ACCOUNTS"/>
Making authenticated Google App Engine requests is a three-part process:
1. Request an auth token.
2. Use the auth token to request an auth cookie.
3. Use the auth cookie to make authenticated requests.
Listing 6.8 demonstrates how to request an auth token for Google accounts using the Account Manager.
Listing 6.8: Requesting an auth token
String acctSvc = Context.ACCOUNT_SERVICE;
AccountManager accountManager = (AccountManager)getSystemService(acctSvc);
Account[] accounts = accountManager.getAccountsByType("com.google");
if (accounts.length > 0)
accountManager.getAuthToken(accounts[0], "ah", false,
myAccountManagerCallback, null);
code snippet PA4AD_Ch6_AppEngine/src/MyActivity.java
The Account Manager then checks to see if the user has approved your request for an auth token. The result is returned to your application via the Account Manager Callback you specified when making the request.
In the following extension to Listing 6.8, the returned bundle is inspected for an Intent stored against the AccountManager.KEY_INTENT key. If this key's value is null, the user has approved your application's request, and you can retrieve the auth token from the bundle.
private static int ASK_PERMISSION = 1;
private class GetAuthTokenCB implements AccountManagerCallback<Bundle> {
public void run(AccountManagerFuture<Bundle> result) {
try {
Bundle bundle = result.getResult();
Intent launch = (Intent)bundle.get(AccountManager.KEY_INTENT);
if (launch != null)
startActivityForResult(launch, ASK_PERMISSION);
else {
// Extract the auth token and request an auth cookie.
}
}
catch (Exception ex) {}
}
};
If the key's value is not null, you must start a new Activity using the bundled Intent to request the user's permission. The user will be prompted to approve or deny your request. After control has been passed back to your application, you should request the auth token again.
The auth token is stored within the Bundle parameter against the AccountManager.KEY_AUTHTOKEN, as follows:
String auth_token = bundle.getString(AccountManager.KEY_AUTHTOKEN);
You can use this token to request an auth cookie from Google App Engine by configuring an httpClient and using it to transmit an HttpGet request, as follows:
DefaultHttpClient http_client = new DefaultHttpClient();
http_client.getParams().setBooleanParameter(ClientPNames.HANDLE_REDIRECTS, false);
String getString = "https://[yourappsubdomain].appspot.com/_ah/login?" +
"continue=http://localhost/&auth=" +
auth_token;
HttpGet get = new HttpGet(getString);
HttpResponse response = http_client.execute(get);
If the request was successful, simply iterate over the Cookies stored in the HTTP Client's Cookie Store to confirm the auth cookie has been set. The HTTP Client used to make the request has the authenticated cookie, and all future requests to Google App Engine using it will be properly authenticated.
if (response.getStatusLine().getStatusCode() != 302)
return false;
else {
for (Cookie cookie : http_client.getCookieStore().getCookies())
if (cookie.getName().equals("ACSID")) {
// Make authenticated requests to your Google App Engine server.
}
}
Best Practices for Downloading Data Without Draining the Battery
The timing and techniques you use to download data can have a significant effect on battery life. The wireless radio on mobile devices draws significant power when active, so it's important to consider how your application's connectivity model may impact the operation of the underlying radio hardware.
Every time you create a new connection to download additional data, you risk waking the wireless radio from standby mode to active mode. In general, it's good practice to bundle your connections and associated downloads to perform them concurrently and infrequently.
To use a converse example, creating frequent, short-lived connections that download small amounts of data can have the most dramatic impact on the battery.
You can use the following techniques to minimize your application's battery cost.
· Aggressively prefetch—The more data you download in a single connection, the less frequently the radio will need to be powered up to download more data. This will need to be balanced with downloading too much data that won't be used.
· Bundle your connections and downloads—Rather than sending time-insensitive data such as analytics as they're received, bundle them together and schedule them to transmit concurrently with other connections, such as when refreshing content or prefetching data. Remember, each new connection has the potential of powering up the radio.
· Reuse existing connections rather than creating new ones—Using existing connections rather than initiating new ones for each transfer can dramatically improve network performance, reduce latency, and allow the network to intelligently react to congestion and related issues
· Schedule repeated downloads as infrequently as possible—It's good practice to set the default refresh frequency to as low as usability will allow, rather than as fast as possible. For users who require their updates to be more frequent, provide preferences that allow them to sacrifice battery life in exchange for freshness.
All materials on the site are licensed Creative Commons Attribution-Sharealike 3.0 Unported CC BY-SA 3.0 & GNU Free Documentation License (GFDL)
If you are the copyright holder of any material contained on our site and intend to remove it, please contact our site administrator for approval.
© 2016-2026 All site design rights belong to S.Y.A.