Professional Android 4 Application Development (2012)
Chapter 8. Databases and Content Providers
What's in this Chapter?
Creating databases and using SQLite
Using Content Providers, Cursors, and Content Values to store, share, and consume application data
Asynchronously querying Content Providers using Cursor Loaders
Adding search capabilities to your applications
Using the native Media Store, Contacts, and Calendar Content Providers
This chapter introduces persistent data storage in Android, starting with the SQLite database library. SQLite offers a powerful SQL database library that provides a robust persistence layer over which you have total control.
You'll also learn how to build and use Content Providers to store, share, and consume structured data within and between applications. Content Providers offer a generic interface to any data source by decoupling the data storage layer from the application layer. You'll see how to query Content Providers asynchronously to ensure your application remains responsive.
Although access to a database is restricted to the application that created it, Content Providers offer a standard interface your applications can use to share data with and consume data from other applications—including many of the native data stores.
Having created an application with data to store, you'll learn how to add search functionality to your application and how to build Content Providers that can provide real-time search suggestions.
Because Content Providers can be used across application boundaries, you have the opportunity to integrate your own application with several native Content Providers, including contacts, calendar, and the Media Store. You'll learn how to store and retrieve data from these core Android applications to provide your users with a richer, more consistent, and fully integrated user experience.
Introducing Android Databases
Android provides structured data persistence through a combination of SQLite databases and Content Providers.
SQLite databases can be used to store application data using a managed, structured approach. Android offers a full SQLite relational database library. Every application can create its own databases over which it has complete control.
Having created your underlying data store, Content Providers offer a generic, well-defined interface for using and sharing data that provides a consistent abstraction from the underlying data source.
SQLite Databases
Using SQLite you can create fully encapsulated relational databases for your applications. Use them to store and manage complex, structured application data.
Android databases are stored in the /data/data/<package_name>/databases folder on your device (or emulator). All databases are private, accessible only by the application that created them.
Database design is a big topic that deserves more thorough coverage than is possible within this book. It is worth highlighting that standard database best practices still apply in Android. In particular, when you're creating databases for resource-constrained devices (such as mobile phones), it's important to normalize your data to minimize redundancy.
Content Providers
Content Providers provide an interface for publishing and consuming data, based around a simple URI addressing model using the content:// schema. They enable you to decouple your application layers from the underlying data layers, making your applications data-source agnostic by abstracting the underlying data source.
Content Providers can be shared between applications, queried for results, have their existing records updated or deleted, and have new records added. Any application—with the appropriate permissions—can add, remove, or update data from any other application, including the native Android Content Providers.
Several native Content Providers have been made accessible for access by third-party applications, including the contact manager, media store, and calendar, as described later in this chapter.
By publishing your own Content Providers, you make it possible for you (and other developers) to incorporate and extend your data in new applications.
Introducing SQLite
SQLite is a well-regarded relational database management system (RDBMS). It is:
· Open-source
· Standards-compliant
· Lightweight
· Single-tier
It has been implemented as a compact C library that's included as part of the Android software stack.
By being implemented as a library, rather than running as a separate ongoing process, each SQLite database is an integrated part of the application that created it. This reduces external dependencies, minimizes latency, and simplifies transaction locking and synchronization.
SQLite has a reputation for being extremely reliable and is the database system of choice for many consumer electronic devices, including many MP3 players and smartphones.
Lightweight and powerful, SQLite differs from many conventional database engines by loosely typing each column, meaning that column values are not required to conform to a single type; instead, each value is typed individually in each row. As a result, type checking isn't necessary when assigning or extracting values from each column within a row.
![]()
For more comprehensive coverage of SQLite, including its particular strengths and limitations, check out the official site, at www.sqlite.org.
Content Values and Cursors
Content Values are used to insert new rows into tables. Each ContentValues object represents a single table row as a map of column names to values.
Database queries are returned as Cursor objects. Rather than extracting and returning a copy of the result values, Cursors are pointers to the result set within the underlying data. Cursors provide a managed way of controlling your position (row) in the result set of a database query.
The Cursor class includes a number of navigation functions, including, but not limited to, the following:
· moveToFirst—Moves the cursor to the first row in the query result
· moveToNext—Moves the cursor to the next row
· moveToPrevious—Moves the cursor to the previous row
· getCount—Returns the number of rows in the result set
· getColumnIndexOrThrow—Returns the zero-based index for the column with the specified name (throwing an exception if no column exists with that name)
· getColumnName—Returns the name of the specified column index
· getColumnNames—Returns a string array of all the column names in the current Cursor
· moveToPosition—Moves the cursor to the specified row
· getPosition—Returns the current cursor position
Android provides a convenient mechanism to ensure queries are performed asynchronously. The CursorLoader class and associated Loader Manager (described later in this chapter) were introduced in Android 3.0 (API level 11) and are now also available as part of the support library, allowing you to leverage them while still supporting earlier Android releases.
Later in this chapter you'll learn how to query a database and how to extract specific row/column values from the resulting Cursors.
Working with SQLite Databases
This section shows you how to create and interact with SQLite databases within your applications.
When working with databases, it's good form to encapsulate the underlying database and expose only the public methods and constants required to interact with that database, generally using what's often referred to as a contract or helper class. This class should expose database constants, particularly column names, which will be required for populating and querying the database. Later in this chapter you'll be introduced to Content Providers, which can also be used to expose these interaction constants.
Listing 8.1 shows a sample of the type of database constants that should be made public within a helper class.

Listing 8.1: Skeleton code for contract class constants
// The index (key) column name for use in where clauses.
public static final String KEY_ID = "_id";
// The name and column index of each column in your database.
// These should be descriptive.
public static final String KEY_GOLD_HOARD_NAME_COLUMN =
"GOLD_HOARD_NAME_COLUMN";
public static final String KEY_GOLD_HOARD_ACCESSIBLE_COLUMN =
"OLD_HOARD_ACCESSIBLE_COLUMN";
public static final String KEY_GOLD_HOARDED_COLUMN =
"GOLD_HOARDED_COLUMN";
// TODO: Create public field for each column in your table.
code snippet PA4AD_ Ch08_DatabaseSkeleton/src/MyHoardDatabase.java
Introducing the SQLiteOpenHelper
SQLiteOpenHelper is an abstract class used to implement the best practice pattern for creating, opening, and upgrading databases.
By implementing an SQLite Open Helper, you hide the logic used to decide if a database needs to be created or upgraded before it's opened, as well as ensure that each operation is completed efficiently.
It's good practice to defer creating and opening databases until they're needed. The SQLite Open Helper caches database instances after they've been successfully opened, so you can make requests to open the database immediately prior to performing a query or transaction. For the same reason, there is no need to close the database manually unless you no longer need to use it again.
![]()
Database operations, especially opening or creating databases, can be time-consuming. To ensure this doesn't impact the user experience, make all database transactions asynchronous.
Listing 8.2 shows how to extend the SQLiteOpenHelper class by overriding the constructor, onCreate, and onUpgrade methods to handle the creation of a new database and upgrading to a new version, respectively.
Listing 8.2: Implementing an SQLite Open Helper
private static class HoardDBOpenHelper extends SQLiteOpenHelper {
private static final String DATABASE_NAME = "myDatabase.db";
private static final String DATABASE_TABLE = "GoldHoards";
private static final int DATABASE_VERSION = 1;
// SQL Statement to create a new database.
private static final String DATABASE_CREATE = "create table " +
DATABASE_TABLE + " (" + KEY_ID +
" integer primary key autoincrement, " +
KEY_GOLD_HOARD_NAME_COLUMN + " text not null, " +
KEY_GOLD_HOARDED_COLUMN + " float, " +
KEY_GOLD_HOARD_ACCESSIBLE_COLUMN + " integer);";
public HoardDBOpenHelper(Context context, String name,
CursorFactory factory, int version) {
super(context, name, factory, version);
}
// Called when no database exists in disk and the helper class needs
// to create a new one.
@Override
public void onCreate(SQLiteDatabase db) {
db.execSQL(DATABASE_CREATE);
}
// Called when there is a database version mismatch meaning that
// the version of the database on disk needs to be upgraded to
// the current version.
@Override
public void onUpgrade(SQLiteDatabase db, int oldVersion,
int newVersion) {
// Log the version upgrade.
Log.w("TaskDBAdapter", "Upgrading from version " +
oldVersion + " to " +
newVersion + ", which will destroy all old data");
// Upgrade the existing database to conform to the new
// version. Multiple previous versions can be handled by
// comparing oldVersion and newVersion values.
// The simplest case is to drop the old table and create a new one.
db.execSQL("DROP TABLE IF IT EXISTS " + DATABASE_TABLE);
// Create a new one.
onCreate(db);
}
}
code snippet PA4AD_ Ch08_DatabaseSkeleton/src/MyHoardDatabase.java
![]()
In this example onUpgrade simply drops the existing table and replaces it with the new definition. This is often the simplest and most practical solution; however, for important data that is not synchronized with an online service or is hard to recapture, a better approach may be to migrate existing data into the new table.
To access a database using the SQLite Open Helper, call getWritableDatabase or getReadableDatabase to open and obtain a writable or read-only instance of the underlying database, respectively.
Behind the scenes, if the database doesn't exist, the helper executes its onCreate handler. If the database version has changed, the onUpgrade handler will fire. In either case, the get<read/writ>ableDatabase call will return the cached, newly opened, newly created, or upgraded database, as appropriate.
When a database has been successfully opened, the SQLite Open Helper will cache it, so you can (and should) use these methods each time you query or perform a transaction on the database, rather than caching the open database within your application.
A call to getWritableDatabase can fail due to disk space or permission issues, so it's good practice to fall back to the getReadableDatabase method for database queries if necessary. In most cases this method will provide the same, cached writeable database instance as getWritableDatabaseunless it does not yet exist or the same permission or disk space issues occur, in which case a read-only copy will be returned.
![]()
To create or upgrade the database, it must be opened in a writeable form; therefore, it's generally good practice to attempt to open a writeable database first, falling back to a read-only alternative if it fails.
Opening and Creating Databases Without the SQLite Open Helper
If you would prefer to manage the creation, opening, and version control of your databases directly, rather than using the SQLite Open Helper, you can use the application Context's openOrCreateDatabase method to create the database itself:
SQLiteDatabase db = context.openOrCreateDatabase(DATABASE_NAME,
Context.MODE_PRIVATE,
null);
After you have created the database, you must handle the creation and upgrade logic handled within the onCreate and onUpgrade handlers of the SQLite Open Helper—typically using the database's execSQL method to create and drop tables, as required.
It's good practice to defer creating and opening databases until they're needed, and to cache database instances after they're successfully opened to limit the associated efficiency costs.
At a minimum, any such operations must be handled asynchronously to avoid impacting the main application thread.
Android Database Design Considerations
You should keep the following Android-specific considerations in mind when designing your database.
· Files (such as bitmaps or audio files) are not usually stored within database tables. Use a string to store a path to the file, preferably a fully qualified URI.
· Although not strictly a requirement, it's strongly recommended that all tables include an auto-increment key field as a unique index field for each row. If you plan to share your table using a Content Provider, a unique ID field is required.
Querying a Database
Each database query is returned as a Cursor. This lets Android manage resources more efficiently by retrieving and releasing row and column values on demand.
To execute a query on a Database object, use the query method, passing in the following:
· An optional Boolean that specifies if the result set should contain only unique values.
· The name of the table to query.
· A projection, as an array of strings, that lists the columns to include in the result set.
· A where clause that defines the rows to be returned. You can include ? wildcards that will be replaced by the values passed in through the selection argument parameter.
· An array of selection argument strings that will replace the ? wildcards in the where clause.
· A group by clause that defines how the resulting rows will be grouped.
· A having clause that defines which row groups to include if you specified a group by clause.
· A string that describes the order of the returned rows.
· A string that defines the maximum number of rows in the result set.
Listing 8.3 shows how to return a selection of rows from within an SQLite database table.
Listing 8.3: Querying a database
// Specify the result column projection. Return the minimum set
// of columns required to satisfy your requirements.
String[] result_columns = new String[] {
KEY_ID, KEY_GOLD_HOARD_ACCESSIBLE_COLUMN, KEY_GOLD_HOARDED_COLUMN };
// Specify the where clause that will limit our results.
String where = KEY_GOLD_HOARD_ACCESSIBLE_COLUMN + "=" + 1;
// Replace these with valid SQL statements as necessary.
String whereArgs[] = null;
String groupBy = null;
String having = null;
String order = null;
SQLiteDatabase db = hoardDBOpenHelper.getWritableDatabase();
Cursor cursor = db.query(HoardDBOpenHelper.DATABASE_TABLE,
result_columns, where,
whereArgs, groupBy, having, order);
code snippet PA4AD_ Ch08_GoldHoarder/src/MyHoardDatabase.java
![]()
In this Listing 8.3, a database instance is opened using an SQLite Open Helper implementation. The SQLite Open Helper defers the creation and opening of database instances until they are first required and caches them after they are successfully opened.
As a result, it's good practice to request a database instance each time you perform a query or transaction on the database. For efficiency reasons, you should close your database instance only when you believe you will no longer require it—typically, when the Activity or Service using it is stopped.
Extracting Values from a Cursor
To extract values from a Cursor, first use the moveTo<location> methods described earlier to position the cursor at the correct row of the result Cursor, and then use the type-safe get<type> methods (passing in a column index) to return the value stored at the current row for the specified column. To find the column index of a particular column within a result Cursor, use its getColumnIndexOrThrow and getColumnIndex methods.
It's good practice to use getColumnIndexOrThrow when you expect the column to exist in all cases. Using getColumnIndex and checking for a –1 result, as shown in the following snippet, is a more efficient technique than catching exceptions when the column might not exist in every case.
int columnIndex = cursor.getColumnIndex(KEY_COLUMN_1_NAME);
if (columnIndex > -1) {
String columnValue = cursor.getString(columnIndex);
// Do something with the column value.
}
else {
// Do something else if the column doesn't exist.
}
![]()
Database implementations should publish static constants that provide the column names. These static constants are typically exposed from within the database contract class or the Content Provider.
Listing 8.4 shows how to iterate over a result Cursor, extracting and averaging a column of float values.
Listing 8.4: Extracting values from a Cursor
float totalHoard = 0f;
float averageHoard = 0f;
// Find the index to the column(s) being used.
int GOLD_HOARDED_COLUMN_INDEX =
cursor.getColumnIndexOrThrow(KEY_GOLD_HOARDED_COLUMN);
// Iterate over the cursors rows.
// The Cursor is initialized at before first, so we can
// check only if there is a "next" row available. If the
// result Cursor is empty this will return false.
while (cursor.moveToNext()) {
float hoard = cursor.getFloat(GOLD_HOARDED_COLUMN_INDEX);
totalHoard += hoard;
}
// Calculate an average -- checking for divide by zero errors.
float cursorCount = cursor.getCount();
averageHoard = cursorCount > 0 ?
(totalHoard / cursorCount) : Float.NaN;
// Close the Cursor when you've finished with it.
cursor.close();
code snippet PA4AD_ Ch08_GoldHoarder/src/MyHoardDatabase.java
Because SQLite database columns are loosely typed, you can cast individual values into valid types, as required. For example, values stored as floats can be read back as strings.
When you have finished using your result Cursor, it's important to close it to avoid memory leaks and reduce your application's resource load:
cursor.close();
Adding, Updating, and Removing Rows
The SQLiteDatabase class exposes insert, delete, and update methods that encapsulate the SQL statements required to perform these actions. Additionally, the execSQL method lets you execute any valid SQL statement on your database tables, should you want to execute these (or any other) operations manually.
Any time you modify the underlying database values, you should update your Cursors by running a new query.
Inserting Rows
To create a new row, construct a ContentValues object and use its put methods to add name/value pairs representing each column name and its associated value.
Insert the new row by passing the Content Values into the insert method called on the target database—along with the table name—as shown in Listing 8.5.
Listing 8.5: Inserting new rows into a database
// Create a new row of values to insert.
ContentValues newValues = new ContentValues();
// Assign values for each row.
newValues.put(KEY_GOLD_HOARD_NAME_COLUMN, hoardName);
newValues.put(KEY_GOLD_HOARDED_COLUMN, hoardValue);
newValues.put(KEY_GOLD_HOARD_ACCESSIBLE_COLUMN, hoardAccessible);
// [ ... Repeat for each column / value pair ... ]
// Insert the row into your table
SQLiteDatabase db = hoardDBOpenHelper.getWritableDatabase();
db.insert(HoardDBOpenHelper.DATABASE_TABLE, null, newValues);
code snippet PA4AD_ Ch08_GoldHoarder/src/MyHoardDatabase.java
![]()
The second parameter used in the insert method shown in Listing 8.5 is known as the null column hack.
If you want to add an empty row to an SQLite database, by passing in an empty Content Values object, you must also pass in the name of a column whose value can be explicitly set to null.
When inserting a new row into an SQLite database, you must always explicitly specify at least one column and a corresponding value, the latter of which can be null. If you set the null column hack parameter to null, as shown in Listing 8.5, when inserting an empty Content Values object SQLite will throw an exception.
It's generally good practice to ensure that your code doesn't attempt to insert empty Content Values into an SQLite database.
Updating Rows
Updating rows is also done with Content Values. Create a new ContentValues object, using the put methods to assign new values to each column you want to update. Call the update method on the database, passing in the table name, the updated Content Values object, and a where clause that specifies the row(s) to update, as shown in Listing 8.6.
Listing 8.6: Updating a database row
// Create the updated row Content Values.
ContentValues updatedValues = new ContentValues();
// Assign values for each row.
updatedValues.put(KEY_GOLD_HOARDED_COLUMN, newHoardValue);
// [ ... Repeat for each column to update ... ]
// Specify a where clause the defines which rows should be
// updated. Specify where arguments as necessary.
String where = KEY_ID + "=" + hoardId;
String whereArgs[] = null;
// Update the row with the specified index with the new values.
SQLiteDatabase db = hoardDBOpenHelper.getWritableDatabase();
db.update(HoardDBOpenHelper.DATABASE_TABLE, updatedValues,
where, whereArgs);
code snippet PA4AD_ Ch08_GoldHoarder/src/MyHoardDatabase.java
Deleting Rows
To delete a row, simply call the delete method on a database, specifying the table name and a where clause that returns the rows you want to delete, as shown in Listing 8.7.
Listing 8.7: Deleting a database row
// Specify a where clause that determines which row(s) to delete.
// Specify where arguments as necessary.
String where = KEY_GOLD_HOARDED_COLUMN + "=" + 0;
String whereArgs[] = null;
// Delete the rows that match the where clause.
SQLiteDatabase db = hoardDBOpenHelper.getWritableDatabase();
db.delete(HoardDBOpenHelper.DATABASE_TABLE, where, whereArgs);
code snippet PA4AD_ Ch08_GoldHoarder/src/MyHoardDatabase.java
Creating Content Providers
Content Providers provide an interface for publishing data that will be consumed using a Content Resolver. They allow you to decouple the application components that consume data from their underlying data sources, providing a generic mechanism through which applications can share their data or consume data provided by others.
To create a new Content Provider, extend the abstract ContentProvider class:
public class MyContentProvider extends ContentProvider
Like the database contract class described in the previous section, it's good practice to include static database constants—particularly column names and the Content Provider authority—that will be required for transacting with, and querying, the database.
You will also need to override the onCreate handler to initialize the underlying data source, as well as the query, update, delete, insert, and getType methods to implement the interface used by the Content Resolver to interact with the data, as described in the following sections.
Registering Content Providers
Like Activities and Services, Content Providers must be registered in your application manifest before the Content Resolver can discover them. This is done using a provider tag that includes a name attribute describing the Provider's class name and an authorities tag.
Use the authorities tag to define the base URI of the Provider's authority. A Content Provider's authority is used by the Content Resolver as an address and used to find the database you want to interact with.
Each Content Provider authority must be unique, so it's good practice to base the URI path on your package name. The general form for defining a Content Provider's authority is as follows:
com.<CompanyName>.provider.<ApplicationName>
The completed provider tag should follow the format show in the following XML snippet:
<provider android:name=".MyContentProvider"
android:authorities="com.paad.skeletondatabaseprovider"/>
Publishing Your Content Provider's URI Address
Each Content Provider should expose its authority using a public static CONTENT_URI property to make it more easily discoverable. This should include a data path to the primary content—for example:
public static final Uri CONTENT_URI =
Uri.parse("content://com.paad.skeletondatabaseprovider/elements");
These content URIs will be used when accessing your Content Provider using a Content Resolver. A query made using this form represents a request for all rows, whereas an appended trailing /<rownumber>, as shown in the following snippet, represents a request for a single record:
content://com.paad.skeletondatabaseprovider/elements/5
It's good practice to support access to your provider for both of these forms. The simplest way to do this is to use a UriMatcher, a useful class that parses URIs and determines their forms.
Listing 8.8 shows the implementation pattern for defining a URI Matcher that analyzes the form of a URI—specifically determining if a URI is a request for all data or for a single row.
Listing 8.8: Defining a UriMatcher to determine if a request is for all elements or a single row
// Create the constants used to differentiate between the different URI
// requests.
private static final int ALLROWS = 1;
private static final int SINGLE_ROW = 2;
private static final UriMatcher uriMatcher;
// Populate the UriMatcher object, where a URI ending in
// ‘elements' will correspond to a request for all items,
// and ‘elements/[rowID]’ represents a single row.
static {
uriMatcher = new UriMatcher(UriMatcher.NO_MATCH);
uriMatcher.addURI("com.paad.skeletondatabaseprovider",
"elements", ALLROWS);
uriMatcher.addURI("com.paad.skeletondatabaseprovider",
"elements/#", SINGLE_ROW);
}
code snippet PA4AD_ Ch08_DatabaseSkeleton/src/MyContentProvider.java
You can use the same technique to expose alternative URIs within the same Content Provider that represent different subsets of data, or different tables within your database.
Having distinguished between full table and single row queries, you can use the SQLiteQueryBuilder class to easily apply the additional selection condition to a query, as shown in the following snippet:
SQLiteQueryBuilder queryBuilder = new SQLiteQueryBuilder();
// If this is a row query, limit the result set to the passed in row.
switch (uriMatcher.match(uri)) {
case SINGLE_ROW :
String rowID = uri.getPathSegments().get(1);
queryBuilder.appendWhere(KEY_ID + "=" + rowID);
default: break;
}
You'll learn how to perform a query using the SQLite Query Builder later in the “Implementing Content Provider Queries” section.
Creating the Content Provider's Database
To initialize the data source you plan to access through the Content Provider, override the onCreate method, as shown in Listing 8.9. This is typically handled using an SQLite Open Helper implementation, of the type described in the previous section, allowing you to effectively defer creating and opening the database until it's required.
Listing 8.9: Creating the Content Provider's database
private MySQLiteOpenHelper myOpenHelper;
@Override
public boolean onCreate() {
// Construct the underlying database.
// Defer opening the database until you need to perform
// a query or transaction.
myOpenHelper = new MySQLiteOpenHelper(getContext(),
MySQLiteOpenHelper.DATABASE_NAME, null,
MySQLiteOpenHelper.DATABASE_VERSION);
return true;
}
code snippet PA4AD_ Ch08_DatabaseSkeleton/src/MyContentProvider.java
![]()
When your application is launched, the onCreate handler of each of its Content Providers is called on the main application thread.
Like the database examples in the previous section, it's best practice to use an SQLite Open Helper to defer opening (and where necessary, creating) the underlying database until it is required within the query or transaction methods of your Content Provider.
For efficiency reasons, it's preferable to leave your Content Provider open while your application is running; it's not necessary to manually close the database at any stage. If the system requires additional resources, your application will be killed and the associated databases closed.
Implementing Content Provider Queries
To support queries with your Content Provider, you must implement the query and getType methods. Content Resolvers use these methods to access the underlying data, without knowing its structure or implementation. These methods enable applications to share data across application boundaries without having to publish a specific interface for each data source.
The most common scenario is to use a Content Provider to provide access to an SQLite database, but within these methods you can access any source of data (including files or application instance variables).
Notice that the UriMatcher object is used to refine the transaction and query requests, and the SQLite Query Builder is used as a convenient helper for performing row-based queries.
Listing 8.10 shows the skeleton code for implementing queries within a Content Provider using an underlying SQLite database.
Listing 8.10: Implementing queries and transactions within a Content Provider
@Override
public Cursor query(Uri uri, String[] projection, String selection,
String[] selectionArgs, String sortOrder) {
// Open the database.
SQLiteDatabase db;
try {
db = myOpenHelper.getWritableDatabase();
} catch (SQLiteException ex) {
db = myOpenHelper.getReadableDatabase();
}
// Replace these with valid SQL statements if necessary.
String groupBy = null;
String having = null;
// Use an SQLite Query Builder to simplify constructing the
// database query.
SQLiteQueryBuilder queryBuilder = new SQLiteQueryBuilder();
// If this is a row query, limit the result set to the passed in row.
switch (uriMatcher.match(uri)) {
case SINGLE_ROW :
String rowID = uri.getPathSegments().get(1);
queryBuilder.appendWhere(KEY_ID + "=" + rowID);
default: break;
}
// Specify the table on which to perform the query. This can
// be a specific table or a join as required.
queryBuilder.setTables(MySQLiteOpenHelper.DATABASE_TABLE);
// Execute the query.
Cursor cursor = queryBuilder.query(db, projection, selection,
selectionArgs, groupBy, having, sortOrder);
// Return the result Cursor.
return cursor;
}
code snippet PA4AD_ Ch08_DatabaseSkeleton/src/MyContentProvider.java
Having implemented queries, you must also specify a MIME type to identify the data returned. Override the getType method to return a string that uniquely describes your data type.
The type returned should include two forms, one for a single entry and another for all the entries, following these forms:
· Single item:
vnd.android.cursor.item/vnd.<companyname>.<contenttype>
· All items:
vnd.android.cursor.dir/vnd.<companyname>.<contenttype>
Listing 8.11 shows how to override the getType method to return the correct MIME type based on the URI passed in.
Listing 8.11: Returning a Content Provider MIME type
@Override
public String getType(Uri uri) {
// Return a string that identifies the MIME type
// for a Content Provider URI
switch (uriMatcher.match(uri)) {
case ALLROWS:
return "vnd.android.cursor.dir/vnd.paad.elemental";
case SINGLE_ROW:
return "vnd.android.cursor.item/vnd.paad.elemental";
default:
throw new IllegalArgumentException("Unsupported URI: " +
uri);
}
}
code snippet PA4AD_ Ch08_DatabaseSkeleton/src/MyContentProvider.java
Content Provider Transactions
To expose delete, insert, and update transactions on your Content Provider, implement the corresponding delete, insert, and update methods.
Like the query method, these methods are used by Content Resolvers to perform transactions on the underlying data without knowing its implementation—allowing applications to update data across application boundaries.
When performing transactions that modify the dataset, it's good practice to call the Content Resolver's notifyChange method. This will notify any Content Observers, registered for a given Cursor using the Cursor.registerContentObserver method, that the underlying table (or a particular row) has been removed, added, or updated.
As with Content Provider queries, the most common use case is performing transactions on an SQLite database, though this is not a requirement. Listing 8.12 shows the skeleton code for implementing transactions within a Content Provider on an underlying SQLite database.
Listing 8.12: Typical Content Provider transaction implementations
@Override
public int delete(Uri uri, String selection, String[] selectionArgs) {
// Open a read / write database to support the transaction.
SQLiteDatabase db = myOpenHelper.getWritableDatabase();
// If this is a row URI, limit the deletion to the specified row.
switch (uriMatcher.match(uri)) {
case SINGLE_ROW :
String rowID = uri.getPathSegments().get(1);
selection = KEY_ID + "=" + rowID
+ (!TextUtils.isEmpty(selection) ?
" AND (" + selection + ‘)’ : "");
default: break;
}
// To return the number of deleted items you must specify a where
// clause. To delete all rows and return a value pass in "1".
if (selection == null)
selection = "1";
// Perform the deletion.
int deleteCount = db.delete(MySQLiteOpenHelper.DATABASE_TABLE,
selection, selectionArgs);
// Notify any observers of the change in the data set.
getContext().getContentResolver().notifyChange(uri, null);
// Return the number of deleted items.
return deleteCount;
}
@Override
public Uri insert(Uri uri, ContentValues values) {
// Open a read / write database to support the transaction.
SQLiteDatabase db = myOpenHelper.getWritableDatabase();
// To add empty rows to your database by passing in an empty
// Content Values object you must use the null column hack
// parameter to specify the name of the column that can be
// set to null.
String nullColumnHack = null;
// Insert the values into the table
long id = db.insert(MySQLiteOpenHelper.DATABASE_TABLE,
nullColumnHack, values);
// Construct and return the URI of the newly inserted row.
if (id > -1) {
// Construct and return the URI of the newly inserted row.
Uri insertedId = ContentUris.withAppendedId(CONTENT_URI, id);
// Notify any observers of the change in the data set.
getContext().getContentResolver().notifyChange(insertedId, null);
return insertedId;
}
else
return null;
}
@Override
public int update(Uri uri, ContentValues values, String selection,
String[] selectionArgs) {
// Open a read / write database to support the transaction.
SQLiteDatabase db = myOpenHelper.getWritableDatabase();
// If this is a row URI, limit the deletion to the specified row.
switch (uriMatcher.match(uri)) {
case SINGLE_ROW :
String rowID = uri.getPathSegments().get(1);
selection = KEY_ID + "=" + rowID
+ (!TextUtils.isEmpty(selection) ?
" AND (" + selection + ‘)’ : "");
default: break;
}
// Perform the update.
int updateCount = db.update(MySQLiteOpenHelper.DATABASE_TABLE,
values, selection, selectionArgs);
// Notify any observers of the change in the data set.
getContext().getContentResolver().notifyChange(uri, null);
return updateCount;
}
code snippet PA4AD_ Ch08_DatabaseSkeleton/src/MyContentProvider.java
![]()
When working with content URIs, the ContentUris class includes the withAppendedId convenience method to easily append a specific row ID to the CONTENT_URI of a Content Provider. This is used in Listing 8.12 to construct the URI of newly insert rows and will be used in the following sections to address a particular row when making database queries and transactions.
Storing Files in a Content Provider
Rather than store large files within your Content Provider, you should represent them within a table as fully qualified URIs to a file stored somewhere else on the filesystem.
To support files within your table, you must include a column labeled _data that will contain the path to the file represented by that record. This column should not be used by client applications. Override the openFile handler to provide a ParcelFileDescriptor when the Content Resolver requests the file associated with that record.
It's typical for a Content Provider to include two tables, one that is used only to store the external files, and another that includes a user-facing column containing a URI reference to the rows in the file table.
Listing 8.13 shows the skeleton code for overriding the openFile handler within a Content Provider. In this instance, the name of the file will be represented by the ID of the row to which it belongs.
Listing 8.13: Storing files within your Content Provider
@Override
public ParcelFileDescriptor openFile(Uri uri, String mode)
throws FileNotFoundException {
// Find the row ID and use it as a filename.
String rowID = uri.getPathSegments().get(1);
// Create a file object in the application's external
// files directory.
String picsDir = Environment.DIRECTORY_PICTURES;
File file =
new File(getContext().getExternalFilesDir(picsDir), rowID);
// If the file doesn't exist, create it now.
if (!file.exists()) {
try {
file.createNewFile();
} catch (IOException e) {
Log.d(TAG, "File creation failed: " + e.getMessage());
}
}
// Translate the mode parameter to the corresponding Parcel File
// Descriptor open mode.
int fileMode = 0;
if (mode.contains("w"))
fileMode |= ParcelFileDescriptor.MODE_WRITE_ONLY;
if (mode.contains("r"))
fileMode |= ParcelFileDescriptor.MODE_READ_ONLY;
if (mode.contains("+"))
fileMode |= ParcelFileDescriptor.MODE_APPEND;
// Return a Parcel File Descriptor that represents the file.
return ParcelFileDescriptor.open(file, fileMode);
}
code snippet PA4AD_ Ch08_DatabaseSkeleton/src/MyHoardContentProvider.java
![]()
Because the files associated with rows in the database are stored externally, it's important to consider what the effect of deleting a row should have on the underlying file.
A Skeleton Content Provider Implementation
Listing 8.14 shows a skeleton implementation of a Content Provider. It uses an SQLite Open Helper to manage the database, and simply passes each query or transaction directly to the underlying SQLite database.
Listing 8.14: A skeleton Content Provider implementation
import android.content.ContentProvider;
import android.content.ContentUris;
import android.content.ContentValues;
import android.content.Context;
import android.content.UriMatcher;
import android.database.Cursor;
import android.database.sqlite.SQLiteDatabase;
import android.database.sqlite.SQLiteDatabase.CursorFactory;
import android.database.sqlite.SQLiteOpenHelper;
import android.database.sqlite.SQLiteQueryBuilder;
import android.net.Uri;
import android.text.TextUtils;
import android.util.Log;
public class MyContentProvider extends ContentProvider {
public static final Uri CONTENT_URI =
Uri.parse("content://com.paad.skeletondatabaseprovider/elements");
// Create the constants used to differentiate between
// the different URI requests.
private static final int ALLROWS = 1;
private static final int SINGLE_ROW = 2;
private static final UriMatcher uriMatcher;
// Populate the UriMatcher object, where a URI ending
// in ‘elements' will correspond to a request for all
// items, and ‘elements/[rowID]’ represents a single row.
static {
uriMatcher = new UriMatcher(UriMatcher.NO_MATCH);
uriMatcher.addURI("com.paad.skeletondatabaseprovider",
"elements", ALLROWS);
uriMatcher.addURI("com.paad.skeletondatabaseprovider",
"elements/#", SINGLE_ROW);
}
// The index (key) column name for use in where clauses.
public static final String KEY_ID = "_id";
// The name and column index of each column in your database.
// These should be descriptive.
public static final String KEY_COLUMN_1_NAME = "KEY_COLUMN_1_NAME";
// TODO: Create public field for each column in your table.
// SQLite Open Helper variable
private MySQLiteOpenHelper myOpenHelper;
@Override
public boolean onCreate() {
// Construct the underlying database.
// Defer opening the database until you need to perform
// a query or transaction.
myOpenHelper = new MySQLiteOpenHelper(getContext(),
MySQLiteOpenHelper.DATABASE_NAME, null,
MySQLiteOpenHelper.DATABASE_VERSION);
return true;
}
@Override
public Cursor query(Uri uri, String[] projection, String selection,
String[] selectionArgs, String sortOrder) {
// Open the database.
SQLiteDatabase db = myOpenHelper.getWritableDatabase();
// Replace these with valid SQL statements if necessary.
String groupBy = null;
String having = null;
SQLiteQueryBuilder queryBuilder = new SQLiteQueryBuilder();
queryBuilder.setTables(MySQLiteOpenHelper.DATABASE_TABLE);
// If this is a row query, limit the result set to the
// passed in row.
switch (uriMatcher.match(uri)) {
case SINGLE_ROW :
String rowID = uri.getPathSegments().get(1);
queryBuilder.appendWhere(KEY_ID + "=" + rowID);
default: break;
}
Cursor cursor = queryBuilder.query(db, projection, selection,
selectionArgs, groupBy, having, sortOrder);
return cursor;
}
@Override
public int delete(Uri uri, String selection, String[] selectionArgs)
{
// Open a read / write database to support the transaction.
SQLiteDatabase db = myOpenHelper.getWritableDatabase();
// If this is a row URI, limit the deletion to the specified row.
switch (uriMatcher.match(uri)) {
case SINGLE_ROW :
String rowID = uri.getPathSegments().get(1);
selection = KEY_ID + "=" + rowID
+ (!TextUtils.isEmpty(selection) ?
" AND (" + selection + ‘)’ : "");
default: break;
}
// To return the number of deleted items, you must specify a where
// clause. To delete all rows and return a value, pass in "1".
if (selection == null)
selection = "1";
// Execute the deletion.
int deleteCount = db.delete(MySQLiteOpenHelper.DATABASE_TABLE,
selection, selectionArgs);
// Notify any observers of the change in the data set.
getContext().getContentResolver().notifyChange(uri, null);
return deleteCount;
}
@Override
public Uri insert(Uri uri, ContentValues values) {
// Open a read / write database to support the transaction.
SQLiteDatabase db = myOpenHelper.getWritableDatabase();
// To add empty rows to your database by passing in an empty
// Content Values object, you must use the null column hack
// parameter to specify the name of the column that can be
// set to null.
String nullColumnHack = null;
// Insert the values into the table
long id = db.insert(MySQLiteOpenHelper.DATABASE_TABLE,
nullColumnHack, values);
if (id > -1) {
// Construct and return the URI of the newly inserted row.
Uri insertedId = ContentUris.withAppendedId(CONTENT_URI, id);
// Notify any observers of the change in the data set.
getContext().getContentResolver().notifyChange(insertedId, null);
return insertedId;
}
else
return null;
}
@Override
public int update(Uri uri, ContentValues values, String selection,
String[] selectionArgs) {
// Open a read / write database to support the transaction.
SQLiteDatabase db = myOpenHelper.getWritableDatabase();
// If this is a row URI, limit the deletion to the specified row.
switch (uriMatcher.match(uri)) {
case SINGLE_ROW :
String rowID = uri.getPathSegments().get(1);
selection = KEY_ID + "=" + rowID
+ (!TextUtils.isEmpty(selection) ?
" AND (" + selection + ‘)’ : "");
default: break;
}
// Perform the update.
int updateCount = db.update(MySQLiteOpenHelper.DATABASE_TABLE,
values, selection, selectionArgs);
// Notify any observers of the change in the data set.
getContext().getContentResolver().notifyChange(uri, null);
return updateCount;
}
@Override
public String getType(Uri uri) {
// Return a string that identifies the MIME type
// for a Content Provider URI
switch (uriMatcher.match(uri)) {
case ALLROWS:
return "vnd.android.cursor.dir/vnd.paad.elemental";
case SINGLE_ROW:
return "vnd.android.cursor.item/vnd.paad.elemental";
default:
throw new IllegalArgumentException("Unsupported URI: " + uri);
}
}
private static class MySQLiteOpenHelper extends SQLiteOpenHelper {
// [ ... SQLite Open Helper Implementation ... ]
}
}
code snippet PA4AD_ Ch08_DatabaseSkeleton/src/MyContentProvider.java
Using Content Providers
The following sections introduce the ContentResolver class and how to use it to query and transact with a Content Provider.
Introducing the Content Resolver
Each application includes a ContentResolver instance, accessible using the getContentResolver method, as follows:
ContentResolver cr = getContentResolver();
When Content Providers are used to expose data, Content Resolvers are the corresponding class used to query and perform transactions on those Content Providers. Whereas Content Providers provide an abstraction from the underlying data, Content Resolvers provide an abstraction from the Content Provider being queried or transacted.
The Content Resolver includes query and transaction methods corresponding to those defined within your Content Providers. The Content Resolver does not need to know the implementation of the Content Providers it is interacting with—each query and transaction method simply accepts a URI that specifies the Content Provider to interact with.
A Content Provider's URI is its authority as defined by its manifest node and typically published as a static constant on the Content Provider implementation.
Content Providers usually accept two forms of URI, one for requests against all data and another that specifies only a single row. The form for the latter appends the row identifier (in the form /<rowID> ) to the base URI.
Querying Content Providers
Content Provider queries take a form very similar to that of database queries. Query results are returned as Cursors over a result set in the same way as described previously in this chapter for databases.
You can extract values from the result Cursor using the same techniques described in the section “Extracting Results from a Cursor.”
Using the query method on the ContentResolver object, pass in the following:
· A URI to the Content Provider you want to query.
· A projection that lists the columns you want to include in the result set.
· A where clause that defines the rows to be returned. You can include ? wildcards that will be replaced by the values passed into the selection argument parameter.
· An array of selection argument strings that will replace the ? wildcards in the where clause.
· A string that describes the order of the returned rows.
Listing 8.15 shows how to use a Content Resolver to apply a query to a Content Provider.
Listing 8.15: Querying a Content Provider with a Content Resolver
// Get the Content Resolver.
ContentResolver cr = getContentResolver();
// Specify the result column projection. Return the minimum set
// of columns required to satisfy your requirements.
String[] result_columns = new String[] {
MyHoardContentProvider.KEY_ID,
MyHoardContentProvider.KEY_GOLD_HOARD_ACCESSIBLE_COLUMN,
MyHoardContentProvider.KEY_GOLD_HOARDED_COLUMN };
// Specify the where clause that will limit your results.
String where = MyHoardContentProvider.KEY_GOLD_HOARD_ACCESSIBLE_COLUMN
+ "=" + 1;
// Replace these with valid SQL statements as necessary.
String whereArgs[] = null;
String order = null;
// Return the specified rows.
Cursor resultCursor = cr.query(MyHoardContentProvider.CONTENT_URI,
result_columns, where, whereArgs, order);
code snippet PA4AD_ Ch08_DatabaseSkeleton/src/DatabaseSkeletonActivity.java
In this example the query is made using static constants provided by the MyHoardContentProvider class; however, it's worth noting that a third-party application can perform the same query, provided it knows the content URI and column names, and has the appropriate permissions.
Most Content Providers also include a shortcut URI pattern that allows you to address a particular row by appending a row ID to the content URI. You can use the static withAppendedId method from the ContentUris class to simplify this, as shown in Listing 8.16.
Listing 8.16: Querying a Content Provider for a particular row
// Get the Content Resolver.
ContentResolver cr = getContentResolver();
// Specify the result column projection. Return the minimum set
// of columns required to satisfy your requirements.
String[] result_columns = new String[] {
MyHoardContentProvider.KEY_ID,
MyHoardContentProvider.KEY_GOLD_HOARD_NAME_COLUMN,
MyHoardContentProvider.KEY_GOLD_HOARDED_COLUMN };
// Append a row ID to the URI to address a specific row.
Uri rowAddress =
ContentUris.withAppendedId(MyHoardContentProvider.CONTENT_URI,
rowId);
// These are null as we are requesting a single row.
String where = null;
String whereArgs[] = null;
String order = null;
// Return the specified rows.
Cursor resultCursor = cr.query(rowAddress,
result_columns, where, whereArgs, order);
code snippet PA4AD_ Ch08_DatabaseSkeleton/src/DatabaseSkeletonActivity.java
To extract values from a result Cursor, use the same techniques described earlier in this chapter, using the moveTo<location> methods in combination with the get<type> methods to extract values from the specified row and column.
Listing 8.17 extends the code from Listing 8.15, by iterating over a result Cursor and displaying the name of the largest hoard.
Listing 8.17: Extracting values from a Content Provider result Cursor
float largestHoard = 0f;
String hoardName = "No Hoards";
// Find the index to the column(s) being used.
int GOLD_HOARDED_COLUMN_INDEX = resultCursor.getColumnIndexOrThrow(
MyHoardContentProvider.KEY_GOLD_HOARDED_COLUMN);
int HOARD_NAME_COLUMN_INDEX = resultCursor.getColumnIndexOrThrow(
MyHoardContentProvider.KEY_GOLD_HOARD_NAME_COLUMN);
// Iterate over the cursors rows.
// The Cursor is initialized at before first, so we can
// check only if there is a "next" row available. If the
// result Cursor is empty, this will return false.
while (resultCursor.moveToNext()) {
float hoard = resultCursor.getFloat(GOLD_HOARDED_COLUMN_INDEX);
if (hoard > largestHoard) {
largestHoard = hoard;
hoardName = resultCursor.getString(HOARD_NAME_COLUMN_INDEX);
}
}
// Close the Cursor when you've finished with it.
resultCursor.close();
code snippet PA4AD_ Ch08_DatabaseSkeleton/src/DatabaseSkeletonActivity.java
When you have finished using your result Cursor it's important to close it to avoid memory leaks and reduce your application's resource load.
resultCursor.close();
You'll see more examples of querying for content later in this chapter when the native Android Content Providers are introduced.
![]()
Database queries can take significant time to execute. By default, the Content Resolver will execute queries—as well as other transactions—on the main application thread.
To ensure your application remains smooth and responsive, you must execute all queries asynchronously, as described in the following section.
Querying for Content Asynchronously Using the Cursor Loader
Database operations can be time-consuming, so it's particularly important that any database and Content Provider queries are not performed on the main application thread.
It can be difficult to manage Cursors, synchronize correctly with the UI thread, and ensure all queries occur on a background. To help simplify the process, Android 3.0 (API level 11) introduced the Loader class. Loaders are now also available within the Android Support Library, making them available for use with every Android platform back to Android 1.6.
Introducing Loaders
Loaders are available within every Activity and Fragment via the LoaderManager. They are designed to asynchronously load data and monitor the underlying data source for changes.
While loaders can be implemented to load any kind of data from any data source, of particular interest is the CursorLoader class. The Cursor Loader allows you to perform asynchronous queries against Content Providers, returning a result Cursor and notifications of any updates to the underlying provider.
![]()
To maintain concise and encapsulated code, not all the examples in this chapter utilize a Cursor Loader when making a Content Provider query. For your own applications it's best practice to always use a Cursor Loader to manage Cursors within your Activities and Fragments.
Using the Cursor Loader
The Cursor Loader handles all the management tasks required to use a Cursor within an Activity or Fragment, effectively deprecating the managedQuery and startManagingCursor Activity methods. This includes managing the Cursor lifecycle to ensure Cursors are closed when the Activity is terminated.
Cursor Loaders also observe changes in the underlying query, so you no longer need to implement your own Content Observers.
Implementing Cursor Loader Callbacks
To use a Cursor Loader, create a new LoaderManager.LoaderCallbacks implementation. Loader Callbacks are implemented using generics, so you should specify the explicit type being loaded, in this case Cursors, when implementing your own.
LoaderManager.LoaderCallbacks<Cursor> loaderCallback
= new LoaderManager.LoaderCallbacks<Cursor>() {
If you require only a single Loader implementation within your Fragment or Activity, this is typically done by having that component implement the interface.
The Loader Callbacks consist of three handlers:
· onCreateLoader—Called when the loader is initialized, this handler should create and return new Cursor Loader object. The Cursor Loader constructor arguments mirror those required for executing a query using the Content Resolver. Accordingly, when this handler is executed, the query parameters you specify will be used to perform a query using the Content Resolver.
· onLoadFinished—When the Loader Manager has completed the asynchronous query, the onLoadFinished handler is called, with the result Cursor passed in as a parameter. Use this Cursor to update adapters and other UI elements.
· onLoaderReset—When the Loader Manager resets your Cursor Loader, onLoaderReset is called. Within this handler you should release any references to data returned by the query and reset the UI accordingly. The Cursor will be closed by the Loader Manager, so you shouldn't attempt to close it.
![]()
The onLoadFinished and onLoaderReset are not synchronized to the UI thread. If you want to modify UI elements directly, you will first need to synchronize with the UI thread using a Handler or similar mechanism. Synchronizing with the UI thread is covered in more details in Chapter 9, “Working in the Background.”
Listing 8.18 show a skeleton implementation of the Cursor Loader Callbacks.
Listing 8.18: Implementing Loader Callbacks
public Loader<Cursor> onCreateLoader(int id, Bundle args) {
// Construct the new query in the form of a Cursor Loader. Use the id
// parameter to construct and return different loaders.
String[] projection = null;
String where = null;
String[] whereArgs = null;
String sortOrder = null;
// Query URI
Uri queryUri = MyContentProvider.CONTENT_URI;
// Create the new Cursor loader.
return new CursorLoader(DatabaseSkeletonActivity.this, queryUri,
projection, where, whereArgs, sortOrder);
}
public void onLoadFinished(Loader<Cursor> loader, Cursor cursor) {
// Replace the result Cursor displayed by the Cursor Adapter with
// the new result set.
adapter.swapCursor(cursor);
// This handler is not synchronized with the UI thread, so you
// will need to synchronize it before modifying any UI elements
// directly.
}
public void onLoaderReset(Loader<Cursor> loader) {
// Remove the existing result Cursor from the List Adapter.
adapter.swapCursor(null);
// This handler is not synchronized with the UI thread, so you
// will need to synchronize it before modifying any UI elements
// directly.
}
code snippet PA4AD_ Ch08_DatabaseSkeleton/src/DatabaseSkeletonActivity.java
Initializing and Restarting the Cursor Loader
Each Activity and Fragment provides access to its Loader Manager through a call to getLoaderManager.
LoaderManager loaderManager = getLoaderManager();
To initialize a new Loader, call the Loader Manager's initLoader method, passing in a reference to your Loader Callback implementation, an optional arguments Bundle, and a loader identifier.
Bundle args = null;
loaderManager.initLoader(LOADER_ID, args, myLoaderCallbacks);
This is generally done within the onCreate method of the host Activity (or the onActivityCreated handler in the case of Fragments).
If a loader corresponding to the identifier used doesn't already exist, it is created within the associated Loader Callback's onCreateLoader handler as described in the previous section.
In most circumstances this is all that is required. The Loader Manager will handle the lifecycle of any Loaders you initialize and the underlying queries and cursors. Similarly, it will manage changes to the query results.
After a Loader has been created, repeated calls to initLoader will simply return the existing Loader. Should you want to discard the previous Loader and re-create it, use the restartLoader method.
loaderManager.restartLoader(LOADER_ID, args, myLoaderCallbacks);
This is typically necessary where your query parameters change, such as search queries or changes in sort order.
Adding, Deleting, and Updating Content
To perform transactions on Content Providers, use the insert, delete, and update methods on the Content Resolver. Like queries, unless moved to a worker thread, Content Provider transactions will execute on the main application thread.
![]()
Database operations can be time-consuming, so it's important to execute each transaction asynchronously.
Inserting Content
The Content Resolver offers two methods for inserting new records into a Content Provider: insert and bulkInsert. Both methods accept the URI of the Content Provider into which you're inserting; the insert method takes a single new ContentValues object, and the bulkInsert method takes an array.
The insert method returns a URI to the newly added record, whereas the bulkInsert method returns the number of successfully added rows.
Listing 8.19 shows how to use the insert method to add new rows to a Content Provider.
Listing 8.19: Inserting new rows into a Content Provider
// Create a new row of values to insert.
ContentValues newValues = new ContentValues();
// Assign values for each row.
newValues.put(MyHoardContentProvider.KEY_GOLD_HOARD_NAME_COLUMN,
hoardName);
newValues.put(MyHoardContentProvider.KEY_GOLD_HOARDED_COLUMN,
hoardValue);
newValues.put(MyHoardContentProvider.KEY_GOLD_HOARD_ACCESSIBLE_COLUMN,
hoardAccessible);
// [ ... Repeat for each column / value pair ... ]
// Get the Content Resolver
ContentResolver cr = getContentResolver();
// Insert the row into your table
Uri myRowUri = cr.insert(MyHoardContentProvider.CONTENT_URI,
newValues);
code snippet PA4AD_ Ch08_DatabaseSkeleton/src/DatabaseSkeletonActivity.java
Deleting Content
To delete a single record, call delete on the Content Resolver, passing in the URI of the row you want to remove. Alternatively, you can specify a where clause to remove multiple rows. Listing 8.20 demonstrates how to delete a number of rows matching a given condition.
Listing 8.20: Deleting rows from a Content Provider
// Specify a where clause that determines which row(s) to delete.
// Specify where arguments as necessary.
String where = MyHoardContentProvider.KEY_GOLD_HOARDED_COLUMN +
"=" + 0;
String whereArgs[] = null;
// Get the Content Resolver.
ContentResolver cr = getContentResolver();
// Delete the matching rows
int deletedRowCount =
cr.delete(MyHoardContentProvider.CONTENT_URI, where, whereArgs);
code snippet PA4AD_ Ch08_DatabaseSkeleton/src/DatabaseSkeletonActivity.java
Updating Content
You can update rows by using the Content Resolver's update method. The update method takes the URI of the target Content Provider, a ContentValues object that maps column names to updated values, and a where clause that indicates which rows to update.
When the update is executed, every row matched by the where clause is updated using the specified Content Values, and the number of successful updates is returned.
Alternatively, you can choose to update a specific row by specifying its unique URI, as shown in Listing 8.21.
Listing 8.21: Updating a record in a Content Provider
// Create the updated row content, assigning values for each row.
ContentValues updatedValues = new ContentValues();
updatedValues.put(MyHoardContentProvider.KEY_GOLD_HOARDED_COLUMN,
newHoardValue);
// [ ... Repeat for each column to update ... ]
// Create a URI addressing a specific row.
Uri rowURI =
ContentUris.withAppendedId(MyHoardContentProvider.CONTENT_URI,
hoardId);
// Specify a specific row so no selection clause is required.
String where = null;
String whereArgs[] = null;
// Get the Content Resolver.
ContentResolver cr = getContentResolver();
// Update the specified row.
int updatedRowCount =
cr.update(rowURI, updatedValues, where, whereArgs);
code snippet PA4AD_ Ch08_DatabaseSkeleton/src/DatabaseSkeletonActivity.java
Accessing Files Stored in Content Providers
Content Providers represent large files as fully qualified URIs rather than raw file blobs; however, this is abstracted away when using the Content Resolver.
To access a file stored in, or to insert a new file into, a Content Provider, simply use the Content Resolver's openOutputStream or openInputStream methods, respectively, passing in the URI to the Content Provider row containing the file you require. The Content Provider will interpret your request and return an input or output stream to the requested file, as shown in Listing 8.22.
Listing 8.22: Reading and writing files from and to a Content Provider
public void addNewHoardWithImage(String hoardName, float hoardValue,
boolean hoardAccessible, Bitmap bitmap) {
// Create a new row of values to insert.
ContentValues newValues = new ContentValues();
// Assign values for each row.
newValues.put(MyHoardContentProvider.KEY_GOLD_HOARD_NAME_COLUMN,
hoardName);
newValues.put(MyHoardContentProvider.KEY_GOLD_HOARDED_COLUMN,
hoardValue);
newValues.put(
MyHoardContentProvider.KEY_GOLD_HOARD_ACCESSIBLE_COLUMN,
hoardAccessible);
// Get the Content Resolver
ContentResolver cr = getContentResolver();
// Insert the row into your table
Uri myRowUri =
cr.insert(MyHoardContentProvider.CONTENT_URI, newValues);
try {
// Open an output stream using the new row's URI.
OutputStream outStream = cr.openOutputStream(myRowUri);
// Compress your bitmap and save it into your provider.
bitmap.compress(Bitmap.CompressFormat.JPEG, 80, outStream);
}
catch (FileNotFoundException e) {
Log.d(TAG, "No file found for this record.");
}
}
public Bitmap getHoardImage(long rowId) {
Uri myRowUri =
ContentUris.withAppendedId(MyHoardContentProvider.CONTENT_URI,
rowId);
try {
// Open an input stream using the new row's URI.
InputStream inStream =
getContentResolver().openInputStream(myRowUri);
// Make a copy of the Bitmap.
Bitmap bitmap = BitmapFactory.decodeStream(inStream);
return bitmap;
}
catch (FileNotFoundException e) {
Log.d(TAG, "No file found for this record.");
}
return null;
}
code snippet PA4AD_ Ch08_DatabaseSkeleton/src/DatabaseSkeletonActivity.java
Creating a To-Do List Database and Content Provider
In Chapter 4, “Building User Interfaces,” you created a To-Do List application. In the following example, you'll create a database and Content Provider to save each of the to-do items added to the list.
1. Start by creating a new ToDoContentProvider class. It will be used to host the database using an SQLiteOpenHelper and manage your database interactions by extending the ContentProvider class. Include stub methods for the onCreate, query, update, insert, delete, and getType methods, and a private skeleton implementation of an SQLiteOpenHelper.
package com.paad.todolist;
import android.content.ContentProvider;
import android.content.ContentUris;
import android.content.ContentValues;
import android.content.Context;
import android.content.UriMatcher;
import android.database.Cursor;
import android.database.sqlite.SQLiteDatabase;
import android.database.sqlite.SQLiteQueryBuilder;
import android.database.sqlite.SQLiteDatabase.CursorFactory;
import android.database.sqlite.SQLiteOpenHelper;
import android.net.Uri;
import android.text.TextUtils;
import android.util.Log;
public class ToDoContentProvider extends ContentProvider {
@Override
public boolean onCreate() {
return false;
}
@Override
public String getType(Uri url) {
return null;
}
@Override
public Cursor query(Uri url, String[] projection, String selection,
String[] selectionArgs, String sort) {
return null;
}
@Override
public Uri insert(Uri url, ContentValues initialValues) {
return null;
}
@Override
public int delete(Uri url, String where, String[] whereArgs) {
return 0;
}
@Override
public int update(Uri url, ContentValues values,
String where, String[]wArgs) {
return 0;
}
private static class MySQLiteOpenHelper extends SQLiteOpenHelper {
public MySQLiteOpenHelper(Context context, String name,
CursorFactory factory, int version) {
super(context, name, factory, version);
}
// Called when no database exists in disk and the helper class needs
// to create a new one.
@Override
public void onCreate(SQLiteDatabase db) {
// TODO Create database tables.
}
// Called when there is a database version mismatch meaning that the version
// of the database on disk needs to be upgraded to the current version.
@Override
public void onUpgrade(SQLiteDatabase db, int oldVersion, int newVersion) {
// TODO Upgrade database.
}
}
}
2. Publish the URI for this provider. This URI will be used to access this Content Provider from within other application components via the ContentResolver.
public static final Uri CONTENT_URI =
Uri.parse("content://com.paad.todoprovider/todoitems");
3. Create public static variables that define the column names. They will be used within the SQLite Open Helper to create the database, and from other application components to extract values from your queries.
public static final String KEY_ID = "_id";
public static final String KEY_TASK = "task";
public static final String KEY_CREATION_DATE = "creation_date";
4. Within the MySQLiteOpenHelper, create variables to store the database name and version, along with the table name of the to-do list item table.
private static final String DATABASE_NAME = "todoDatabase.db";
private static final int DATABASE_VERSION = 1;
private static final String DATABASE_TABLE = "todoItemTable";
5. Still in the MySQLiteOpenHelper, overwrite the onCreate and onUpgrade methods to handle the database creation using the columns from step 3 and standard upgrade logic.
// SQL statement to create a new database.
private static final String DATABASE_CREATE = "create table " +
DATABASE_TABLE + " (" + KEY_ID +
" integer primary key autoincrement, " +
KEY_TASK + " text not null, " +
KEY_CREATION_DATE + "long);";
// Called when no database exists in disk and the helper class needs
// to create a new one.
@Override
public void onCreate(SQLiteDatabase db) {
db.execSQL(DATABASE_CREATE);
}
// Called when there is a database version mismatch, meaning that the version
// of the database on disk needs to be upgraded to the current version.
@Override
public void onUpgrade(SQLiteDatabase db, int oldVersion, int newVersion) {
// Log the version upgrade.
Log.w("TaskDBAdapter", "Upgrading from version " +
oldVersion + " to " +
newVersion + ", which will destroy all old data");
// Upgrade the existing database to conform to the new version. Multiple
// previous versions can be handled by comparing oldVersion and newVersion
// values.
// The simplest case is to drop the old table and create a new one.
db.execSQL("DROP TABLE IF IT EXISTS " + DATABASE_TABLE);
// Create a new one.
onCreate(db);
}
6. Returning to the ToDoContentProvider, add a private variable to store an instance of the MySQLiteOpenHelper class, and create it within the onCreate handler.
private MySQLiteOpenHelper myOpenHelper;
@Override
public boolean onCreate() {
// Construct the underlying database.
// Defer opening the database until you need to perform
// a query or transaction.
myOpenHelper = new MySQLiteOpenHelper(getContext(),
MySQLiteOpenHelper.DATABASE_NAME, null,
MySQLiteOpenHelper.DATABASE_VERSION);
return true;
}
7. Still in the Content Provider, create a new UriMatcher to allow your Content Provider to differentiate between a query against the entire table and one that addresses a particular row. Use it within the getType handler to return the correct MIME type, depending on the query type.
private static final int ALLROWS = 1;
private static final int SINGLE_ROW = 2;
private static final UriMatcher uriMatcher;
//Populate the UriMatcher object, where a URI ending in ‘todoitems' will
//correspond to a request for all items, and ‘todoitems/[rowID]'
//represents a single row.
static {
uriMatcher = new UriMatcher(UriMatcher.NO_MATCH);
uriMatcher.addURI("com.paad.todoprovider", "todoitems", ALLROWS);
uriMatcher.addURI("com.paad.todoprovider", "todoitems/#", SINGLE_ROW);
}
@Override
public String getType(Uri uri) {
// Return a string that identifies the MIME type
// for a Content Provider URI
switch (uriMatcher.match(uri)) {
case ALLROWS: return "vnd.android.cursor.dir/vnd.paad.todos";
case SINGLE_ROW: return "vnd.android.cursor.item/vnd.paad.todos";
default: throw new IllegalArgumentException("Unsupported URI: " + uri);
}
}
8. Implement the query method stub. Start by requesting an instance of the database, before constructing a query based on the parameters passed in. In this simple instance, you need to apply the same query parameters only to the underlying database—modifying the query only to account for the possibility of a URI that addresses a single row.
@Override
public Cursor query(Uri uri, String[] projection, String selection,
String[] selectionArgs, String sortOrder) {
// Open a read-only database.
SQLiteDatabase db = myOpenHelper.getWritableDatabase();
// Replace these with valid SQL statements if necessary.
String groupBy = null;
String having = null;
SQLiteQueryBuilder queryBuilder = new SQLiteQueryBuilder();
queryBuilder.setTables(MySQLiteOpenHelper.DATABASE_TABLE);
// If this is a row query, limit the result set to the passed in row.
switch (uriMatcher.match(uri)) {
case SINGLE_ROW :
String rowID = uri.getPathSegments().get(1);
queryBuilder.appendWhere(KEY_ID + "=" + rowID);
default: break;
}
Cursor cursor = queryBuilder.query(db, projection, selection,
selectionArgs, groupBy, having, sortOrder);
return cursor;
}
9. Implement the delete, insert, and update methods using the same approach—pass through the received parameters while handling the special case of single-row URIs.
@Override
public int delete(Uri uri, String selection, String[] selectionArgs) {
// Open a read / write database to support the transaction.
SQLiteDatabase db = myOpenHelper.getWritableDatabase();
// If this is a row URI, limit the deletion to the specified row.
switch (uriMatcher.match(uri)) {
case SINGLE_ROW :
String rowID = uri.getPathSegments().get(1);
selection = KEY_ID + "=" + rowID
+ (!TextUtils.isEmpty(selection) ?
" AND (" + selection + ‘)’ : "");
default: break;
}
// To return the number of deleted items, you must specify a where
// clause. To delete all rows and return a value, pass in "1".
if (selection == null)
selection = "1";
// Execute the deletion.
int deleteCount = db.delete(MySQLiteOpenHelper.DATABASE_TABLE, selection,
selectionArgs);
// Notify any observers of the change in the data set.
getContext().getContentResolver().notifyChange(uri, null);
return deleteCount;
}
@Override
public Uri insert(Uri uri, ContentValues values) {
// Open a read / write database to support the transaction.
SQLiteDatabase db = myOpenHelper.getWritableDatabase();
// To add empty rows to your database by passing in an empty Content Values
// object, you must use the null column hack parameter to specify the name of
// the column that can be set to null.
String nullColumnHack = null;
// Insert the values into the table
long id = db.insert(MySQLiteOpenHelper.DATABASE_TABLE,
nullColumnHack, values);
if (id > -1) {
// Construct and return the URI of the newly inserted row.
Uri insertedId = ContentUris.withAppendedId(CONTENT_URI, id);
// Notify any observers of the change in the data set.
getContext().getContentResolver().notifyChange(insertedId, null);
return insertedId;
}
else
return null;
}
@Override
public int update(Uri uri, ContentValues values, String selection,
String[] selectionArgs) {
// Open a read / write database to support the transaction.
SQLiteDatabase db = myOpenHelper.getWritableDatabase();
// If this is a row URI, limit the deletion to the specified row.
switch (uriMatcher.match(uri)) {
case SINGLE_ROW :
String rowID = uri.getPathSegments().get(1);
selection = KEY_ID + "=" + rowID
+ (!TextUtils.isEmpty(selection) ?
" AND (" + selection + ‘)’ : "");
default: break;
}
// Perform the update.
int updateCount = db.update(MySQLiteOpenHelper.DATABASE_TABLE,
values, selection, selectionArgs);
// Notify any observers of the change in the data set.
getContext().getContentResolver().notifyChange(uri, null);
return updateCount;
}
10. That completes the Content Provider class. Add it to your application Manifest, specifying the base URI to use as its authority.
<provider android:name=".ToDoContentProvider"
android:authorities="com.paad.todoprovider"/>
11. Return to the ToDoList Activity and update it to persist the to-do list array. Start by modifying the Activity to implement LoaderManager.LoaderCallbacks<Cursor>, and then add the associated stub methods.
public class ToDoList extends Activity implements
NewItemFragment.OnNewItemAddedListener, LoaderManager.LoaderCallbacks<Cursor> {
// [... Existing ToDoList Activity code ...]
public Loader<Cursor> onCreateLoader(int id, Bundle args) {
return null;
}
public void onLoadFinished(Loader<Cursor> loader, Cursor cursor) {
}
public void onLoaderReset(Loader<Cursor> loader) {
}
}
12. Complete the onCreateLoader handler by building and returning a Loader that queries the ToDoListContentProvider for all of its elements.
public Loader<Cursor> onCreateLoader(int id, Bundle args) {
CursorLoader loader = new CursorLoader(this,
ToDoContentProvider.CONTENT_URI, null, null, null, null);
return loader;
}
13. When the Loader's query completes, the result Cursor will be returned to the onLoadFinished handler. Update it to iterate over the result Cursor and repopulate the to-do list Array Adapter accordingly.
public void onLoadFinished(Loader<Cursor> loader, Cursor cursor) {
int keyTaskIndex = cursor.getColumnIndexOrThrow(ToDoContentProvider.KEY_TASK);
todoItems.clear();
while (cursor.moveToNext()) {
ToDoItem newItem = new ToDoItem(cursor.getString(keyTaskIndex));
todoItems.add(newItem);
}
aa.notifyDataSetChanged();
}
14. Update the onCreate handler to initiate the Loader when the Activity is created, and the onResume handler to restart the Loader when the Activity is restarted.
public void onCreate(Bundle savedInstanceState) {
// [... Existing onCreate code …]
getLoaderManager().initLoader(0, null, this);
}
@Override
protected void onResume() {
super.onResume();
getLoaderManager().restartLoader(0, null, this);
}
15. The final step is to modify the behavior of the onNewItemAdded handler. Rather than adding the item to the to-do Array List directly, use the ContentResolver to add it to the Content Provider.
public void onNewItemAdded(String newItem) {
ContentResolver cr = getContentResolver();
ContentValues values = new ContentValues();
values.put(ToDoContentProvider.KEY_TASK, newItem);
cr.insert(ToDoContentProvider.CONTENT_URI, values);
getLoaderManager().restartLoader(0, null, this);
}
![]()
All code snippets in this example are part of the Chapter 8 Todo List project, available for download at www.wrox.com.
You have now created a database into which to save your to-do items. A better approach than copying Cursor rows to an Array List is to use a Simple Cursor Adapter. You'll do this later in the chapter, in the section “Creating a Searchable Earthquake Provider.”
To make this To-Do List application more useful, consider adding functionality to delete and update list items, change the sort order, and store additional information.
Adding Search to Your Application
Surfacing your application's content through search is a simple and powerful way to make your content more discoverable, increase user engagement, and improve the visibility of your application. On mobile devices speed is everything, and search provides a mechanism for users to quickly find the content they need.
Android includes a framework that simplifies the process ofmaking your Content Providers searchable, adding search functionality to your Activities, and surfacing application search results on the home screen.
Until Android 3.0 (API level 11) most Android devices featured a hardware search key. In more recent releases this has been replaced with on-screen widgets, typically placed on your application's Action Bar.
By implementing search within your application, you can expose your application-specific search functionality whenever a user presses the search button or uses the search widget.
You can provide search capabilities for your application in three ways:
· Search bar—When activated, the search bar (often referred to as the search dialog) is displayed over the title bar of your Activity, as shown in Figure 8.1. The search bar is activated when the user presses the hardware search button, or it can be initiated programmatically with a call to your Activity's onSearchRequested method.
Figure 8.1

· Not all Android devices include a hardware search key, particularly newer devices and tablets, so it's good practice to also include a software trigger to initiate search.
· Search View—Introduced in Android 3.0 (API level 11), the Search View is a search widget that can be placed anywhere within your Activity. Typically represented as an icon in the Action Bar, it is shown expanded in Figure 8.2.
Figure 8.2

· Quick Search Box—The Quick Search Box, as shown in Figure 8.3, is a home screen search Widget that performs searches across all supported applications. You can configure your application's search results to be surfaced for searches initiated through the Quick Search Box.
Figure 8.3

The search bar, Search View, and Quick Search Box support the display of search suggestions, providing a powerful mechanism for improving the responsiveness of your application.
Making Your Content Provider Searchable
Before you can enable the search dialog or use a Search View widget within your application, you need to define what is searchable.
To do this, the first step is to create a new searchable metadata XML resource in your project's res/xml folder. As shown in Listing 8.23, you must specify the android:label attribute (typically your application name), and best practice suggests you also include an android:hint attribute to help users understand what they can search for. The hint is typically in the form of “Search for [content type or product name].”
Listing 8.23: Defining application search metadata
<?xml version="1.0" encoding="utf-8"?>
<searchable xmlns:android="http://schemas.android.com/apk/res/android"
android:label="@string/app_name"
android:hint="@string/search_hint">
</searchable>
code snippet PA4AD_ Ch08_DatabaseSkeleton/res/xml/searchable.xml
Creating a Search Activity for Your Application
Having defined the Content Provider to search, you must now create an Activity that will be used to display search results. This will most commonly be a simple List View-based Activity, but you can use any user interface, provided that it has a mechanism for displaying search results.
Users will not generally expect multiple searches to be added to the back stack, so it's good practice to set a search Activity as “single top,” ensuring that the same instance will be used repeatedly rather than creating a new instance for each search.
To indicate that an Activity can be used to provide search results, include an Intent Filter registered for the android.intent.action.SEARCH action and the DEFAULT category.
You must also include a meta-data tag that includes a name attribute that specifies android.app.searchable, and a resource attribute that specifies a searchable XML resource, as shown in Listing 8.24.
Listing 8.24: Registering a search results Activity
<activity android:name=".DatabaseSkeletonSearchActivity"
android:label="Element Search"
android:launchMode="singleTop">
<intent-filter>
<action android:name="android.intent.action.SEARCH" />
<category android:name="android.intent.category.DEFAULT" />
</intent-filter>
<meta-data
android:name="android.app.searchable"
android:resource="@xml/searchable"
/>
</activity>
code snippet PA4AD_ Ch08_DatabaseSkeleton/AndroidManifest.xml
To enable the search dialog for a given Activity, you need to specify which search results Activity should be used to handle search requests. You can do this by adding a meta-data tag to its activity node in the manifest. Set the name attribute to android.app.default_searchable and specify your search Activity using the value attribute, as shown in the following snippet:
<meta-data
android:name="android.app.default_searchable"
android:value=".DatabaseSkeletonSearchActivity"
/>
Searches initiated from within the search results Activity are automatically handled by it, so there's no need to annotate it specifically.
After users have initiated a search, your Activity will be started and their search queries will be available from within the Intent that started it, accessible through the SearchManager.QUERY extra. Searches initiated from within the search results Activity will result in new Intents being received—you can capture those Intents and extract the new queries from the onNewIntent handler, as shown in Listing 8.25.
Listing 8.25: Extracting the search query
@Override
public void onCreate(Bundle savedInstanceState) {
super.onCreate(savedInstanceState);
// Get the launch Intent
parseIntent(getIntent());
}
@Override
protected void onNewIntent(Intent intent) {
super.onNewIntent(intent);
parseIntent(getIntent());
}
private void parseIntent(Intent intent) {
// If the Activity was started to service a Search request,
// extract the search query.
if (Intent.ACTION_SEARCH.equals(intent.getAction())) {
String searchQuery = intent.getStringExtra(SearchManager.QUERY);
// Perform the search
performSearch(searchQuery);
}
}
code snippet PA4AD_ Ch08_DatabaseSkeleton/src/DatabaseSkeletonSearchActivity.java
Making Your Search Activity the Default Search Provider for Your Application
It's generally good practice to use the same search results form for your entire application. To set a search Activity as the default search result provider for all Activities within your application, add a meta-data tag within the application manifest node. Set the name attribute toandroid.app.default_searchable and specify your search Activity using the value attribute, as shown in Listing 8.26.
Listing 8.26: Setting a default search result Activity for an application
<meta-data
android:name="android.app.default_searchable"
android:value=".DatabaseSkeletonSearchActivity"
/>
code snippet PA4AD_ Ch08_DatabaseSkeleton/AndroidManifest.xml
Performing a Search and Displaying the Results
When your search Activity receives a new search query, you must execute the search and display the results within the Activity. How you choose to implement your search query and display its results depends on your application, what you're searching, and where the searchable content is stored.
If you are searching a Content Provider, it's good practice to use a Cursor Loader to execute a query whose result Cursor is bound to a List View, as shown in Listing 8.27.
Listing 8.27: Performing a search and displaying the results
import android.app.ListActivity;
import android.app.LoaderManager;
import android.app.SearchManager;
import android.content.ContentUris;
import android.content.CursorLoader;
import android.content.Intent;
import android.content.Loader;
import android.database.Cursor;
import android.net.Uri;
import android.os.Bundle;
import android.view.View;
import android.widget.ListView;
import android.widget.SimpleCursorAdapter;
public class DatabaseSkeletonSearchActivity extends ListActivity
implements LoaderManager.LoaderCallbacks<Cursor> {
private static String QUERY_EXTRA_KEY = "QUERY_EXTRA_KEY";
private SimpleCursorAdapter adapter;
@Override
public void onCreate(Bundle savedInstanceState) {
super.onCreate(savedInstanceState);
// Create a new adapter and bind it to the List View
adapter = new SimpleCursorAdapter(this,
android.R.layout.simple_list_item_1, null,
new String[] { MyContentProvider.KEY_COLUMN_1_NAME },
new int[] { android.R.id.text1 }, 0);
setListAdapter(adapter);
// Initiate the Cursor Loader
getLoaderManager().initLoader(0, null, this);
// Get the launch Intent
parseIntent(getIntent());
}
@Override
protected void onNewIntent(Intent intent) {
super.onNewIntent(intent);
parseIntent(getIntent());
}
private void parseIntent(Intent intent) {
// If the Activity was started to service a Search request,
// extract the search query.
if (Intent.ACTION_SEARCH.equals(intent.getAction())) {
String searchQuery = intent.getStringExtra(SearchManager.QUERY);
// Perform the search
performSearch(searchQuery);
}
}
// Execute the search.
private void performSearch(String query) {
// Pass the search query as an argument to the Cursor Loader
Bundle args = new Bundle();
args.putString(QUERY_EXTRA_KEY, query);
// Restart the Cursor Loader to execute the new query.
getLoaderManager().restartLoader(0, args, this);
}
public Loader<Cursor> onCreateLoader(int id, Bundle args) {
String query = "0";
// Extract the search query from the arguments.
if (args != null)
query = args.getString(QUERY_EXTRA_KEY);
// Construct the new query in the form of a Cursor Loader.
String[] projection = {
MyContentProvider.KEY_ID,
MyContentProvider.KEY_COLUMN_1_NAME
};
String where = MyContentProvider.KEY_COLUMN_1_NAME
+ " LIKE \"%" + query + "%\"";
String[] whereArgs = null;
String sortOrder = MyContentProvider.KEY_COLUMN_1_NAME +
" COLLATE LOCALIZED ASC";
// Create the new Cursor loader.
return new CursorLoader(this, MyContentProvider.CONTENT_URI,
projection, where, whereArgs, sortOrder);
}
public void onLoadFinished(Loader<Cursor> loader, Cursor cursor) {
// Replace the result Cursor displayed by the Cursor Adapter with
// the new result set.
adapter.swapCursor(cursor);
}
public void onLoaderReset(Loader<Cursor> loader) {
// Remove the existing result Cursor from the List Adapter.
adapter.swapCursor(null);
}
}
code snippet PA4AD_ Ch08_DatabaseSkeleton/DatabaseSkeletonSearchActivity.java
![]()
This example uses a simple like-based search against a single column in a local Content Provider. Although outside the scope of this book, it's often more effective to perform full text searches on local databases, and to incorporate search results from cloud-based data sources.
In most circumstances you'll need to provide some functionality beyond simply displaying the search results. If you are using a List Activity or List Fragment, you can override the onListItemClick handler to react to user's selecting a search result, such as displaying the result details, as shown in Listing 8.28.
Listing 8.28: Providing actions for search result selection
@Override
protected void onListItemClick(ListView listView, View view, int position, long id) {
super.onListItemClick(listView, view, position, id);
// Create a URI to the selected item.
Uri selectedUri =
ContentUris.withAppendedId(MyContentProvider.CONTENT_URI, id);
// Create an Intent to view the selected item.
Intent intent = new Intent(Intent.ACTION_VIEW);
intent.setData(selectedUri);
// Start an Activity to view the selected item.
startActivity(intent);
}
code snippet PA4AD_ Ch08_DatabaseSkeleton/DatabaseSkeletonSearchActivity.java
Using the Search View Widget
Android 3.0 (API level 11) introduced the SearchView widget as an alternative to the Activity search bar. The Search View appears and behaves as an Edit Text View, but it can be configured to offer search suggestions and to initiate search queries within your application in the same way as the search bar in earlier versions of Android.
![]()
You can add the Search View anywhere in your View hierarchy and configure it in the same way; however, it's best practice to add it as an action View within your Activity's Action Bar, as described in more detail in Chapter 10, “Expanding the User Experience.”
To connect your Search View to your search Activity, you must first extract a reference to its SearchableInfo using the Search Manager's getSearchableInfo method. Use the Search View's setSearchableInfo method to bind this object to your Search View, as shown in Listing 8.29.
Listing 8.29: Binding a Search View to your searchable Activity
// Use the Search Manager to find the SearchableInfo related
// to this Activity.
SearchManager searchManager =
(SearchManager)getSystemService(Context.SEARCH_SERVICE);
SearchableInfo searchableInfo =
searchManager.getSearchableInfo(getComponentName());
// Bind the Activity's SearchableInfo to the Search View
SearchView searchView = (SearchView)findViewById(R.id.searchView);
searchView.setSearchableInfo(searchableInfo);
code snippet PA4AD_ Ch08_DatabaseSkeleton/DatabaseSkeletonSearchActivity.java
When connected, your Search View will work like the search bar, providing search suggestions (where possible) and displaying the Search Activity after a query has been entered.
By default, the Search View will be displayed as an icon that, when clicked, expands to the search edit box. You can use its setIconifiedByDefault method to disable this and have it always display as an edit box.
searchView.setIconifiedByDefault(false);
By default a Search View query is initiated when the user presses Enter. You can choose to also display a button to submit a search using the setSubmitButtonEnabled method.
searchView.setSubmitButtonEnabled(true);
Supporting Search Suggestions from a Content Provider
Beyond the simple case of submitting a search and listing the results in your Activities, one of the most engaging innovations in search is the provision of real-time search suggestions as users type their queries.
Search suggestions display a simple list of possible search results beneath the search bar/Search View widget as users enter their queries, allowing them to bypass the search result Activity and jump directly to the search result.
Although your search Activity can structure its query and display the results Cursor data in any way, if you want to provide search suggestions, you need to create (or modify) a Content Provider to receive search queries and return suggestions using the expected projection.
To support search suggestions, you need to configure your Content Provider to recognize specific URI paths as search queries. Listing 8.30 shows a URI Matcher that compares a requested URI to the known search-query path values.
Listing 8.30: Detecting search suggestion requests in Content Providers
private static final int ALLROWS = 1;
private static final int SINGLE_ROW = 2;
private static final int SEARCH = 3;
private static final UriMatcher uriMatcher;
static {
uriMatcher = new UriMatcher(UriMatcher.NO_MATCH);
uriMatcher.addURI("com.paad.skeletondatabaseprovider",
"elements", ALLROWS);
uriMatcher.addURI("com.paad.skeletondatabaseprovider",
"elements/#", SINGLE_ROW);
uriMatcher.addURI("com.paad.skeletondatabaseprovider",
SearchManager.SUGGEST_URI_PATH_QUERY, SEARCH);
uriMatcher.addURI("com.paad.skeletondatabaseprovider",
SearchManager.SUGGEST_URI_PATH_QUERY + "/*", SEARCH);
uriMatcher.addURI("com.paad.skeletondatabaseprovider",
SearchManager.SUGGEST_URI_PATH_SHORTCUT, SEARCH);
uriMatcher.addURI("com.paad.skeletondatabaseprovider",
SearchManager.SUGGEST_URI_PATH_SHORTCUT + "/*", SEARCH);
}
code snippet PA4AD_ Ch08_DatabaseSkeleton/src/MySearchSuggestionsContentProvider.java
Within your Content Provider use the Uri Matcher to return the search suggestion MIME type for search queries, as shown in Listing 8.31.
Listing 8.31: Returning the correct MIME type for search results
@Override
public String getType(Uri uri) {
// Return a string that identifies the MIME type
// for a Content Provider URI
switch (uriMatcher.match(uri)) {
case ALLROWS:
return "vnd.android.cursor.dir/vnd.paad.elemental";
case SINGLE_ROW:
return "vnd.android.cursor.item/vnd.paad.elemental";
case SEARCH :
return SearchManager.SUGGEST_MIME_TYPE;
default:
throw new IllegalArgumentException("Unsupported URI: " + uri);
}
}
code snippet PA4AD_ Ch08_DatabaseSkeleton/src/MySearchSuggestionsContentProvider.java
The Search Manager requests your search suggestions by initiating a query on your Content Provider, passing in the query value as the last element in the URI path. To provide suggestions, you must return a Cursor using a set of predefined columns.
There are two required columns, SUGGEST_COLUMN_TEXT_1, which displays the search result text, and _id, which indicates the unique row ID. You can supply up to two columns containing text, and an icon to be displayed on either the left or right of the text results.
It's also useful to include a SUGGEST_COLUMN_INTENT_DATA_ID column. The value returned in this column can be appended to a specified URI path and used to populate an Intent that will be fired if the suggestion is selected.
As speed is critical for real-time search results, in many cases it's good practice to create a separate table specifically to store and provide them. Listing 8.32 shows the skeleton code for creating a projection that returns a Cursor suitable for search results.
Listing 8.32: Creating a projection for returning search suggestions
public static final String KEY_SEARCH_COLUMN = KEY_COLUMN_1_NAME;
private static final HashMap<String, String> SEARCH_SUGGEST_PROJECTION_MAP;
static {
SEARCH_SUGGEST_PROJECTION_MAP = new HashMap<String, String>();
SEARCH_SUGGEST_PROJECTION_MAP.put(
"_id", KEY_ID + " AS " + "_id");
SEARCH_SUGGEST_PROJECTION_MAP.put(
SearchManager.SUGGEST_COLUMN_TEXT_1,
KEY_SEARCH_COLUMN + " AS " + SearchManager.SUGGEST_COLUMN_TEXT_1);
SEARCH_SUGGEST_PROJECTION_MAP.put(
SearchManager.SUGGEST_COLUMN_INTENT_DATA_ID, KEY_ID +
" AS " + "_id");
}
code snippet PA4AD_ Ch08_DatabaseSkeleton/src/MySearchSuggestionsContentProvider.java
To perform the query that will supply the search suggestions, use the Uri Matcher within your query implementation, applying the projection map of the form defined in the previous listing, as shown in Listing 8.33.
Listing 8.33: Returning search suggestions for a query
@Override
public Cursor query(Uri uri, String[] projection, String selection,
String[] selectionArgs, String sortOrder) {
// Open a read-only database.
SQLiteDatabase db = myOpenHelper.getWritableDatabase();
// Replace these with valid SQL statements if necessary.
String groupBy = null;
String having = null;
SQLiteQueryBuilder queryBuilder = new SQLiteQueryBuilder();
queryBuilder.setTables(MySQLiteOpenHelper.DATABASE_TABLE);
// If this is a row query, limit the result set to the passed in row.
switch (uriMatcher.match(uri)) {
case SINGLE_ROW :
String rowID = uri.getPathSegments().get(1);
queryBuilder.appendWhere(KEY_ID + "=" + rowID);
break;
case SEARCH :
String query = uri.getPathSegments().get(1);
queryBuilder.appendWhere(KEY_SEARCH_COLUMN +
" LIKE \"%" + query + "%\"");
queryBuilder.setProjectionMap(SEARCH_SUGGEST_PROJECTION_MAP);
break;
default: break;
}
Cursor cursor = queryBuilder.query(db, projection, selection,
selectionArgs, groupBy, having, sortOrder);
return cursor;
}
code snippet PA4AD_ Ch08_DatabaseSkeleton/src/MySearchSuggestionsContentProvider.java
The final step is to update your searchable resource to specify the authority of the Content Provider that should be used to supply search suggestions for your search bar and/or Search View. This can be the same Content Provider used to execute regular queries (if you've mapped the columns as required), or an entirely different Provider.
Listing 8.34 shows how to specify the authority, as well as to define the searchSuggestIntentAction to determine which action to perform if a suggestion is clicked, and the searchSuggestIntentData attribute to specify the base URI that will be used in the action Intent's data value.
If you have included an Intent data ID column in your search suggestion result Cursor, it will be appended to this base URI.
Listing 8.34: Configuring a searchable resource for search suggestions
<?xml version="1.0" encoding="utf-8"?>
<searchable xmlns:android="http://schemas.android.com/apk/res/android"
android:label="@string/app_name"
android:searchSuggestAuthority=
"com.paad.skeletonsearchabledatabaseprovider"
android:searchSuggestIntentAction="android.intent.action.VIEW"
android:searchSuggestIntentData=
"content://com.paad.skeletonsearchabledatabaseprovider/elements">
</searchable>
code snippet PA4AD_ Ch08_DatabaseSkeleton/res/xml/searchablewithsuggestions.xml
Surfacing Search Results in the Quick Search Box
The Quick Search Box (QSB) is a home screen Widget designed to provide universal search across every application installed on the host device, as well as to initiate web searches. Inclusion in QSB results is opt in—that is, developers can choose to supply search results, and users can select which supported application's results they want to see.
![]()
To supply results to the QSB, your application must be able to provide search suggestions, as described in the previous section, “Supporting Search Suggestions from a Content Provider.” Chapter 14, “Invading the Home Screen,” provides more details on how to surface your search results to the QSB.
Creating a Searchable Earthquake Content Provider
In this example you will modify the earthquake application you created in Chapter 6, “Using Internet Resources,” by storing the earthquake data in a Content Provider. In this three-part example, you will start by moving the data to a Content Provider, and then update the application to use that Provider, and, finally, add support for search.
Creating the Content Provider
Start by creating a new Content Provider that will be used to store each earthquake once it has been parsed out of the Internet feed.
1. Open the Earthquake project and create a new EarthquakeProvider class that extends ContentProvider. Include stubs to override the onCreate, getType, query, insert, delete, and update methods.
package com.paad.earthquake;
import android.content.ContentProvider;
import android.content.ContentUris;
import android.content.ContentValues;
import android.content.Context;
import android.content.UriMatcher;
import android.database.Cursor;
import android.database.SQLException;
import android.database.sqlite.SQLiteDatabase;
import android.database.sqlite.SQLiteDatabase.CursorFactory;
import android.database.sqlite.SQLiteOpenHelper;
import android.database.sqlite.SQLiteQueryBuilder;
import android.net.Uri;
import android.text.TextUtils;
import android.util.Log;
public class EarthquakeProvider extends ContentProvider {
@Override
public boolean onCreate() {
return false;
}
@Override
public String getType(Uri url) {
return null;
}
@Override
public Cursor query(Uri url, String[] projection, String selection,
String[] selectionArgs, String sort) {
return null;
}
@Override
public Uri insert(Uri _url, ContentValues _initialValues) {
return null;
}
@Override
public int delete(Uri url, String where, String[] whereArgs) {
return 0;
}
@Override
public int update(Uri url, ContentValues values,
String where, String[]wArgs) {
return 0;
}
}
2. Publish the URI for this provider. This URI will be used to access this Content Provider from within other application components via the ContentResolver.
public static final Uri CONTENT_URI =
Uri.parse("content://com.paad.earthquakeprovider/earthquakes");
3. Create a set of public variables that describe the column names to be used within your database table.
// Column Names
public static final String KEY_ID = "_id";
public static final String KEY_DATE = "date";
public static final String KEY_DETAILS = "details";
public static final String KEY_SUMMARY = "summary";
public static final String KEY_LOCATION_LAT = "latitude";
public static final String KEY_LOCATION_LNG = "longitude";
public static final String KEY_MAGNITUDE = "magnitude";
public static final String KEY_LINK = "link";
4. Create the database that will be used to store the earthquakes. Within the EarthquakeProvider create a new SQLiteOpenHelper implementation that creates and updates the database.
// Helper class for opening, creating, and managing database version control
private static class EarthquakeDatabaseHelper extends SQLiteOpenHelper {
private static final String TAG = "EarthquakeProvider";
private static final String DATABASE_NAME = "earthquakes.db";
private static final int DATABASE_VERSION = 1;
private static final String EARTHQUAKE_TABLE = "earthquakes";
private static final String DATABASE_CREATE =
"create table " + EARTHQUAKE_TABLE + " ("
+ KEY_ID + " integer primary key autoincrement, "
+ KEY_DATE + " INTEGER, "
+ KEY_DETAILS + " TEXT, "
+ KEY_SUMMARY + " TEXT, "
+ KEY_LOCATION_LAT + " FLOAT, "
+ KEY_LOCATION_LNG + " FLOAT, "
+ KEY_MAGNITUDE + " FLOAT, "
+ KEY_LINK + " TEXT);";
// The underlying database
private SQLiteDatabase earthquakeDB;
public EarthquakeDatabaseHelper(Context context, String name,
CursorFactory factory, int version) {
super(context, name, factory, version);
}
@Override
public void onCreate(SQLiteDatabase db) {
db.execSQL(DATABASE_CREATE);
}
@Override
public void onUpgrade(SQLiteDatabase db, int oldVersion, int newVersion) {
Log.w(TAG, "Upgrading database from version " + oldVersion + " to "
+ newVersion + ", which will destroy all old data");
db.execSQL("DROP TABLE IF EXISTS " + EARTHQUAKE_TABLE);
onCreate(db);
}
}
5. Override the Provider's onCreate handler to create a new instance of the database helper you created in step 4.
EarthquakeDatabaseHelper dbHelper;
@Override
public boolean onCreate() {
Context context = getContext();
dbHelper = new EarthquakeDatabaseHelper(context,
EarthquakeDatabaseHelper.DATABASE_NAME, null,
EarthquakeDatabaseHelper.DATABASE_VERSION);
return true;
}
6. Create a UriMatcher to handle requests using different URIs. Include support for queries and transactions over the entire dataset (QUAKES) and a single record matching a quake index value (QUAKE_ID). Also override the getType method to return a MIME type for each of the URI structures supported.
// Create the constants used to differentiate between the different URI
// requests.
private static final int QUAKES = 1;
private static final int QUAKE_ID = 2;
private static final UriMatcher uriMatcher;
// Allocate the UriMatcher object, where a URI ending in ‘earthquakes' will
// correspond to a request for all earthquakes, and ‘earthquakes' with a
// trailing ‘/[rowID]’ will represent a single earthquake row.
static {
uriMatcher = new UriMatcher(UriMatcher.NO_MATCH);
uriMatcher.addURI("com.paad.earthquakeprovider", "earthquakes", QUAKES);
uriMatcher.addURI("com.paad.earthquakeprovider", "earthquakes/#", QUAKE_ID);
}
@Override
public String getType(Uri uri) {
switch (uriMatcher.match(uri)) {
case QUAKES: return "vnd.android.cursor.dir/vnd.paad.earthquake";
case QUAKE_ID: return "vnd.android.cursor.item/vnd.paad.earthquake";
default: throw new IllegalArgumentException("Unsupported URI: " + uri);
}
}
7. Implement the query and transaction stubs. Start by requesting a read / write version of the database using the SQLite Open Helper. Then implement the query method, which should decode the request being made based on the URI (either all content or a single row), and apply the selection, projection, and sort-order parameters to the database before returning a result Cursor.
@Override
public Cursor query(Uri uri,
String[] projection,
String selection,
String[] selectionArgs,
String sort) {
SQLiteDatabase database = dbHelper.getWritableDatabase();
SQLiteQueryBuilder qb = new SQLiteQueryBuilder();
qb.setTables(EarthquakeDatabaseHelper.EARTHQUAKE_TABLE);
// If this is a row query, limit the result set to the passed in row.
switch (uriMatcher.match(uri)) {
case QUAKE_ID: qb.appendWhere(KEY_ID + "=" + uri.getPathSegments().get(1));
break;
default : break;
}
// If no sort order is specified, sort by date / time
String orderBy;
if (TextUtils.isEmpty(sort)) {
orderBy = KEY_DATE;
} else {
orderBy = sort;
}
// Apply the query to the underlying database.
Cursor c = qb.query(database,
projection,
selection, selectionArgs,
null, null,
orderBy);
// Register the contexts ContentResolver to be notified if
// the cursor result set changes.
c.setNotificationUri(getContext().getContentResolver(), uri);
// Return a cursor to the query result.
return c;
}
8. Now implement methods for inserting, deleting, and updating content. In this case the process is an exercise in mapping Content Provider transaction requests to their database equivalents.
@Override
public Uri insert(Uri _uri, ContentValues _initialValues) {
SQLiteDatabase database = dbHelper.getWritableDatabase();
// Insert the new row. The call to database.insert will return the row number
// if it is successful.
long rowID = database.insert(
EarthquakeDatabaseHelper.EARTHQUAKE_TABLE, "quake", _initialValues);
// Return a URI to the newly inserted row on success.
if (rowID > 0) {
Uri uri = ContentUris.withAppendedId(CONTENT_URI, rowID);
getContext().getContentResolver().notifyChange(uri, null);
return uri;
}
throw new SQLException("Failed to insert row into " + _uri);
}
@Override
public int delete(Uri uri, String where, String[] whereArgs) {
SQLiteDatabase database = dbHelper.getWritableDatabase();
int count;
switch (uriMatcher.match(uri)) {
case QUAKES:
count = database.delete(
EarthquakeDatabaseHelper.EARTHQUAKE_TABLE, where, whereArgs);
break;
case QUAKE_ID:
String segment = uri.getPathSegments().get(1);
count = database.delete(EarthquakeDatabaseHelper.EARTHQUAKE_TABLE,
KEY_ID + "="
+ segment
+ (!TextUtils.isEmpty(where) ? " AND ("
+ where + ‘)’ : ""), whereArgs);
break;
default: throw new IllegalArgumentException("Unsupported URI: " + uri);
}
getContext().getContentResolver().notifyChange(uri, null);
return count;
}
@Override
public int update(Uri uri, ContentValues values,
String where, String[] whereArgs) {
SQLiteDatabase database = dbHelper.getWritableDatabase();
int count;
switch (uriMatcher.match(uri)) {
case QUAKES:
count = database.update(EarthquakeDatabaseHelper.EARTHQUAKE_TABLE,
values, where, whereArgs);
break;
case QUAKE_ID:
String segment = uri.getPathSegments().get(1);
count = database.update(EarthquakeDatabaseHelper.EARTHQUAKE_TABLE,
values, KEY_ID
+ "=" + segment
+ (!TextUtils.isEmpty(where) ? " AND ("
+ where + ‘)’ : ""), whereArgs);
break;
default: throw new IllegalArgumentException("Unknown URI " + uri);
}
getContext().getContentResolver().notifyChange(uri, null);
return count;
}
9. With the Content Provider complete, register it in the manifest by creating a new provider node within the application tag.
<provider android:name=".EarthquakeProvider"
android:authorities="com.paad.earthquakeprovider" />
![]()
All code snippets in this example are part of the Chapter 8 Earthquake Part 1 project, available for download at www.wrox.com.
Using the Earthquake Provider
You can now update the Earthquake List Fragment to store each earthquake using the Earthquake Provider, and use that Content Provider to populate the associated List View.
1. Within the EarthquakeListFragment, update the addNewQuake method. It should use the application's Content Resolver to insert each new Earthquake into the provider.
private void addNewQuake(Quake _quake) {
ContentResolver cr = getActivity().getContentResolver();
// Construct a where clause to make sure we don't already have this
// earthquake in the provider.
String w = EarthquakeProvider.KEY_DATE + " = " + _quake.getDate().getTime();
// If the earthquake is new, insert it into the provider.
Cursor query = cr.query(EarthquakeProvider.CONTENT_URI, null, w, null, null);
if (query.getCount()==0) {
ContentValues values = new ContentValues();
values.put(EarthquakeProvider.KEY_DATE, _quake.getDate().getTime());
values.put(EarthquakeProvider.KEY_DETAILS, _quake.getDetails());
values.put(EarthquakeProvider.KEY_SUMMARY, _quake.toString());
double lat = _quake.getLocation().getLatitude();
double lng = _quake.getLocation().getLongitude();
values.put(EarthquakeProvider.KEY_LOCATION_LAT, lat);
values.put(EarthquakeProvider.KEY_LOCATION_LNG, lng);
values.put(EarthquakeProvider.KEY_LINK, _quake.getLink());
values.put(EarthquakeProvider.KEY_MAGNITUDE, _quake.getMagnitude());
cr.insert(EarthquakeProvider.CONTENT_URI, values);
}
query.close();
}
2. Now that you're storing each earthquake in a Content Provider, you should replace your Array Adapter with a Simple Cursor Adapter. This adapter will manage applying changes to the underlying table directly to your List View. Take the opportunity to remove the Array Adapter and array as well. (You'll need to remove the reference to the earthquake array from the refreshEarthquakes method.)
SimpleCursorAdapter adapter;
@Override
public void onActivityCreated(Bundle savedInstanceState) {
super.onActivityCreated(savedInstanceState);
// Create a new Adapter and bind it to the List View
adapter = new SimpleCursorAdapter(getActivity(),
android.R.layout.simple_list_item_1, null,
new String[] { EarthquakeProvider.KEY_SUMMARY },
new int[] { android.R.id.text1 }, 0);
setListAdapter(adapter);
Thread t = new Thread(new Runnable() {
public void run() {
refreshEarthquakes();
}
});
t.start();
}
3. Use a Cursor Loader to query the database and supply a Cursor to the Cursor Adapter you created in step 2. Start by modifying the Fragment inheritance to implement LoaderManager.LoaderCallbacks<Cursor> and add the associated method stubs.
public class EarthquakeListFragment extends ListFragment implements
LoaderManager.LoaderCallbacks<Cursor> {
// [... Existing EarthquakeListFragment code ...]
public Loader<Cursor> onCreateLoader(int id, Bundle args) {
return null;
}
public void onLoadFinished(Loader<Cursor> loader, Cursor cursor) {
}
public void onLoaderReset(Loader<Cursor> loader) {
}
}
4. Complete the onCreateLoader handler by building and returning a Loader that queries the EarthquakeProvider for all its elements. Be sure to add a where clause that restricts the result Cursor to only earthquakes of the minimum magnitude specified by the user preferences.
public Loader<Cursor> onCreateLoader(int id, Bundle args) {
String[] projection = new String[] {
EarthquakeProvider.KEY_ID,
EarthquakeProvider.KEY_SUMMARY
};
Earthquake earthquakeActivity = (Earthquake)getActivity();
String where = EarthquakeProvider.KEY_MAGNITUDE + " > " +
earthquakeActivity.minimumMagnitude;
CursorLoader loader = new CursorLoader(getActivity(),
EarthquakeProvider.CONTENT_URI, projection, where, null, null);
return loader;
}
5. When the Loader's query completes, the result Cursor will be returned to the onLoadFinished handler, so you need to swap out the previous Cursor with the new result. Similarly, remove the reference to the Cursor when the Loader resets.
public void onLoadFinished(Loader<Cursor> loader, Cursor cursor) {
adapter.swapCursor(cursor);
}
public void onLoaderReset(Loader<Cursor> loader) {
adapter.swapCursor(null);
}
6. Update the onActivityCreated handler to initiate the Loader when the Activity is created, and the refreshEarthquakes method to restart it. Note that you must initialize and restart the loader from the main UI thread, so use a Handler to post the restart from within the refreshEarthquakesthread.
Handler handler = new Handler();
@Override
public void onActivityCreated(Bundle savedInstanceState) {
super.onActivityCreated(savedInstanceState);
// Create a new Adapter and bind it to the List View
adapter = new SimpleCursorAdapter(getActivity(),
android.R.layout.simple_list_item_1, null,
new String[] { EarthquakeProvider.KEY_SUMMARY },
new int[] { android.R.id.text1 }, 0);
setListAdapter(adapter);
getLoaderManager().initLoader(0, null, this);
Thread t = new Thread(new Runnable() {
public void run() {
refreshEarthquakes();
}
});
t.start();
}
public void refreshEarthquakes() {
handler.post(new Runnable() {
public void run() {
getLoaderManager().restartLoader(0, null, EarthquakeListFragment.this);
}
});
// [... Existing refreshEarthquakes code ...]
}
![]()
All code snippets in this example are part of the Chapter 8 Earthquake Part 2 project, available for download at www.wrox.com.
Searching the Earthquake Provider
In the following example you'll add search functionality to the Earthquake project and make sure results are available from the home screen Quick Search Box.
1. Start by adding a new string resource to the strings.xml file (in the res/values folder) that describes the earthquake search description.
<string name="search_description">Search earthquake locations</string>
2. Create a new searchable.xml file in the res/xml folder that defines the metadata for your Earthquake search results provider. Specify the string from step 1 as the description. Specify the Earthquake Content Provider's authority and set the searchSuggestIntentAction andsearchSuggestIntentData attributes.
<searchable xmlns:android="http://schemas.android.com/apk/res/android"
android:label="@string/app_name"
android:searchSettingsDescription="@string/search_description"
android:searchSuggestAuthority="com.paad.earthquakeprovider"
android:searchSuggestIntentAction="android.intent.action.VIEW"
android:searchSuggestIntentData=
"content://com.paad.earthquakeprovider/earthquakes">
</searchable>
3. Open the Earthquake Content Provider and create a new Hash Map that will be used to supply a projection to support search suggestions.
private static final HashMap<String, String> SEARCH_PROJECTION_MAP;
static {
SEARCH_PROJECTION_MAP = new HashMap<String, String>();
SEARCH_PROJECTION_MAP.put(SearchManager.SUGGEST_COLUMN_TEXT_1, KEY_SUMMARY +
" AS " + SearchManager.SUGGEST_COLUMN_TEXT_1);
SEARCH_PROJECTION_MAP.put("_id", KEY_ID +
" AS " + "_id");
}
4. Modify the UriMatcher to include search queries.
private static final int QUAKES = 1;
private static final int QUAKE_ID = 2;
private static final int SEARCH = 3;
private static final UriMatcher uriMatcher;
//Allocate the UriMatcher object, where a URI ending in ‘earthquakes' will
//correspond to a request for all earthquakes, and ‘earthquakes' with a
//trailing ‘/[rowID]’ will represent a single earthquake row.
static {
uriMatcher = new UriMatcher(UriMatcher.NO_MATCH);
uriMatcher.addURI("com.paad.earthquakeprovider", "earthquakes", QUAKES);
uriMatcher.addURI("com.paad.earthquakeprovider", "earthquakes/#", QUAKE_ID);
uriMatcher.addURI("com.paad.earthquakeprovider",
SearchManager.SUGGEST_URI_PATH_QUERY, SEARCH);
uriMatcher.addURI("com.paad.earthquakeprovider",
SearchManager.SUGGEST_URI_PATH_QUERY + "/*", SEARCH);
uriMatcher.addURI("com.paad.earthquakeprovider",
SearchManager.SUGGEST_URI_PATH_SHORTCUT, SEARCH);
uriMatcher.addURI("com.paad.earthquakeprovider",
SearchManager.SUGGEST_URI_PATH_SHORTCUT + "/*", SEARCH);
}
5. Also modify the getType method to return the appropriate MIME type for the search results.
@Override
public String getType(Uri uri) {
switch (uriMatcher.match(uri)) {
case QUAKES : return "vnd.android.cursor.dir/vnd.paad.earthquake";
case QUAKE_ID: return "vnd.android.cursor.item/vnd.paad.earthquake";
case SEARCH : return SearchManager.SUGGEST_MIME_TYPE;
default: throw new IllegalArgumentException("Unsupported URI: " + uri);
}
}
6. The final change to the Content Provider is to modify the query method to apply the search term and return the result Cursor using the projection you created in step 3.
@Override
public Cursor query(Uri uri,
String[] projection,
String selection,
String[] selectionArgs,
String sort) {
SQLiteDatabase database = dbHelper.getWritableDatabase();
SQLiteQueryBuilder qb = new SQLiteQueryBuilder();
qb.setTables(EarthquakeDatabaseHelper.EARTHQUAKE_TABLE);
// If this is a row query, limit the result set to the passed in row.
switch (uriMatcher.match(uri)) {
case QUAKE_ID: qb.appendWhere(KEY_ID + "=" + uri.getPathSegments().get(1));
break;
case SEARCH : qb.appendWhere(KEY_SUMMARY + " LIKE \"%" +
uri.getPathSegments().get(1) + "%\"");
qb.setProjectionMap(SEARCH_PROJECTION_MAP);
break;
default : break;
}
[ ... existing query method ... ]
}
7. Now create a Search Results Activity. Create a simple EarthquakeSearchResults Activity that extends ListActivity and is populated using a Simple Cursor Adapter. The Activity will use a Cursor Loader to perform the search query, so it must also implement the Loader Manager Loader Callbacks.
import android.app.ListActivity;
import android.app.LoaderManager;
import android.app.SearchManager;
import android.content.CursorLoader;
import android.content.Intent;
import android.content.Loader;
import android.database.Cursor;
import android.os.Bundle;
import android.widget.SimpleCursorAdapter;
public class EarthquakeSearchResults extends ListActivity implements
LoaderManager.LoaderCallbacks<Cursor> {
private SimpleCursorAdapter adapter;
@Override
public void onCreate(Bundle savedInstanceState) {
super.onCreate(savedInstanceState);
// Create a new adapter and bind it to the List View
adapter = new SimpleCursorAdapter(this,
android.R.layout.simple_list_item_1, null,
new String[] { EarthquakeProvider.KEY_SUMMARY },
new int[] { android.R.id.text1 }, 0);
setListAdapter(adapter);
}
public Loader<Cursor> onCreateLoader(int id, Bundle args) {
return null;
}
public void onLoadFinished(Loader<Cursor> loader, Cursor cursor) {
}
public void onLoaderReset(Loader<Cursor> loader) {
}
}
8. Update the onCreate method to initialize the Cursor Loader. Create a new parseIntent stub method that will be used to parse the Intents containing the search query and pass in the launch Intents from within onCreate and onNewIntent.
@Override
public void onCreate(Bundle savedInstanceState) {
super.onCreate(savedInstanceState);
// Create a new adapter and bind it to the List View
adapter = new SimpleCursorAdapter(this,
android.R.layout.simple_list_item_1, null,
new String[] { EarthquakeProvider.KEY_SUMMARY },
new int[] { android.R.id.text1 }, 0);
setListAdapter(adapter);
// Initiate the Cursor Loader
getLoaderManager().initLoader(0, null, this);
// Get the launch Intent
parseIntent(getIntent());
}
@Override
protected void onNewIntent(Intent intent) {
super.onNewIntent(intent);
parseIntent(getIntent());
}
private void parseIntent(Intent intent) {
}
9. Update the parseIntent method to extract the search query from within the Intent and restart the Cursor Loader to apply the new query, passing in the query value using a Bundle.
private static String QUERY_EXTRA_KEY = "QUERY_EXTRA_KEY";
private void parseIntent(Intent intent) {
// If the Activity was started to service a Search request,
// extract the search query.
if (Intent.ACTION_SEARCH.equals(intent.getAction())) {
String searchQuery = intent.getStringExtra(SearchManager.QUERY);
// Perform the search, passing in the search query as an argument
// to the Cursor Loader
Bundle args = new Bundle();
args.putString(QUERY_EXTRA_KEY, searchQuery);
// Restart the Cursor Loader to execute the new query.
getLoaderManager().restartLoader(0, args, this);
}
}
10. Implement the Loader Manager Loader Callback handlers to execute the search query, and assign the results to the Simple Cursor Adapter.
public Loader<Cursor> onCreateLoader(int id, Bundle args) {
String query = "0";
if (args != null) {
// Extract the search query from the arguments.
query = args.getString(QUERY_EXTRA_KEY);
}
// Construct the new query in the form of a Cursor Loader.
String[] projection = { EarthquakeProvider.KEY_ID,
EarthquakeProvider.KEY_SUMMARY };
String where = EarthquakeProvider.KEY_SUMMARY
+ " LIKE \"%" + query + "%\"";
String[] whereArgs = null;
String sortOrder = EarthquakeProvider.KEY_SUMMARY + " COLLATE LOCALIZED ASC";
// Create the new Cursor loader.
return new CursorLoader(this, EarthquakeProvider.CONTENT_URI,
projection, where, whereArgs,
sortOrder);
}
public void onLoadFinished(Loader<Cursor> loader, Cursor cursor) {
// Replace the result Cursor displayed by the Cursor Adapter with
// the new result set.
adapter.swapCursor(cursor);
}
public void onLoaderReset(Loader<Cursor> loader) {
// Remove the existing result Cursor from the List Adapter.
adapter.swapCursor(null);
}
11. Open the application Manifest, and add the new EarthquakeSearchResults Activity. Make sure you add an Intent Filter for the SEARCH action in the DEFAULT category. You will also need to add a meta-data tag that specifies the searchable XML resource you created in step 2.
<activity android:name=".EarthquakeSearchResults"
android:label="Earthquake Search"
android:launchMode="singleTop">
<intent-filter>
<action android:name="android.intent.action.SEARCH" />
<category android:name="android.intent.category.DEFAULT" />
</intent-filter>
<meta-data
android:name="android.app.searchable"
android:resource="@xml/searchable"
/>
</activity>
12. Still in the manifest, add a new meta-data tag to the application node that describes the Earthquake Search Results Activity as the default search provider for the application.
<application android:icon="@drawable/icon"
android:label="@string/app_name">
<meta-data
android:name="android.app.default_searchable"
android:value=".EarthquakeSearchResults"
/>
[ ... existing application node ... ]
</application>
13. For Android devices that feature a hardware search key, you're finished. To add support for devices without hardware search keys, you can add a Search View to the main.xml layout definition for the Earthquake Activity.
<?xml version="1.0" encoding="utf-8"?>
<LinearLayout xmlns:android="http://schemas.android.com/apk/res/android"
android:orientation="vertical"
android:layout_width="match_parent"
android:layout_height="match_parent">
<SearchView
android:id="@+id/searchView"
android:iconifiedByDefault="false"
android:background="#FFF"
android:layout_width="wrap_content"
android:layout_height="wrap_content">
</SearchView>
<fragment android:name="com.paad.earthquake.EarthquakeListFragment"
android:id="@+id/EarthquakeListFragment"
android:layout_width="match_parent"
android:layout_height="match_parent"
/>
</LinearLayout>
14. Return to the Earthquake Activity and connect the Search View to the searchable definition within the onCreate handler of the Earthquake Activity.
@Override
public void onCreate(Bundle savedInstanceState) {
super.onCreate(savedInstanceState);
setContentView(R.layout.main);
updateFromPreferences();
// Use the Search Manager to find the SearchableInfo related to this
// Activity.
SearchManager searchManager =
(SearchManager)getSystemService(Context.SEARCH_SERVICE);
SearchableInfo searchableInfo =
searchManager.getSearchableInfo(getComponentName());
// Bind the Activity's SearchableInfo to the Search View
SearchView searchView = (SearchView)findViewById(R.id.searchView);
searchView.setSearchableInfo(searchableInfo);
}
![]()
All code snippets in this example are part of the Chapter 8 Earthquake Part 3 project, available for download at www.wrox.com.
Native Android Content Providers
Android exposes several native Content Providers, which you can access directly using the techniques described earlier in this chapter. Alternatively, the android.provider package includes APIs that can simplify access to many of the most useful Content Providers, including the following:
· Media Store—Provides centralized, managed access to the multimedia on your device, including audio, video, and images. You can store your own multimedia within the Media Store and make it globally available, as shown in Chapter 15, “Audio, Video, and Using the Camera.”
· Browser—Reads or modifies browser and browser search history.
· Contacts Contract—Retrieves, modifies, or stores contact details and associated social stream updates.
· Calendar—Creates new events, and deletes or updates existing calendar entries. That includes modifying the attendee lists and setting reminders.
· Call Log—Views or updates the call history, including incoming and outgoing calls, missed calls, and call details, including caller IDs and call durations.
These Content Providers, with the exception of the Browser and Call Log, are covered in more detail in the following sections.
You should use these native Content Providers wherever possible to ensure your application integrates seamlessly with other native and third-party applications.
Using the Media Store Content Provider
The Android Media Store is a managed repository of audio, video, and image files.
Whenever you add a new multimedia file to the filesystem, it should also be added to the Media Store using the Content Scanner, as described in Chapter 15; this will expose it to other applications, including media players. In most circumstances it's not necessary (or recommended) to modify the contents of the Media Store Content Provider directly.
To access the media available within the Media Store, the MediaStore class includes Audio, Video, and Images subclasses, which in turn contain subclasses that are used to provide the column names and content URIs for the corresponding media providers.
The Media Store segregates media kept on the internal and external volumes of the host device. Each Media Store subclass provides a URI for either the internally or externally stored media using the forms:
· MediaStore.<mediatype>.Media.EXTERNAL_CONTENT_URI
· MediaStore.<mediatype>.Media.INTERNAL_CONTENT_URI
Listing 8.35 shows a simple code snippet used to find the song title and album name for each piece of audio stored on the external volume.
Listing 8.35: Accessing the Media Store Content Provider
// Get a Cursor over every piece of audio on the external volume,
// extracting the song title and album name.
String[] projection = new String[] {
MediaStore.Audio.AudioColumns.ALBUM,
MediaStore.Audio.AudioColumns.TITLE
};
Uri contentUri = MediaStore.Audio.Media.EXTERNAL_CONTENT_URI;
Cursor cursor =
getContentResolver().query(contentUri, projection,
null, null, null);
// Get the index of the columns we need.
int albumIdx =
cursor.getColumnIndexOrThrow(MediaStore.Audio.AudioColumns.ALBUM);
int titleIdx =
cursor.getColumnIndexOrThrow(MediaStore.Audio.AudioColumns.TITLE);
// Create an array to store the result set.
String[] result = new String[cursor.getCount()];
// Iterate over the Cursor, extracting each album name and song title.
while (cursor.moveToNext()) {
// Extract the song title.
String title = cursor.getString(titleIdx);
// Extract the album name.
String album = cursor.getString(albumIdx);
result[cursor.getPosition()] = title + " (" + album + ")";
}
// Close the Cursor.
cursor.close();
code snippet PA4AD_ Ch08_ContentProviders/src/Ch08_ContentProvidersActivity.java
![]()
In Chapter 15 you'll learn how to play audio and video resources stored in the Media Store by specifying the URI of a particular multimedia item.
Using the Contacts Contract Content Provider
Android makes the full database of contact information available to any application that has been granted the READ_CONTACTS permission.
The Contacts Contract Provider provides an extensible database of contact-related information. This allows users to specify multiple sources for their contact information. More importantly, it allows developers to arbitrarily extend the data stored against each contact, or even become an alternative provider for contacts and contact details.
![]()
Android 2.0 (API level 5) introduced the ContactsContract class, which superseded the deprecated Contacts class that had previously been used to store and manage the contacts stored on the device.
Introducing the Contacts Contract Content Provider
Rather than providing a single, fully defined table of contact detail columns, the Contacts Contract provider uses a three-tier data model to store data, associate it with a contact, and aggregate it to a single person using the following ContactsContract subclasses:
· Data—Each row in the underlying table defines a set of personal data (phone numbers, email addresses, and so on), separated by MIME type. Although there is a predefined set of common column names for each personal data-type available (along with the appropriate MIME types from subclasses within ContactsContract.CommonDataKinds), this table can be used to store any value.
· The kind of data stored in a particular row is determined by the MIME type specified for that row. A series of generic columns is then used to store up to 15 different pieces of data varying by MIME type.
· When adding new data to the Data table, you specify a Raw Contact to which a set of data will be associated.
· RawContacts—From Android 2.0 (API level 5) forward, users can add multiple contact account providers to their device. Each row in the Raw Contacts table defines an account to which a set of Data values is associated.
· Contacts—The Contacts table aggregates rows from Raw Contacts that all describe the same person.
The contents of each of these tables are aggregated as shown in Figure 8.4.
Figure 8.4
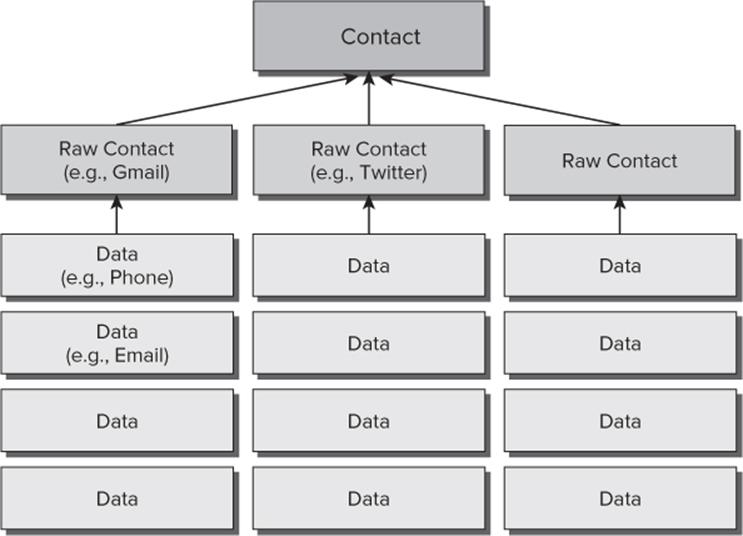
Typically, you will use the Data table to add, delete, or modify data stored against an existing contact account, the Raw Contacts table to create and manage accounts, and both the Contact and Data tables to query the database to extract contact details.
Reading Contact Details
To access any contact details, you need to include the READ_CONTACTS uses-permission in your application manifest:
<uses-permission android:name="android.permission.READ_CONTACTS"/>
Use the Content Resolver to query any of the three Contact Contracts Providers previously described using their respective CONTENT_URI static constants. Each class includes their column names as static properties.
Listing 8.36 queries the Contacts table for a Cursor to every person in the address book, creating an array of strings that holds each contact's name and unique ID.
Listing 8.36: Accessing the Contacts Contract Contact Content Provider
// Create a projection that limits the result Cursor
// to the required columns.
String[] projection = {
ContactsContract.Contacts._ID,
ContactsContract.Contacts.DISPLAY_NAME
};
// Get a Cursor over the Contacts Provider.
Cursor cursor =
getContentResolver().query(ContactsContract.Contacts.CONTENT_URI,
projection, null, null, null);
// Get the index of the columns.
int nameIdx =
cursor.getColumnIndexOrThrow(ContactsContract.Contacts.DISPLAY_NAME);
int idIdx =
cursor.getColumnIndexOrThrow(ContactsContract.Contacts._ID);
// Initialize the result set.
String[] result = new String[cursor.getCount()];
// Iterate over the result Cursor.
while(cursor.moveToNext()) {
// Extract the name.
String name = cursor.getString(nameIdx);
// Extract the unique ID.
String id = cursor.getString(idIdx);
result[cursor.getPosition()] = name + " (" + id + ")";
}
// Close the Cursor.
cursor.close();
code snippet PA4AD_ Ch08_ContentProviders/src/Ch08_ContentProvidersActivity.java
The ContactsContract.Data Content Provider is used to store all the contact details, such as addresses, phone numbers, and email addresses. In most cases, you will likely be querying for contact details based on a full or partial contact name.
To simplify this lookup, Android provides the ContactsContract.Contacts.CONTENT_FILTER_URI query URI. Append the full or partial name to this lookup as an additional path segment to the URI. To extract the associated contact details, find the _ID value from the returned Cursor, and use it to create a query on the Data table.
The content of each column with a row in the Data table depends on the MIME type specified for that row. As a result, any query on the Data table must filter the rows by MIME type to meaningfully extract data.
Listing 8.37 shows how to use the contact-detail column names available in the CommonDataKinds subclasses to extract the display name and mobile phone number from the Data table for a particular contact.
Listing 8.37: Finding contact details for a contact name
ContentResolver cr = getContentResolver();
String[] result = null;
// Find a contact using a partial name match
String searchName = "andy";
Uri lookupUri =
Uri.withAppendedPath(ContactsContract.Contacts.CONTENT_FILTER_URI,
searchName);
// Create a projection of the required column names.
String[] projection = new String[] {
ContactsContract.Contacts._ID
};
// Get a Cursor that will return the ID(s) of the matched name.
Cursor idCursor = cr.query(lookupUri,
projection, null, null, null);
// Extract the first matching ID if it exists.
String id = null;
if (idCursor.moveToFirst()) {
int idIdx =
idCursor.getColumnIndexOrThrow(ContactsContract.Contacts._ID);
id = idCursor.getString(idIdx);
}
// Close that Cursor.
idCursor.close();
// Create a new Cursor searching for the data associated with the returned Contact ID.
if (id != null) {
// Return all the PHONE data for the contact.
String where = ContactsContract.Data.CONTACT_ID +
" = " + id + " AND " +
ContactsContract.Data.MIMETYPE + " = ‘" +
ContactsContract.CommonDataKinds.Phone.CONTENT_ITEM_TYPE +
"'";
projection = new String[] {
ContactsContract.Data.DISPLAY_NAME,
ContactsContract.CommonDataKinds.Phone.NUMBER
};
Cursor dataCursor =
getContentResolver().query(ContactsContract.Data.CONTENT_URI,
projection, where, null, null);
// Get the indexes of the required columns.
int nameIdx =
dataCursor.getColumnIndexOrThrow(ContactsContract.Data.DISPLAY_NAME);
int phoneIdx =
dataCursor.getColumnIndexOrThrow(
ContactsContract.CommonDataKinds.Phone.NUMBER);
result = new String[dataCursor.getCount()];
while(dataCursor.moveToNext()) {
// Extract the name.
String name = dataCursor.getString(nameIdx);
// Extract the phone number.
String number = dataCursor.getString(phoneIdx);
result[dataCursor.getPosition()] = name + " (" + number + ")";
}
dataCursor.close();
}
code snippet PA4AD_ Ch08_ContentProviders/src/Ch08_ContentProvidersActivity.java
The Contacts subclass also offers a phone number lookup URI to help find a contact associated with a particular phone number. This query is highly optimized to return fast results for caller-ID notification.
Use ContactsContract.PhoneLookup.CONTENT_FILTER_URI, appending the number to look up as an additional path segment, as shown in Listing 8.38.
Listing 8.38: Performing a caller-ID lookup
String incomingNumber = "(650)253-0000";
String result = "Not Found";
Uri lookupUri =
Uri.withAppendedPath(ContactsContract.PhoneLookup.CONTENT_FILTER_URI,
incomingNumber);
String[] projection = new String[] {
ContactsContract.Contacts.DISPLAY_NAME
};
Cursor cursor = getContentResolver().query(lookupUri,
projection, null, null, null);
if (cursor.moveToFirst()) {
int nameIdx =
cursor.getColumnIndexOrThrow(ContactsContract.Contacts.DISPLAY_NAME);
result = cursor.getString(nameIdx);
}
cursor.close();
code snippet PA4AD_ Ch08_ContentProviders/src/Ch08_ContentProvidersActivity.java
Creating and Picking Contacts Using Intents
The Contacts Contract Content Provider includes an Intent-based mechanism that can be used to view, insert, or select a contact using an existing contact application (typically, the native application).
This is the best practice approach and has the advantage of presenting the user with a consistent interface for performing the same task, avoiding ambiguity and improving the overall user experience.
To display a list of contacts for your users to select from, you can use the Intent.ACTION_PICK action along with the ContactsContract.Contacts.CONTENT_URI, as shown in Listing 8.39.
Listing 8.39: Picking a contact
private static int PICK_CONTACT = 0;
private void pickContact() {
Intent intent = new Intent(Intent.ACTION_PICK,
ContactsContract.Contacts.CONTENT_URI);
startActivityForResult(intent, PICK_CONTACT);
}
code snippet PA4AD_ Ch08_ContentProviders/src/Ch08_ContentProvidersActivity.java
This will display a List View of the contacts available (as shown in Figure 8.5).
Figure 8.5
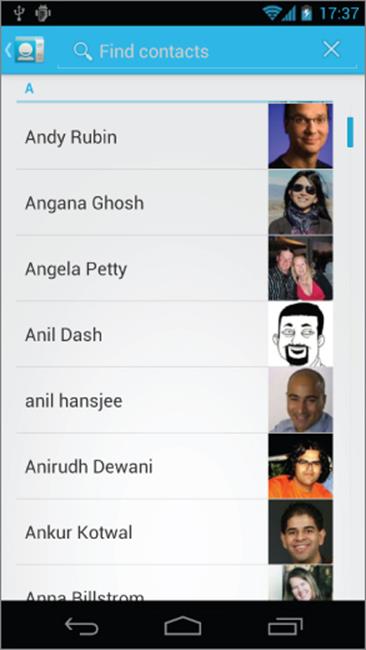
When the user selects a contact, it will be returned as a URI within the data property of the returned Intent, as shown in this extension to Listing 8.39.
@Override
protected void onActivityResult(int requestCode, int resultCode, Intent data) {
super.onActivityResult(requestCode, resultCode, data);
if ((requestCode == PICK_CONTACT) && (resultCode == RESULT_OK)) {
resultTextView.setText(data.getData().toString());
}
}
There are two alternatives to insert a new contact, both of which will prepopulate the new contact form using the values you specify as extras in your Intent.
The ContactsContract.Intents.SHOW_OR_CREATE_CONTACT action will search the contacts Provider for a particular email address or telephone number URI, offering to insert a new entry only if a contact with the specified contact address doesn't exist.
Use the constants in the ContactsContract.Intents.Insert class to include Intent extras that can be used to prepopulate contact details, including the name, company, email, phone number, notes, and postal address of the new contact, as shown in Listing 8.40.
Listing 8.40: Inserting a new contact using an Intent
Intent intent =
new Intent(ContactsContract.Intents.SHOW_OR_CREATE_CONTACT,
ContactsContract.Contacts.CONTENT_URI);
intent.setData(Uri.parse("tel:(650)253-0000"));
intent.putExtra(ContactsContract.Intents.Insert.COMPANY, "Google");
intent.putExtra(ContactsContract.Intents.Insert.POSTAL,
"1600 Amphitheatre Parkway, Mountain View, California");
startActivity(intent);
code snippet PA4AD_ Ch08_ContentProviders/src/Ch08_ContentProvidersActivity.java
Modifying and Augmenting Contact Details Directly
If you want to build your own Sync Adapter to insert server-synchronized contacts into the contacts Provider, you can modify the contact tables directly.
You can use the contact Content Providers to modify, delete, or insert contact records after adding the WRITE_CONTACTS uses-permission to your application manifest.
<uses-permission android:name="android.permission.WRITE_CONTACTS"/>
The extensible nature of the Contacts Contract provider allows you to add arbitrary Data table rows to any account stored as a Raw Contact.
In practice it's inadvisable to extend a Contacts Contract provider belonging to a third-party account with custom data. Such extensions won't be synchronized with the data owner's online server. It's better practice to create your own synchronized contact adapter that will be aggregated with the other accounts within the Contacts Content Provider.
The process for creating your own syncing contact account adapter is beyond the scope of this book. However, in general terms, by creating a record in the Raw Contacts Provider, it's possible for you to create a contacts account type for your own custom data.
You can add new records into the Contacts Contract Content Provider that are associated with your custom contact account. When added, your custom contact data will be aggregated with the details provided by native and other third-party contact information adapters and made available when developers query the Contacts Content Provider, as described in the previous section.
Using the Calendar Content Provider
Android 4.0 (API level 14) introduced a supported API for accessing the Calendar Content Provider. The Calendar API allows you to insert, view, and edit the complete Calendar database, providing access to calendars, events, attendees, and event reminders using either Intents or through direct manipulation of the Calendar Content Providers.
Like the Contacts Contract Content Provider, the Calendar Content Provider is designed to support multiple synchronized accounts. As a result, you can choose to read from, and contribute to, existing calendar applications and accounts; develop an alternative Calendar Provider by creating a calendar Sync Adapter; or create an alternative calendar application.
Querying the Calendar
To access the Calendar Content Provider, you must include the READ_CALENDAR uses-permission in your application manifest:
<uses-permission android:name="android.permission.READ_CALENDAR"/>
Use the Content Resolver to query any of the Calendar Provider tables using their CONTENT_URI static constant. Each table is exposed from within the CalendarContract class, including:
· Calendars—The Calendar application can display multiple calendars associated with multiple accounts. This table holds each calendar that can be displayed, as well as details such as the calendar's display name, time zone, and color.
· Events—The Events table includes an entry for each scheduled calendar event, including the name, description, location, and start/end times.
· Instances—Each event has one or (in the case of recurring events) multiple instances. The Instances table is populated with entries generated by the contents of the Events table and includes a reference to the event that generated it.
· Attendees—Each entry in the Attendees table represents a single attendee of a given event. Each attendee can include a name, email address, and attendance status, and if they are optional or required guests.
· Reminders—Event reminders are represented within the Reminders table, with each row representing one reminder for a particular event.
Each class includes its column names as static properties.
Listing 8.41 queries the Events table for every event, creating an array of strings that holds each event's name and unique ID.
Listing 8.41: Querying the Events table
// Create a projection that limits the result Cursor
// to the required columns.
String[] projection = {
CalendarContract.Events._ID,
CalendarContract.Events.TITLE
};
// Get a Cursor over the Events Provider.
Cursor cursor =
getContentResolver().query(CalendarContract.Events.CONTENT_URI,
projection, null, null, null);
// Get the index of the columns.
int nameIdx =
cursor.getColumnIndexOrThrow(CalendarContract.Events.TITLE);
int idIdx = cursor. getColumnIndexOrThrow(CalendarContract.Events._ID);
// Initialize the result set.
String[] result = new String[cursor.getCount()];
// Iterate over the result Cursor.
while(cursor.moveToNext()) {
// Extract the name.
String name = cursor.getString(nameIdx);
// Extract the unique ID.
String id = cursor.getString(idIdx);
result[cursor.getPosition()] = name + " (" + id + ")";
}
// Close the Cursor.
cursor.close();
code snippet PA4AD_ Ch08_ContentProviders/src/Ch08_ContentProvidersActivity.java
Creating and Editing Calendar Entries Using Intents
The Calendar Content Provider includes an Intent-based mechanism that allows you to perform common actions without the need for special permissions using the Calendar application. Using Intents, you can open the Calendar application to a specific time, view event details, insert a new event, or edit an existing event.
Like the Contacts API, using Intents is the best practice approach for manipulating calendar entries and should be used in preference to direct manipulation of the underlying tables whenever possible.
Creating New Calendar Events
Using the Intent.ACTION_INSERT action, specifying the CalendarContract.Events.CONTENT_URI, you can add new events to an existing calendar without requiring any special permissions.
Your Intent can include extras that define each of the event attributes, including the title, start and end time, location, and description, as shown in Listing 8.42. When triggered, the Intent will be received by the Calendar application, which will create a new entry prepopulated with the data provided.
Listing 8.42: Inserting a new calendar event using an Intent
// Create a new insertion Intent.
Intent intent = new Intent(Intent.ACTION_INSERT, CalendarContract.Events.CONTENT_URI);
// Add the calendar event details
intent.putExtra(CalendarContract.Events.TITLE, "Launch!");
intent.putExtra(CalendarContract.Events.DESCRIPTION,
"Professional Android 4 " +
"Application Development release!");
intent.putExtra(CalendarContract.Events.EVENT_LOCATION, "Wrox.com");
Calendar startTime = Calendar.getInstance();
startTime.set(2012, 2, 13, 0, 30);
intent.putExtra(CalendarContract.EXTRA_EVENT_BEGIN_TIME, startTime.getTimeInMillis());
intent.putExtra(CalendarContract.EXTRA_EVENT_ALL_DAY, true);
// Use the Calendar app to add the new event.
startActivity(intent);
code snippet PA4AD_ Ch08_ContentProviders/src/Ch08_ContentProvidersActivity.java
Editing Calendar Events
To edit a calendar event, you must first know its row ID. To find this, you need to query the Events Content Provider, as described earlier in this section.
When you have the ID of the event you want to edit, create a new Intent using the Intent.ACTION_EDIT action and a URI that appends the event's row ID to the end of the Events table's CONTENT_URI, as shown in Listing 8.43.
Note that the Intent mechanism provides support only for editing the start and end times of an event.
Listing 8.43: Editing a calendar event using an Intent
// Create a URI addressing a specific event by its row ID.
// Use it to create a new edit Intent.
long rowID = 760;
Uri uri = ContentUris.withAppendedId(
CalendarContract.Events.CONTENT_URI, rowID);
Intent intent = new Intent(Intent.ACTION_EDIT, uri);
// Modify the calendar event details
Calendar startTime = Calendar.getInstance();
startTime.set(2012, 2, 13, 0, 30);
intent.putExtra(CalendarContract.EXTRA_EVENT_BEGIN_TIME, startTime.getTimeInMillis());
intent.putExtra(CalendarContract.EXTRA_EVENT_ALL_DAY, true);
// Use the Calendar app to edit the event.
startActivity(intent);
code snippet PA4AD_ Ch08_ContentProviders/src/Ch08_ContentProvidersActivity.java
Displaying the Calendar and Calendar Events
You can also use Intents to display a particular event or to open the Calendar application to display a specific date and time using the Intent.ACTION_VIEW action.
To view an existing event, specify the Intent's URI using a row ID, as you would when editing an event, as shown in Listing 8.43. To view a specific date and time, the URI should be of the form content://com.android.calendar/time/[milliseconds since epoch], as shown in Listing 8.44.
Listing 8.44: Displaying a calendar event using an Intent
// Create a URI that specifies a particular time to view.
Calendar startTime = Calendar.getInstance();
startTime.set(2012, 2, 13, 0, 30);
Uri uri = Uri.parse("content://com.android.calendar/time/" +
String.valueOf(startTime.getTimeInMillis()));
Intent intent = new Intent(Intent.ACTION_VIEW, uri);
// Use the Calendar app to view the time.
startActivity(intent);
code snippet PA4AD_ Ch08_ContentProviders/src/Ch08_ContentProvidersActivity.java
Modifying Calendar Entries Directly
If you are building your own contacts application, or want to build a Sync Adapter to integrate events from your own cloud-based calendar service, you can use the Calendar Content Providers to modify, delete, or insert contact records after adding the WRITE_CONTACTS uses-permission to your application manifest.
<uses-permission android:name="android.permission.WRITE_CALENDAR"/>
The process for creating your own syncing calendar account adapter is beyond the scope of this book; however, the process for adding, modifying, and deleting rows from the associated Calendar Content Providers is the same as that described for your own Content Providers earlier in this chapter.
![]()
You can find further details on performing transactions on the Calendar Content Providers and building Sync Adapters in the Android Dev Guide ((http://developer.android.com/guide/topics/providers/calendar-provider.html.
All materials on the site are licensed Creative Commons Attribution-Sharealike 3.0 Unported CC BY-SA 3.0 & GNU Free Documentation License (GFDL)
If you are the copyright holder of any material contained on our site and intend to remove it, please contact our site administrator for approval.
© 2016-2026 All site design rights belong to S.Y.A.