Programming Chrome Apps
Chapter 6. Miscellaneous APIs
This chapter discusses a grab-bag of Chrome APIs, none of which warrants a full chapter of its own. Some of them are pretty useful, and others you’ll want to read about but will probably never use.
Alarms
JavaScript has always had a way to set one-time or periodic alarms by using the setInterval and setTimeout functions, but their lifetime was limited to the lifetime of the program. When it stops, they’re gone.
With the Chrome alarm APIs, you can set an alarm that lasts as long as the app is installed, even if its background page goes inactive. You create such an alarm with chrome.alarms.create:
chrome.alarms.create(name, alarmInfo)
The second argument is an object that has the following three properties:
when
When the alarm should first fire, in milliseconds past the current time (Date.now())
delayInMinutes
How long to delay until the alarm first fires
periodInMinutes
How long to wait between firings
One of the when and delayInMinutes properties is required, and periodInMinutes should be present only if you want the alarm to fire more than once.
When an alarm fires, it triggers a chrome.alarms.onAlarm event, the callback function of which receives an Alarm object as its argument, indicating which alarm fired. Its most important property is name.
You clear an alarm by using chrome.alarms.clear:
chrome.alarms.clear(name, callback)
The callback function has a Boolean argument that indicates whether the alarm was cleared.
There are also APIs to get information about existing alarms and to clear all alarms, which you can read about in the documentation.
To see how alarms work, here’s an example that displays a notification reminding you to stretch every 20 minutes, as shown in Figure 6-1. When the alarm fires, the notification is generated with the chrome.notifications API that we saw back in Notifications.
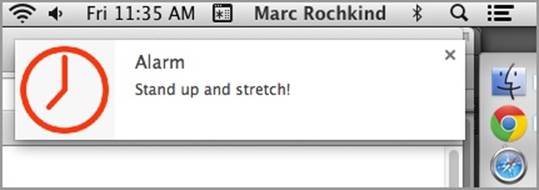
Figure 6-1. An alarm notification
This example has no HTML or JavaScript files other than background.js. Its manifest.json requests alarms and notifications permissions:
{
"app": {
"background": {
"scripts": [
"background.js"
]
}
},
"manifest_version": 2,
"name": "Alarm",
"version": "1.0.0",
"icons": {
"128": "icon128-alarm.png"
},
"permissions": [
"alarms",
"notifications"
]
}
The icon is the one shown in Figure 6-1. We use this both for the app and for its notifications, as we’re about to see.
Here’s background.js, which is the entire app:
chrome.runtime.onInstalled.addListener(
function() {
chrome.alarms.create("alarm-stretch",
{
when: Date.now() + 10 * 1000, // in 10 seconds
periodInMinutes: 20
}
);
}
);
chrome.alarms.onAlarm.addListener(
function(alarm) {
chrome.notifications.create(
'',
{
type: 'basic',
iconUrl: 'icon128-alarm.png',
title: "Alarm",
message: 'Stand up and stretch!'
},
function (notificationID) {
}
);
}
);
Recall from Notifications that after background.js executes, the background page goes inactive because there’s no window active (see Figure 6-2), although Chrome remembers that it had set a listener for the chrome.alarms.onAlarm event. When that event occurs (every 20 minutes, in this case), background.js is executed, thereby reestablishing that event’s handler, and then the event is handled by invoking the handler function, which generates the notification that pops up on the screen.
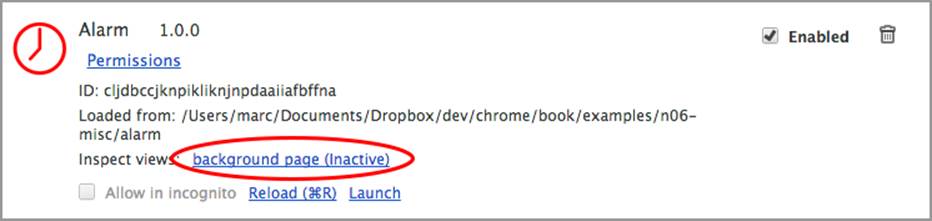
Figure 6-2. The alarm app going inactive
Context Menus
If you right-click (or control-click on a Mac) with the mouse pointer inside a Chrome App window, nothing happens unless the app was loaded unpacked, in which case you get some debugging options, such as Reload App or Inspect Element. But you can create your own context menu by using chrome.contextMenus.create:
chrome.contextMenus.create(createProperties, callback)
Each call creates just one menu item; if you want several items, you must make a call for each one. The createProperties argument has a bunch of properties having to do with the style of the menu item (normal, checkbox, and so on), its title, the context in which it’s effective, and so forth. I’ll just get into the basic properties; you can read about the others in the chrome.contextMenus documentation.
The second argument is a callback that indicates that the item was created, with chrome.runtime.lastError being set if an error occurred.
The background.js page for the simple example we’ll look at just creates a window loaded with index.html, which has just a paragraph of introductory text:
<!DOCTYPE html>
<html lang="en">
<head>
<meta charset="utf-8" />
<title>Context Menus</title>
<script src="contextMenus.js"></script>
</head>
<body>
<p id="para">Right-click to choose something.</p>
</body>
</html>
The manifest requests contextMenus permission:
{
...
"permissions": [
"contextMenus"
]
}
Here’s the app’s JavaScript file, contextMenus.js, which creates two menu items and a handler that’s called when the user clicks an item:
window.onload = function () {
function done() {
if (chrome.runtime.lastError)
console.log(chrome.runtime.lastError);
}
chrome.contextMenus.create(
{
id: "menu-item-1",
title: "Menu Item 1"
},
done
);
chrome.contextMenus.create(
{
id: "menu-item-2",
title: "Menu Item 2"
},
done
);
chrome.contextMenus.onClicked.addListener(
function (info) {
document.querySelector('#para').innerText =
"You clicked " + info.menuItemId;
}
);
};
As of this writing, the documentation for context menus is in pretty bad shape. For example, it refers to extensions instead of apps, and it indicates that certain properties are required or prohibited for “event pages,” by which is meant the app’s background script, which I always namebackground.js. In fact, these rules seem to apply to all uses of context menus, which is either a bug or a documentation error. I suspect that it’s the latter.
Anyway, when you run the app, right-clicking brings up the context menu shown in Figure 6-3. In the figure, the first menu item was chosen earlier, resulting in the text that’s shown in the window (put there by the event handler), and the second menu item is about to be chosen.
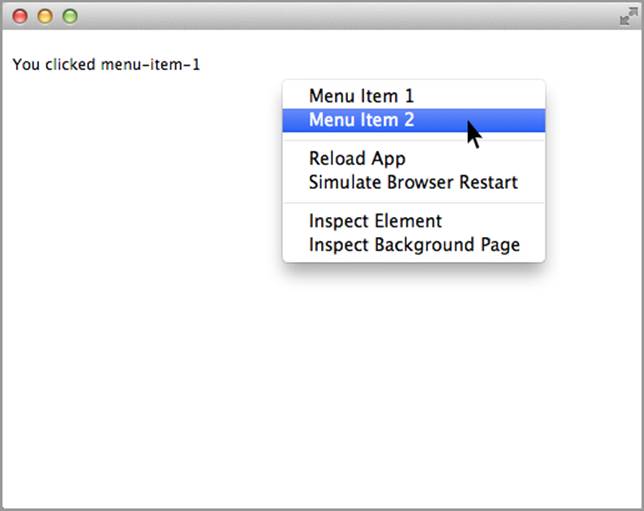
Figure 6-3. Choosing an item from a context menu
Location
The location API provides a way to determine the app’s geographical location or, to be more precise, the location of the device on which it’s running. You start by calling chrome.location.watchLocation to cause a chrome.location.onLocationUpdate event to be fired initially and whenever the location changes:
chrome.location.watchLocation(name, requestInfo)
The first argument names the request, but it’s optional and you can supply an empty string if you want. The second argument, also optional, is an object that provides parameters such as the minimum distance and minimum time between location updates. Both default to zero, which means that all changes are reported. You can read about the details at developer.chrome.com/apps/location.
To see the API in action, here’s a simple example with the usual boring background.js and manifest.json files, except that you need location permission:
{
...
"permissions": [
"location"
]
}
The index.html file has a <p> element to report the location. There’s also an initial “Wait…” notice, because getting the location takes a few seconds:
<!DOCTYPE html>
<html lang="en">
<head>
<meta charset="utf-8" />
<title>Location</title>
<script src="location.js"></script>
</head>
<body>
<p id="para">Wait...</p>
</body>
</html>
Here’s the important part, the location.js file. This just shows the location when it changes:
window.onload = function () {
chrome.location.watchLocation('', {});
chrome.location.onLocationUpdate.addListener(
function(position) {
document.querySelector('#para').innerText = "You are at " +
position.coords.latitude + ' ' + position.coords.longitude;
}
);
};
Figure 6-4 shows the result, and it’s pretty accurate. Because my desktop computer rarely moves, the chrome.location.onLocationUpdate event occurred only once, but had it been a more portable device that did move while the app was running, one or more subsequent updates would have occurred.
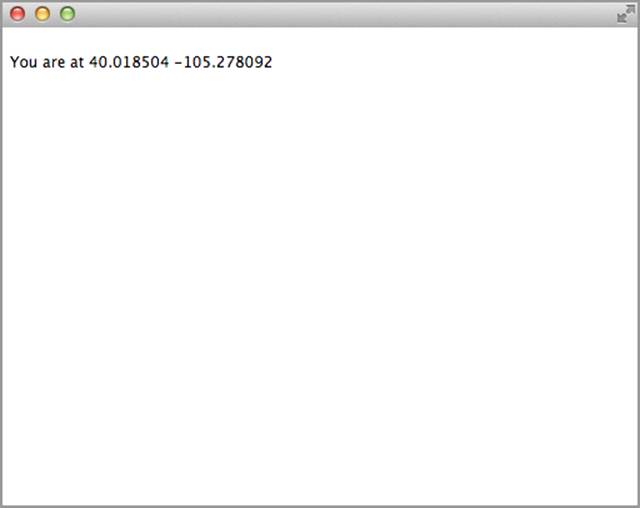
Figure 6-4. An app showing current location
Text-to-Speech
With the tts (text-to-speech) API, you can make your app talk. The primary call is chrome.tts.speak, which utters the text supplied as its first argument:
chrome.tts.speak(utterance, options, callback)
The optional second argument is an object with properties that control the voice to be used, the speech rate, the pitch, and so on, although not every implementation supports every possibility. You can find more details at developer.chrome.com/apps/tts. The optional callback is called right away, perhaps before the speech even started, so you can check chrome.runtime.lastError to see if an error occurred.
You can call chrome.tts.getVoices to get a list of the available voices:
chrome.tts.getVoices(
function(voices) {
console.log(voices);
}
);
Part of the output from this call is shown in Figure 6-5.

Figure 6-5. Available voices for the tts API
A speaking example we’ll look at has the usual background.js and manifest.json files, the latter with tts permission:
{
...
"permissions": [
"tts"
]
}
The index.html file has a text area in which you can type whatever you want spoken, and a button that starts the speech:
<!DOCTYPE html>
<html lang="en">
<head>
<meta charset="utf-8" />
<title>Text-to-Speech</title>
<script src="tts.js"></script>
</head>
<body>
<p>
<textarea id="textarea" cols="55"
rows="20">Text-to-speech example.</textarea>
</p>
<button id="speak">Speak</button>
</body>
</html>
You can see this user interface in Figure 6-6, for which I’ve typed part of a famous speech.
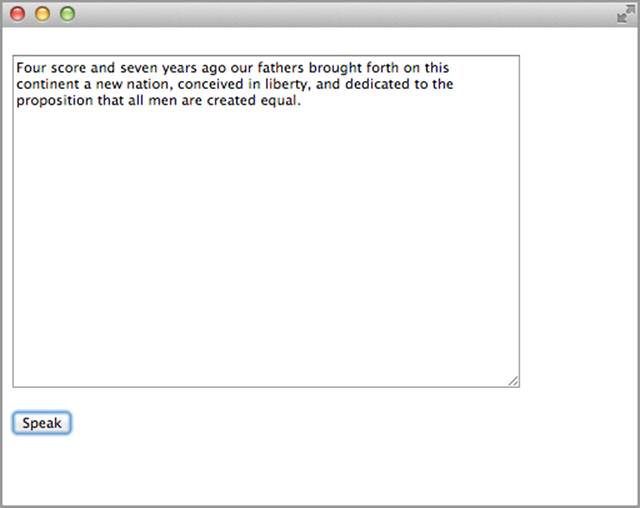
Figure 6-6. Text-to-speech example
Here’s the tts.js file:
window.onload = function () {
document.querySelector("#speak").onclick = function () {
chrome.tts.speak(
document.querySelector("#textarea").value,
{
voiceName: "Google UK English Female",
onEvent: function(event) {
console.log('Event ' + event.type + ' at ' + event.charIndex);
if (event.type === 'error')
console.log('Error: ' + event.errorMessage);
}
},
function() {
if (chrome.runtime.lastError)
console.log('Error: ' + chrome.runtime.lastError.message);
}
);
};
};
chrome.tts.speak is called with two options: voiceName, taken from Figure 6-5, and a callback function that indicates various events during the speaking. The Gettysburg Address sounds strange in a female English voice, but that’s computers for you.
System Queries
There are a few simple APIs for getting information about the system—specifically, CPU usage, displays, memory, network, and storage:
chrome.system.cpu.getInfo(callback)
chrome.system.display.getInfo(callback)
chrome.system.memory.getInfo(callback)
chrome.system.network.getNetworkInterfaces(callback)
chrome.system.storage.getInfo(callback)
Each callback function has a single argument that provides the requested information. There are some additional APIs, for such things as ejecting a storage device; you can read about these on the relevant pages, such as developer.chrome.com/apps/system_storage.
Each info query has its own permission in the manifest.json file:
{
...
"permissions": [
"system.cpu",
"system.display",
"system.memory",
"system.network",
"system.storage"
]
}
In the example program we’ll look at, background.js is as usual and the index.html file has no user interface at all because the output will be displayed on the console log:
<!DOCTYPE html>
<html lang="en">
<head>
<meta charset="utf-8" />
<title>System</title>
<script src="system.js"></script>
</head>
<body>
</body>
</html>
Here’s system.js:
window.onload = function () {
chrome.system.cpu.getInfo(
function (info) {
console.log(info);
}
);
chrome.system.display.getInfo(
function (info) {
console.log(info);
}
);
chrome.system.memory.getInfo(
function (info) {
console.log(info);
}
);
chrome.system.network.getNetworkInterfaces(
function (networkInterfaces) {
console.log(networkInterfaces);
}
);
chrome.system.storage.getInfo(
function (info) {
console.log(info);
}
);
};
The output is shown in Figures 6-7, 6-8, 6-9, 6-10, and 6-11.
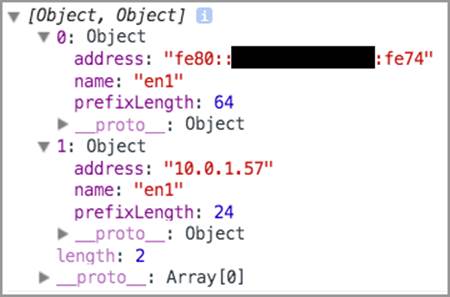
Figure 6-7. Network information
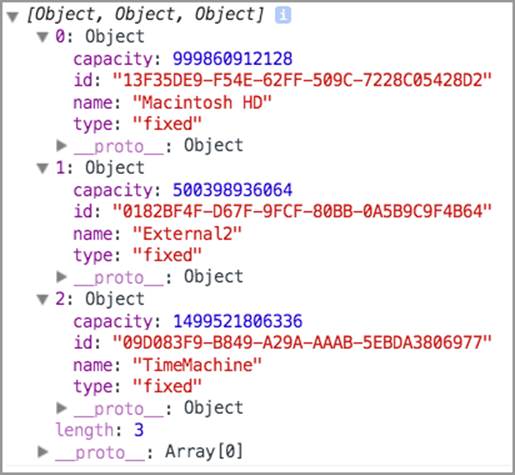
Figure 6-8. Storage information
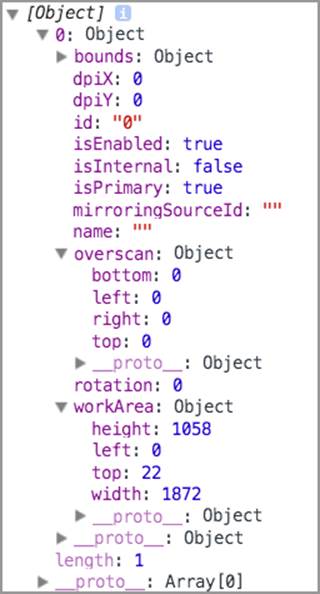
Figure 6-9. Display information
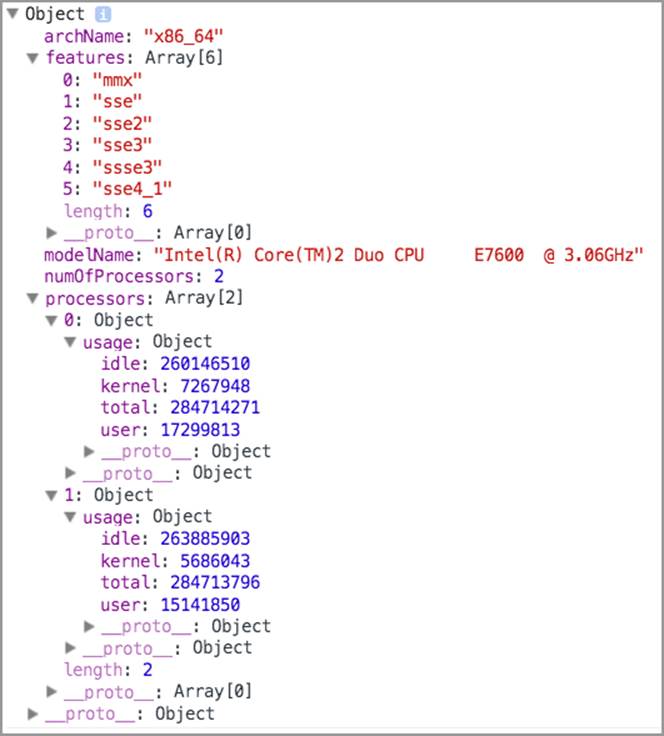
Figure 6-10. CPU information
![]()
Figure 6-11. Memory information
Camera
There are no Chrome APIs for operating the computer’s camera; for that, you use the standard HTML5 media stream APIs. However, you do need to request videoCapture permission in the manifest.json file:
{
...
"permissions": [
"videoCapture"
]
}
Figure 6-12 shows an example app. The larger image is a live video of me fiddling with my computer. I smiled up at the camera and clicked the Take Photo button, resulting in the still capture in the smaller image.

Figure 6-12. Live video (on left) and a captured image
As you’ve come to expect, background.js is nothing special. Here’s the index.html file it references:
<!DOCTYPE html>
<html lang="en">
<head>
<meta charset="utf-8" />
<title>Camera</title>
<script src="camera.js"></script>
</head>
<body>
<video id="video" autoplay></video>
<button id="shutter">Take Photo</button>
<img id="img"></img>
</body>
</html>
The first thing the app must do is connect the <video> element in the HTML to the camera with the HTML5 navigator.webkitGetUserMedia API (details in the “MediaStream API” article on the Mozilla Developer Network):
window.onload = function () {
var img = document.querySelector('#img');
var video = document.querySelector('#video');
navigator.webkitGetUserMedia({video: true, audio: true},
function(localMediaStream) {
video.src = window.URL.createObjectURL(localMediaStream);
video.onloadedmetadata = function(e) {
// ... video is loaded ...
};
},
function(e) {
console.log('Error:', e);
}
);
};
The first callback function receives a MediaStream object, which is converted to an object URL and then set as the <video> element’s src property. A handler for the onloadedmetadata event is also set, but it doesn’t do anything in the example.
The second callback (third argument) to navigator.webkitGetUserMedia is an error callback.
After navigator.webkitGetUserMedia completes, video appears in the larger image, as shown in Figure 6-12.
Following is the code for the button and its handler, also in the window.onload function:
var maxWidth = 300;
function capture() {
var canvas = document.createElement('canvas');
canvas.width = maxWidth;
canvas.height = video.videoHeight * maxWidth / video.videoWidth;
canvas.getContext('2d').drawImage(video, 0, 0, canvas.width, canvas.height);
var data = canvas.toDataURL('image/png');
img.setAttribute('src', data);
}
document.querySelector('#shutter').onclick = capture;
Because the captured image can’t be directly set into an <img> element, it’s first drawn into a canvas (see HTML5 Canvas) and then a data URL extracted from that canvas is set as the src property of the <img> element. That makes the still appear in the window (see Figure 6-12).
Bluetooth, USB, and Serial APIs
Chrome provides APIs for connecting to three kinds of external devices: Bluetooth, USB, and serial. The APIs supply functionality to discover which devices are available and to open them in some sense, but the actual data sent back and forth is device-specific. This is similar to the situation with data files: the APIs handle discovering what’s there, opening a connection, and transmitting data, but the actual data depends on the file: JPEG, Excel spreadsheet, some sort of calendar, or whatever. Chrome APIs don’t help with the data itself, only with the plumbing.
There are too many APIs, too many devices, and too many complications to discuss in depth here, so I’ll just explain some basic Bluetooth operations, and if you want to deal with these hardware devices, you can consult the relevant documentation pages for chrome.bluetooth,chrome.bluetoothLowEnergy, chrome.bluetoothSocket, chrome.usb, and chrome.serial.
To use Bluetooth, you include a bluetooth section in your manifest.json file; there are no permissions:
{
...
"bluetooth": {
"uuids": [ "1105", "1106" ],
"socket": true
}
}
The uuids are numbers that identify Bluetooth profiles that the app will be using. Profiles are specific data formats that are defined as part of various Bluetooth standards. This example specifies two, although it doesn’t do any actual data communication, as we’ll see.
The background.js is the usual one that just opens a window. The index.html has a Discover button and a text area for results, and it also has some CSS for buttons that the JavaScript will add dynamically:
<!DOCTYPE html>
<html lang="en">
<head>
<meta charset="utf-8" />
<title>Bluetooth</title>
<script src="bluetooth.js"></script>
<style>
.device {
display: block;
margin-top: 5px;
}
</style>
</head>
<body>
<button id="discover">Discover</button>
<p>
<textarea id="textarea" cols="55" rows="20" readonly
style='outline: none;'></textarea>
</p>
</body>
</html>
The app in bluetooth.js first queries for all existing device connections with the chrome.bluetooth.getDevices API:
chrome.bluetooth.getDevices(callback)
The example makes this call and then shows the devices in the window as a series of buttons:
window.onload = function () {
chrome.bluetooth.getDevices(
function(devices) {
devices.forEach(updateDeviceName);
}
);
function updateDeviceName(device) {
log('\nadded: ' + device.name);
console.log(device);
var b = document.createElement('button');
b.className = 'device';
b.innerText = 'Connect to ' + device.name;
b.device = device;
b.onclick = function (e) {
connectTo(e.srcElement.device);
};
document.body.appendChild(b);
};
function log(msg) {
var m = (typeof(msg) == 'object') ? JSON.stringify(msg) : msg;
console.log(m);
document.querySelector("#textarea").value += m + '\n';
}
};
You can see these buttons in Figure 6-13. I’ll show the connectTo function a bit later.
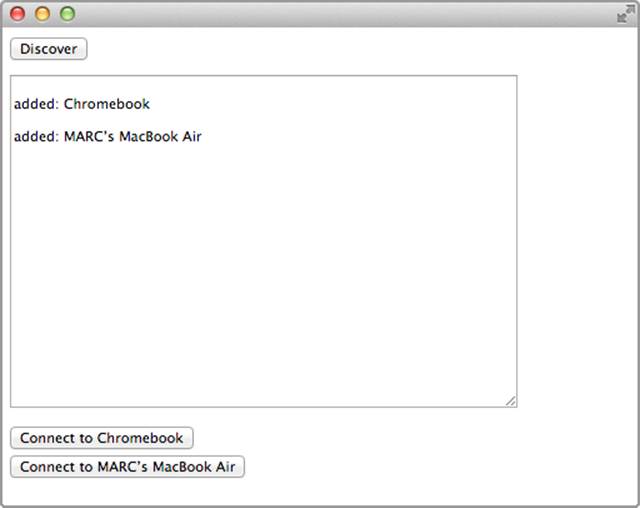
Figure 6-13. Initial list of devices with connection buttons
If a device is subsequently activated somehow for Bluetooth (the details are up to the device and the OS), the app can discover them by using chrome.bluetooth.startDiscovery:
chrome.bluetooth.startDiscovery(callback)
Because discovery uses a lot of resources, it’s important to stop it at some point with chrome.bluetooth.stopDiscovery:
chrome.bluetooth.stopDiscovery(callback)
The example calls chrome.bluetooth.startDiscovery when you click the Discover button, and then it calls chrome.bluetooth.stopDiscovery 30 seconds later:
document.querySelector("#discover").onclick = function () {
chrome.bluetooth.startDiscovery(
function() {
log('\ndiscovery started');
// Stop discovery after 30 seconds.
setTimeout(
function() {
chrome.bluetooth.stopDiscovery(function() {});
log('\ndiscovery stopped');
},
30000
);
}
);
};
When a device is discovered, changed, or removed, an event is fired. Here’s the code that sets up handlers for these three events.
chrome.bluetooth.onDeviceAdded.addListener(updateDeviceName);
chrome.bluetooth.onDeviceChanged.addListener(updateDeviceName);
chrome.bluetooth.onDeviceRemoved.addListener(removeDeviceName);
The updateDeviceName function in the preceding example is what added the button for a device. Figure 6-14 shows an additional device that was discovered after the Discover button was clicked.
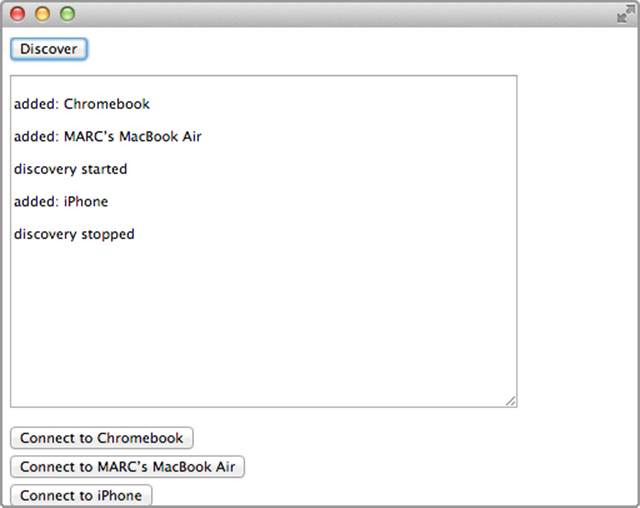
Figure 6-14. The list of devices after clicking the Discover button
The removeDeviceName function removes the corresponding button (the device connection itself has already been removed):
function removeDeviceName(device) {
log('\ndeleted: ' + device.name);
for (var d of document.body.children) {
if (d.className === 'device' && d.device.address === device.address)
document.body.removeChild(d);
}
}
That’s really all this example can do. Here’s the connectTo function that acts as the button onclick handler, which creates a Bluetooth socket:
function connectTo(device) {
var uuid = '1106';
var onConnectedCallback = function() {
if (chrome.runtime.lastError) {
console.log("Connection failed: " +
chrome.runtime.lastError.message, device.name);
}
else {
console.log('Connected OK');
// ... use connection as defined by profile ...
}
};
chrome.bluetoothSocket.create(
function(createInfo) {
console.log(createInfo);
// ... should save createInfo.socketId ...
chrome.bluetoothSocket.connect(createInfo.socketId,
device.address, uuid, onConnectedCallback);
}
);
}
Attempting to connect results in an error, because I made no serious attempt to determine the correct profile for any of the devices, much less implement that profile. That’s work for a Bluetooth expert, but at least you have some idea of how things operate from the Chrome API perspective.
Internationalization and Localization
Internationalization is designing your application so that it’s reasonably easy to configure it for a specific language and/or culture. The configuration job is called localization. Because both words are hard to type and pronounce, they’re often abbreviated by the count of their interior letters:i18n and l10n.
Internationalization mostly involves three kinds of information that varies depending on language and culture:
§ Strings
§ Dates and times
§ Numbers, including currency and percentages
Localization is mostly translating the strings from the language of the developer to some other language. After you have internationalized dates and numbers, localization is automatic and doesn’t require any human creativity and decision making.
To the extent possible, it’s generally a good idea to globalize your user interface so as to reduce the amount of localization. For example, if you represent a date as 2014-06-12, users around the world will know what you mean. If you instead represent it as “June 12, 2014”, you will need to internationalize and then localize the month name. The same goes for the horrible choice 6/12/2014. (Even if you show it as 12/6/2014 for European users, you still have problems, for how are they to know that you’ve localized it?)
Another example of globalization is using icons instead of words to represent actions, although even then you have to make sure that the icons are globally meaningful.
(As you already know, outside of this section, I haven’t internationalized any of my examples, because that would make the source code harder to follow.)
Internationalizing and Localizing Strings
Most systems for internationalizing and localizing strings, including the Chrome App system, work like this:
§ In the code, each literal string is replaced by a key into a dictionary of strings.
§ There’s one dictionary per supported language, identified by a language identifier such as en, de, or es.
§ At runtime, the effective language is chosen by the user or from a system-wide setting.
§ Localizing for a specific language involves taking an existing dictionary, usually the one that the developer created, and translating the strings to create a new dictionary.
For Chrome Apps, you get a localized string with the call:
chrome.i18n.getMessage("messagename")
In this example, messagename is the key. In the manifest and CSS files, you refer to an internationalized string with the notation MSG_messagename. You can’t use that notation in HTML files—you have to modify strings with JavaScript, as I’m about to show.
A language dictionary, which must be named messages.json, is coded in JSON as in this example, for English (locale en):
{
"hello": {
"message": "Hello",
"description": "The word 'Hello', to appear in the main window."
},
"goodbye": {
"message": "Goodbye",
"description": "The word 'Goodbye', to appear in the main window."
}
}
For each key, there’s a message property that supplies the localized string, and an optional description that’s an aid to the translator.
Here’s the corresponding Spanish dictionary:
{
"hello": {
"message": "Hola",
"description": "The word 'Hello', to appear in the main window."
},
"goodbye": {
"message": "Adiós",
"description": "The word 'Goodbye', to appear in the main window."
}
}
The text needs to be in UTF-8, so make sure you’re using a text editor that supports that encoding.
You put each messages.json in a folder named for its locale (en, es, and so on), and you put the local folders in a folder named _locales, as shown in Figure 6-15.
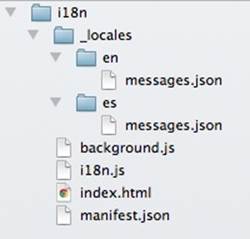
Figure 6-15. Source files set up for I18N
You have to add a default_locale property to the manifest, like this:
{
"app": {
"background": {
"scripts": ["background.js"]
}
},
"manifest_version": 2,
"name": "I18N",
"version": "1.0.0",
"default_locale": "en"
}
The background.js file in the example is the usual one that just opens a window. Here’s the index.html file:
<!DOCTYPE html>
<html lang="en">
<head>
<meta charset="utf-8" />
<title>I18N</title>
<script src="i18n.js"></script>
</head>
<body>
<h1 id=hello_phrase>[hello goes here]</h1>
<h1 id=goodbye_phrase>[goodbye goes here]</h1>
</body>
</html>
What actually appears at runtime is determined by the JavaScript in i18n.js:
window.onload = function () {
document.querySelector("#hello_phrase").innerHTML =
chrome.i18n.getMessage("hello");
document.querySelector("#goodbye_phrase").innerHTML =
chrome.i18n.getMessage("goodbye");
}
So, assuming that the computer’s locale is set to English, when the app is first launched you see what’s shown in Figure 6-16.
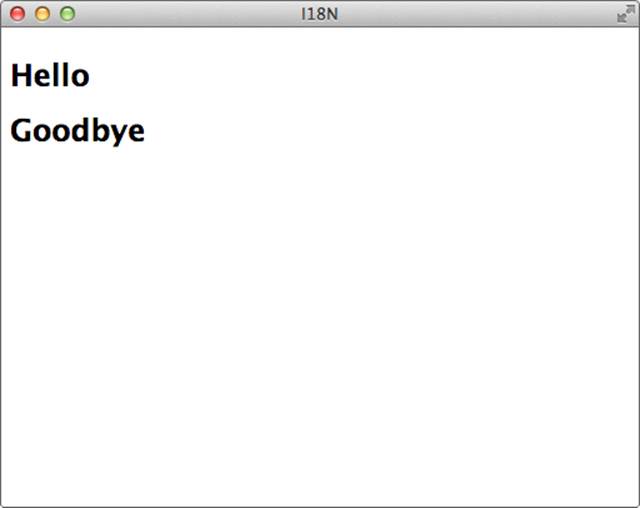
Figure 6-16. An app localized for English
If you then set your computer’s locale to Spanish (how you do that varies with your operating system), relaunch Chrome, and then launch the app, you get what’s shown in Figure 6-17.
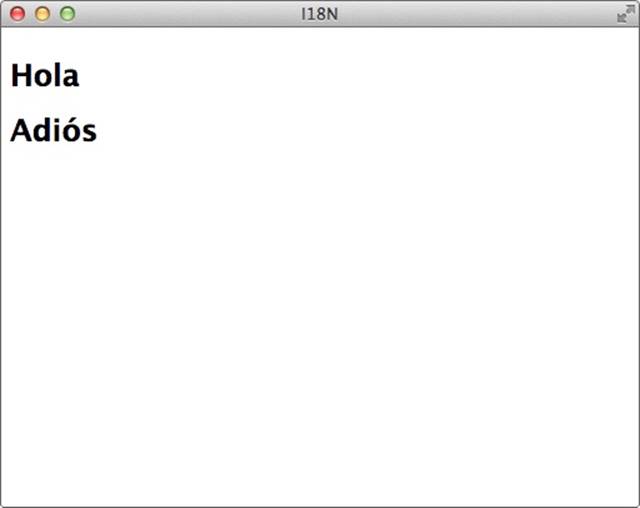
Figure 6-17. An app localized for Spanish
In practice, here’s how you should internationalize strings:
§ Create messages.json files for two locales as you develop the app, so that you can test that the internationalization mechanism works.
§ Choose your native locale (English, for me) for one of them and code the strings as they should appear in that locale.
§ Pick any other locale for the other messages.json file. If you know that language, go ahead and enter the strings. If not, put in bogus strings for testing (as I’ll show in a bit).
§ As you develop the user interface, switch locales occasionally to ensure that strings are being handled properly.
§ To localize the app, give the dictionary you developed in your native language to the translator, and then place the messages.json file that he or she produces into the proper folder. Then, provide a test version of the app to the translator so that he or she can verify that the translation went as expected.
§ Unfortunately, most people will be unable to translate a JSON file without making a few errors that mess up the JSON notation, so you’ll likely need to fix the files that you get back.
Because I know only one language, here’s an ersatz German dictionary I might use during development:
{
"hello": {
"message": "Hello [de]",
"description": "The word 'Hello', to appear in the main window."
},
"goodbye": {
"message": "Goodbye [de]",
"description": "The word 'Goodbye', to appear in the main window."
}
}
Changing the locale to de results in what’s shown in Figure 6-18, which is good enough for testing.
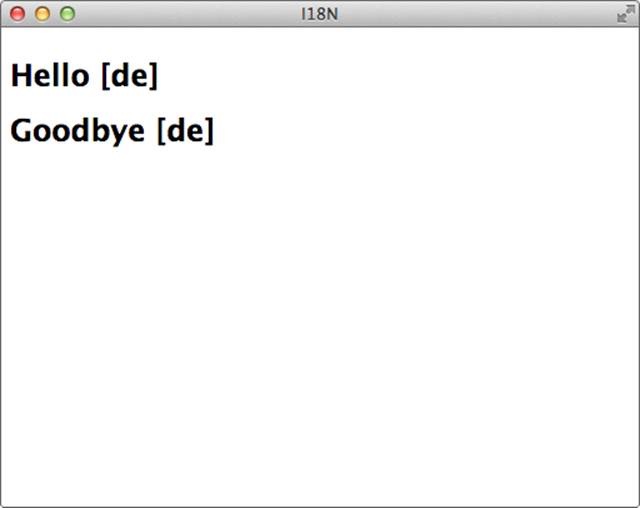
Figure 6-18. An app localized for ersatz German
There are a few more features of the i18n API that I didn’t cover here; if you’d like more information, see the chrome.i18n documentation for the full treatment.
Internationalizing Numbers
Numbers can be handled with ECMAScript (what standard JavaScript is called) facilities, not unique to Chrome Apps. I’ll give the highlights here, and you can read all the details at the ECMAScript Internationalization API.
Countries vary in whether they use commas to group digits and a period to mark the decimal point, or vice versa. The simplest way to format a decimal number for the current locale is to construct a Number object and call its toLocaleString method, like this:
var num = new Number(1234.56);
var s = num.toLocaleString();
You can also explicitly choose the locale with an argument to toLocaleString:
function decimalNumbers() {
var num = new Number(1234.56);
console.log("Decimal format, user's language:", num.toLocaleString());
console.log("Decimal format, German:", num.toLocaleString("de"));
}
Figure 6-19 illustrates what appears on the console.

Figure 6-19. A number localized for English and German
For currency, toLocaleString takes a second argument that indicates the currency. For the current locale, you need to supply an explicit argument. You can get the current locale by using navigator.language (see also Figure 6-20):
function currencyNumbers() {
var lang = navigator.language;
var num = new Number(1234.56);
console.log("Currency format, pound sterling, user's language:",
num.toLocaleString(lang, {style: "currency", currency: "GBP"}));
console.log("Currency format, pound sterling, German:",
num.toLocaleString("de", {style: "currency", currency: "GBP"}));
}

Figure 6-20. A number in pounds sterling localized for English and German
You can also handle percent (see also Figure 6-21):
function percentNumbers() {
var lang = navigator.language;
var num = new Number(1234.56);
console.log("Percent format, user's language:",
num.toLocaleString(lang, {style: "percent"}));
console.log("Percent format, German:",
num.toLocaleString("de", {style: "percent"}));
}
![]()
Figure 6-21. Percentage localized for English and German
Internationalizing Dates
There are only a couple of ways to represent numbers in any locale ($1234.56 or $1,234.56, for US English), but there are numerous ways to represent dates: 6/12/14, 6/12/2014, June 12 2014, 12-June-2014, 2014-06-12, 2014 June 12, 12 June 2014, and 2014-June-12 are all the same date. Add time, and it gets worse: you can have 12-hour or 24-hour time, with various forms of A.M./P.M. notations, a time zone expressed as letters (for example, MST) or a time offset, and so on.
So, even without any attempt at localization, dates and times are messy. With localization, they’re messier.
You can handle dates, like numbers, by using ECMAScript standard facilities. You can go to the ECMAScript Internationalization API documentation for more detail than I’ll present here.
At first, things seem easy—all you do is the following:
var d = new Date("2014-06-12");
console.log("Local time, user's language:", d.toLocaleString(lang));
console.log("Local time, German:", d.toLocaleString("de"));
Figure 6-22 reveals what you get.

Figure 6-22. A date localized in default format for English and German
There are three problems here:
§ A time is shown even though none was specified.
§ The ambiguous format MM/DD/YYYY or DD.MM.YYYY is used, even though I have my computer set to use the format YYYY-MM-DD. It seems that Chrome ignores the computer’s date-format setting.
§ The date seems to be wrong!
The seemingly wrong date was caused by 2014-06-12 being interpreted as 2014-06-12T00:00:00-00:00 (midnight, UTC) and then being translated to Mountain Daylight Time, which moves it six hours backward to 6 P.M. on 11-June-2013.
You can solve the shifting-date problem easily by passing a time-zone option to toLocaleString, one of several options it takes as its second argument. The principal ones are listed in Table 6-1.
Table 6-1. toLocaleString options
|
Option |
Values |
|
timeZone |
UTC or an IANA time-zone name (see iana.org/time-zones), such as America/Denver or Europe/Bucharest |
|
hour12 |
Whether to use 12-hour time; true or false |
|
weekday |
narrow, short, long |
|
era |
narrow, short, long |
|
year |
numeric, 2-digit |
|
month |
numeric, 2-digit, narrow, short, long |
|
day |
numeric, 2-digit |
|
hour |
numeric, 2-digit |
|
minute |
numeric, 2-digit |
|
second |
numeric, 2-digit |
|
timeZoneName |
short, long |
Because the options are properties of an object, you can’t specify the order. For instance:
{year: "numeric", month: "numeric", day: "numeric"}
and:
{year: "numeric", day: "numeric", month: "numeric"}
are the same.
Here are some examples:
var d = new Date("2014-06-12T12:00:00-00:00");
var options1 = {
year: "numeric",
month: "long",
day: "numeric"
};
console.log("Local date, user's language:", d.toLocaleString(lang, options1));
console.log("Local date, German:", d.toLocaleString("de", options1));
var options2 = {
year: "numeric",
month: "short",
day: "numeric",
hour: "2-digit",
minute: "2-digit",
second: "2-digit",
timeZone: "America/Denver",
timeZoneName: "short"
};
console.log("Local date, user's language:", d.toLocaleString(lang, options2));
console.log("Local date, German:", d.toLocaleString("de", options2));
The console output is shown in Figure 6-23.

Figure 6-23. Example dates localized for English and German
Here’s a function to provide a date in the global YYYY-MM-DD format without using toLocaleString at all. Note that the Date methods it does call all return results in the local time zone:
function getDateLocal(d) {
return d.getFullYear() + "-" + (101 + d.getMonth()).toString().slice(-2) +
"-" + (100 + d.getDate()).toString().slice(-2);
}
var d = new Date("2014-06-12T12:00:00-00:00");
console.log("Local date, YYYY-MM-DD:", getDateLocal(d));
Figure 6-24 displays the output.
![]()
Figure 6-24. A date in global format
I like to write dates in the form DD-MMM-YYYY, where MMM is the month in English, because it’s a little more readable to most people than the YYYY-MM-DD format, and because there’s no ambiguity. Even though I write the month name in English, most people can recognize at least month names in English, even if they’re not fluent speakers.
Following is a function to return the local date with a spelled-out month, localized by the computer, even though I don’t know the month names in any language but my own:
function getDateLocalLongMonth(d, lang) {
if (!lang)
lang = navigator.language;
var month = d.toLocaleString(lang, {month: "long"});
return d.getDate().toString() + "-" + month + "-" + d.getFullYear();
}
var d = new Date("2014-06-12T12:00:00-00:00");
console.log("Local date, DD-MMM-YYYY:", getDateLocalLongMonth(d));
console.log("Local date, German, DD-MMM-YYYY:", getDateLocalLongMonth(d, "de"));
Figure 6-25 depicts the resulting output.

Figure 6-25. A date with month localized for English and German
Chapter Summary
This final chapter included a bunch of miscellaneous APIs for alarms, context menus, location, text-to-speech, system queries, the camera, hardware interfaces (Bluetooth, USB, and serial), and internationalization.
All materials on the site are licensed Creative Commons Attribution-Sharealike 3.0 Unported CC BY-SA 3.0 & GNU Free Documentation License (GFDL)
If you are the copyright holder of any material contained on our site and intend to remove it, please contact our site administrator for approval.
© 2016-2026 All site design rights belong to S.Y.A.