Programming Google App Engine
Chapter 12. Large Data and the Blobstore
App Engine limits the sizes of chunks of data that can be passed between the clients, application instances, and services. Incoming requests and outgoing responses cannot exceed 32 megabytes, datastore entities and memcache values cannot contain more than 1 megabyte, and services limit API calls and responses to sizes ranging between 1 and 32 megabytes, depending on the service. These limits help App Engine maintain a responsive infrastructure at a large scale. Google has managed to increase some of these limits by improving and tuning its infrastructure, but the role of limits remains.
1 megabyte data entities and 32 megabyte requests and responses are generous for many purposes, but insufficient for others. Images, audio, video, and large data applications such as scientific computing often involve transmitting and manipulating larger units. Even if most of your user-oriented transactions are small, administrative tasks such as backups and data aggregation can get hefty.
The App Engine Blobstore is a specialized service for creating, manipulating, and serving very large amounts of data. The size of a single Blobstore value is unlimited. (Or rather, it’s limited only by your budget.) Your app can accept a large file as a user upload, serve a Blobstore value in response to a request, create a new Blobstore value, or append to or delete an existing one. An app can also read from a Blobstore value, a portion at a time.
For the same reasons other services have limits, the way apps interact with the Blobstore is also limited. An app can only read 32 megabytes from a Blobstore value with a single API call. If it needs more, it must make multiple calls. Appending to values is similarly constrained.
However, the Blobstore has a special relationship with the frontend, such that much larger values can be served as responses to requests, or accepted from users as uploads. Your app manages these interactions, using a combination of response headers, Blobstore-specific upload URLs, and standard browser protocols. The app can serve a Blobstore value in response to any request by setting a response header. The frontend intercepts the header, and pipes the value directly from the Blobstore to the client. The data does not pass through the application instance.
An app can also accept a new Blobstore value by using a standard web form’s file upload widget, or from any client that behaves similarly (using a PUT request with MIME multipart data). The app calls the Blobstore API to generate a unique short-lived upload URL for the form. When the user submits the form, the file upload fields are routed directly to the Blobstore to become large Blobstore values, and the rest of the form data becomes a request for the app itself. The app gets an opportunity to accept or reject the value, and can preemptively set certain limits on what the Blobstore will accept.
Blobstore values are simple, potentially large, chunks of data. They have no structure that is used by the service, and cannot be queried directly with a service call. Each value has a Blobstore key. For easier retrieval of keys, the Blobstore interacts with the datastore to store metadata about its values in datastore entities. These entities can be referred to in your own data models, and queried for metadata properties (such as size). They can even be deleted: deleting the datastore entity deletes the corresponding Blobstore value.
WARNING
Careful not to confuse Blobstore values and the name for the bytestring value type in the datastore API (“blob”). These are not related. We’ll try to use the term “Blobstore value” consistently, but be aware that the Blobstore API sometimes uses the word “blob” to mean “Blobstore value.”
In this chapter, we walk through the features of the Blobstore, such as accepting large files from users with a web form, managing the values with the datastore, and serving them back to users. We also discuss creating, appending to, and reading byte ranges from values in application code. This chapter also presents a complete example app, in Python and Java, for a simple private file storage service. You can download the complete code for the example apps from the book’s website.
Accepting User Uploads
The Blobstore was originally designed as a way to accept file uploads from users, such as for photo sharing or document management services. The mechanism for accepting large data in requests is compatible with how browsers submit file uploads from web forms, by using MIME multipart messages in a POST request. You can also implement this standard protocol in a custom client.
Because the POST request may exceed the request size limit for an application server, the request must go to a special URL known to the frontend as intended for the Blobstore. Your app creates this URL by calling the Blobstore API. When the frontend receives a request at this URL, it recognizes the file uploads and directs them to the Blobstore to become Blobstore values. If the data contains multiple such parts, multiple Blobstore values are created. Then the data portions of these parts are removed from the request, the parts are annotated with Blobstore information (such as the Blobstore key for the new value), and the annotated request is passed to a “success” request handler for further processing. You tell App Engine which request handler URL to use when you generate the Blobstore upload URL.
You can specify size limits on the expected user uploads when you call the API to create the upload URL. App Engine will reject a request with an individual value or total size exceeding the limits you set. If the request doesn’t meet these requirements or is otherwise malformed, App Engine responds with a generic HTTP 500 server error status code. In this case, no Blobstore values are created, and the app’s request handler is not invoked.
The upload URL is randomly generated and difficult to guess, it can only be used once, and it must be used within 10 minutes of when it is created. It otherwise has no restrictions. If the user is uploading private data that ought to be associated with her account, or if the user must otherwise be signed in to upload files, the request handler must check for these conditions, and delete inappropriate uploaded Blobstore values, if any. Cookies are preserved on the rewritten request. Note that merely restricting access to the upload request handler URL in app.yaml is not enough to prevent Blobstore values from being created.
The request handler can do whatever it wants in response to the posted form. A best practice is to reply to the client with an HTTP redirect, using status code 302 and a Location header of another URL. This prevents browsers from allowing the accidental resubmission of the form if the user navigates through their browser history (such as with the “back” button). This also prevents the rather weird-looking generated Blobstore URL from appearing in the browser’s address bar.
TIP
Using the “back” button to return to a simple form whose action in a Blobstore upload URL can be problematic. A Blobstore upload URL expires after its first use, and a subsequent submission to that URL results in a 404 Not Found error response served by the Blobstore. If your users are likely to use the “back” button after submitting a form in order to submit the form again, you may want to use JavaScript to call the app and regenerate the form each time it is viewed. (The 302 Redirect only prevents the browser’s “Do you want to resubmit?” message, it does not prevent the user from viewing the form again from the browser history.)
Blobstore values are created before your request handler is called. If your app decides it does not want the values, it must delete them. Furthermore, if there is an error during the execution of the request handler, the Blobstore values will remain.
Before we see the APIs for processing uploads in Python and Java, let’s take a quick look at the underlying protocol. Understanding the protocol is useful when adapting these instructions to your web application framework of choice.
Web Forms and MIME Multipart Data
Here is HTML for a typical web form, with a file upload field:
<form action="/my-upload-url" method="post" enctype="multipart/form-data">
<label for="title">Title:</label>
<input type="text" id="title" name="title" /><br />
<label for="upload">File:</label>
<input type="file" id="upload" name="upload" /><br />
<input type="submit" value="Upload File" />
</form>
This form describes three form widgets: a text field, a file upload field, and a submit button. Figure 12-1 shows what this form looks like in Chrome on a Mac.
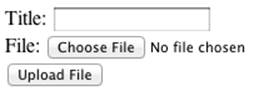
Figure 12-1. A simple web form, with a text field, a file upload field, and a submit button
When the user clicks the “Upload File” button, the browser assembles the data entered into the form fields (if any) into a request to the URL declared in the action attribute of the <form> element, in this case /my-upload-url. The request uses the HTTP method POST, which is set in the method attribute.
The request includes a Content-Type header that tells the server how to interpret the rest of the data. Its value has two parts: a declaration that the body of the request is a MIME multipart value, and the boundary string used to delimit the parts. The client generates a random boundary string that it knows does not appear in the data of any of the parts. For example:
Content-Type: multipart/form-data;
boundary=----WebKitFormBoundaryBv22aFA20gESR2pT
(This would appear without a line break in the request header text.) The request also includes the header Mime-Version: 1.0, which allows for future revisions of the MIME message protocol.
TIP
The enctype="multipart/form-data" attribute of the <form> element is required for forms with one or more file upload fields. Without it, the form data is sent with the simpler content type of application/x-www-form-urlencoded, and the value of the file upload field becomes just the filename, without the file contents.
The request body consists of one or more parts. Each part consists of two hyphens (--), the boundary string, an end-of-line sequence (a carriage return followed by a newline), zero or more header lines, a blank line, and the part body, followed by one more end-of-line sequence. The entire request body ends with two hyphens, the boundary string, and two more hyphens.
For example, the web form above might produce a request body like so:
------WebKitFormBoundaryBv22aFA20gESR2pT
Content-Type: text/plain
MIME-Version: 1.0
Content-Disposition: form-data; name="title"
The value of the title field
------WebKitFormBoundaryBv22aFA20gESR2pT
Content-Type: application/octet-stream
MIME-Version: 1.0
Content-Length: 12345
Content-MD5: NzgyMGRkYTRjNTVmOThjODAyY2U2M2M1Y2ZkNjA2NzA=
Content-Type: application/octet-stream
Content-Disposition: form-data; name="upload"; filename="filename"
The content of the file
------WebKitFormBoundaryBv22aFA20gESR2pT--
Each field in the form that has a value becomes a message part. The name of the field appears in the Content-Disposition header of the part, and the value of the field is the part’s body.
Multiple parts can have the same name. This occurs if the form has multiple fields of the same name and the fields have values. For example, you might give a set of checkboxes (of type="checkbox") all the same name, so the selected checkboxes are grouped when the app reads the form data. If a file upload field (of type="file") has the attribute multiple="true", the browser will allow the user to select more than one file, and each file will appear as a separate part, using the name of the field.
A form field must have a value to appear as a part. How this behaves depends on the field type. For example, a checkbox widget only contributes a part to the request if it is checked. A file upload field only contributes a part if there is a file selected.
File parts have a Content-Disposition header that includes the name of the field as well as the filename of the upload, as reported by the browser. The browser also provides a Content-Type header, which it either gets from the filesystem or derives from the filename extension. For example:
Content-Disposition: form-data; name="upload"; filename="mypic.jpg"
Content-Type: image/jpeg
The header and body are separated by a blank line. The body itself is a stream of bytes that represents the content of the file, followed by the end-of-line sequence and the next boundary string (either beginning the next part or ending the request body).
Blobstore Upload Requests
We just saw what the request looks like when it arrives at the frontend. If the request URL (the form’s action URL) is a Blobstore upload URL, the frontend juggles the data such that file upload parts go to the Blobstore, and the rest of the request goes to your app.
When handling a request to a Blobstore upload URL, App Engine processes the MIME multipart data looking for file upload fields, specifically parts where a filename="..." appears in the Content-Disposition header and a Content-Type header is provided. For each of these, App Engine creates a Blobstore value whose content is the body of the part. It also remembers the filename, the content type, and the date and time the file was uploaded. The Blobstore value is assigned a unique, randomly generated key.
App Engine then rewrites the request. The result is still in the MIME multipart format, with one part for each field with a value. App Engine generates a new boundary string to make sure it does not collide with anything in the rewritten request. Parts without filenames are otherwise left intact.
Parts with filenames are replaced with new data that indicates the actual data for the part is now in the Blobstore. The new data includes the Blobstore key for the value, as well as everything else it knows about the value. For example:
--===============1986177482156009064==
Content-Type: message/external-body; blob-key="UKt09ITADgRVeO_WZDdz2w==";
access-type="X-AppEngine-BlobKey"
MIME-Version: 1.0
Content-Disposition: form-data; name="upload"; filename="mypic.jpg"
Content-Type: image/jpeg
MIME-Version: 1.0
Content-Length: 733
Content-MD5: ZjIyMzY3MDIyYTViMWEzYzZiNzYwNjhhZjMwMWI2YTQ=
content-type: image/jpeg
content-disposition: form-data; name="upload"; filename="mypic.jpg"
X-AppEngine-Upload-Creation: 2012-01-18 22:45:06.980751
--===============1986177482156009064==--
As shown, the Blobstore key appears in the Content-Type header for the part, as blob-key="...". The body of the part now includes more header-like information, such as the MD5 hash and creation date and time. This region ends with two blank lines, which any MIME message parser would recognize as an empty body. (The additional header information is actually in the body of this part, but you could further parse this body data as a MIME message.)
That’s all you need to know about web forms and the Blobstore. Let’s look at some common ways to implement the web form and upload request handler, first in Python, then in Java.
Handling Uploads in Python
To generate a Blobstore upload URL in Python, call the create_upload_url() function in the blobstore module, which is in the google.appengine.ext package. (Note the ext in the package path, not api. There is a google.appengine.api.blobstore module, but extprovides a few additional features, which we’ll use later.)
Here’s a simple request handler for rendering an upload form using a Jinja2 template. Since we know we’ll need it in a moment, we’ll also include the upload handler, which for now just redirects back to the main page without doing anything special with the Blobstore data:
import jinja2
import os
import webapp2
from google.appengine.ext import blobstore
template_env = jinja2.Environment(
loader=jinja2.FileSystemLoader(os.getcwd())
class MainPage(webapp2.RequestHandler):
def get(self):
upload_url = blobstore.create_upload_url('/upload')
template = template_env.get_template('home.html')
context = {
'upload_url': upload_url,
}
self.response.write(template.render(context)
class UploadHandler(webapp2.RequestHandler):
def post(self):
self.redirect('/')
application = webapp2.WSGIApplication([('/', MainPage),
('/upload', UploadHandler)],
debug=True)
The web form itself is defined in the template, which in this example is named home.html:
<html>
<head>
<title>Blobstore Demo</title>
</head>
<body>
<form action="{{ upload_url }}" method="post" enctype="multipart/form-data">
<label for="title">Title:</label>
<input type="text" name="title" id="title" /><br />
<label for="upload">File:</label>
<input type="file" name="upload" id="upload" /><br />
<input type="submit" value="Upload File" />
</form>
</body>
</html>
The create_upload_url() function takes the URL path to a request handler as its first argument. Without additional arguments, the upload URL it generates accepts file uploads of any size. You can restrict the size of an individual file, or the total size of the upload request, using themax_bytes_per_blob and max_bytes_total arguments, respectively. A request that exceeds either of these amounts is rejected by App Engine, and no Blobstore values are created.
The details of parsing the request data in your upload request handler depend on the web application framework you are using. All major frameworks provide a way to access multipart form data. (If for some reason you’re stuck having to parse the MIME multipart request body yourself, look at the Python standard library’s cgi module and its FieldStorage class.) Check your framework’s documentation.
The webapp2 framework provides request data on the request handler’s self.request object. This object is an instance of the Request class, provided by the open source library WebOb, included with App Engine. WebOb parses the request data into self.request.params, an object that maps field names to values. This object has dict-like features, with extensions that support multiple values with the same key. For example:
title = self.request.params['title']
multiple_uploads = self.request.params.getall('upload')
for key, value in self.request.params.items():
# This loop may see the same key more than once.
# ...
A Blobstore file upload field has a value that is an instance of the cgi.FieldStorage class. This value must be parsed further to extrapolate the information about the Blobstore value, so the API provides a function for that: blobstore.parse_blob_info(). This function returns an instance of the BlobInfo class:
for value in multiple_uploads:
blob_info = blobstore.parse_blob_info(value)
filename = blob_info.filename
Every Blobstore value has a corresponding datastore entity of the kind 'BlobInfo'. The BlobInfo class is the db.Model-like class for these entities. blobstore.parse_blob_info() creates a BlobInfo object based on the request data, without actually accessing the datastore. We’ll discuss BlobInfo objects in the next section.
webapp (the original, compatible version of webapp2) provides a slightly more convenient way to access file uploads, in the form of a base class for the request handler. This class is called BlobstoreUploadHandler, in the blobstore_handlers module of thegoogle.appengine.ext.webapp package. The get_uploads() method of this class returns a list of BlobInfo objects:
from google.appengine.ext.webapp import blobstore_handlers
# ...
class UploadHandler(blobstore_handlers.BlobstoreUploadHandler):
def post(self):
blob_info_objects = self.get_uploads('upload')
# ...
TIP
When you call blobstore.create_upload_url() in the development server, the server creates a datastore entity of the kind __BlobUploadSession__, which you’ll see in the datastore viewer of the Console. When your app is running on App Engine, the Blobstore itself tracks these values and does not use datastore entities.
The development server doesn’t clean these up, but leaving them around doesn’t interfere with anything. You can use the --clear_datastore flag when you start the development server to clear all persistent data, including these entities and the corresponding Blobstore values. (See The Development Server and the Datastore.)
Handling Uploads in Java
The Blobstore API in Java is in the package com.google.appengine.api.blobstore. As with other service APIs in Java, you access Blobstore functionality by calling methods on an object that implements the BlobstoreService interface. You get such an object by calling the static method BlobstoreServiceFactory.getBlobstoreService():
import com.google.appengine.api.blobstore.BlobstoreService;
import com.google.appengine.api.blobstore.BlobstoreServiceFactory;
// ...
BlobstoreService blobstoreService =
BlobstoreServiceFactory.getBlobstoreService();
To generate a Blobstore upload URL, call the createUploadUrl() method. Its first argument is the URL path to a request handler, as a String:
String uploadUrl = blobstoreService.createUploadUrl("/upload");
Without additional arguments, the upload URL it generates accepts file uploads of any size. You can restrict the size of an individual file, or the total size of the upload request, by passing an UploadOptions instance as a second argument. UploadOptions uses the Builder pattern, viaUploadOptions.Builder, like so:
import com.google.appengine.api.blobstore.UploadOptions;
// ...
UploadOptions uploadOptions = UploadOptions.Builder
.withMaxUploadSizeBytesPerBlob(1024 * 1024 * 1024)
.maxUploadSizeBytes(10 * 1024 * 1024 * 1024);
String uploadUrl = blobstoreService.createUploadUrl("/upload", uploadOptions);
This example generates a Blobstore upload URL that accepts an upload request up to 10 gigabytes in size, where each file part can be at most 1 gigabyte in size. A request that exceeds either of these amounts is rejected by App Engine, and no Blobstore values are created.
The HttpServletRequest object itself doesn’t offer much help for parsing multipart form data, but there are various libraries and frameworks that can help (such as Apache Struts). To keep things easy, the Blobstore API itself includes a request parser for extracting Blobstore keys from the processed upload request. The getUploads() method of BlobstoreService takes the HttpServletRequest and returns a Map of form field names to Lists of BlobKey objects. (A form field may map to zero or more uploads, depending on whether the form accepts multiple files for a single upload field, and how the user completed the form.) Each BlobKey object wraps the string form of the key that appears in the blob-key part of the Content-Type header:
import java.util.List;
import java.util.Map;
import com.google.appengine.api.blobstore.BlobKey;
// ...
Map<String, List<BlobKey>> blobFields = blobstoreService.getUploads(req);
List<BlobKey> blobKeys = blobFields.get("upload");
BlobKey blobKey = null;
if (blobKeys != null && !blobKeys.isEmpty() {
// We're only expecting one, so take the first one.
blobKey = blobKeys.get(0);
}
TIP
When you call blobstoreService.createUploadUrl() in the development server, the server creates a datastore entity of the kind __BlobUploadSession__, which you’ll see in the datastore viewer of the Console. When your app is running on App Engine, the Blobstore itself tracks these values and does not use datastore entities. The development server doesn’t clean these up, but leaving them around doesn’t interfere with anything.
Using BlobInfo Entities
The Blobstore remembers a set of metadata properties about each value. These properties include the generated Blobstore key, the date and time the value was created, the content type and filename reported by the client, and the size and MD5 hash of the uploaded value.
The Blobstore maintains a read-only entity in the datastore for each value, known in the API as a BlobInfo entity. The datastore kind name for these entities is __BlobInfo__ (that’s two underscores before and after), and each entity’s key name is the Blobstore key. An entity represents the metadata for a value with entity properties. You can perform queries for BlobInfo entities by using the metadata properties. You can refer to BlobInfo entities in properties of other datastore entities by using the BlobInfo entity’s key, just like any other entity key.
Naturally, the BlobInfo entities do not pretend to contain the Blobstore values themselves, and you cannot perform queries on the data in the values. The result of a BlobInfo query is zero or more BlobInfo entities, which you can trace back to Blobstore values using Blobstore keys stored in the entities. And since these entities are read-only, you cannot modify the properties, or save BlobInfo entities back to the datastore.
We’ve already seen how to build a BlobInfo object in the upload request handler using just the request information. This action does not access the datastore, but it does build the same BlobInfo object that would be returned by the datastore for the value.
TIP
The development console (http://localhost:8080/_ah/admin, where 8080 is your development server’s port) does not have an explicit “Blobstore viewer” feature. However, you can use the datastore viewer to inspect __BlobInfo__ entities. This entry kind appears in the datastore viewer after your app creates its first Blobstore value. Deleting a __BlobInfo__ entity in this interface will also delete the Blobstore value.
When your app is running on App Engine, the kind __BlobInfo__ does not appear in the list of kinds in the Datastore Viewer. But you can perform GQL queries on this kind in the Viewer. The Administration Console also features a Blob Viewer, which you can use to browse and delete Blobstore values.
Using BlobInfo Entities in Python
In Python, the blobstore module in the google.appengine.ext package provides a BlobInfo class. Instances of this class behave like a db.Model class, but disallow the updating of properties or saving of the entity. The class also manages the special kind name behind the scenes, and provides a couple of Blobstore-specific features.
The Blobstore metadata properties are simply attributes of the object:
content_type
The MIME content type (a str).
creation
The date and time the value was created (a datetime.datetime).
filename
The filename provided with the upload.
size
The size of the value, in bytes (an int).
The key() method of a BlobInfo instance returns the Blobstore key for the value, in the form of a BlobKey object. This class (also defined in google.appengine.ext.blobstore) can convert between the key value and a web-safe string. str(key) evaluates to the string, andBlobKey(key_str) makes a new BlobKey value for that key. This is the same key string that you see in the blob-key part of the upload request’s Content-Type. We’ll see this again in the next section on serving Blobstore values.
Because BlobInfo entities are read-only, if you want to associate additional data with a Blobstore value, you must use another datastore entity, and store the BlobKey object in one of its properties. BlobKey objects are fundamental value types in the datastore, and can be stored directly in a property.
You can model this property in a db.Model, using the blobstore.BlobReferenceProperty class. (Refer back to Chapter 9 for information about db.Model.) Similar to db.ReferenceProperty attributes, an attribute modeled as a BlobReferenceProperty can be treated as theBlobInfo object it represents. The BlobInfo object is fetched from the datastore when its attributes are accessed for the first time.
Here’s an example of an upload handler that creates a UserUpload entity in the datastore that associates the signed-in user with the Blobstore value via the key. Another handler can render a page of the files the user has uploaded by querying the UserUpload entities:
import webapp2
from google.appengine.api import users
from google.appengine.ext import blobstore
from google.appengine.ext import db
from google.appengine.ext.webapp import blobstore_handlers
# ...
class UserUpload(db.Model):
user = db.UserProperty()
blob = blobstore.BlobReferenceProperty()
class UploadHandler(blobstore_handlers.BlobstoreUploadHandler):
def post(self):
for blob_info in self.get_uploads('upload'):
upload = UserUpload(user=users.get_current_user(),
blob=blob_info.key()
upload.put()
self.redirect('/')
class MyUploadsPage(webapp2.RequestHandler):
def get(self):
user = users.get_current_user()
for upload in UserUpload.all().filter('user =', user):
filename = upload.blob.filename
# ...
BlobInfo entities can be queried directly by using the same methods as with other db.Model classes. As we saw in Chapter 6, the all() returns a query object for all BlobInfo entities, and this query can be refined further using the query object’s filter() and order() methods:
# Query for all Blobstore values > 1 gigabyte in size.
q = blobstore.BlobInfo.all().filter('size >',
1024 * 1024 * 1024)
for result in q:
filename = result.filename
# ...
The gql() method lets you prepare a similar query, using GQL string syntax:
# Query for all Blobstore values > 1 gigabyte in size.
q = blobstore.BlobInfo.gql('WHERE size > 1073741824')
for result in q:
filename = result.filename
# ...
Using BlobInfo Entities in Java
In Java, the BlobInfo class in the com.google.appengine.api.blobstore package represents the metadata for a Blobstore value. You use accessors to get the fields:
getContentType()
The MIME content type (a String).
getCreation()
The date and time the value was created (a java.util.Date).
getFilename()
The filename provided with the upload.
getSize()
The size of the value, in bytes (a long).
You get BlobInfo objects with a BlobInfoFactory. This factory uses the datastore for querying BlobInfo data. If you have a custom implementation of the DatastoreService (such as in a stubbed testing environment), you can pass it to the BlobInfoFactory constructor. But typically you’d just use the default constructor, with no arguments:
BlobInfoFactory blobInfoFactory = new BlobInfoFactory();
You can get a BlobInfo instance given a BlobKey instance, such as those returned by blobstoreService.getUploads(req) in the upload request handler. The blobInfoFactory.loadBlobInfo() method takes a BlobKey and performs a datastore fetch to get the metadata for the value:
// BlobKey blobKey;
BlobInfo blobInfo = blobInfoFactory.loadBlobInfo(blobKey);
To perform a query of Blobstore value metadata, you perform a datastore query using the low-level datastore API. (See Chapter 6.) The kind and field names are available as constants in the BlobInfoFactory class: KIND, CONTENT_TYPE, CREATION, FILENAME, and SIZE. You can convert each Entity result to a BlobInfo instance using the blobInfoFactory.createBlobInfo() method:
// Query for all Blobstore values > 1 gigabyte in size.
DatastoreService ds = DatastoreServiceFactory.getDatastoreService();
Query q = new Query(BlobInfoFactory.KIND);
q.addFilter(BlobInfoFactory.SIZE,
Query.FilterOperator.GREATER_THAN,
1024L * 1024L * 1024L);
PreparedQuery pq = ds.prepare(q);
Iterable<Entity> results = pq.asIterable();
for (Entity result : results) {
BlobInfo blobInfo = blobInfoFactory.createBlobInfo(result);
// ...
}
Serving Blobstore Values
An application can serve a Blobstore value in response to any request. It does so by setting a special header on the response whose value is the Blobstore key. The frontend recognizes this header, and instead of the body set by the request handler, it streams the value directly out of the Blobstore to the client. As with uploads, the app code never sees a byte of the Blobstore value.
Note that the app can respond this way to any request. Unlike upload URLs, which are special URLs generated by the Blobstore API, the app can define its own scheme for when and where to serve Blobstore values. Combined with upload handlers that redirect immediately to an app URL, the user never sees an App Engine-generated URL in the address bar of the browser. Furthermore, the app can decide to not serve a Blobstore value but instead generate its own response for any URL, if the situation warrants it.
The header to set is named X-AppEngine-BlobKey. Its value is the string form of the Blobstore key, similar to the blob-key in the upload request header, and which the app can get from the BlobInfo entity.
The app is responsible for setting other headers that go with the content, especially Content-Type. While the Blobstore records the content type declared by the client that uploaded the value, it’s up to the app to decide whether to trust it and serve it, or to use another type.
TIP
If you’re serving a file that a browser ought to save as a file instead of attempt to view, set the Content-Disposition header on the response. This header can suggest a filename to the browser, which can be the filename used for the original upload, or another name:
Content-Disposition: attachment; filename=YourPhotos.zip
Without further information, the frontend serves the entire value. The app can instruct the frontend to serve only a range of bytes from the value in response to the request. This is useful when responding to requests that ask for a byte range with the Range header, or when it’s otherwise needed to send parts of a value in separate requests. To send a partial value, the app sets the X-AppEngine-BlobRange header on the response. Its value is a starting index, an ending index, or both, separated by the hyphen, where the first byte of the value is 0. For example, 0-499 sends the first 500 bytes, as does -499. 500- sends all bytes starting with the 501st.
When serving a partial value, the frontend uses HTTP status code 206 Partial Content. If the range is invalid for the value, it serves HTTP status code 416 Requested Range Not Satisfiable.
Serving Blobstore Values in Python
Continuing the Python example from this chapter, here’s a new request handler that takes the string form of the key for a UserUpload datastore entity as a query parameter, verifies that the user making the request is the user who uploaded the file, and then serves the Blobstore value. It serves the value with the same Content-Type that was declared with the upload, which we trust in this case because the user uploaded the file in the first place:
class ViewHandler(webapp2.RequestHandler):
def get(self):
user = users.get_current_user()
upload_key_str = self.request.params.get('key')
upload = None
if upload_key_str:
upload = db.get(upload_key_str)
if (not user or not upload or upload.user != user):
self.error(404)
return
self.response.headers['X-AppEngine-BlobKey'] = str(upload.blob.key()
self.response.headers['Content-Type'] = str(upload.blob.content_type)
As written, this handler ignores the Range header in the request, if one was provided, and just serves the entire Blobstore value. You can implement this directly in the handler, checking self.request.headers['Range'] and setting self.response.headers['X-AppEngine-BlobRange'] appropriately. (Don’t forget to validate the request data.)
Alternatively, webapp includes a handler base class that can take care of this automatically, named BlobstoreDownloadHandler in the blobstore_handlers module of the google.appengine.ext.webapp package. The handler also sets Content-Type from the BlobInfoautomatically, if the app doesn’t override it. To use it, simply subclass it, and then call the self.send_blob() method from your get() handler.
Here’s an improved version of ViewHandler using BlobstoreDownloadHandler that supports Range requests:
from google.appengine.ext.webapp import blobstore_handlers
# ...
class ViewHandler(blobstore_handlers.BlobstoreDownloadHandler):
def get(self):
user = users.get_current_user()
upload_key_str = self.request.params.get('key')
upload = None
if upload_key_str:
upload = db.get(upload_key_str)
if (not user or not upload or upload.user != user):
self.error(404)
return
self.send_blob(upload.blob)
Serving Blobstore Values in Java
Given a BlobKey object or a Blobstore key string, a Java app can send the corresponding Blobstore value in response to any request by setting the X-AppEngine-BlobKey header in the response. The app can do this directly by calling the setHeader() method on theHttpServletRequest, but there’s an easier way. The BlobstoreService instance provides a serve() method that modifies the response to serve a Blobstore value.
The serve() method takes a BlobKey and the HttpServletResponse object, and sets the appropriate headers on the response, including the Content-Type:
blobstoreService.serve(blobKey, res);
You can tell the method to serve just a portion of the value. serve() can accept a properly formatted HTTP range string as its second argument (the HttpServletResponse is the third). It can also accept an instance of the ByteRange class, provided by the blobstore package, and it’ll handle the formatting of the Content-Range header itself:
import com.google.appengine.api.blobstore.ByteRange;
// ...
// Serve the first 500 bytes.
blobstoreService.serve(blobKey, "0-499", res);
// Serve the first 500 bytes.
ByteRange byteRange = new ByteRange(0, 499);
blobstoreService.serve(blobKey, byteRange, res);
// Serve all bytes after the first 500.
ByteRange byteRange = new ByteRange(500);
blobstoreService.serve(blobKey, byteRange, res);
A client can ask for a specific byte range (such as when resuming a large download) by specifying the Range header in the request. To honor this request, your app must validate the header and set the range in the response. The BlobstoreService includes another convenience method for this purpose: getByteRange() takes the HttpServletRequest and returns a ByteRange suitable for passing to serve(). (This can be null, but that’s OK: serve() will serve the entire value if the range argument is null.)
blobstoreService.serve(
blobKey,
blobstoreService.getByteRange(req),
res);
Deleting Blobstore Values
There are two ways to delete a value from the Blobstore. The first is to call a method of the Blobstore API with the Blobstore key to delete. The second is to use the datastore API to delete the BlobInfo entity.
The datastore method is useful for deleting Blobstore values and datastore entities together. BlobInfo entities cannot be created belonging to an existing entity group, but they can be the entity group parent of other entities you create. This allows you to delete a Blobstore value and other datastore entities (created with the BlobInfo entity as their parent) in a single datastore transaction. Even without a transaction, it’s useful to delete BlobInfo entities and other entities in the same datastore batch call, to reduce the number of API calls made by the app.
Deleting a Blobstore value with the Blobstore API has the same effect as deleting the value in the datastore API. One consequence of this is you cannot delete using the Blobstore API in a datastore transaction where you could not also delete using the datastore API. The Blobstore API does not circumvent the entity group requirement of a transaction.
To delete a Blobstore value with the Blobstore API in Python, you can call the blobstore.delete() function with the BlobKey object. You can also call the delete() method of the BlobInfo object, which in turn uses the Blobstore API (not the datastore API) to delete the value:
# blob_key_str = ...
blob_key = blobstore.BlobKey(blob_key_str)
blobstore.delete(blob_key)
# Or:
blob_info = blobstore.BlobInfo.get(blob_key)
if blob_info:
blob_info.delete()
# Deleting multiple Blobstore values in a batch:
blob_key_lst = [blob_key_1, blob_key_2, blob_key_3]
blobstore.delete(blob_key_lst)
As with some datastore functions in Python, the blobstore.delete() function accepts a singular BlobKey value, the str form of a Blobstore key, or a list of BlobKey or str. Given a list, the delete is performed with a single batch call to the service, which is faster than multiple serial calls with single arguments.
In Java, you call the delete() method of the BlobstoreService, with one or more BlobKey values:
// Deleting a single Blobstore value:
// BlobKey blobKey;
blobstoreService.delete(blobKey);
// Using the variable length parameter list:
blobstoreService.delete(blobKey1, blobKey2, blobKey3);
// Using an array of BlobKey:
// BlobKey[] blobKeyArray;
blobstoreService.delete(blobKeyArray);
TIP
You can reset the state of the development server datastore by starting the server with the --clear_datastore command-line flag. This also deletes all Blobstore values. As with datastore values, Blobstore values persist between runs of the development server, unless you specify this command-line flag. (See The Development Server and the Datastore.)
Reading Blobstore Values
The mechanisms we’ve seen so far go to great lengths to avoid passing Blobstore data through the application code. To accept an uploaded a value, the app facilitates a direct connection between the client and the Blobstore using an upload URL generated by the API. To serve a value, the app collaborates with the frontend to have the data streamed to the client directly from storage. These methods work around a constraint imposed by the service infrastructure that caps the amount of data that passes between services and application instances. (App Engine relies on such constraints to tune the performance of its infrastructure.)
Applications can read data from Blobstore values directly, as long as a single call to the Blobstore service fits within the size constraint. You can use the Blobstore API to read ranges of bytes from a value, up to the maximum size of 32 megabytes. The API also provides a streaming data abstraction that can access the entire value using multiple service calls. This abstraction can behave as a file-like object to interoperate with libraries that know how to read data from filesystems.
Because a Blobstore value can be arbitrarily large, it may take an arbitrary amount of time and computation to process an entire value. Depending on your use case, you may need to either limit the amount of data you process, or distribute your computation across multiple tasks. SeeChapter 16 for more information.
Fetching Byte Ranges
To fetch a range of bytes in Python, call the fetch_data() method:
from google.appengine.ext import blobstore
# ...
# blob = ...
start_index = 0
end_index = 1024
bytes = blobstore.fetch_data(blob, start_index, end_index)
The blob parameter can be a BlobKey object, a string-ified blob key, or a BlobInfo entity.
The maximum fetch size (end_index - start_index) is available in the API as the constant blobstore.MAX_BLOB_FETCH_SIZE.
In Java, you call the fetchData() method of the BlobstoreService instance:
import com.google.appengine.api.blobstore.BlobKey;
import com.google.appengine.api.blobstore.BlobstoreService;
import com.google.appengine.api.blobstore.BlobstoreServiceFactory;
// ...
BlobstoreService blobstore = BlobstoreServiceFactory.getBlobstoreService();
// BlobKey blobKey = ...;
long startIndex = 0;
long endIndex = 1024;
byte[] bytes = blobstore.fetchData(blobKey, startIndex, endIndex);
The maximum fetch size constant in Java is BlobstoreService.MAX_BLOB_FETCH_SIZE.
Reading Values with Streams
Fetching byte ranges is mostly useful as a building block for other access patterns. The Blobstore API provides such a pattern: a buffered streaming interface that fetches byte ranges as needed using multiple service calls.
In Python, you use a BlobReader, a read-only file-like object. You get a reader either by constructing it directly, or by calling the open() method of a BlobInfo instance:
from google.appengine.ext import blobstore
# ...
# blob = ...
reader = blobstore.BlobReader(blob)
# Or:
# blob_info = ...
reader = blob_info.open()
As before, the constructor’s blob argument can be a BlobKey, a string, or a BlobInfo. You can optionally configure the buffer size (in bytes) and starting byte position for the reader with the buffer_size and position arguments to the constructor. blob_info.open() returns aBlobReader with default settings.
Given a reader, you can access its BlobInfo object by accessing the blob_info property:
blob_info = reader.blob_info
BlobReader instances support most of the file interface. For example, you can iterate over lines in textual data:
import re
# ...
# MAX_LINE_COUNT = ...
for i, line in enumerate(reader):
if i >= MAX_LINE_COUNT:
break
words = re.sub(r'\W', ' ', line).lower().split()
# ...
Or parse the data as a comma-separated values file exported from a spreadsheet:
import csv
# ...
sheet = csv.DictReader(reader)
total = 0
for row in sheet:
total += row['Price']
Or read compressed data from a ZIP archive:
import zipfile
# ...
zip = zipfile.ZipFile(reader)
file_list = zip.infolist()
# ...
BlobReader objects can be serialized with pickle for storage, or passing between tasks (see Chapter 16).
The Java API provides the BlobstoreInputStream class, a proper subclass of java.io.InputStream. You can combine this with reader classes appropriate for the data you are reading. For example, you can read lines of text:
import java.io.BufferedReader;
import java.io.InputStreamReader;
import com.google.appengine.api.blobstore.BlobKey;
import com.google.appengine.api.blobstore.BlobstoreInputStream;
// ...
// BlobKey blobKey = ...;
// final long MAX_LINE_COUNT = ...;
BufferedReader reader =
BufferedReader(InputStreamReader(BlobstoreInputStream(blobKey));
int lineCount = 0;
String line;
while (line = reader.readLine() != null
&& lineCount++ < MAX_LINE_COUNT) {
String[] words = line.replaceAll("\\W", " ").toLowerCase().split("\\s");
// ...
}
Or read compressed data from a ZIP archive:
import java.util.zip.ZipEntry;
import java.util.zip.ZipInputStream;
import com.google.appengine.api.blobstore.BlobKey;
import com.google.appengine.api.blobstore.BlobstoreInputStream;
// ...
zipStream = ZipInputStream(BlobstoreInputStream(blobKey);
ZipEntry entry;
while (entry = zipStream.getNextEntry() != null) {
// ...
}
A Complete Example
Let’s put the features of the Blobstore to use in a complete sample application. This application accepts uploads from a user, associates the upload with the user’s account, shows the user a list of files she has uploaded, and offers to serve them back. In other words, it’s a simple private file storage app.
We’ll use the same structure for both the Python version and the Java version:
§ The / URL displays a list of the (signed-in) user’s files, with metadata (filename, size) and links. It also displays an upload form with a “description” text field and a file upload field. The form uses multiple="true" to allow the user to attach multiple files to the same description.
§ The form action is a Blobstore upload URL, which passes through to the handler mapped to the /upload URL. The handler stores the Blobstore keys along with the description and the user ID, then redirects back to /.
§ When the user clicks on a file in her file list, the app serves the file. The app uses the MIME content type and filename used for the upload to serve the file.
§ The file list is also a form, with checkboxes next to each file. If the user checks one or more boxes and clicks the Delete Selected button, the form submits to the /delete URL. A handler at this URL deletes the Blobstore values and corresponding datastore entities, and redirects back to/.
Each user upload has a datastore entity of the kind UserUpload. This entity contains the user value (from the Users API) that identifies the user, the description the user entered into the form, and a reference to the BlobInfo entity for the Blobstore value.
You’ll notice that each UserUpload entity is created with an entity group parent specific to the user. (The parent does not need to be an entity that exists. We just need to create and use a consistent parent key.) This lets us use an ancestor query to get the file list.
If we were to do this without an ancestor, the query would rely on a global index for the UserUpload kind. Global indexes in the HR datastore are eventually consistent, and may not update completely between the time we create the entity in the upload handler and the time we perform the global query on the main page. By using an entity group per user, we can perform a query on an index that is strongly consistent with the update, guaranteeing a complete result.
Of course, the trade-off is all the UserUpload entities for a user are in the same entity group. But a typical app can organize its datastore activity to minimize contention on data for a single user. See Chapter 7 for more information on entity groups.
This design also prevents us from using the technique of putting the UserUpload entity in the same entity group as the BlobInfo record, so they can be deleted together transactionally. A robust workaround would be to use a single transaction to delete the UserUpload entity and enqueue a task that deletes the Blobstore value. See Chapter 16.
TIP
Remember, you can download the complete application code for this and other chapters from the book’s website:
|
http://www.dansanderson.com/appengine |
A Blobstore Example in Python
The Python version of this app uses four request handlers, all defined in main.py (Example 12-1):
§ / is handled by MainPage. This handler gets information about the currently signed-in user from the Users service, queries the datastore for all entities of the kind UserUpload belonging to that user, and generates URLs for sign in, sign out, and Blobstore uploading. It then renders thehome.html Jinja2 template with all of this information.
§ /upload is handled by UploadHandler. The /upload URL is used by MainPage as the target for the Blobstore upload URL. The UploadHandler class inherits from blobstore_handlers.BlobstoreUploadHandler, which provides the self.get_uploads() method that parses the form data after it has been modified by the Blobstore. The handler creates a new UserUpload entity for each upload, which associates the user’s identity with each Blobstore key.
§ /view is handled by ViewHandler. The parent class blobstore_handlers.BlobstoreDownloadHandler provides the self.send_blob() method, which this handler uses to serve the requested value. But first, it uses the entity key provided in the request to fetch theUserUpload value and confirm that the current user owns the file. If so, it passes the Blobstore key from the entity to self.send_blob().
§ /delete is handled by DeleteHandler. This processes the delete form containing the checkboxes and the Delete Selected button. The handler loads each UserUpload entity, confirms that the current user owns them, then deletes both the datastore entities and the Blobstore values referred to by those entities.
The datastore entities are modeled by the UserUpload class, a db.Model with three modeled properties. The blob property uses blobstore.BlobReferenceProperty to manage the storage of Blobstore keys.
The only other files used by this application are home.html (Example 12-2), the Jinja2 template for the main page, and app.yaml (Example 12-3), which simply associates all URL paths with the WSGI application defined in main.application (in the main.py source file). TheWSGIApplication instance itself maps the URL paths to the specific handler classes.
Example 12-1. A Blobstore example in Python, main.py
import jinja2
import os
import webapp2
from google.appengine.api import users
from google.appengine.ext import blobstore
from google.appengine.ext import db
from google.appengine.ext.webapp import blobstore_handlers
template_env = jinja2.Environment(
loader=jinja2.FileSystemLoader(os.getcwd())
class UserUpload(db.Model):
user = db.UserProperty()
description = db.StringProperty()
blob = blobstore.BlobReferenceProperty()
class MainPage(webapp2.RequestHandler):
def get(self):
user = users.get_current_user()
login_url = users.create_login_url(self.request.path)
logout_url = users.create_logout_url(self.request.path)
uploads = None
if user:
q = UserUpload.all()
q.filter('user =', user)
q.ancestor(db.Key.from_path('UserUploadGroup', user.email())
uploads = q.fetch(100)
upload_url = blobstore.create_upload_url('/upload')
template = template_env.get_template('home.html')
context = {
'user': user,
'login_url': login_url,
'logout_url': logout_url,
'uploads': uploads,
'upload_url': upload_url,
}
self.response.write(template.render(context)
class UploadHandler(blobstore_handlers.BlobstoreUploadHandler):
def post(self):
user = users.get_current_user()
description = self.request.params['description']
for blob_info in self.get_uploads('upload'):
upload = UserUpload(
parent=db.Key.from_path('UserUploadGroup', user.email(),
user=user,
description=description,
blob=blob_info.key()
upload.put()
self.redirect('/')
class ViewHandler(blobstore_handlers.BlobstoreDownloadHandler):
def get(self):
user = users.get_current_user()
upload_key_str = self.request.params.get('key')
upload = None
if upload_key_str:
upload = db.get(upload_key_str)
if (not user or not upload or upload.user != user):
self.error(404)
return
self.send_blob(upload.blob)
class DeleteHandler(webapp2.RequestHandler):
def post(self):
user = users.get_current_user()
if user:
entities_to_delete = []
for delete_key in self.request.params.getall('delete'):
upload = db.get(delete_key)
if upload.user != user:
continue
entities_to_delete.append(upload.key()
entities_to_delete.append(
db.Key.from_path('__BlobInfo__', str(upload.blob.key())
db.delete(entities_to_delete)
self.redirect('/')
application = webapp2.WSGIApplication([('/', MainPage),
('/upload', UploadHandler),
('/view', ViewHandler),
('/delete', DeleteHandler)],
debug=True)
Example 12-2. A Blobstore example in Python, home.html
<html>
<head>
<title>Blobstore Demo</title>
</head>
<body>
{% if user %}
<p>Welcome, {{ user.email() }}! You can <a href="{{ logout_url }}">sign out</a>.</p>
{% if uploads %}
<form action="/delete" method="post">
<p>Your uploads:</p>
<ul>
{% for upload in uploads %}
<li>
<input type="checkbox" name="delete" value="{{ upload.key() }}" />
{{ upload.description }}:
<a href="/view?key={{ upload.key() }}">{{ upload.blob.filename }}</a>
</li>
{% endfor %}
</ul>
<input type="submit" value="Delete Selected" />
</form>
{% else %} {# User has no uploads. #}
<p>You have no uploads.</p>
{% endif %}
<p>Upload files:</p>
<form action="{{ upload_url }}" method="post" enctype="multipart/form-data">
<label for="description">Description:</label>
<input type="text" name="description" id="description" /><br />
<label for="upload">File:</label>
<input type="file" name="upload" id="upload" multiple="true" /><br />
<input type="submit" value="Upload File" />
</form>
{% else %} {# User is not signed in. #}
<p>Welcome! Please
<a href="{{ login_url }}">sign in or register</a> to upload files.</p>
{% endif %}
</body>
</html>
Example 12-3. A Blobstore example in Python, app.yaml
application: blobstore
version: 1
runtime: python27
api_version: 1
threadsafe: yes
handlers:
- url: .*
script: main.application
libraries:
- name: webapp2
version: "2.5.1"
- name: jinja2
version: latest
- name: markupsafe
version: latest
A Blobstore Example in Java
The Java version of this app has four servlets mapped to URL paths:
§ / calls MainPageServlet (Example 12-4). This servlet calls the Users service to get information about the signed-in user, performs a datastore query to get the user’s UserUpload entities, and generates a Blobstore upload URL. It forwards all of this information to the home.jsp servlet (Example 12-5) to render the final page.
§ /upload calls UploadServlet (Example 12-6). This is the forwarding target of the Blobstore upload URL. It receives an HTTP POST request when the user submits the upload form, after the Blobstore has consumed the uploaded data. The servlet creates UserUpload datastore entities as needed, and then redirects the user back to /.
§ /view calls ViewUploadServlet (Example 12-7). It expects an HTTP GET request with the key parameter on the URL. The parameter’s value is the string form of the datastore key for a UserUpload entity that belongs to the user. If the entity exists and belongs to the user, the servlet tells the Blobstore to serve the value. Otherwise, it serves a 404 Not Found error.
§ /delete calls DeleteUploadServlet (Example 12-8). This is the form action for the Delete Selected feature of the file list on the main page. In an HTTP POST request, each delete parameter contains the key of a UserUpload entity. For each one, if the entity exists and is owned by the user, both the datastore entity and the corresponding Blobstore value are deleted. The servlet redirects the user back to /.
If you’re following along at home, create each of the Java source files in the appropriate package in your src/ directory. home.jsp and web.xml go in war/WEB-INF/.
Example 12-4. A Blobstore example in Java, MainPageServlet.java
package blobstoredemo;
import java.io.IOException;
import java.util.ArrayList;
import java.util.HashMap;
import java.util.List;
import java.util.Map;
import javax.servlet.RequestDispatcher;
import javax.servlet.ServletException;
import javax.servlet.http.*;
import com.google.appengine.api.blobstore.BlobInfoFactory;
import com.google.appengine.api.blobstore.BlobKey;
import com.google.appengine.api.blobstore.BlobstoreService;
import com.google.appengine.api.blobstore.BlobstoreServiceFactory;
import com.google.appengine.api.blobstore.UploadOptions;
import com.google.appengine.api.datastore.DatastoreService;
import com.google.appengine.api.datastore.DatastoreServiceFactory;
import com.google.appengine.api.datastore.Entity;
import com.google.appengine.api.datastore.Key;
import com.google.appengine.api.datastore.KeyFactory;
import com.google.appengine.api.datastore.PreparedQuery;
import com.google.appengine.api.datastore.Query;
import com.google.appengine.api.users.User;
import com.google.appengine.api.users.UserService;
import com.google.appengine.api.users.UserServiceFactory;
@SuppressWarnings("serial")
public class MainPageServlet extends HttpServlet {
public void doGet(HttpServletRequest req,
HttpServletResponse resp)
throws IOException, ServletException {
UserService userService = UserServiceFactory.getUserService();
User user = userService.getCurrentUser();
String loginUrl = userService.createLoginURL("/");
String logoutUrl = userService.createLogoutURL("/");
BlobstoreService blobstoreService =
BlobstoreServiceFactory.getBlobstoreService();
UploadOptions uploadOptions = UploadOptions.Builder
.withMaxUploadSizeBytesPerBlob(1024L * 1024L * 1024L)
.maxUploadSizeBytes(10L * 1024L * 1024L * 1024L);
String uploadUrl = blobstoreService.createUploadUrl("/upload", uploadOptions);
DatastoreService ds = DatastoreServiceFactory.getDatastoreService();
BlobInfoFactory blobInfoFactory = new BlobInfoFactory();
List<Map<String, Object>> uploads = new ArrayList<Map<String, Object>>();
Key userGroupKey = KeyFactory.createKey("UserUploadGroup", user.getEmail();
Query q = new Query("UserUpload").setAncestor(userGroupKey);
q.addFilter("user", Query.FilterOperator.EQUAL, user);
PreparedQuery pq = ds.prepare(q);
Iterable<Entity> results = pq.asIterable();
for (Entity result : results) {
Map<String, Object> upload = new HashMap<String, Object>();
upload.put("description", (String) result.getProperty("description");
BlobKey blobKey = (BlobKey) result.getProperty("upload");
upload.put("blob", blobInfoFactory.loadBlobInfo(blobKey);
upload.put("uploadKey", KeyFactory.keyToString(result.getKey());
uploads.add(upload);
}
req.setAttribute("user", user);
req.setAttribute("loginUrl", loginUrl);
req.setAttribute("logoutUrl", logoutUrl);
req.setAttribute("uploadUrl", uploadUrl);
req.setAttribute("uploads", uploads);
req.setAttribute("hasUploads", !uploads.isEmpty();
resp.setContentType("text/html");
RequestDispatcher jsp = req.getRequestDispatcher("/WEB-INF/home.jsp");
jsp.forward(req, resp);
}
}
Example 12-5. A Blobstore example in Java, home.jsp
<%@ taglib uri="http://java.sun.com/jsp/jstl/core" prefix="c" %>
<html>
<head>
<title>Blobstore Demo</title>
</head>
<body>
<c:choose>
<c:when test="${user != null}">
<p>
Welcome, ${user.email}!
You can <a href="${logoutUrl}">sign out</a>.
</p>
<c:choose>
<c:when test="${hasUploads}">
<form action="/delete" method="post">
<p>Your uploads:</p>
<ul>
<c:forEach var="upload" items="${uploads}">
<li>
<input type="checkbox" name="delete" value="${upload.uploadKey}" />
${upload.description}
<a href="/view?key=${upload.uploadKey}"
>${upload.blob.filename}</a>
</li>
</c:forEach>
</ul>
<input type="submit" value="Delete Selected" />
</form>
</c:when>
<c:otherwise>
<p>You have no uploads.</p>
</c:otherwise>
</c:choose>
<form action="${uploadUrl}" method="post" enctype="multipart/form-data">
<label for="description">Description:</label>
<input type="text" name="description" id="description" /><br />
<label for="upload">File:</label>
<input type="file" name="upload" multiple="true" /><br />
<input type="submit" value="Upload File" />
</form>
</c:when>
<c:otherwise>
<p>
Welcome! Please
<a href="${loginUrl}">sign in or register</a> to upload files.
</p>
</c:otherwise>
</c:choose>
</body>
</html>
Example 12-6. A Blobstore example in Java, UploadServlet.java
package blobstoredemo;
import java.io.IOException;
import java.util.List;
import java.util.Map;
import javax.servlet.http.HttpServlet;
import javax.servlet.http.HttpServletRequest;
import javax.servlet.http.HttpServletResponse;
import com.google.appengine.api.blobstore.BlobKey;
import com.google.appengine.api.blobstore.BlobstoreService;
import com.google.appengine.api.blobstore.BlobstoreServiceFactory;
import com.google.appengine.api.datastore.DatastoreService;
import com.google.appengine.api.datastore.DatastoreServiceFactory;
import com.google.appengine.api.datastore.Entity;
import com.google.appengine.api.datastore.Key;
import com.google.appengine.api.datastore.KeyFactory;
import com.google.appengine.api.users.User;
import com.google.appengine.api.users.UserService;
import com.google.appengine.api.users.UserServiceFactory;
@SuppressWarnings("serial")
public class UploadServlet extends HttpServlet {
public void doPost(HttpServletRequest req,
HttpServletResponse resp)
throws IOException {
UserService userService = UserServiceFactory.getUserService();
User user = userService.getCurrentUser();
DatastoreService ds = DatastoreServiceFactory.getDatastoreService();
BlobstoreService bs =
BlobstoreServiceFactory.getBlobstoreService();
Map<String, List<BlobKey>> blobFields = bs.getUploads(req);
List<BlobKey> blobKeys = blobFields.get("upload");
Key userGroupKey = KeyFactory.createKey("UserUploadGroup", user.getEmail();
for (BlobKey blobKey : blobKeys) {
Entity userUpload = new Entity("UserUpload", userGroupKey);
userUpload.setProperty("user", user);
userUpload.setProperty("description", req.getParameter("description");
userUpload.setProperty("upload", blobKey);
ds.put(userUpload);
}
resp.sendRedirect("/");
}
}
Example 12-7. A Blobstore example in Java, ViewUploadServlet.java
package blobstoredemo;
import java.io.IOException;
import javax.servlet.http.HttpServlet;
import javax.servlet.http.HttpServletRequest;
import javax.servlet.http.HttpServletResponse;
import com.google.appengine.api.blobstore.BlobKey;
import com.google.appengine.api.blobstore.BlobstoreService;
import com.google.appengine.api.blobstore.BlobstoreServiceFactory;
import com.google.appengine.api.datastore.DatastoreService;
import com.google.appengine.api.datastore.DatastoreServiceFactory;
import com.google.appengine.api.datastore.Entity;
import com.google.appengine.api.datastore.EntityNotFoundException;
import com.google.appengine.api.datastore.KeyFactory;
import com.google.appengine.api.users.User;
import com.google.appengine.api.users.UserService;
import com.google.appengine.api.users.UserServiceFactory;
@SuppressWarnings("serial")
public class ViewUploadServlet extends HttpServlet {
public void doGet(HttpServletRequest req,
HttpServletResponse resp)
throws IOException {
UserService userService = UserServiceFactory.getUserService();
User user = userService.getCurrentUser();
DatastoreService ds = DatastoreServiceFactory.getDatastoreService();
BlobstoreService bs =
BlobstoreServiceFactory.getBlobstoreService();
String uploadKeyStr = req.getParameter("key");
Entity userUpload = null;
BlobKey blobKey = null;
if (uploadKeyStr != null) {
try {
userUpload = ds.get(KeyFactory.stringToKey(uploadKeyStr);
if ((User)userUpload.getProperty("user").equals(user) {
blobKey = (BlobKey)userUpload.getProperty("upload");
}
} catch (EntityNotFoundException e) {
// Leave blobKey null.
}
}
if (blobKey != null) {
bs.serve(
blobKey,
bs.getByteRange(req),
resp);
} else {
resp.sendError(404);
}
}
}
Example 12-8. A Blobstore example in Java, DeleteUploadServlet.java
package blobstoredemo;
import java.io.IOException;
import java.util.ArrayList;
import java.util.List;
import javax.servlet.http.HttpServlet;
import javax.servlet.http.HttpServletRequest;
import javax.servlet.http.HttpServletResponse;
import com.google.appengine.api.blobstore.BlobInfoFactory;
import com.google.appengine.api.blobstore.BlobKey;
import com.google.appengine.api.datastore.DatastoreService;
import com.google.appengine.api.datastore.DatastoreServiceFactory;
import com.google.appengine.api.datastore.Entity;
import com.google.appengine.api.datastore.EntityNotFoundException;
import com.google.appengine.api.datastore.Key;
import com.google.appengine.api.datastore.KeyFactory;
import com.google.appengine.api.users.User;
import com.google.appengine.api.users.UserService;
import com.google.appengine.api.users.UserServiceFactory;
@SuppressWarnings("serial")
public class DeleteUploadServlet extends HttpServlet {
public void doPost(HttpServletRequest req,
HttpServletResponse resp)
throws IOException {
UserService userService = UserServiceFactory.getUserService();
User user = userService.getCurrentUser();
DatastoreService ds = DatastoreServiceFactory.getDatastoreService();
BlobstoreService bs =
BlobstoreServiceFactory.getBlobstoreService();
String[] uploadKeyStrings = req.getParameterValues("delete");
List<Key> keysToDelete = new ArrayList<Key>();
if (uploadKeyStrings != null) {
for (String uploadKeyStr : uploadKeyStrings) {
try {
Entity userUpload = ds.get(KeyFactory.stringToKey(uploadKeyStr);
if ((User)userUpload.getProperty("user").equals(user) {
BlobKey blobKey = (BlobKey)userUpload.getProperty("upload");
Key blobInfoKey = KeyFactory.createKey(
BlobInfoFactory.KIND, blobKey.getKeyString();
keysToDelete.add(blobInfoKey);
keysToDelete.add(userUpload.getKey();
}
} catch (EntityNotFoundException e) {
// Do nothing.
}
}
}
ds.delete(keysToDelete.toArray(new Key[0]);
resp.sendRedirect("/");
}
}
Example 12-9. A Blobstore example in Java, web.xml
<?xml version="1.0" encoding="utf-8"?>
<web-app xmlns:xsi="http://www.w3.org/2001/XMLSchema-instance"
xmlns="http://java.sun.com/xml/ns/javaee"
xmlns:web="http://java.sun.com/xml/ns/javaee/web-app_2_5.xsd"
xsi:schemaLocation="http://java.sun.com/xml/ns/javaee
http://java.sun.com/xml/ns/javaee/web-app_2_5.xsd" version="2.5">
<servlet>
<servlet-name>mainpage</servlet-name>
<servlet-class>blobstoredemo.MainPageServlet</servlet-class>
</servlet>
<servlet-mapping>
<servlet-name>mainpage</servlet-name>
<url-pattern>/</url-pattern>
</servlet-mapping>
<servlet>
<servlet-name>upload</servlet-name>
<servlet-class>blobstoredemo.UploadServlet</servlet-class>
</servlet>
<servlet-mapping>
<servlet-name>upload</servlet-name>
<url-pattern>/upload</url-pattern>
</servlet-mapping>
<servlet>
<servlet-name>viewupload</servlet-name>
<servlet-class>blobstoredemo.ViewUploadServlet</servlet-class>
</servlet>
<servlet-mapping>
<servlet-name>viewupload</servlet-name>
<url-pattern>/view</url-pattern>
</servlet-mapping>
<servlet>
<servlet-name>deleteupload</servlet-name>
<servlet-class>blobstoredemo.DeleteUploadServlet</servlet-class>
</servlet>
<servlet-mapping>
<servlet-name>deleteupload</servlet-name>
<url-pattern>/delete</url-pattern>
</servlet-mapping>
</web-app>
All materials on the site are licensed Creative Commons Attribution-Sharealike 3.0 Unported CC BY-SA 3.0 & GNU Free Documentation License (GFDL)
If you are the copyright holder of any material contained on our site and intend to remove it, please contact our site administrator for approval.
© 2016-2026 All site design rights belong to S.Y.A.