Programming Android (2011)
Part II. About the Android Framework
Chapter 8. Fragments and Multiplatform Support
Now that you have written some Android code you know that Activity, View, and the layout and widget subclasses of View are among the most important classes in Android. Typically, an Android user interface is built from widget views organized in layouts: a ListView in a LinearLayout, for instance. A single hierarchy of view objects gets loaded from a resource (or created by code) when an Activity is started. It is initialized and displayed on the device screen.
For small screens, this is fine: users move from screen to screen to access different parts of a program’s UI, and the Activity class (Android’s concept of a task) supports a back stack that enables quick and intuitive traversal through the strictly tree-structured interface. This changes completely, however, when the UI is spread over the surface of a larger tablet screen. Some parts of the screen remain constant over longer durations than others. Some parts of the screen determine the contents of other parts. A card-stack metaphor just doesn’t cut it.
It is entirely possible to implement UIs in which some parts of the screen change in response to activities in another part, simply by showing and hiding views. Android’s developers decided, however, that they needed more than just convention to encourage great large-screen UIs with a consistent feel and behavior. In order to facilitate this new kind of interaction, they introduced a new a feature based on the Fragment class, as part of the Android 3.0 SDK (API 11, Honeycomb).
A Fragment object is somewhere between a View and an Activity. Like a View, it can be added to a ViewGroup or be part of a layout. It isn’t a subclass of View, however, and can only be added to a ViewGroup using a FragmentTransaction. Like an Activity, a Fragment has a life cycle and implements both the ComponentCallbacks and View.OnCreateContextMenuListener interfaces. Unlike an Activity, though, a Fragment is not a Context, and its life cycle is dependent on that of the Activity to which it belongs.
Fragments constitute a major change in the Android API. In order to ease transition to the new API, Google provides a compatibility library that supports the feature in versions as far back as version 2.0 of the SDK (API 5, Éclair). We’ll have a look at backward compatibility in a moment. First, though, let’s look at fragments in their native environment, Honeycomb.
Creating a Fragment
Like any other view object, a fragment can either be part of the XML definition of a layout, or be added to a view programmatically. In a layout, a fragment looks like this:
<LinearLayout
xmlns:android="http://schemas.android.com/apk/res/android"
android:orientation="horizontal"
android:layout_width="fill_parent"
android:layout_height="fill_parent"
>
<fragment
class="com.oreilly.demo.android.ch085.contactviewer.DateTime"
android:id="@+id/date_time"
android:layout_width="fill_parent"
android:layout_height="fill_parent"
/>
</LinearLayout>
An activity would use this layout in the normal way:
@Override
public void onCreate(Bundle state) {
super.onCreate(state);
setContentView(R.layout.main);
}
This should all look pretty familiar by now. The only thing that is new is the fragment tag in main.xml. The tag uses a class attribute to specify the fully qualified name of a class that implements the fragment. There are a couple of constraints on a fragment implementation class, which in this case, is com.oreilly.demo.android.ch085.contactviewer.DateTime:
§ A class with the exact name must exist and be visible from the application.
§ The named class must be a subclass of Fragment.
Although it would be quite possible to verify both of these things statically, the current Android tools do not do so. You’ll have to check both constraints by hand.
The Android Framework creates a new instance of the named class when the layout is inflated. The implications of this can be surprising. To begin, it means the class must have a no-args constructor. This is the constructor that Java supplies by default. The Android Developer Documentation recommends—strongly, in fact—against defining any constructors at all in subclasses of Fragment because a newly created Fragment object may not be in a consistent state at creation. The documentation recommends that fragment initialization be postponed until later in the fragment life cycle.
No matter how you use the fragment elsewhere in the application, if you use it in a layout, the inflation process must be able to create it, without supplying any initialization parameters. As a corollary, a fragment that is created in this way must be prepared to do something sensible even without initialization. A fragment, for instance, that displays content from a passed URL must handle the case where the URL—and therefore the content—is empty.
Here, then, is a very simple fragment:
public class DateTime extends Fragment {
private String time;
public void onCreate(Bundle state) {
super.onCreate(state);
if (null == time) {
time = new SimpleDateFormat("d MMM yyyy HH:mm:ss")
.format(new Date());
}
}
@Override
public View onCreateView(
LayoutInflater inflater,
ViewGroup container,
Bundle b)
{
View view = inflater.inflate(
R.layout.date_time,
container,
false); //!!! this is important
((TextView) view.findViewById(R.id.last_view_time))
.setText(time);
return view;
}
}
This code demonstrates several essential points. First, just the existence of an onCreate life cycle method should bring to mind the Activity class and its life cycle methods. While the life cycle of a Fragment is not identical to that of an Activity, it does have many of the same methods. As for an activity, a fragment’s onCreate method is called when the fragment is initialized. This is a great place to do the initialization that was postponed from the constructor. The example guarantees that the value of the variable time, the thing the fragment will display, is correctly initialized.
Fragments have a few additional life cycle methods, including onCreateView, also used in this example. The onCreateView method is called when a fragment’s view is initialized (in contrast with onCreate, which is called when the fragment itself is initialized). Notice that the fragment creates the view it manages by using the passed LayoutInflater to instantiate the view shard R.layout.date_time. This simple view shard—just a pair of TextViews in a RelativeLayout—is defined in its own file, layout/date_time.xml (not shown here), much as was the main layout shown earlier.
Also notice (and this is a bit of a gotcha) that there is a third parameter, the Boolean false, in that call to inflate. It is important! The inflater must have access to container, the view that will eventually be the newly created shard’s parent. It needs the parent view in order to handle layout correctly. Suppose, for instance, that container happens to be a RelativeLayout that specifies the position of the newly created shard using a layout_toRightOf directive.
On the other hand, the fragment framework owns and manages the view that is returned by the onCreateView method. The code in onCreateView must not attach the view shard to its container, as it normally would during inflation. That third argument is the flag that tells the inflater that the fragment framework is in control and that it must not attach the view shard to the container.
Once the fragment’s view shard is created, its findViewById method can be used to find other widgets nested within. The example uses it to locate the TextView that will display the time, and to set its value from the variable time, initialized in onCreate.
When run, this application looks like Figure 8-1.
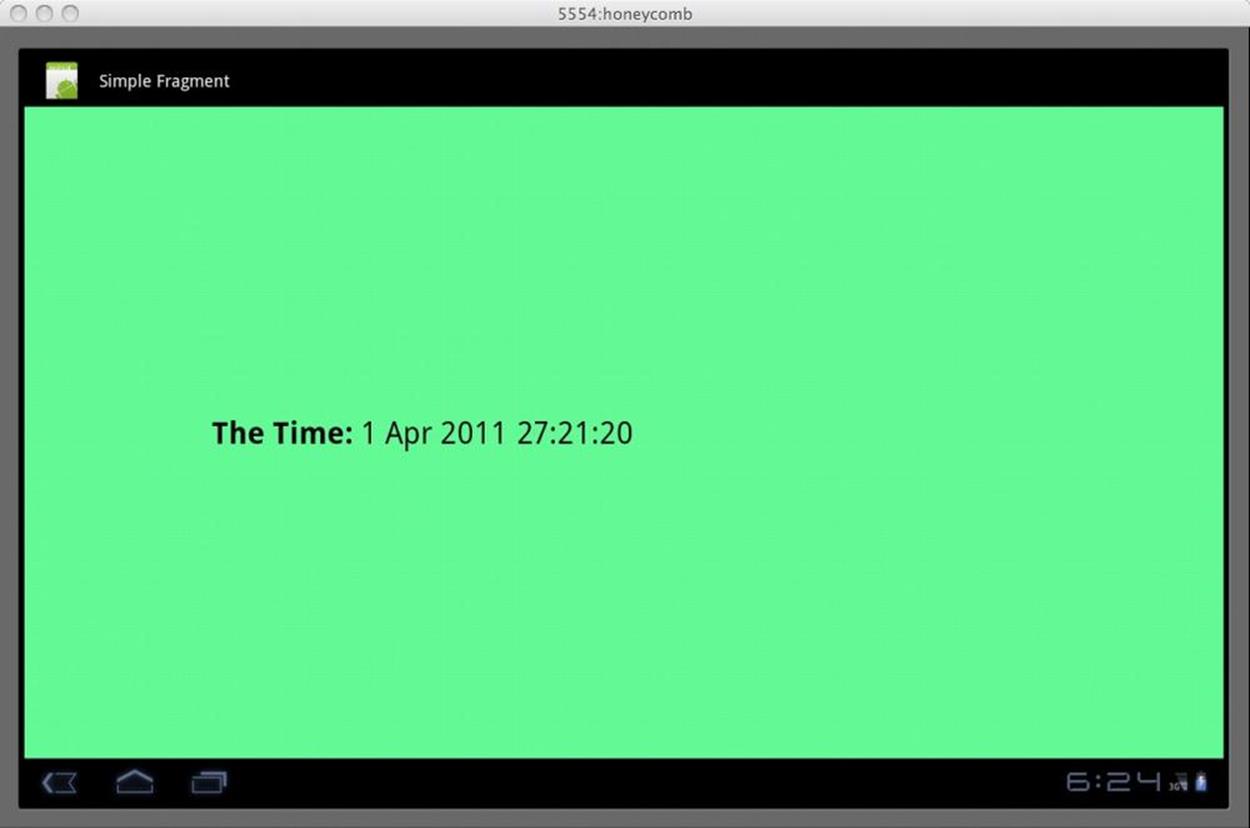
Figure 8-1. A simple fragment
Fragment Life Cycle
If you run this application, as it is described so far, and rotate the screen while it is running, you’ll notice that the displayed date changes each time the screen is rotated. Rotating the screen causes an application to be destroyed and re-created. This version of the example application loses all its state each time that happens.
NOTE
This is a great way to test your application. Pressing Ctrl-F11 rotates the emulator 90 degrees. In response to this rotation, Android steps an activity through nearly its entire life cycle. With this one key-chord, you get coverage for most of your code!
In this trivial example application, losing state is not particularly significant. A real application, however, must not lose state. It would be incredibly annoying if, for instance, rotating your phone to landscape mode while looking at some web page caused the browser to return to a home page.
The application can be modified to keep its state with two small changes. First, override the DateTime fragment’s life cycle method onSaveInstanceState to preserve its state. Second, change the onCreate method to recover the preserved state. As it did with activities (see The Activity Life Cycle), the Android Framework provides a Bundle object to the former method when it suspends the fragment. It provides the same bundle to onCreate when reconstructing a clone of a suspended fragment.
Here are the two affected methods, changed to support state preservation:
@Override
public void onCreate(Bundle state) {
super.onCreate(state);
if (null != state) { time = state.getString(TAG_DATE_TIME); }
if (null == time) {
time = new SimpleDateFormat("d MMM yyyy HH:mm:ss")
.format(new Date());
}
}
@Override
public void onSaveInstanceState(Bundle state) {
super.onSaveInstanceState(state);
state.putString(TAG_DATE_TIME, time);
}
That’s it. Running this version of the program through its life cycle will no longer cause it to lose its state. Notice, incidentally, that because the variable time (and, in general, any fragment state) is initialized in the onCreate method, it cannot be declared final. This reduces the value of using a constructor to set up the fragment state and is in keeping with the recommendation that Fragment subclasses not have any explicit constructors at all.
The Android Developer Documentation describes the complete fragment life cycle. One other life cycle callback method, though, deserves special notice: onPause. The onPause method is important for the same reason that it is important in an activity. In order for an application to play nicely in the Android environment, it should not be doing things (using the CPU, running down the battery, etc.) when it is not visible. The Android environment arranges to call a fragment’s onPause method whenever the fragment becomes invisible. In this method, a fragment should release any resources it might be holding, terminate any long-running processes that it has started, and so on.
The Fragment Manager
As mentioned earlier, fragments can be created programmatically as well as in layouts. Programmatic manipulation of fragments is accomplished using an instance of the class FragmentManager obtained from an Activity using its getFragmentManager method. The fragment manager handles three important groups of operations: fragment tagging and location, transactions, and the back stack. Let’s extend the example program to investigate each, in turn.
Adapting the example application to use programmatically created fragments requires only two changes: one in the layout main.xml and the other in the SimpleFragment activity. In the layout, the fragment element is replaced with a nearly identical FrameLayout:
<LinearLayout
xmlns:android="http://schemas.android.com/apk/res/android"
android:orientation="horizontal"
android:layout_width="fill_parent"
android:layout_height="fill_parent"
>
<FrameLayout
android:id="@+id/date_time"
android:layout_width="fill_parent"
android:layout_height="fill_parent"
android:background="@color/green"
/>
</LinearLayout>
SimpleFragment will still use this layout, just as it did before. Now, though, the layout does not automatically create a new fragment. Instead, the following code does that:
@Override
public void onCreate(Bundle state) {
super.onCreate(state);
setContentView(R.layout.main);
FragmentManager fragMgr = getFragmentManager();
FragmentTransaction xact = fragMgr.beginTransaction();
if (null == fragMgr.findFragmentByTag(FRAG1_TAG)) {
xact.add(R.id.date_time, new DateTime(), FRAG1_TAG);
}
xact.commit();
}
These changes introduce no new application features. When run, this version of the example behaves exactly as did the original, layout-based version.
The important feature in this code snippet is the use of tagging. It is entirely possible that an activity’s onCreate will be called while it is still associated with a previously created fragment. Simply adding a new fragment whenever onCreate is called will leak fragments. In order to prevent that, the example code makes use of the fragment manager’s tagging and location features.
The third argument to the add method is a unique tag, assigned to the fragment as it is added to the activity. Once the tag has been created, the fragment manager method findFragmentByTag can be used to recover the exact, single fragment that was added with the given tag. The example checks to see if the tagged fragment already exists before it creates a new fragment instance. If there is no such fragment, it creates it. If the fragment already exists, no action is necessary. This guarantees that there is only a single fragment in a given role, and prevents fragment leaking.
Tagging and location can be used for other purposes as well. Whenever an activity needs to communicate some change of state to an attached fragment, it will probably do so by tagging that fragment, in advance, and then using the FragmentManager to look up the tag to obtain a reference to the fragment at the appropriate time.
Fragment Transactions
In addition to using fragment tagging, the new code also alludes to fragment transactions. Let’s extend the application once again to demonstrate their value.
Before we take on transactions, though, we need to take a brief detour. We noted earlier that the Android Developer Documentation recommends that fragment subclasses not have explicit constructors. So, how does an external object supply initialization state for a new fragment? TheFragment class supports two methods, setArguments and getArguments, that provide this capability. Respectively, they allow an external caller—probably the fragment creator—to store a Bundle in the fragment and the fragment to recover that bundle at some later time.
This elaborate combination of a new instance of the fragment, a Bundle, and a call to setArguments functions very much like a constructor. It makes sense, then, to combine them into a static factory method in the Fragment object, like this:
public static DateTime createInstance(Date time) {
Bundle init = new Bundle();
init.putString(
DateTime.TAG_DATE_TIME,
getDateTimeString(time));
DateTime frag = new DateTime();
frag.setArguments(init);
return frag;
}
private static String getDateTimeString(Date time) {
return new SimpleDateFormat("d MMM yyyy HH:mm:ss")
.format(time);
}
Now we can use the static factory method in SimpleFragment’s onCreate method to create a new instance of the fragment with its argument bundle correctly initialized. This code is nearly identical to the preview version, except that it now uses DateTime’s static factory method, and passes it an argument:
@Override
public void onCreate(Bundle state) {
super.onCreate(state);
setContentView(R.layout.main);
FragmentManager fragMgr = getFragmentManager();
FragmentTransaction xact = fragMgr.beginTransaction();
if (null == fragMgr.findFragmentByTag(FRAG1_TAG)) {
xact.add(
R.id.date_time,
DateTime.newInstance(new Date()),
FRAG1_TAG);
}
xact.commit();
}
Finally, the fragment onCreate method retrieves the initialization data from the passed argument bundle, unless there is state from a previous incarnation:
@Override
public void onCreate(Bundle state) {
super.onCreate(state);
if (null == state) { state = getArguments(); }
if (null != state) { time = state.getString(TAG_DATE_TIME); }
if (null == time) { time = getDateTimeString(new Date()); }
}
Once again, the application as modified to this point still behaves exactly as did the original. The implementation is quite different, though, and much more flexible. In particular, we now have a fragment that can be initialized externally and can be used to demonstrate transactions.
The idea of a fragment transaction is, as the name implies, that all changes take place as a single, atomic action. To demonstrate this, let’s make one final extension to the example program: let’s add the ability to create pairs of fragments.
Here’s the new layout:
<LinearLayout
xmlns:android="http://schemas.android.com/apk/res/android"
android:orientation="vertical"
android:layout_width="fill_parent"
android:layout_height="fill_parent"
>
<Button
android:id="@+id/new_fragments"
android:layout_width="fill_parent"
android:layout_height="0dp"
android:layout_weight="1"
android:textSize="24dp"
android:text="@string/doit"
/>
<FrameLayout
android:id="@+id/date_time2"
android:layout_width="fill_parent"
android:layout_height="0dp"
android:layout_weight="2"
android:background="@color/blue"
/>
<FrameLayout
android:id="@+id/date_time"
android:layout_width="fill_parent"
android:layout_height="0dp"
android:layout_weight="2"
android:background="@color/green"
/>
</LinearLayout>
Here are the corresponding additions to the onCreate method in SimpleFragment:
public void onCreate(Bundle state) {
super.onCreate(state);
setContentView(R.layout.main);
((Button) findViewById(R.id.new_fragments))
.setOnClickListener(
new Button.OnClickListener() {
@Override
public void onClick(View v) { update(); }
});
Date time = new Date();
FragmentManager fragMgr = getFragmentManager();
FragmentTransaction xact = fragMgr.beginTransaction();
if (null == fragMgr.findFragmentByTag(FRAG1_TAG)) {
xact.add(
R.id.date_time,
DateTime.newInstance(time),
FRAG1_TAG);
}
if (null == fragMgr.findFragmentByTag(FRAG2_TAG)) {
xact.add(
R.id.date_time2,
DateTime.newInstance(time),
FRAG2_TAG);
}
xact.commit();
}
Finally, the example application does something different. When run, it looks like Figure 8-2.
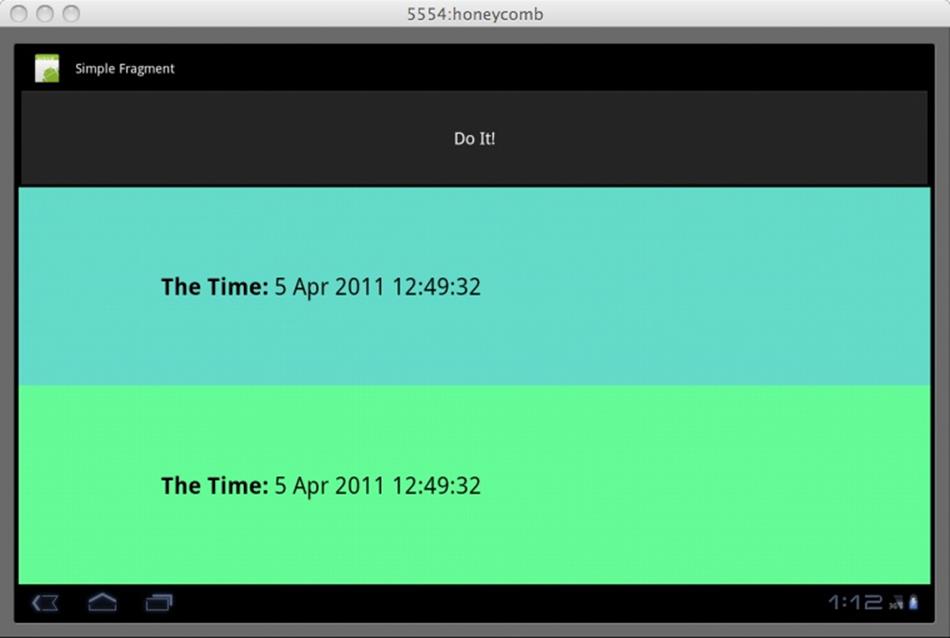
Figure 8-2. Fragment transactions
Both fragments display the exact same date and time because a single value is passed to both. Neither visiting other applications and returning to the demo nor rotating the display will cause this application to lose its state. It’s pretty solid. So let’s give the button an implementation. Here it is:
void update() {
Date time = new Date();
FragmentTransaction xact
= getFragmentManager().beginTransaction();
xact.replace(
R.id.date_time,
DateTime.newInstance(time),
FRAG1_TAG);
xact.replace(
R.id.date_time2,
DateTime.newInstance(time),
FRAG2_TAG);
xact.addToBackStack(null);
xact.setTransition(FragmentTransaction.TRANSIT_FRAGMENT_OPEN);
xact.commit();
}
This method actually makes use of the atomicity of fragment transactions. It looks a lot like the fragment initialization code in SimpleFragment’s onCreate method. Instead of using the transaction to add new fragment instances, however, it replaces the current fragments. The call to commit at the end of the method causes both of the new fragments to become visible simultaneously. The blue and the green times will always be in sync.
WARNING
A fragment created in a layout (using an XML fragment tag) must never be replaced with a dynamically created fragment. Although is it pretty hard to tell just by looking at them, the life cycle of one is much different from that of the other. There’s no reason you can’t use both in your application, but never replace one with the other. Attempting to use setContentView, for instance, with a layout that has had a layout fragment replaced with one that was programmatically created will cause bugs that can be difficult to find and fix. A frequent symptom of this kind of problem is an IllegalStateException with the message “Fragment did not create a view.”
This brings us to the last essential feature of fragments, the back stack. If you run several activities in sequence, you can return to them in reverse order using the back button. This behavior also applies to fragment transactions.
If you run this application, the display will look something like Figure 8-2. When you push the button at the top of the display, the blue and green fragments will update simultaneously. Better yet, though, if you push the back button (the left-facing arrow icon in the lower-right corner of the display), you will see, in reverse order, each update you generated by pushing the Do It! button. For instance, if both fragments display the time “5 Apr 2011 12:49:32” and you push the Do It! button, the display might be updated so that both the blue and the green regions show the date/time as “5 Apr 2011 13:02:43”. If you now push the back button, both fragments will again display “5 Apr 2011 12:49:32”. The entire transaction—the updates of both fragments—is pushed onto the back stack as a single event. When you push the back button, an entire transaction is removed, revealing the entire state from the previous transaction.
The Compatibility Package
One of the most important aspects of fragments is that, although they were introduced in Android 3.0 and are not available in previous releases of the API, Google provides the Android Compatibility Package (ACP) to make it possible to use the fragment feature on devices that are still using an older version of Android.
The compatibility package is not a complete win. It is not forward compatible. An application that runs using the ACP requires the ACP, even when running on an Android 3.0 system. When choosing an implementation strategy for the ACP, Google faced a conundrum. Even if it had been possible to implement the ACP so that an application ported transparently, without change, from Android 3.0 to Android 2.0 + ACP, there would have been a problem. The ACP must be included as part of an application. If the ACP defined classes with names that are identical to those in Android 3.0, an application that embedded it would, without some serious class loader trickery, define classes that collided with their system definitions.
Instead, the ACP uses a different base package, android.support.v4, in which to define the compatibility features. A program developed for Android 3.0 will need code changes to use the ACP. You will need to make, at least, the following changes:
§ Copy the ACP library to your project. Create a directory named lib at the top level of your project and copy android-support-v4.jar from the Android SDK folder extras/android/compatibility/v4/ into it.
§ Add the ACP to your project build path. In Eclipse, select the library in the Package Explorer (you may have to refresh the project to see it: press F5 or left-click→Refresh). Once it is selected, you should be able to left-click→Build Path→Add to Build Path.
§ Change your project build target from Android 3.0 to Android 2.0.1 (Properties→Android). This will cause many errors to appear.
§ Some imports that refer to android.app will have to be updated to refer to android.support.v4.app. Presuming your program had no errors before changing its build target, you need only find broken imports and update their base package.
§ All the activities in the application that use fragments must be updated to the subclass FragmentActivity instead of Activity.
§ Change all calls to getFragmentManager into calls to getSupportFragmentManager.
§ Fix any remaining errors and test your program.
All materials on the site are licensed Creative Commons Attribution-Sharealike 3.0 Unported CC BY-SA 3.0 & GNU Free Documentation License (GFDL)
If you are the copyright holder of any material contained on our site and intend to remove it, please contact our site administrator for approval.
© 2016-2025 All site design rights belong to S.Y.A.