Google Apps Script for Beginners
Chapter 4. Embedding Scripts in Text Documents
In the previous chapter, through the example of compiling the boss' e-mails, we learned that Google documents can have embedded scripts just like spreadsheets or forms do.
This example use case could well have been implemented in a spreadsheet and in some aspects, it probably would have been easier, but the reason was more an aesthetic choice; in spreadsheets there is an absence of grid and cell limitations and the ability to customize the appearance with styles and colors.
That is only a small example of what can be done in Google documents.
What can be done
If we consider the way these online documents work "behind the scenes", that is, the functioning of the backend software that Google has put in place to allow real-time editing and sharing, we shouldn't be surprised that a part of it has become available to Apps Script programmers.
Remember that the file we are about to manipulate will not be hosted on our computer, but somewhere on Google's servers. The page we actually see is nothing but the rendering of a set of instructions that we sent to this server. Each keystroke, paragraph, or format we change may be considered as a small code sent to the server running an application.
Of course, we don't need to know all of them. The engineers who designed the Google Docs service API had to translate it in a JavaScript-compliant language that anyone could use.
A look at the available methods at https://developers.google.com/apps-script/reference/document will tell you more about the plethora of methods than a description in this book ever could, even if I had a 100 pages to fill.
So, let us focus on a couple of pleasant features illustrated with practical examples in the following sections.
Generating a Google document from spreadsheet data using a script
I mentioned earlier that we could have used a spreadsheet in the previous Gmail example to log the data we retrieved from the e-mail messages, but that the document approach was more pleasant in terms of "look". So I suggest that we try to build a Google document from data stored in a spreadsheet.
The data can be a list of addresses or recipes. It doesn't really matter what data we use as the methods we use will be the same, but we'll use the list of recipes because they have pictures in them and had might as well give you some ideas for your next weekend lunch.
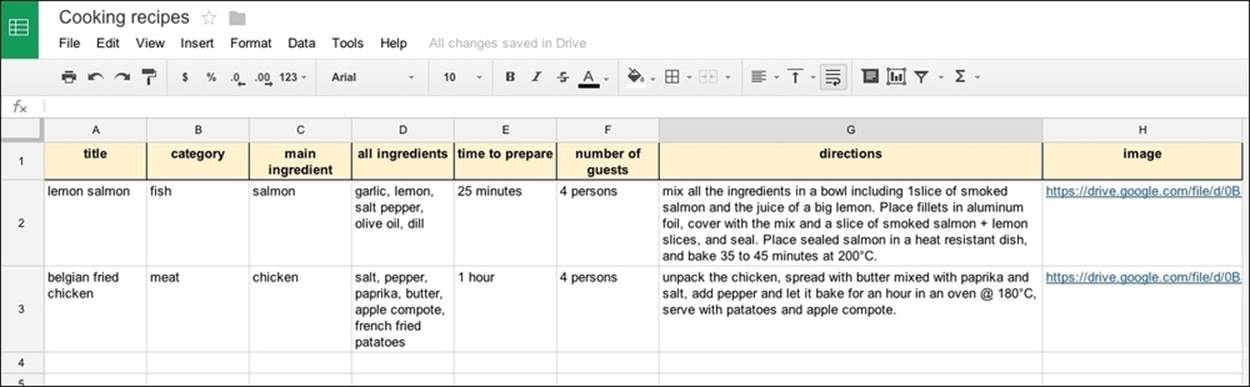
The following screenshot shows how our current data sheet looks—it's not very elegant:
We already know how to get data from a spreadsheet (see Chapter 1, Enhancing Spreadsheets) and that using getValues() will return an array of arrays with all the cells' data in a raw format.
Each row will be an array of values corresponding to each cell; these arrays will in turn be wrapped in an array. We also see in our example that the first row in the sheet has headers that we may want to use to get the structure of the data.
Speaking of structure, if you read the tutorials on Google's help page (https://developers.google.com/apps-script/articles), you have probably noticed that they use a method to get data from a spreadsheet as objects, with the object of each row having its cell properties labelled using header values (https://developers.google.com/apps-script/guides/sheets#reading).
There are actually many ways to manipulate data from spreadsheets. A Two-Dimensional (2D) array (in other words, an array of arrays) is a pleasant one. JavaScript-named objects are also nice to use and I have no real opinion about which is best, so I suggest that this time we give the object method a try. The next time will use pure array manipulation. Both approaches begin the same way: select a range in the sheet and get its values, then isolate the headers to know what data it has. This is done using the following code:
var data = SpreadsheetApp.getActive().getDataRange().getValues();
var headers = data.shift();
The preceding code results in the following output:

Tip
var data contains all the cells in an array of arrays. The shift() method removes the first array (which is equal to the first row) and assigns it to var headers. See the example documentation from w3schools at the following link:
http://www.w3schools.com/jsref/jsref_shift.asp
That is the common part of the two approaches. From now on, we must change our script to get JavaScript objects. As explained in the Google tutorial, it is advisable to use a CamelCase format for the object's variable names. It suggests a script to do so, but we're going to try something else, such as playing with a few string and array methods. See the comments in the following code and use the Logger to see every step of the process:
function camelise(stringArray) {
var camelised = [];// this will hold the function result
for(var n in stringArray){
Logger.log('title original = '+stringArray[n])
var title = stringArray[n].replace(/\W/gi,' ').split(' ');
// replace every non "word" char with space and split string into an array (split on space)
Logger.log('title array alphanumeric only = '+title)
var result = '';
for(var t in title){
if(title[t].replace(/ /g,'')==''){ continue };
// skip any empty field
result+=title[t].replace(/ /g,'')+'|';
// compose a result string with | separators (easier to see in the Logger) and no spaces
}
title = result.toLowerCase().split('|');
// everything in lowercase and convert back to an array splitting on | separators
var camelCase = '';// initialize the result string
for(t=0 ; t<title.length-1 ; t++){
// let's handle each word separately, the first word (index 0) should remain unchanged
if(t==0){
var capWord = title[t];
}else{
capWord = title[t].substring(0,1).toUpperCase()+title[t].substr(1);
} // every following item gets a capital first letter
camelCase+=capWord;// compose output result
}
// view each result in the Logger and store in an array
Logger.log('camelCase = '+camelCase);
camelised.push(camelCase);
}
// return the array of headers in CamelCase format
return camelised;
}
Now we can test the preceding code using a special temporary function such as the one in the following code snippet:
function testGetHeadersAsCamelCase(){
var data = SpreadsheetApp.getActive().getDataRange().getValues();// we get all the cells with data in one call
var headers = data.shift();// the first row is headers row and we remove this row from data altogether
var ccHeaders = camelise(headers);
for(var n in headers){ // create a loop
Logger.log(headers[n]+' becomes >> '+ccHeaders[n]);
}
}
So we get the following partial log:
……….
[13-12-31 09:16:19:385 CET] Recipe title becomes >> recipeTitle
[13-12-31 09:16:19:385 CET] Meal category becomes >> mealCategory
[13-12-31 09:16:19:386 CET] main ingredient becomes >> mainIngredient
[13-12-31 09:16:19:386 CET] all ingredients becomes >> allIngredients
[13-12-31 09:16:19:386 CET] time to prepare becomes >> timeToPrepare
[13-12-31 09:16:19:386 CET] number of guests becomes >> numberOfGuests
[13-12-31 09:16:19:387 CET] directions becomes >> directions
[13-12-31 09:16:19:387 CET] image url becomes >> imageUrl
Now that we have our headers in the right format, that is CamelCase, we can read the data in the sheet using the headers as keys and each cell row as value to build JavaScript Objects with key:value pairs as properties; the following code snippet depicts this:
function getObjects(data, keys) {
var objects = [];// create an empty array variable
for (var i = 0; i < data.length; ++i) {// iterate sheet data
var object = {};
// create an empty "object" variable and then iterate each row's content
for (var j = 0; j < data[i].length; ++j) {
var cellData = data[i][j];
// check if cell is empty or contains any white space
if (cellData.toString().replace(/ /g,'')=='') {
continue;
}else{
object[keys[j]] = cellData;// assign value to key
}
}
objects.push(object);//store every object in array
}
return objects;
}
Create a new document to hold the values as shown in the following piece of code:
var docId = DocumentApp.create('Recipes in a doc').getId();
Logger.log(docId);
We use another function to populate the document with text, tables, and images. In this chapter, I have called this function exportToDoc(docId,objects,keys,headers). It has four parameters: the newly created document ID, the array of objects, the keys (in case we need them), and the headers to show field information.
The next part of the code is not very hard to read. The various style definitions are defined as global variables at the end of the script as usual, but the data handling itself is very simple, thanks to the array-of-objects structure.
The document formatting function is reproduced in the following code with comments on the important parts:
function exportToDoc(docId,objects,keys,headers){
var doc = DocumentApp.openById(docId);
var body = doc.getBody();
var docHeader = doc.addHeader().appendParagraph('My favourite recipes\rCreated by script on '
+Utilities.formatDate(new Date(), Session.getTimeZone(),'MMM dd @ HH:mm'));
// use the style defined outside of the function and use an alignment setting
docHeader.setAttributes(styleHeader).setAlignment(DocumentApp.HorizontalAlignment.CENTER);
for(var n in objects){
body.appendParagraph('An idea for a meal with '+objects[n][keys[1]]+' composed mainly of '+objects[n][keys[2]]+' for '+objects[n][keys[5]]+' :').setAttributes(styleBase);
body.appendParagraph('The name of this recipe is "'+objects[n][keys[0]]+'" but I invented it myself \rso you can change it if you want').setAttributes(styleBase);
body.appendHorizontalRule();
body.appendParagraph('List of '+headers[3]+' :');
var table = [];
var ing = objects[n][keys[3]].split(',');
for(var i in ing){ table.push(['You must have '+ ing[i]]) };
body.appendTable(table).setAttributes(styleTable);
body.appendParagraph('Try to get some free time, it will take approximately '+objects[n][keys[4]]+', then clean up your kitchen and '+objects[n][keys[6]]).setAttributes(styleDirections);
body.appendHorizontalRule();
var image = DriveApp.getFileById(objects[n][keys[7]].split('d/')[1].split('/')[0]).getBlob();// retrieve ID from URL
// https://drive.google.com/file/d/0B3qSFd3iikE3UmpjelRQdlZmQXc/edit?usp=sharing This is a typical link
body.appendParagraph('good apetite ;) ').appendInlineImage(image).setWidth(300).setHeight(200).getParent().setAttributes(styleImage);
body.appendHorizontalRule();
if(n<objects.length){body.appendPageBreak()};
}
}
The style definitions are grouped at the end of the script. They can even be stored in a separate script file within the same project. This is shown in the following code snippet:
// Style definitions as global variables
var bodyStyle = {};// define a style for body, margin etc...
bodyStyle[DocumentApp.Attribute.MARGIN_LEFT] = 30;
bodyStyle[DocumentApp.Attribute.MARGIN_BOTTOM] = 20;
bodyStyle[DocumentApp.Attribute.MARGIN_RIGHT] = 30;
bodyStyle[DocumentApp.Attribute.MARGIN_TOP] = 20;
body.setAttributes(bodyStyle);
var styleBase = {};// a "base" style for paragraphs
styleBase[DocumentApp.Attribute.FONT_SIZE] = 11;
styleBase[DocumentApp.Attribute.FONT_FAMILY] = DocumentApp.FontFamily.AMARANTH;
styleBase[DocumentApp.Attribute.FOREGROUND_COLOR] = "#444400";
var styleHeader = {};// define a style for document header
styleHeader[DocumentApp.Attribute.BACKGROUND_COLOR] = '#eeeeff'
styleHeader[DocumentApp.Attribute.FONT_SIZE] = 16;
styleHeader[DocumentApp.Attribute.FONT_FAMILY] = DocumentApp.FontFamily.CORSIVA;
styleHeader[DocumentApp.Attribute.FOREGROUND_COLOR] = '#0000aa';
var styleTable = {};// define a style for table
styleTable[DocumentApp.Attribute.FONT_SIZE] = 10;
styleTable[DocumentApp.Attribute.FONT_FAMILY] =DocumentApp.FontFamily.AMARANTH;
styleTable[DocumentApp.Attribute.FOREGROUND_COLOR] = "#005500";
styleTable[DocumentApp.Attribute.BORDER_WIDTH] = 0 ;
var styleDirections = {};// define a style for direction paragraph
styleDirections[DocumentApp.Attribute.FONT_SIZE] = 12;
styleDirections[DocumentApp.Attribute.FONT_FAMILY] = DocumentApp.FontFamily.CONSOLAS;
styleDirections[DocumentApp.Attribute.ITALIC] = true;
styleDirections[DocumentApp.Attribute.FOREGROUND_COLOR] = "#000066";
var styleImage = {};
styleImage[DocumentApp.Attribute.HORIZONTAL_ALIGNMENT] = DocumentApp.HorizontalAlignment.CENTER;
// end of file
We can now write a main function that will call all the others in turn; the function generateDoc() will be the one to call to create the document as shown in the following code snippet:
function generateDoc(){
var data = SpreadsheetApp.getActive().getDataRange().getValues();
// we first get all the cells with data in one call
var headers = data.shift();
// shift is an array function the removes the first row
// and assign it to the variable headers
var keys = getHeadersAsCamelCase(headers);
// get the CamelCase formatted headers using a separate function
var objects = getObjects(data, keys);
for(var n in objects){
for(var k in keys){
Logger.log('Object '+n+' properties '+keys[k]+' = '+objects[n][keys[k]]);
}
}
// we get all the values using 2 loops
var docId = DocumentApp.create('Recipes in a doc').getId();
//create a doc as a container for our recipes
Logger.log(docId);
exportToDoc(docId,objects,keys,headers);
}
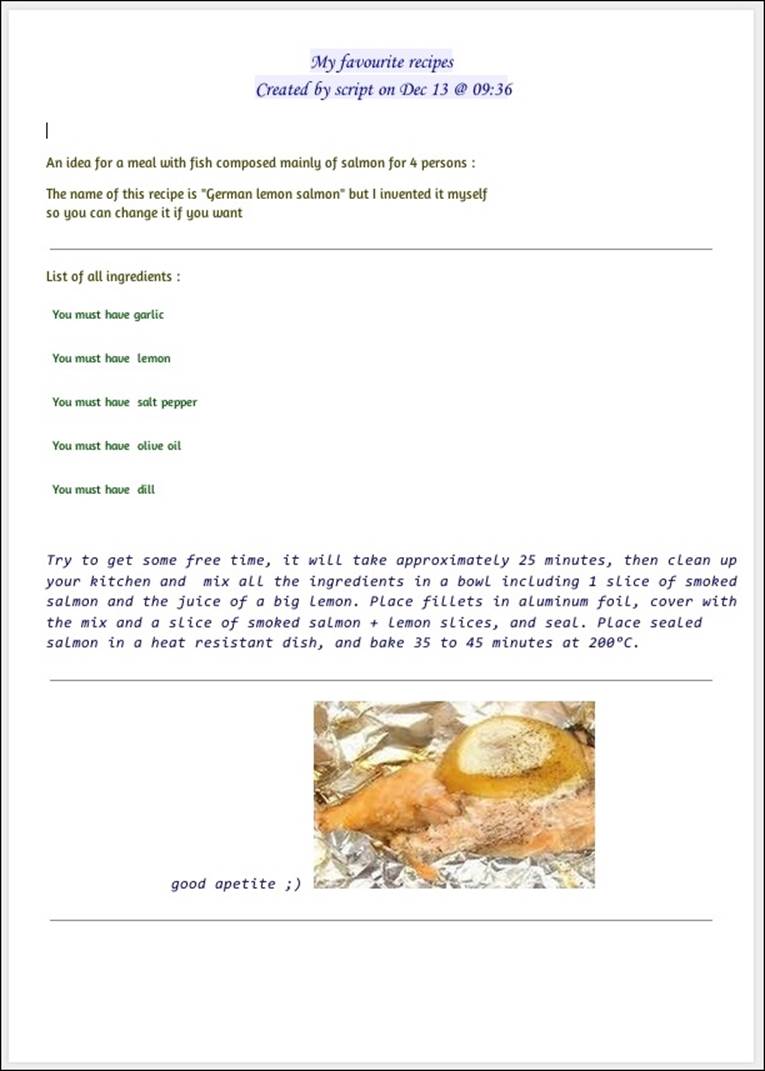
Running generateDoc() is going to create a multipage document with one recipe per page with a better layout and an inline image.
The next step would be to create a form linked to the source spreadsheet (as seen in Chapter 2, Create and Manipulate Forms) so that all your friends can add their own recipes. With a single click, you will be ready to publish a cookbook with no effort. If you do, just let me know, I love cooking!
The following screenshot shows the document created:
Analyzing, duplicating, and modifying document elements
In the first section of this chapter, we have built a document from scratch using various methods, but we could also try the reverse process; in other words, we can analyze a document to see its content.
In doing so, we will be able to copy a part of the document, modify the document's content, and even insert new elements in the document or simply assemble multiple documents in one (see, for example, my last answer on this post athttp://stackoverflow.com/questions/10939031/how-to-delete-blank-pages-in-a-multipage-).
Just about every method set in DocumentApp has a symmetric get method that returns precise information on every element. Elements can be built hierarchically with parents and children (I used that hierarchy when inserting the image in our example; the image was a child of the paragraph : body.appendParagraph('good apetite').appendInlineImage(image) and a good analyze script will have to examine elements at every level.
Using a script to insert an image into a document
A complete example including every method would be very long, so I'll show a simplified layout to show how it works, but that only identifies every type of element and replaces a paragraph with an image if a predefined placeholder =='###', is found in the paragraph.
You should easily be able to implement a more universal version yourself that adds or modifies elements based on certain conditions. Test the following code in a text document, such as the one we just created with our recipes.
function findMarkAndReplace() {
var Doc = DocumentApp.getActiveDocument();
var image = DocsList.getFileById('0B3qSFd3iikE3UmpjelRQdlZmQXc');
// this is an image from the recipe's example stored on my drive and shared publicly
var totalElements = Doc.getNumChildren();
var el=[];
for( var j = 0; j < totalElements; ++j ) {
var element = Doc.getChild(j);
var type = element.getType();
Logger.log('element '+j+" : "+type);
// to see doc's content type
if (type =='PARAGRAPH'){
el[j]=element.getText();
if(el[j]=='###'){
element.removeFromParent();
// remove the ### placeholder
Doc.insertImage(j, image);
// 'image' is the image file as blob
}
}
}
}
Compiling and presenting data from other services
In the example we used to create a document, we were getting data from a spreadsheet; but, of course, you can get data from any other Google service and, although it is not as simple, any other data server on the Internet. This is one of the major advantages of the document creation mode that Google has implemented in this service.
Just about anything that contains text can be imported and presented in a Google document along with images, drawings, and even math formulas. The preceding example showed how to insert an image stored in our drive; the next one will get text from our personal calendar.
Calendar, contact, spreadsheets, and forms are really easy to get data from in a way that fits pretty well in a text document, because every property can be obtained as a string. It is only a matter of imagination and creativity on your part to concatenate everything in a pleasant way.
The following is a very basic example of a script that gets events from your default calendar and writes them in an open document. I haven't used any style parameters apart from background color and horizontal alignment to keep it as short as possible:
function importFromCal(){
var cal = CalendarApp.getDefaultCalendar();
var endDate = new Date();
var startDate = new Date(endDate.getTime()-30*24*3600000);
// start date is 30 days before end date
var events = cal.getEvents(startDate, endDate);
var doc = DocumentApp.getActiveDocument();
var body = doc.getBody();
var styleEvent = {};
//define a style object to play with
for(var n=0 ; n<events.length; n++){
if( n % 2 == 0){
// every odd row will be right aligned, every even row will be left aligned
styleEvent[DocumentApp.Attribute.HORIZONTAL_ALIGNMENT] = DocumentApp.HorizontalAlignment.LEFT;
}else{
styleEvent[DocumentApp.Attribute.HORIZONTAL_ALIGNMENT] = DocumentApp.HorizontalAlignment.RIGHT;
}
var bgColor = parseInt(0xff*(n+1)/events.length);
// fade color to white using hex values
Logger.log('color = #'+bgColor.toString(16)+'ffff');
styleEvent[DocumentApp.Attribute.FOREGROUND_COLOR] = '#222222';
styleEvent[DocumentApp.Attribute.BACKGROUND_COLOR] = '#'+bgColor.toString(16)+'ffff';
body.appendParagraph(events[n].getTitle()+'\r'+events[n].getDescription()+'\ron '+Utilities.formatDate(events[n].getStartTime(), Session.getTimeZone(),'MMM dd, yyyy')+'\r@'+events[n].getLocation()).setAttributes(styleEvent);
}
}
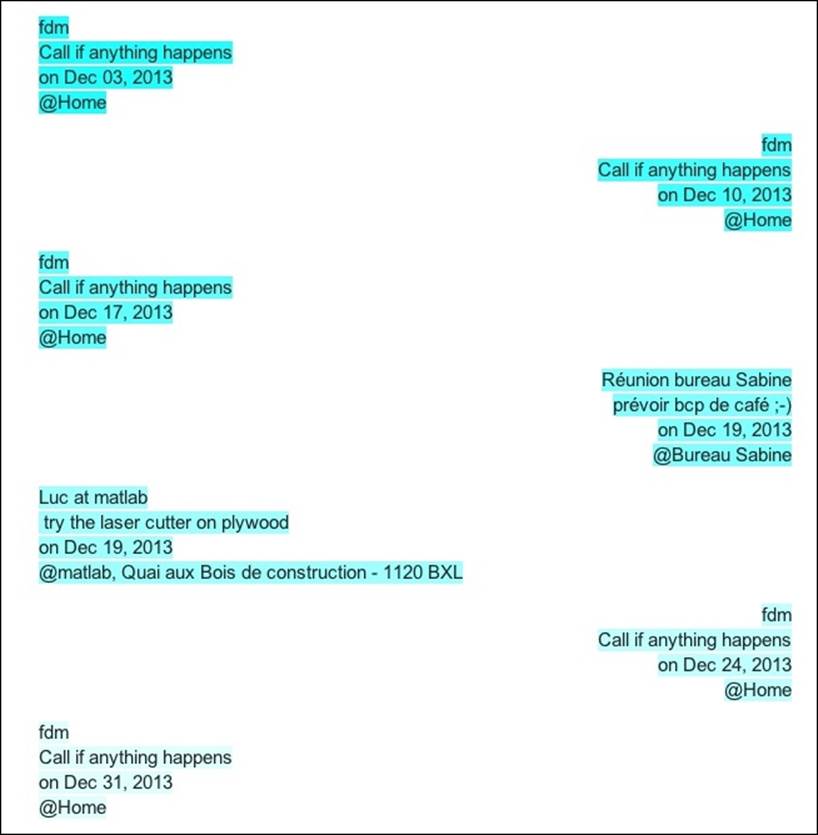
The following screenshot shows the result of the preceding code:
In the preceding code, we used some pure JavaScript methods such as Math.floor and % that are well explained on many JavaScript reference websites (for example, https://developer.mozilla.org/en-US/docs/Web/JavaScript/Reference/Global_Objects/Math).
Spend some time reading the documentation about all the elements that you can include in a document and all the data sources you can use.
In the next chapter, we will use a document embedded in a Google website and update it automatically everyday with data from a spreadsheet.
Summary
Document-embedded scripts can be used on many different occasions; we have seen how to build or change the content of a document and analyze what is already in it; this process could easily be developed to create an elegant mail-merge workflow, getting data directly from your Gmail contact.
In Chapter 7, Using User Interfaces in Spreadsheets and Documents, we'll see that we can also add a custom user interface to a document and create new features that make the documents even more attractive and efficient. In the next chapter, we will learn about embedding scripts on Google sites.
All materials on the site are licensed Creative Commons Attribution-Sharealike 3.0 Unported CC BY-SA 3.0 & GNU Free Documentation License (GFDL)
If you are the copyright holder of any material contained on our site and intend to remove it, please contact our site administrator for approval.
© 2016-2026 All site design rights belong to S.Y.A.