Getting Started with Spark Core and Photon (2015)
Chapter 6. If This Then That
The If This Then That (IFTTT) web service allows you link together various internet services in a simple way. IFTTT (http://ifttt.com) allows you to define “recipes" such as “if someone forks one of my Github projects, send me an email, telling me who." IFTTT also allows linking of more conventional web services like Gmail, Twitter, Facebook etc. IFTTT can also integrate with IoT services, including Spark. This means that you can make IFTTT recipes that use a Photon or Core. For example, “when the temperature rises over 70 degrees F send me an email” or “Whenever anyone mentions me in a tweet, have my device ring a bell” or even, “flash the subject line of any emails I receive to me as Morse Code.”
If This Then That
To get started with IFTTT, you will need to visit http://ifttt.com and register. Once you are registered you can get started writing your own recipes, or for that matter use recipes that other people have contributed.
IFTTT integrates lots of other web services such as Facebook, Twitter and Gmail and to be able to create and use recipes that use these web services, you will have to grant IFTTT access to these accounts by logging into these separate accounts as you set up a recipe that uses them.
At this point, you might like to explore IFTTT read their instructions on getting started and even try out a simple recipe or two before you start using it with the Photon/Core.
Project 11. Temperature eMail Alerts
This project uses the same code on the Photon/Core as Project 10. In fact it has exactly the same hardware as project 10 too. So, if you have not already done so, build Project 10 and try it out before moving on to this project.
In this project, the webpage that we created to show the temperature in Project 10 will not be used (although you can still use it for testing). Instead, you are going to create an IFTTT recipe that monitors the temperature Variable and sends you an email when a temperature of 70 degrees F is exceeded.
Make Project 10 and power-up the Photon/Core so that IFTTT can find it and then start by creating a new IFTTT Recipe by clicking on the Create a Recipe button (Figure 6-1).

Figure 6-1. Figure 6-1. Creating a New Recipe in IFTTT
The big clue here is the hyperlinked word “this” that is inviting you to click on it so that you can define a trigger. This will take you to a screen-full of icons for all the various web services that IFTTT knows about, that can act as a “trigger channel." Scroll down the list until you find the icon for Spark, shown in Figure 6-2. If this is the first time you have used Spark with IFTTT then you will be asked to log into Spark. Remember you are already logged into IFTTT, the login details you need to enter here are the username and password for your Spark.io account, so that IFTTT can have access to it.
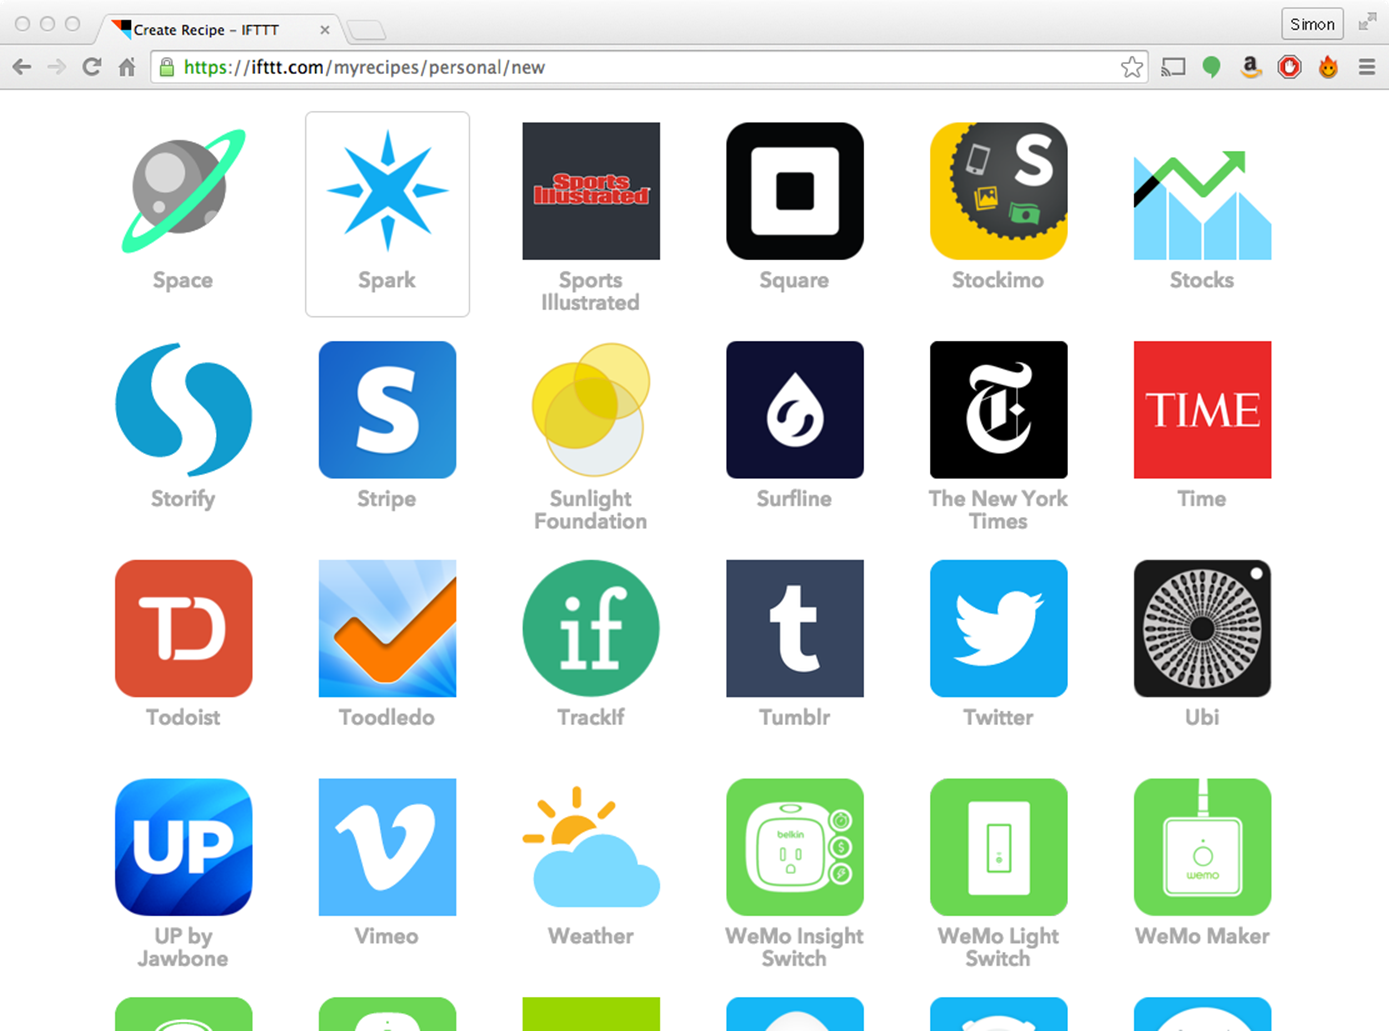
Figure 6-2. Figure 6-2. Selecting a Trigger Channel in IFTTT
Click on the Spark Icon and you will be presented with a list of Triggers to chose from (Figure 6-3).
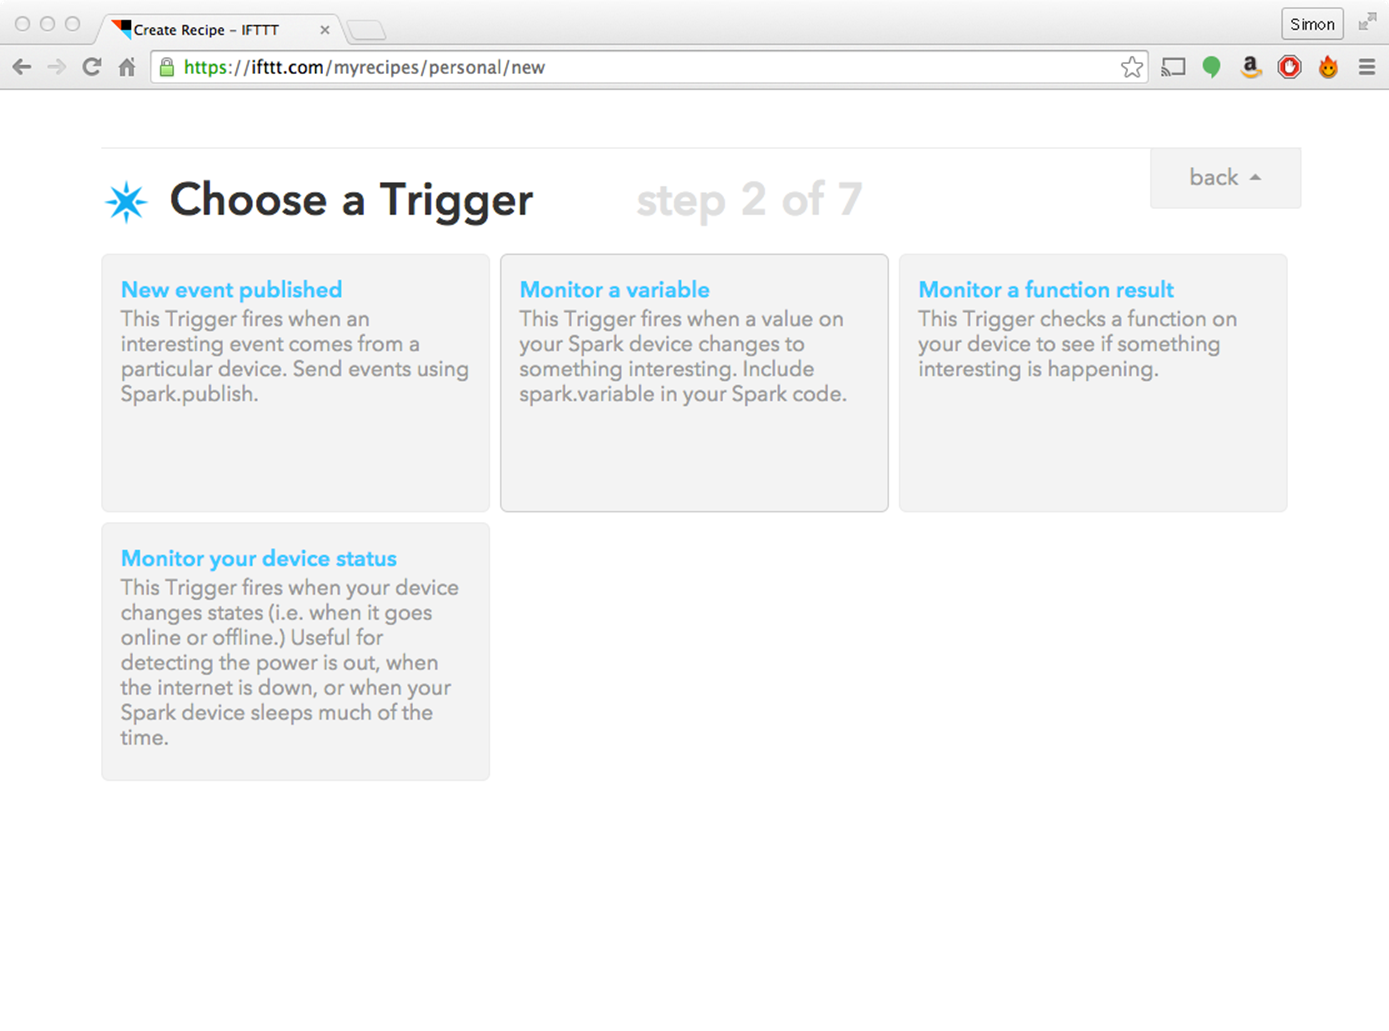
Figure 6-3. Figure 6-3. Selecting a Trigger in IFTTT
Select the option “Monitor a variable," since you want to be able to monitor the value of the tempF Variable on your Photon/Core.
This will open the simple form shown in Figure 6-4.
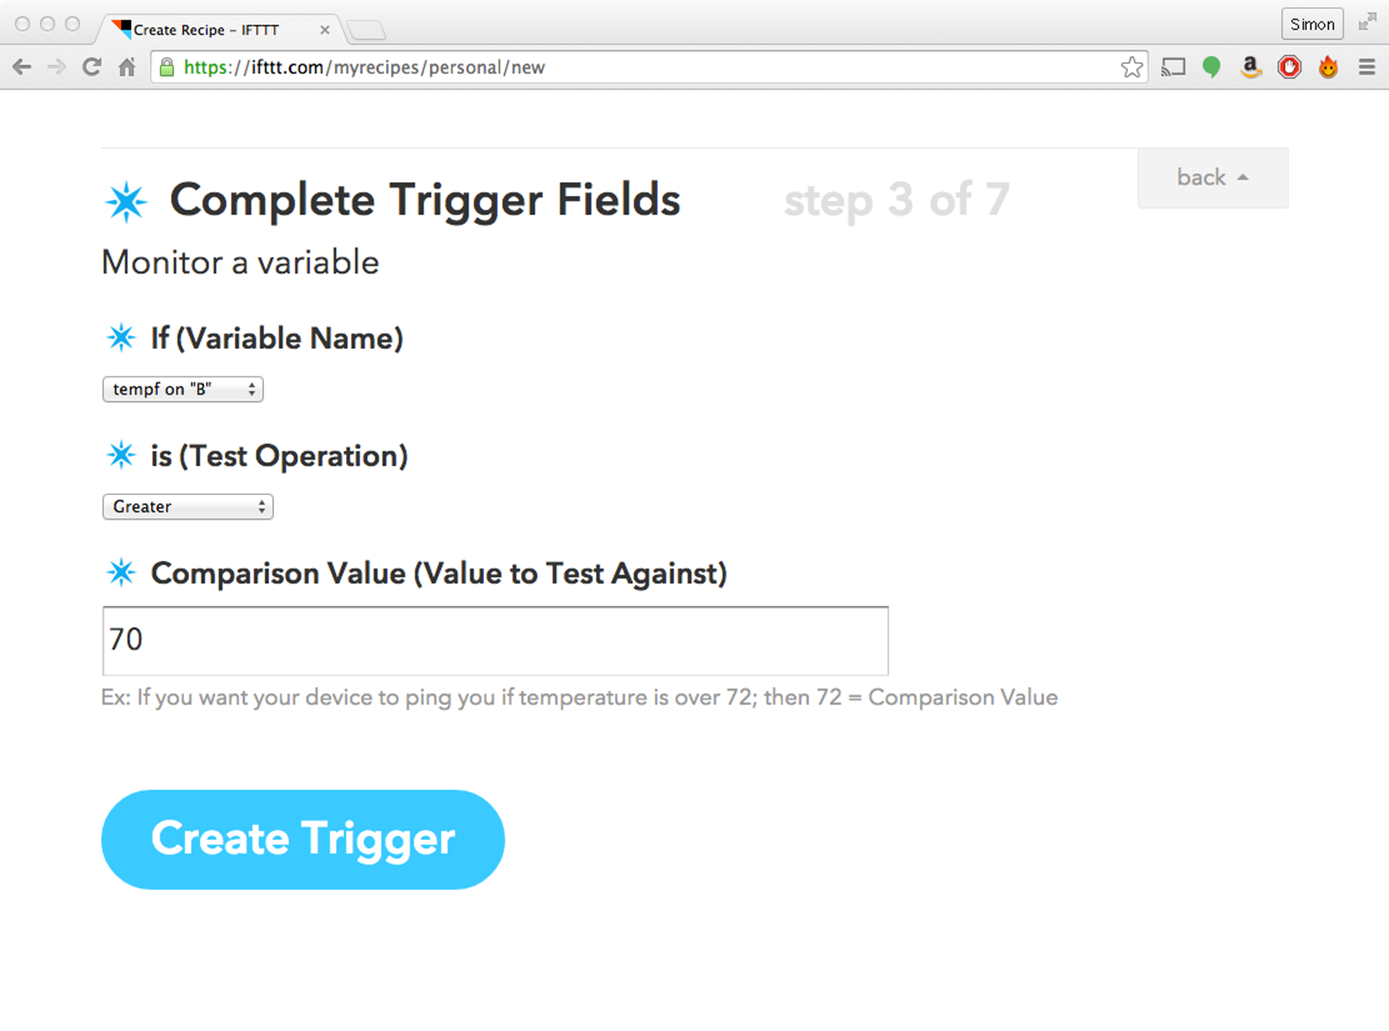
Figure 6-4. Figure 6-4. Configuring the Trigger
Here, when you click on the “If (Variable name)” field, you will be shown a drop-down list of all the Variables on all your Photons (and Cores). In Figure 6-4 you can see that “tempf on B” is selected (my Photon is rather unimaginatively called B).
In the next field you need to select the “Test Operation." We want to trigger something when the temperature exceeds 70, so select the Test Operation of “Greater." If you wanted to set up alerts for temperatures falling below some threshold (say to warn you of pipes about to freeze) then you could use “Less” here.
In the final field of Figure 6-4 set the “Comparison Value” to be 70 and then click on Create Trigger to move onto the next stage (Figure 6-5). If you live somewhere warm then you may want to increase 70 to perhaps 80, so that when testing the recipe, it isn’t triggered until you deliberately warm up the sensor.
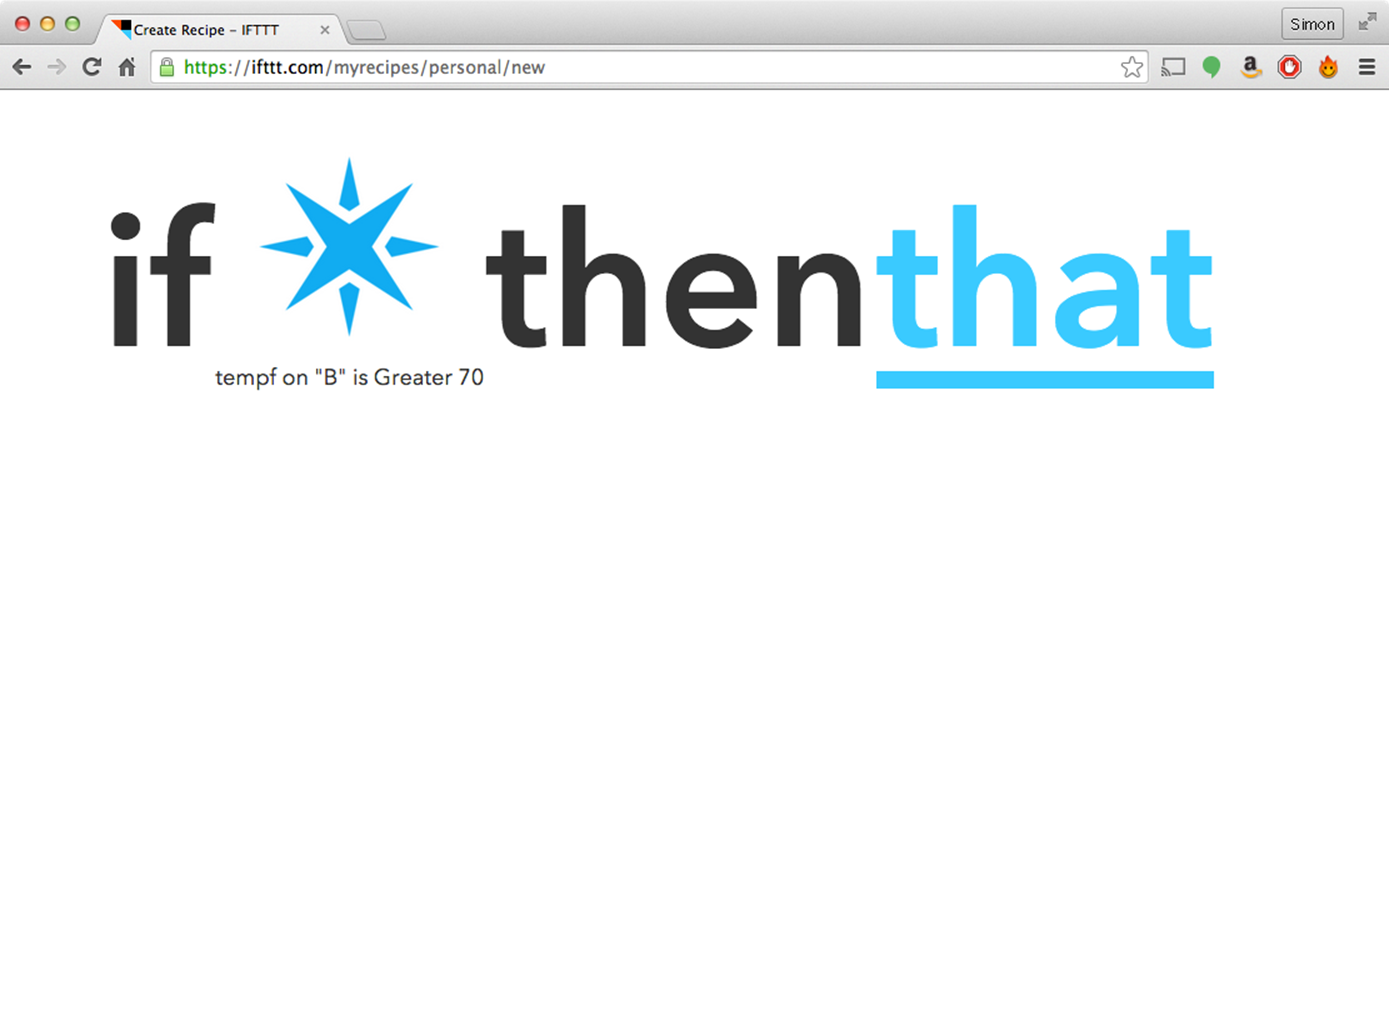
Figure 6-5. Figure 6-5. Defining an Action in IFTTT
Now you are being invited to complete the “That” part of the recipe. Notice that underneath the If part of the recipe it says “tempf on ‘B' is Greater 70." Now click on the “That” hyperlink and you will be given a selection of Action Channels to select from (Figure 6-6).
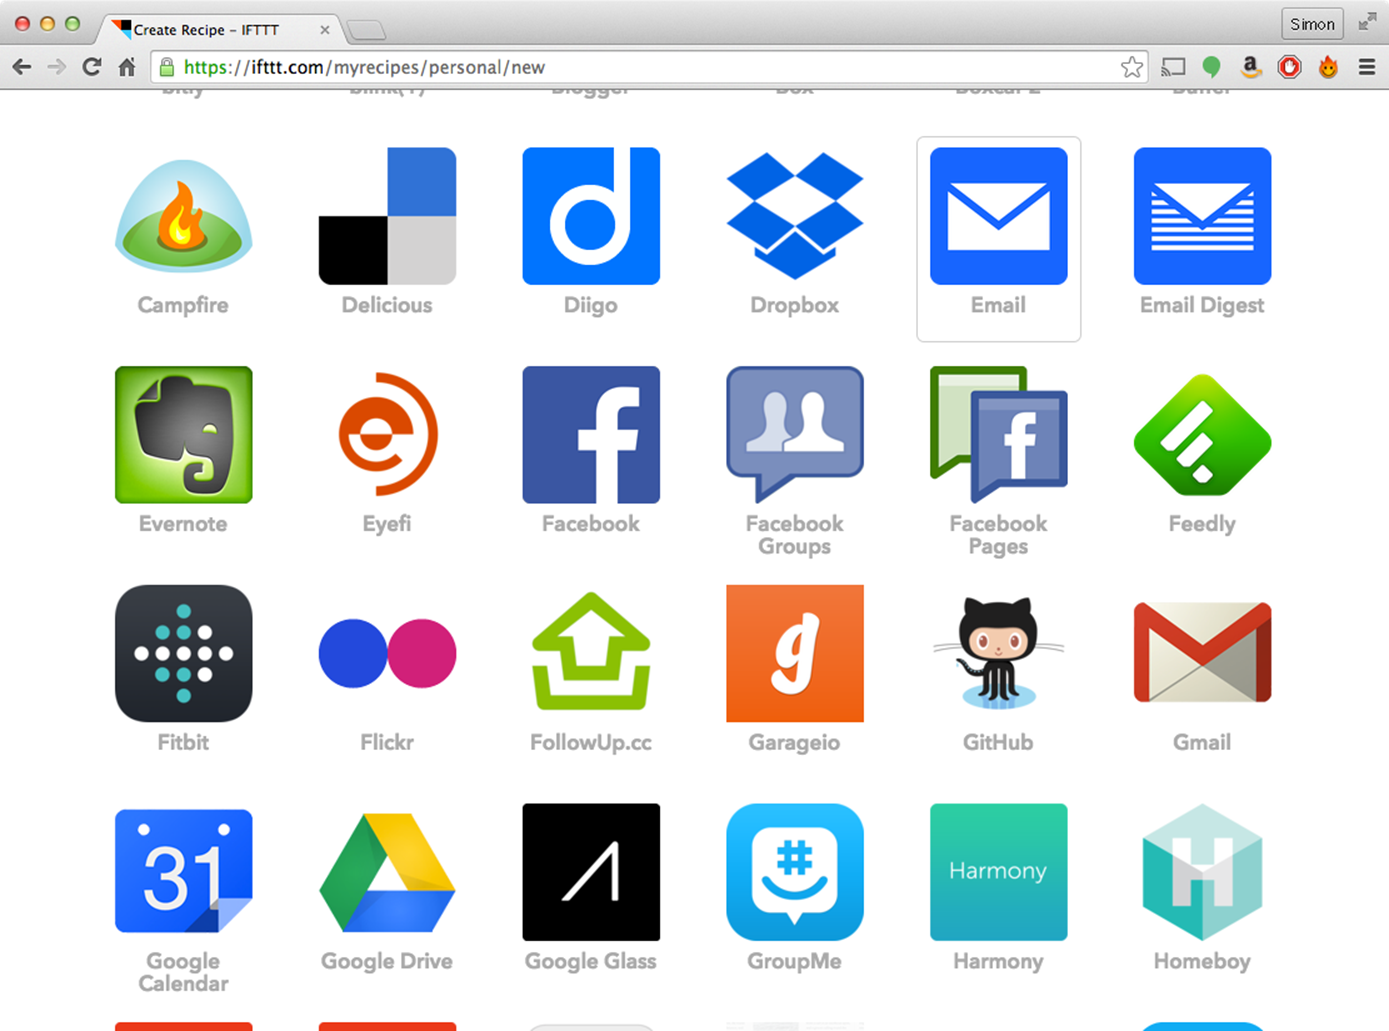
Figure 6-6. Figure 6-6. Selecting an Action Channel.
The action we want is to have an email sent to us. The email will come from IFTTT’s email server and they already know your email address from when you registered, so select the Email icon from the list of Action Channels.
Next, you need to select the action you want to take with that Channel and there is only one choice (“Send me an email”) shown in Figure 6-7.
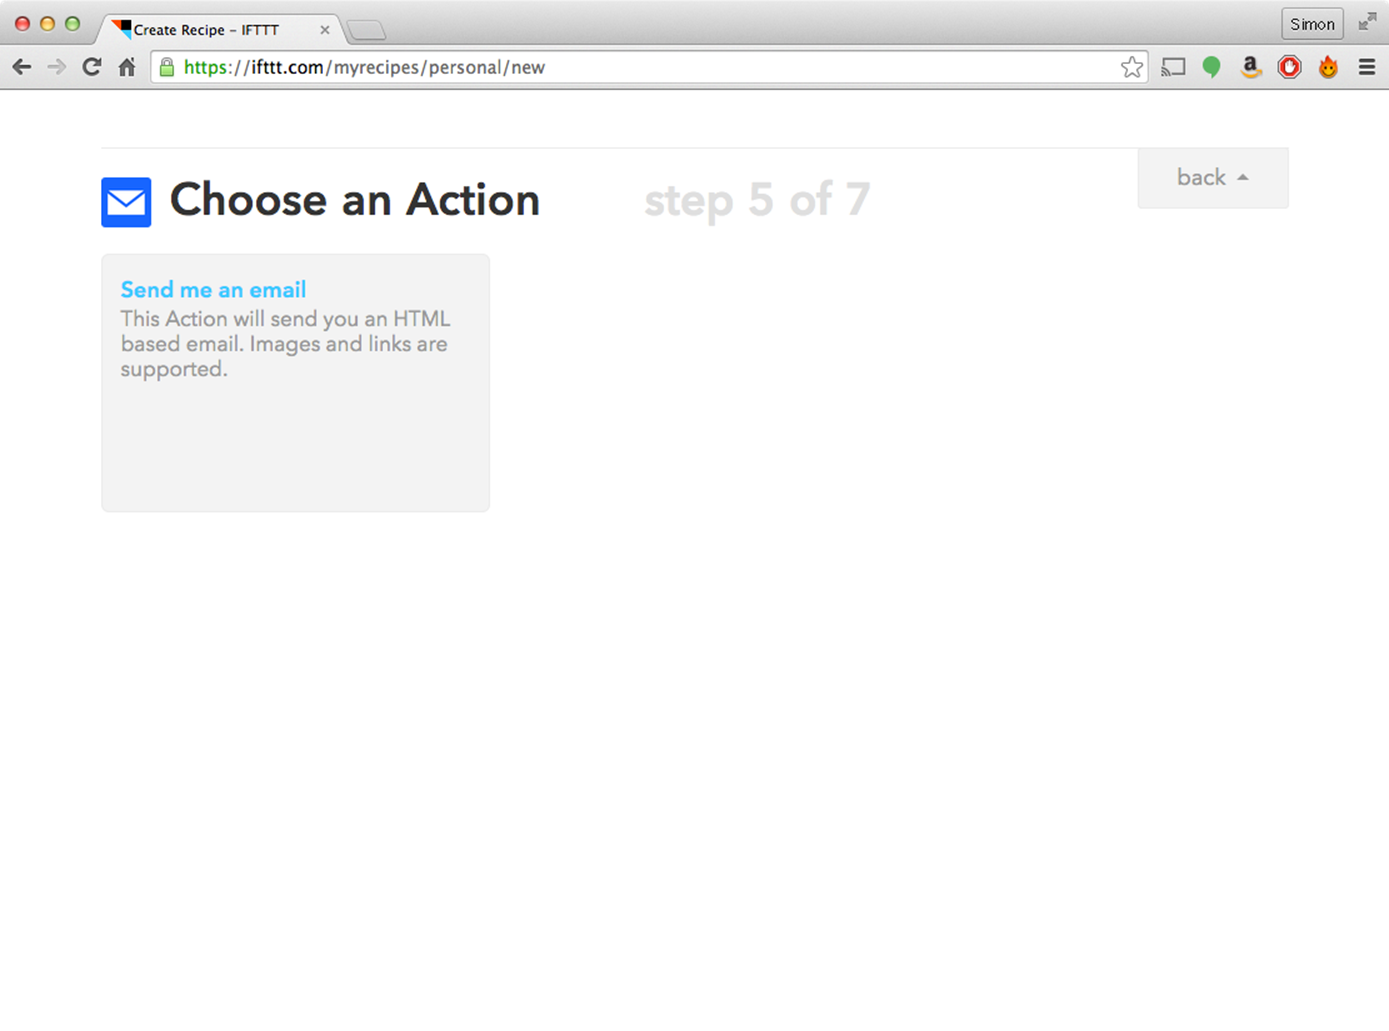
Figure 6-7. Figure 6-7. Selecting the Send Email Action
Click on the “Send me an email” option and another form will appear for you to complete (Figure 6-8).
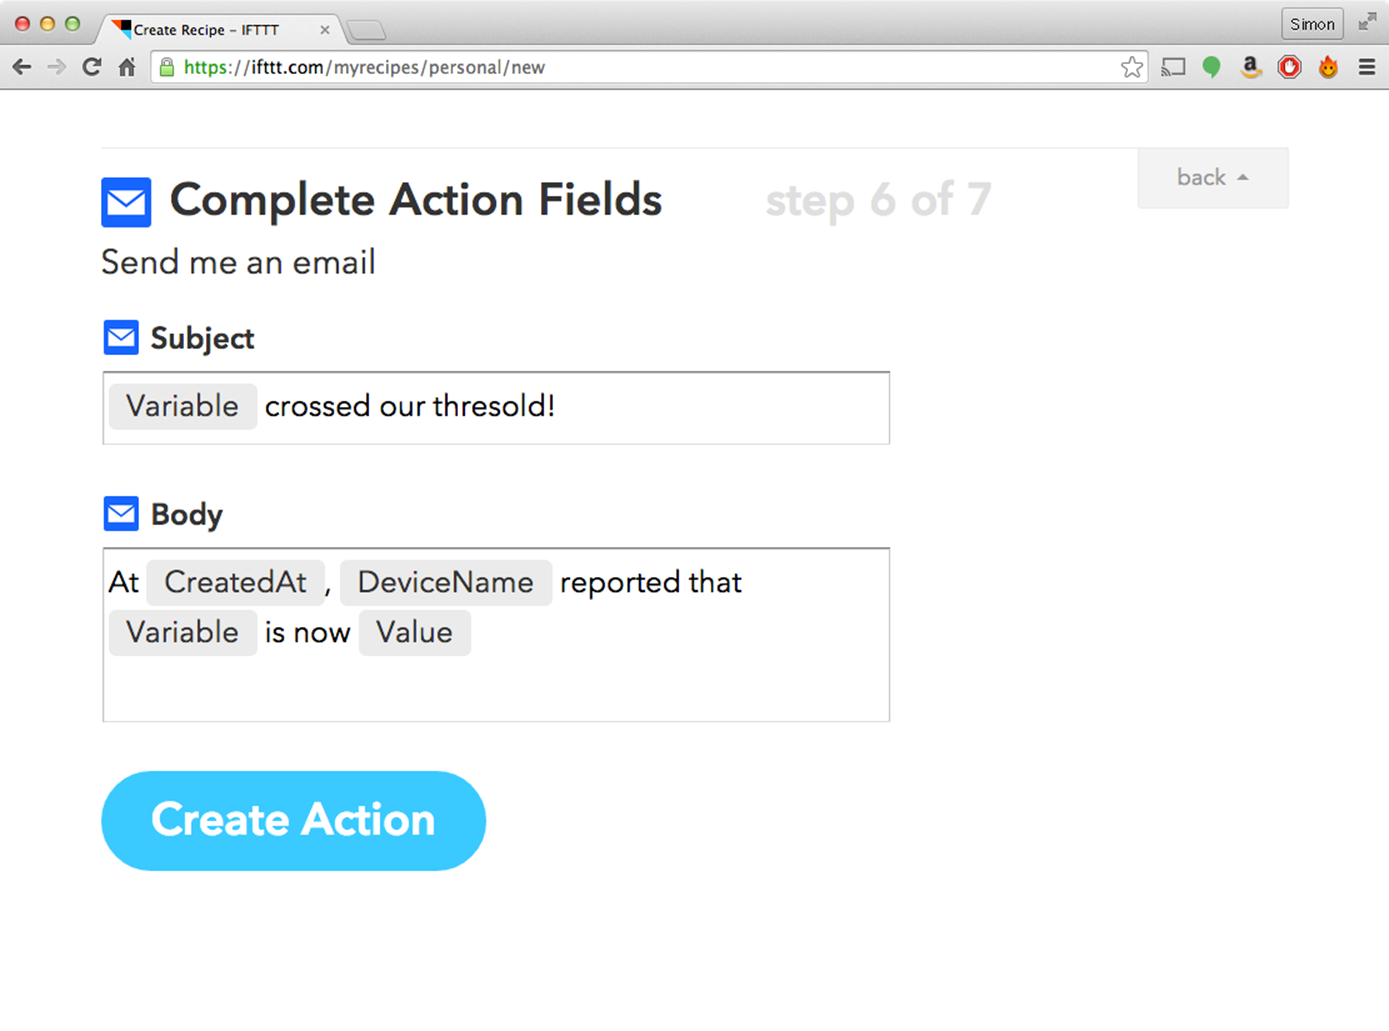
Figure 6-8. Figure 6-8. Options for Send Email.
This form will determine what will go into the email that gets automatically sent. It is a mixture of regular text and also “ingredients” (Variable, CreatedAt, DeviceName and Value). These ingredients can be used in both the Subject and body of the email. Their meanings are as follows:
§ Variable - the name of the Spark.io Variable on the Photon/Core, in this case, always “tempf”
§ CreatedAt - the date and time when the email was triggered
§ DeviceName - the name you gave to your Photon or Core
§ Value - the actual value of the Variable at the time that the email was triggered
Change the fields so that they look like Figure 6-9. Note that when you go to edit a field, the variables in that field will be converted to text enclosed in to mark them out as variables.
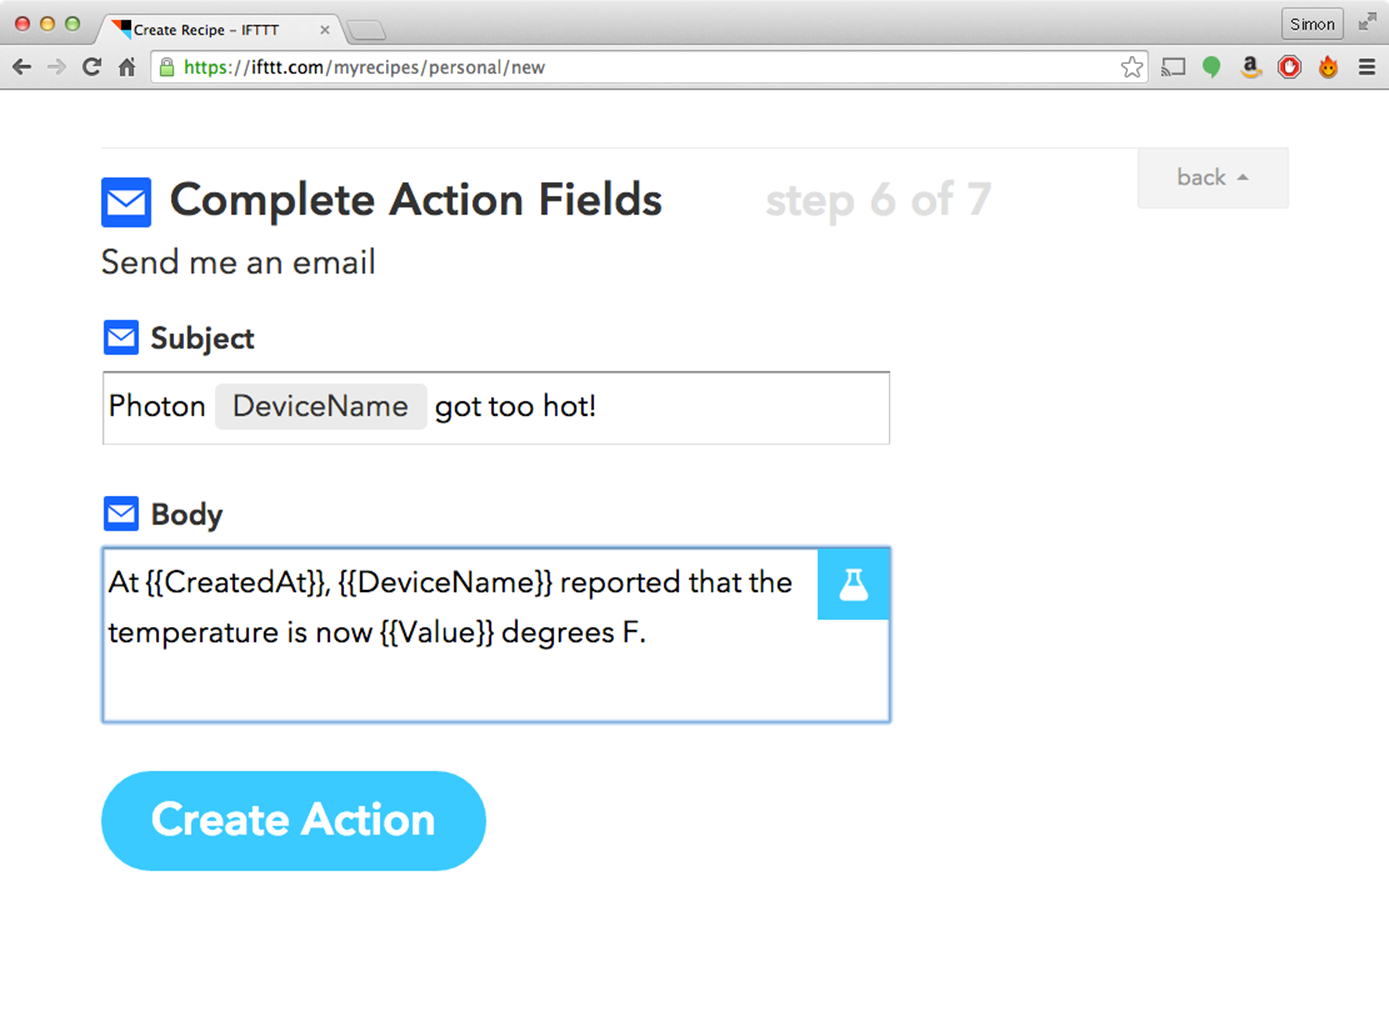
Figure 6-9. Figure 6-9. The Send Email Option Configured
Click on the “Create Action” button and you will come to the final screen, which asks you to “Create and Activate” the recipe (Figure 6-10). Once you do this the recipe will go live! IFTTT only guarantees to check every 15 minutes, so you may not receive an email immediately and you are not going to be flooded with emails.
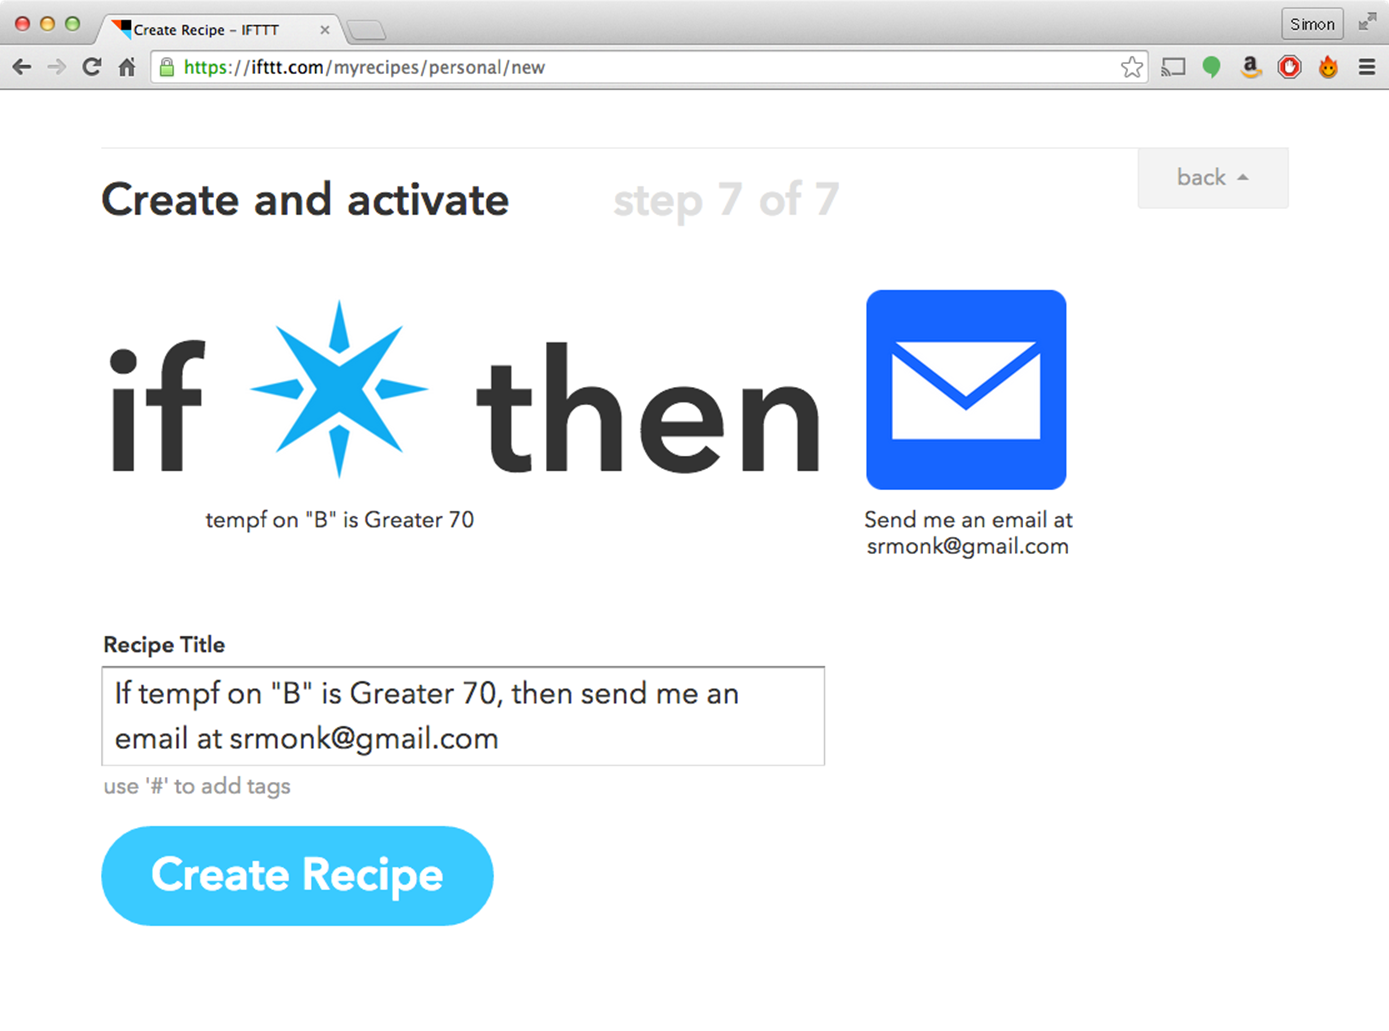
Figure 6-10. Figure 6-10. Creating and Activating the New Recipe
Also, you may need to warm up your sensor to over 70 degrees F by pinching it between your fingers, or leaning it against a warm mug of coffee (which you can drink while you wait for the email).
Eventually, you should get an email something the one in Figure 6-11.
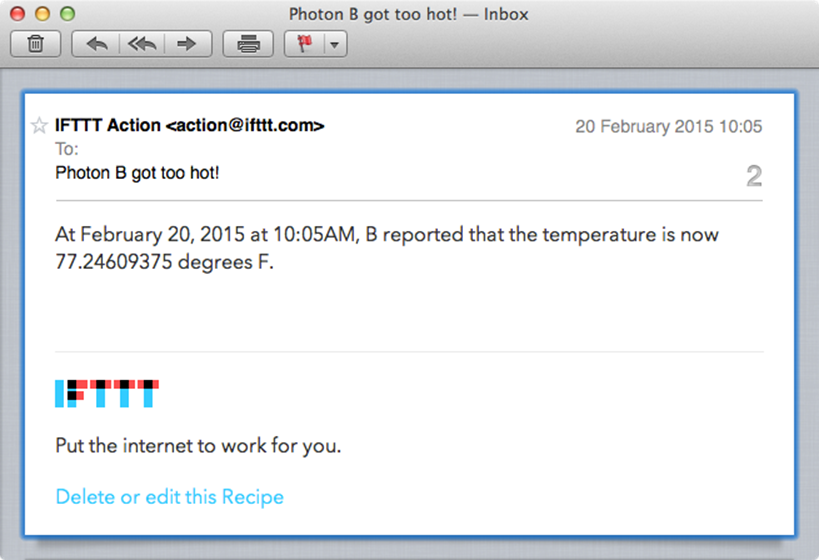
Figure 6-11. Figure 6-11. An Email Notification from IFTTT
Of course there are all sorts of other actions that you could trigger as a notification, so you may like to go back and modify the Action part of the recipe to, say, send a Tweet or Facebook status update.
In the next project you will learn how to use a Photon or Core with IFTTT to act as an action rather than a trigger.
Project 12. Ring a Bell for Tweets
This is another project that includes hardware and software that you already created in an earlier project. In this case, the Project in question is Project 7, where you used a Relay Shield and connected a bell to one of the relays, so that you could turn the bell on and off over the Internet.
In this case, you will use IFTTT to ring the bell every time someone mentions your name in a Tweet.
The bell used in Project 7 was kind of loud, and rather than have it sound for any longer than necessary, in this project, it will just be turned on for a fraction of a second. Just long enough for it to alert you, without driving you insane.
You could of course wire up a light-bulb or some other device to the relay if you want something a bit quieter.
Software
The program for the Photon/Core is similar to that of Project 7, so please refer back to that project for a full description of the code. You can find the code in the files p_12_tweet_bell in the PHOTON_BOOK library examples.
The program is still general purpose, in that it allows you to control any of the relays. However, the Function name has changed to “relaycontrol” and an extra option of specifying an “on” time has been added. This will allow us to make the duration of the bell sounding just short enough to alert us to the tweet.
The syntax of the command is backwards compatible with the old relay command, so that you can still use the command “31” to turn relay 3 on and “30” to turn relay 3 off again. However, now there is a different separate command “P” in place of “1” and “0” for on and off that then takes another parameter of the duration in milliseconds for the relay to be on. For example “3P-1000” will turn relay three on for one second.
The code for relaySwitcher function that implements this is listed below:
int relaySwitcher(String command) {
// "11", "10", "1P-1000" - P for pulse duration in millis
int relayNumber = command.charAt(0) - '0';
char action = command.charAt(1);
if (action == '1') {
digitalWrite(relayPins[relayNumber-1], HIGH);
}
else if (action == '0') {
digitalWrite(relayPins[relayNumber-1], LOW);
}
else if (action == 'P' || action == 'p') {
int duration = command.substring(3).toInt();
digitalWrite(relayPins[relayNumber-1], HIGH);
delay(duration);
digitalWrite(relayPins[relayNumber-1], LOW);
}
return 1;
}
The new part of the function (highlighted in the code) first checks to see if the action is “P” or “p” and then uses a substring from position 3 to the end of the command and converts this from a string to an integer using “toInt.”
Turning the relay on for the right duration is then just a matter of setting the appropriate relay pin high, delaying for the required number of milliseconds and then turning it off again.
Flash the program onto your Photon/Core so that IFTTT will be aware of the new Action.
IFTTT
Login to your IFTTT account and then, when choosing a Trigger Channel, select Twitter. If its the first time that you have used Twitter from IFTTT then it will ask you to authenticate with Twitter, so that IFTTT can monitor your Twitter account. There are quite a few triggers that you can then select from within Twitter. The one I decided on was “New Mention of You.”
Select “New Mention of You” and the next screen will tell you that there are no fields to complete, so just click “Create Trigger." You can now move on to the “that” section of the recipe.
Click on the “Spark” icon in the Action channel source and you will be given the choice shown in Figure 6-12.
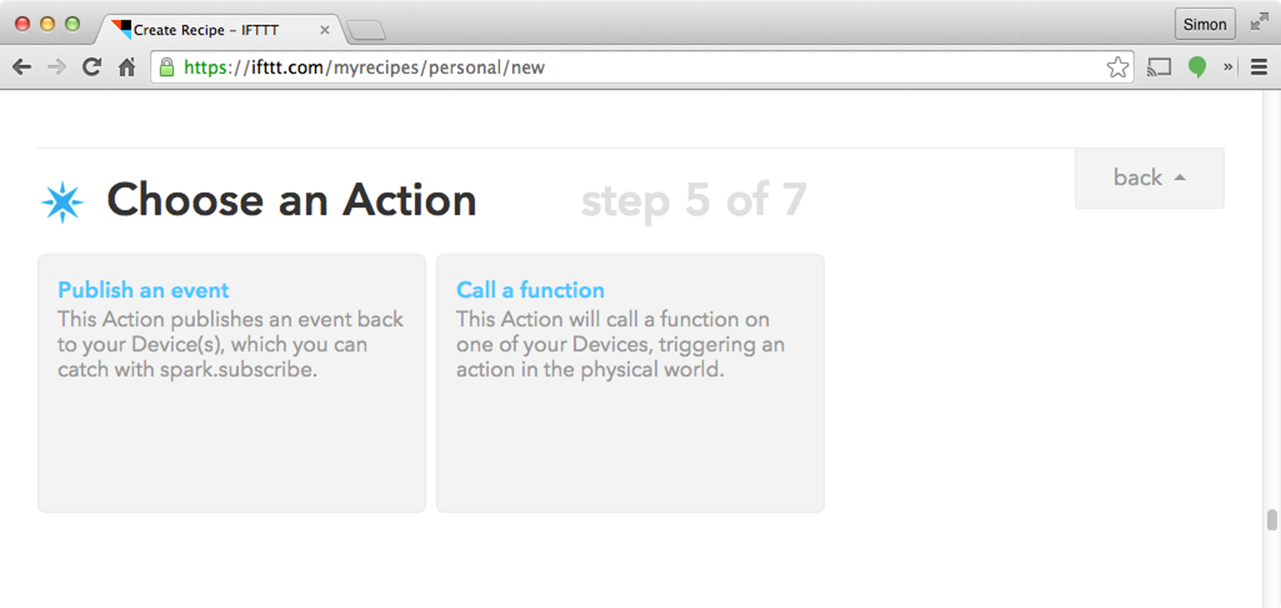
Figure 6-12. Figure 6-12. Selecting a Spark Action
Select the option “Call a function” and you will be asked to “Complete Action Fields." From the “Then call” dropdown, select “relay control” on whatever Photon or Core you just flashed, and then delete the contents of the “with input” field with the text “1P-100” (see Figure 6-13).
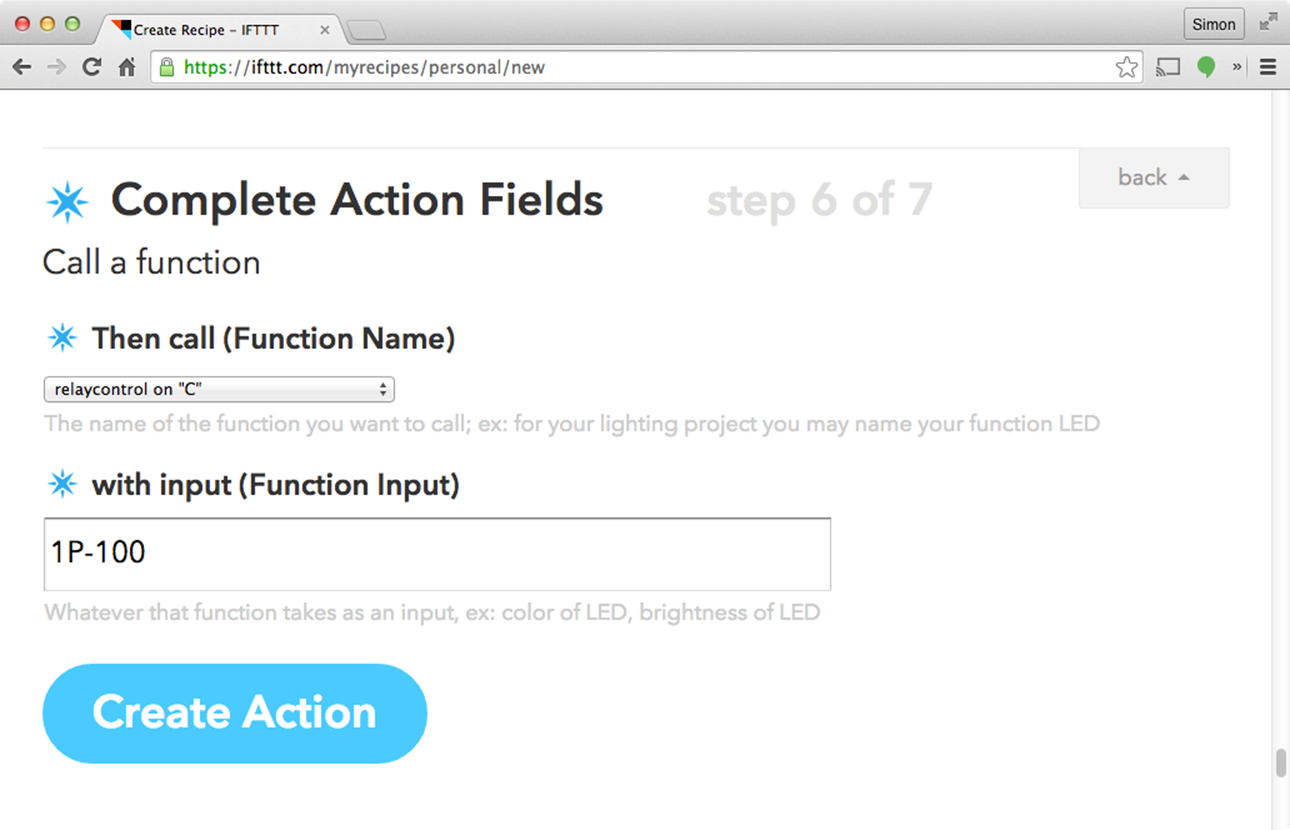
Figure 6-13. Figure 6-13. Configuring a Spark Action
Click Create Action and then click Create Recipe.
That’s it, the code is all ready. You now just need to setup the hardware.
Hardware
The hardware for this project is just the same as that of Project 6. So, if you have not already made Project 6, you might like to go back to Chapter 5 and build it now.
Using the Project
To test out the project, you need to mention yourself in a Tweet, or get someone to mention you. When IFTTT notices this, then the bell will ring. You can adjust the duration of the bell ring by editing the parameter to the Action in the IFTTT recipe.
Note that IFTTT only guarantees to check triggers every 15 minutes, so you will probably have to wait a minute or two before you know if the project worked.
As an alternative to alerting you of mentions would be to alert you of new followers or when you tweet using a specific Hashtag. Or, you could chose another type of trigger entirely, such as sending an email (use the “Email” trigger source) or simply at a certain time of day using the “Date & Time” trigger source.
Project 13. Flash Email as Morse Code
The final IFTTT example project takes the Morse Code flasher of Project 8 and gives it an IFTTT twist. The twist is that when you send an email to IFTTT the subject of that email will be flashed as Morse code.
Software
The code running on the Photon/Core is exactly the same as for Projects 8. Just flash your Photon with the program P_08_Morse_Function from the PHOTON_BOOK library.
Hardware
The hardware for the project is also exactly the same as for Project 8. The software will actually flash the built-in LED on D7, so if you do not want to use an external LED or buzzer, then you can just use the Photon/Core on its own without any components attached to it at all.
If you have decided that you want a buzzer and external LED then follow the instructions for Project 8 in Chapter 6.
IFTTT
To create the IFTTT recipe for this project, create an new Recipe and then select Email as the trigger source. In IFTTT the Email trigger source means emails to and from the IFTTT email server. In this case, select the trigger “Send IFTTT any email." There are no fields to enter, so at the next screen click on Create Trigger.
The Action is more interesting. Select Spark as the Action Channel and then the “Call a Function” action.
In the “Then call (Function Name)” field select the Function “morse” on whatever Photon/Core you have just flashed the program onto.
Now you need a way of passing the subject of the email to the “morse” Function. To do this kind of thing, IFTTT provides the concept of an “ingredient” for the recipe. Delete the contents of the “with input (Function Input)” field and click on the beaker icon on the right. The popup-list in Figure 6-15 will then appear and you can click on the “Subject” ingredient.
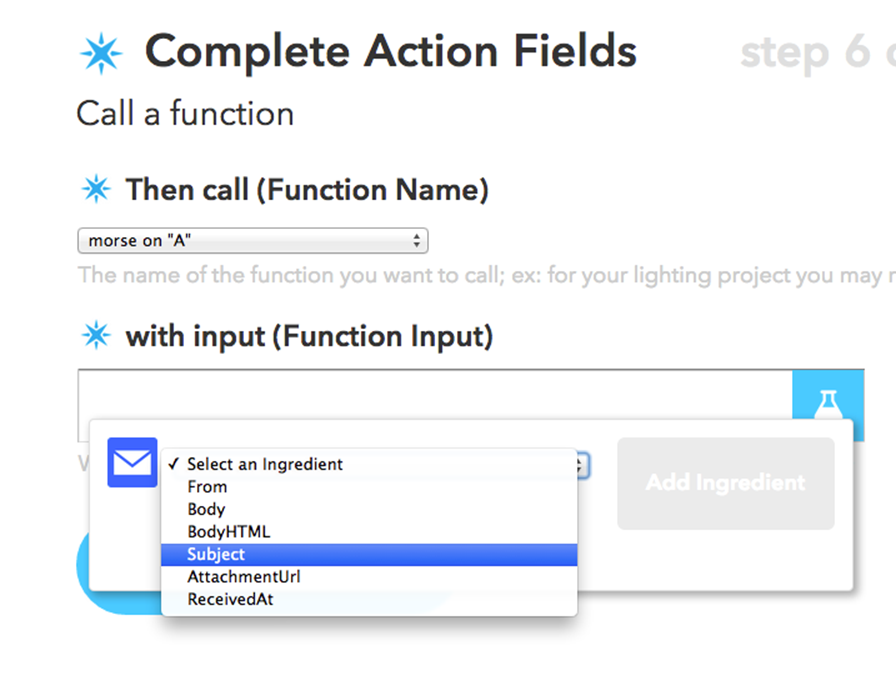
Figure 6-15. Figure 6-15. Selecting Ingredients for your Recipe
This will insert the text into the field. Click on Create Action and then Create Recipe.
Using the Project
To test out the project, send an email to trigger@recipe.ifttt.com with the subject line of the text that you want to be flashed and beeped as Morse Code. This email must be sent from the email account that you used to register with IFTTT.
Summary
In the next chapter, you will learn how to use a Photon/Core to create a small roving robot that is controlled from a webpage and that also displays its battery voltage and the distance to any obstacle in front of it.
All materials on the site are licensed Creative Commons Attribution-Sharealike 3.0 Unported CC BY-SA 3.0 & GNU Free Documentation License (GFDL)
If you are the copyright holder of any material contained on our site and intend to remove it, please contact our site administrator for approval.
© 2016-2026 All site design rights belong to S.Y.A.