Raspberry Pi: A Quick-Start Guide, 2nd Edition (2014)
Chapter 3. Configure Raspbian
No operating system or hardware will fit every user’s needs out of the box. This is especially true for the version of Debian that runs on the Pi, because it comes as an image, which means you cannot choose all the configuration parameters that you usually enter at installation time. For example, the image comes with a fixed keyboard layout and locale. In this chapter, you’ll boot the Pi for the first time and take a look around. You’ll learn how to configure a lot of basics, such as your password and the time zone.
Boot the Pi for the First Time
Preparing the hardware and installing an operating system are important, but it’s much more fun to actually boot the Raspberry Pi and see what it’s capable of. So, insert the SD card you prepared in the previous chapter, and plug in the power supply.
If you’ve worked with Linux before, you’ll recognize most of the messages pouring onto the screen. This comes as no surprise, because even if the Pi is an unusual computer, Raspbian still is an ordinary Linux distribution.
When you boot Raspbian for the first time, it starts a configuration program named Raspi-config. This program helps you configure the most important aspects of the Linux system. You can see its main menu in Figure 10, Raspi-config makes most configuration tasks a breeze.
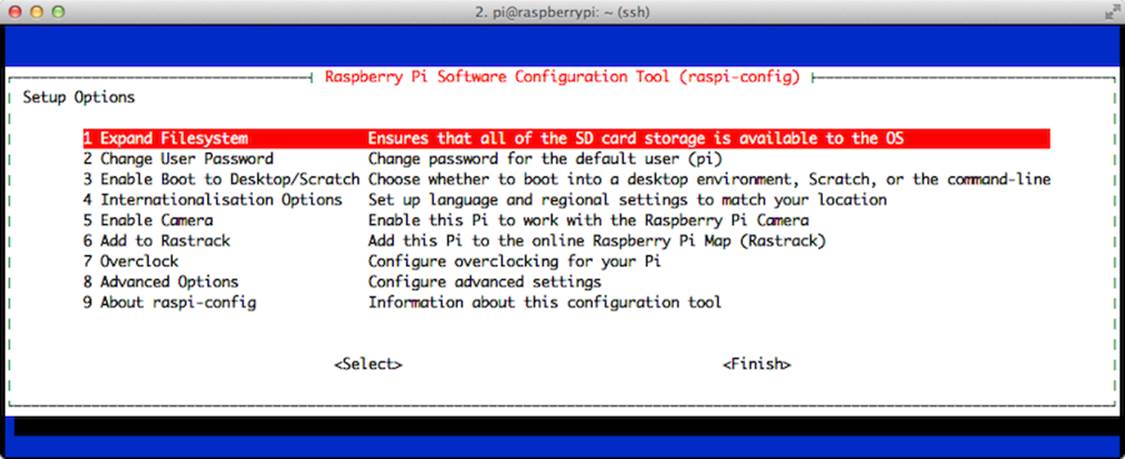
Figure 10. Raspi-config makes most configuration tasks a breeze.
You’re probably used to controlling user interfaces with your mouse, but you have to control Raspi-config with your keyboard. Use the down cursor key to move to the next menu item, and use the up cursor key to move to the preceding one. To select a menu item, press the Tab key or the right cursor key. This will highlight the Select button at the bottom. Press the spacebar or the Return key to select the menu item. Use the Esc key to leave Raspi-config.
To get familiar with Raspi-config, select the About raspi-config menu item. This will open a new window that briefly explains what Raspi-config is for. Click the OK button and press the spacebar to return to the main menu.
Most menus in Raspi-config also have a Cancel button. To cancel the current operation, press the Tab key until the Cancel button is highlighted, and then press the spacebar or the Return key.
The main menu has a Finish button that exits Raspi-config. Most changes you can perform with Raspi-config require you to reboot the Pi. So, when you press the Finish button in Raspi-config, it asks you whether you’d like to reboot.
Raspi-config will not start automatically the next time you boot the Pi. Don’t worry. You can always invoke it in a terminal, like this:
|
|
pi@raspberry:~$ sudo raspi-config |
In the next section, you’ll learn what most of the Raspi-config options are for.
Customize Your Installation with Raspi-config
Before you do anything else with the Pi, you should adjust the most important aspects of your Raspbian installation with Raspi-config. For example, you should increase the space available on your SD card, and you should set the right locale.
In this section, you’ll get to know the most important menu items in Raspi-config. You’ll learn about the rest of the menu items later in the book.
Use All the Space on Your SD Card
The Raspbian image limits your root file system to 2GB. In other words, no matter what the real capacity of your SD card is, you’ll be limited to 2GB. You could copy the image to a 16GB SD card, for example, but you still would only be able to use 2GB.
With the Expand Filesystem menu in Raspi-config, you can easily change this situation. Select the menu item, and after the next reboot, the Pi will grab all the space it can get on your SD card. Depending on your SD card’s capacity and speed, this will take a while.
A few people have reported file system errors after they’ve resized the SD file system on an overclocked Pi. (See Accelerate/Overclock the Pi, to learn more about overclocking.) In this case, rebooting the Pi usually helps.
Keep in mind that Raspi-config will not start automatically again. You have to log in with the username pi and the password raspberry. To start Raspi-config again, run the following command:
|
|
pi@raspberry:~$ sudo raspi-config |
Change Your Password
At the time of this writing, you have to enter the username pi and the password raspberry to log into the Pi. If you’re one of the lucky few who got one of the first boards, you also got a flyer with incorrect credentials. In previous releases the password was suse, so to be completely sure, check the credentials on the download page.[40]
Select the Change User Password menu item in Raspi-config to change the password. Raspi-config asks you for a new password, and it asks you to confirm that password. Note that for security reasons, you cannot choose simple passwords such as 123 or aaaa. If you want to learn more about users and passwords, take a look at Manage Users.
By the way, raspberry is a really bad password—not only because it’s easily guessed, but also because it contains the character y. For anyone without an English or American keyboard layout, this will lead to some frustrating login sessions. By default, Debian uses a QWERTY keyboard layout, but in Germany, for example, people usually use a QWERTZ layout. So if you’re absolutely sure you’ve typed the password correctly for the tenth time, try raspberrz instead.
Enable Boot to Desktop
By default, the Pi does not start a graphical desktop environment. Instead, it greets you with a plain terminal.
In Start the Desktop, you’ll learn how to start the desktop environment manually. The “Enable Boot to Desktop/Scratch” menu itemgives you the options of starting the Pi in command line mode, in desktop mode, or with the Scratch programming environment.[41] Scratch is a graphical programming language that makes it easy to create animations and games, even for children.
Remap Your Keyboard and Change Your Locale
By default, Debian assumes you’re using an English keyboard layout, which might lead to some confusion if you’re not. You can change the keyboard layout by choosing the Change Keyboard Layout menu item in Raspi-config’s Internationalisation Options. This will spawn a configuration program that first asks for your type of keyboard (see the following figure).
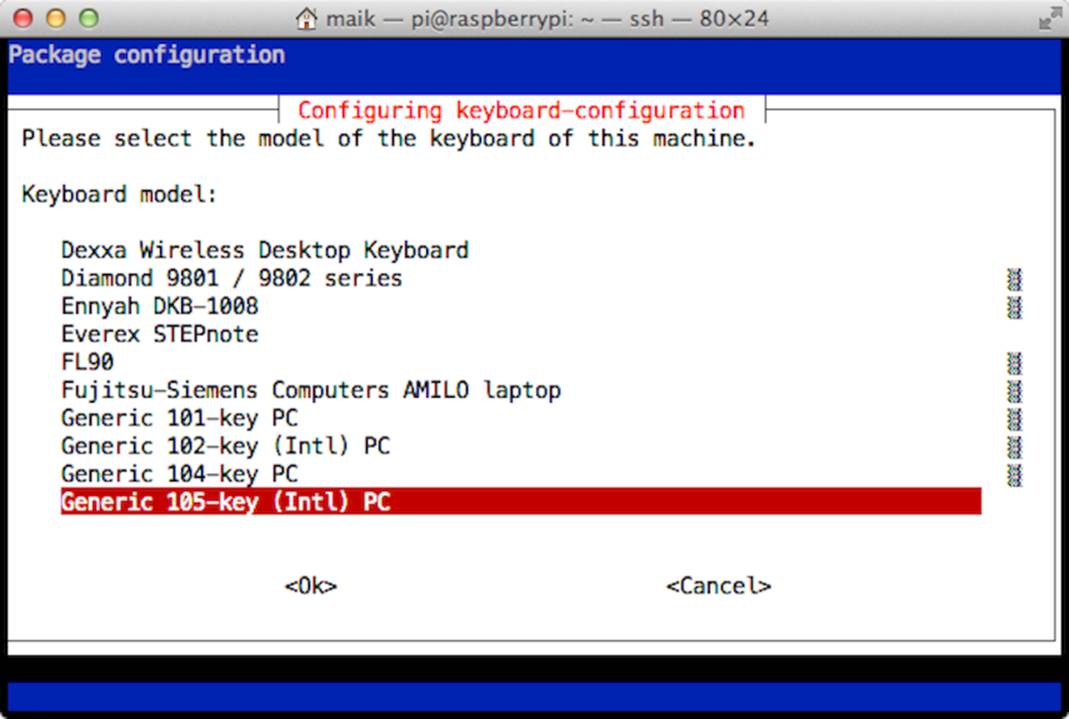
Figure 11. Choose your keyboard type.
Next, you’ll specify the language you’re using, and after that, you’ll configure the behavior of a few special keys.
To enable the new keyboard layout, you have to exit Raspi-config using the Finish button and then reboot the Pi, but before that, you should consider changing the locale, too. A locale determines more than a mere keyboard layout. It determines how data such as text and dates get sorted and formatted, for example. Also, it affects the language the system uses to display information such as menu text in applications. In the following figure, you can see a German version of the LXDE desktop, for example.
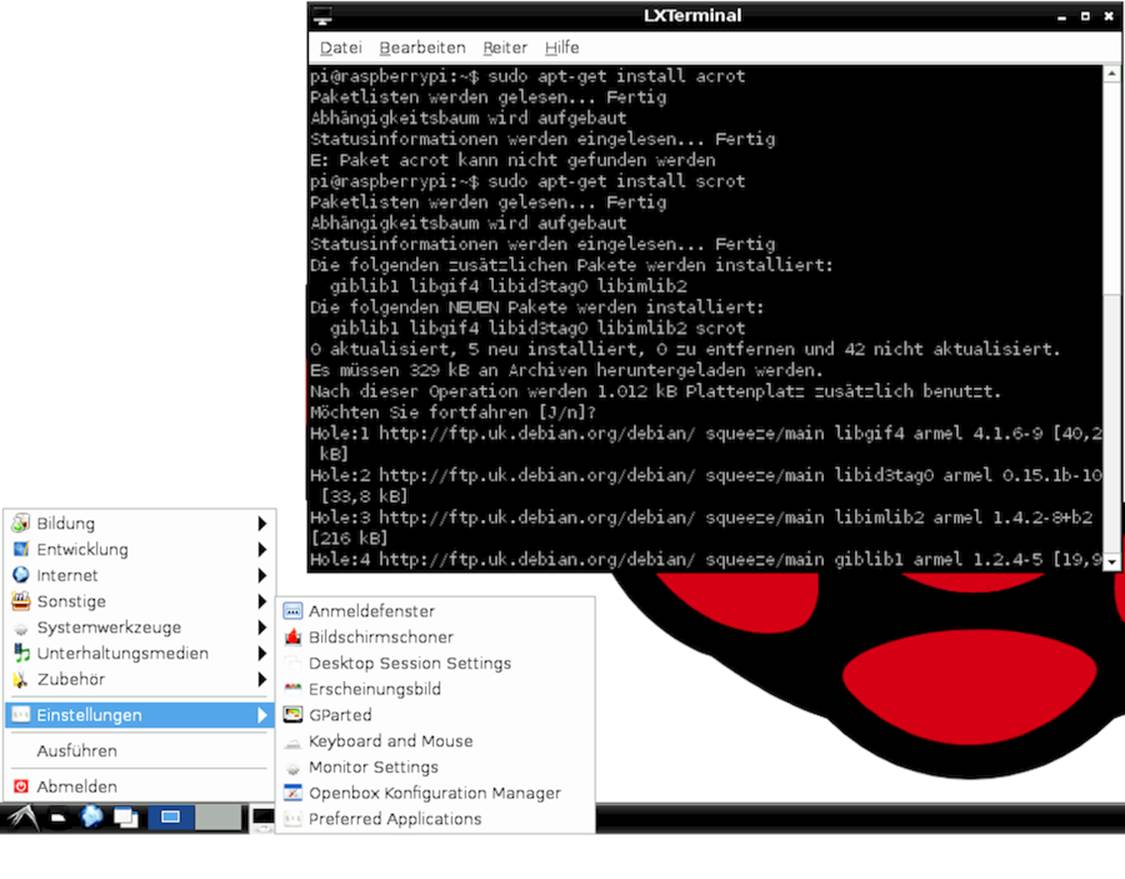
Figure 12. A German version of LXDE
You can configure your locale using Raspi-config’s Change Locale menu. This starts a configuration program that greets you with the menu in Figure 13, Generate your locale.
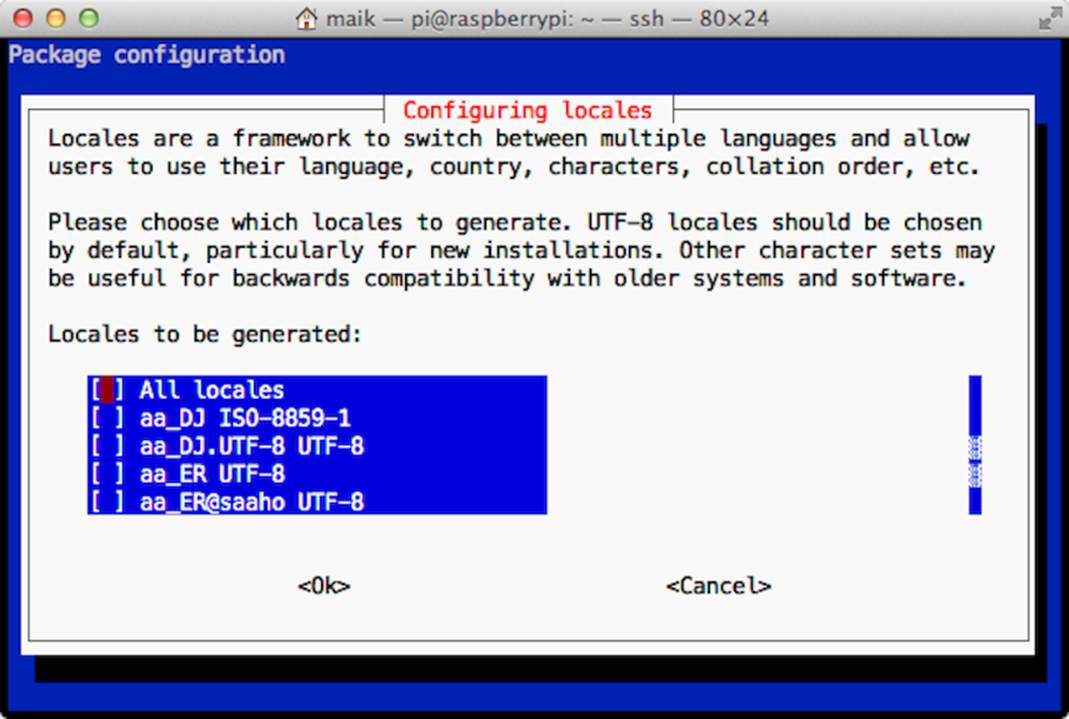
Figure 13. Generate your locale.
Here you can select which locales Raspbian should generate. You can select several and switch between them if necessary. Use the cursor keys to move through the list, and use the spacebar to select or deselect a locale. Using the Tab key, you can move the focus between the list of locales and the OK and Cancel buttons. Press the Return key to select a button.
After you select a list of locales and press the OK button, you can choose your default locale. Press the OK button again, and you’re finished.
Set Your Time Zone, the Time, and the Date
To reduce costs, the Pi doesn’t have a real-time clock, so it doesn’t store the current date and time internally. Setting the correct date and time isn’t just a nice feature; it’s critical for cryptographic operations, such as validating certificates. You need correct time information for many purposes. Raspbian contacts a time server on the Internet when it boots and sets the current time and date automatically.
So, internally the Pi knows the exact date and time in the UTC time zone, but it doesn’t know your time zone. That’s what the Change Timezone menu item is for in Raspi-config’s Internationalisation Options menu. Select it, and it will ask a few questions to determine exactly where you live. Then Raspi-config will store the time-zone information in your profile, so the next time you boot your Pi, the machine will know what time zone you live in.
If you haven’t connected your Pi to the Internet, you can manually set the date and time like this:
|
|
pi@raspberry:~$ sudo date --set="2014-02-04 13:24:42" |
This solution has a few disadvantages. It’s not as accurate as it might be, and you have to repeat it whenever the Pi boots, so it’s easy to forget it.
Enable the Pi Camera
The camera is a useful accessory for the Pi, and in Chapter 11, Control the Pi Camera, you’ll learn how to control it. Before you can use the camera, you have to enable it with the Enable Camera option.
Add Your Pi to Rastrack
Rastrack[42] is an online service that shows the locations of thousands of Pis on a map. If you want to make your Pi show up on the map as well, choose the Add to Rastrack menu option.
Accelerate/Overclock the Pi
By default, the Pi’s internal clock rate is 700MHz. This is pretty fast for most tasks, but compared to the speed of modern PCs it’s still rather modest. As with many PCs, you can overclock the Pi using Raspi-config’s Overclock menu item. Here you can set the clock rate to 700MHz, 800MHz, 900MHz, 950MHz, or even 1GHz. This will increase your Pi’s speed, but it will also lead to greater power consumption and a higher working temperature.
Note: depending on the quality of your power supply, overclocking can lead to stability problems or even damage the file system. In that case, hold the Shift key while booting the Pi. This will disable the overclocking, and you can then set a lower clock rate using Raspi-config.
Configure the Pi’s Overscan Mode
The Raspberry team wanted the Pi to work with as many displays as possible, so they had to take into account overscan and underscan. In the case of underscan, the video output doesn’t use the whole display size, so you can see a black frame around the actual video output. In the case of overscan, the opposite happens, so in some cases you can’t see the whole output because it gets clipped at the display’s borders. With the Overscan menu in Raspi-config’s Advanced Options menu, you can enable or disable the overscan mode completely. In Configure the Video Output, you’ll learn how to control video output in a more refined manner.
Adjust the Pi’s Memory Layout
As you’ve learned, a Pi has either 256MB or 512MB of RAM. Let’s assume you have the 256MB variant. Using the following command, you can check how much memory is on your Pi:
|
|
pi@raspberry:~$ free -m |
|
|
total used free shared buffers cached |
|
|
Mem: 186 37 149 0 5 19 |
|
|
-/+ buffers/cache: 12 174 |
|
|
Swap: 127 0 127 |
Oops! Apparently the Pi has much less than 256MB of RAM. How can that be? Don’t worry: everything’s OK with your hardware, and your Pi has 256MB of RAM. It just splits it between the CPU and the GPU (the device responsible for processing graphics). By default, the CPU gets 192MB of RAM, while the GPU gets 64MB. In most cases this is reasonable, but in some cases a different setup might make more sense. If you use the Pi as a server, for example, you won’t need much graphics power, but you’ll need more RAM for the CPU.
You can change the memory layout using the Memory Split menu item in Raspi-config’s Advanced Options menu. Here you can determine how much memory the GPU gets. Choose the right amount for your usage and reboot the Pi.
Enable the SPI Kernel Module
The Pi is an excellent platform for creating electronic projects. In these projects you may use devices you can integrate using a protocol named SPI (Serial Peripheral Interface Bus). Such devices depend on a certain kernel module, and you can enable or disable this module using the SPI menu item in Raspi-config’s Advanced Options menu. You’ll learn a lot more about SPI in Chapter 10, Working with Digital and Analog Sensors.
Choose the Audio Output
The Pi can output audio using two different channels: via HDMI or using its RCA jack. When connecting the Pi to a display using HDMI, it usually makes sense to output audio via HDMI, too. If you’ve connected the Pi to a display using its composite connector, you probably want to output audio with the analog RCA connector.
Under some circumstances the Pi cannot determine the correct settings automatically, so you have to adjust them manually. You can do this using the Audio menu item in Raspi-config’s Advanced Options menu.
Start the Desktop
Unlike in other operating systems, a desktop environment is optional on Linux. So, it’s not uncommon to have to start the environment manually. Alternatively, you can start a desktop environment automatically whenever the Pi boots. Choose Raspi-config’s Enable Boot to Desktop/Scratch menu item to enable this behavior. If you rarely use the command line, this is a convenient option. Otherwise, the Pi will greet you with the login prompt:
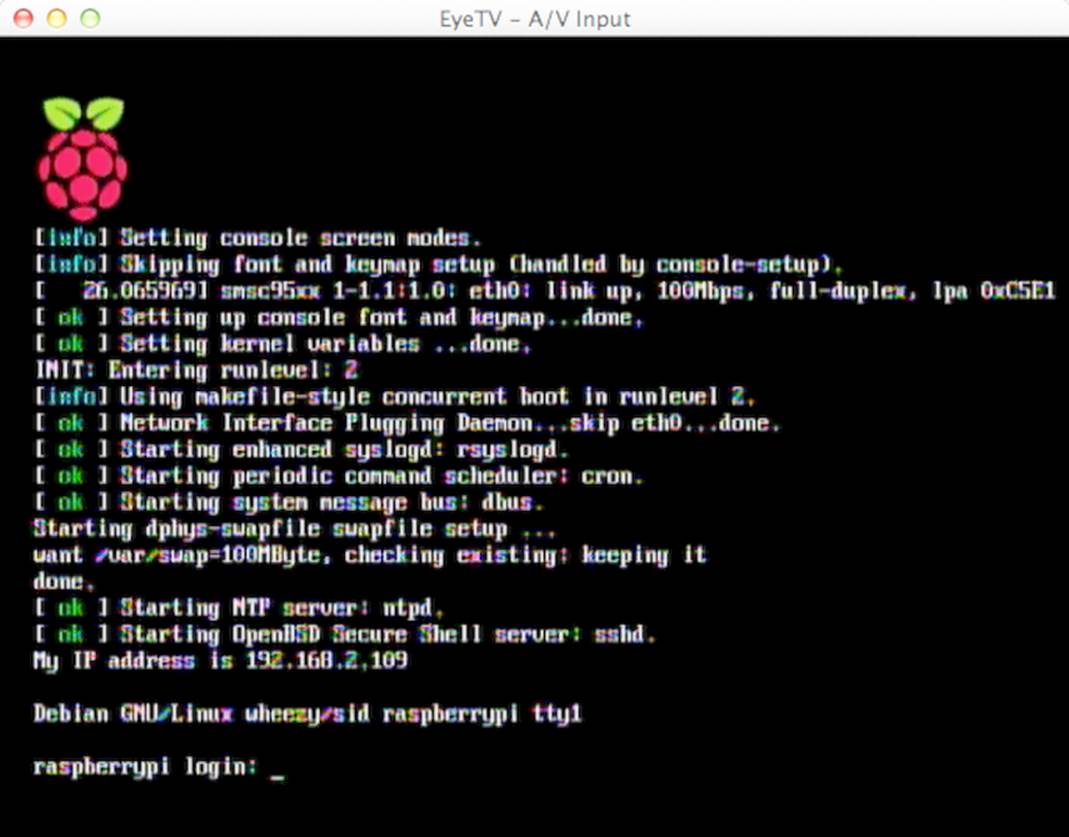
Figure 14. The Raspberry Pi’s login prompt
After you’ve successfully logged in, you still won’t see much more than a boring shell prompt. Use the following command to start the desktop and see some more colors. (It reminds you of the good ol’ MS-DOS times when you had to run win to start the real action, doesn’t it?)
|
|
pi@raspberry:~$ startx |
After a few seconds, the Pi presents a nice desktop with a colorful raspberry in the background (see the following figure).
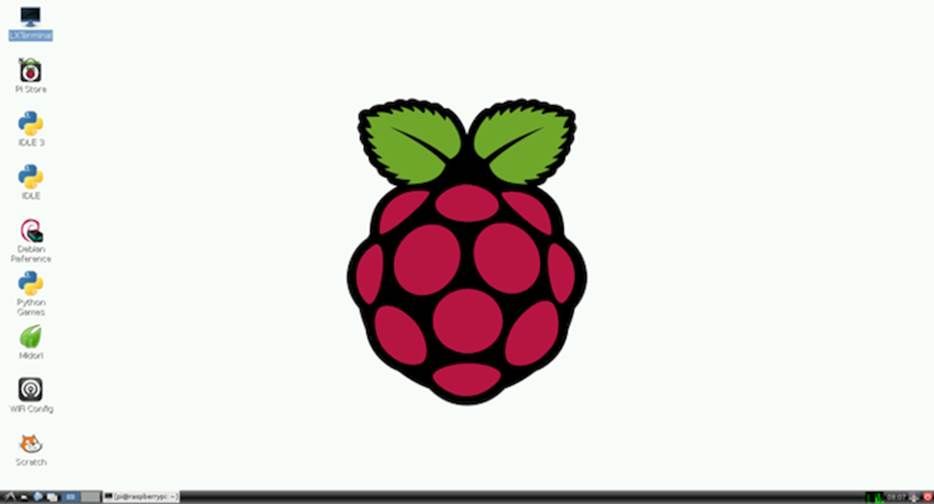
Figure 15. Raspberry Pi desktop
The desktop environment you’ve just started is named LXDE,[43] and although it doesn’t use many resources, it still comes with some nice features. For example, it has virtual screens you can manage with the buttons in the toolbar at the bottom.
Starting applications is similar to starting them on Windows systems prior to Windows 8. Click the small LXDE logo on the left of the toolbar at the bottom of the screen to see which applications are available. Move the mouse to navigate through the pop-up menu, and start an application by clicking its name. In Figure 12, A German version of LXDE, you can see the pop-up menu in action.
Also, you can configure a lot, such as the look and feel of all UI elements, the desktop resolution, and so on. You can change most of the settings using the system preferences menus; for example, you can see some of them in Figure 16, You can change many preferences in LXDE.
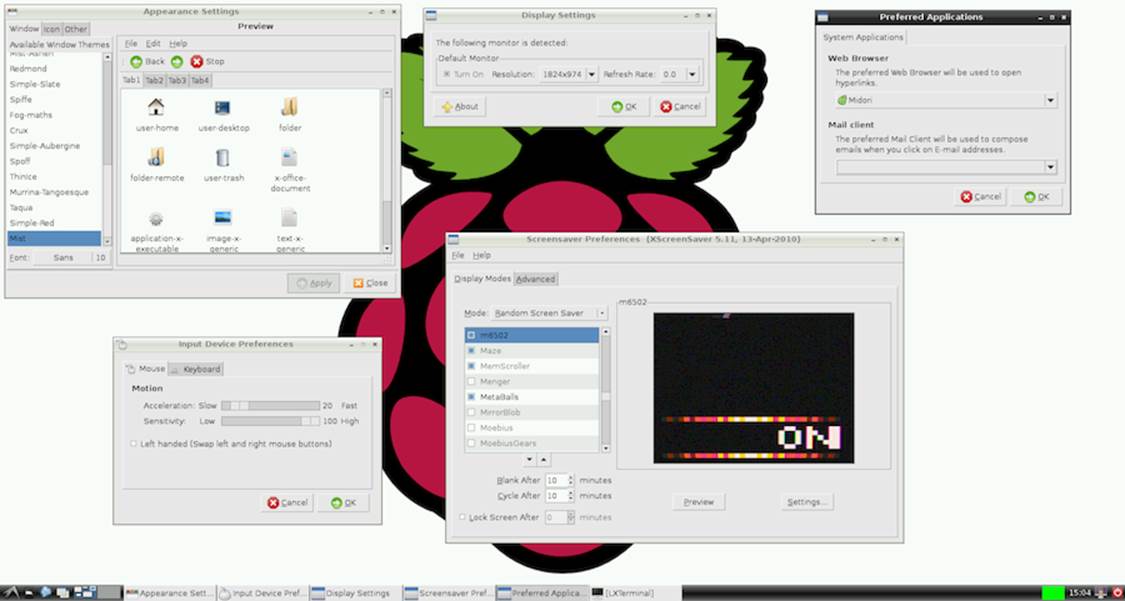
Figure 16. You can change many preferences in LXDE.
To leave LXDE, use the small power-switch icon at the bottom right of the screen. If you’ve configured Raspi-config to always start the desktop, the Pi will shut down completely when you log out from LXDE. Otherwise, it will return to the boot terminal. To shut down the Pi from there, run the following:
|
|
pi@raspberry:~$ sudo halt |
Manage Your Software with apt-get
Now that you have Debian set up, you probably want to add more software. Back in the old days, it was difficult to install new software on Linux systems. Usually you had to download a program’s source code and compile and install it yourself. If the program depended on other projects or libraries, you learned about it when the compiler or the linker spat out some nasty error messages, and then you had to resolve the dependencies yourself—you had to download, compile, and install even more programs, and so on.
Fortunately, those days are long gone; all modern Linux distributions come with a package manager that automates the whole process of downloading and installing new software. Not only do package managers resolve all dependencies automatically, but they also save a lot of time by downloading binary packages instead of compiling them locally. Oh, and they help you get rid of stuff you no longer need.
Debian comes with a package manager, too; its name is apt-get. (apt stands for Advanced Packaging Tool.) In this section, you’ll learn how to perform more operations, such as adding, updating, and removing software.
Install New Software
The Pi’s Debian distribution comes with a minimal set of applications. This makes sense because the Pi doesn’t have a hard drive, but to get the most out of the Pi, you’ll probably have to install a few programs. The good news is that installing software on the Pi is no different from installing software on a regular PC running Debian. You’ll get your software mostly from the same sources, and you can choose from many applications. Unfortunately, not all packages are available for the Pi’s ARM architecture, and some applications simply don’t run because they need more resources than the Pi has to offer. Still, you can find plenty of useful programs.
In this section, you’ll install a PDF reader on your Pi. If you’ve worked exclusively with Microsoft Windows or Mac OS X before, you probably didn’t worry much about PDF readers, but on some Linux systems—and especially on the little Pi—you can’t take a good PDF reader for granted.
Interestingly, you can choose from a variety of different tools, and there’s even a website dedicated to free PDF readers.[44] Two of these readers look especially interesting: Xpdf [45] and Evince.[46] You’ll install them both, try them, and uninstall the one you don’t like.
You can install new packages using the install command. To install Xpdf and Evince, run the following command (just make sure you’re connected to the Internet):
|
|
pi@raspberry:~$ sudo apt-get install xpdf |
|
|
pi@raspberry:~$ sudo apt-get install evince |
Alternatively, you can install more than one package at a time like this:
|
|
pi@raspberry:~$ sudo apt-get install xpdf evince |
Note that the most recent version of Raspbian installs Xpdf by default. In that case, apt-get will tell you that Xpdf is installed already.
Now you have both PDF readers installed as independent packages, and you can start and test them to see which one better suits your needs. You can find shortcuts for both applications in the Graphics section of the LXDE desktop’s start menu. Also, you can start them from a terminal by running either of the following (only if you’ve started the desktop environment before):
|
|
pi@raspberry:~$ evince |
or:
|
|
pi@raspberry:~$ xpdf |
In the following figure, you can see both programs in action rendering the same PDF document.
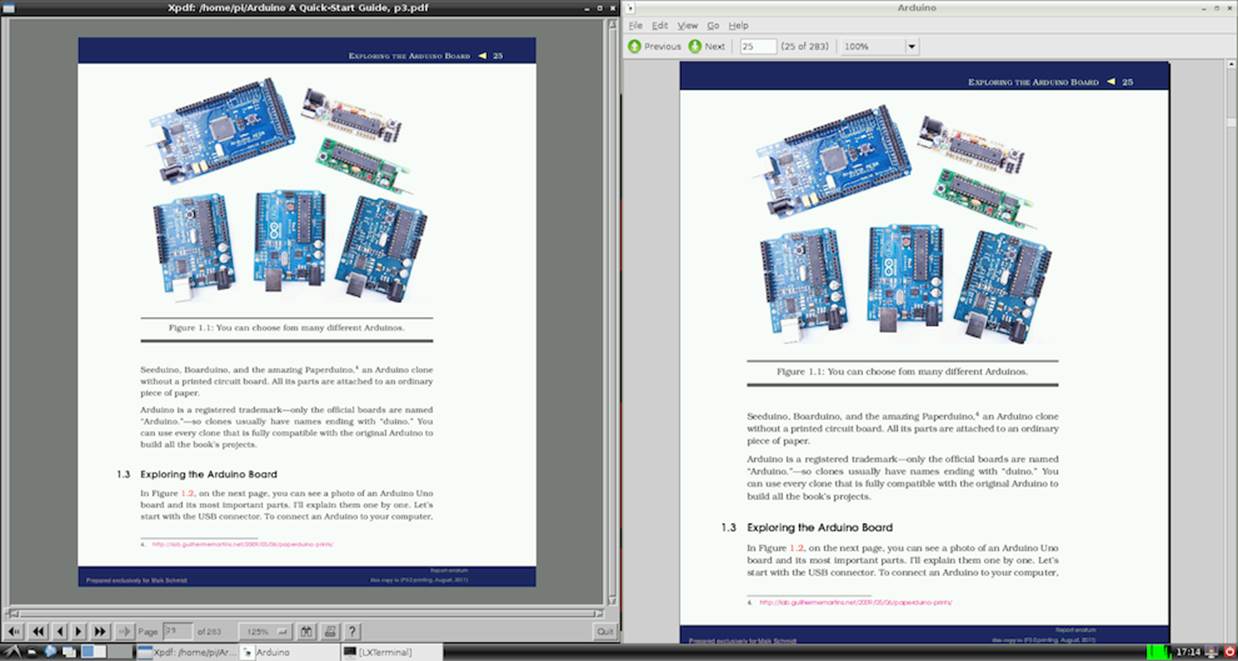
Figure 17. Two PDF readers showing the same document
Remove Software
Play around with both applications for a while and see which one you like best. Let’s assume that you prefer Evince; you can uninstall Xpdf using the following command:
|
|
pi@raspberry:~$ sudo apt-get purge xpdf |
|
|
Reading package lists... Done |
|
|
Building dependency tree |
|
|
Reading state information... Done |
|
|
The following packages were automatically installed and are no |
|
|
longer required: |
|
|
cups-bsd cups-client fonts-droid ghostscript lesstif2 |
|
|
libcupsimage2 libfile-copy-recursive-perl libgs9 libgs9-common |
|
|
libijs-0.35 libpaper-utils libpaper1 libpoppler19 libxp6 poppler-data |
|
|
poppler-utils update-inetd |
|
|
Use 'apt-get autoremove' to remove them. |
|
|
The following packages will be REMOVED: |
|
|
xpdf* |
|
|
0 upgraded, 0 newly installed, 1 to remove and 24 not upgraded. |
|
|
After this operation, 404 kB disk space will be freed. |
|
|
Do you want to continue [Y/n]? |
|
|
(Reading database ... 60245 files and directories currently installed.) |
|
|
Removing xpdf ... |
|
|
Purging configuration files for xpdf ... |
|
|
Processing triggers for mime-support ... |
|
|
Processing triggers for man-db ... |
|
|
Processing triggers for menu ... |
|
|
Processing triggers for desktop-file-utils ... |
The Xpdf application is gone now, without any trace. If you want to remove the application but keep its configuration files, use remove instead of purge.
Keep Your Software Up to Date
To make the software installation process as easy and as unobtrusive as possible, apt-get comes with a small database containing a list of all available packages and their dependencies. This database consists of only a few files. You usually won’t work with it directly, but you should run the following command occasionally to update it:
|
|
pi@raspberry:~$ sudo apt-get update |
This downloads the latest package lists from a central server and updates apt-get’s local database. So, if you run the apt-get command before you install a new package, you can be sure that you will get the latest version available. Note that in some cases you have to run this command twice.apt-get is nice enough to tell you when this is the case.
If you’ve already installed software on your Pi using apt-get, you’ll probably want to update it from time to time. The following command upgrades all software that is currently installed on your Pi:
|
|
pi@raspberry:~$ sudo apt-get upgrade |
Running this command will take a while, but when it’s finished you’ll have the latest version of every single application and library on your Pi. For this, apt-get has to download a lot of files that you no longer need after apt-get has installed the applications. You can delete these obsolete files easily.
|
|
pi@raspberry:~$ sudo apt-get autoclean |
|
|
Reading package lists... Done |
|
|
Building dependency tree... |
|
|
Reading state information... Done |
Sometimes dependencies between packages and package versions change, so you might not need some of the installed packages anymore. You can remove them using the following command:
|
|
pi@raspberry:~$ sudo apt-get autoremove |
|
|
Reading package lists... Done |
|
|
Building dependency tree |
|
|
Reading state information... Done |
|
|
The following packages will be REMOVED: |
|
|
ghostscript lesstif2 libxp6 poppler-data poppler-utils |
|
|
0 upgraded, 0 newly installed, 5 to remove and 0 not upgraded. |
|
|
After this operation, 15.3 MB disk space will be freed. |
|
|
Do you want to continue [Y/n]? |
|
|
(Reading database ... 49185 files and directories currently installed.) |
|
|
Removing ghostscript ... |
|
|
Removing lesstif2 ... |
|
|
Removing libxp6 ... |
|
|
Removing poppler-data ... |
|
|
Removing poppler-utils ... |
|
|
Processing triggers for man-db ... |
In theory, this is all you need to know about managing software on a Debian system. There is one more helpful tool that you should know about, which you’ll learn about in the next section.
Find Packages with apt-file
If you know the exact name of a package you’d like to install, apt-get is all you need, but in some cases you might not know the name. For example, you still have to install a lot of software from source and compile it yourself. If this software depends on a certain library that you don’t have installed, the compiler or the linker will stop with an error message. Usually, the error message contains the missing file’s name, so it would be great to have a tool that searches for all packages that contain this file. apt-file is such a tool, and you can install it as follows:
|
|
pi@raspberry:~$ sudo apt-get install apt-file |
Like apt-get, the apt-file command depends on a local database containing a list of all packages and their dependencies. To update this database, you should run the following command:
|
|
pi@raspberry:~$ sudo apt-file update |
Now you can use apt-file to search for a package containing a certain file. Let’s assume you’ve heard about a cool PDF reader for the Pi named Evince, and you don’t know which package you have to install to use it. The command shown here is all you need:
|
|
pi@raspberry:~$ apt-file -l search evince |
|
|
evince |
|
|
evince-common |
|
|
evince-dbg |
|
|
evince-gtk |
|
|
gir1.0-evince-2.30 |
|
|
libevince-dev |
|
|
libevince2 |
|
|
python-evince |
This outputs a list of all packages referring to Evince so you can decide which one you’d like to install.
You can also use apt-file to list the contents of a package, even if you haven’t installed the package.
|
|
pi@raspberry:~$ apt-file list evince |
Package managers are really helpful, and every modern Linux distribution has one. On Debian it’s apt-get, on Fedora it’s yum, and on Arch Linux it’s pacman. Although they differ slightly in their syntax, they all offer the same operations and behavior.
Install Software and Media Using the Pi Store
At the end of 2012, the Raspberry Pi Foundation launched the Pi Store[47] together with IndieCity[48] and Velocix.[49] In the store, you can find free and commercial applications, games, development tools, and media such as magazines or videos. The store offers two types of commercial applications: you have to pay a fee upfront for some, while for others you can make a donation if you like the application.
The Pi Store is available as a website, but it’s much more convenient to use its native client (see Figure 18, The Pi Store has a native client). The latest Raspbian image contains the Pi Store client, and you can launch it by double-clicking its icon on the desktop.
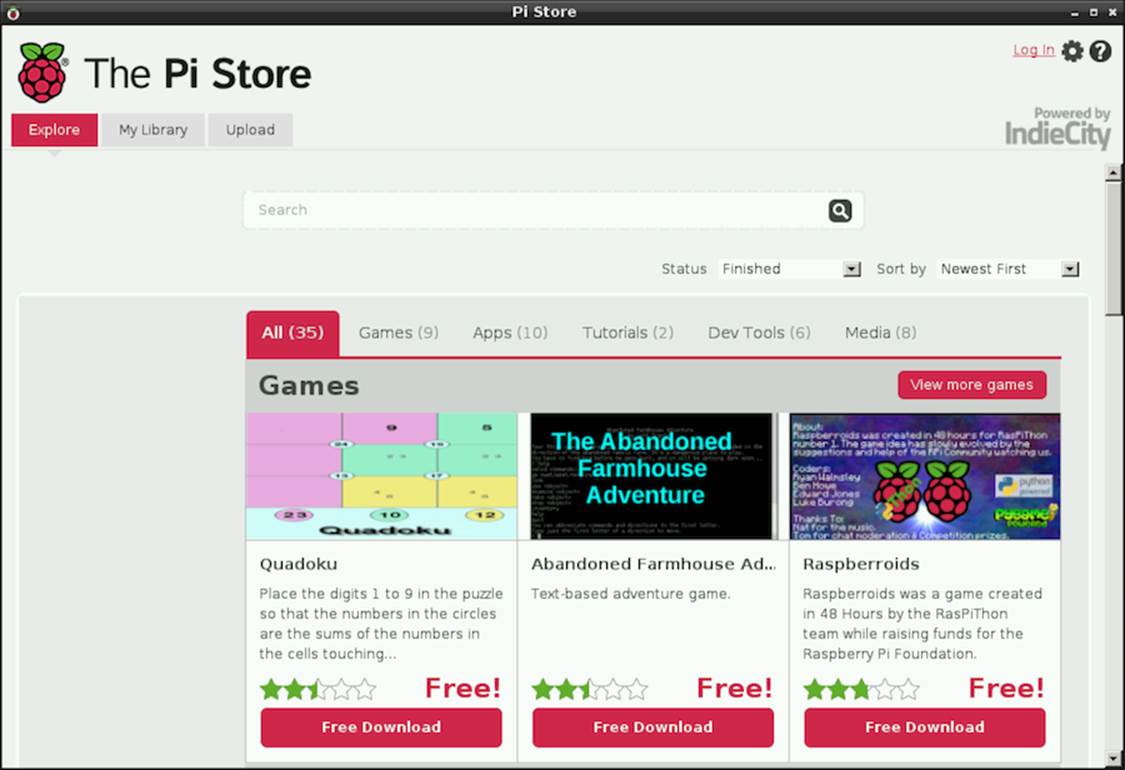
Figure 18. The Pi Store has a native client.
If you don’t already have the Pi Store client, you can install it using the following commands:
|
|
pi@raspberry:~$ sudo apt-get update |
|
|
pi@raspberry:~$ sudo apt-get install pistore |
The application is fairly self-explanatory. After you’ve logged in, you can install software with a single mouse click. At the moment, the store contains only a few items, but taking the Pi’s popularity into account, that might change soon. One title is particularly interesting: Iridium Rising[50] is an exclusive game for the Pi. It’s free, and it looks very professional.
Next Steps
In this chapter, you booted the Pi for the first time, and you configured many aspects to suit your personal preferences. Also, you learned how to manage software on the Pi—how to install, update, and remove it.
Installing and configuring the Pi’s operating system are important steps, but in contrast to regular PCs, the Pi needs some more configuration. In the next chapter, you’ll learn about the Pi’s firmware and how to adjust it to your needs.
Footnotes
|
[40] |
http://www.raspberrypi.org/downloads |
|
[41] |
http://scratch.mit.edu/ |
|
[42] |
http://rastrack.co.uk/ |
|
[43] |
http://lxde.org/ |
|
[44] |
http://pdfreaders.org/ |
|
[45] |
http://www.foolabs.com/xpdf/ |
|
[46] |
http://projects.gnome.org/evince/ |
|
[47] |
http://store.raspberrypi.com/ |
|
[48] |
http://www.indiecity.com/ |
|
[49] |
http://www.velocix.com/ |
|
[50] |
http://store.raspberrypi.com/projects/iridiumrising |
All materials on the site are licensed Creative Commons Attribution-Sharealike 3.0 Unported CC BY-SA 3.0 & GNU Free Documentation License (GFDL)
If you are the copyright holder of any material contained on our site and intend to remove it, please contact our site administrator for approval.
© 2016-2026 All site design rights belong to S.Y.A.