Learning Raspbian (2015)
Chapter 2. Getting Started with Raspbian
Now that you know a bit more about Raspbian, it is time to get started. The first thing that you need to do is plug in your Raspberry Pi and then install Raspbian onto an SD card. This process is different from installing software onto your Windows PC or Mac.
In this chapter, we will cover the following topics:
· SD card specifications
· Downloading Raspbian
· Imaging Raspbian onto your SD card
SD card specifications
It is recommended that your SD card has the following specifications:
|
Capacity |
At least 8 GB |
|
Class |
Class 4 is minimum but class 10 is recommended |
Note
Make sure that you get the correct SD card. Raspberry Pi A and Raspberry Pi B both use a full-sized SD card. Raspberry Pi B+ uses a mini SD card.
It is highly recommended that you don't run your Raspberry Pi without an SD card. This is because all the hardware on your Raspberry Pi will not be set up correctly. This might lead to the damage of your Raspberry Pi hardware.
Downloading Raspbian
Now that you have got all the hardware, you need to get your Raspberry Pi up and running. It is time to get the Raspbian image. You can download the Raspbian image from several places. The easiest place from which you can download this is directly from theRaspberry Pi Foundation website at http://www.raspberrypi.org/downloads/.
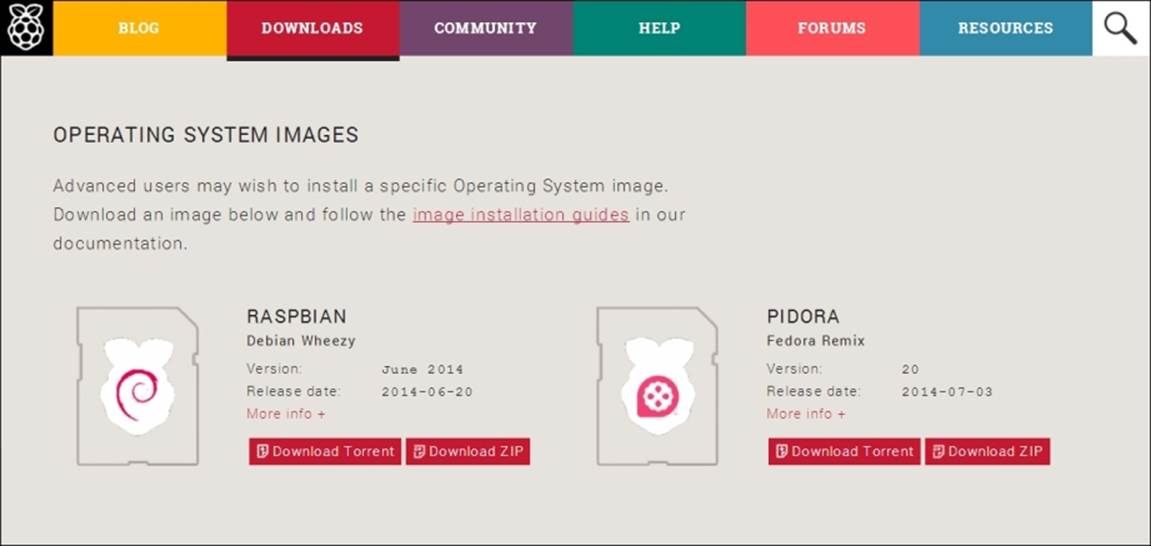
The official Raspbian download page
On this page, you will see links to all the official operating systems supported by the Foundation. We are interested in the Raspbian image. If you are able to download the image from a BitTorrent client, you can help the Foundation save some bandwidth. If you can't do this, simply download the zip file.
At the time of writing this book, the latest version of Raspbian is based on Debian Wheezy, which was released in January 2015. The download itself is just over 800 MB. When you have downloaded the file, you need to extract the image from the zip file. How you do this depends on the operating system that you are running.
You are now ready to image Raspbian onto your SD card.
Imaging Raspbian onto your SD card
The file that you have just downloaded is an exact replica of the all the contents of an SD card. For this reason, you can't simply copy the file onto the SD card and be up and running. To copy Raspbian onto your SD card, you need to write the image directly to your SD card. The process to do this varies depending on your operating system.
Writing the image using Windows
To write the Raspbian image to an SD card using Windows, you need a software program that is capable of performing the task. There are several programs available, but we will be using a program called Win32 Disk Imager. Win32 Disk Imager is an open source tool designed to write image files to a removable storage device such as an SD card or USB drive. You can get Win32 Disk Imager from http://sourceforge.net/projects/win32diskimager/. Its icon will look like the following:
The steps to be performed for writing the image using Windows are as follows:
1. The first step is to insert the SD card into your computer.
2. You then need to download and install Win32 Disk Imager.
3. Once you have done this, you need to run the file that you have just downloaded and install Win32 Disk Imager.
4. You need to run Win32 Disk Imager as an administrator. To do this, right-click on the Win32DiskImager shortcut and click on Run as Administrator.
5. Once you have launched Win32 Disk Imager, you should see the following screen:
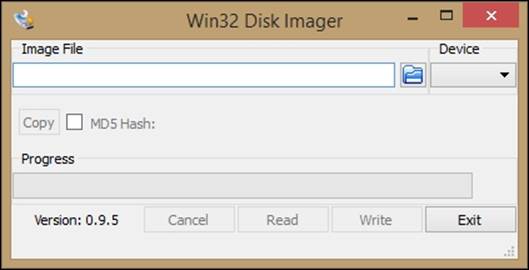
6. You now need to click on the folder button and browse to the Raspbian image that you downloaded previously. At the time of writing this book, the image file is called 2015-01-31-wheezy-raspbian.img. The file might be compressed inside a zip file. If this is the case, you will need to extract the .img file first.
7. The next step is to make sure that you select the correct drive your SD card, in the Device drop-down list.
Note
It is really important to double-check that you have selected the correct device, as you will be destroying all the files on the drive. You can make sure that you are selecting the correct disk by going into Windows explorer and making a note of the drive that matches the size and label of the SD card you have just inserted.
It is a good idea to remove any other removable storage devices when you do this, as this will ensure that they are not selected by mistake.
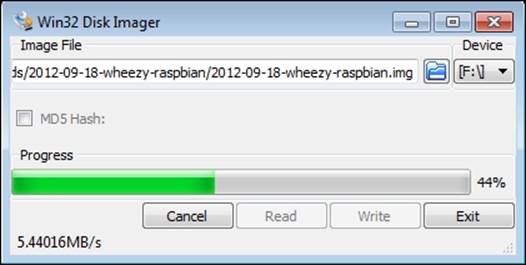
8. When you are satisfied that you have selected the correct device, click on Write. The write process will take a few minutes depending on the machine, and it might be a good idea to grab a cup of coffee! When this is done, you are ready to get started with your Raspberry Pi.
Writing the image using Mac
You are able to write the image file that you downloaded from the Raspberry Pi Foundation using Mac OS X. You don't even need to install any additional software onto your Mac to do this.
These instructions are for OS X 10.10 (Yosemite), but they will also work on previous versions of OS X.
The steps to be performed for writing the image using Mac are as follows:
1. First, you need to insert your SD card into your Mac and ensure that all other removable storage devices are unplugged so that they don't get erased by mistake.
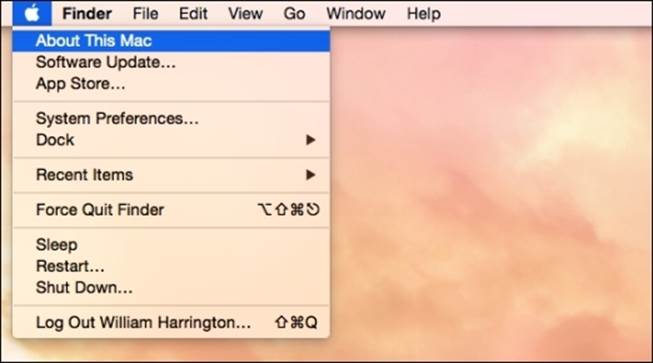
2. Now that the SD card is inserted, we need to find out what internal device name has the operating system given to the SD card. The device name will be in the form /dev/diskX. We do this by clicking on the Apple symbol in the top-left corner and selectingAbout this Mac, as shown here:
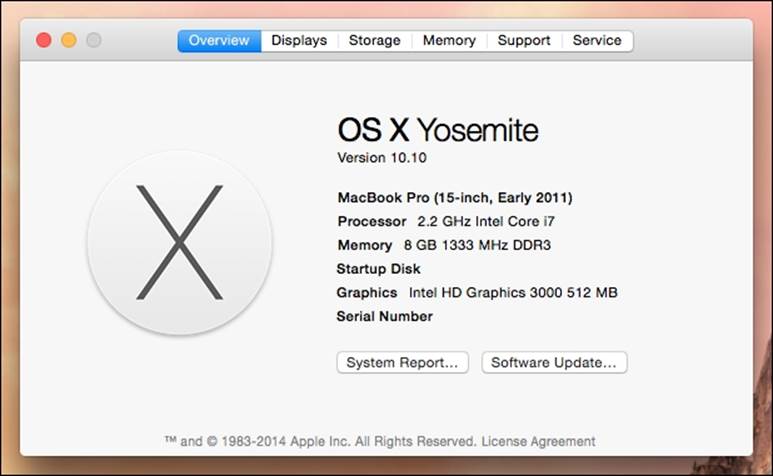
3. Now, you need to select System Report… as shown in the following screenshot:
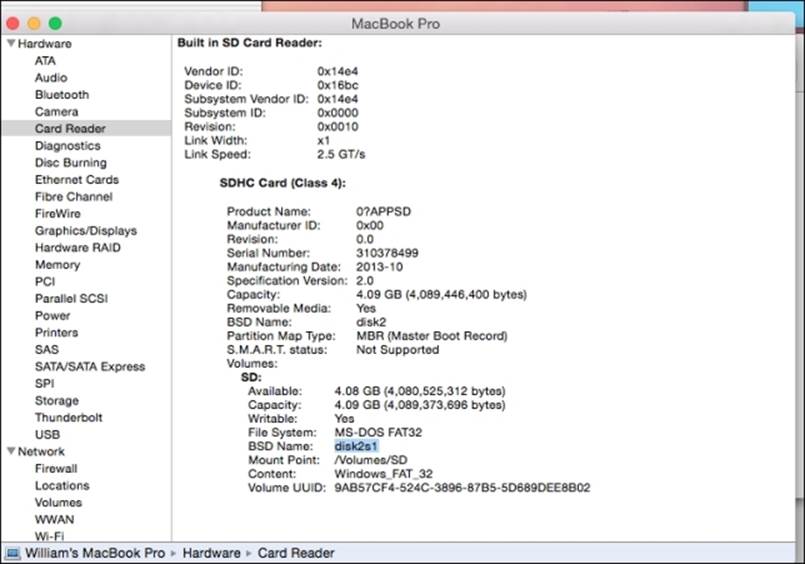
4. You will then see the system report on your screen. If your Mac has an internal SD card reader, you need to select Card Reader on the left-hand side of the screen.
5. If you are using a USB-to-SD card reader, you need to select USB and then find your SD card reader in the list.
6. After you have selected the SD card, look at the bottom of the page for BSD Name. It will be something similar to disk2 (in this case, disk2s1). This name is the internal name that the OS X kernel gives the SD card.
If there are other partitions in the card, they will be listed as diskXs1, diskXs2, and so on. We only need the diskX part.
Now that we have the BSD name of the SD card, we need to make sure that none of the partitions on the SD card are mounted, but we don't want to eject the card either. By using Disk Utility, we can do this as follows:
1. First, we need to open up Disk Utility. You can find Disk Utility by navigating to Applications | Utilities.
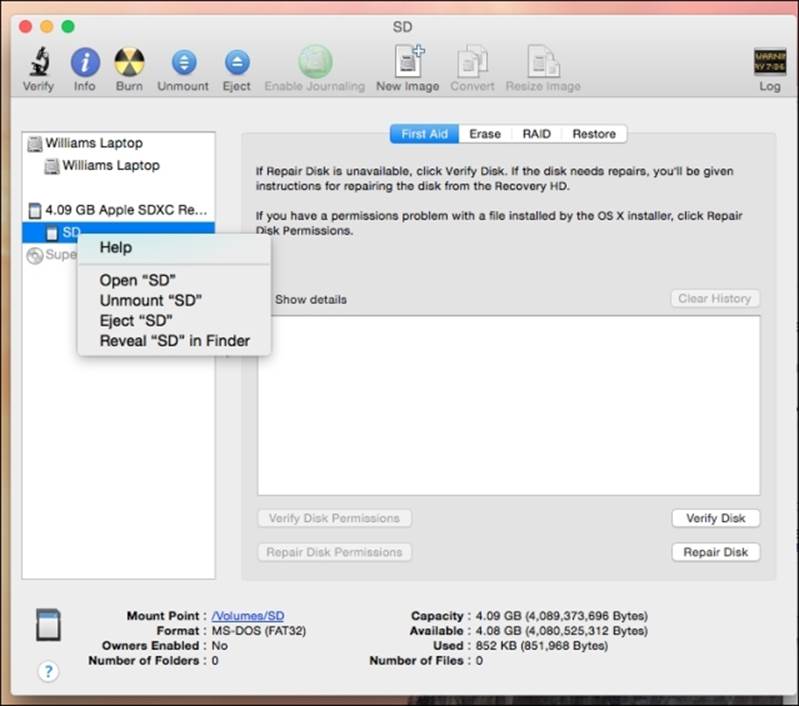
2. Once you have opened up Disk Utility, you will find your SD card on the left-hand side in the list of devices. You need to right-click on every partition in the list and select Unmount. This will stop the operating system from using the partition. If you don't do this, you will get a Device in use message when you actually write the image to the SD card.
3. Now, you are finally ready to write the Raspbian image to your SD card. To do this, fire up Terminal. You will find it in the Utilities tab under Applications.
As OS X is based on the BSD operating system, we have access to all of its utilities. We are going to use a utility called Disk Dump (dd) to actually write the image file to our SD card. The dd utility is designed to read and write raw data from devices and can be used for anything from copying hard drives to writing images to SD cards.
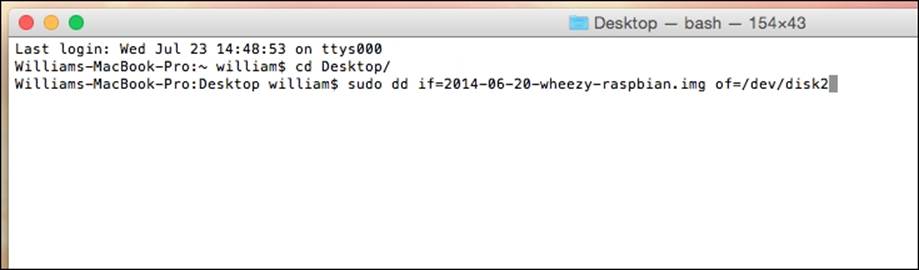
1. Once you have opened Terminal, you need to change to the directory that contains the image file. In this case, it is the Desktop folder, cd Desktop.
2. We then run the actual command to write the image to the SD card, substituting 2015-01-31-wheezy-raspbian.img with the name of your Raspbian image file, and diskX with the BSD name that you found in the previous steps:
3. sudo dd bs=1m if=2015-01-31-wheezy-raspbian.img of=/dev/diskX
This command runs the dd command as a super user. The dd command reads the image file 2015-10-31-wheezy-raspbian.img and writes it to the SD card. It writes the data in chunks of one megabyte.
4. You will be asked for your administrator's password when you run this command. This command will take anywhere up to half an hour to write the image to your SD card, depending on its speed.
When this is done, insert the card into your Raspberry Pi and you are ready to go.
Writing the image using Linux
The process of writing the Raspbian image that you have just downloaded using Linux is straightforward. As mentioned, there are many different distributions of Linux. The steps that follow are tested on Ubuntu, a distribution of Linux that, like Raspbian, is based on Debian. As mentioned previously, make sure that all your removable storage devices are unplugged so that they are not accidently erased.
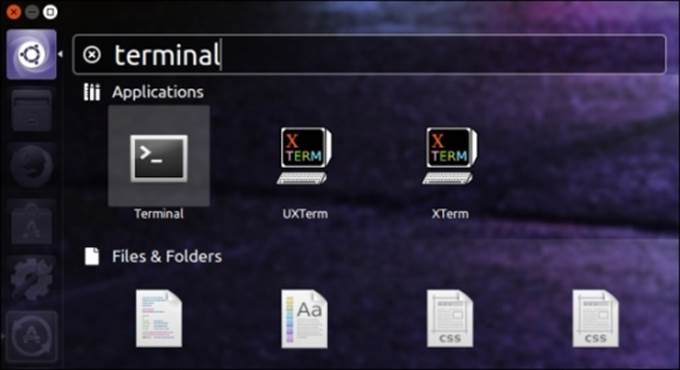
The first thing that we need to do is launch a terminal. A terminal is available in all the different Linux environments. In the case of Ubuntu, it is called Terminal. The following screenshot shows you how to find the terminal application in the latest version of Ubuntu:
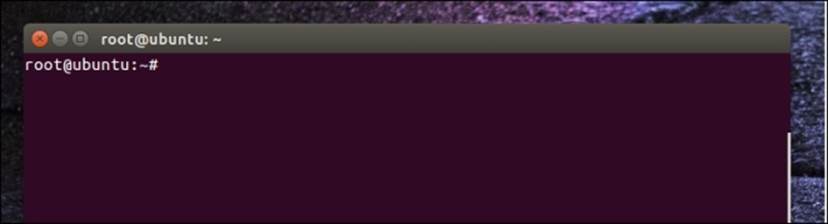
Now that you have launched the terminal, you need to gain root permissions as follows:
1. The easiest way to do this is to run the following command:
2. sudo –i
3. sudo gives administration permissions to any program that you run in the terminal. This is necessary as writing the image to your SD card is an operation that can affect all the users. sudo is discussed further later in this book. You will see a terminal similar to what is shown in the following screenshot:
4. Now you are ready to find out the device name of your SD card. To do this, run the df command. The df command allows you to find out how much storage is available for each storage device that is attached to your computer. We need to run the following command:
5. df –h
6. The following screenshot shows the output:
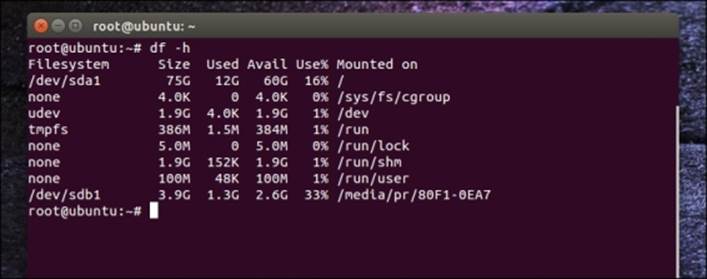
The results obtained by running the df -h command are shown in the preceding screenshot. We can see that in this case, the SD card we are using is /dev/sdb1. If your machine has a built-in SD card reader, this can be called /dev/mmcblk0p1. Regardless of the device name, we only need the first part of the name. In the preceding example, we will use /dev/sdb, or in the case of /dev/mmcblk0p1, we will use /dev/mmcblk0. An easy way to double-check whether you have chosen the correct device is to check the size.
Now that you have got the name of your device, you need to unmount the SD card. To do this, we will use the unmount command. We do this by running the following command in your terminal for the device name that we just found:
umount /dev/sdb1
Now we are finally ready to write the image to our SD card. To do this, we need to change into the directory in which you have downloaded the Raspbian image. We then run the dd application. As mentioned in the previous section, the dd utility is designed to read and write raw data from devices and can be used for anything from copying hard drives to writing images to SD cards. The following command runs the dd command as a super user:
cd Desktop
dd bs=1m if=2014-06-20-wheezy-raspbian.img of=/dev/sdb1
The dd command reads the image file 2015-01-31-wheezy-raspbian.img and writes it to the SD card. It writes the data in chunks of one megabyte.
This command can take anywhere from a few minutes up to half an hour, depending on the size of your SD card. When this is done, insert the SD card into your Raspberry Pi and you are ready to go.
Summary
In this chapter, you learned where to download the Raspbian image from. You also stepped through how to write the Raspbian image to your SD card using several different operating systems. The next chapter will show you how to set up your Raspberry Pi and configure Raspbian.
All materials on the site are licensed Creative Commons Attribution-Sharealike 3.0 Unported CC BY-SA 3.0 & GNU Free Documentation License (GFDL)
If you are the copyright holder of any material contained on our site and intend to remove it, please contact our site administrator for approval.
© 2016-2026 All site design rights belong to S.Y.A.